Constructing a patio yourself is completely doable, even if you've never done it before. The basic sequence is: plan your layout, excavate and prep a compacted gravel base, add bedding sand, lay your surface material, install edge restraints, fill the joints, and finish with sealing. The whole thing lives or dies on two things: a solid, compacted base and a proper drainage slope away from your house. If you are still deciding on the exact base layers, this guide on how to make a base for a patio is a solid next step. Get those right and everything else falls into place.
How to Construct a Patio: Step-by-Step DIY Guide

Nolan Carver
1 May 2026
Planning and measuring your patio footprint
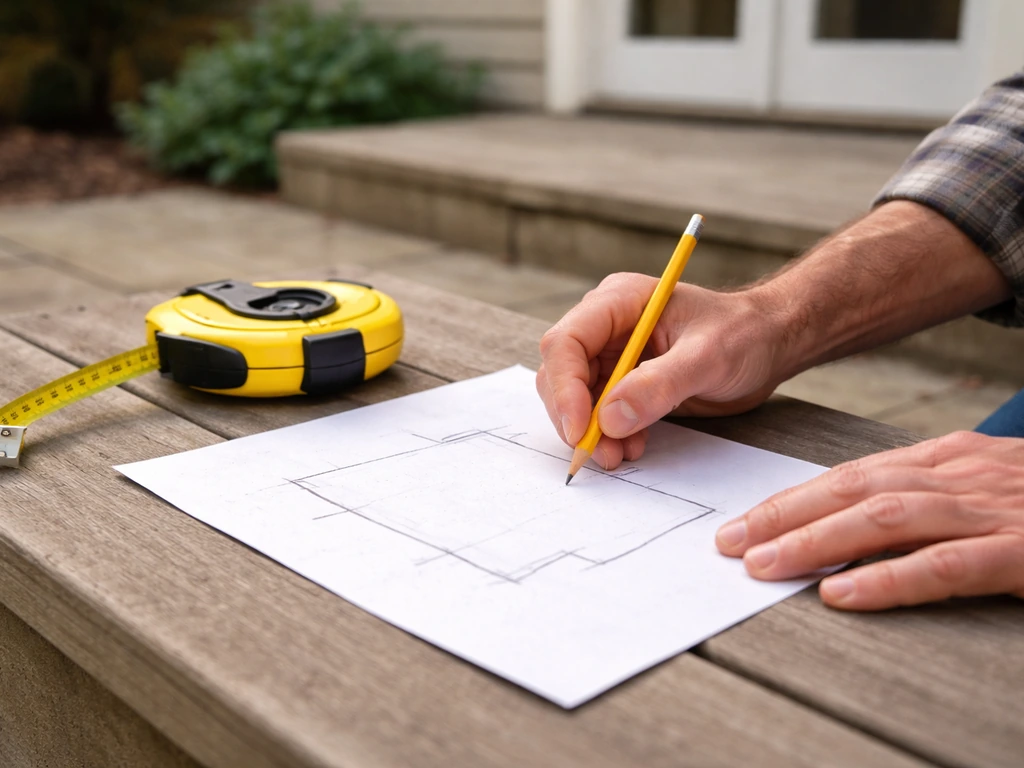
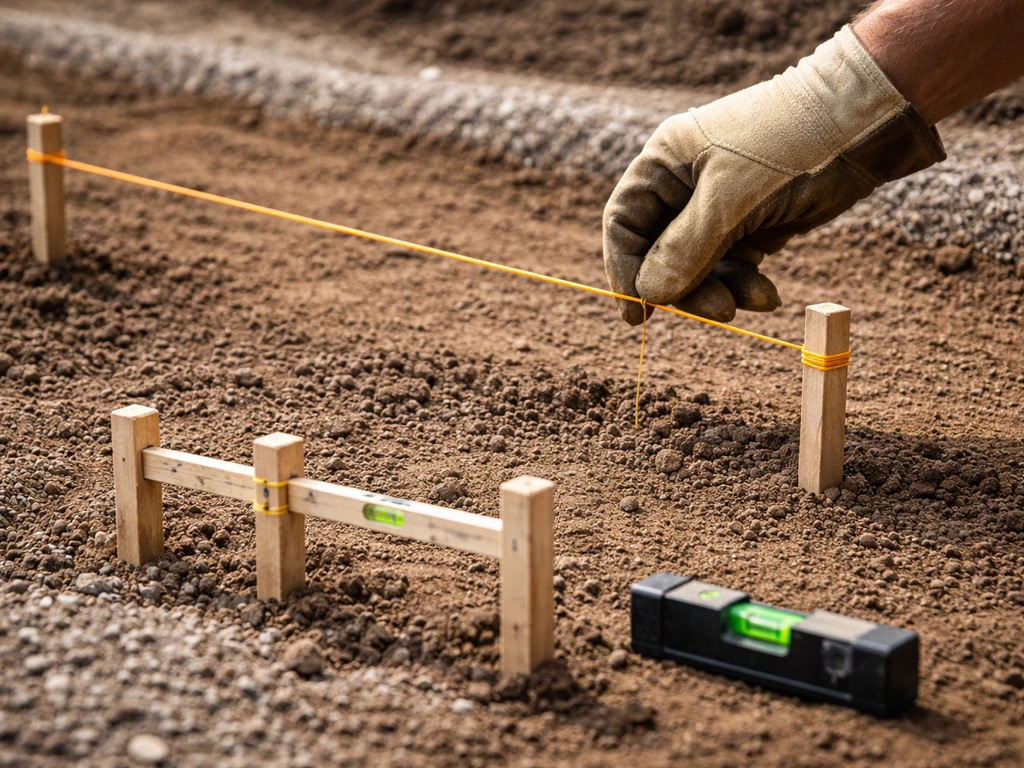
Start by sketching your patio on paper before you touch a shovel. Mark your house wall, note any doors or steps, and decide where you want the outer edges. Grab a 100-foot tape measure and stake out the corners with wooden stakes and mason's line. Measure the diagonals, corner to corner: if both diagonals match, your layout is square. If they don't, adjust one corner until they do. It sounds fussy, but a square layout saves you hours of cutting and frustration later.
Build your drainage slope into the plan right now, not as an afterthought. The standard is a 1/4-inch drop per linear foot of patio, sloping away from the house. So a 12-foot-deep patio needs 3 inches of total drop from the house wall to the outer edge. You can calculate any slope with this formula: Slope (%) = (Rise / Run) x 100. For a 1/4-inch-per-foot slope that works out to about 2%, which is the minimum most pros use. Mark that slope on your stakes using a line level or a 4-foot level with a slope gauge so you have a real reference point before you start digging.
Size matters more than people expect. A 10x10-foot patio feels cramped once you put a table and four chairs on it. A 12x16 or 16x20 is much more livable for a typical family. Check with your local building department too, since some areas require a permit for patios above a certain size or those attached to the house. It takes 10 minutes and can save a major headache at resale time.
Choosing materials and patio styles
You basically have three mainstream choices: concrete pavers, poured concrete, or loose-aggregate (gravel/decomposed granite) surfaces. Each has a different cost, skill level, and long-term maintenance profile. Here's a straight comparison:
| Material | Typical DIY Cost (materials) | Skill Level | Drainage | Repairability | Maintenance |
|---|---|---|---|---|---|
| Concrete pavers | $$–$$$ | Beginner to intermediate | Excellent (joint gaps) | Very easy (swap individual units) | Resand joints every few years, reseal every 3–5 years |
| Poured concrete | $–$$ | Intermediate to advanced | Needs controlled slope and control joints | Difficult (crack repair, resurfacing) | Seal every 2–3 years, monitor cracks |
| Gravel / decomposed granite | $ | Beginner | Excellent (drains freely) | Easy (top up material) | Rake periodically, replenish material annually |
For most DIYers, concrete pavers are the best starting point. You can work at your own pace, fix mistakes easily by pulling and resetting individual pieces, and get a result that looks genuinely great. Poured concrete is cheaper on materials but demands speed, mixing precision, and good finishing technique before the concrete sets. Gravel patios are the fastest and cheapest to install and drain perfectly, but they're not ideal for furniture-heavy setups since chairs sink and shift on loose stone.
Within pavers, you have concrete, brick, and natural stone options. Concrete pavers are the most consistent in thickness (which makes leveling easier) and come in a huge range of shapes and colors. Brick adds character but varies slightly in thickness between units. Natural flagstone looks beautiful but requires more skill to level because each piece is unique. For a first patio build, stick with standard concrete pavers in a consistent thickness, around 2-3/8 inches, and your life will be much easier.
Site prep: grading, base layers, drainage, and compaction
This is where most DIY patios either succeed or fail. When you learn how to build a nice patio, getting these fundamentals right makes everything that follows much easier succeed or fail. A beautiful surface on a bad base will shift, sink, and crack within a few seasons. These site-prep steps and drainage basics are the heart of practical tips for building a patio that lasts. Spend the time here and you'll never regret it. If you want a strong, long-lasting patio, the base build process is the part to get right first: proper excavation, drainage slope, and compacted gravel layers patio base.
Excavation depth
Your total excavation depth equals paver thickness + 1 inch of bedding sand + your gravel base depth. For standard 2-3/8-inch pavers, that's roughly 2. 375 + 1 + 4 to 6 inches = about 7. 5 to 9.
5 inches total. On clay-heavy soils that drain poorly, bump the gravel base up to 6 to 8 inches, and seriously consider adding a layer of geotextile fabric between the soil and your gravel. Concrete Network also recommends geotextile fabric in moist or wet areas and where soils are expansive to keep virgin soil separated from the base [adding a layer of geotextile fabric between the soil and your gravel](https://www. concretenetwork.
com/concrete/pavers/installation_overview. html). That fabric stops clay from mixing up into your base over time, which is one of the sneaky causes of long-term settling. On sandy or well-draining soils, 4 to 6 inches of compacted class 5 gravel (also called road base or crushed stone) is standard.
A commonly cited total excavation depth for a typical paver install is around 10 inches, which gives you room for all layers with a little buffer.
Grading and slope
Once you've excavated, re-check your slope before adding any base material. Use your mason's line as a reference and grade the subgrade (the raw dirt at the bottom of your dig) with the same 1/4-inch-per-foot slope you planned. Everything you put on top of it follows that slope, so if the subgrade is off, you're building the whole stack crooked.
Base material and compaction
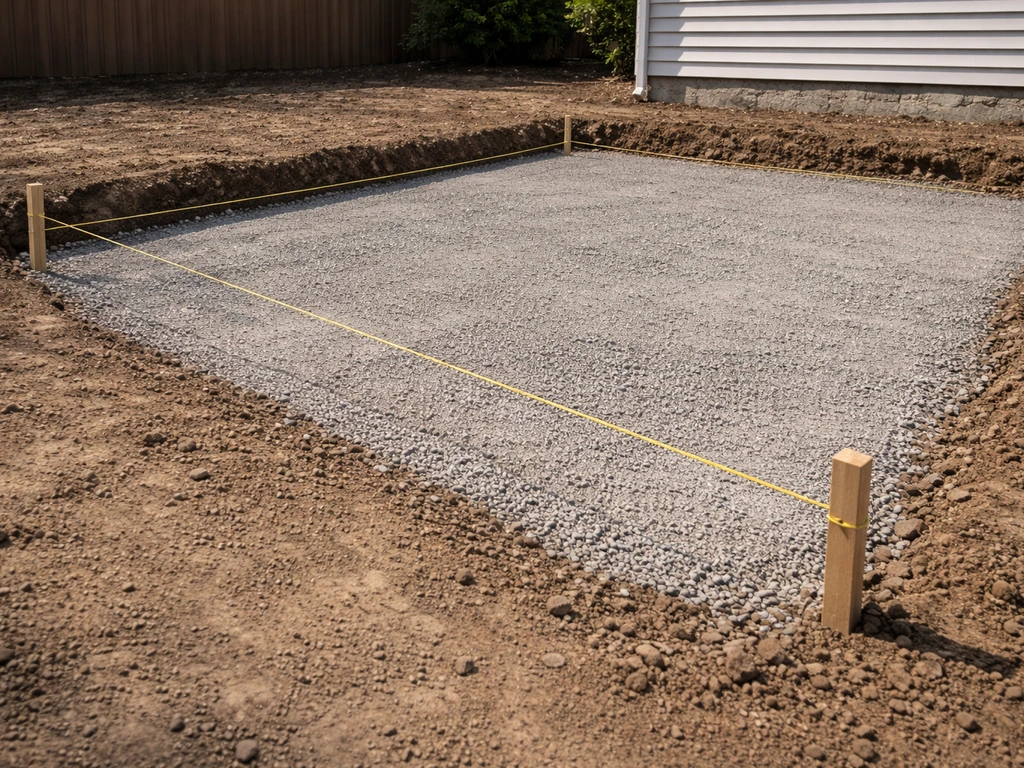
Fill in your gravel base in 2- to 3-inch lifts and compact each lift before adding the next. A plate compactor (minimum 5,000 lbf) is the right tool here. You can rent one for under $100 a day at most equipment rental shops, and it makes a massive difference compared to trying to tamp by hand. The compaction acceptance test is simple: drive a 10-inch spike into the base with a hammer. If it takes multiple hard strikes to get it in, your base is compacted. If it sinks in easily, keep compacting. After the final lift, wet the base lightly and compact one more time to lock everything together.
Step-by-step construction process
- Stake out the perimeter with wooden stakes and mason's line, confirm square diagonals, and mark your drainage slope (1/4 inch drop per foot away from the house).
- Excavate the area to your target depth (typically 7.5 to 10 inches for standard pavers, deeper on clay soils). Remove all grass and organic material, which will decompose and cause settling.
- If you're on clay or poorly draining soil, lay a sheet of geotextile landscape fabric on the subgrade before adding any gravel. Overlap seams by at least 12 inches.
- Add your compacted gravel base in 2- to 3-inch lifts, compacting each lift with a plate compactor. Maintain your drainage slope throughout. Total compacted depth should be 4 to 8 inches depending on soil type.
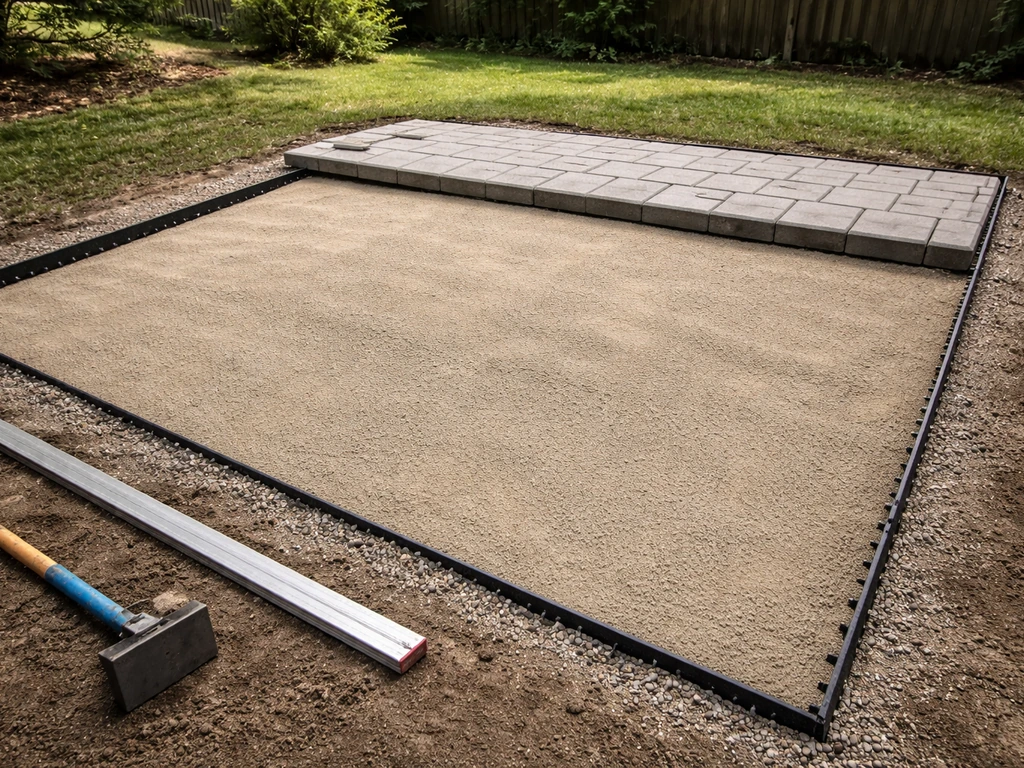
- Install your edge restraints (plastic, aluminum, or steel) around the perimeter of the compacted gravel base, before adding bedding sand. Stake them firmly every 12 inches. This is a critical sequence: edge restraints go in after base compaction, before sand.
- Screed a 1-inch layer of bedding sand over the compacted base. Set two pieces of 1-inch conduit or lumber as screed guides, pour sand between them, and drag a straight 2x4 board along the guides to create a flat, even surface. Pull the guides out and fill the voids.
- Lay your pavers starting from a corner or a straight house-wall edge, working outward. Lay them tight to each other and tap each one gently with a rubber mallet. Don't walk on freshly screeded sand — work from the pavers you've already laid.
- Cut pavers to fit edges using a circular saw with a diamond blade or a rented paver splitter. Measure twice, cut once.
- Once all pavers are laid, run the plate compactor over the entire surface (use a rubber pad attachment to protect the paver faces) to seat everything firmly into the sand.
- Spread joint sand or polymeric sand over the surface and sweep it diagonally into the joints. For polymeric sand, ensure joints are at least 1.5 inches deep for proper performance. Compact the surface again after the first sand fill, then add more sand and sweep again until joints are filled.
- If using polymeric sand, mist the surface lightly with water to activate the binders. Do not apply if rain is expected within 24 hours, and keep the surface dry until it has fully cured and polymerized.
Edging, leveling, and stability details
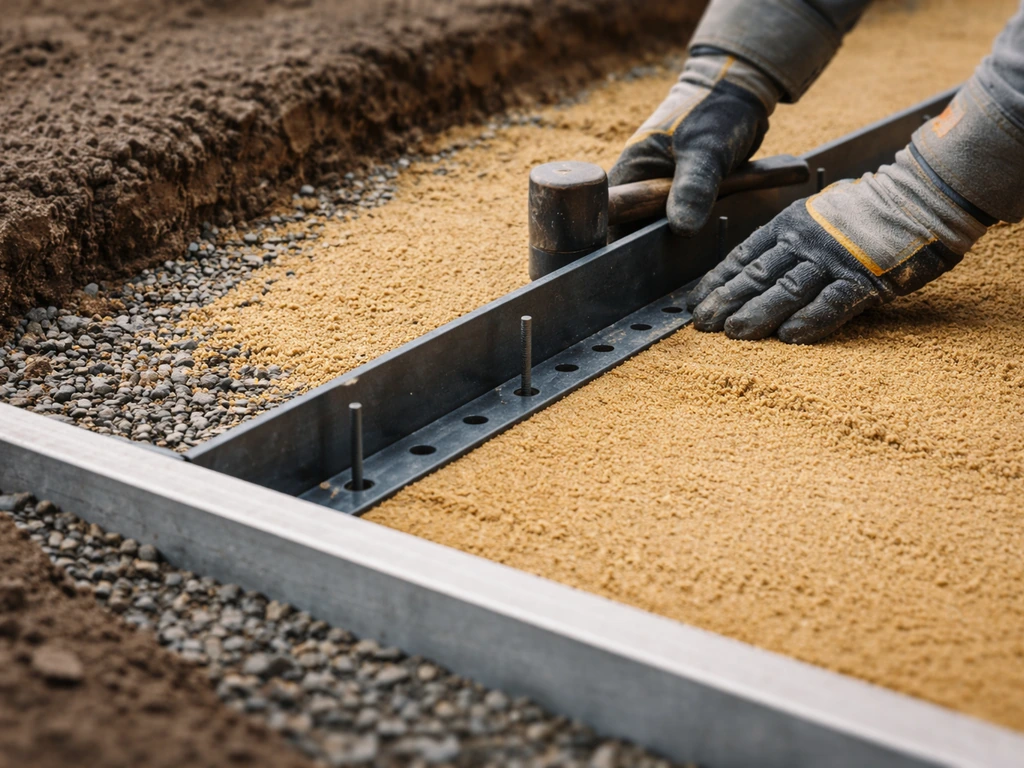
Edge restraints are not optional. Without them, pavers slowly migrate outward under foot traffic and freeze-thaw cycles, and the whole field starts to spread and sag at the edges. Plastic snap-edge is the most common DIY choice. Aluminum and steel edging provides a sleaner look and a smooth vertical face that holds pavers tightly, which is worth the extra cost for visible edges. In freeze-thaw climates, avoid concrete edge curbs as your primary restraint since frost movement can crack them. If sand migration around the restraints is a concern, tuck geotextile fabric in behind the edge restraint before backfilling.
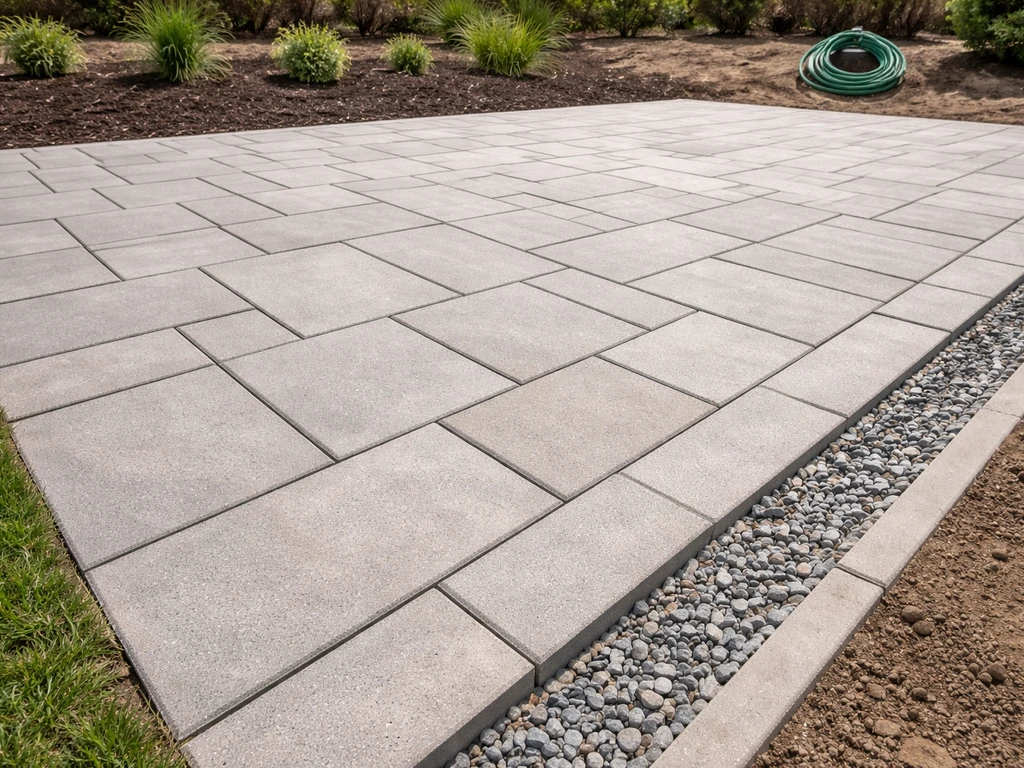
For leveling, the goal during screeding is to finish within 3/8 inch of your final grade target. After you've laid pavers and compacted them, check for high and low spots with a long straightedge or level. A high paver usually means a little extra sand crept under it during laying. Pull it up, scrape a small amount of sand out, reset and re-tamp.
A low paver means not enough sand underneath. Add a small amount of sand, reset, and compact. Don't try to fix level problems by shimming with random material. The paver surface should also sit 1/8 to 1/4 inch above the adjacent drainage area (like a lawn edge or drain channel) so water runs off cleanly without ponding at the transition.
If you're planning any raised sections or steps as part of a more complex build, the base prep principles are the same but you'll be working with retaining-wall blocks or concrete forms to build elevation. The base still needs to be compacted and sloped, and edge restraint becomes even more important at the transitions between levels.
Curing, sealing, and keeping it looking good long-term
If you poured a concrete slab rather than laying pavers, curing is your top priority for the first week. Keep the surface continuously moist for at least 7 days. Cover it with plastic sheeting or burlap and wet it down morning and evening. Concrete that dries out too fast during curing ends up weaker and more prone to surface cracking. After 7 days it's cured enough to walk on; give it 28 days before putting heavy furniture or vehicle weight on it.
For pavers, wait until the polymeric sand has fully cured (usually 24 to 48 hours after activation, depending on conditions) before sealing. Techniseal’s technical data sheet also advises that installation and the polymeric sand should be blank" rel="noopener noreferrer">protected from rain for 24 hours after installation, with longer protection potentially needed in colder conditions. The surface and joints must be completely dry before you apply sealer. Sealing over moisture is a top cause of efflorescence (a white chalky haze) and sealer adhesion failure. Apply a penetrating or film-forming sealer with a low-pressure sprayer or roller, working in manageable sections. Most concrete paver surfaces benefit from resealing every 3 to 5 years depending on sun exposure and traffic.
Ongoing maintenance is simple. Every year or two, check your joints. If you see gaps where sand has washed out, sweep in fresh joint sand and compact or tamp it down. Before resealing, clean the surface thoroughly with a patio cleaner or a diluted cleaning solution, rinse well, and let it dry completely. If you have persistent joint sand loss, geotextile under the base (if you didn't install it initially) won't help retroactively, but switching to polymeric sand on your next resand will significantly reduce washout.
Common mistakes and how to fix them on real installs
Standing water on the finished patio is the number one complaint, and it almost always traces back to insufficient slope. If water pools near the house wall, the patio is either sloped toward the house or the slope is too flat. Short of rebuilding, you can sometimes correct minor ponding by pulling up the affected pavers, adding or removing bedding sand to adjust the grade, and resetting. If the slope error is serious, you may need to relay a larger section. The fix is always easier than living with the problem for years, so don't talk yourself out of it.
- Pavers rocking or sinking: Usually means inadequate base compaction or base depth. Pull the affected units, add and re-compact gravel, re-screed the sand, and reset.
- Pavers spreading and gaps opening at edges: Edge restraints weren't installed, were installed too lightly staked, or failed. Install or reinforce restraints and backfill firmly behind them.
- Efflorescence (white haze) on concrete or pavers: Moisture trapped under the surface or sealer applied too soon. Let the surface dry fully, scrub with an efflorescence cleaner, rinse, dry completely, then reseal.
- Polymeric sand washing out: Applied during wet weather, joints weren't deep enough (minimum 1.5 inches required), or surface wasn't properly misted during activation. Remove remaining sand, let joints dry fully, and reinstall per product instructions.
- Uneven surface after compaction: A few high or low pavers are normal. Pull and reset them individually rather than trying to force them level with the compactor. Check your screed guides before assuming the problem is the pavers.
- Cracking in poured concrete: Shrinkage cracks are common without proper control joints. Space control joints every 8 to 10 feet in both directions (roughly equal to the slab thickness in feet). If cracks appear, fill with flexible polyurethane sealant to prevent water intrusion.
The honest truth about patio construction is that the work isn't complicated, it's just physical and sequential. Most problems come from skipping steps or rushing the base because you're excited to get to the fun part of laying the surface. If you take your time on planning, excavation, and compaction, the rest of the build goes surprisingly smoothly. A strong plan upfront is one of the best ways to build a patio without ending up with drainage problems later best way to build a patio. And if something does go wrong, almost every paver-based problem is fixable without starting from scratch. That's one of the best reasons to choose pavers over poured concrete for a first build.
FAQ
How do I adjust the patio build if I’m putting heavy items on it (hot tub, grill, or vehicle)?
If you will place a hot tub, fire pit, shed, or parked vehicle on the patio, you need a stronger design than a typical seating area. Plan for a thicker compacted base and consider reducing spacing flexibility by using the manufacturer’s recommended paver and base specs (often a deeper road-base layer than the DIY range). Also verify local load limits and whether a permit is required for heavy-live-load uses.
Can I construct a patio against my house foundation or right next to it?
Yes, but only if you keep the interface properly graded and restrained. For best results, build the patio as a separate field with edging tied into the drainage plan, then grade the border so water still moves away from the house. Avoid fastening pavers rigidly to the foundation, since differential movement can cause cracking or uneven joints at the transition.
What’s the best way to confirm my patio slope before installing pavers?
For pavers, the slope target is important, but so is the direction. If you suspect you might be on the “wrong” side of a slope, test before you build layers by flooding a shallow trench area with water and observing where it flows. Once the base is installed, you cannot fix water flow without lifting and resetting a section.
Can polymeric sand fix pooling water or a weak base?
Polymeric sand should not be used as a substitute for proper drainage and base compaction. If you already have washout or ponding, polymeric sand only addresses joint stability, not standing water. Fix the underlying grade and base, then reinstall joints with the correct sand type and activation amount.
How can I tell if my soil is clay-heavy and needs geotextile or a thicker gravel base?
If you do not know your soil type, do a simple percolation and cohesion check. Dig a test hole, fill it with water, and time how fast it drains (very slow indicates clay problems). For poorly draining or clay-heavy conditions, increase gravel depth and consider geotextile, then ensure a continuous slope throughout the subgrade.
What should I do if a few pavers are high or low after compacting?
If a paver is slightly off, correct it by adjusting bedding sand, then re-check compaction. Do not try to compensate with random debris or thick shims under a single unit, since it creates future flex points. Use a screed or straightedge to bring the surface back within about 3/8 inch of target before final settling.
How do I control moisture when compacting the gravel base?
Wetting is not the same as soaking. After each gravel lift, compact and then lightly wet only enough to help fines lock in, then compact again once the moisture is uniform. Over-wetting can make layers pump or stay unstable under the plate compactor.
When should I check level and slope during the build to avoid rework?
A level check should happen at three stages: after subgrade grading, after bedding sand is screeded, and after final paver placement. If you only check at the end, you may have to redo a lot more work because the error could be buried under sand. Use a long straightedge across multiple directions, not just near walls.
What if my patio shape is not a simple rectangle, like an L-shape or with cut corners?
If you need to change direction at a border, keep the drainage slope continuous across the whole surface rather than “step-sloping” sections. You may create a low spot at the corner if the slope breaks. When in doubt, set the layout with a grid and verify elevations at several points using a consistent reference line.
When can I seal, and how can I avoid efflorescence or sealer peeling?
Sealing timing depends on the surface system. For pavers, joints and bedding must be fully dry and polymeric sand must be fully cured before sealing, otherwise you can trap moisture and increase efflorescence risk. For poured concrete, allow the full curing time and only seal when the surface is dry enough to avoid adhesion failures.
My paver joints keep washing out, what are the likely causes and the best fix?
Most joint sand loss comes from either improper activation of polymeric sand, excessive washing, or traffic moving sand out through gaps. Try cleaning with a gentle approach, re-sanding with the correct product, and compact/tamp the joints according to the instructions. If washout keeps returning quickly, you likely have a drainage or base-layer issue.
Can I extend my patio later without compromising the existing surface?
Yes, but plan for it early. If you expect to add items like a walkway extension later, keep a clean expansion separation or design edging so the original patio remains restrained and the new section can settle without pushing the old one. Avoid tying a future extension rigidly into the existing field.
How do freeze-thaw conditions change what I should do at the patio edges and drainage points?
If you encounter frost, avoid rigid edge restraints like concrete curbs as the main restraint and ensure edging is tight, straight, and properly backfilled. In freeze-thaw climates, also make sure drainage does not route water into the edge interface, since trapped water can expand and lift. Verify that your slope actually carries water away before winter.
What should I do if I hit tree roots or need to avoid underground utilities during excavation?
If you have to work around underground utilities or tree roots, plan your layout to keep loads off unstable zones and to avoid compromising utility lines. Roots can create future voids under the base, so you may need to reroute the patio edge or increase the base depth and compaction in stable areas. Always follow local utility locating rules before digging.