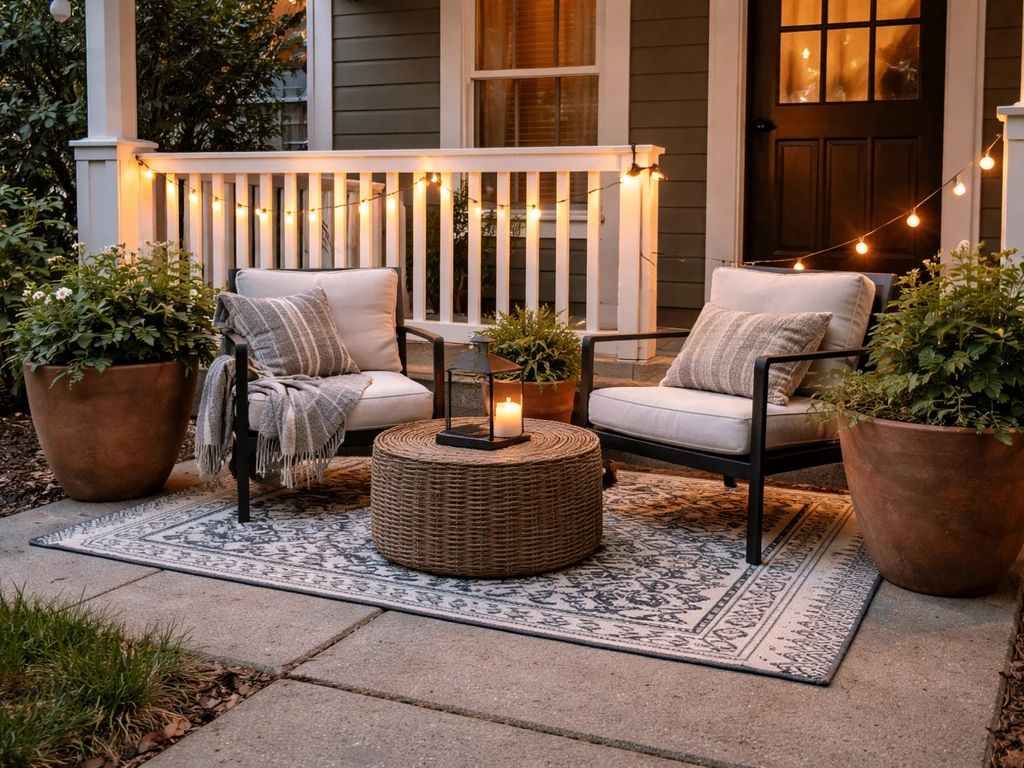
You can completely transform a front patio in a single weekend without touching a single tool or hiring anyone. Start by measuring what you have, pick one cohesive style, layer in weatherproof furniture and textiles, add lighting, and finish with plants and seasonal accents. That's the whole playbook. The sections below walk you through each step in order so you end up with a plan you can actually shop for and execute this weekend.
How to Decorate a Front Patio: Step-by-Step DIY Plan

Nolan Carver
3 May 2026
Step 1: Do a quick patio assessment before you buy anything
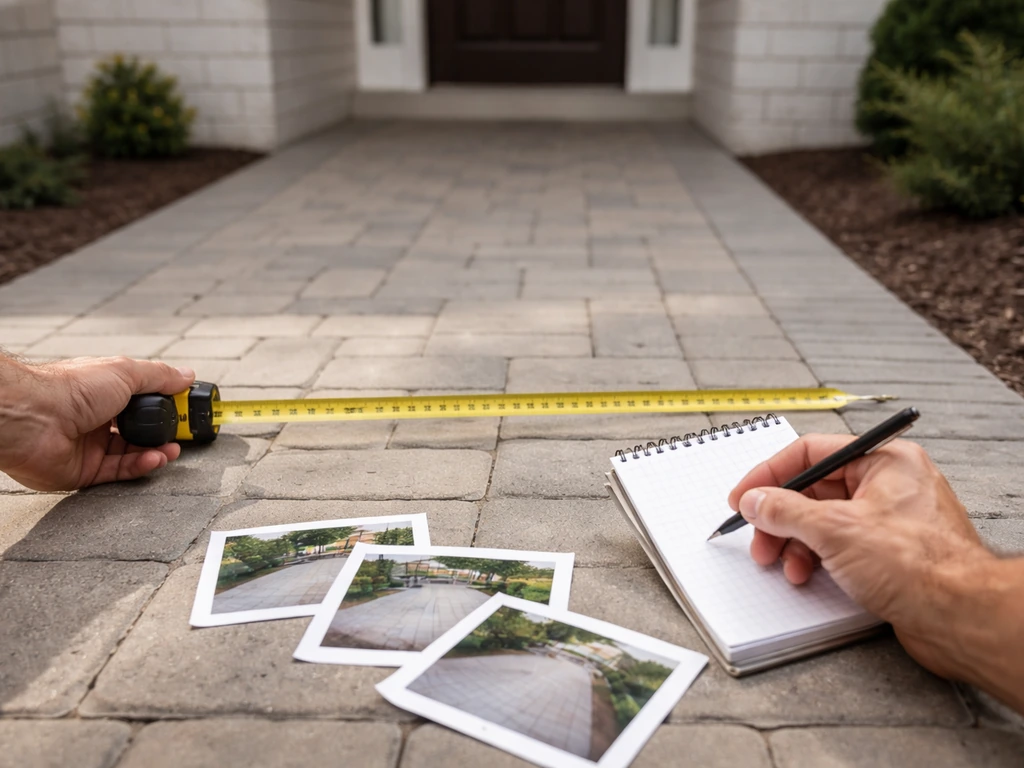
The single biggest decorating mistake people make is buying furniture or decor before they know exactly what they're working with. Spend 20 minutes on this assessment and you'll avoid expensive returns.
Grab a tape measure and write down the full width and depth of your patio. Measure wall to wall, or edge to edge if there's no wall. Also note any fixed obstacles: columns, railings, light fixtures, hose bibs, or steps. These will dictate where furniture can and can't go.
While you're out there, observe a few more things that will affect every decision you make:
- Sun and shade: Is it full sun all day, morning shade, or covered by a roof or overhang? This determines fabric fade resistance needs and whether plants can survive there.
- Existing surface material: Concrete, pavers, brick, or wood decking each anchor rugs and furniture differently and drain water at different rates.
- Privacy level: Is it exposed to the street, neighbors, or passersby? You may need screening elements.
- Wind exposure: A corner patio or elevated front porch gets more wind than a recessed entry. Anything lightweight needs to be anchored.
- Traffic flow: Where do people walk from the street or driveway to the front door? That path needs to stay clear.
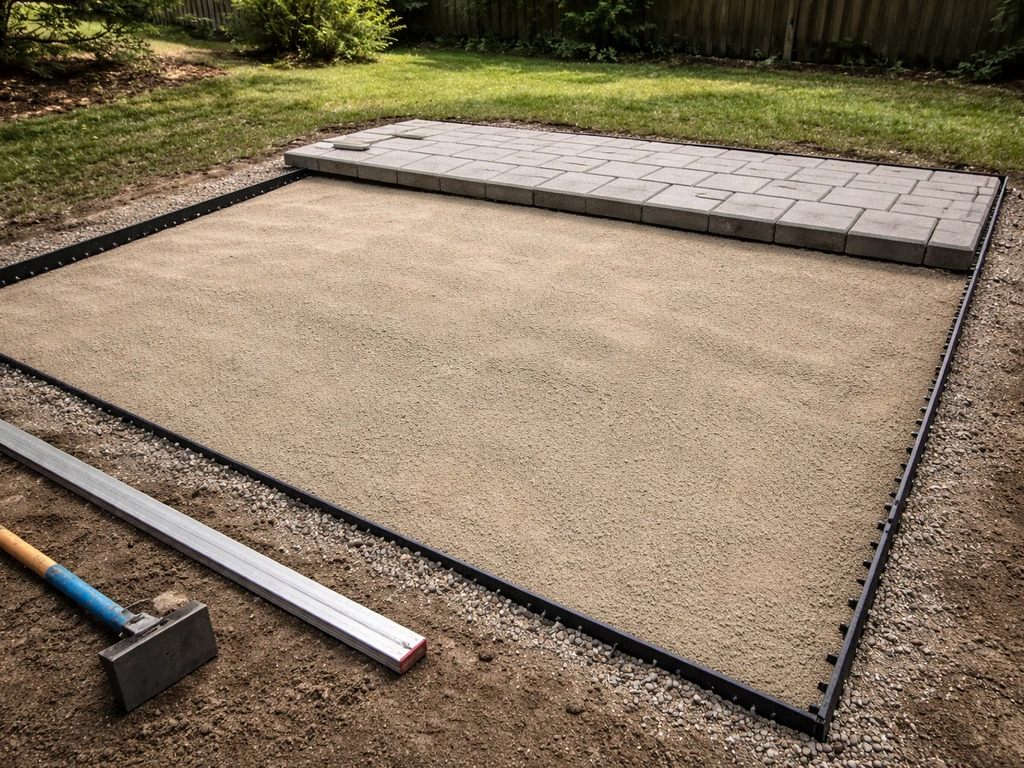
Once you have measurements, sketch the space on paper. It doesn't need to be pretty. Just draw a rough rectangle, label the dimensions, and mark where the door, steps, and any fixed elements sit. This sketch is your planning tool for every decision that follows. If you built the patio yourself or are still in the planning phase, the related guides on how to build a front patio and how to make a front patio cover the construction side in detail.
Step 2: Pick a style and a color direction that fits your home
A front patio that looks pulled-together almost always comes down to one thing: consistency. You don't need expensive pieces. You need pieces that belong to the same visual family. Pick a style first, then let that style guide every purchase.
Common front patio styles
| Style | Key look | Best for | Material palette |
|---|---|---|---|
| Modern farmhouse | Clean lines, natural wood tones, black metal accents | Craftsman, cottage, or modern ranch homes | Teak or acacia wood, matte black iron, cream/white/warm gray |
| Classic traditional | Symmetrical layout, ornate details, rich colors | Colonial, Tudor, or brick-front homes | Wrought iron, rattan, deep green, navy, burgundy |
| Coastal/relaxed | Light and airy, woven textures, bleached tones | Cape Cod, stucco, or beach-adjacent homes | All-weather wicker, teak, sand, white, soft blue |
| Urban contemporary | Minimal, geometric, bold contrast | Modern or mid-century homes | Powder-coated aluminum, concrete planters, black/white/charcoal |
| Cottage/bohemian | Layered textiles, mixed patterns, lush planting | Tudor cottage, Victorian, older bungalows | Painted wood, macramé, terracotta, warm jewel tones |
Look at your home's exterior: the siding color, roof line, trim color, and front door color. Your patio decor should feel like it was designed for that specific house. A quick rule: pull one or two colors directly from your home's exterior and use them as anchor colors in your cushions, planters, or door mat. Then add one accent color for interest.
For texture, stick to two or three material types maximum. Mixing four or more (wood, wicker, metal, concrete, rope, fabric, ceramic) in a small space reads as clutter. Choose your dominant material, a secondary material, and one accent. That's it.
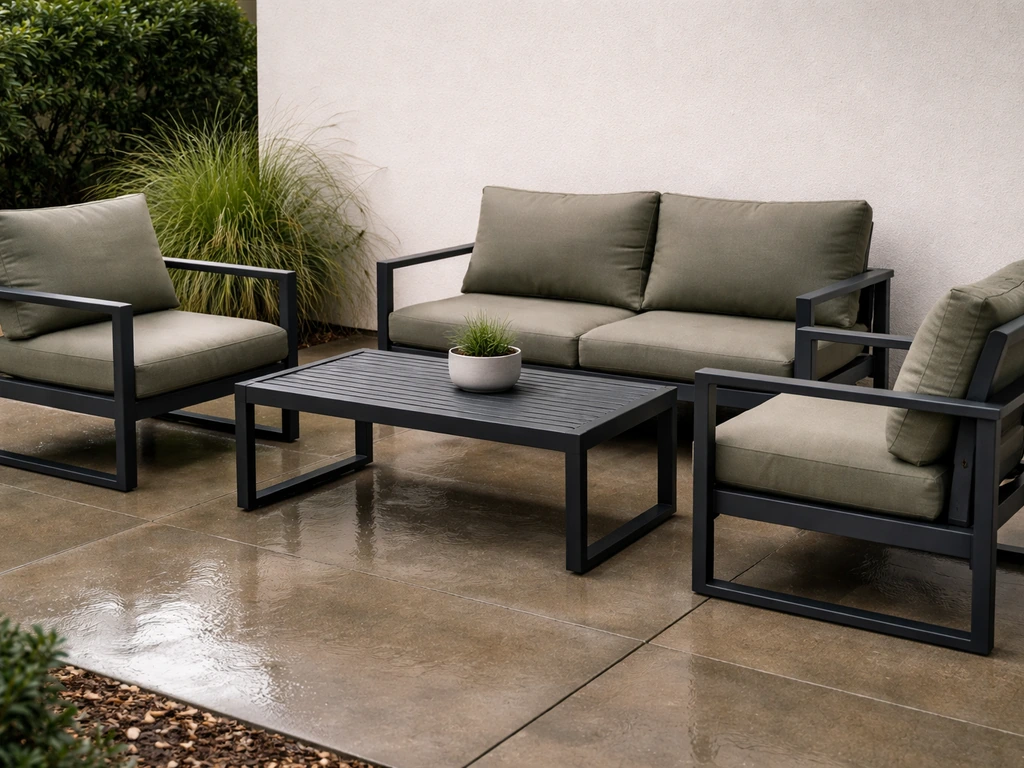
Step 3: Plan your furniture layout and functional zones
Before you buy a single chair, you need to know how much room you actually have to work with once traffic flow is accounted for. This is where most people undersize their space and end up with furniture that blocks the path to the front door.
Traffic flow comes first
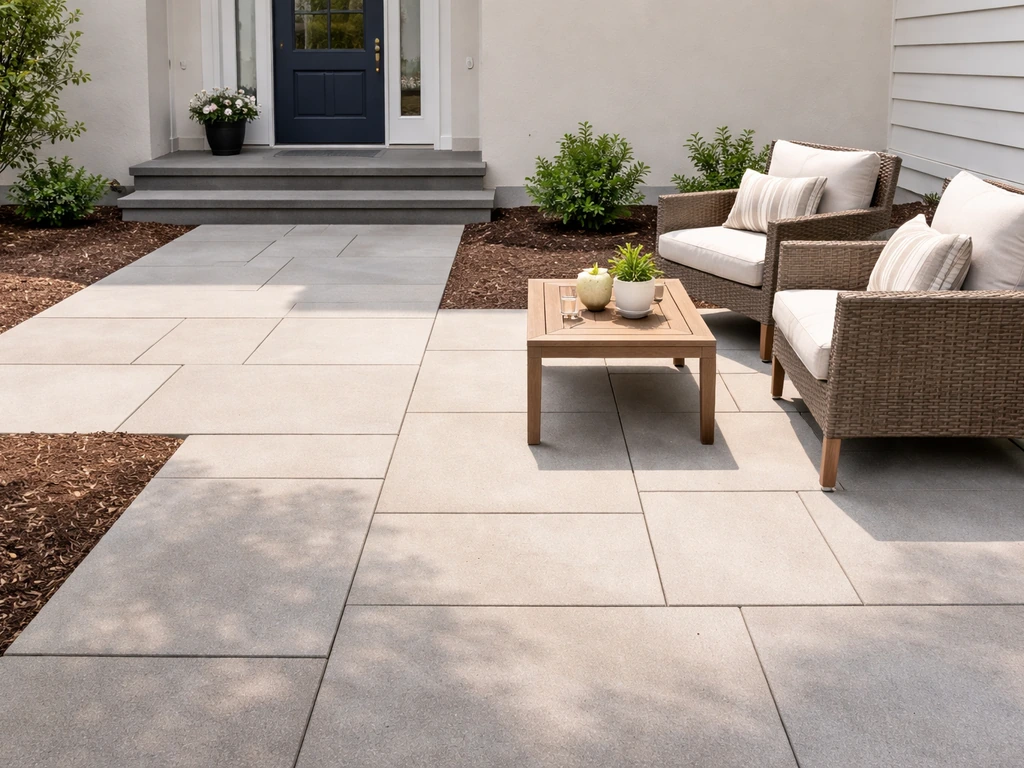
Keep at least 36 inches of clear walking width on the main path from the steps or driveway to your front door. That's wide enough for two people to pass comfortably and meets standard accessibility guidelines. If your patio is narrow, that clear path might take up most of the usable width, which means you're working with the edges for furniture and decor.
If you're placing a seating area, leave 30 to 36 inches of clearance in any zone where people walk through or around the furniture. Behind each chair, you want at least 24 to 30 inches so chairs can pull out without scraping a wall or railing. If you have a small bistro table setup, 36 inches from the table edge to the nearest wall or railing is the comfortable minimum.
Zoning a small front patio
Most front patios aren't large enough to support separate zones the way a big backyard patio can. Instead, think about one primary function and one supporting function. For example: a seating zone plus a planted entry zone. Or a café-style dining spot plus a storage/landing zone near the door. If you're working with a larger front patio and want to divide it into distinct areas, the guides on how to fill a large patio and how to divide up a large patio go deep on zone planning for bigger spaces. If you have a larger patio, the guide on how to fill a large patio can help you zone the space and choose pieces that feel balanced.
For most front patios, here's what works well by size:
| Patio size (approx.) | Recommended setup | Furniture footprint to target |
|---|---|---|
| Under 6 ft deep | Entry styling only: doormat, planters, wall decor, lighting | No furniture — focus on vertical and landing decor |
| 6–8 ft deep | One or two chairs with a side table | Chair pair with 24-inch side table; keep path at 36 inches |
| 8–12 ft deep | Bistro table and chairs OR small loveseat with coffee table | Bistro: 30-inch table; Seating: 48-inch loveseat max |
| 12+ ft deep | Full seating group or conversational cluster | Sofa + chairs + coffee table; still protect 36-inch path |
Furniture material recommendations
For a front patio exposed to sun, rain, and wind, material choice matters more than aesthetics. These are the materials worth putting money into:
- Powder-coated aluminum: Lightweight, rust-proof, and easy to anchor. Best all-around choice for exposed front patios.
- All-weather wicker (resin wicker): Looks great, handles moisture, but can fade in full sun over several years.
- Teak or eucalyptus wood: Beautiful and weather-resistant when sealed annually. Heavier, so better in calmer wind conditions.
- Wrought iron: Heavy and durable but rusts if the finish is scratched. Good for covered porches, riskier in full rain exposure.
- Avoid: Untreated pine, cheap folding chairs, or anything with fabric cushions not rated for outdoor UV exposure.
Step 4: Add weatherproof rugs, textiles, and accessories
An outdoor rug is one of the highest-impact, lowest-cost upgrades you can make to a front patio. It anchors your furniture arrangement, defines the zone visually, and immediately makes the space feel finished. For a front patio, always choose a rug made from polypropylene or other synthetic outdoor-rated materials. They resist mold, fade slowly, and can be rinsed with a garden hose. Avoid natural fiber rugs like jute or sisal outdoors, they wick moisture, grow mold, and rot within one season.
Size the rug so all furniture legs sit on it, or at least the front two legs of each chair. A rug that's too small (with all the furniture floating around it) actually makes a space look smaller and cheaper. If you're between sizes, go bigger.
For cushions and throw pillows, look for Sunbrella fabric or similar solution-dyed acrylic. These resist UV fading and moisture far better than standard outdoor polyester. On a front patio that gets full sun and rain, cheap cushions look old in a single season. A set of quality cushion covers costs $30 to $80 and lasts three to five times longer.
One practical note on rugs and drainage: if your patio surface has a slight slope for water drainage (as most good patios should), make sure the rug lies flat and isn't creating a water trap beneath it. Lift and air the rug every few weeks during rainy seasons. If water consistently pools under it, move or replace it with a more open-weave style that allows drainage through.
Beyond the rug and cushions, a few accessories make a big difference without crowding the space:
- A side table or small accent table next to seating — 18 to 24 inches in diameter is plenty for a front patio
- A storage bench near the door for shoes, packages, or gardening gloves — doubles as extra seating
- A decorative tray on a table to corral small items and keep the surface looking intentional
- Windproof candle lanterns if the space is sheltered enough (avoid in high-wind spots)
Step 5: Upgrade curb appeal with lighting and vertical decor
Lighting does more for a front patio's evening curb appeal than almost any other single element. It also extends usability into the evening and adds safety. The good news is most front patio lighting options are easy DIY installs that require no electrical work.
Lighting options that actually work
- Solar post or wall lights: Easiest install possible — screw into a post or wall, done. Modern solar lights have improved dramatically in brightness. Look for ones with 200+ lumens for functional light rather than just ambiance.
- String lights: Warm and inviting overhead. Anchor to posts, columns, or a nearby tree with screw-in hooks. Use outdoor-rated string lights with shatter-resistant bulbs. Keep them at least 8 feet above the walking surface.
- Low-voltage path or step lights: These highlight the entry path and steps safely. Most use a plug-in transformer that can go into any exterior outlet — no electrician needed.
- Plug-in wall sconces: If you have an exterior outlet, a plug-in sconce flanking the door is a quick upgrade that looks hardwired but isn't.
- Lanterns: Battery-powered or solar lanterns placed on steps, side tables, or railings add warmth without any install.
Vertical and entry decor
The area around your front door is prime decorating real estate. A lot of front patios waste this vertical space by leaving blank walls or empty railings. Here's what works well:
- Door wreaths or seasonal door art: The easiest, most impactful swap. A well-chosen wreath frames the door and signals style immediately.
- House numbers: Updated address numbers in a style that matches your overall patio aesthetic are a low-cost, high-impact detail. Matte black numbers against light siding or brushed brass against dark wood both read sharply.
- Wall-mounted planters or trellises: If your patio wall is blank, a wall planter with trailing greenery or a simple trellis with climbing vines adds vertical dimension without taking up floor space. Anchor trellises into studs or use appropriate masonry anchors — wind will test them.
- Privacy screens: If street exposure is a problem, a freestanding lattice screen or bamboo privacy panel defines the space without requiring a building permit in most areas. Weight the base or anchor it to a railing so it doesn't blow over.
- Outdoor-rated artwork or signs: Weather-resistant metal or composite art pieces work well on a covered porch. Skip canvas or wood unless you have a full roof overhead.
Step 6: Bring it to life with plants, planters, and seasonal updates
Plants are the fastest way to make a front patio feel like it belongs there rather than looking like staged furniture sitting on concrete. They add color, texture, scale, and life. The key is choosing plants that match your sun and water conditions, and planters that won't create drainage problems.
Planter placement and drainage
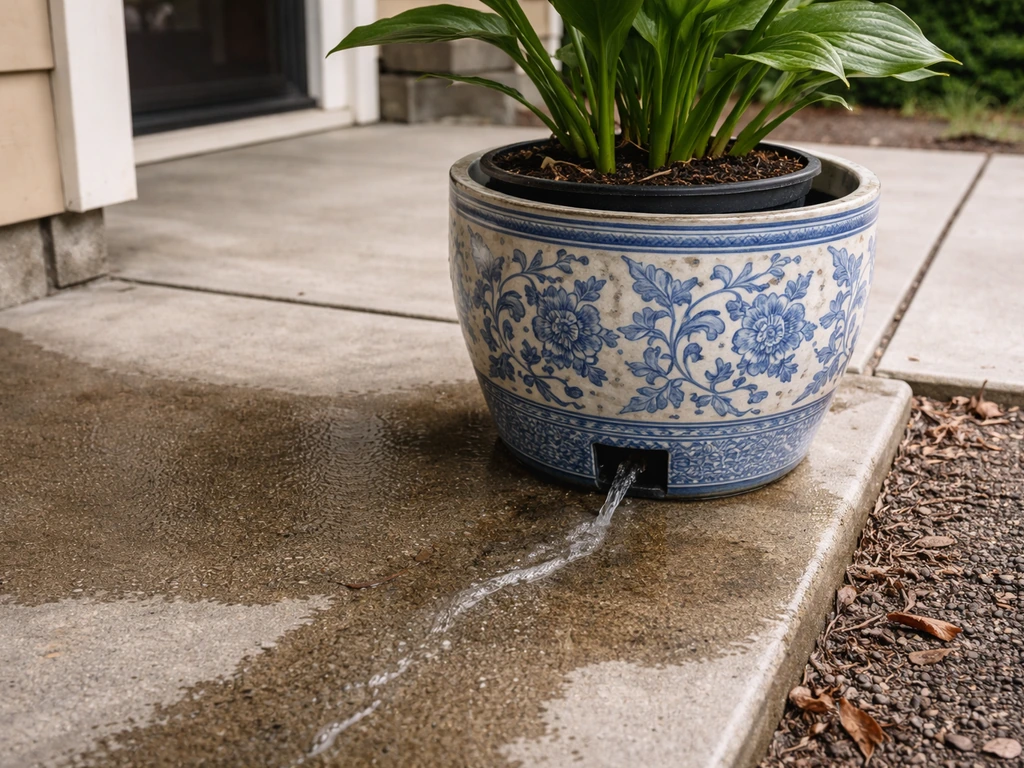
Every planter needs a drainage hole. If you fall in love with a decorative pot that doesn't have one, use it as an outer cachepot and put the actual plant in a nursery pot with drainage inside it. Standing water in sealed planters kills plants and, if sitting on pavers or wood, can stain the surface or trap moisture that promotes mold.
For front patios with a drainage slope, position planters so water draining from them flows away from the house foundation and toward the patio edge or yard. Don't cluster planters in a depression where water collects.
Plant and planter recommendations by spot
| Location | Best plants | Planter material |
|---|---|---|
| Flanking the front door | Boxwood topiaries, ornamental grasses, tall cordyline | Classic urns or tall square planters; concrete, fiberglass, or ceramic |
| Step edges | Low-growing annuals: petunias, alyssum, calibrachoa | Small terracotta or resin pots (resin is lighter for steps) |
| Railing or wall | Trailing pothos, ivy, or sweet potato vine in wall-mount planters | Powder-coated metal wall planters |
| Seating area accent | Lavender, dwarf citrus, rosemary (aromatic and attractive) | Medium round or square resin planter, 14–18 inches |
| Shaded front porch | Ferns, hostas, impatiens, caladiums | Hanging baskets or wide low planters |
Seasonal updates that keep things fresh
The best front patios evolve with the seasons. You don't need to overhaul everything, just swap a few easy elements: swap the doormat design, change out annual flowers in your flanking planters, add a fall wreath in October, or bring in a pair of pumpkins in late September. Keep a small storage bin or basket near the door for seasonal swap-outs so it actually happens instead of staying on your to-do list.
Step 7: Budget-friendly shopping list and how to execute this weekend
Here's a realistic breakdown of what a front patio refresh costs at three budget levels, followed by a step-by-step execution plan you can follow this weekend.
| Budget tier | Approximate spend | What you get |
|---|---|---|
| Entry-level refresh | $75–$150 | New doormat, two planters with plants, solar lights, a small wall accent or wreath |
| Mid-range makeover | $300–$600 | Above + outdoor rug, bistro set or two chairs with side table, string lights, cushion covers |
| Full front patio setup | $800–$1,500 | Above + quality seating group, trellis or privacy screen, multiple planter arrangements, path lighting, house numbers |
Budget tips that actually work: shop end-of-season sales in August and September for deep discounts on outdoor furniture (often 40 to 60 percent off). Check Facebook Marketplace and Craigslist for quality powder-coated or teak furniture at a fraction of retail. Repaint or spray-paint existing metal furniture with outdoor-rated spray paint for about $10 a can. Buy plants from a local nursery rather than a big-box store and you'll often get better-sized plants at the same or lower price.
Your weekend execution plan
- Saturday morning: Do your patio assessment with a tape measure. Sketch the space, note measurements, sun exposure, and traffic path. Take photos from the street so you can see what visitors see.
- Saturday midday: Based on your style choice, shop or order online. Prioritize: outdoor rug, doormat, two planters, cushion covers, and at least one lighting element. These give the biggest visual return.
- Saturday afternoon: Clear the patio completely. Sweep or power wash the surface. Let it dry fully before laying the rug.
- Saturday late afternoon: Position the rug first, then arrange furniture on top of it. Confirm your traffic path is still 36 inches clear from furniture edge to the door path.
- Sunday morning: Plant your planters. Mix one tall thriller plant, one mid-height filler plant, and one trailing spiller per pot for a professional look. Make sure drainage holes are clear.
- Sunday afternoon: Install lighting. Start with any solar or plug-in wall lights, then add string lights if using them. Test everything before it gets dark.
- Sunday evening: Add finishing details — hang or place the doormat, add cushion covers to furniture, hang a wreath, place any lanterns or accents. Step back and look from the street. Adjust anything that looks off from that view.
A front patio refresh really can happen in a weekend. The assessment and planning take the most time on day one, but once you have a clear style, the right measurements, and a shopping list, the execution is straightforward. If your patio is on the larger side and you want to think through how to furnish and zone a bigger space, the guide on how to decorate a large patio covers those scenarios in more depth. For now, start with step one, measure what you have, and work forward from there. If you're wondering how to make a front patio that looks pulled-together, follow these steps in order.
FAQ
Should I use the same materials if my front patio is covered or mostly shaded?
If you have a covered entry or awning, you can treat your patio like a semi-protected space, so you have more freedom with fabrics and lighter outdoor decor. If it is fully exposed to sun and rain, prioritize UV-resistant cushion fabric, sealed outdoor finishes, and a rug that can fully dry between storms.
How do I account for the front door swing when planning furniture placement?
For door proximity, measure from the door swing path to the nearest furniture edge, not just the floor space. If the door opens outward, keep clearance on that arc, otherwise you will end up pushing furniture aside every day.
What should I prioritize for the entry area if people walk over it often?
Choose outdoor pieces that can handle foot traffic, especially in the entry zone. In practice, that means either durable planters that won’t wobble, a rug that stays flat, and furniture with protective glides that won’t catch on uneven concrete.
Where should front patio lighting go if the steps or walkway are the main safety issue?
Use lighting to solve sightlines. If your steps or walkway are dark, add a path light or a small well light aimed downward, then supplement with a warmer ambient light near seating for comfort.
How tall can planters be near the front door without blocking visibility?
A good rule is to keep plant height working with your sightline to the door. Avoid tall planters directly beside the door handle or near places you want to see clearly, then place taller plants farther out on the corners.
What can I do if my outdoor rug keeps wrinkling, moving, or trapping water?
If your patio surface is slightly uneven, a rug pad helps prevent shifting and water pooling. Skip thick pads that trap moisture, and choose an outdoor rug liner made to drain.
What’s the best way to decorate a very small front patio without making it feel cluttered?
If you have a small patio, you usually get more impact by combining functions into one piece, like a bench that covers seating plus storage, or a narrow console table paired with wall sconces. Separate zones often look crowded when there is limited width.
Can I decorate a front patio if I rent or cannot drill into surfaces?
If you rent, avoid permanent mounts. Opt for freestanding decor (outdoor rug, weighted planters, portable lantern lighting) and use temporary hooks or adhesive outdoor-rated mounts only where the surface allows and manufacturer rules permit.
How do I make the patio look cohesive if I’m using a mix of older decor pieces?
Avoid stacking decorative items too high when there is no room for breathing space. Instead, create one focal point per side of the entry, then repeat one element (a matching planter shape or consistent trim color) to create cohesion.
What should I check before buying a decor piece that looks perfect in photos?
If a piece looks great in the store but doesn’t fit your sun and rain exposure, treat textiles and finishes as the deciding factor. Most mismatches happen with cushions, rugs, and unsealed wood, so upgrade those first even if you keep the furniture.
How can I make seasonal decor changes actually happen without creating extra clutter?
For seasonal swaps, keep a small, weather-resistant storage bin near the door so you can rotate items without hauling everything in and out. Label bins by season (spring, fall) to reduce decision fatigue when it’s time to refresh.
What’s the safest way to place planters if my patio has a drainage slope or uneven surface?
If your patio furniture is on pavers or another permeable surface, prioritize planters that drain well and use liners or cachepots so runoff doesn’t soak nearby surfaces. On concrete with a slope, position planters so water exits toward the edge, not toward a low spot near the house.