The best way to arrange potted plants on a patio is to start from the edges and corners, group pots in odd numbers (3 to 5 works well), vary the heights deliberately, and always keep a clear path through the space. That formula works on a sprawling backyard patio and on a tiny 8-by-10-foot slab equally well. The rest is just fine-tuning for your specific setup. For more detailed steps on choosing containers, soil, and plants for your space, see our guide on how to plant patio pots. If you want to go beyond general patio layouts, follow specific guidance for how to plant patio roses, including selecting the right container size and sun exposure.
How to Arrange Potted Plants on a Patio: Simple Layout Tips

Nolan Carver
6 May 2026
Start by reading your patio before you move a single pot
Before you start dragging pots around, spend five minutes actually looking at your space. How big is it? Where does foot traffic flow? Where does the sun hit hardest and where does shade fall by noon? These three things determine almost every placement decision you'll make.
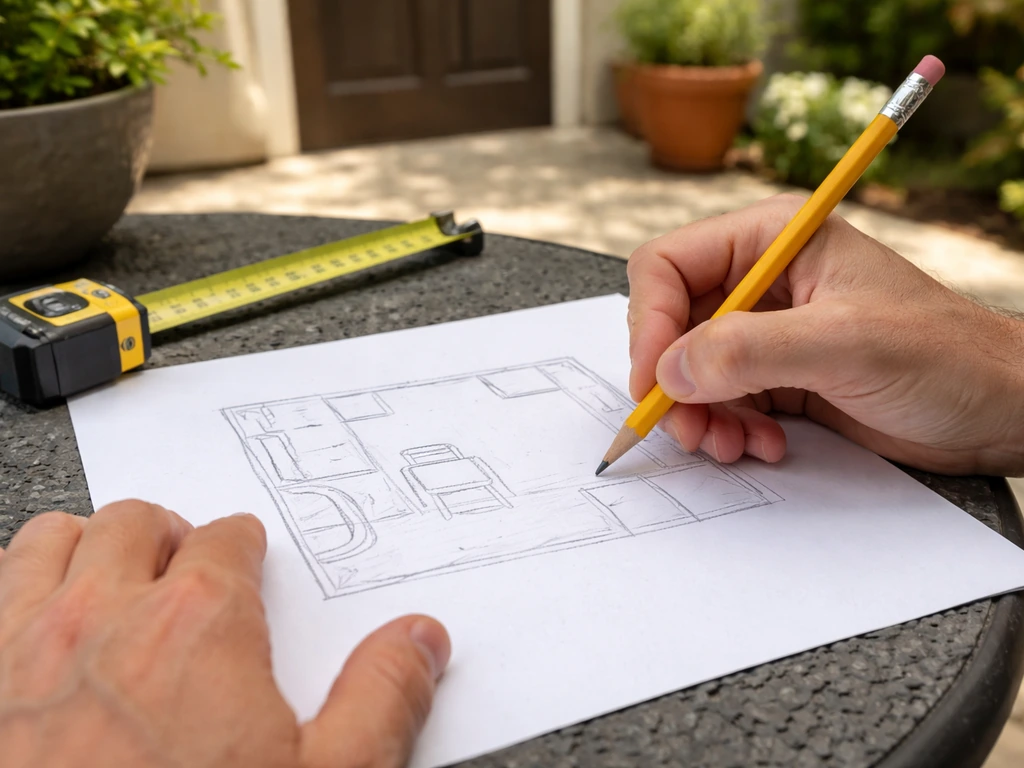
Measure your patio and sketch a rough outline on paper. Note any fixed features: a door, a gate, a grill, a seating area. These are your anchors. You can't place a heavy pot cluster where it blocks the door swing or crowds the chair legs. Mark those zones as off-limits first.
Sun tracking matters more than most people realize. Colorado State University Extension points out that sun scald and heat stress are real problems for container plants, so a pot sitting in full reflected sun off a south-facing concrete wall will cook roots that would be fine in open ground. When you plant a patio container, you still want to match the pot size, drainage, and sun exposure to the specific plants you’re growing. Walk your patio at 8 a.m., noon, and 4 p.m. and note which areas are in full sun, part shade, or full shade at each time. Sun-loving plants like lavender and geraniums go in those full-sun spots; ferns, hostas, and impatiens go where it stays cool and shaded. Getting this right means less wilting, less watering, and plants that actually look good all season. A patio rose in a container will do best when you plant it in fresh potting mix, choose a roomy pot with good drainage, and water consistently so the roots stay evenly moist how to plant a patio rose in a container.
Also check your patio's drainage pitch. Most well-built patios slope about 1/4 inch per foot away from the house to push water away from the foundation. Knowing which direction water flows across your surface matters when you're placing pots: you don't want a cluster of containers sitting in a low spot where water pools under them, and you never want pots blocking the natural drainage path across the patio.
Pick a layout style that fits your patio shape
There are four basic arrangement styles, and one will suit your patio better than the others depending on size and shape. None of them are complicated, but picking intentionally makes a huge difference over just scattering pots wherever there's room.
| Layout Style | Best For | How It Looks | Watch Out For |
|---|---|---|---|
| Grid | Large, formal patios with a symmetrical layout | Evenly spaced pots at regular intervals, often matching containers | Can feel stiff; needs uniform pot sizes to work well |
| Grouped clusters | Most patios, especially informal or mixed-use spaces | 3 to 5 pots pulled close together as a unit, with space between clusters | Clusters need height variation or they read as a blob |
| Staggered heights | Any patio where you want depth and a garden feel | Tallest pots at back or center, stepping down to smaller pots at front | Tall back pots need to be stable; check for wind exposure |
| Border/edge line | Narrow patios, walls, fences, or defining a boundary | Pots lined along a perimeter edge to frame the space | Single-file lines look flat without height variation |
For most homeowners, grouped clusters combined with staggered heights is the sweet spot. You get visual interest without a rigid, manicured look, and it's forgiving when pots don't all match perfectly.
Spacing rules and where to place pots near edges and walkways
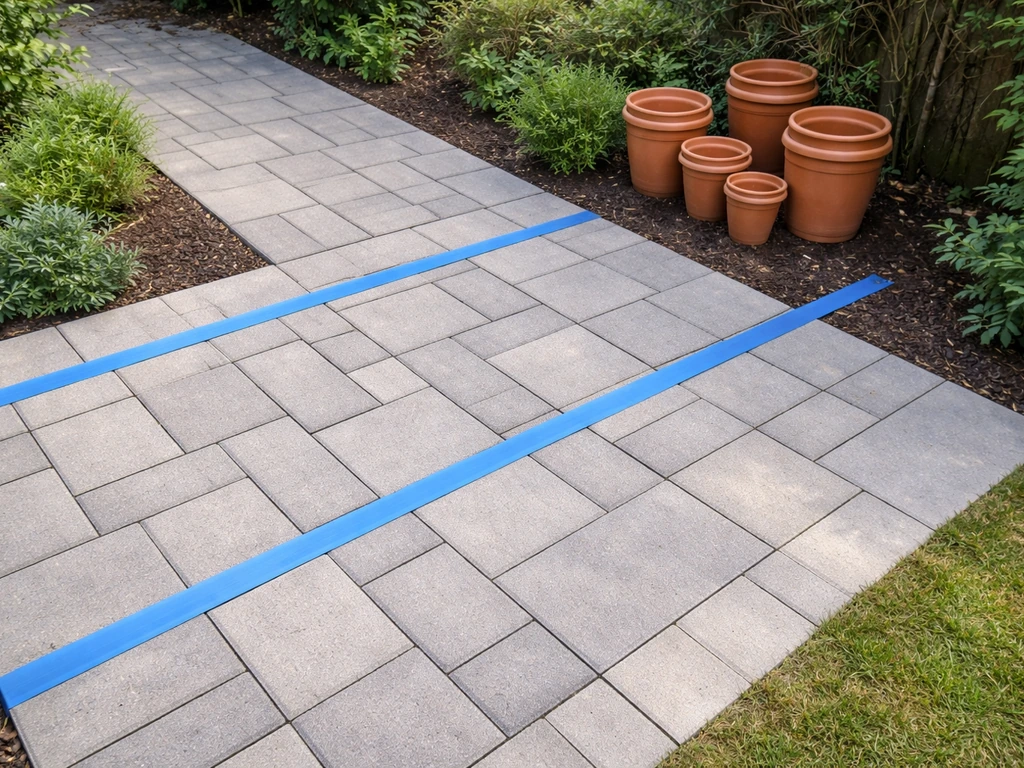
A walkway needs at least 36 inches of clear width for comfortable single-file movement, and 48 inches or more if two people will pass at the same time. That's not negotiable if you want the patio to feel functional rather than like an obstacle course. Measure your path before placing anything, and keep pots well clear of that corridor.
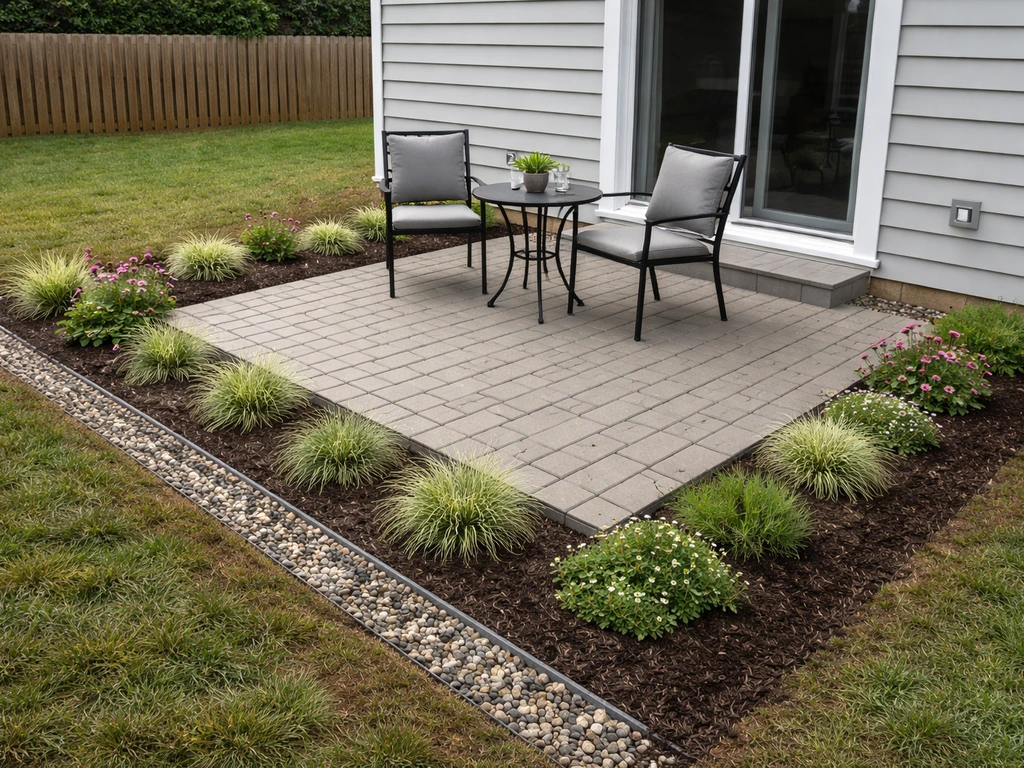
Corners are your best friends. They're underused dead space on most patios, and a tall statement pot or a tight cluster fits perfectly there without eating into usable floor area. The same goes for the areas directly beside steps or a door: framing an entry with two matching pots on either side immediately makes the whole space look more intentional.
Along edges, keep the base of pots at least 6 inches from the outer edge of the patio surface. This prevents pots from tipping off the edge if someone brushes past, and it also keeps them away from the zone where the patio edge is most likely to have settled unevenly over time. On a wood deck, that edge margin also reduces moisture buildup against the fascia board.
Between grouped clusters, aim for at least 18 to 24 inches of open space. This gives you room to step in for watering and deadheading, and it prevents the whole arrangement from feeling wall-to-wall crowded. Chicago Botanic Garden's container gardening guidance emphasizes accessible design: you should be able to reach every pot for maintenance without having to move others out of the way.
Layer by height and texture for a look that actually holds together
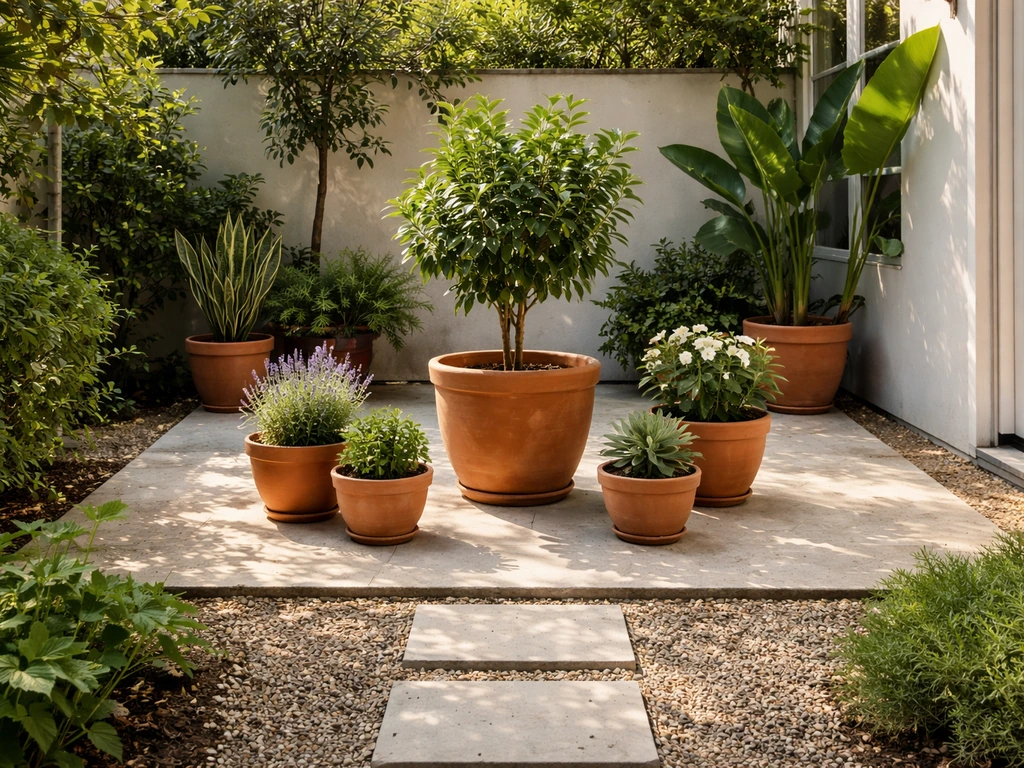
Height variation is the single most effective thing you can do to make a patio arrangement look designed rather than dumped. The rule of thumb borrowed from container planting (and it works just as well for arranging multiple pots) is: tallest at the back or center, mid-height in the middle, low or trailing plants at the front edge. This is the classic thriller-filler-spiller framework applied at the arrangement level instead of just inside a single pot.
Within individual large pots (roughly 10 to 12 inches in diameter or bigger), that framework means using one tall thriller plant as the vertical anchor, two to three mid-height fillers to add volume, and two to three trailing spillers to soften the rim. At the arrangement level, you're doing the same thing: one tall pot or plant stands as the thriller for the whole cluster, medium pots fill out the sides, and low bowls or hanging baskets at the front create the spill effect.
You don't need to buy bigger pots to get height variation. University of Illinois Extension and several other garden sources point out the obvious but often-overlooked trick: flip an old pot upside down and set another pot on top of it. Bricks, concrete blocks, and wooden crates do the same job. Elevating a smaller pot by 8 to 12 inches transforms a flat grouping into something with real layered depth, and it costs nothing.
Texture adds the second layer of visual interest. Pair broad, glossy leaves (like elephant ears or fatsia) next to fine, feathery foliage (like ornamental grasses or fennel). Hard, architectural shapes (agave, cordyline) read well next to soft, mounding shapes (petunias, sweet alyssum). You don't need to overthink this: just avoid putting two plants with identical leaf shapes and sizes next to each other.
Create zones and focal points around the patio
Entry points
Frame any door or gate with two matching pots. They don't have to be identical plants inside, but matching containers (same size, same material, same color) signals intentional design. Go tall here: a 24-inch or taller pot with an upright plant reads well from a distance and marks the entry clearly. This is a good spot for something with seasonal interest like a small topiary, a standard rose, or a structural ornamental grass.
Seating areas
Around a table and chairs, keep pots at the perimeter rather than tucked under chairs or between seats. A cluster of three pots in one corner of the seating zone adds greenery without blocking movement. Fragrant plants like lavender, scented geraniums, or herbs work especially well near a seating area since you actually spend time there. Keep tall pots to the outside edge so they don't block sight lines across the table.
Privacy screens
If you want to block a sightline from a neighbor's window or screen a street view, a line of tall pots along that edge does the job. Use large containers (18 inches or wider) with upright shrubs, ornamental grasses, or bamboo. Stagger their depths slightly so it looks like a planted screen rather than a fence. This approach works best along a back edge or a side boundary where foot traffic doesn't need to pass.
Making a small patio work harder
On a small patio, the temptation is to spread everything out to use every inch of floor space. That almost always makes it look more cluttered, not less. The counterintuitive move is to pull pots into tight groups and leave the middle open. One strong cluster in a corner plus two framing entry pots reads as intentional design. Twelve scattered pots reads as chaos.
- Go vertical: wall-mounted planters, tiered shelving units, and hanging baskets use airspace instead of floor space
- Use one large focal pot instead of many small ones; a single 18-inch pot with a bold plant commands attention without taking up more floor area than three small pots
- Keep the main walkway completely clear; even on a tiny patio, a clear 36-inch path makes the whole space feel bigger
- Choose pots with a smaller footprint but taller profile; a tall, narrow pot holds as much soil volume as a wide shallow one but uses far less floor space
- Use shelving or overturned pots to stack smaller containers vertically rather than spreading them across the floor
UNH Extension notes one of the best advantages of container gardening: you can move everything. If a small patio feels cramped in the morning when you're eating breakfast outside, try shifting the cluster to a different corner. You're not committed to anything. That flexibility is the whole point of containers.
Keeping the arrangement stable, safe, and drainage-friendly
Weight is the issue most people underestimate. A 16-inch terracotta pot filled with wet soil can weigh 40 to 60 pounds. A group of five large pots clustered together can easily put 200 to 300 pounds in one spot. Before clustering heavy containers on a wood deck, check that the decking and joists can handle concentrated point loads. On a concrete patio slab, this is rarely a problem, but on a raised wood deck it genuinely matters.
Drainage under the pots is the other practical issue. Pots sitting flat on an impermeable patio surface trap water underneath them, which stains the patio, promotes mold, and can rot wood decking. Use pot feet (small ceramic or rubber risers that lift the pot about an inch off the surface) to keep airflow under every container. Horticulture magazine specifically recommends pot feet as the reliable fix for both staining and drainage problems. If you're using saucers to catch drips, empty them every day or two: water sitting in a saucer will wick back up into the pot's drainage holes and can cause root rot over time.
For large pots you want to fill partially, Oregon State University Extension suggests placing upside-down 1-gallon plastic pots at the bottom of the container before adding soil. This reduces the total soil volume you need (which saves weight) while keeping drainage fully functional. It's a practical trick worth knowing when you're filling a big statement pot. When it comes to large patio pots, the main goal is to fill them with a lightweight, well-draining potting mix while leaving enough headroom for watering.
Stability matters especially for tall, top-heavy pots. On a windy patio, a 24-inch pot with a tall ornamental grass or bamboo acts like a sail. Keep tall pots in corners or against a wall where they get some wind shelter, and consider placing them on non-slip rubber mat pieces to prevent any sliding on a smooth patio surface. If the patio surface is slightly uneven (common on older pavers), use a thin shim or folded rubber mat under one side of the pot base to level it before planting.
Repositioning and adjusting as plants grow
A layout that looks great in May can look crowded and wrong by August. Plants fill in, spill over their pots, cast more shade on neighboring containers, and sometimes outgrow their spot entirely. Plan for this from the start by leaving a little more space between groupings than you think you need in spring. NC State Extension also notes that container watering needs vary with factors like light, temperature, humidity, container size and media, and the plant's stage, so planning for growth can help you manage watering more precisely leaving a little more space between groupings than you think you need in spring. What looks like a gap in April is usually perfect by July.
Every few weeks, step back and look at the arrangement from the angle you see it most often (usually from a door or from the seating area). If one pot is being overwhelmed by its neighbor, pull it forward or to the side. If a plant has grown tall enough to block something you want visible, move it to the back of a cluster. This is normal maintenance, not a sign the original plan failed.
Sun shifts seasonally too. UNH Extension points out that one of the best features of container gardening is the ability to reposition plants as light conditions change through the seasons. A spot that was full sun in spring may be partially shaded by a pergola or neighboring trees by midsummer. If a sun-loving plant starts stretching or leaning, it's telling you to move it somewhere with more direct light. Don't ignore it.
As plants grow larger, revisit your pot sizing too. A plant that's become root-bound will dry out within a day of watering and will look stressed regardless of how well you've arranged it. Potting up into the next size container (generally 2 inches larger in diameter) usually fixes the problem immediately. If you're filling large pots from scratch, the guides on how to fill large patio pots and how to plant patio pots cover the soil layering and planting process in detail. If you want to put that patio setup to work in a bigger way, learn how to grow potatoes on a patio as well.
A quick arrangement checklist before you start
- Measure the patio and sketch a rough layout noting fixed features (doors, furniture, steps)
- Track sun and shade across the day and note which zones are full sun, part shade, and full shade
- Check the drainage pitch of your patio surface and make sure no pot cluster will block water flow
- Decide on your layout style: grouped clusters with staggered heights works for most patios
- Place entry-framing pots first, then corner clusters, then any privacy or seating-area groupings
- Keep all walkways at least 36 inches wide and leave 18 to 24 inches between clusters
- Vary heights within every group using elevated pots, overturned containers, or bricks
- Fit pot feet under every container and empty saucers every couple of days
- Step back and assess from the main viewing angle; adjust as plants grow through the season
FAQ
How many potted plants should I use on a patio without it looking cluttered?
Aim for clusters, not counts. A common starting point is 3 to 5 pots per cluster (with 1 main cluster plus 2 framing pots near an entry) and leave an open “breathing space” in the middle. If you catch yourself placing a pot to fill a gap, pause and group those extras into a single cluster instead.
What’s the best way to handle a patio with an awkward shape or lots of odd angles?
Anchor first to the longest straight boundary, then build clusters outward from that line. Use corners and the next two “turns” of the patio perimeter as your reference points, keeping each cluster aligned to the patio edges so the arrangement reads intentional instead of random.
Should I place pots directly on the patio surface or use risers?
Use risers (pot feet) whenever the patio is prone to trapping moisture, especially on wood decking and any non-porous surface. Risers lift the pot about an inch for airflow and reduce staining and mold, and they help prevent drainage water from lingering under the base.
Do saucers make watering easier, or do they cause problems?
They help catch drips, but they can also create root rot risk if water stays too long. Empty saucers every day or two, and only top up saucers when the plant is actually drinking, not as a “set it and forget it” water reservoir.
How do I decide where to put tall pots versus low trailing plants?
Put the tallest pot or plant at the back of the viewing angle, or in the patio’s center axis if people view it from multiple sides. Low and trailing plants should sit closer to the front edge of the cluster, with enough clearance so spillover doesn’t block walking paths or sit too close to patio edges.
What spacing should I use between pot clusters for maintenance?
Use at least 18 to 24 inches of open space between clusters so you can reach every pot for watering, deadheading, and pruning without dragging through stems. If you have to squeeze your body or tools between pots, the layout will feel fine in spring and frustrating by midsummer.
How can I stop pots from sliding or tipping on windy patios?
For tall or top-heavy plantings, place them in sheltered corners or against a wall, and consider a non-slip rubber mat piece under the pot base on smooth surfaces. If pavers are uneven, level with a folded rubber mat or a thin shim so the pot doesn’t sit on a wobble point.
What should I do if my patio doesn’t seem to drain well in certain spots?
Before planting, test flow by sprinkling water or running a hose and watching where it pools after 30 to 60 minutes. Don’t anchor heavy clusters in low pockets, and if you must, use pot risers and choose pots with good drainage so water doesn’t sit under or around the containers.
Can I reuse the same pots but change the plant layout later?
Yes, that’s one of container gardening’s strengths. If light conditions or plant sizes change, you can swap pot locations seasonally (for example, moving sun-lovers to brighter zones after midsummer shade increases). Reassess access and spacing each time you move clusters so maintenance remains easy.
How do I know when a plant needs to be repotted even if the layout looks perfect?
Watch for root-bound signs like fast drying (needing water daily), roots circling the inside of the pot, or plants wilting soon after watering. When you see this, increase pot size (commonly about 2 inches wider in diameter) rather than trying to fix the issue with more frequent watering.
What’s the simplest way to add height variation without buying new large containers?
Elevate. Stack containers using an upside-down pot, pot risers, bricks, or concrete blocks to raise a mid or low pot by 8 to 12 inches. This creates layered depth for the overall arrangement while keeping the main container investment smaller and lighter.
Should I frame doors and gates with matching plants or matching pots?
Matching containers usually matters more than matching plants. Use two pots that are the same size, material, and color on either side, then choose plants based on sun exposure and maintenance needs. Go taller near entries (a pot 24 inches or taller reads better from a distance).
Is there a rule for placing pots near seating areas and around a table?
Keep pots on the perimeter of the seating zone, not under chair footprints or between seats. Cluster three pots in one corner if you want greenery without blocking movement, and use shorter heights closer to sight lines while reserving tall pots for the outside edges.