You can build a solid, good-looking wooden patio yourself over a few weekends with basic carpentry tools, pressure-treated lumber for the frame, and your choice of decking boards on top. If you are aiming to install a patio on a pallet, focus on creating a stable base, aligning the pallet surface, and using weather-rated materials so it holds up outdoors wooden patio. The process breaks down into six stages: design and wood selection, site prep and layout, framing the substructure, laying the decking boards, finishing with sealant, and ongoing maintenance. Each stage has decisions that directly affect how long your patio lasts and how safe it is, so this guide walks you through all of them with real measurements and honest trade-offs.
How to Build a Wooden Patio: DIY Step-by-Step Guide

Nolan Carver
7 May 2026
Choosing the Right Design and Wood Type
Before you buy a single board, lock in two things: what the patio will look like structurally, and what wood you want for the decking surface. These decisions drive every material and budget choice downstream.
Design options: ground-level vs. raised
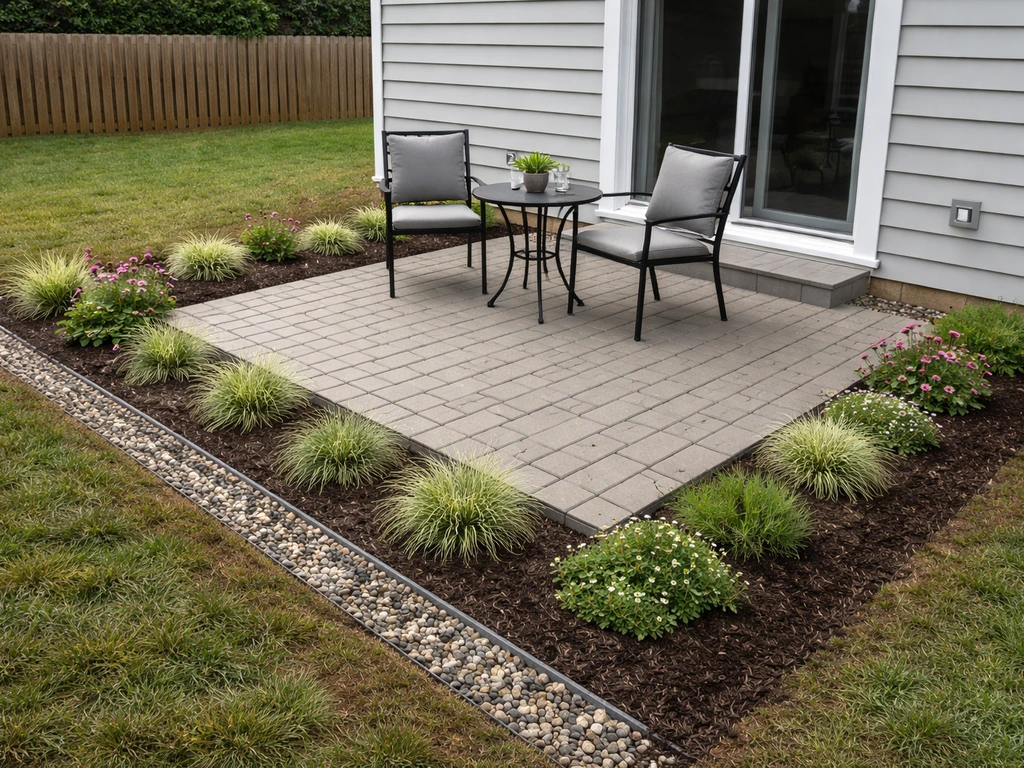
A ground-level (floating) wooden patio sits just a few inches above grade on concrete piers or surface-mounted post bases. It is the most DIY-friendly option, usually skips permit requirements, and suits flat or gently sloped yards. A raised wooden patio connects to the house via a ledger board or stands on its own posts and beams, giving you usable space over a slope or above an existing surface. Raised platforms over 30 inches above grade require guardrails under the IRC (International Residential Code), and those over 42 inches typically need 42-inch-high guards. Know your finished height before you design, because railing costs and permit requirements kick in at specific thresholds.
Picking your decking wood
Pressure-treated (PT) pine is the default choice for most DIYers because it is widely available, easy to cut, and the most affordable option. It handles moisture well when protected with a finish, and modern formulations (CA-B or CA-C) are safe for residential use. Cedar and redwood are naturally rot-resistant, lighter, and more attractive right out of the box, though they cost more and need regular sealing to reach their full 10 to 20-year lifespan.
Ipe and other tropical hardwoods are the premium tier, lasting 40 to 75-plus years, but they are dense (you need carbide-tipped bits and sharp blades), expensive, and harder to source responsibly. For most homeowners building their first wooden patio, pressure-treated framing with cedar or PT decking boards is the sweet spot of cost, durability, and workability.
| Wood Type | Typical Lifespan | Relative Cost | Maintenance Needs | Best For |
|---|---|---|---|---|
| Pressure-treated pine | 15–25+ years | Low | Seal every 2–3 years | Framing, budget decking |
| Cedar / Redwood | 10–20 years | Medium | Seal every 2–3 years | Surface boards, aesthetics |
| Ipe / Tropical hardwood | 40–75+ years | High | Oil annually | Long-term premium decks |
| Reclaimed / Pallet wood | Varies widely | Very low | High; inspect constantly | Low-budget, low-traffic areas |
If you are curious about ultra-budget builds using reclaimed material, pallet-based patios are a related approach worth understanding, though they come with their own structural and safety caveats. Pallet patios use many of the same planning and drainage principles as standard wooden patios, but you need to verify the pallets are safe and structurally sound before you build pallet-based patios.
Planning Layout, Permits, and Site Prep
Check local codes and permits first
In most US jurisdictions, any attached deck or elevated platform requires a building permit. Ground-level floating patios often fall under exemptions, but rules vary by city and county. Pull up your local building department's website or call them before you dig a single hole. In the US, structural requirements live in IRC Section R507, which covers ledger attachment, footing depth, framing geometry, and guardrails. Outside the US, check your equivalent code body: in Canada, provincial building codes apply (Alberta, for example, requires 42-inch guards when the deck surface is less than 6 feet above grade); in the UK, decking may qualify as permitted development if it meets specific conditions, but you should verify with your Local Authority Building Control.
Site selection and slope drainage
Walk your yard after a rain and watch where water flows. You want your patio to shed water, not collect it. The standard rule of thumb is to build in a slope of about 1/8 inch per foot away from the house. That is barely noticeable underfoot but makes a real difference in how quickly the surface dries.
For a 12-foot-deep patio, that means the outer edge sits 1. 5 inches lower than the house-side edge. If your yard already slopes away from the house, great. If it slopes toward the house, you will need to address drainage either through grading or by planning a French drain at the outer edge.
Water pooling against wood is one of the leading causes of rot and fastener corrosion, so get this right at the planning stage rather than trying to fix it later.
Laying out the footprint
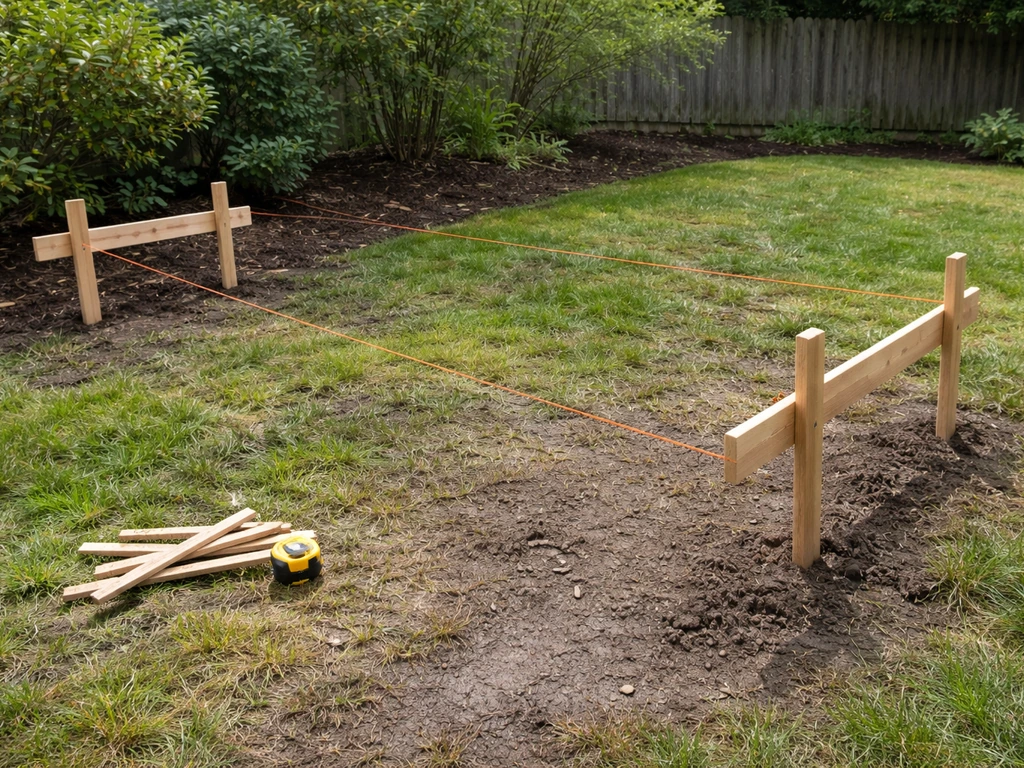
Use batter boards and mason's line to establish your patio's corners. To check for square, use the 3-4-5 triangle method: measure 3 feet along one string, 4 feet along the perpendicular string, and confirm the diagonal is exactly 5 feet. For larger patios, scale this up (6-8-10 or 9-12-15 work fine). Mark your post or pier locations on the layout and confirm they clear underground utilities. Call 811 (in the US) before digging. Also confirm setback requirements from property lines, easements, and any overhead utilities.
Materials and Tools Checklist
Here is what a typical ground-level or low-raised wooden patio requires. Scale quantities to your specific dimensions using your final layout drawing.
Materials
- Pressure-treated 4x4 or 6x6 posts (for piers or footings)
- Pressure-treated 2x8 or 2x10 joists and rim/band joists (size depends on span)
- Pressure-treated 2x6 or 2x8 beam stock (if needed for your span)
- Decking boards in your chosen species (5/4x6 or 2x6 are most common widths)
- Concrete for footings (bagged or ready-mix depending on quantity)
- Concrete tube forms (Sonotubes) for poured footings
- Post bases and joist hangers (hot-dipped galvanized, ASTM A653 G185 rated)
- Lag screws or structural bolts for ledger attachment (if attaching to house)
- Deck screws or hidden fasteners: stainless steel or hot-dipped galvanized, sized for your decking thickness
- Ledger flashing tape or metal flashing (for attached decks)
- Gravel for under-deck drainage and post-base drainage
- Landscape fabric (optional, to suppress weeds under the deck)
- Wood sealer, stain, or exterior finish for the decking surface
- Joist tape (protects the top edge of framing members from moisture)
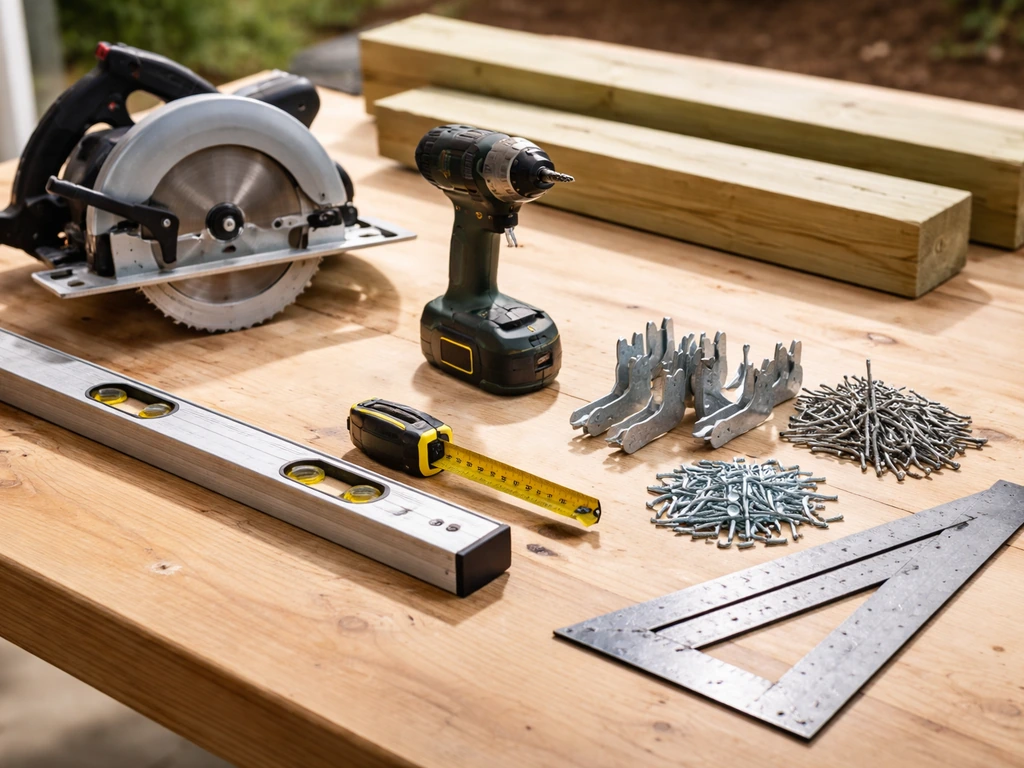
Tools
- Circular saw and miter saw
- Cordless drill and impact driver
- Post hole digger or rented power auger
- Level (4-foot and torpedo)
- Speed square and framing square
- Tape measure (25-foot minimum)
- Mason's line and batter boards
- Chalk line
- Rubber mallet
- Safety glasses, hearing protection, work gloves
- Clamps (several bar or C-clamps)
- Pencil or lumber crayon for marking cuts
A note on fasteners: for pressure-treated lumber treated with CA-C or CA-B formulations, you must use hot-dipped galvanized fasteners that meet ASTM A153, or stainless steel. Thread discussion on r/Decks notes CA-C can require connector hardware complying with ASTM A153 / ASTM A653 G185 (or better), with comments on corrosion risk versus coating types blank" rel="noopener noreferrer">hot-dipped galvanized fasteners that meet ASTM A153. Simpson Strong-Tie’s connector documentation notes minimum zinc coating specifications and indicates that certain hanger series are available with G185 zinc coating hot-dipped galvanized fasteners that meet ASTM A153. Standard zinc-plated or electroplated screws corrode quickly in contact with modern PT wood chemistry and will fail years before the wood does. This is not a place to cut corners.
Building the Base and Substructure
Footings: the part that makes everything else work
Every post needs a footing that extends below the local frost line to prevent heaving. Look up your jurisdiction's frost depth (IRC Table R301.2(1) lists this by region in the US). In cold climates this can be 36 to 48 inches; in warmer zones it may be only 12 inches. Dig or auger your holes to the required depth, pour concrete into tube forms, and set a post base anchor while the concrete is still wet. Use a level to make sure the anchors are plumb and aligned with your layout strings. Let the concrete cure at least 48 hours (72 is better) before loading it.
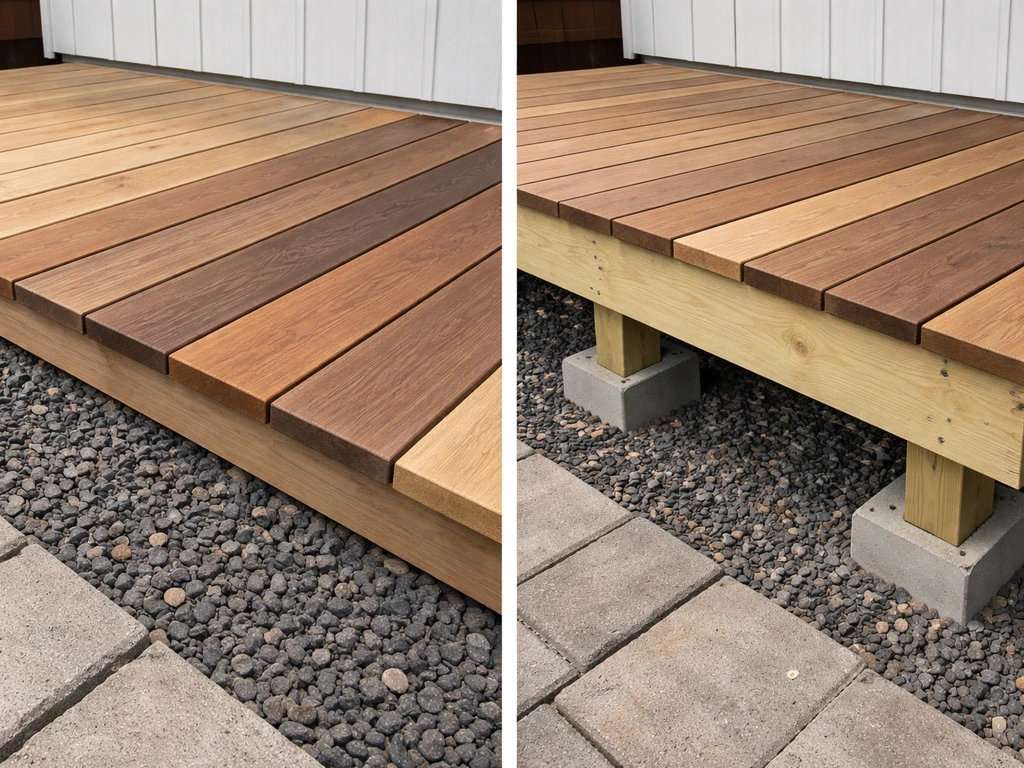
For true floating/ground-level patios, you can sometimes use surface-mounted concrete deck blocks or precast pier blocks instead of poured footings, which skips the digging and curing time. This works well on stable, well-draining soil in mild climates, but check your local code since some jurisdictions still require poured footings for any structure.
Posts and beams
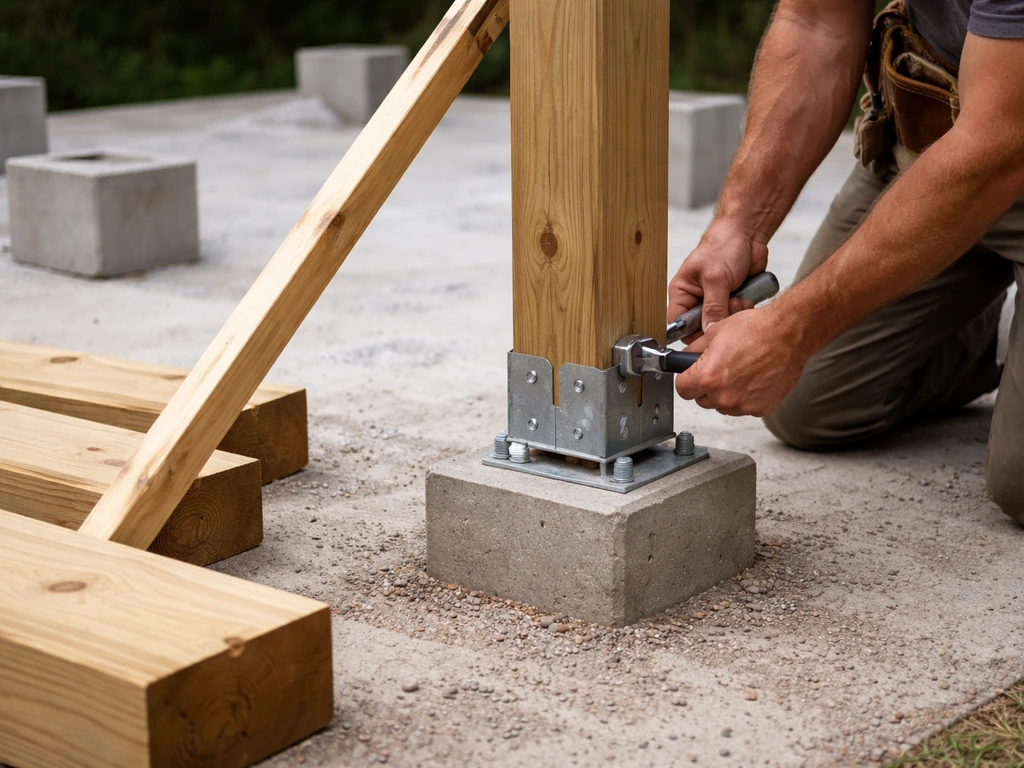
Set your posts in the anchor bases and brace them plumb with temporary diagonal bracing. Never embed wood posts directly in concrete or soil. Use post bases to keep the wood end-grain off the concrete surface, which allows moisture to escape and dramatically extends post life. Cut posts to height using a level and chalk line snapped across all of them to ensure a flat, level plane for the beams. Beams (doubled 2x10s or 2x12s are common) sit on top of the posts and carry the joists. Fasten beam-to-post connections with structural post caps.
Framing the joists
Rim joists (also called band joists) form the outer frame. Interior joists hang between them using metal joist hangers, not toe-nails alone. Standard joist spacing is 16 inches on center for most decking boards, but check the span tables for your specific lumber size and species. For 5/4x6 decking boards, some manufacturers allow up to 24-inch joist spacing, but 16 inches gives a noticeably stiffer, more comfortable feel underfoot.
If you are building an attached deck, the ledger board replaces the house-side rim joist. Attach it through the house sheathing into the rim joist of the house framing using lag screws on an IRC-compliant spacing schedule, and flash it thoroughly with metal flashing or self-adhesive membrane to prevent water from getting behind the ledger. That interface is the single most common failure point on attached decks.
A practical tip: leave a small gap (about 1/2 inch) between the ledger and the house's band joist behind it if you can, and use proper flashing so any water that gets in can drain out rather than sitting against both pieces of wood. Trapped moisture is what turns a sound ledger into a rotted one.
Installing the Decking Boards
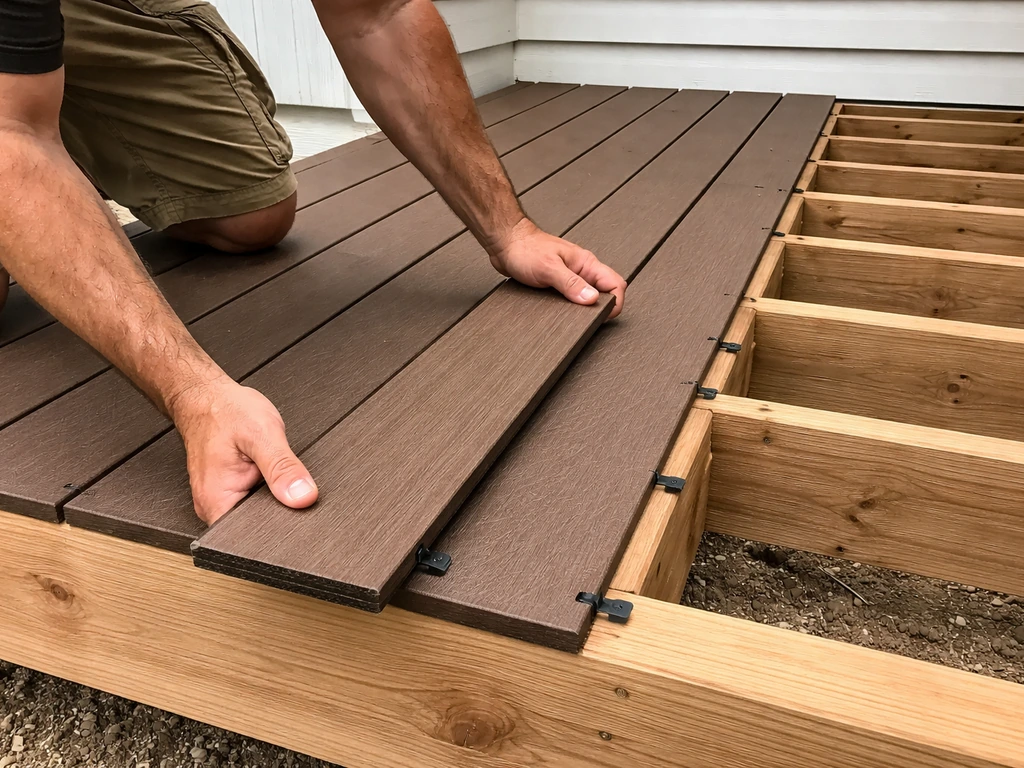
Spacing and layout
Start your first decking board flush with or slightly overhanging the outer rim joist, and work your way toward the house. Space boards 1/8 to 1/4 inch apart. That gap serves two purposes: it lets rainwater drain through instead of pooling on the surface, and it accommodates natural expansion and contraction as the wood cycles through wet and dry seasons. For dry wood or kiln-dried boards, use 1/4-inch spacers because the wood will swell slightly once exposed to outdoor humidity.
For wet or green PT lumber (which is common straight off the shelf), start at 1/8 inch because the wood will shrink as it dries. If you are installing in winter, add a bit more gap since the wood will expand in summer heat and humidity.
Before you fasten the first board, do a dry layout of all your boards across the joists and do the math on your last board. You do not want to end up with a sliver of board at the house wall. If that is where you are headed, either adjust your spacing slightly or shift the starting position. A consistent-looking edge is one of the marks of a quality installation.
Fastening
Face-screwing (driving screws down through the face of the board into the joist below) is the most straightforward method and fine for most residential patios. Use two screws per board per joist, positioned about 3/4 inch from each edge to avoid splitting. Pre-drill near board ends to prevent splitting, especially with cedar and hardwoods. Use 3-inch decking screws for 5/4-inch boards. Hidden fastener systems (biscuit or clip style) give you a cleaner, screw-free surface and are worth the extra cost if appearance matters to you, though they do add installation time and cost.
Edge details and overhangs
Allow decking boards to run long past the rim joist, then snap a chalk line and trim them all in one pass with a circular saw. This gives you a perfectly straight, clean edge. A 1-inch overhang past the rim joist is typical and looks finished. If you want a more polished border, add a picture-frame board running perpendicular around the perimeter. Miter the corners at 45 degrees for a clean look. This detail also hides the cut ends of your field boards and gives the patio a defined boundary.
Finishing: Sealing, Staining, and Weather Protection

New pressure-treated lumber needs to dry out before it will properly accept a finish. Check by sprinkling water on the surface: if it beads, the wood is still too wet. Wait two to four weeks after installation before sealing. Cedar and other dry-kiln lumber can often be finished sooner. Lightly sand the surface before finishing to open the grain and remove any mill glaze or fuzz that raised during the drying process.
Choose a penetrating water-repellent stain or oil-based deck finish over a film-forming paint or solid stain. Film-forming products look great initially but tend to peel as wood moves seasonally, trapping moisture underneath. Penetrating finishes soak into the wood, move with it, and are far easier to maintain. A semi-transparent stain gives you both UV protection and color while still showing the wood grain. Apply with a brush or roller, working the finish into the gaps between boards and paying extra attention to end-grain cuts, which absorb moisture fastest.
Plan to recoat every two to three years under normal conditions. If your patio is in full sun or a wet climate, check it annually. The test is simple: if water no longer beads on the surface, it is time to clean and recoat. A light cleaning with a deck cleaner or diluted oxygen bleach solution, followed by a rinse and dry time, is all the prep you need for a maintenance recoat.
Troubleshooting, Maintenance, Costs, and Timeline
Common problems and how to fix them
- Cupping or warping boards: Usually caused by moisture imbalance, meaning the top dries faster than the bottom or vice versa. Ensure adequate airflow under the deck, keep spacing gaps clear of debris, and make sure the underside isn't sitting in standing water. Apply finish to all six sides of boards (including the bottom face and ends) before installation to slow uneven moisture exchange.
- Water pooling on the surface: Check your slope. If the deck is flat or pitches toward the house, you may need to shim joists on the house side to add slope, or clear clogged gaps between boards that are trapping debris and blocking drainage.
- Boards moving or bouncing: Check that all joists are fully seated in hangers and all fasteners are tight. If the bounce is across a span, you may have too-wide joist spacing for your decking thickness. Adding an intermediate joist often solves this.
- Squeaky boards: Usually a loose screw or a board that has shrunk away from a fastener. Drive a new screw adjacent to the old one at a slight angle to grab fresh wood.
- Ledger separation or rot signs: If you see daylight between the ledger and the house, or soft/dark wood around the ledger, address it immediately. This is a structural safety issue. Remove deteriorated material, treat the area, and reattach with properly flashed hardware.
- Corrosion on fasteners: If screws are leaving rust streaks, they are likely the wrong type for PT wood. Replace with hot-dipped galvanized or stainless-steel screws and seal the surrounding wood.
Annual maintenance routine
- Inspect every visible fastener, connector, and ledger bolt for corrosion or looseness. Tighten or replace as needed.
- Clear all debris from between boards, especially leaf accumulation that holds moisture against the wood.
- Check the ledger-to-house connection and flashing for gaps, cracks, or water staining.
- Test the surface finish with the water-bead test. Recoat if water no longer beads.
- Inspect any guardrail posts and balusters for wobble. Guardrail failures are the leading cause of deck-related injuries, so this is not optional.
- Look under the deck at post bases, beam-to-post connections, and the underside of the ledger for signs of rot, insect damage, or structural shifts.
What it costs and how long it takes
Installed wooden patio costs run roughly $15 to $45 or more per square foot depending on materials, complexity, and your region. A straightforward 300-square-foot pressure-treated patio with basic framing might come in around $5,000 to $10,000 if you are hiring the whole job out. DIYing the labor saves the largest chunk of that. Material-only costs for a pressure-treated build typically run $8 to $15 per square foot for the structure and decking combined, depending on local lumber prices and the decking species you choose. Permit fees, if required, usually add $100 to $500 depending on your municipality.
Timeline-wise: plan for the whole project, from final design through first coat of sealant, to take six to twelve weeks if you are working weekends. The construction portion alone, spread across weekends, typically runs four to twelve weeks depending on complexity. Footings add a curing delay of several days. If your project requires a permit and inspection, build in extra time for the inspection scheduling. Complexity multipliers include slope management, ledger attachment to the house, stairs, and guardrails, each of which adds meaningful time.
Handling slope and drainage on challenging sites
If your site slopes significantly, a raised wooden patio on a post-and-beam structure is often the cleaner solution compared to extensive grading. Taller posts on the downhill side bring the frame level while the site stays natural underneath. For sites that slope toward the house, consider installing a French drain or gravel trench at the perimeter of the patio to intercept runoff before it reaches the structure. Always keep the soil beneath a ground-level platform graded away from the house foundation, and if you are working with a timber patio or a heavier structural approach on grade, the foundation and post sizing requirements scale up accordingly.
You now have everything you need to move from a rough idea to a built, finished wooden patio. Start with your site assessment and a call to your local building department this week, sketch your layout with real dimensions, and price out materials at your local lumber yard before committing to a final design. A patio bar made from pallets can follow the same planning and sealing principles, but with extra attention to bar-height stability and food-safe finishing. Getting real lumber quotes in hand early almost always changes the plan in useful ways, and it puts you in a much better position to start building on schedule.
FAQ
What should I do if my yard stays wet after rain, even if I build in a small slope?
If your yard is wet or you cannot keep water moving away from the patio, a floating design still needs a drained surface under it. Plan for a gravel base or drainage layer, keep soil from touching the underside of boards, and consider adding a perimeter French drain before you frame. Without reliable drainage, even rot-resistant wood will fail quickly and fasteners will corrode faster than expected.
Can I skip poured footings and use deck blocks for my wooden patio?
Yes, but treat it as a different structural problem. A “deck block” or precast pier setup can be quicker, but it may not be allowed for your height, soil type, or wind load requirements. If you see movement in the blocks, spongy soil, or you are in a frost region, switch to code-compliant poured footings and anchors rather than assuming surface blocks will hold.
What’s the safest fastener choice for pressure-treated lumber I’m using for a patio?
Do not use regular zinc-plated screws in modern CA-B or CA-C pressure-treated lumber. Even if they start holding well, corrosion will eat the threads and head, loosening the deck over time. Use hot-dipped galvanized fasteners that meet the correct ASTM spec, or stainless steel for all structural and decking fasteners.
How do I avoid water damage at the house ledger when building a raised patio?
For a ledger connection, flashing is not optional, and it must be installed to manage water that gets behind the ledger. Dry-fit and level the ledger, then use proper flashing details, not just caulk, because sealants can fail under movement. Also confirm the attachment method matches code for your house framing, since ledger attachment depends on where in the rim framing you can anchor.
How much clearance do I need between the patio and nearby walls, fences, or landscaping?
Floating patios typically need clearance so air can circulate under the structure and water can drain. A common mistake is building too tight to plants, fences, or adjacent wood surfaces, which traps moisture and prevents drying. Leave space from grade and any nearby walls, and keep mulch or soil from contacting the framing.
Why do gap spacing recommendations change depending on the decking boards I buy (green vs kiln-dried)?
Start by matching board type and condition to your spacing plan. If you use green or freshly purchased PT boards, begin with tighter gaps to account for shrinkage, then recheck and touch up later if needed. If you use kiln-dried boards, wider gaps reduce the chance of buckling or uncomfortable tight seams during seasonal swelling.
Can I build a wooden patio over existing concrete or patio slabs?
It is possible to build over existing concrete, but you cannot just screw wood directly to it. You still need a level substructure with post bases or sleepers that keep end grain off concrete and allow drainage. Ensure the overall height, slope away from the house, and fastener type still meet your code requirements and do not create a trapped-moisture sandwich.
What changes if I add stairs to my wooden patio?
If you need stairs, plan stringer placement and landing support early, because stair loads and footing requirements can differ from the main deck. Your finished stair height and run must align with local code, and you may need extra framing under treads to prevent bounce. Also budget for handrails if your deck height triggers guardrails.
How can I tell early if my patio layout is out of square before I start installing decking?
A square patio is not only about looks, it also affects how boards land and whether joists align. If you are off-square even slightly, you can end up with inconsistent deck overhangs and a final course that turns into a narrow sliver. Measure diagonal distances after framing each side, and correct within the framing layout rather than trying to “fix” it at the decking step.
How do I know when my patio is ready for sealing, and what finish type should I choose?
Most wood-finish failures come from applying too soon or using the wrong finish type for PT. If water beads, the deck is not ready yet, and sealing early can trap moisture and accelerate checking. Wait for the wood to dry, lightly sand to remove fuzz, then use a penetrating stain or oil-based deck finish and recoat on schedule.
What’s the biggest footing mistake that causes wooden patios to fail in freezing climates?
The safest approach for cold regions is to size footings to frost depth and brace posts plumb while concrete cures. Inadequate depth leads to heaving, which eventually cracks fasteners and loosens joist alignment. If you are unsure of your frost depth, confirm with your local code tables or building department before digging.
How often should I inspect and recoat my wooden patio, and what signs mean it’s time?
Your plan should include a maintenance trigger, not just a calendar. Recoat based on whether water still beads, and increase frequency if the surface is in full sun, receives frequent wetting, or you use harsher cleaners. Also inspect annually for corrosion, loose screws, and lifted decking boards, since one fastener failure can lead to a chain reaction.