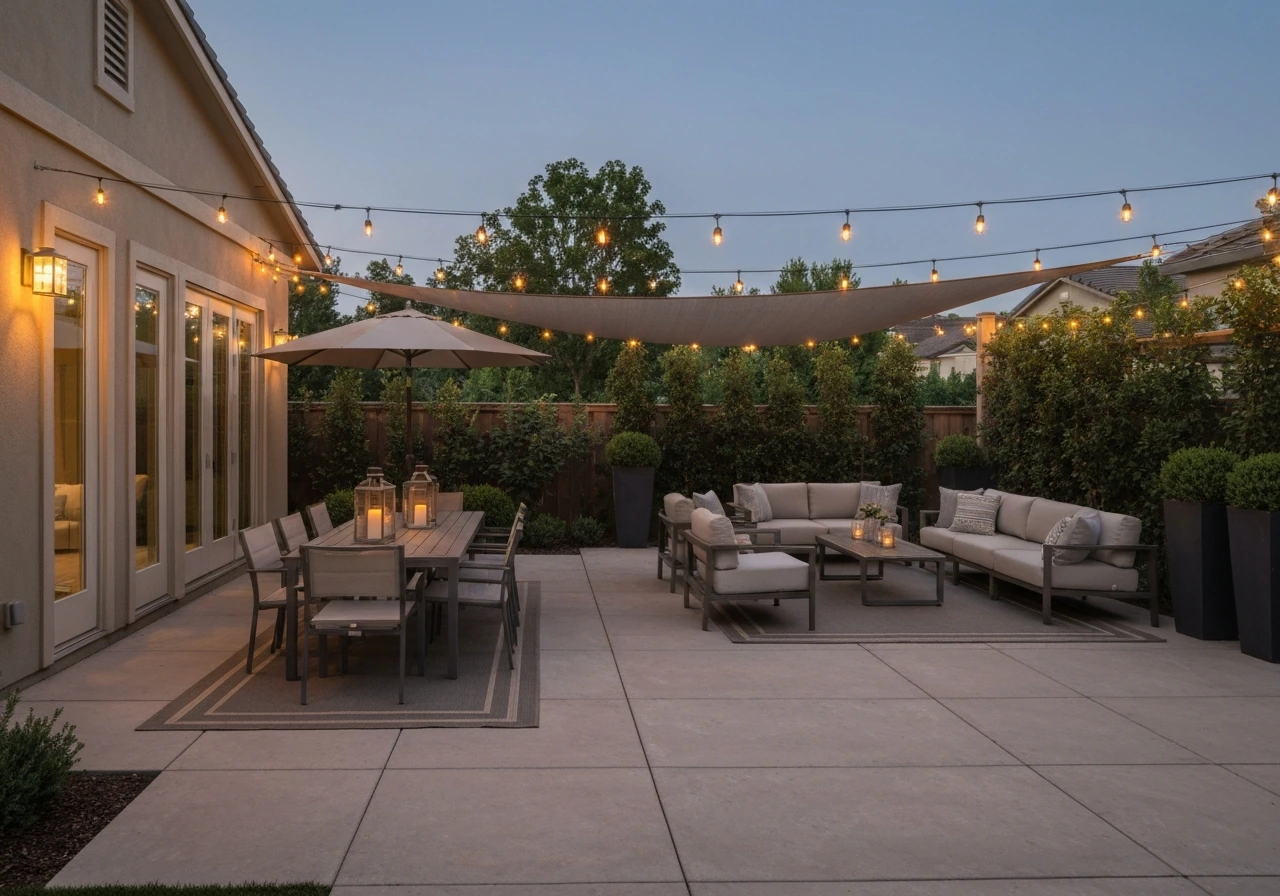
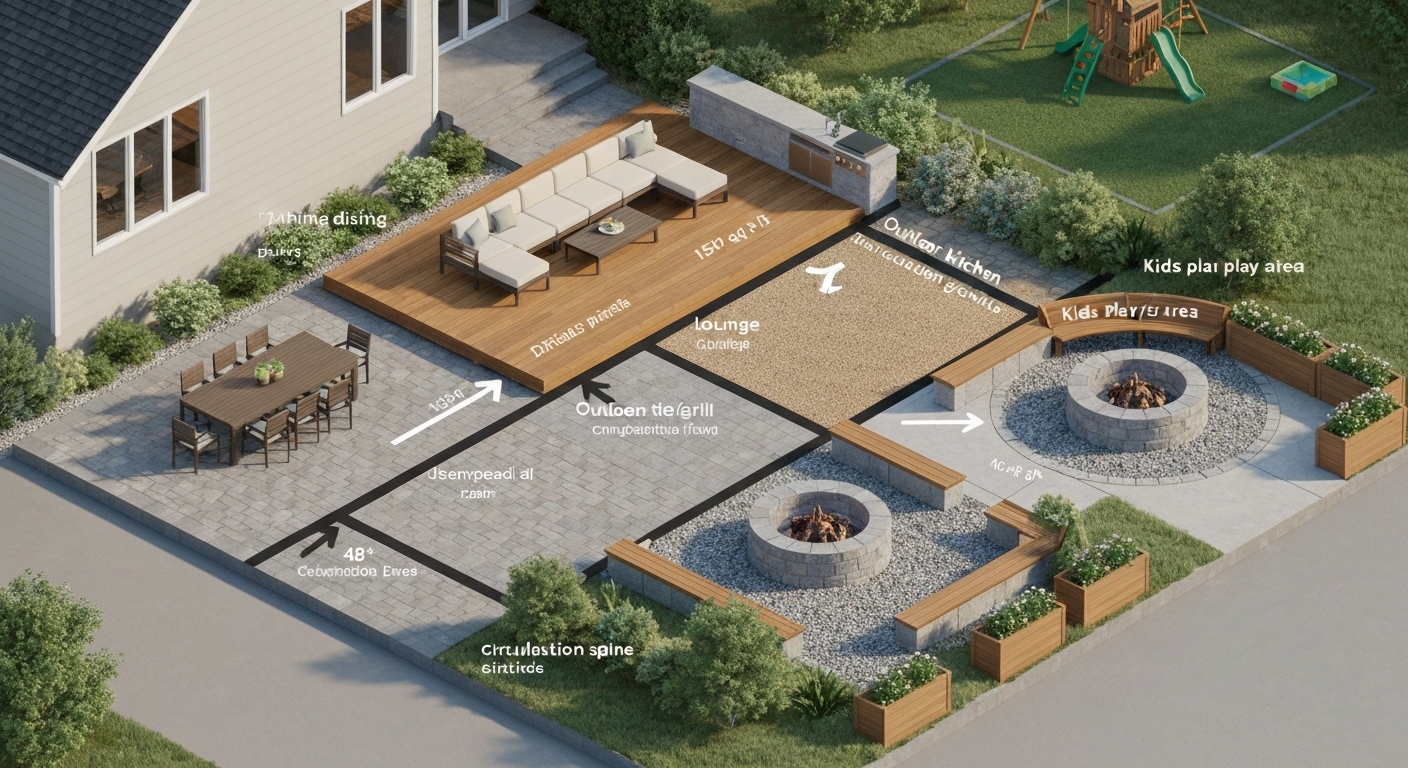
The best way to divide a large patio is to map it into distinct use zones, dining, lounge, cooking, fire pit, walkway, planting, and kids' play, then assign each zone a footprint, connect them with clear circulation paths, and choose materials or infill that visually and physically separate the spaces. You don't need walls or fences to make it work. A change in paving material, a step down, a row of planters, or simply a gravel pocket between zones is enough to tell visitors 'this area does this job.' The rest is measurement, base prep, and sequencing the build in the right order.
How to Divide Up a Large Patio: DIY Zones, Steps & Materials

Nolan Carver
15 Jul 2026
Why bother dividing a large patio at all?
A single undivided slab or paver field over 300–400 square feet tends to feel like a parking lot. Nothing pulls people to a spot, furniture clusters awkwardly in the middle, and the space never feels finished no matter how much you spend on it. Zoning fixes that by giving each activity its own territory. Suddenly the cooking area has room for a grill and cart without crowding the people sitting down. The fire pit has a safe buffer. Kids have somewhere to go that isn't underfoot. This guide walks you through every step: measuring and assessing your site, planning zones and circulation, choosing and comparing materials, infilling empty areas, building levels and transitions, and finishing with lighting, planting, and privacy.
Start here: assess your site before drawing a single line
I always tell people to spend at least one full weekend just watching the space before picking up a pencil. Walk out there in the morning and in the afternoon. Notice where the sun hammers down at 2 p.m. and where the shade lands by 4. Check which direction the prevailing wind comes from, that affects where you put a fire pit and where a cooking area stays comfortable. Mark the access points: doors from the house, gate from the driveway, path to the yard. These become your fixed circulation anchors and nothing should block them. For specific guidance on entry layouts and curb appeal, see our guide on how to build front patio.
- Measure the full patio footprint (length × width) and note any irregular edges, bump-outs, or angles. Sketch it on graph paper at 1 inch = 4 feet.
- Record slope direction and rough grade change using a line level and string — you need at least 1/8 inch per foot (about 1%) sloping away from the house for drainage, with 1/4 inch per foot (2%) preferred.
- Identify all access points: exterior doors, stairs, side gates, and paths leading to the yard or driveway.
- Locate sun and shade patterns at morning, midday, and late afternoon — note any structures or trees casting shade.
- Check wind direction for your region and note any natural windbreaks (fences, hedges, walls).
- Call 811 (or your state's One-Call center) at least 48–72 hours before any digging. Utility marks are typically valid for 10 working days, but note they don't always show privately owned service laterals, so verify those separately.
- Note any existing structures you want to keep: garden walls, existing paving, tree roots, downspouts, exterior outlets or gas lines.
Once you have a scaled sketch and the above information filled in, you can see which areas are practically off-limits, which get the best conditions for dining or lounging, and where a fire pit or cooking zone can sit safely away from the house (most codes require combustion sources at least 10 feet from structures, check your local ordinance).
Step-by-step planning checklist
Use this decision order to avoid expensive backtracking. It's tempting to jump straight to materials, but the structural and permit decisions have to come first.
- Complete site assessment (measurements, slope, sun, wind, access, utilities) — see section above.
- List every activity you want the patio to support and roughly how many people each zone needs to seat or serve at peak use.
- Check local building codes and HOA rules. Many municipalities require a permit for patios over a certain area (commonly 200 sq ft), for retaining walls over 30 inches, and for any attached structure. Pull permits before breaking ground.
- Decide on single-level vs. multi-level layout — level changes add cost and complexity but are sometimes required on sloped lots.
- Sketch your zone layout on the scaled drawing, assigning approximate square footages to each area.
- Confirm circulation paths: main paths at minimum 36 inches wide (48 inches preferred), secondary paths at 24–30 inches.
- Choose materials for each zone and decide on joint/transition types between them.
- Estimate quantities and get material prices from at least two suppliers.
- Build your timeline: a simple single-level paver patio over 300 sq ft is realistically a 2–3 weekend project for two people. Multi-level with steps adds at least one more weekend.
- Gather tools and schedule the build in the correct sequence: demo/excavation, base prep, drainage, paving, transitions, finishing.
Define your zones: what each area does and what it needs
Most large patios will include some combination of the following zones. You don't need all of them, pick what matches your household's actual habits, not what looks good in a magazine.
| Zone | Primary Purpose | Key Requirements | Typical Footprint |
|---|---|---|---|
| Dining | Meals and gatherings | Level surface, shade option, near kitchen access | 100–120 sq ft (4 people); 150–180 sq ft (6–8 people) |
| Lounge / seating | Relaxing, conversation | Comfortable clearance, shade or sun per preference | 100–150 sq ft for sectional + coffee table + circulation |
| Outdoor kitchen / cooking | Grilling, prep, serving | 30" clearance around grill, ventilation, utility access if gas/electric | 50–100 sq ft including cart and movement space |
| Fire pit | Evening gathering, warmth | 10+ ft from structures, non-combustible base or designated pad, seating ring | 150–200 sq ft including seating ring and safety buffer |
| Walkway / circulation spine | Connecting zones, house access | 36" min width (48" preferred), non-slip surface, well-lit | Varies by path length; budget ~3–4 sq ft per linear foot at 36–48" wide |
| Planting beds / garden pockets | Softening hardscape, privacy, fragrance | Edging or raised border, drainage, access for maintenance | Variable; even 18–24" wide beds along edges make a visual difference |
| Kids' play zone | Safe, contained play area | Cushioned or rubberized surface or pea gravel, visible from main seating | 50–100+ sq ft depending on equipment or open play area |
On a 400–600 sq ft patio you realistically have room for three or four zones. On 800+ sq ft you can comfortably fit five or six without anything feeling cramped. If your patio is on the smaller end of 'large,' I'd prioritize the zones you actually use every week over ones that look complete on paper.
Zone sizing, scale, and circulation rules
Scale is where most DIY patio plans go wrong. People either underestimate how much space furniture actually takes up, or they leave so much circulation room that zones feel like hallways. Here are the numbers I use.
Circulation clearances
- Main paths between zones: 36 inches minimum, 48 inches preferred for comfortable two-way traffic.
- Secondary or side paths (e.g., behind a planter, along a wall): 24–30 inches.
- Behind a dining chair when it's pulled out: 36–48 inches for comfortable passage; 18–24 inches as a bare minimum in tight spots.
- If you want the patio to be universally accessible, include at least one 60-inch turning circle or a 60×60-inch T-turn at decision points (per 2010 ADA Standards). This is worth building in even if nobody in your household currently uses a wheelchair — it costs nothing to plan for.
Keeping zones in proportion
A good rule of thumb is that the dining zone and the lounge zone should each occupy roughly 25–30% of your total patio footprint, with the remaining 40–50% split among cooking, fire pit, paths, and planting. On a 600 sq ft patio, that means a 150–180 sq ft dining area, a 150–180 sq ft lounge, and about 240–300 sq ft for everything else. Adjust based on your priorities, if outdoor cooking is your main event, swap proportions accordingly.
Furniture templates and layout dimensions
Before you mark out any zones with stakes and string, cut out paper templates at your drawing scale and physically move them around the sketch. It takes 20 minutes and saves you from pouring a base that's six inches too narrow. Here are standard furniture dimensions to work from.
| Furniture / Item | Typical Dimensions | Zone Footprint Needed (furniture + clearance) |
|---|---|---|
| 4-person rectangular dining table | 36"×60" to 40"×72" | ~100–120 sq ft |
| 6-person rectangular dining table | 40"×72" to 42"×84" | ~150–160 sq ft |
| Round dining table (4 person) | 42"–48" diameter | ~100 sq ft |
| 3-seat outdoor sofa | 72"–84" wide × 30"–34" deep | Pair with coffee table: 100–130 sq ft zone |
| L-shaped sectional (medium) | 100"–110" per side | ~150 sq ft zone minimum |
| Gas or charcoal grill (standalone) | 24"–30" wide × 18"–22" deep | Add 30" all sides clearance: ~50 sq ft working area |
| Built-in grill / outdoor kitchen island | 48"–72" long | ~80–100 sq ft including prep and access |
| Fire pit (standalone round) | 36"–48" diameter | 6 chairs at 18" each + clearance: ~150–200 sq ft total zone |
When laying out the dining zone, place the table first, then add chair positions with chairs pulled out (add 18–20 inches per chair beyond the table edge), then add the path clearance around the outside. That outermost ring is what most people forget, and it's why chairs end up backing into planters or walls.
Comparing materials: pavers, concrete, flagstone, decking, gravel, and turf
The material you choose for each zone doesn't have to be the same across the whole patio, in fact, using two or three complementary materials is one of the cleanest ways to visually separate zones without building walls. Here's how the main options stack up for a DIY installation.
| Material | DIY Difficulty | Approx. Cost (materials only) | Best Zone Use | Main Weakness |
|---|---|---|---|---|
| Concrete pavers (interlocking) | Beginner–Intermediate | $3–$8/sq ft | Dining, lounge, walkways | Requires careful base prep; polymeric sand jointing has a learning curve |
| Poured concrete | Intermediate–Advanced | $4–$8/sq ft (DIY slab) | Large level zones, cooking area base | Cracks over time; difficult to repair cleanly; requires forming and finishing skill |
| Flagstone (irregular) | Intermediate | $5–$12/sq ft | Lounge, garden paths, accent zones | Uneven surface if not set carefully; large gaps need jointing |
| Composite or hardwood decking | Intermediate | $8–$15/sq ft | Lounge zone, multi-level platforms | Requires framing; higher cost; wood needs annual maintenance |
| Decomposed granite / pea gravel | Beginner | $1–$3/sq ft | Infill areas, paths, fire pit surround | Shifts underfoot without edging; tracks into house; needs topping up |
| Permeable gravel grid / turf infill | Beginner–Intermediate | $2–$5/sq ft | Play zone, planting infill, overflow parking | Needs regular clearing of debris to prevent clogging; not load-bearing for heavy furniture |
Jointing and joint fill options
How you fill the joints between pavers affects appearance, weed resistance, drainage, and long-term stability. Polymeric jointing sand is the most common choice for interlocking pavers. It hardens when activated with water, resists weed growth, and locks pavers against lateral movement. The catch: you must work on a completely dry surface, sweep off all excess dust before misting, and follow the manufacturer's temperature and curing windows exactly. Over-watering or activating too early causes washout and a sandy, unstable joint. For wider joints in flagstone (half an inch to an inch or more), a dry mortar mix or decomposed granite works better than polymeric sand. For a permeable or planted joint look, coarse sand or fine gravel left loose allows water infiltration but requires maintenance to prevent weed colonization. Porous Pavement: Design Criteria, Performance & Upkeep (Stormwater Center fact sheet) notes that permeable/porous pavement and joints increase infiltration but require more frequent maintenance, brushing, vacuuming, and clearing leaves and sediment, or they can lose performance without upkeep.
My recommendation by zone
- Dining and lounge zones: concrete interlocking pavers are the best DIY value — durable, replaceable, and available in enough styles to look intentional. Use a contrasting color or format to distinguish the two zones.
- Cooking zone: pavers or poured concrete both work; avoid wood decking near a grill.
- Fire pit surround: compacted decomposed granite or a paver ring with a gravel center handles heat and looks natural.
- Walkways: a contrasting paver pattern (like a running bond vs. herringbone) or a narrower flagstone strip reads clearly as a path.
- Planting and infill areas: pea gravel, planted joints, or mulch in framed beds — these don't need a compacted base and are the lowest-cost option.
How to infill empty patio areas without spending a lot
One of the most common problems with a large patio is that the hardscape footprint is bigger than the usable zone layout, you end up with dead zones at the edges or corners. The good news is these are cheap to fix, and the options actually add character. Thinking about how to fill a large patio is really just about asking what would thrive or function in that leftover space.
- Gravel pockets with metal or plastic edging: excavate 4–6 inches, lay landscaping fabric (not plastic sheeting — it traps water), and fill with pea gravel or crushed granite. Costs roughly $1–$2 per square foot in materials.
- Modular raised planters: cedar or composite planter boxes placed directly on the patio surface define a zone, add greenery, and move if your layout changes. No digging required.
- Planted joints or stepping stone paths through gravel: set irregular flagstone or large pavers into a gravel field and plant low-growing ground covers (creeping thyme, sedums) between them. Over a season these fill in beautifully.
- Permeable turf or grass grids: interlocking plastic grid systems filled with gravel or turf plugs work well in low-traffic corners and reduce heat island effect. They need occasional clearing of debris to prevent clogging — monthly checks initially, then annual maintenance.
- Movable furniture anchors: a pair of Adirondack chairs with a side table, or a movable bench planter, can define a secondary conversation spot in an otherwise empty corner without any construction.
- Paver mosaic or fieldstone accent: use leftover or salvaged pavers to create a pattern, compass rose, or decorative band that fills a corner and looks intentional.
Levels and transitions: single vs. multi-level, steps, and simple retaining elements
A flat patio is the easiest to build, but a sloped yard often demands level changes, and even on a flat lot, a small step up or down between zones adds tremendous visual interest. Here's how to think about it and how to build it safely.
Single-level vs. multi-level
Single-level patios are faster, cheaper, and accessible to everyone. If your grade change is less than 6 inches across the patio footprint, stay single-level and manage it through your base depth and slope. Multi-level makes sense when your yard drops more than 8–12 inches, when you want to create distinct 'rooms' with a step transition, or when a raised platform for a lounge zone would improve the view or sightlines. The tradeoff is cost (more material, more excavation) and complexity (steps need to be built to code).
Step dimensions and layout
Outdoor steps have a different comfortable proportion than indoor stairs. The standard rule for comfortable exterior steps is: riser + tread = 26 inches (the '26-inch rule'). Common combinations are a 6-inch riser with a 14-inch tread, or a 5-inch riser with a 15-inch tread. Steps should be a minimum of 48 inches wide for a patio transition, 60 inches or wider feels generous and inviting. Each step needs a landing at top and bottom at least as wide as the step itself. Never build a single isolated step; single-step changes are a trip hazard. Either ramp the grade change (using the 1/8–1/4 inch per foot slope to absorb small differences) or build a full step with proper riser height.
Simple retaining elements for DIYers
For grade changes up to about 24–30 inches, a DIY-built retaining wall using interlocking concrete blocks, natural dry-stack stone, or landscape timbers/sleepers is manageable without engineering. Beyond 30 inches, most jurisdictions require a permit and possibly an engineered design, check before you build. For shorter walls, the key rules are: set the first course at or slightly below grade (buried at least 1 inch per foot of wall height), backfill with crushed gravel rather than native soil for drainage, and install a perforated drain pipe at the base of the wall to route water away from the structure. Sleepers (treated 6×6 lumber or rail ties) are among the cheapest retaining solutions for low walls under 18 inches and create a natural, garden-like look between patio levels.
Base prep and drainage: the work that makes everything last
I've seen beautiful paver patios heave, sink, and crack within two years because the base was rushed. This is the least glamorous part of the project and the most important. Here's the sequence and the specs.
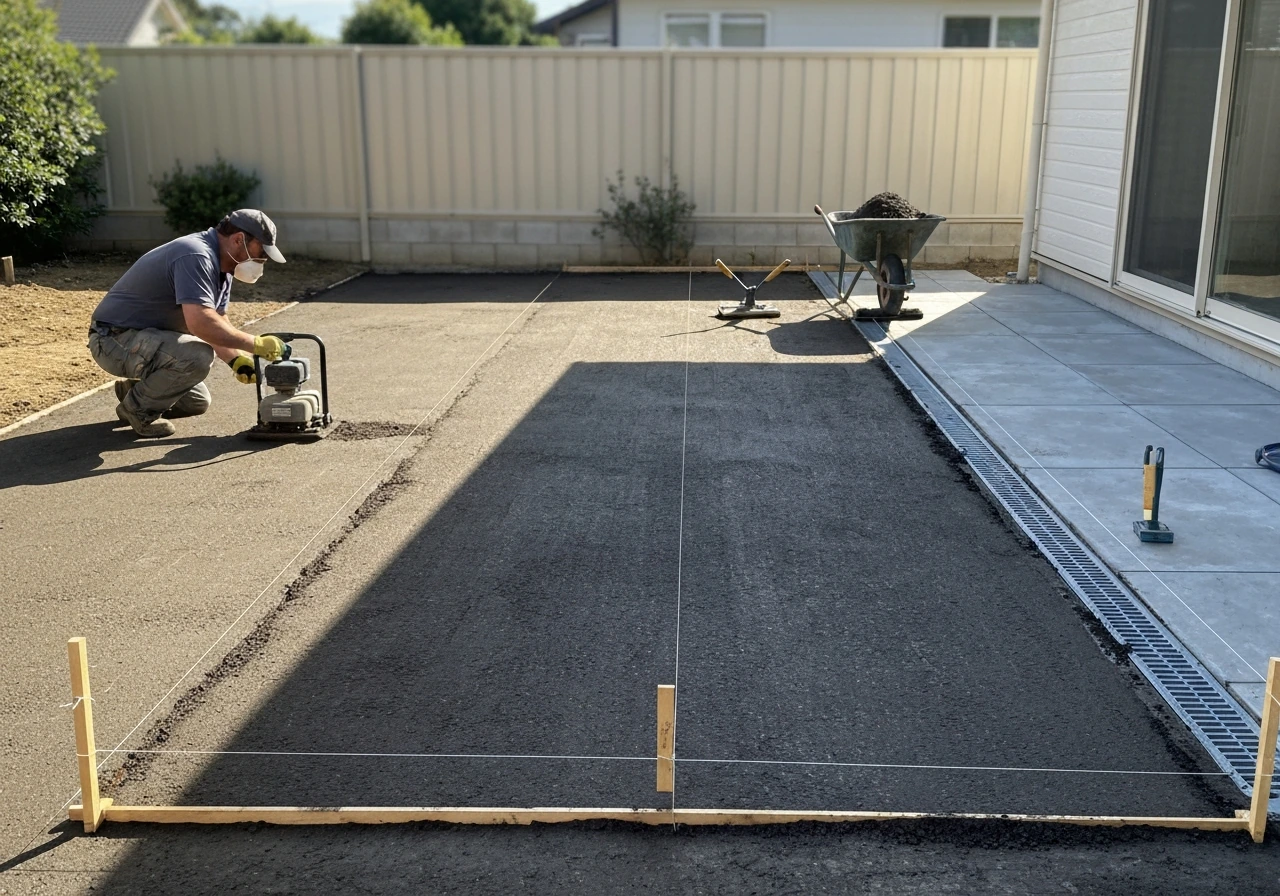
- Excavate to the correct depth: for a pedestrian patio, plan for 4–6 inches of compacted aggregate base (4 inches minimum in well-drained soils, 6 inches in clay or poorly drained conditions) plus 1 inch of bedding sand plus the paver thickness (typically 2.375 inches or 3.125 inches). Total excavation is often 7.5–10 inches below finished grade.
- Grade the subgrade to drain: the bottom of your excavation should already slope at 1/8–1/4 inch per foot away from the house. Check this with a string line and level before adding base material.
- Add and compact base material in 2–3 inch lifts using a plate compactor. Don't dump 6 inches in at once and compact it once — it won't consolidate properly. Target at least 95% standard Proctor density, which in practical terms means the surface stops moving under the plate compactor.
- Screed 1 inch of ASTM C33 coarse washed concrete sand over the compacted base. This is bedding sand, not mason sand or play sand. Set screed pipes or rails at the correct height and drag a straight board across them. Do not compact this layer.
- Lay pavers in your chosen pattern, maintaining consistent joint spacing with spacers or by eye if the paver has built-in lugs.
- Compact the laid pavers with a plate compactor fitted with a protective rubber pad or carpet strip — this seats them firmly into the sand.
- Sweep dry jointing sand (polymeric or regular) into joints. For polymeric sand, sweep multiple times until joints are full to within 1/8 inch of the surface, blow off all surface dust, then mist gently. Follow manufacturer cure time before foot traffic.
- Install perimeter edge restraints (plastic, aluminum, or steel) spiked into the base before you lay pavers — don't forget this step or the edges will migrate outward over time.
If water pools anywhere on the finished surface, add a channel drain (linear slot drain) at the low point and route it to daylight or a dry well. For chronic wet areas or heavy clay, a French drain running perforated pipe in a gravel trench at minimum 1% slope (1/8 inch per foot) wrapped in filter fabric does the job at relatively low cost. For detailed French drain design guidance, including recommended pipe size, gravel envelope, and slope, see How to Design a French Drain: Pipe Size, Gravel, and Slope (design guidance).
Tools you'll need for a DIY patio build
- Measuring tape (25 ft minimum), carpenter's square, line level, and string stakes for layout
- Plate compactor (rent for the day — typically $60–$90; absolutely necessary, don't skip it)
- Tamper for hand-compacting tight spots near edges
- Screed pipes or rails and a straight 2×4 screed board
- Rubber mallet for seating pavers
- Paver saw or angle grinder with a diamond blade for cuts (rent or buy)
- Wheelbarrow, square-mouth shovel, and a rake
- Hand maul or sledgehammer for edge restraint spikes
- Safety glasses, ear protection, and knee pads — you'll be on your knees more than you expect
- Level (4 ft torpedo or longer) for checking slope
Budget breakdown and ways to cut costs
Labor is the biggest cost in professionally installed patios, typically 50–60% of the total. When you DIY, that savings goes directly into better materials or a larger footprint. Here's a rough material-only budget framework.
| Project Size | Basic Paver Patio (materials) | Mid-Range with Levels/Steps | Premium (mixed materials, built-ins) |
|---|---|---|---|
| 200 sq ft | $600–$1,200 | $1,200–$2,000 | $2,500–$4,500 |
| 400 sq ft | $1,200–$2,400 | $2,500–$4,000 | $5,000–$9,000 |
| 600–800 sq ft | $2,000–$4,500 | $4,500–$7,500 | $9,000–$16,000 |
Budget-friendly moves: use a standard concrete paver in a basic color instead of premium tumbled or textured units (can save $2–$4 per square foot), source gravel base material from a local landscape supplier rather than a home center (usually 30–40% cheaper by the ton), rent a plate compactor and paver saw rather than buying, and do the demo and excavation yourself rather than hiring a skid steer for small projects.
Lighting, planting, privacy, and finishing touches
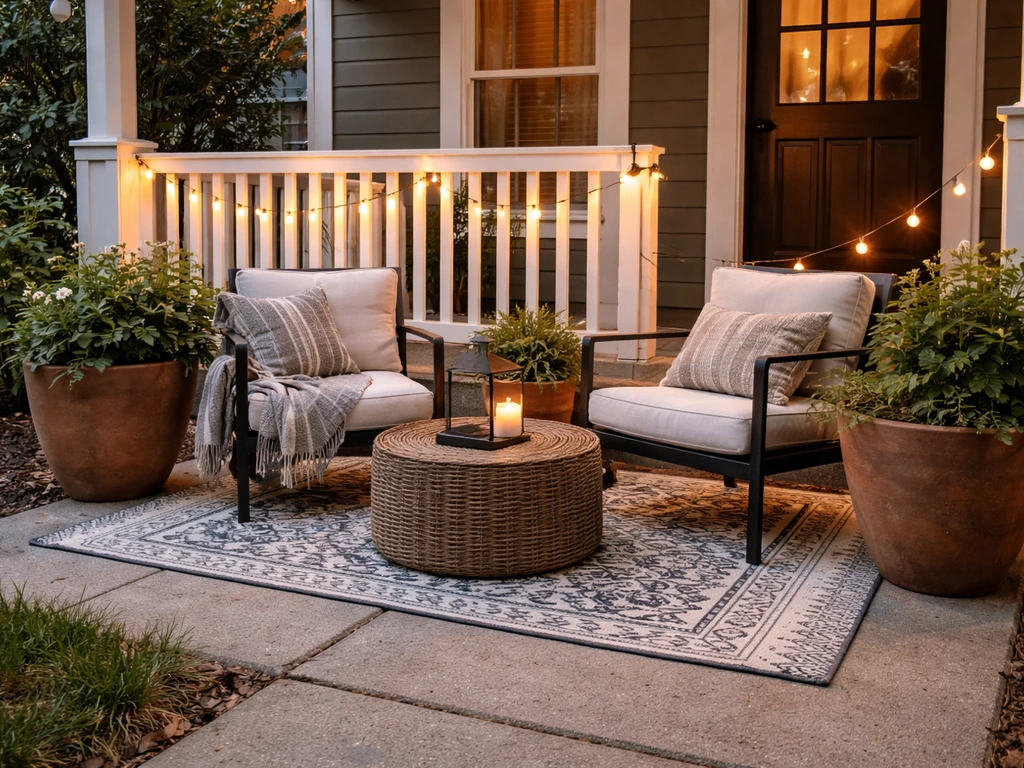
Zone definition doesn't stop at the hardscape. For practical, step-by-step guidance on designing and building an entry-facing outdoor space, see how to make a front patio. Lighting is one of the highest-impact, lowest-cost ways to reinforce zone boundaries after dark. Use low-voltage path lights to mark walkway edges, recessed step lights on any level transitions, string lights overhead to define the dining or lounge area overhead, and a lantern or spotlight near the fire pit or cooking zone. For more ideas on styling and layout, see how to decorate a large patio. Most low-voltage LED landscape lighting systems are plug-and-play for DIYers, no electrician required for the fixtures, though hardwired systems near the cooking zone should be run to code by a licensed professional.
Privacy is often the final missing piece on a large patio. A pergola or shade sail over the dining or lounge zone creates overhead definition and blocks sight lines from neighbors above. Planted screening, bamboo in containers, ornamental grasses, or tall columnar shrubs along the perimeter, provides a living edge that softens the hardscape. For a front patio especially, balancing openness with privacy is worth thinking through early in the design, since curb appeal and neighbor sight lines both factor in. Even simple things like placing taller planters strategically near the seating zones makes the space feel more enclosed and intentional.
Maintenance: keeping every zone looking good
- Pavers: sweep polymeric sand back into joints annually and re-activate with a light mist if joints are pulling apart. Spot-clean stains promptly with a paver-safe cleaner. Re-compact any sunken areas by lifting the affected pavers, adding sand, re-seating, and recompacting.
- Gravel infill areas: rake level each spring, top up gravel as needed, and pull any weeds that get through the fabric. If you skipped the fabric, a pre-emergent herbicide applied in early spring helps.
- Permeable joints or gravel grids: check monthly in the first season and clear leaf debris before it compacts. After year one, an annual vacuum sweep or light jet wash keeps infiltration rates from dropping.
- Steps and retaining walls: check for movement or lean annually, especially after the first winter frost-thaw cycle. Repoint any dry-stack joints that have shifted. Watch for water pooling behind retaining walls — if the drain pipe has clogged, clear it before pressure builds.
- Decking zones: clean composite decking with a soft brush and soap annually; hardwood decking needs sanding and re-oiling every 1–2 years.
- Planted zones: top up mulch to 2–3 inches depth each spring; cut back ornamental grasses in late winter before new growth starts.
Troubleshooting common problems
Pavers sinking or rocking
Almost always a base problem: either insufficient compaction, inadequate base depth, or bedding sand that was too thick (more than 1.5 inches compresses unevenly). Lift the affected pavers, check and correct the base, add sand to the correct 1-inch screeded depth, and re-lay. It sounds like a pain but it's genuinely a two-hour fix for a small area.
Water pooling on the surface
Your surface slope is either insufficient or running the wrong direction. Check with a level. If you have less than 1/8 inch per foot of fall away from the house, the fix is either re-grading the base and releveling the pavers in the low area, or installing a channel drain at the low point. Don't just hope it evaporates, standing water under paver joints erodes the bedding sand and causes sinking.
Polymeric sand washing out after rain
Usually caused by activating too early, over-watering, or leaving surface dust in the joints before misting. The fix is to wait for a dry spell, remove the old sand, re-sweep, blow the joints clean, and repeat the activation carefully. Don't rush the drying time between sweeping and misting.
Retaining wall leaning or bowing
This is usually hydrostatic pressure from water building up behind the wall, a blocked or absent drain pipe. If the wall has moved more than an inch out of plumb, take it down and rebuild with proper drainage. A leaning retaining wall will continue to lean; there's no minor patch fix that holds long-term.
Weeds coming through joints
Weeds in paver joints grow from wind-deposited seeds on the surface, not from below, so landscape fabric under the base doesn't stop them. Polymeric sand's main job is to close the joint tightly enough that seeds can't establish. Keep joints filled, apply a targeted patio herbicide on visible weeds before they set seed, and consider a surface sealant that hardens the top layer of joint sand.
FAQ
What’s the first thing I should do before dividing and building a large patio?
Start with a site assessment and safety checks: call your local One‑Call (811 in the U.S.) at least 48–72 hours before digging to locate underground utilities; verify private laterals separately. Note sun/shade patterns, existing drainage, grade relative to the house, soil type, property lines, and any local setbacks or HOA rules. Photograph the site, sketch a base plan with measured dimensions, and mark utilities and fixed features before you design zones.
How do I plan zones and circulation so the patio feels organized and usable?
List the functions you want (dining, lounge, cooking, fire pit, kids play, walkways, planting). Allocate footprint heuristics as a starting point—dining for 4 ≈100–120 sq ft, lounge 100–150 sq ft, grill/cooking 50–100 sq ft, fire‑pit module 150–200 sq ft—then arrange zones to minimize cross‑traffic. Design main walkways at 36–48" (36" minimum for accessibility), secondary paths 24–30". Allow 36–48" behind dining chairs for comfortable passage. Include a 60" turning circle or T‑turn if universal access is a goal (per 2010 ADA Standards). Sketch circulation lines and furniture templates to confirm scale before committing.
How do I choose between single‑level, multi‑level, or raised patio zones?
Base the decision on grade, desired separation, sightlines and budget. Single‑level is simplest and cheapest on flat sites. Multi‑level/raised zones add separation and drama on sloped sites or to separate messy zones (grill, fire pit) but require steps/retaining elements and more structure. Use small raised platforms (6–12") to define areas without heavy retaining walls; anything above ~12–18" often needs engineered retaining walls and footings—check local codes. Start with a simple sketch and measure vertical differences to size steps and walls.
What are the essential base, slope and drainage rules I must follow?
Always slope finished surfaces away from the house—1/8" per foot (≈1%) minimum, 1/4" per foot (≈2%) preferred where possible. For pavers and similar systems, provide a stable compacted aggregate base: industry guidance recommends about 4" compacted for pedestrian patios (6" safer in many soils); use 6–8" for light vehicle loads and 8–12" for heavier loads. Compact base in lifts (2–3" lifts) with a plate compactor to reach required density (installer guidance cites ≥95% standard Proctor). Where surface drainage is insufficient, add channel drains or French drains (perforated pipe in gravel wrapped with fabric) with a minimum 1% slope to outlet when possible.
What materials should I consider for patio zones and how do they compare?
Common options: - Interlocking pavers: modular, repairable, good range of looks; need compacted base and bedding sand. - Concrete slab: durable and lower initial labor if poured; limited DIY finishing unless you have form and finishing experience. - Flagstone/fieldstone: natural look, irregular joints, often set on sand/soil or mortar—more labor for dry‑laid. - Timber or composite decking: warmer, raised solutions for uneven sites; requires framing and maintenance (depending on material). - Gravel/pea stone: low cost and permeable if edged properly; can shift under heavy use. - Turf or gravel grid systems: stabilize infill for walking or occasional vehicles. Consider costs, DIY skill, maintenance, drainage, and the look you want.
What joint and infill options should I use between pavers or stone?
Options include polymeric sand (for tight joints, follows strict manufacturer activation steps), coarse jointing sand, mortar (for fixed stone), and permeable options like crushed stone, aggregate, or planted joints. Polymeric sand provides weed control and stabilizes joints but must be applied to clean, dry surfaces and activated per instructions to avoid washout. Permeable joints increase infiltration but require more frequent maintenance (vacuuming/jetting) to avoid clogging; follow local stormwater guidance when choosing permeable systems.