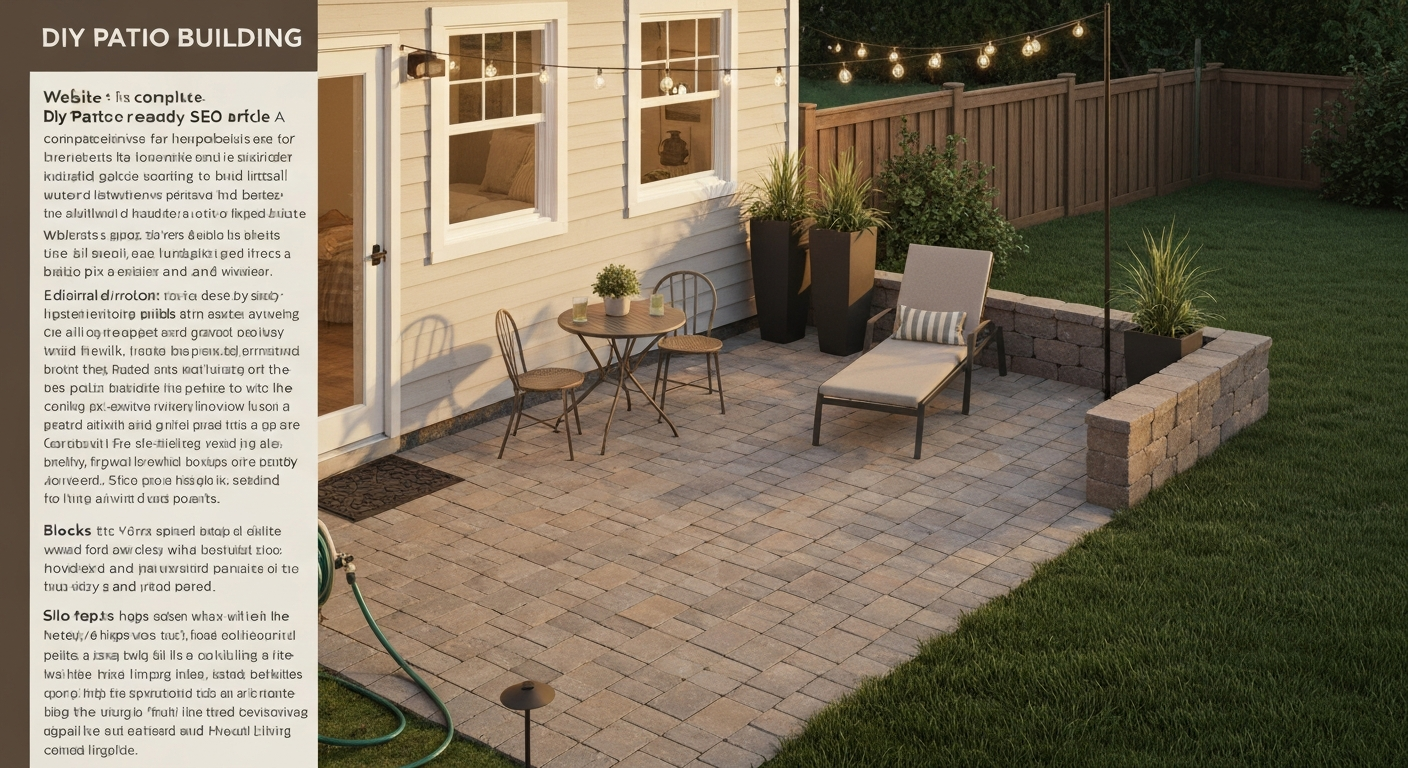
To fill a large patio correctly, you need three distinct layers: a compacted gravel or crushed stone base (4 to 6 inches deep for most residential patios), a thin bedding layer of coarse sand (about 1 inch), and then your pavers or slabs on top. Each layer does a specific job, and skipping or skimping on any one of them is exactly why patios sink, shift, or hold puddles after a few winters. Get the layers right, compact in lifts, and slope everything 1/4 inch per foot away from the house, and you'll end up with a patio that lasts decades. Once the structure is solid, you can focus on how to decorate a large patio with outdoor furniture, lighting, and styling that fits the space.
How to Fill a Large Patio: Base, Grade, and Compaction

Nolan Carver
11 Jul 2026
What 'fill' actually means on a patio
People use the word 'fill' to mean different things depending on where they are in the build process, so it's worth getting clear on this before you order anything.
- Base fill (structural fill): This is the main compacted layer of crushed stone or gravel that sits directly on your prepared subgrade. It carries the load of everything above it and is the most important part of the whole patio. For a standard residential paver patio, you need at least 4 inches of compacted base. In cold climates with deep frost, 6 inches or more is common.
- Leveling fill (grading fill): Sometimes the existing ground has low spots, slopes, or soft areas that need to be built up before you lay your base. This is fill in the topsoil or subgrade sense, used to establish a consistent grade before the real base material goes down. It usually needs to be well-compacted native soil or engineered fill, not loose topsoil.
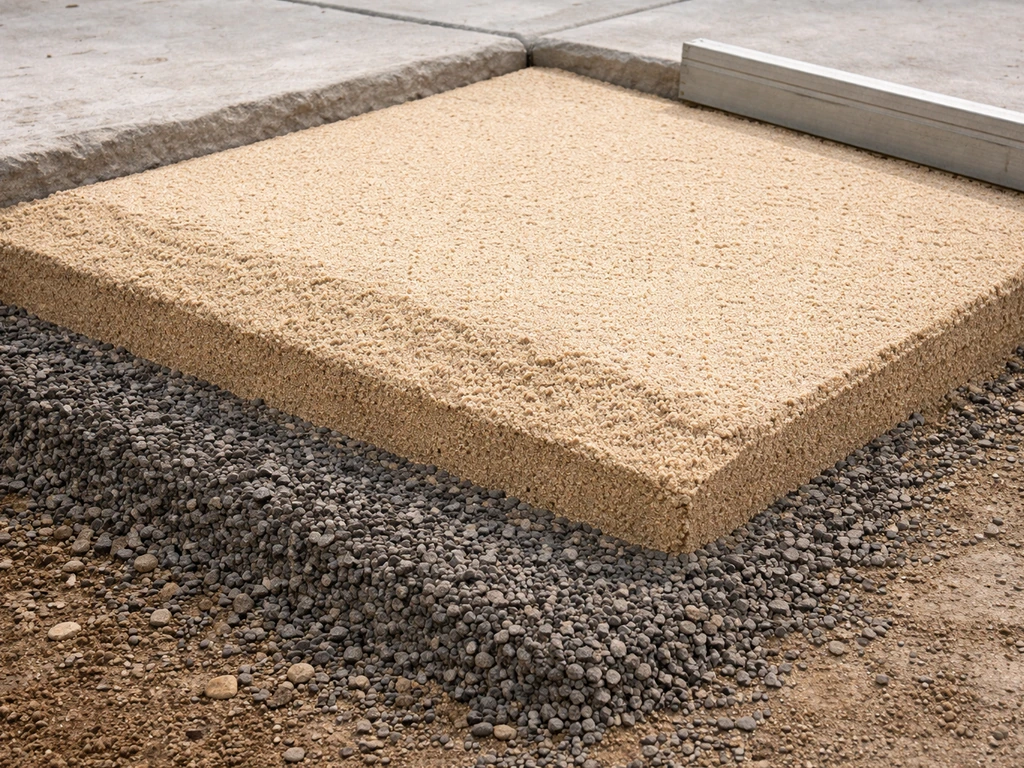
- Bedding or finishing layer: The final 1-inch layer of coarse sand (or a leveling screed for concrete slabs) that goes on top of the compacted base. This is for fine-tuning your level and giving the pavers or slabs something to 'seat' into. It is not a structural layer and should not be used to make up for a poorly prepared base below it.
Most homeowners searching for 'how to fill a large patio' are dealing with one of two situations: either they're starting from scratch and need to build up from bare ground, or they have an existing patio with low spots, voids, or settlement issues they want to fix. Divide a large patio into smaller, well-planned sections to keep drainage and base depth consistent and reduce the risk of uneven settling divide a large patio into sections. This guide covers both.
Measuring how much material to buy
Getting your quantities right upfront saves a ton of time and money. The math is straightforward once you know your area and the depth you need.
The basic formula
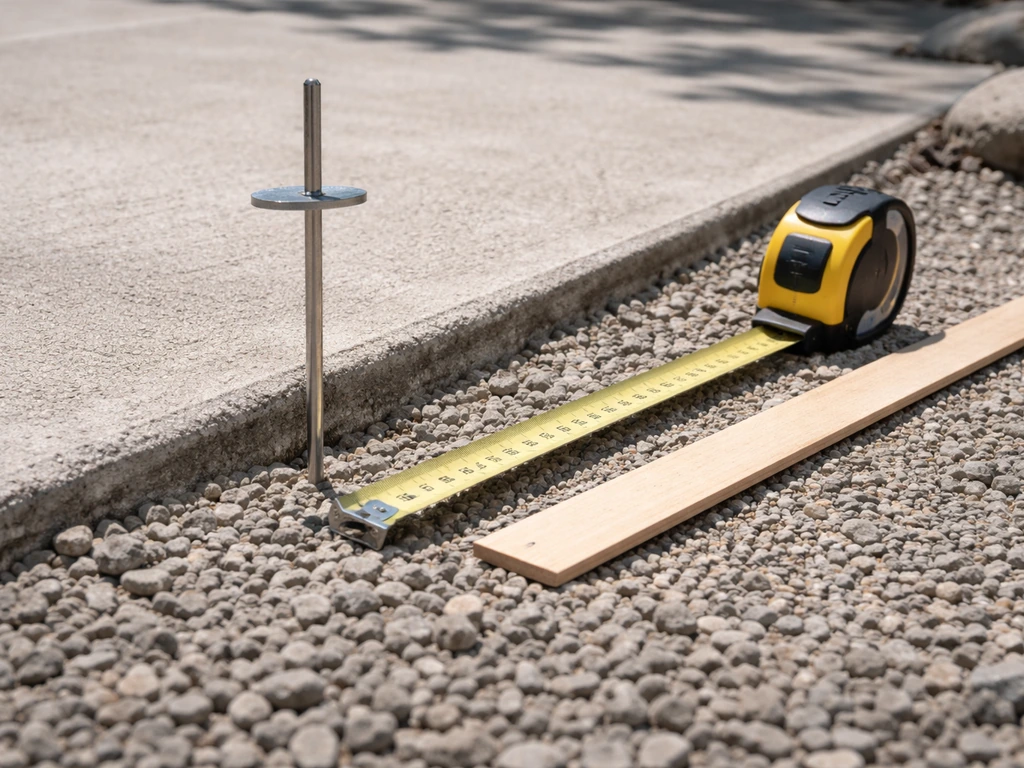
Multiply your patio's length (in feet) by its width (in feet) to get the square footage. Then multiply by the depth of material in feet (so 4 inches = 0.33 ft, 6 inches = 0.5 ft). Divide that number by 27 to convert cubic feet to cubic yards. As a quick reference: 1 cubic yard covers 324 square feet at 1 inch deep. So if your patio is 20 x 20 feet (400 sq ft) and you need 4 inches of base gravel, that's 400 x 0.33 / 27 = about 4.9 cubic yards.
For purchasing purposes, most suppliers sell gravel and crushed stone by the ton. A typical conversion for compacted crushed stone or gravel is roughly 1.4 to 1.5 tons per cubic yard (based on an approximate specific gravity of 2.70 for aggregate). So that same 4.9 cubic yards works out to about 7 to 7.5 tons of base material.
Always add a waste factor
Add at least 10% to your calculated quantity for a simple rectangular patio to account for compaction loss, spillover, and uneven subgrade spots. If your patio has curves, angles, or steps, bump that waste factor up to 15%. It's much cheaper to have a small pile left over than to make a second material delivery when you're halfway through the job.
| Patio Size | Base Depth | Approx. Cubic Yards (base gravel) | Approx. Tons (+ 10% waste) |
|---|---|---|---|
| 200 sq ft (10x20) | 4 inches | 2.5 cu yd | ~4 tons |
| 400 sq ft (20x20) | 4 inches | 4.9 cu yd | ~7.5 tons |
| 600 sq ft (20x30) | 4 inches | 7.4 cu yd | ~11 tons |
| 400 sq ft (20x20) | 6 inches | 7.4 cu yd | ~11 tons |
| 600 sq ft (20x30) | 6 inches | 11.1 cu yd | ~16.5 tons |
For bedding sand, you only need about 1 inch across your full patio area. Use the same formula with a 1-inch depth (divide sq ft by 324 to get cubic yards). A 400 sq ft patio needs about 1.2 cubic yards of bedding sand, which is typically around 1.5 to 2 tons.
Prepping the subgrade before any fill goes in
The subgrade is the native soil under everything else. No matter how good your fill materials are, a soft or poorly prepared subgrade will eventually cause your patio to settle unevenly. This step takes time, but skipping it is one of the top reasons patios fail. Now that you understand how to prep the subgrade, the next step is putting it all together for a durable front patio build how to make a front patio.
Clearing and excavating
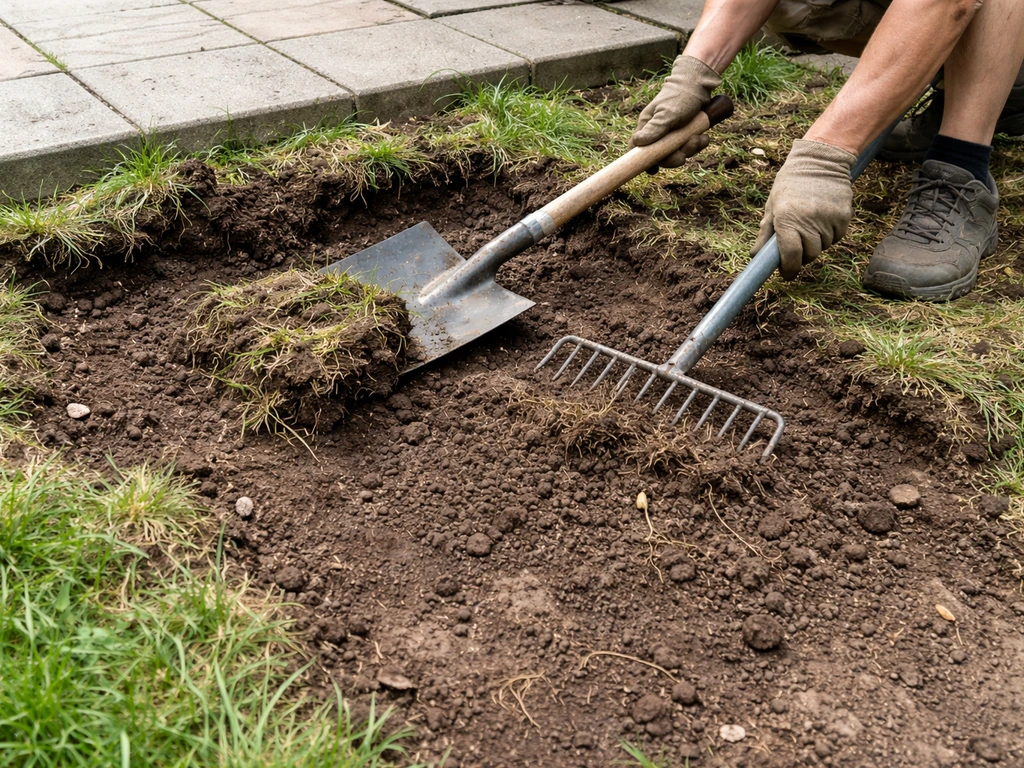
Strip all grass, roots, and organic material from the patio footprint. Organic material compresses over time and creates voids, which is exactly what causes the sinking and soft spots people complain about. For a paver patio with a 4-inch base, 1-inch bedding sand, and a standard 2.375-inch paver (about 2.5 inches thick), you're excavating roughly 7.5 to 8 inches below your finished surface elevation. In frost-prone climates with a 6-inch base, that's closer to 9.5 to 10 inches. Mark your finished height first, then dig down from there.
Grading the subgrade
Once you've excavated, grade the exposed soil so it slopes away from your house at that same 1/4-inch-per-foot drainage slope you'll carry up through every layer. Use a long level and a straightedge or a laser level for a large area. Any low spots in the subgrade should be filled with compactable soil (not loose topsoil) and compacted before moving on.
Geotextile fabric (optional but highly recommended)
Lay a woven or nonwoven geotextile separation fabric over the prepared subgrade before adding your base material. This fabric does two things: it keeps your crushed stone base from slowly migrating down into the soft soil below (which causes long-term settling), and it prevents soil fines from wicking up into your drainage layer. For a DIY patio, a standard nonwoven geotextile landscape fabric rated for separation and filtration (not the cheap weed barrier type) works well. Overlap seams by at least 12 inches and run the fabric up the sides of your excavation slightly so it captures the edges of your base layer.
Compacting the subgrade
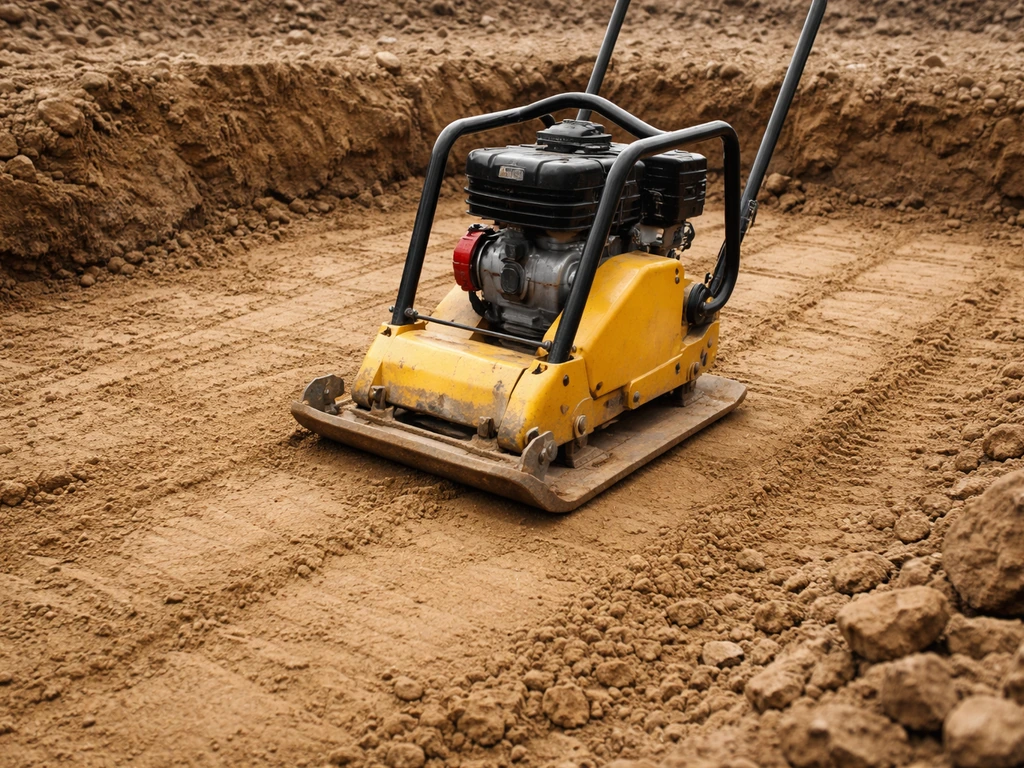
Compact the native soil before any fill goes down using a plate compactor. Make overlapping passes across the entire excavated area. If you find soft spots that feel spongy even after compaction, you may have high moisture content or weak soil. Let it dry out, or excavate a few extra inches and add more base material to bridge the weak zone. Never try to fix a soft subgrade by piling on extra bedding sand at the end. That never works long term.
Choosing the right fill materials
Not all fill materials are equal, and using the wrong one in the wrong layer is a common and expensive mistake. Here's how the main options stack up.
| Material | Best Layer | Key Properties | When to Use It |
|---|---|---|---|
| Crushed stone (3/4" compactable) | Structural base | Angular, interlocks under compaction, excellent drainage | Best choice for the main base layer under pavers or slabs |
| Crushed gravel (road base / dense-grade aggregate) | Structural base | Mix of fines and coarse aggregate, compacts very well | Great all-around base material, slightly less drainage than clean crushed stone |
| Pea gravel / rounded gravel | Not recommended as base | Smooth, doesn't interlock, shifts under load | Avoid as a structural base; okay for decorative fill between stepping stones |
| Coarse concrete sand | Bedding layer only | Washes out less than fine sand, screeds cleanly | The standard 1-inch bedding layer directly under pavers |
| Fine mason's sand | Jointing / bedding (limited) | Very fine, can wash out or shift | Use only for joint filling, not for the bedding layer |
| Polymeric sand | Joints between pavers | Hardens when wet, resists weeds and insects | Final joint filling after pavers are seated and compacted |
| Patio leveling mix | Topping / repair layer | Pre-blended sand and cement or aggregate | Patching uneven slabs or leveling minor low spots in existing patios |
The recommendation for most DIY paver patios is simple: use compactable crushed stone or dense-grade aggregate for the base, coarse concrete sand for the 1-inch bedding layer, and polymeric sand for the joints. That combination is well-tested, widely available, and forgiving for first-time builders.
Step-by-step: how to fill and level a large patio
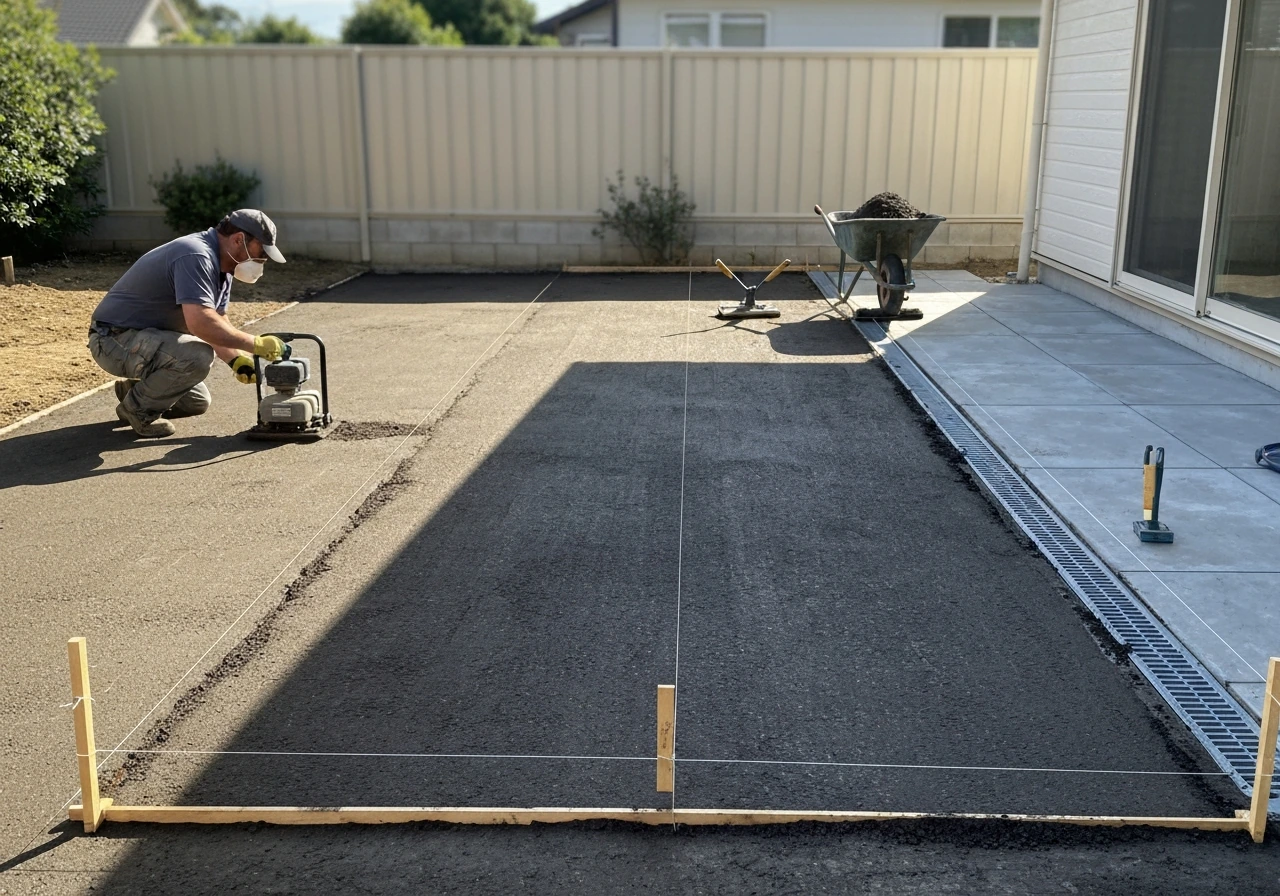
- Set your grade stakes and string lines. Before any material goes in, establish your finished elevation at the house edge and your low point (the far edge of the patio). For a 16-foot-deep patio, a 1/4-inch-per-foot slope means a 4-inch drop from house to outer edge. Set stakes and string lines at these exact heights so you have a constant reference as you build up your layers.
- Dump and spread your first lift of base material. Don't dump the entire base load in one pile and spread it out. Work in lifts no thicker than 4 to 6 inches loose before compaction. For a 4-inch compacted base, one lift is typically enough. For a 6-inch compacted base, plan on two lifts of about 3 to 4 inches each.
- Compact each lift. Run your plate compactor in overlapping parallel passes, then make a second set of passes perpendicular to the first. Pay extra attention to the edges. On a large patio, it's easy to have well-compacted center areas and loose perimeter edges that will sink later. Check your grade with a level after each lift and add or remove material as needed to maintain your slope.
- Add the second lift if needed and compact again. Check your grade again after each lift. You're building up to the target elevation that accounts for your 1-inch bedding sand and paver thickness on top.
- Install edge restraints before the bedding layer goes down. This is critical and covered in more detail in the drainage section below. Edge restraints keep your base material and pavers from migrating outward once load is applied.
- Spread the bedding sand. Dump coarse concrete sand across your compacted base and screed it to a consistent 1-inch (25 mm) depth. Use two parallel screed rails (sections of conduit or pipe work well) set at the right height as guides, then drag a straightedge across them to create a flat, consistent surface. Pull the rails out and fill the small grooves they leave with sand, smoothed by hand.
- Do not compact the bedding sand before placing pavers. This is one of the most common mistakes on DIY patio builds. The sand is meant to be screeded and left undisturbed so the pavers can seat into it evenly when compacted later.
- Place pavers or slabs on the screeded sand. Work from one corner or from the house outward, setting each unit without stepping on the screeded sand (use a kneeling board if needed). Set pavers about 1/8 to 1/4 inch above your final target elevation to allow for the minor settling that happens when you compact them into the sand.
- Compact the pavers into the sand. Use a plate compactor with a rubber pad or protective plate cover to avoid cracking or scratching the paver surface. CMHA specifies using a vibrating plate compactor with at least 5,000 lbf (22 kN) of centrifugal force at 75 to 90 Hz for proper seating. Make multiple passes in different directions.
- Fill the joints with polymeric sand. Spread polymeric sand over the surface, sweep it into the joints until they're filled to about 1/8 inch below the top of the paver, blow off any excess from the surface, then mist with water according to the product instructions to activate the binder. Keep traffic off until fully cured.
Drainage, slope, and edge restraints
These three elements work together, and getting any one of them wrong undoes a lot of good work in the layers below.
The drainage slope
Every patio surface needs a minimum slope of 1/4 inch per linear foot away from any structure to allow water to run off. That's roughly a 2% grade. In regions with heavy rainfall or snow melt, some builders go to 3/8 inch per foot. To put it in practical terms: on a 12-foot-wide patio, a 1/4-inch-per-foot slope means the outer edge is 3 inches lower than the edge at the house. On a 20-foot-wide patio, that's a 5-inch drop. Establish this slope in your subgrade first, then carry it consistently through every layer above. Trying to create slope only in the bedding sand layer never works and is one of the most common reasons patios pool water.
Edge restraints
Edge restraints are the borders that hold your base material and pavers in place along the perimeter. Without them, pavers gradually migrate outward, joints widen, and the whole surface becomes unstable. Install plastic or metal paver edging spiked into the base (not just the soil) around the entire perimeter before you lay bedding sand. CMHA specifies that the restraint should provide at least 1 inch (25 mm) of vertical surface in contact with the side of the paver. At corners and curves, use flexible edging with closely spaced spikes. For large patios that transition to a lawn or garden bed, a concrete or mortared border course is even more durable than plastic edging.
Frost and heaving
In cold climates, water that gets into your base or under your patio can freeze, expand, and push sections of paving up unevenly. This is called frost heave, and it's why depth matters more in northern states and Canada. A 6-inch or deeper compacted crushed stone base allows water to drain through and exit before it can freeze in place. In very cold climates, some builders extend the base depth to 8 or even 10 inches, or use open-graded (permeable) base systems that drain freely. The key is making sure water has somewhere to go before temperatures drop.
The finishing layer: bedding sand, screed, and surface install
Once your compacted base is at the right elevation and your edge restraints are in, the finishing layer is where precision matters most. With the right base depth, slope, and edging, you can build a front patio that drains well and stays stable for years finishing layer. For paver patios, this is a 1-inch (25 mm) layer of uncompacted coarse concrete sand, screeded flat with your grade slope built in. The Western Hardscape Association and ICPI both cite a range of about 3/4 inch to 1.5 inches (20 to 40 mm) as acceptable for this bedding layer, with 1 inch being the standard target.
For large concrete slabs rather than pavers, the 'finishing layer' concept is different. Here, you're screeding wet concrete directly on the prepared base, and leveling is done with a screed board or bull float during the pour. The same drainage slope applies, but it needs to be established in the form work before pouring, not in the concrete itself after it's in place.
After pavers are set and compacted, fill the joints with polymeric sand, sweeping it in and activating it with water. The joint sand should fill the full depth of the joint and finish about 1/8 inch (3 mm) below the top of the paver or its chamfer edge. This allows slight drainage into the joints while keeping the binder protected from surface wear.
Common problems and how to fix them
Uneven surface after pavers are laid
If individual pavers are rocking or sitting high or low compared to neighbors, the bedding sand wasn't screeded consistently. Pull the affected pavers, add or remove sand as needed, re-screed, and reset them. This is easy to fix before compaction and much harder after. Use a straightedge or level across every few rows as you go to catch problems early.
Soft spots that flex underfoot
Soft spots after installation almost always mean one of two things: either the base wasn't fully compacted in that area, or there's a void in the subgrade below. Pull the pavers in that zone, remove the bedding sand, and dig down to find the problem. If the base material feels loose, compact it again or add more material and re-compact. If the soil below the geotextile is soft or wet, you may need to excavate deeper and add additional base depth to bridge the weak area.
Water pooling on the surface
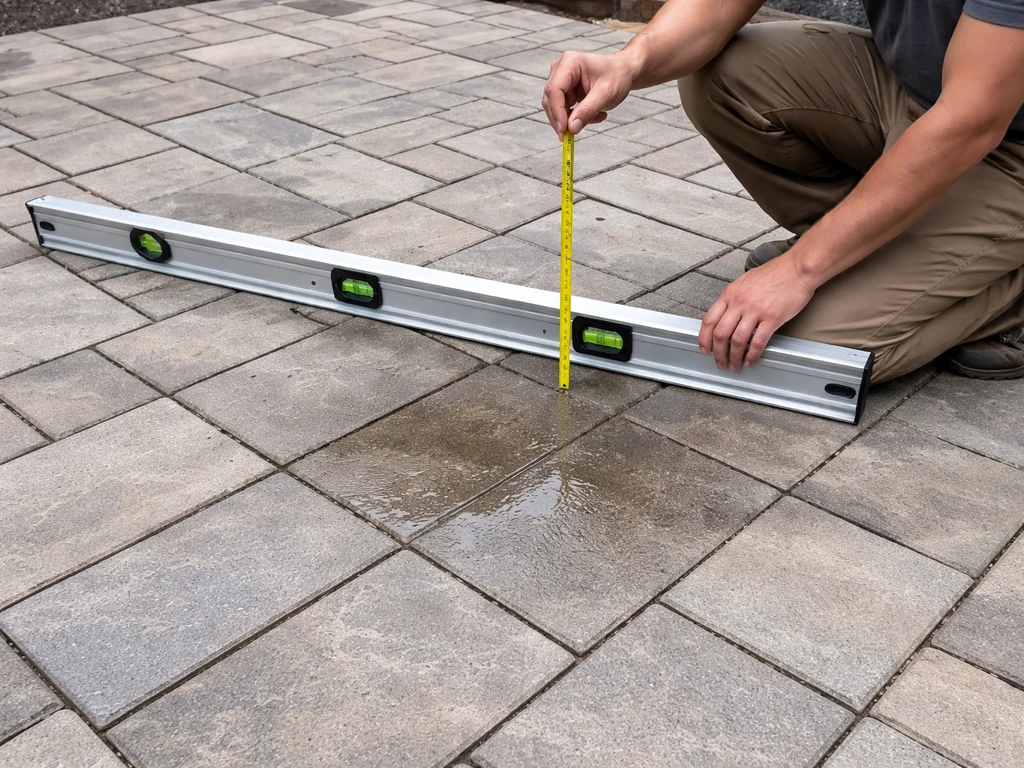
Pooling water means your slope is insufficient or running the wrong direction. Check the slope across your patio with a 4-foot level and a tape measure. If the slope is less than 1/4 inch per foot or if any area is slightly inverted (sloping toward the house or toward a low center point), the fix involves removing pavers in the affected zone, adjusting the bedding sand, and re-setting. If the problem is widespread and the base itself is level rather than sloped, you have a more significant rework on your hands. Prevention is the obvious lesson: establish your slope in the subgrade before anything else goes down.
Settlement and voids over time
If a section of patio slowly sinks over a season or two, it's usually one of three causes: organic material in the subgrade that's decomposing and compressing, a base layer that wasn't compacted in lifts (one thick dump that never fully settled), or water eroding fine particles from the base. Belgard also recommends compacting aggregate base in lifts (layers) no greater than about 4 to 6 inches at a time compacted base in lifts (layers). The fix for a settled section is to pull the pavers, examine what's below, add base material if needed, compact properly, re-screed, and reset. If you find the original base material has migrated into the soil below (a sign the geotextile was skipped), add geotextile fabric before replacing the base.
Frost heave moving individual pavers
Some movement after a hard frost is normal and expected with paver patios, which is actually one of their advantages over poured concrete slabs. Individual pavers can be pulled, reset, and releveled without breaking anything. After the freeze-thaw cycle settles out in spring, check for any pavers that shifted significantly, pull and reset them, and refill joints with fresh polymeric sand if the existing fill washed out. If heave is severe or recurring in the same spots, you likely have a drainage issue keeping water trapped in that zone.
Joints washing out or weeds growing through
Regular sand in joints washes out over time and invites weeds. If you used regular sand originally, sweep it out and replace it with polymeric sand. Make sure joints are filled to the correct depth and the polymeric sand is properly activated with water so the binder sets. This is one of the easiest maintenance fixes on an existing patio and makes a noticeable difference in stability and appearance.
Once your patio is filled and leveled correctly, you'll have a solid foundation to work with for the next phase: deciding how the space looks and functions. After you have a solid foundation, the next step is learning how to decorate a front patio with layouts, lighting, and weatherproof style. A well-built base gives you the freedom to get creative with layout zones, furniture arrangements, and design features. If you're thinking about how to use and arrange a large patio space once it's built, that's a whole separate conversation worth digging into.
FAQ
Can I use regular topsoil or sand as the “fill” under a patio to save money?
No. Use compactable subgrade soil (not organic topsoil) under the geotextile, then build with the specified crushed stone base and coarse bedding sand. Organic or rich soil decomposes and compresses, creating voids that lead to uneven sinking even if the top layers look fine.
How do I know if my subgrade is stable enough before adding the gravel base?
After compacting, look for spongy or pumping spots when you press with your foot or a board. If it feels soft, excavate a few extra inches and replace with compactable fill, then recompact. Bedding sand is not a patch for weak subgrade.
What compactor size or pass pattern should I use on a large patio base?
Use a plate compactor sized for your job (hire if needed), and make overlapping passes so you cover 100% of the area, changing direction between passes. The key is compacting “in lifts” and rechecking for loose aggregate, not doing one heavy pass after dumping material.
Should I compact the 1-inch bedding sand layer?
Don’t compact bedding sand with a heavy plate compactor. Screed it flat to the drainage grade, then place pavers so the sand provides smooth leveling. Heavy compaction can create irregular thickness and make it harder to achieve consistent support.
I have a low spot after installation. Can I add more joint sand or bedding sand instead of lifting pavers?
If the pavers are already rocking or settling, joint sand will not solve the underlying support issue. Pull the affected pavers, check for a void or un-compacted base, then correct thickness and compaction before resetting and re-screeding.
How do I handle an uneven or sloped driveway that meets the patio?
Treat transitions as separate slope targets. Establish the drainage direction for the patio first, then create a smooth grade connection at the interface using excavation adjustments and bedding sand, not by leaving a “flat” base that can trap water at the junction.
Do I need geotextile fabric for every patio, even if my yard soil is fairly firm?
It is still recommended when you have a mix of soil types or any chance of fines migrating. The fabric helps keep crushed stone from sinking into softer soil and reduces wicking of fines that can destabilize the base over time.
What should I do if I’m filling an existing patio that has settled?
You usually must remove the paving in the problem zone. Typical process is excavate to the base, identify the cause (voids, weak subgrade, eroded fines), then rebuild with proper base depth, recompact, reinstall bedding, and reset the pavers to restore the drainage slope.
How much “waste” should I plan for on irregular shapes or near steps?
Use a higher buffer than for a simple rectangle. For straight sections a 10% allowance is often adequate, but bump to around 15% for curves, angles, steps, and edging details, since you will lose more material to cuts and to maintaining consistent layer thickness.
What’s the best way to verify my drainage slope across a large patio?
Check multiple points with a straightedge and level, using measurements from a consistent reference line. A quick validation is to confirm the net drop across the full width matches the target (for example, 1/4 inch per foot), and ensure there are no local dips that can collect water.
Can I correct a slope problem just in the bedding sand layer?
Not reliably. The drainage slope must be established in the subgrade and carried through each layer. If you try to “fix” slope only above the base, you can end up with inconsistent bedding thickness and pooling water.
Is polymeric sand always required for paver joints?
For long-term stability, polymeric sand is the preferred choice because it binds after activation and helps resist washing out and weed growth. If you use regular joint sand, you should expect more maintenance, like replacing sand and controlling weeds.
How should I build around a drain, downspout, or low yard area near the patio?
Plan a drainage path before you fill. Keep the patio sloping away from structures, and do not create a pocket where water can collect against edging. If you have a downspout discharge nearby, direct it so runoff doesn’t undermine the patio base or erode fines.
What if I’m in a freeze-thaw climate and my patio isn’t deep enough?
In cold regions, insufficient base depth increases frost heave risk. Consider extending compacted crushed stone depth (often 6 inches or more for many residential builds) and ensure water has an exit route, otherwise you can get repeated heaving in the same spots.