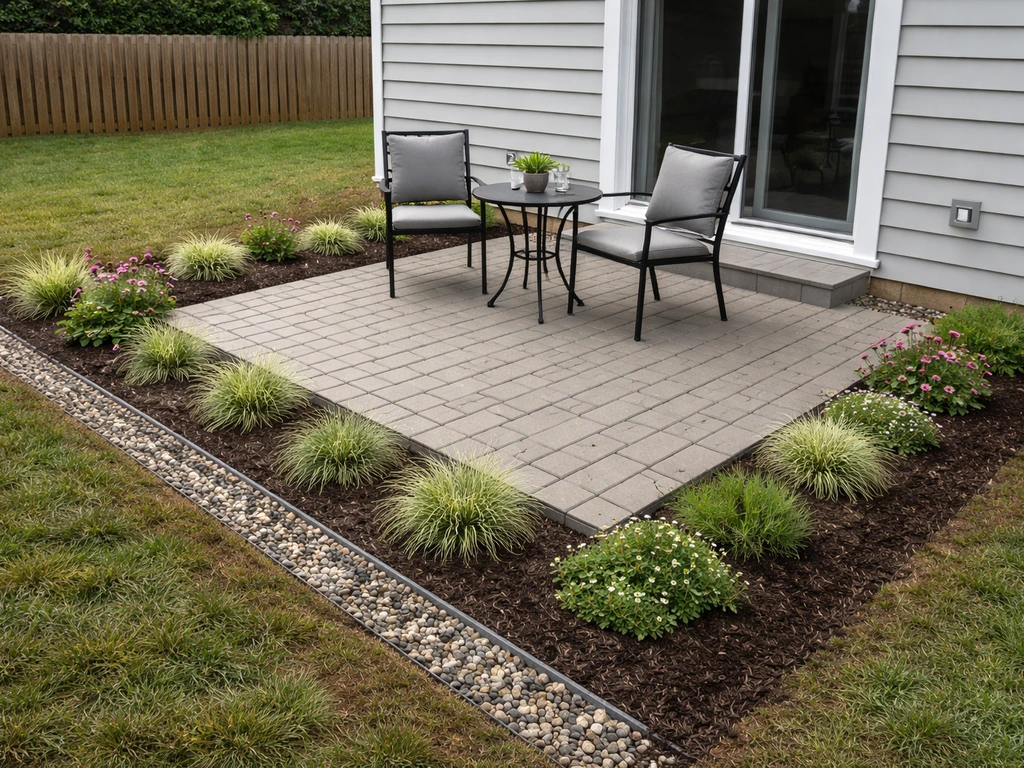
Landscaping a small patio comes down to three things: a layout that keeps circulation comfortable, plants that stay in scale, and hardscape details that look intentional rather than crammed. Even a 10x10 foot space can feel like a proper outdoor room if you plan the furniture clearances first, add vertical greenery to draw the eye up instead of out, and handle drainage before you start placing anything permanent. This guide walks you through every step, from sketching your layout to the final sweep of polymeric sand.
How to Landscape a Small Patio: Step by Step DIY Guide

Nolan Carver
21 Jun 2026
Quick plan for a small patio layout
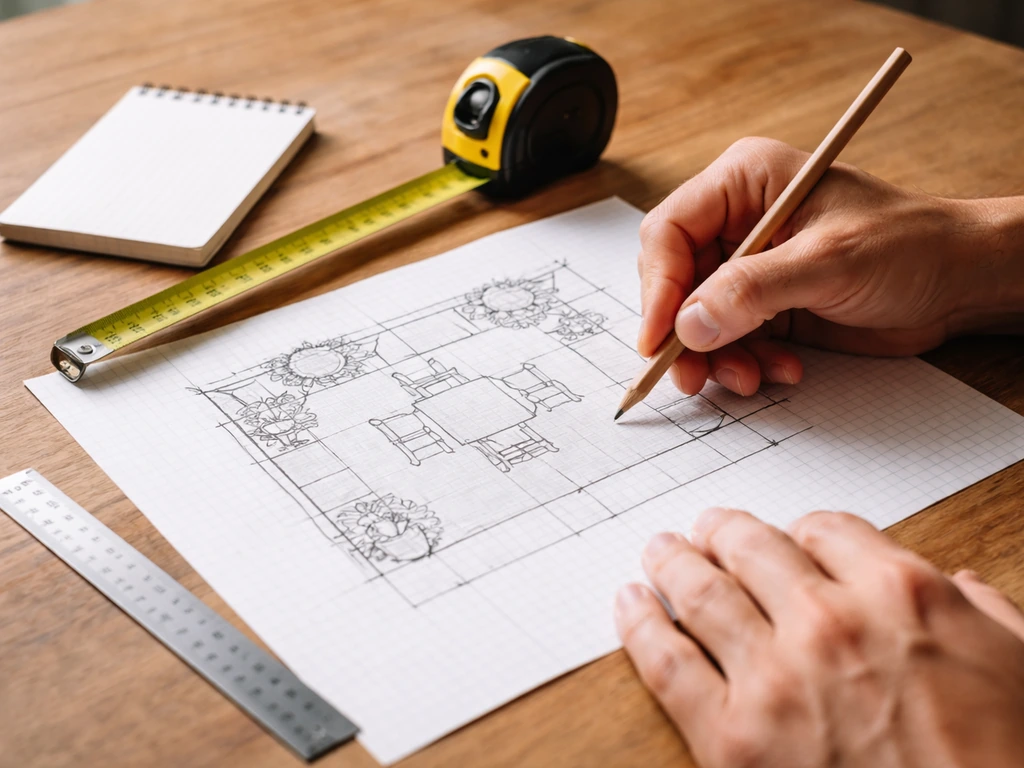
Before you buy a single plant or paver, draw your patio to scale on graph paper. Let each square equal one foot. Mark the door opening (you need at least 32 inches of clear width to step through comfortably, so do not let planters creep into that zone), then map your furniture. A small bistro table and two chairs typically needs a 6x6 foot footprint when you add the 30 to 36 inches of circulation space around the outside edge. A full dining set for four needs more like a 10x10 clear zone. If you only have an 8x10 patio, a dining set leaves almost no room to walk, so build the layout around what actually fits rather than what you wish would fit.
A practical rule: allow 24 inches behind any chair to pull it out, and 42 to 48 inches behind chairs that get pushed all the way back. That matters most if you plan to eat out there regularly. Once you know where furniture lives, everything else, planters, a small water feature, a vertical trellis, fills the edges and corners. If you use those design steps alongside a few style choices, you will be on your way to how to make a small patio look nice. Sketching this out before you start avoids the most common small-patio mistake: buying furniture and decor first, then realizing nothing fits.
For the overall shape, rectangular layouts are easiest to execute and make a small space feel larger because straight lines read as intentional. If your patio is already a fixed slab or set of pavers, work with the shape you have. If you are building from scratch, keep it simple. A 10x12 or 12x12 square or rectangle gives you enough room for a small seating zone plus a planting border without demanding a complex cut pattern in your pavers.
Best plants and greenery for tight spaces
The biggest plant mistake on a small patio is choosing something that looks fine at the nursery but outgrows the space in two or three seasons. Always look at the mature size on the tag, not the current size in the pot. A dwarf shrub that matures at 3 to 4 feet wide is a very different problem than one that hits 8 feet. The extension services at both University of Minnesota and Clemson are firm on this: match the plant to the space it will occupy at maturity, and never bury the root flare (the spot where the trunk or main stem flares out at the base) or you will cause long-term decline.
For a small patio, vertical plants are your best friends. A narrow columnar shrub, a climbing vine on a trellis, or tall ornamental grasses in containers add visual height without eating floor space. Pair them with low groundcovers or trailing plants at the base and you get a high/low combo that reads as lush and designed rather than sparse. Groundcovers spread via rhizomes or stolons, so give them room but keep them from creeping onto paver joints. Space them based on their mature spread and match them to your sun and shade conditions before you plant. University of Maryland Extension recommends a native-plant landscape design approach, including groundcovers and small shrubs, with guidance that considers plant size at maturity and sun tolerance.
Containers are a great option on patios because they are moveable and you can swap plants seasonally. One important caution: containers sitting on concrete in full sun heat up and dry out fast. Oklahoma State University Extension research confirms this leads to plant stress and root damage if you are not watering consistently. Choose drought-tolerant plants for sun-exposed container spots, use larger pots (they hold moisture longer), and avoid letting any container sit in a saucer with standing water, which causes root rot and disease.
| Plant Type | Best Use | Space Needed | Sun/Shade |
|---|---|---|---|
| Columnar arborvitae or juniper | Vertical privacy screen | 1–2 ft wide, 6–15 ft tall | Full sun |
| Dwarf boxwood or compact spirea | Low border or corner anchor | 2–4 ft wide at maturity | Sun to part shade |
| Ornamental grasses (dwarf varieties) | Container or border | 1–3 ft wide clump | Full sun |
| Climbing hydrangea or clematis on trellis | Wall or fence coverage | Trellis: 2–4 ft wide | Part shade to full sun |
| Creeping thyme or sedum groundcover | Fill between pavers or border edge | Spreads slowly | Full sun |
| Trailing petunias or calibrachoa | Containers and hanging planters | Drapes, no floor space | Full sun |
| Ferns or hostas | Shaded corner containers | 1–3 ft wide | Shade to part shade |
If you want plants to go directly in the ground along the patio edge, follow proper planting depth every time. Dig the hole two to three times wider than the root ball but only as deep as the root ball itself. Do not add organic amendments to the backfill. Water deeply right after planting, then establish a watering schedule that tapers off as roots spread into surrounding soil, which happens faster than most people expect.
Space-saving hardscape landscaping ideas
Hardscape, meaning paving, edging, walls, and structures, does heavy lifting on a small patio because it defines zones without requiring the maintenance of plants. The trick is picking elements that are proportional and serve double duty.
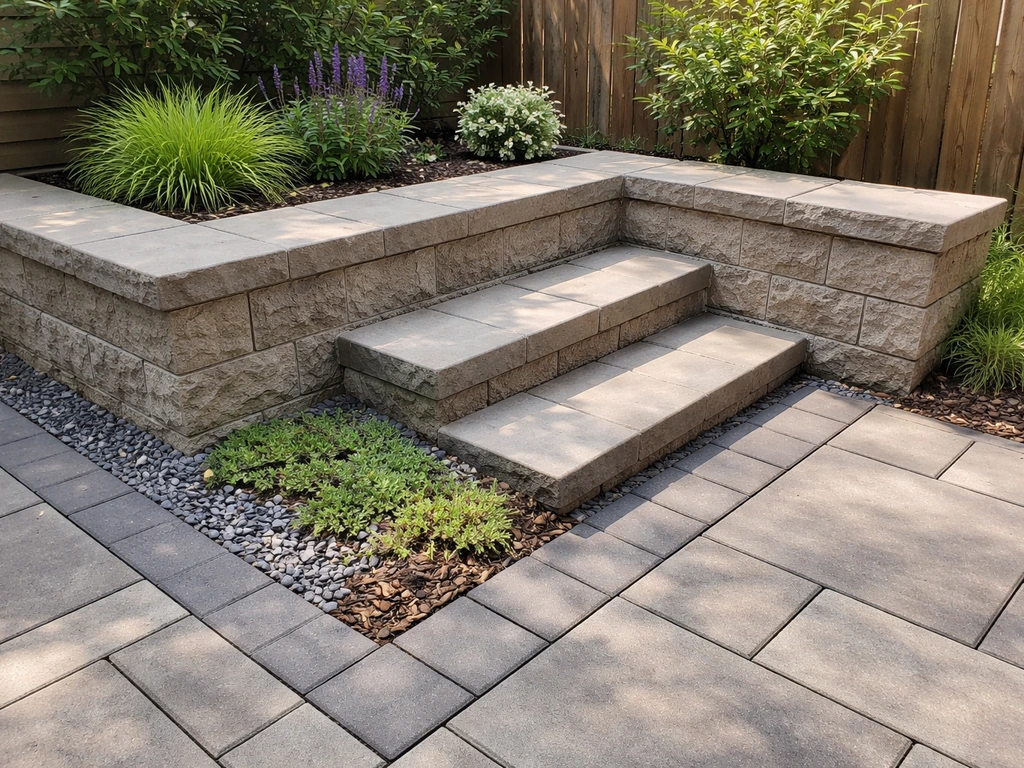
- Raised planter walls: A 12 to 18 inch tall seat wall made from concrete block or natural stone doubles as seating and contains a planting bed. This is one of the best small-patio moves because you gain seating without adding furniture footprint.
- Vertical trellises: A 4 to 6 foot trellis mounted flat against a fence or wall takes almost no floor space but gives climbing plants a home and creates a visual privacy screen.
- Pea gravel or decomposed granite accent strips: A narrow border of loose gravel between the paver surface and a planting bed handles edge drainage and looks intentional without requiring edging plants.
- Corner water features: A small self-contained fountain or pondless bubbler in a corner adds ambiance without a large footprint. Most small units are 18 to 24 inches across.
- Built-in storage bench: A bench with a hinged seat and storage underneath keeps cushions, tools, and outdoor gear out of sight. Build it along a fence line to keep the center open.
- String light poles or wall-mounted lighting: Lights on a pole or bracket rather than a freestanding lamp post keep floor space clear while still providing evening ambiance.
- Stepped planters: Tiered planter shelves or stacked block planters go vertical and can hold four to six plants in the footprint of one large container.
When you add any hardscape feature to an existing patio, think about what goes below it. If you are setting a planter wall or heavy container directly on pavers, make sure the base beneath those pavers can handle the added weight. On smaller additions this rarely causes structural issues, but very heavy stone walls on an undersized sand base can cause settling.
Drainage and site prep considerations
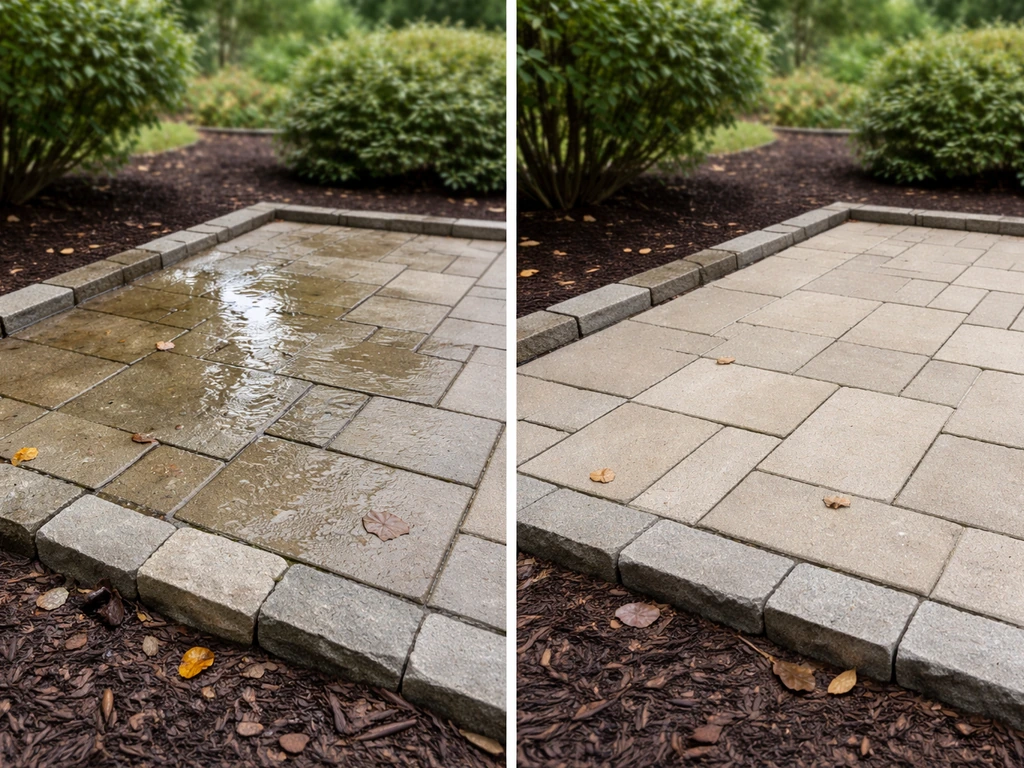
Drainage is the part most DIYers skip, and it is the thing that causes the most headaches later. Water pooling on or around a patio damages the base, kills plants, and makes the space uncomfortable to use. If you are trying to fix up a small patio, addressing drainage first is the fastest way to prevent cracking, sinking, and recurring messes. The non-negotiable rule: your patio surface must slope away from your house. Aim for 1/8 to 1/4 inch of drop per foot of patio width. Over a 10-foot-wide patio, that is 1.25 to 2.5 inches of total drop from the house edge to the outer edge. It sounds small, but it is enough to move water reliably.
If you have a downspout anywhere near the patio, handle it before you landscape. Water from downspouts should discharge at least 5 feet from the foundation at the surface, or be routed underground to a point at least 10 feet away. Running a downspout extension pipe under a paver edge and into a pop-up emitter in the lawn is a clean, DIY-friendly solution that keeps the patio surface dry.
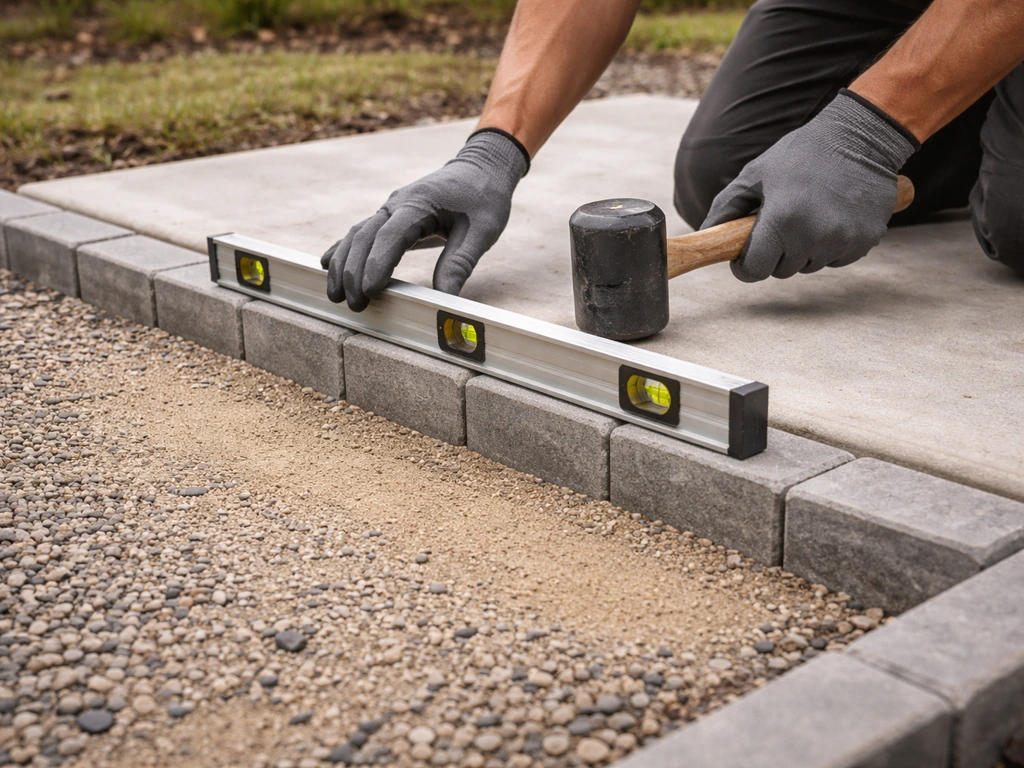
For any new paver work you are adding as part of your landscaping upgrade, the base is what determines whether it lasts. The standard layer stack is: excavated and compacted native soil, then 4 inches of compacted crushed aggregate base, then 1 inch of bedding sand, then your pavers, then jointing material. Do not swap the bedding sand for mason's sand, which does not compact properly and leads to shifting pavers. Also check your surface for flatness: undulations greater than 1/4 inch under a straightedge indicate a problem in the base that will only get worse.
If your patio sits on clay soil, water drains slowly through the base regardless of how well you slope the surface. In that case, consider a layer of geotextile fabric between the native soil and the aggregate base to prevent soil migration upward into the base layer over time. It is a small addition at installation but it extends the life of the paver system significantly.
How to install patio landscaping step by step
This sequence works whether you are building a brand-new small patio from scratch or adding landscaping improvements to an existing one. If you are looking for the full sequence of how to build small patio, this step-by-step flow will guide you from prep to finishing touches. Adjust the steps that do not apply to your situation.
- Sketch your layout to scale and mark all furniture zones, planting areas, and hardscape features. Confirm you have at least 30 to 36 inches of circulation around furniture and that the door swing is completely clear.
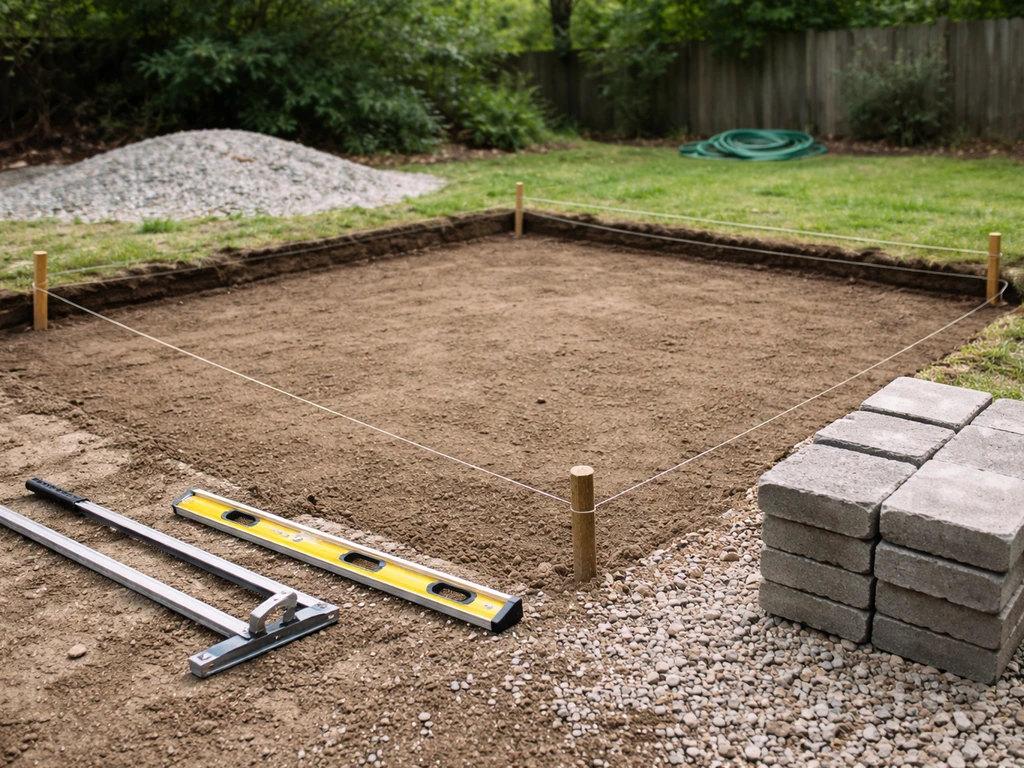
- Mark the patio boundary with marking paint or stakes and string lines. Use a line level or laser level to establish your slope: drop 1/8 to 1/4 inch per foot away from the house.
- Call 811 (the US dig-safe hotline) before digging anything, even shallow planting holes. This is a legal requirement in most states, not optional.
- If adding new paved area: excavate to the correct depth (paver thickness plus 1 inch of sand plus 4 inches of compacted base). Remove all sod and organic material from the dig area.
- Lay and compact the aggregate base in 2-inch lifts using a plate compactor. This is the most important step for long-term stability, do not skip the compaction.
- Install plastic or aluminum paver edging around the perimeter and stake it into the base. This keeps pavers from migrating outward over time, which is especially important on small patios with tight borders.
- Screed 1 inch of bedding sand to a uniform depth using two pipe guides and a straight board. Do not walk on the screeded sand after it is leveled.
- Set pavers from one corner, working outward. Use layout lines to keep rows straight. Check slope with a level frequently, especially at the start.
- Cut border pavers as needed using a wet saw or angle grinder with a diamond blade. Wear eye and ear protection.
- Once all pavers are set, run a plate compactor over the surface (with a rubber pad protector) to seat them into the sand.
- Sweep polymeric jointing sand into the joints, compact again, then mist with water to activate the binding agent. This is a better long-term choice than regular sand because it resists weeds and erosion.
- For planting beds along the border: dig holes two to three times wider than the root ball and exactly as deep. Set the plant so the root flare sits at or just above grade. Backfill with native soil, water deeply, and mulch the surface 2 to 3 inches deep, keeping mulch away from the stem.
- Set containers in their planned positions. Confirm they are not blocking door clearances or patio circulation paths.
- Install any vertical hardscape (trellises, lighting poles, seat walls) as the final step so you are not working around finished surfaces any longer than necessary.
- Do a final walk-through with a garden hose: run water across the surface and watch where it goes. If it pools anywhere, identify the low spot and correct it before calling the project done.
Budget, materials, and maintenance tradeoffs
For a DIY paver patio, expect to spend roughly $5 to $10 per square foot on materials alone. A 10x10 patio runs $500 to $1,000 in materials if you do the labor yourself. Professional installation typically doubles or triples that number, so the DIY savings are real and significant. The biggest variable is your paver choice: concrete pavers are the most budget-friendly, natural stone like bluestone or travertine costs more, and porcelain pavers fall somewhere in between and offer very low maintenance.
| Material/Feature | Approximate DIY Cost | Maintenance Level | Best For |
|---|---|---|---|
| Concrete pavers | $3–$6/sq ft materials | Low (seal every 2–3 yrs) | Budget-friendly, durable |
| Natural stone (flagstone, bluestone) | $8–$15/sq ft materials | Medium (re-sand joints, seal) | Higher-end look |
| Decomposed granite/gravel border | $1–$3/sq ft | Low-medium (top up annually) | Edge accents, drainage zones |
| Polymeric jointing sand | $25–$40/bag (covers ~40 sq ft) | Very low (resists weeds) | All paver patios |
| Pea gravel accent areas | $30–$50/ton | Low (rake occasionally) | Between pavers or planting borders |
| Raised planter wall (concrete block) | $3–$6/linear ft materials | Low (inspect annually) | Seating + planting combo |
| Vertical trellis (cedar or metal) | $50–$200 per panel | Low (stain wood every 2–3 yrs) | Privacy, climbing plants |
| Container plants (seasonal) | $10–$40 per container | Medium (watering, fertilizing) | Flexible, moveable color |
On the maintenance side, the choices you make at installation determine how much work you create for yourself later. Polymeric jointing sand costs more upfront than regular sand but dramatically reduces weeding. Drought-tolerant plants in containers need less watering than thirsty annuals. Columnar shrubs planted in the ground need no trimming to stay narrow, while a fast-growing hedge needs regular cutting to stay in bounds on a small patio. Choose based on how much ongoing time you want to spend, not just upfront cost.
Common mistakes and how to fix them
Most small patio landscaping problems come from skipping planning steps or using the wrong materials. If you want a clear path for how to transform a small patio, start by planning layout, drainage, and proportions before choosing plants or hardscape. Here are the ones that come up most often and what to do about them.
- Wrong furniture scale: Buying full-size outdoor furniture for a small patio is the most common mistake. Fix it by measuring your space first, accounting for the 30 to 36 inch circulation clearance around the table, and shopping for bistro sets or compact sectionals designed for tight spaces.
- No slope or slope toward the house: Water pooling on the patio or running toward the foundation causes long-term damage. If your existing patio has this problem, you can sometimes add a thin overlay of self-leveling compound or regrade the surrounding soil, but on a paver patio you may need to reset the affected section with corrected slope.
- Plants placed too close together or to paving: Crowding plants reduces air circulation, increases disease, and leads to plants outgrowing their space fast. Refer to mature spread dimensions before spacing. If you have already planted too close, thin by removing every other plant rather than trying to trim everything into submission.
- Burying the root flare: Planting too deep is one of the leading causes of shrub and tree decline. If a plant is struggling and you suspect this, carefully pull back soil and mulch to expose the root flare and let the crown breathe.
- Using mason's sand as bedding sand: This causes pavers to shift and sink within a season or two. If your pavers are already moving, you need to pull them up, remove the mason's sand, and reset with the correct bedding material.
- Forgetting edging restraints: Without edging, pavers migrate outward over time, especially on smaller patios where the border is close to soft soil. Add plastic or aluminum edging staked at 12-inch intervals if yours is missing.
- Overfilling a small space with features: A fire pit, fountain, planter wall, and four pieces of furniture do not all fit in a 10x12 patio. Pick the one or two features that matter most and build around those. A cluttered patio feels smaller than an open one.
- Ignoring door clearances when placing planters: A heavy planter that blocks the arc of a door swing is a safety and circulation problem. Keep at least 32 inches of clear width at any door or entry point, and more if possible.
If you have already built your patio and it needs more of a transformation than a few fixes, the process of figuring out what to do with the space, choosing a style direction, and deciding which features to add is its own planning exercise worth working through deliberately. If you are still deciding, use your space and goals to narrow down the best small-patio layout, furniture, plants, and hardscape features what to do with a small patio. Similarly, if you are starting from the very beginning and need guidance on actually building the patio structure itself before you landscape it, the foundation and construction steps deserve their own careful attention before you move on to the finishing touches covered here.
FAQ
How do I calculate furniture clearances if I plan to add a border or edging to my small patio?
Measure the patio’s finished surface, not the slab size, because caps, edging, and base additions change the usable footprint. If you plan to add a planting border, decide its width first, then subtract it from the dining or lounge area so you do not end up with “nice on paper” clearances you cannot use in reality.
Can I landscape around a patio door without blocking access?
Yes, but plan for an exit path. Keep at least one side of the patio free for a practical walking line and avoid placing tall planters or trellises where you must pass close by. If your door is the main entry, treat the door zone as a no-obstruction corridor, including hanging planters.
What plant mix works best so my small patio does not look crowded?
Use two different plant types and repeat them, rather than adding many varieties. For a small patio, you usually want one “mass” (spreading groundcover or low shrubs), one “accent” (vertical columnar plant or tall grasses), and one trailing element. This keeps the design cohesive even when space is tight.
How should I place tall plants so they make the patio feel bigger instead of narrower?
Stagger your vertical elements by height, then repeat the same height range across two or more corners. A common mistake is putting everything tall in one area, which compresses the space visually. Also ensure taller plants are placed where they will not cast long afternoon shade onto low plants.
What is the best way to transition from pavers to mulch, gravel, or groundcover on a small patio?
For pavers, aim for tight edging contact so paver edges do not move as you build up mulch or gravel. If you use gravel at the perimeter, install a small border restraint first and keep gravel from migrating onto paver joints, which can break jointing sand down over time.
How do I maintain polymeric sand joints on a small patio?
Treat “polymeric sand” as a maintenance system, not a one-time fix. Avoid hosing it with high-pressure water, and do not let weeds sprout and reseed the joints, because polymeric sand can be harder to correct after it degrades. Plan a spot-check of joint lines after the first heavy rain season.
What container size should I choose for small-patio planting, and how do I avoid dry-out problems?
Choose container size based on the mature plant width and how often you can realistically water. A small pot for a plant that is naturally thirsty will force frequent watering, which many patios do not support. In heat, larger pots usually outperform small ones because they hold moisture longer.
When planting into the ground near pavers, what depth mistakes cause the most failures?
Follow the plant’s root ball depth and confirm whether the soil line in the container matches the planting depth you need outdoors. If you are planting into clay or dense soil, loosen the sides of the hole (without over-digging) so roots can spread, and always keep the root flare at the correct height.
Is it safe to build a planter wall or heavy feature directly on an existing paver patio?
For heavier additions like planter walls, check that the base under the pavers can carry the added load, especially if your patio was built with minimal aggregate or over soil that settles. When in doubt, do not anchor directly into unsupported paver zones, instead build the feature on a properly compacted base area.
Where should a downspout discharge if my patio is close to the foundation or lawn?
If you want to route a downspout, avoid discharging water onto areas that will freeze or overflow during storms. A safer approach is directing water to a controlled outlet location on a permeable area, or using an underground routing system to a distant discharge point away from the foundation and any saturated landscaping.
What should I do if my existing patio already has low spots or puddling?
If the surface dips or puddles, fix the slope before adding plants or decorative layers, because water problems will undermine everything you install. If the patio is already in place and leveling is difficult, consider localized regrading at the trouble area and confirm drainage performance after the next rain.
If I have clay soil, is geotextile enough by itself to protect the paver base?
If you have a clay site, geotextile helps prevent soil migration into the base, but you still need correct drainage slope and proper compaction. Skip either step and you can still get settlement, heaving, or base contamination that shortens paver life.
How do I add lighting to a small patio without creating glare or clutter?
Because smaller patios are visually sensitive, keep lighting and hardscape lines aligned with the furniture and main circulation path. Use low-level lighting or subtle uplights so you do not create glare in a seating sightline, and place light sources so you can see steps and edges at night.
How do I choose plants for a small patio if I do not have time for frequent trimming?
Set a realistic maintenance budget before choosing fast-growing options. On small patios, trimming and replacement cycles are amplified because plants can quickly outgrow the available volume. Prefer slow to moderate growth, or commit to a schedule if you choose hedges or vigorously spreading groundcovers.