You can make a small patio yourself in a weekend or two, even with zero hardscaping experience. If you want a more hands-on walkthrough, follow this guide on how to transform a small patio from layout to finishing details. If you want more ideas and a clear checklist, follow this guide on how to build small patio from planning to finishing. The process comes down to six things: mark out your space, prep the ground, build a compacted gravel base, set your surface material in leveled bedding sand, lock the joints, and finish the edges. Do those six steps correctly and you get a solid, level, well-drained patio that won't heave, pool water, or sprout weeds through the cracks. Skip or rush any of them and those are exactly the problems you'll be fixing a year from now.
How to Make a Small Patio: DIY Patio Garden Guide


Define your small patio size and layout
Before you buy a single paver, figure out how much usable space you actually need versus how much ground you have. Most small patios fall somewhere between 100 and 200 square feet, but even a 6x8-foot (48 sq ft) slab can work if your goal is a quiet corner with a chair and a planter or two. The mistake people make is designing from the outside in, starting with the available space and cramming furniture into it. Instead, start with what you want to do out there and work backward.
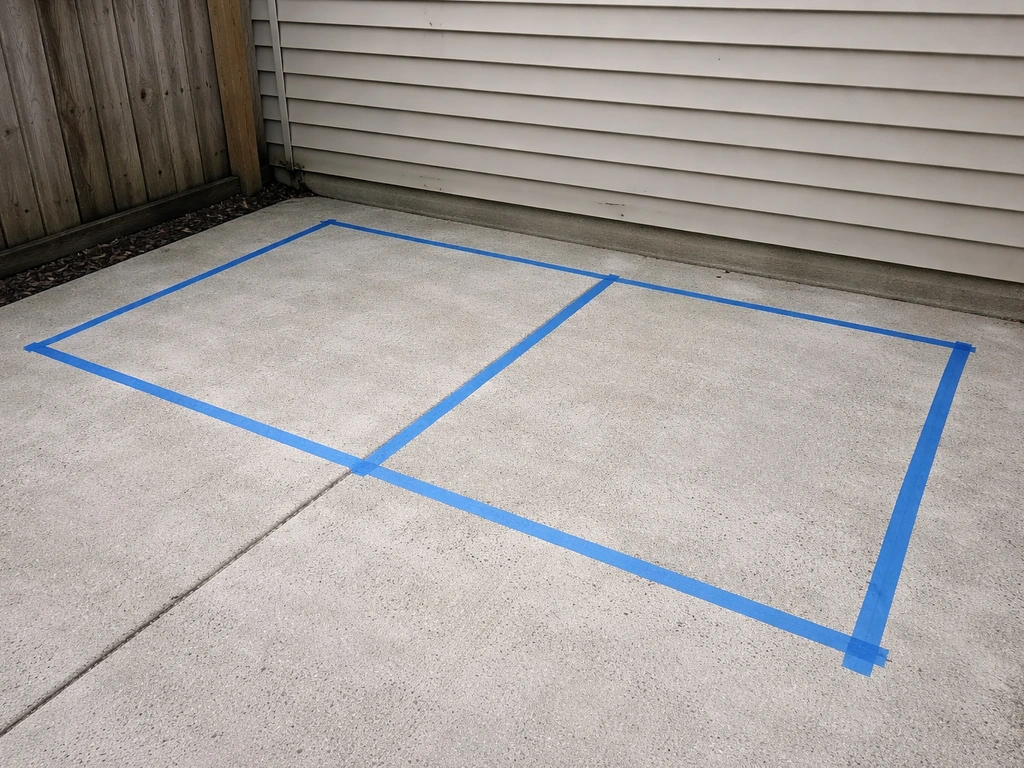
A practical layout trick: grab a roll of painter's tape and mock up your patio directly on the grass or existing surface. Mark the door swing first. A standard door sweeps about 30 to 36 inches, and you need that arc kept completely clear. Then tape a walking path of at least 36 inches from the door into the seating zone (bump that to 48 inches if two people need to pass each other comfortably). Whatever square footage is left after those circulation paths is your true patio area. Sit in a folding chair inside the taped outline and see how it feels before you commit to dimensions.
For shape, rectangles are the easiest to cut pavers for and the cheapest to build. L-shapes work well when you want to wrap around a corner or create a dedicated garden zone on one side. Freeform or curved edges look great but add complexity and material waste, so save those for your second project or plan to use full pavers with a flexible edge restraint system. Sketch your layout on paper, note the dimensions, and count the square footage. Add 10% to your material order to cover cuts and breakage.
Site prep and drainage considerations
This is the part that separates a patio that lasts from one that causes problems. The ground underneath is doing all the work, and if you shortcut it, you will absolutely deal with settling, pooling water, or both within a season or two.
Check your slope before you dig
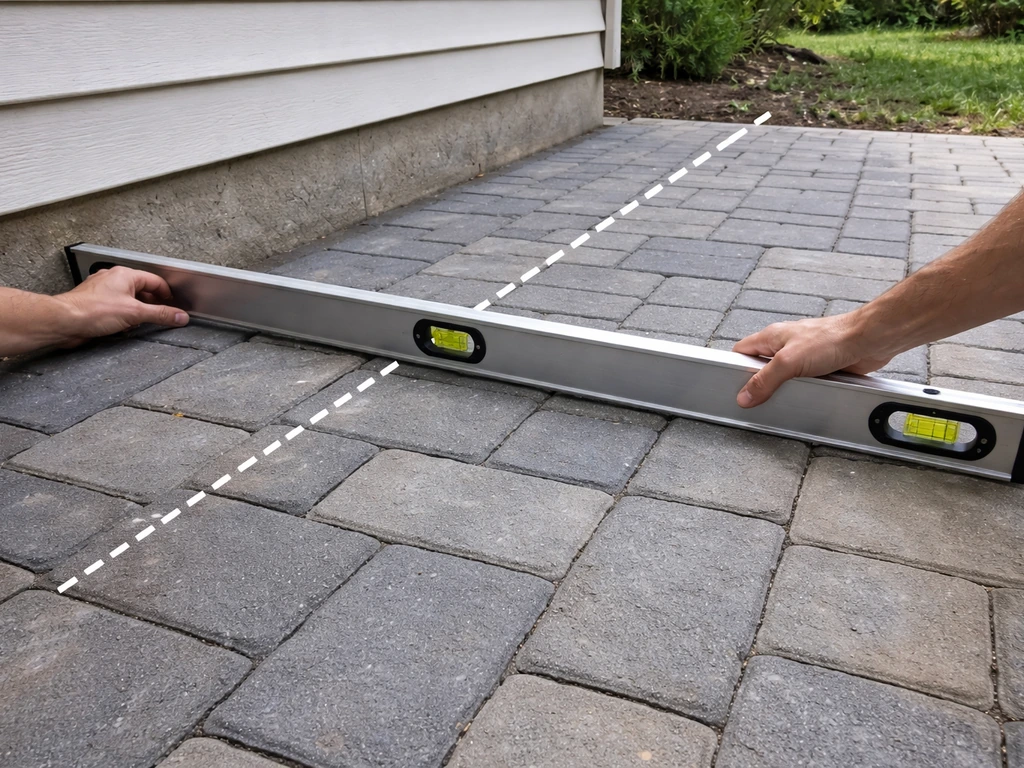
Water needs to run away from your house, not toward it. The standard drainage slope for a paver patio is 1/8 inch to 1/4 inch per foot, measured away from the structure. That's a subtle pitch. On a 10-foot-deep patio, you're looking at 1.25 to 2.5 inches of total drop from the house side to the outer edge. Use a 4-foot level with a tape measure, or a string line and line level, to check what your existing grade looks like. If your yard already slopes away from the house, you're in great shape. If it slopes toward the house or is flat, you'll need to build that pitch into your base during excavation.
Proximity to the foundation
If your patio will sit directly against the house, keep the finished patio surface at least 2 inches below the siding or the threshold of any door. Water that wicks up against wood siding or framing causes rot. In most cases your slope handles this naturally, but double-check before you set the first paver. Also call 811 (in the US) before you dig. It's free and it locates underground utilities so you don't hit a gas line with your shovel.
What to do on a slope
If your yard drops off significantly in the patio zone, you have two choices: cut into the hillside and build a level pad (which requires a small retaining wall along the cut edge), or build a raised patio on a frame. For most small DIY projects, cutting into a gentle slope is the simpler path. Steep slopes are a bigger undertaking and really deserve their own project plan. For this guide, we're focused on a relatively level or gently sloping site where you're working with natural grade.
Choose the right materials for a small patio
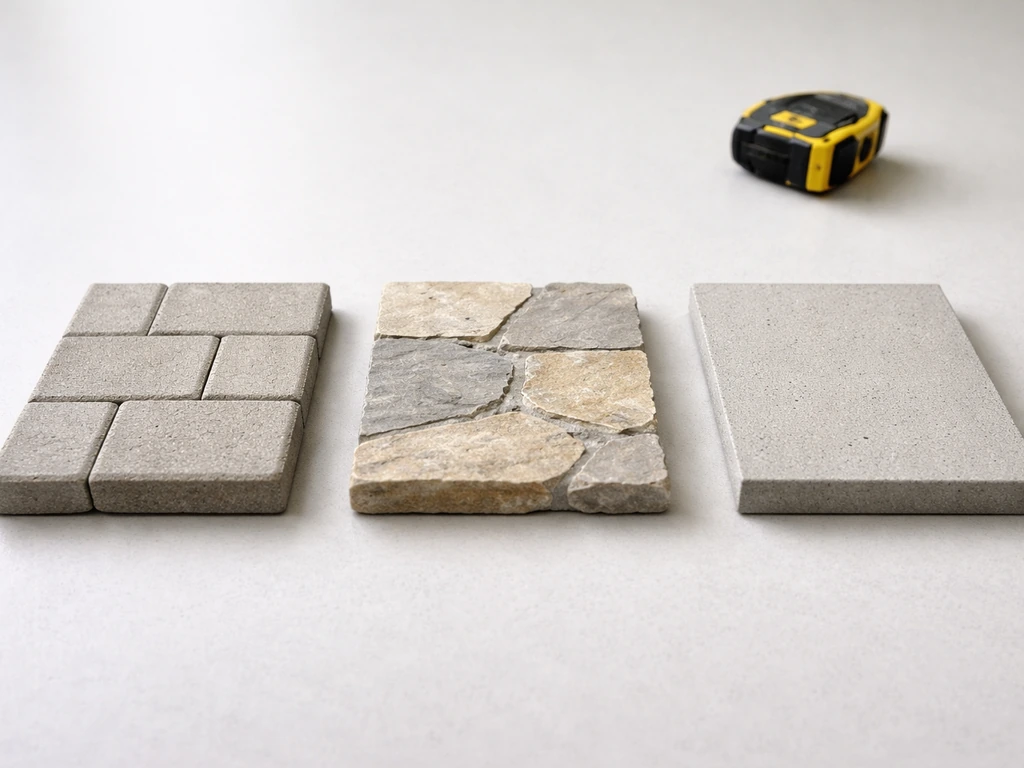
Material choice affects your budget, installation difficulty, maintenance load, and how the finished patio looks. For small spaces, you have more options than you might think, and the best choice depends on your specific situation.
| Material | Cost (approx. installed DIY) | Difficulty | Durability | Best For |
|---|---|---|---|---|
| Concrete pavers | $3–$8 per sq ft materials | Beginner-friendly | Excellent (20+ years) | Most small patio projects, clean look, easy to relay |
| Natural flagstone | $4–$10 per sq ft materials | Moderate | Very good | Garden-style patios, irregular/rustic look |
| Pea gravel + stepping stones | $1–$3 per sq ft materials | Very easy | Good | Budget builds, garden integration, flexible layouts |
| Brick pavers | $4–$8 per sq ft materials | Beginner-friendly | Excellent | Traditional/cottage style, great for small spaces |
| Concrete slab (poured) | $5–$10 per sq ft materials | Hard (formwork required) | Excellent | Permanent installations, not beginner-friendly for DIY |
For most first-time DIYers, concrete pavers are the smart pick. They're uniform in thickness (usually 2.375 inches or 3.125 inches), which makes leveling straightforward. They're available at every home improvement store, they come in dozens of sizes and finishes, and if one cracks or shifts years down the road, you can pull it up and relay it without touching the rest of the patio. Flagstone is beautiful and great for patio garden aesthetics, but the irregular thicknesses make leveling harder. If you love that look but want an easier build, use irregularly shaped concrete pavers instead.
Edge restraints and border options
Edges are not optional. Without a restraint holding the perimeter pavers in place, they spread outward over time and your joints open up. Plastic paver edge restraint systems (sometimes called snap edge or bender board) are the standard choice: they're cheap (around $0.50 to $1.00 per linear foot), flexible enough to follow curves, and spike directly into the compacted base with 10-inch steel spikes. For a more decorative border, you can use a row of soldier-course pavers set on end, natural stone, or decorative metal edging. Whatever you choose, install it before you lay the field pavers so it holds everything tight from the start.
Step-by-step base preparation and patio installation
This is the core of the project. Take your time here and the rest of the build goes smoothly. Rush it and you'll be relaying pavers before the summer is over.
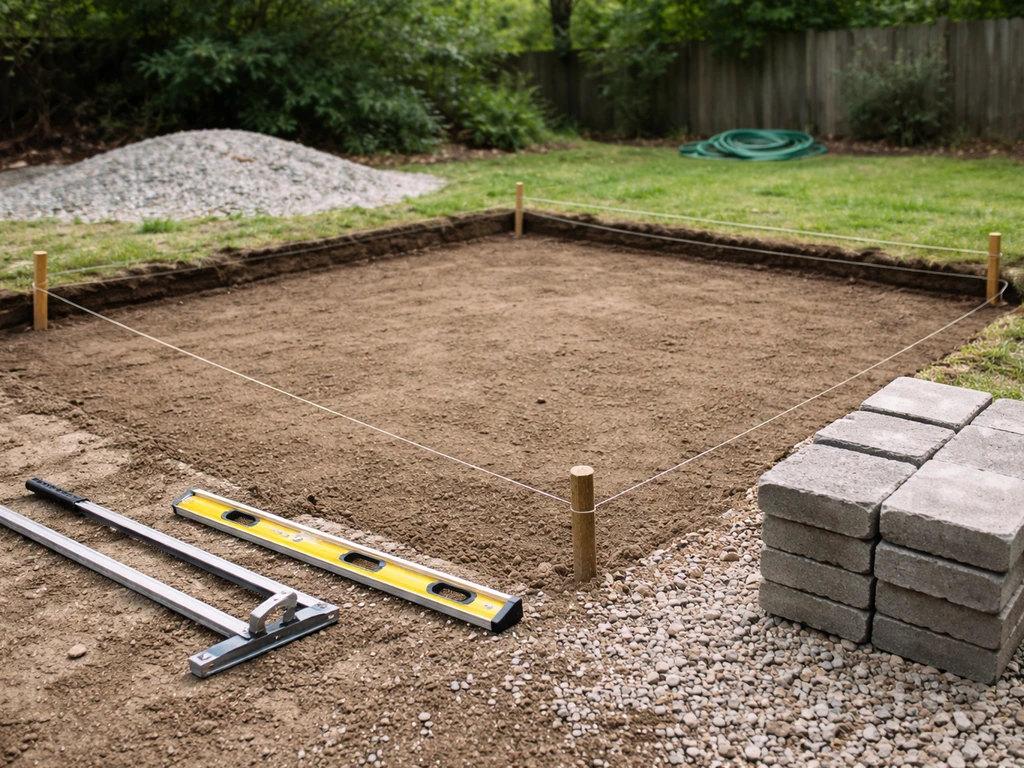
- Mark your patio outline: Use stakes and string line to define the exact perimeter. Spray paint or marking chalk along the string gives you a clear cut line.
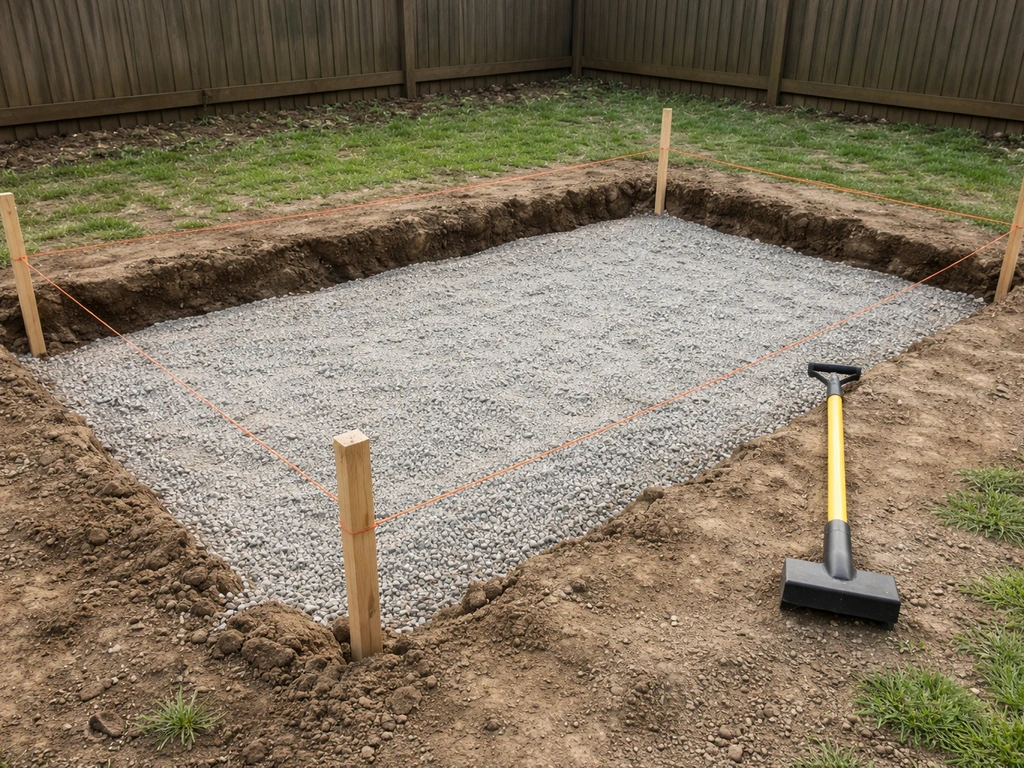
- Excavate the area: Dig down 6 to 8 inches below your finished patio grade. That depth accounts for 4 inches of compacted gravel base, 1 inch of bedding sand, and the thickness of your pavers (typically 2.375 inches). Remove all sod and organic material — roots and organic matter compress and cause settling.
- Set your slope: As you excavate, build in the 1/8 to 1/4 inch per foot slope away from the house. Use a long level and stakes with string to confirm the slope is consistent across the whole area. This is easier to fix now than after you've compacted gravel.
- Add and compact the gravel base: Fill with crushed angular gravel (compactable gravel, also called road base or Class II base rock). Pour it in lifts of no more than 2 to 3 inches at a time, compact each lift with a plate compactor before adding more. Do not skip the plate compactor — it's the difference between a base that lasts and one that settles into soft pockets. Rent one from your local hardware store for about $60 to $100 per day. Your finished compacted base should be at least 4 inches thick.
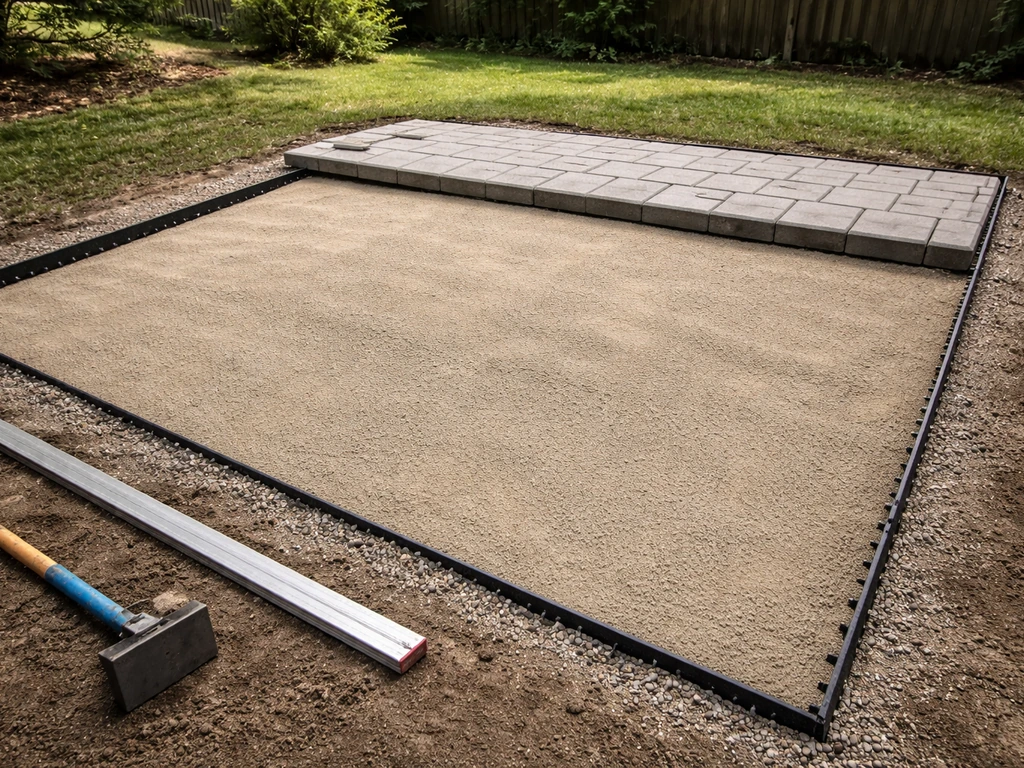
- Install edge restraints: Snap your plastic edge restraint around the perimeter and spike it every 12 inches. This locks everything in before you start laying pavers.
- Spread bedding sand: Pour coarse, washed concrete sand over the compacted base. Rake it roughly level, then use two sections of 1-inch diameter conduit pipe as screeding rails and a straight 2x4 board to drag across them, creating a perfectly flat 1-inch-thick sand layer. Pull the pipes out after screeding and fill those small furrows by hand.
- Lay the pavers: Start at the corner closest to your house (or your most visible starting edge) and work outward. Set each paver gently onto the sand — don't slide it or it disturbs the bedding. Use a rubber mallet to tap each paver flush with its neighbors. Check flatness with a long straightedge every few rows and adjust by adding or removing sand under individual pavers as needed.
- Cut pavers for edges and borders: Use an angle grinder with a diamond blade or rent a wet saw for cleaner cuts. Always wear eye protection and a dust mask.
- Compact the pavers: Once all pavers are set, run the plate compactor (with a rubber pad attachment to protect the surface) over the entire patio to seat the pavers firmly into the bedding sand.
- Apply polymeric sand to joints: Sweep dry polymeric sand across the surface, working it into all the joints with a push broom. Make multiple passes until joints are full. Mist the patio lightly with water to activate the polymer binder. This hardens the joint sand so it resists erosion, weed growth, and insects. Follow the manufacturer's cure time before using the patio heavily.
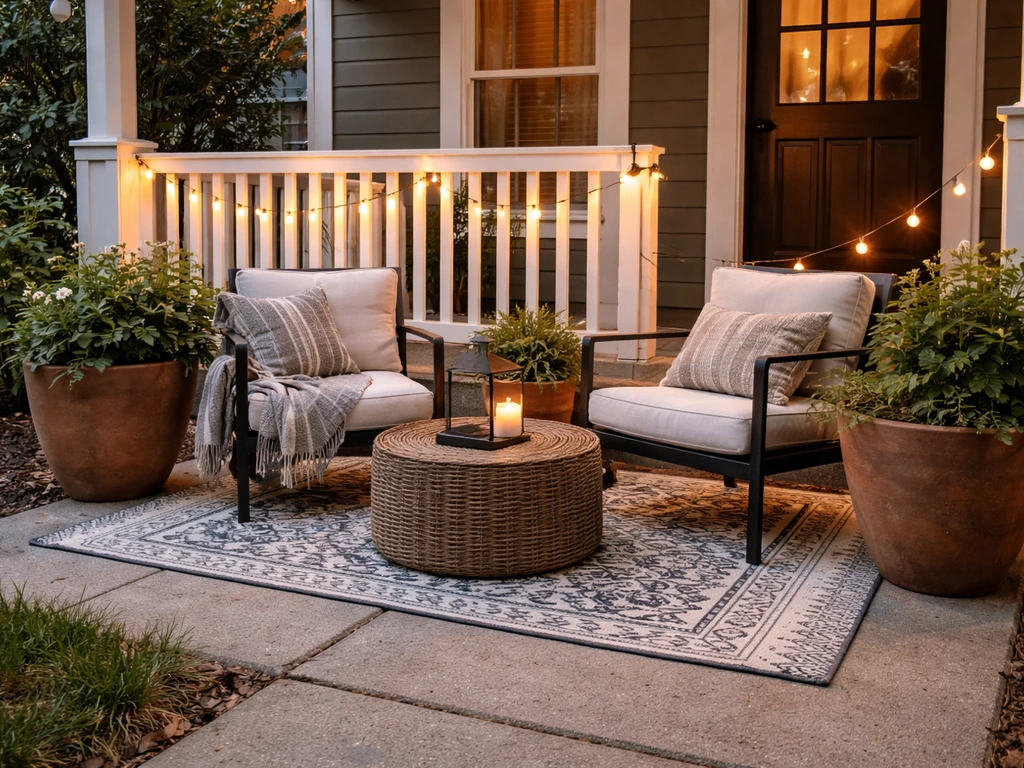
Make it feel like a patio garden, not just a slab
A small patio doesn't have to feel like a parking spot. With the right greenery and layout choices, even a 10x12-foot patio can feel like a lush outdoor room. The key is to use vertical space and containers so you're adding life without eating into your usable square footage.
Use containers and planters strategically
Tall containers at the corners of your patio visually extend the space upward and create a sense of enclosure without walls. A pair of 18 to 24-inch pots flanking a seating area, planted with ornamental grasses or boxwood, anchors the space and makes it feel intentional. For a true patio garden feel, mix heights: a tall planter with a small tree or tall grass, a medium planter with herbs or lavender, and low-profile containers at the edge for annuals and groundcovers. Keep planters on the outer edge of the patio rather than in the middle so you preserve circulation space.
Integrate planting beds at the perimeter
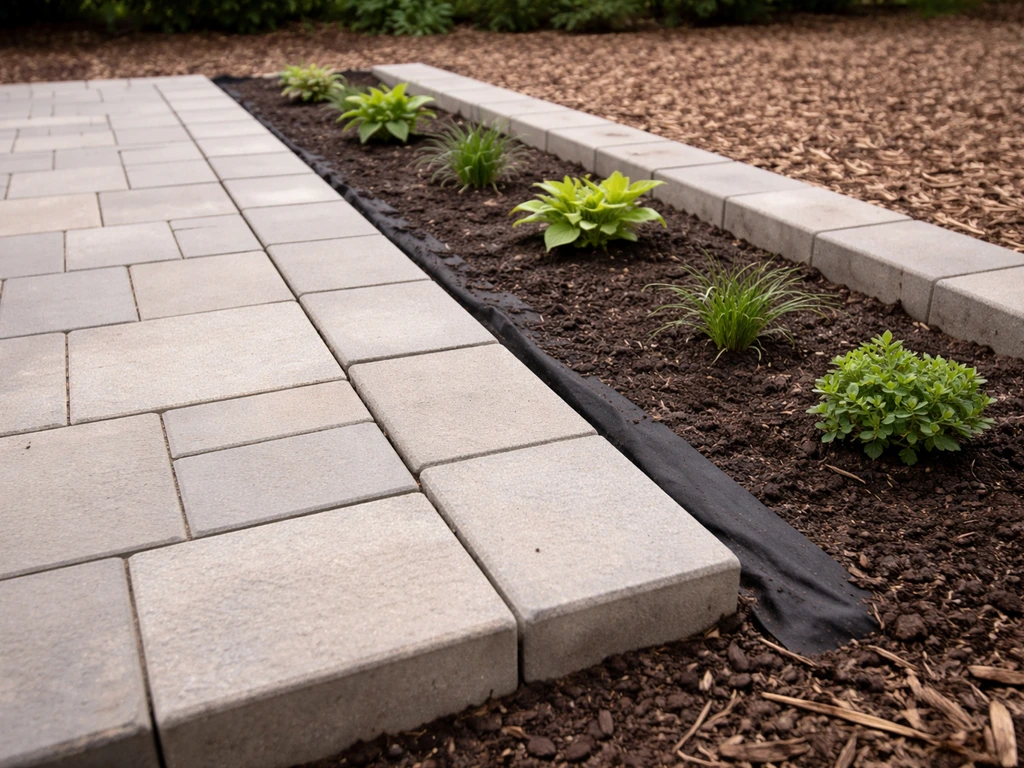
One of the most effective things you can do for a small patio garden is plan a planting bed directly adjacent to the patio edge rather than trying to grow everything in pots. When you're laying out your patio, designate one or two sides as garden-facing, and keep those edges bordered with a simple steel or brick edging that transitions cleanly into a mulched or planted bed. Low-growing plants like creeping thyme, sedum, or mondo grass planted between the patio edge and a fence or wall soften the hard surface dramatically and improve drainage of surface runoff at the perimeter.
Privacy and overhead greenery
If your small patio feels exposed, a simple trellis on one side with a fast-growing vine (jasmine, clematis, or climbing roses depending on your climate) adds privacy and shade without requiring a full pergola build. A freestanding trellis panel costs $30 to $80 and can be anchored in a large container filled with concrete, no digging required. For overhead dappled shade on a budget, a large patio umbrella anchored in a weighted base gets you there instantly while you wait for plants to grow.
If you're thinking beyond just building and want ideas for how to style, landscape, or transform the look of your finished patio, those are worth exploring as their own creative projects once the construction is solid. Once your construction is solid, you can use the ideas in the earlier sections to make a small patio look nice with better layout, materials, and finishing details. Once your patio is built, the next step in how to style a small patio is choosing furniture, planters, and lighting that fit the scale and layout. Once your patio is built, use these tips on how to landscape a small patio to turn your slab into a cohesive outdoor space how to style, landscape, or transform.
Finishing details, sealing, maintenance, and troubleshooting
Should you seal your paver patio?
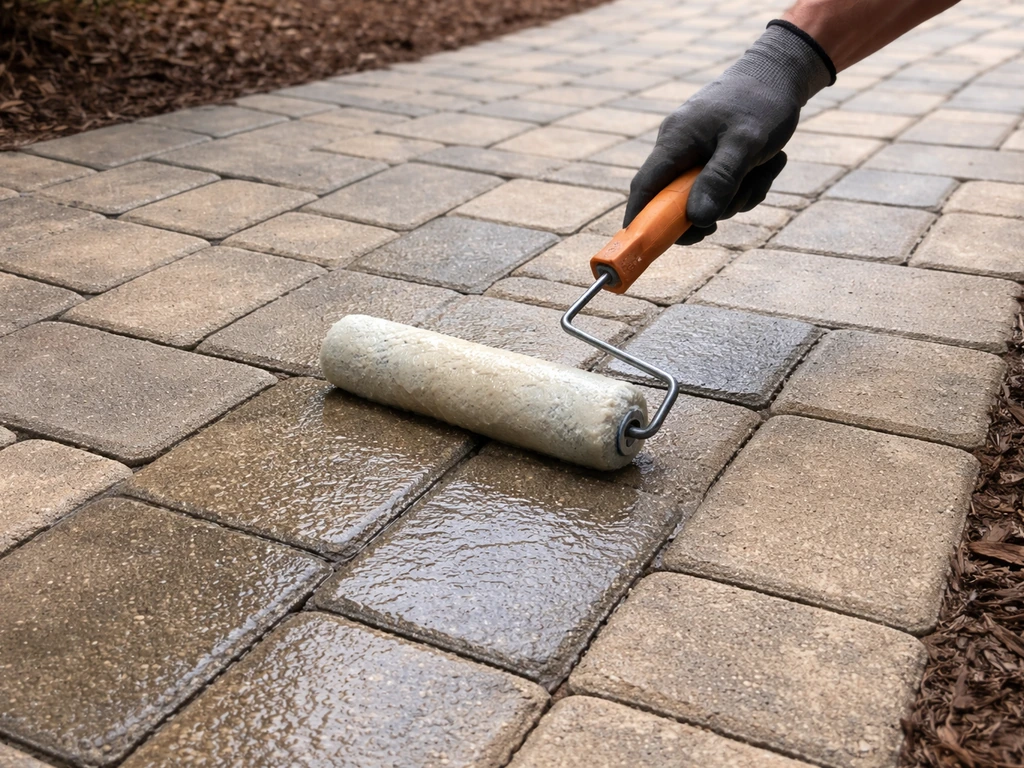
Sealing is optional but worthwhile. A good paver sealer locks in the polymeric sand, enhances the color of your pavers, and makes the surface easier to clean. Wait at least 24 to 72 hours after wetting polymeric sand before applying sealer so the binder has fully cured. Apply sealer with a pump sprayer or roller on a dry day when temperatures are between 50 and 90 degrees Fahrenheit, and keep foot traffic off it for at least 24 hours. Reapply every 3 to 5 years depending on sun exposure and foot traffic.
Ongoing maintenance
- Sweep off debris regularly — organic material sitting on joint sand promotes weed germination and staining
- Re-sand joints every few years as polymeric sand gradually breaks down, especially in high-traffic areas
- Check your drainage slope after the first heavy rain season — if water is pooling, address it early before it undermines the base
- Reseal every 3 to 5 years to maintain color and joint integrity
- Clean oil or stubborn stains with a paver-specific cleaner, not bleach, which can damage polymeric sand and surrounding plants
Troubleshooting common small patio problems
Uneven or rocking pavers almost always mean the bedding sand wasn't screeded consistently, or the base under that area wasn't compacted properly. Pull the affected pavers, add or remove sand underneath, tamp the area flat, and relay them. This is genuinely easy to fix on a small patio because individual pavers lift out without disturbing the rest of the surface.
Water pooling on the surface means your slope is insufficient or inconsistent. Check with a level across the problem area. If the slope is flat or running the wrong way, the real fix is to pull those pavers, regrade the base, and re-screen the bedding sand with the correct pitch. Patching the surface without fixing the underlying grade just delays the problem.
Weeds pushing through the joints typically mean the polymeric sand wasn't activated properly, has degraded, or wasn't used at all. Pull the existing joint material out of the affected joints with a stiff brush or jointing tool, sweep in fresh polymeric sand, and re-activate it with water. Polymeric sand is genuinely the best tool available for keeping weeds out of joints, hand-weeding alone is a losing battle.
Settling low spots that appear months after installation are almost always caused by inadequate base compaction. If only the top layer was tamped but the deeper lifts were left fluffy, those layers compress under load over time. The fix is to pull the pavers in the settled zone, excavate the base material, recompact in proper lifts with a plate compactor, re-screen bedding sand, and relay. It's more work than doing it right the first time, but it's absolutely fixable.
Your build checklist before you start
- Call 811 to mark utilities before you dig
- Measure and tape out your layout, including door swing and circulation paths
- Confirm your drainage slope direction and target (1/8 to 1/4 inch per foot away from house)
- Calculate square footage and order materials with 10% overage
- Rent a plate compactor for base compaction day
- Order crushed angular gravel base (4+ inches compacted), coarse bedding sand (1 inch), and polymeric jointing sand
- Pick up plastic edge restraints and 10-inch spikes
- Have a long straightedge and a 4-foot level on hand throughout the build
- Plan your planter and garden integration before laying pavers so you can account for any adjacent bed edging in your layout
FAQ
What size patio is the smallest that still works for a small sitting area?
A 6x8-foot patio can work if you treat it like a quiet corner, not a dining space. If you plan for one chair plus a small side table, keep circulation clear from the door swing and aim for at least a 36-inch path to the seating zone (48 inches if two people need to pass).
How do I decide between paving a rectangle versus an L-shape for a small patio?
Choose a rectangle if you want the easiest cuts and the fewest waste pieces. Pick an L-shape when you need to wrap around a corner or dedicate one side to a garden bed, but expect more layout time to keep the border straight and the joints consistent at the interior angle.
Do I need to remove sod and topsoil, or can I build over it?
You should remove organics like grass and topsoil before the gravel base. If you leave any living material, it will decompose and create voids that cause rocking and settling even if the pavers are level at install.
What if my yard is flat or slopes slightly toward the house, how steep does the patio need to be?
Use the recommended slope away from the structure (typically 1/8 to 1/4 inch per foot). Even a small inconsistency can create a low spot where water sits, so check grade with a string line or level and rebuild the pitch into the base, not just the sand layer.
How do I keep pavers from staining the first year after I install polymeric sand and sealer?
Avoid foot traffic and heavy cleaning right after sealing, and keep the area dry during curing. Also, make sure polymeric sand is fully cured before sealing, because sealing too soon can trap moisture and reduce how well the joints bind.
Can I use regular sand instead of polymeric sand between pavers?
You can, but regular sand tends to wash out or loosen, leading to more weeds and joint cracking over time. If your goal is low maintenance and fewer weeds, polymeric sand is the right choice, and it still must be properly activated with water.
How should I handle pavers that meet a driveway, step, or walkway?
Treat those edges like part of the drainage system. Plan a clean height transition so runoff can escape, and install edging restraint along the entire border that faces lateral movement, especially where pavers abut concrete or stone slabs.
What is the easiest way to prevent rocking pavers without redoing the whole patio?
Fix localized rocking by lifting only the affected pavers, checking whether the sand was screeded evenly and whether the base is compacted. Add or remove bedding sand, tamp the area flat, and relay the pavers, since reworking individual sections is manageable on small patios.
Why are my pavers uneven even though I leveled the sand?
Unevenness usually points to inconsistent base compaction or sand screeded inconsistently in one spot. If the top looks correct but a paver rocks, the base likely has a soft pocket beneath it, so you need to remove that area down to the base layer and recompact.
If my patio settled months later, how can I tell whether it’s a base issue or a joint issue?
Low spots that develop under load are almost always base compaction problems, especially if only certain areas sink. Joint material problems usually show as open joints and weed growth, not big vertical drops, so when height changes occur, plan to excavate and recompact in lifts.
Do I have to use edging restraint, and what happens if I skip it?
Edging restraint is essential for long-term stability. Without it, perimeter pavers can spread outward, joints open, and water can find paths under the patio, making weeds and shifting more likely.
Can I install a small patio on a gentle slope without building a retaining wall?
Often yes, if the slope is mild. The simpler DIY approach is to cut and excavate to create a level pad with the correct drainage pitch built into the base. If the grade drop is large, that’s when a retaining wall or a raised frame platform becomes necessary.
When is the best time to seal pavers, and do I need to wait after activating polymeric sand?
Wait at least 24 to 72 hours after wetting polymeric sand so the binder cures fully. Seal on a dry day when temperatures are in a comfortable working range (about 50 to 90 degrees Fahrenheit) and keep traffic off it for at least 24 hours.
How often should I reapply paver sealer on a small patio?
Plan on reapplying every 3 to 5 years, depending on sun exposure, rainfall patterns, and how much you use the space. Patios with heavy foot traffic or intense sun usually need reapplication sooner.