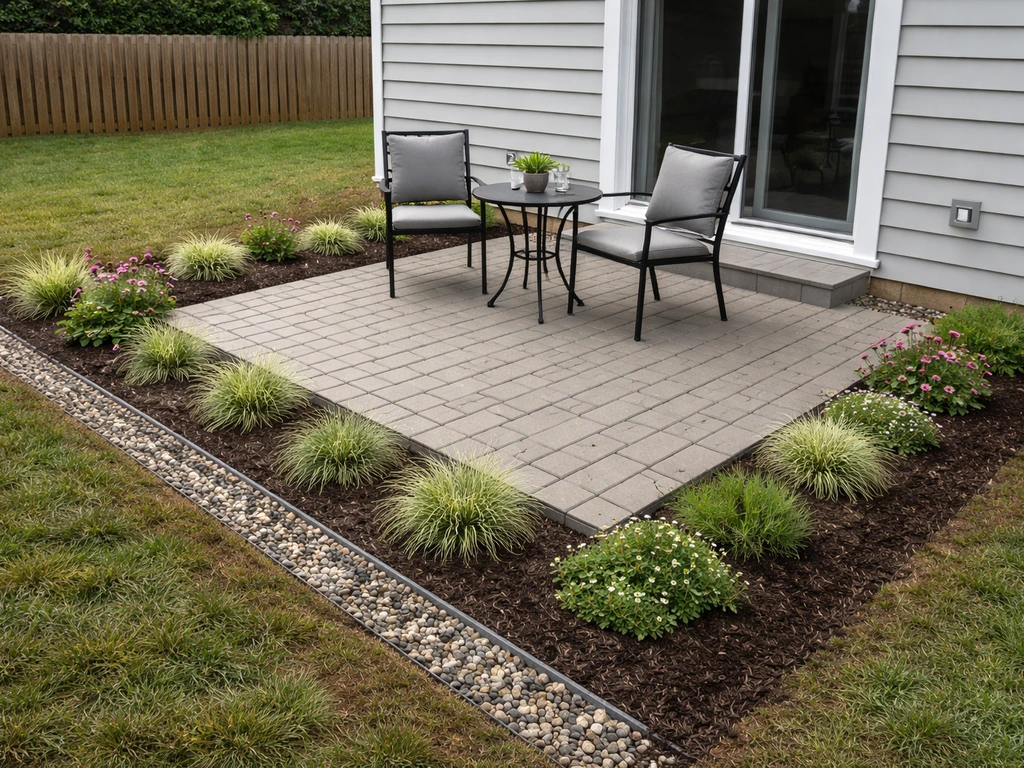
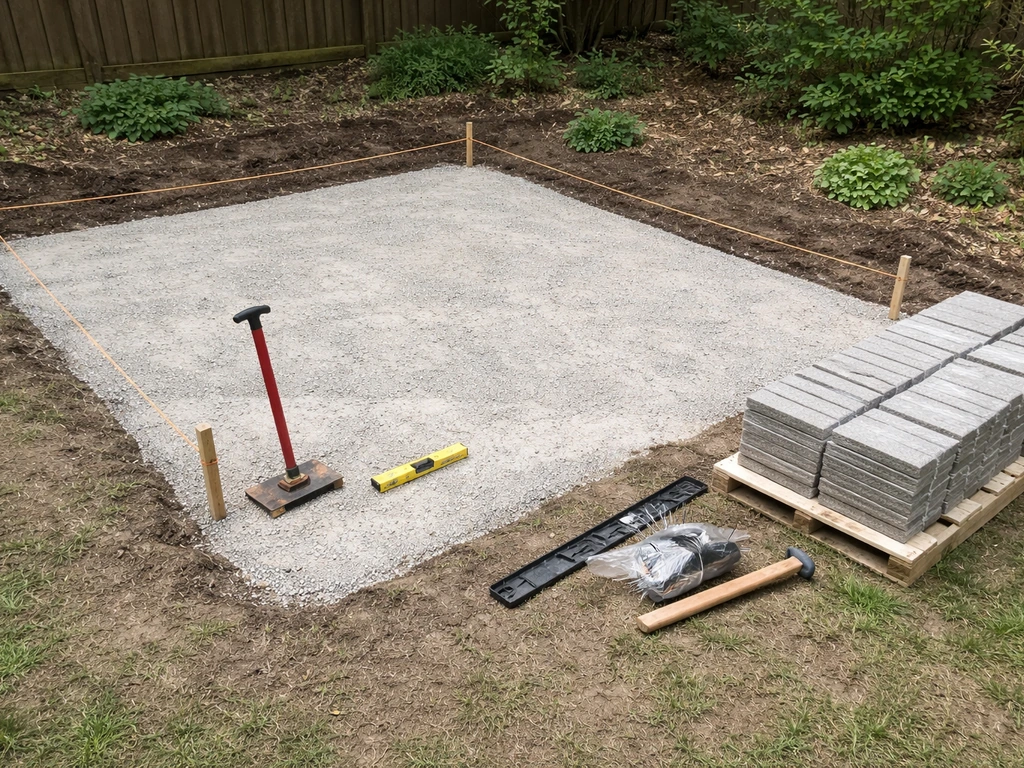
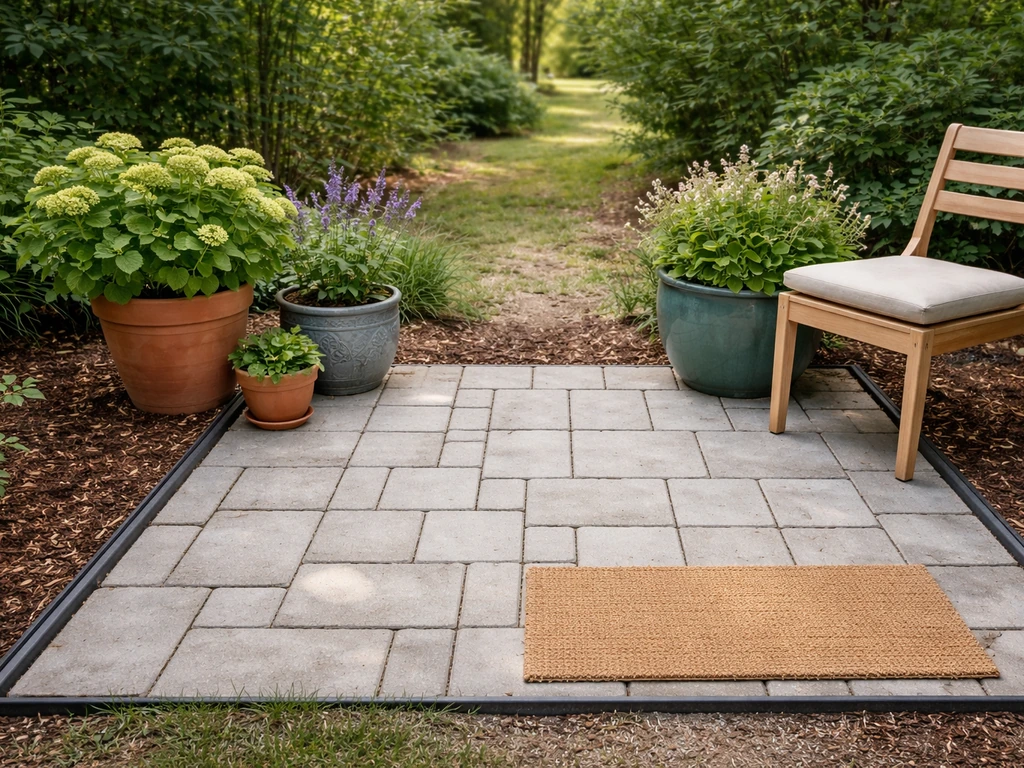
A small patio can do a lot of work if you plan it right. Whether you have a 6x8 ft concrete slab behind a rental or a sloped 10x12 ft patch of bare dirt, you can turn it into a real outdoor living space yourself, without a contractor, without a huge budget, and without a construction background. The key is working through the right sequence: assess your site honestly, pick a surface that matches your constraints, prep the ground properly, and layer in furniture, planting, and features that actually fit the scale.
What to Do With a Small Patio: Complete DIY Guide for Small Outdoor Spaces

Nolan Carver
23 Jul 2026
Who this guide is for and what you'll walk away with
This guide is written for homeowners and renters who have a small outdoor area, anywhere from roughly 6x6 ft to about 12x16 ft, and want to do something real with it. That includes people starting from bare dirt who need to build a patio from scratch, people with an existing concrete slab or paver surface who want to fix it up or restyle it, and everyone in between. You do not need prior construction experience to follow along. By the end you will be able to measure your site and document its constraints, choose the right surface type for your budget and conditions, prepare the ground correctly, lay a basic paver, gravel, or concrete surface yourself, and then style the finished space with furniture, lighting, and planting that makes sense at a small scale.
Assess the site before you plan anything
Site assessment sounds formal but it really just means spending 20 minutes outside with a tape measure and a notepad before you buy a single thing. Skipping this step is the most common reason small patio projects end up with drainage problems, undersized furniture, or a surface that cracks within two winters.
Measure the space accurately
Measure the length and width of the area with a tape measure and write both numbers down. For a rectangle, that is all you need. For an L-shape or irregular outline, break it into smaller rectangles, measure each, and add the areas together. A laser distance measurer speeds this up and removes parallax errors from long tape pulls. If you want a digital plan, apps like MagicPlan or the LiDAR-based Measure app on a recent iPhone can generate a scaled floor plan directly from your phone. Draw a rough sketch on paper at a simple scale, something like 1/4 inch equals 1 foot, and mark where doors, steps, hose bibs, exterior outlets, and any other fixed features sit. Also note overhangs, tree canopies, and fence lines.
Check the slope and drainage
Slope determines whether water runs away from your house or pools on the surface. To measure it without special equipment, drive two stakes into the ground, tie a taut string between them at a fixed height, clip a line level to the string, and then measure the vertical drop from the string down to the ground at each stake. Divide the vertical drop in inches by the horizontal distance in feet to get slope in inches per foot. The standard minimum for patio drainage is 1/4 inch per foot (about 2%) sloping away from the building for the first 10 feet. Some projects tolerate 1/8 inch per foot if drainage is otherwise good, but check your local code. A builder's transit or rotary laser level gives more accurate readings over larger areas if you have access to one.
Understand your soil
Soil type affects how thick your base needs to be and how well water drains. Clay soils drain slowly, shift with freeze-thaw cycles, and typically require a thicker compacted aggregate base (lean toward the 6-inch end of recommended ranges rather than the 4-inch minimum). Sandy or gravelly soils drain well and are more forgiving. You can look up your specific soil using the USDA/NRCS Web Soil Survey at websoilsurvey.nrcs.usda.gov, which gives you drainage class, shrink-swell potential, and frost depth data for free. Dig a small test hole 12 inches deep and see whether water drains away within an hour or sits there. That tells you everything you need to know practically.
Note sun, access, and setbacks
Observe the area at different times of day and note when it gets full sun, partial shade, or deep shade. This matters for plant choices, whether you need an umbrella or pergola, and even material selection (dark pavers in full sun become uncomfortably hot). Check your local zoning for setback requirements before you build, because even a patio slab can require a minimum distance from property lines and fences in many municipalities. Also locate any easements on your property survey.
Site assessment checklist
- Measure and record length, width, and area (in square feet)
- Draw a scaled sketch showing doors, steps, and fixed features
- Measure slope in inches per foot in both directions
- Note where water currently flows or collects after rain
- Identify soil type (do a 12-inch test hole and drainage check)
- Mark sun/shade patterns morning, midday, and afternoon
- Locate overhead obstructions (tree canopies, gutters, wires)
- Call 811 at least 48 business hours before any digging to have utilities marked (it is free)
- Check local setback and permit requirements at your planning department
- Note property lines, easements, and any existing drainage infrastructure
Decide what the patio needs to do
Before you choose a surface material or layout, get specific about how you will actually use the space. A 10x10 ft patio used primarily for morning coffee requires completely different furniture, flow, and features than the same footprint used for weekend grilling with four adults. Trying to do everything in a small space without a clear priority usually results in a space that does nothing well.
Single-use vs. multi-use zones
Single-use layouts are simpler and easier to execute. A bistro setup for two, a compact lounge corner, or a dedicated grill station each require only one furniture grouping and one clear zone. Multi-use layouts are possible in small spaces but require deliberate planning. The most reliable approach is to define one primary zone (usually seating or dining) and one secondary zone (often a grill station or planting corner), keep them visually separated with a change in surface material or a low planter row, and make sure there is at least 36 inches of clear walking path between zones.
How much space do common setups actually need
These are realistic minimums, not ideal dimensions. Work from these numbers when sizing your patio or deciding what furniture will actually fit.
| Use Case | Minimum Footprint | Notes |
|---|---|---|
| Bistro table for 2 | 6 x 6 ft (36 sq ft) | Chairs pulled out need ~18" clearance each side |
| 2-seat dining with circulation path | 6 x 8 ft (48 sq ft) | Allows one person to pass behind a seated person |
| Small lounge for 2-3 (love seat + chair) | 8 x 8 ft (64 sq ft) | Coffee table centered, ~18" clearance around seating |
| 4-seat dining table with chairs | 8 x 10 ft (80 sq ft) | 36" table + chairs pulled out + 24" walkway behind |
| 4-seat dining + small grill zone | 10 x 12 ft (120 sq ft) | Separates cooking heat from dining area |
| Lounge + dining combo | 12 x 16 ft (192 sq ft) | Still a small patio; two distinct zones possible |
If your patio is smaller than 6x8 ft, go vertical. Wall-mounted folding tables, stacking chairs, and tall planters on brackets give you functionality without permanently occupying floor area.
Which patio type should you choose
There are five realistic options for a small DIY patio: interlocking pavers, a poured concrete slab, compacted gravel, modular/composite decking tiles, and a raised patio (which is usually pavers or concrete on a built-up or retained platform). Each suits different budgets, skill levels, site conditions, and goals. Here is an honest breakdown.
| Type | Best For | Main Pros | Main Cons | DIY Skill Level |
|---|---|---|---|---|
| Interlocking pavers | Most residential patios; good drainage, long life | Repairable, permeable options available, attractive, long lifespan (25+ years) | Higher upfront cost, more labor than gravel, requires accurate base prep | Beginner to intermediate |
| Poured concrete slab | Budget builds, clean modern look | Low material cost, monolithic surface, easy to furnish | Cracks over time, hard to repair individual sections, needs control joints | Intermediate (or hire concrete pour) |
| Compacted gravel | Budget projects, drainage priority, informal look | Lowest cost, excellent drainage, fast to install, permeable | Shifts underfoot, needs containment edging, not ideal for furniture without stepping stones | Beginner |
| Modular/composite deck tiles | Existing slabs that need a facelift, rental-friendly installs | Fast install (no excavation on a slab), removable, clean finish | Requires flat base, gaps can collect debris, limited in size variety | Beginner |
| Raised patio | Sloped sites, level transitions between grade changes | Solves significant slope problems, defines the space well | Most complex to build, may need permits or engineering review for taller walls | Intermediate to advanced |
When to pick each one
Go with interlocking pavers if you want the best long-term result and you are willing to spend time on proper base prep. They are repairable (one sunken or cracked paver can be pulled and reset without touching the rest), they handle freeze-thaw cycles better than concrete because the joints can flex, and permeable paver systems count as stormwater management in many municipalities. Fine Homebuilding: Concrete vs. paver patio guide explains that interlocking pavers are repairable, handle freeze–thaw cycles better than monolithic concrete, and can be installed in permeable systems that assist stormwater management. Go with a concrete slab if material cost is the primary constraint and you are comfortable managing the one significant weakness: cracking. Cut control joints per ACI guidance, which for a standard 4-inch slab means spacing joints approximately every 8 to 12 feet in both directions and cutting them to at least 1 inch deep. Gravel is the right call when drainage is the top priority or when the budget is very tight. Use it with stepping stones set into the gravel surface if you need stable spots for furniture legs. Modular deck tiles are ideal when you already have an existing concrete slab that is just ugly or damaged cosmetically, since they install directly on the existing surface in an afternoon with no excavation. A raised patio makes sense when your yard slopes significantly and leveling it with fill would be impractical, but build it with the understanding that retaining walls taller than 2 to 3 feet usually require a permit and possibly an engineer's sign-off depending on your jurisdiction.
Material and cost comparison
These ranges reflect typical U.S. DIY costs as of mid-2026 for materials only (not labor, since you are doing the work). Regional prices vary, and aggregate/concrete prices have shifted with fuel costs, so treat these as planning estimates and get local quotes for anything over $200. For another relevant comparison, see how to landscape a small patio.
| Material | Typical DIY Cost (materials) | Lifespan | Maintenance | Repairability |
|---|---|---|---|---|
| Concrete pavers (standard) | $3–$6 per sq ft | 25–50 years | Low: sweep, re-sand joints every few years, reseal optional | Excellent: individual pavers replaceable |
| Natural stone pavers (flagstone, bluestone) | $8–$20 per sq ft | 50+ years | Low to medium: may need re-leveling over time | Good: individual stones replaceable |
| Poured concrete slab (4" thickness) | $2–$4 per sq ft (materials) | 20–30 years | Low: seal every 2–3 years, patch cracks as needed | Poor: patching is visible, resurfacing possible |
| Pea gravel / decorative gravel | $1–$2 per sq ft (aggregate only) | Indefinite (replenish as needed) | Medium: rake and top up annually, edging upkeep | N/A: add material as it disperses |
| Modular composite deck tiles | $4–$10 per sq ft | 15–25 years (composite) | Low: rinse, check for loose tiles annually | Good: individual tiles replaceable |
| Pressure-treated wood decking (raised) | $3–$7 per sq ft (lumber) | 15–20 years with maintenance | Medium: seal or stain every 2–3 years, check fasteners | Fair: individual boards replaceable |
Do not forget to budget for base materials (crushed stone runs $30 to $55 per ton, and a 100 sq ft patio with a 4-inch base needs roughly 1.5 tons), geotextile fabric ($15 to $30 for a small roll), bedding sand, polymeric joint sand, and edge restraints. Those items can easily add $1 to $2 per square foot to your total.
Tools, materials, and safety checklist
You do not need to own every tool on this list. Most plate compactors and laser levels are available at equipment rental yards for $50 to $100 per day, which is far cheaper than buying them for a one-time project.
Essential DIY tools
- Tape measure (25 ft minimum) and/or laser distance measurer
- String line and line level (for establishing grade and layout)
- Stakes (wood or metal) for batter boards and layout lines
- Shovel and square-point spade for excavation
- Wheelbarrow for moving aggregate, sand, and debris
- Hand tamper for small areas; plate compactor rental for anything over 50 sq ft
- Rubber mallet for seating pavers
- Screed board (a straight 2x4 works fine) for leveling sand
- Level (4 ft is most useful)
- Circular saw with diamond blade (for cutting pavers) or angle grinder with masonry disc
- Broom and push broom for sweeping joint sand
- Safety glasses, work gloves, knee pads, and dust mask or N95 respirator (cutting pavers and concrete generate fine silica dust)
Optional but genuinely useful
- Rotary laser level (rental, ~$40/day): much faster for establishing consistent grade across the whole site
- Paver splitter/guillotine (rental, ~$50/day): cleaner cuts than a saw, no dust, faster for straight cuts
- Sod cutter (rental, ~$60/day): saves hours of hand stripping on grass areas over 100 sq ft
- Chalk line for marking cut lines on pavers or concrete
PPE and safety reminders
- Always call 811 before digging, even shallow excavation of 4–6 inches can hit a shallow utility line
- Wear ANSI-rated safety glasses whenever cutting or chipping stone or concrete
- Use an N95 or P100 respirator when cutting pavers, concrete, or mixing dry cement products (silica dust causes serious lung disease)
- Wear steel-toed or composite-toed boots: pavers and concrete blocks are heavy and drop unexpectedly
- Keep a first aid kit on site and have a charged phone accessible
- Never operate a plate compactor over underground utilities that have been marked
Prepare the site step by step
Good site prep is where patio projects succeed or fail. A surface that looks fine in October can heave, sink, or crack by spring if the base is not right. Take your time here. Rushing excavation and compaction causes 80% of the long-term problems I see in DIY patios.
- Call 811 at least 48 business hours before you dig. Wait for utilities to be marked before doing anything else.
- Clear the area: remove furniture, containers, and any surface features. If there is turf, strip it with a spade or rent a sod cutter. Remove organic debris, roots, and any existing loose fill that was never compacted.
- Mark the perimeter using stakes and string lines at the exact finished patio corners. Use the 3-4-5 triangle method to confirm square corners (measure 3 ft on one string, 4 ft on the adjacent string; the diagonal between those two points should be exactly 5 ft if the corner is square).
- Establish your finished grade: set your string lines at the desired finished surface height (accounting for paver/surface thickness plus base depth) and slope them at 1/4 inch per foot away from the building. This string becomes your reference for all excavation and base work.
- Excavate to the correct depth: for pavers, you need depth for the paver thickness (typically 2-3/8 inches for standard 60 mm pavers), plus 1 inch of bedding sand, plus 4 to 6 inches of compacted aggregate base. Total excavation is commonly 8 to 10 inches below finished surface. Add 1 to 2 extra inches if you have clay or soft soil. For a 4-inch concrete slab, excavate 8 to 10 inches below finished surface to allow for the 4 to 6-inch aggregate base.
- Remove all loose and organic topsoil from the excavated area. Topsoil compresses under load and causes settlement. You want to be down into subsoil (usually a different color and texture).
- Check the subgrade slope with your string line reference. The bottom of the excavation should slope at the same 1/4 inch per foot as your finished surface. Adjust by scraping high spots or adding subbase material to low spots, then hand tamp.
- Address drainage if needed: if water currently drains toward the house or pools in the excavated area, this is the time to install a simple French drain (perforated pipe in gravel-filled trench) redirecting water away from the foundation before you build on top of it.
Base layers, foundations, and edging
The base is the invisible part of a patio that makes or breaks everything above it. Getting this right matters more than the choice of surface material.
Geotextile fabric: when to use it
Lay a non-woven geotextile fabric directly on the prepared subgrade before you add aggregate. Its job is to prevent fine soil particles from migrating up into your crushed stone base (which would eventually cause settling and surface failure). Use it on any soil that is soft, silty, or clayey. On firm, sandy, well-drained subgrade it is optional but never harmful. Overlap seams by at least 12 inches and fold fabric up the sides of the excavation to keep it in place while you add base material.
Aggregate base depth and compaction
Use clean crushed stone, sometimes sold as 3/4-inch crusher run, dense grade aggregate (DGA), or road base depending on your region. The ICPI (Interlocking Concrete Pavement Institute) recommends 4 to 6 inches compacted depth for pedestrian-use patios. On clay or high-shrink soil, use 6 inches. Add the aggregate in lifts of no more than 3 to 4 inches and compact each lift with a plate compactor before adding the next. Compact in overlapping passes, going over each strip twice. Proper compaction is the single most important factor in base performance. Compaction that leaves footprints in the aggregate is not done. The surface should feel like a road when you walk on it.
Bedding layer for pavers
For interlocking pavers, add 1 inch of coarse concrete sand (ASTM C33 spec) on top of the compacted aggregate base. This is the bedding layer. Screed it flat and to your desired slope using a straight 2x4 dragged across two screed rails (lengths of conduit or pipe work well) set to the finished surface height minus paver thickness. Do not compact or walk on screeded sand before laying pavers. Lay pavers on the screeded sand, then compact the whole surface with a plate compactor (use a rubber pad between the compactor plate and the pavers to prevent surface scarring). Sweep polymeric sand into the joints, compact again, mist with water to activate the polymeric binder.
Edge restraints and why they matter
Without edge restraints, pavers migrate outward over time under foot traffic and freeze-thaw pressure, opening joints and creating trip hazards. Install a rigid plastic or aluminum paver edge restraint on all exposed patio edges before you compact the final surface. Spike or stake it through the holes provided every 12 inches. For gravel patios, use benderboard, steel edging, or a buried concrete border to contain the aggregate. Edge restraints are inexpensive (usually $0.50 to $1.50 per linear foot) and eliminating them to save money always costs more in repairs later.
When footings or beams replace a base layer
A standard aggregate base works for ground-level paver and concrete patios. You switch to footings and framing (beams, joists, posts) only when building a raised deck or elevated patio structure. Post footings must extend below the local frost depth, which ranges from a few inches in the South to 48 inches or more in northern climates. Check your local building department for the required frost depth before digging post holes. Short raised patios using interlocking retaining wall blocks (up to about 3 feet tall in most jurisdictions) typically use a compacted gravel pad and batter (backward lean) rather than formal footings, but check local code.
Quick fixes and low-cost makeovers for existing patios
If you already have a concrete slab or existing paver surface that is sound but ugly, worn, or just not working aesthetically, you have several options that cost far less and take far less time than a full rebuild. These tactics work well together and can transform a tired patio in a weekend.
- Concrete resurfacer: products like Quikrete Concrete Resurfacer bond to existing slabs and add a fresh 1/4-inch coating for $0.50 to $1.50 per sq ft in materials. This hides surface crazing, old stains, and minor spalling. The slab must be structurally sound (no major cracks wider than 1/4 inch or sections that flex underfoot).
- Concrete paint/stain: a solid-color patio paint (look for products rated for masonry/concrete with built-in grip additive) costs $30 to $60 per gallon covering 200 to 400 sq ft. Acid stain gives a more natural mottled look for a similar price. Both require a clean, degreased, etched surface to bond properly.
- Modular deck tiles: laid directly over an existing slab, these give a completely different look in an afternoon with no tools beyond a utility knife for trimming edge tiles.
- Pressure-wash and reseal: a simple pressure wash (1,500 to 2,000 PSI on concrete, lower on pavers) followed by a penetrating concrete or paver sealer ($25 to $50 per gallon) can make a dull surface look like new for a season.
- Re-sand paver joints: if existing pavers are stable but joints are empty or growing weeds, sweep fresh polymeric sand into joints, compact lightly, and mist. This costs under $30 for most small patios and significantly extends paver life and weed resistance.
Styling a small patio: design principles that actually work
Small-space design is mostly about restraint and scale. The instinct to fill every corner with something is exactly what makes small patios feel cramped. The principle to follow is: choose fewer, better things at the right scale rather than more things that are slightly too big.
Furniture scale and layout
Standard outdoor dining sets are designed for patios of 12x16 ft or larger. On a small patio, look specifically for bistro tables (usually 24 to 28 inches in diameter), apartment-scale sofas (under 60 inches wide), and armless or sling chairs that tuck under tables when not in use. Folding and stackable furniture is a legitimate design tool, not a compromise. A folding table stored flat against the fence occupies zero floor area when you do not need it. Keep one primary seating group as your anchor and resist adding a second until you have lived in the space for a season.
Go vertical with planting and storage
Wall-mounted planters, pocket planters hung on fence panels, and tall narrow containers draw the eye upward and add greenery without eating into floor space. A trellis or lattice panel attached to an existing fence can support climbing plants like clematis or jasmine and adds privacy at the same time. Raised planter beds built along the edge of the patio, typically 12 to 18 inches wide and 12 to 24 inches tall, work as both a garden and a natural visual boundary for the space.
Lighting, color, and surface choices
String lights strung at 7 to 8 feet overhead define the patio space visually at night and make a small area feel intentional and enclosed in a good way. Solar stake lights along a border or solar wall sconces on a fence work without running electrical. For surface color: lighter pavers or concrete reflect heat in full-sun situations and make a space feel larger; darker tones absorb heat and create a more intimate feel but can become uncomfortable in direct afternoon sun. Limit your surface and furniture palette to two or three colors to avoid a cluttered look.
Adding compact features: fire pits, planters, and short walls
Small patios can absolutely have features beyond furniture. The constraint is choosing compact versions and integrating them so they do not block circulation or dominate the space.
Compact fire pits
A tabletop propane fire bowl (12 to 18 inches diameter) or a small in-ground fire pit ring (24 to 30 inches inside diameter) works well on a small patio. For a DIY in-ground ring, excavate an 8-inch deep pit, line it with compacted gravel for drainage, build the ring with fire-rated retaining wall blocks or firebrick (standard landscaping concrete blocks crack under heat cycles), and keep a minimum 10-foot clearance from any structure or overhead obstruction. Check local ordinances: many municipalities restrict open burning or require gas-only fire features near structures. A tabletop propane unit sidesteps most of these restrictions.
Raised planter beds and retaining walls
A raised planter bed along one edge of a small patio is one of the best multi-tasking features you can add: it brings planting to a comfortable height, creates a visual edge to the patio, can double as informal seating with a wide cap, and if built tall enough, adds privacy. Build with retaining wall block (concrete), brick, or rot-resistant wood (cedar, black locust, or pressure-treated lumber rated for ground contact). For a planter under about 24 inches tall: dig a level base trench 4 to 6 inches deep, fill with compacted gravel, lay the first course below grade, and backfill with good quality potting mix or amended garden soil. Provide drainage by leaving occasional gaps in the lowest course between blocks, or by drilling 1/2-inch holes in wood walls every 24 inches.
Privacy screens
A freestanding privacy screen (a wood frame with lattice or slatted panels, typically 5 to 6 feet tall) can be anchored into the patio with surface-mount post bases, which avoids digging through your finished surface. Alternatively, a row of tall planters or a containerized bamboo screen provides living privacy with no construction at all.
Permits, inspections, and rules worth knowing
A simple ground-level patio at grade typically does not require a permit in most U.S. jurisdictions, but rules vary significantly. Check with your local building or planning department before starting on anything that involves: a raised structure (deck, elevated platform, retaining wall over 3 feet in most areas), electrical work (running a permanent outdoor circuit for lighting or outlets), natural gas for a fire feature, or impervious surface area in a municipality with stormwater ordinances. Many localities limit the percentage of a property that can be covered with impervious surfaces. Permeable pavers and porous gravel surfaces are often exempt from these limits, which is another practical reason to consider them.
Troubleshooting common small patio problems
Even well-built patios develop issues over time, especially in climates with hard freezes or poor drainage. Most common problems are fixable without a full rebuild if you catch them early.
| Problem | Likely Cause | DIY Fix |
|---|---|---|
| Sunken or rocking pavers | Inadequate base compaction or erosion of bedding sand | Pull affected pavers, add and compact base material if needed, re-screed bedding sand, relay pavers, re-sand joints |
| Pooling water on surface | Insufficient slope or a low spot from settlement | Re-set affected area to restore 1/4"/ft slope; add a channel drain at low point if settlement is widespread |
| Frost heave lifting pavers or concrete | Water in base freezing and expanding under surface | For pavers: reset after freeze cycle, improve drainage in base. For concrete: fill and seal cracks before next freeze season |
| Cracks in concrete slab | Missing or improperly spaced control joints; shrinkage; heave | Route and fill hairline cracks with flexible polyurethane sealant; saw additional control joints near problem areas to redirect future cracking |
| Weeds in paver joints | Depleted joint sand; seeds germinating in organic debris in joints | Remove weeds (heat gun works well without chemicals), sweep fresh polymeric sand into joints, compact and mist |
| Gravel migrating outside patio border | Missing or failed edge restraint | Install or replace rigid edge restraint, rake aggregate back inside border, top up with fresh stone |
| Efflorescence (white mineral staining on pavers or concrete) | Soluble calcium migrating to surface with water | Scrub with diluted muriatic acid solution per manufacturer guidance; improve drainage to reduce water migration |
Maintenance: what to do and when
Small patios are low maintenance, not no maintenance. A simple annual routine keeps problems from compounding.
- Spring: inspect for frost heave or settlement, reset any shifted pavers, check edge restraints for movement, re-sand joints if empty, clean surface with pressure washer or stiff broom
- Spring (concrete): inspect cracks, fill any new hairline cracks with flexible sealant before they accept water and widen
- Spring/Summer: check drainage after the first heavy rain and address any new pooling areas immediately
- Summer: rinse composite deck tiles and check for any loose snap-in connectors; inspect wood surfaces for checking or raised grain and re-sand if needed
- Fall: sweep all debris off surface before winter (organic debris traps moisture and stains), apply penetrating sealer to pavers or concrete if due (typically every 2 to 3 years), store fabric cushions and seat pads inside
- Ongoing: pull or treat weeds in paver joints before they root deeply into the base; restock polymeric joint sand as needed
Your next steps
Start with the site assessment checklist above before you do anything else. Measure the area, check the slope, dig a test hole, and sketch the layout with your intended use in mind. From there, the surface type and layout template almost choose themselves based on your constraints. If you are building from scratch, the detailed construction process for a paver or concrete patio is covered in depth in the guides on how to build a small patio and how to make a small patio, including specific step-by-step paver laying and concrete pouring instructions. If you have an existing surface that needs work, the guide on how to fix up a small patio covers repair and resurfacing in detail. For detailed repair and resurfacing steps, see the guide on how to fix up a small patio. See our step-by-step walkthrough on how to transform a small patio for practical before-and-after examples and a project checklist. If you prefer a step-by-step build, see our guide on how to make a small patio for detailed instructions. And if you want to go deep on planting, containers, and finished styling, the guides on how to landscape a small patio and how to style a small patio cover those topics thoroughly. For practical tips on finishing touches, see the guide on how to style a small patio. For quick, practical aesthetic tips, see our guide on how to make a small patio look nice. Pick the starting point that matches where you are and work the process in order. The biggest mistake is skipping the ground prep because you are eager to see results. Do the base right and everything else is straightforward.
FAQ
How do I assess my small patio site before planning a project?
Measure and document: use a tape measure or laser measurer to record length, width and doorway offsets; sketch to scale (example: 1/4" = 1'). Note fixed items (doors, steps, utilities), trees/roots, slope direction, sun/shade, property lines and easements. Measure slope: run a taut string with a line level or use a laser level and record vertical drop over a measured horizontal run; convert to % or inches/ft (recommended minimum slope away from buildings is 1/4" per ft). Check soil/drainage: review local soil maps (NRCS/SSURGO) for clay or high-water table. Call 811 before any digging to locate underground utilities. Record goals: write a short program (bistro two-seat, lounge for 2–3, four-seat dining). Translate program into minimum zone sizes (examples: bistro 6×6 ft, 2-seat with circulation 6×8 ft, lounge 8×8–8×10 ft, 4-seat dining 8×10–10×10 ft).
Which surface material should I choose for a small patio: pavers, concrete slab, gravel, modular decking, or raised patio?
Compare by needs: Interlocking pavers — durable, repairable, available permeable options; need 4–6" compacted base + 1" bedding sand; good for patterning and small spaces. Concrete slab — lowest long-term maintenance for smooth surfaces, quick install, prone to cracking; typical 4" slab on 4–6" base; add control joints and reinforcement as needed. Gravel — lowest installed cost, highly permeable, shifts underfoot, needs edging and geotextile on soft soils; typical: 3–4" compacted base + 2–3" finishing gravel. Modular/composite decking — quick, attractive raised surface, needs framing/footings (or pedestal system) and clearance for drainage; good over uneven ground or to match house deck height. Raised patio/retaining walls — solves steep sites and creates usable flat area but can trigger engineering and permits when walls or fills exceed local thresholds. Choose pavers for repairability and look, concrete for simplicity and low cost, gravel for permeability/budget, modular decking for elevation or quick install, raised structures when slope makes at-grade work impractical.
What are the step-by-step instructions to build a paver patio?
Checklist and steps: 1) Plan and mark layout; call 811. 2) Excavate to accommodate 4–6" compacted aggregate + 1" bedding sand + paver thickness (typically 2-3/8" for pedestrian). 3) Install and compact subgrade; lay geotextile on soft soils. 4) Spread and compact crushed stone base in 2–3 lifts to final depth; use plate compactor. 5) Screed 1" bedding sand (ASTM C33) over base. 6) Lay pavers in chosen pattern with edge restraint in place (plastic/metal/curb). 7) Compact pavers with plate compactor covered by rubber mat. 8) Sweep joint sand or polymeric sand into joints; compact again. 9) Seal if desired. Tools/materials: tape/laser, shovel, plate compactor, rake, screed board, level, edge restraints, crushed stone, bedding sand, pavers, joint sand, rubber mat, gloves. Typical cost ranges (DIY, material-only, small patio 8×8–10×10): pavers $8–20/sq ft installed (materials portion lower ~$4–10/sq ft).
How do I pour a concrete patio slab for a small area?
Basic steps: 1) Plan, mark and call 811. 2) Excavate for 4" slab plus 4–6" compacted base (increase thickness to 5–6" for occasional vehicle loads). 3) Install compacted crushed stone base, add vapor/weed barrier if desired. 4) Set formwork, check slope (min 1/4"/ft away from building). 5) Place reinforcement (wire mesh, rebar or fibers) as needed. 6) Pour and screed concrete, float finish, and trowel for final texture. 7) Cut contraction joints to 1/4 slab thickness at recommended spacing (rule of thumb: spacing in feet ≈ 2–3× slab thickness in inches; do not exceed local guidance). 8) Cure per instructions (keep moist 3–7 days). Tools/materials: forms, concrete mix or ready-mix truck, tamper/plate compactor for base, screed, floats, saw for joints, broom (for non-slip finish). Typical cost (DIY small slab, material-only): concrete $4–8/sq ft; installed $6–12+/sq ft depending on finish.
How do I build a gravel patio that stays stable and looks neat?
Steps and tips: 1) Excavate organic topsoil to desired depth (allow for 3–4" compacted base + 2–3" top gravel). 2) Grade and compact subgrade; install geotextile fabric if soil is soft. 3) Lay and compact crushed stone base in lifts (3–4" total). 4) Install strong edging (metal, timber, concrete curbing) to contain gravel. 5) Spread and rake decorative washed gravel 2–3" deep. 6) Optional: add paver stepping pads or a flagstone perimeter for stability. Tools/materials: shovel, rake, plate compactor, geotextile, crushed stone, decorative gravel, edging. Gravel patios are very permeable and budget-friendly (materials often $1–4/sq ft plus edging). Maintain by topping with new gravel and raking annually.
What about modular decking or deck tiles for small patios?
When to choose: good for uneven ground, quick install, above-grade appearance, and cooler underfoot than concrete. Options: interlocking deck tiles (wood or composite) that sit on a compacted base or pedestal systems that create a raised platform. Steps: 1) Level base and install weed fabric. 2) Place a compacted stone pad or adjustable pedestals per manufacturer spacing. 3) Lay framing or interlocking tile and fasten per instructions. Allow clearance for drainage and air circulation under decking. Tools/materials: level, compacted base, pedestals or subframe, deck tiles or boards, saw. Costs vary widely: interlocking tiles material $8–15+/sq ft; composite decking with framing higher. Check manufacturer for load and clearance requirements.