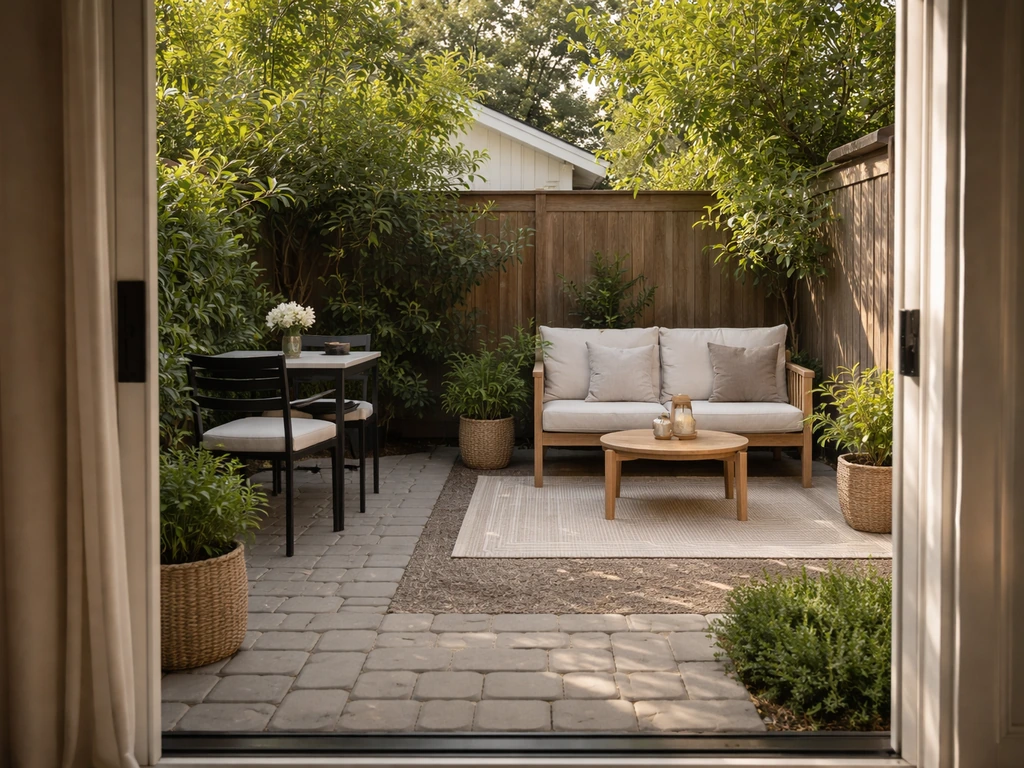
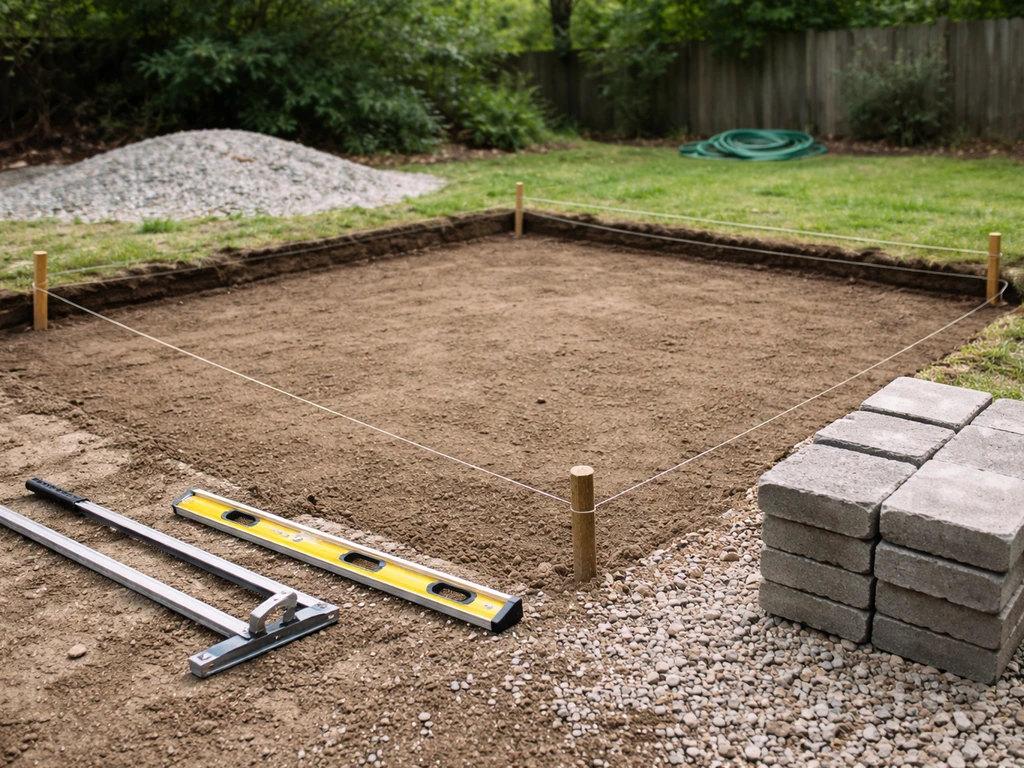
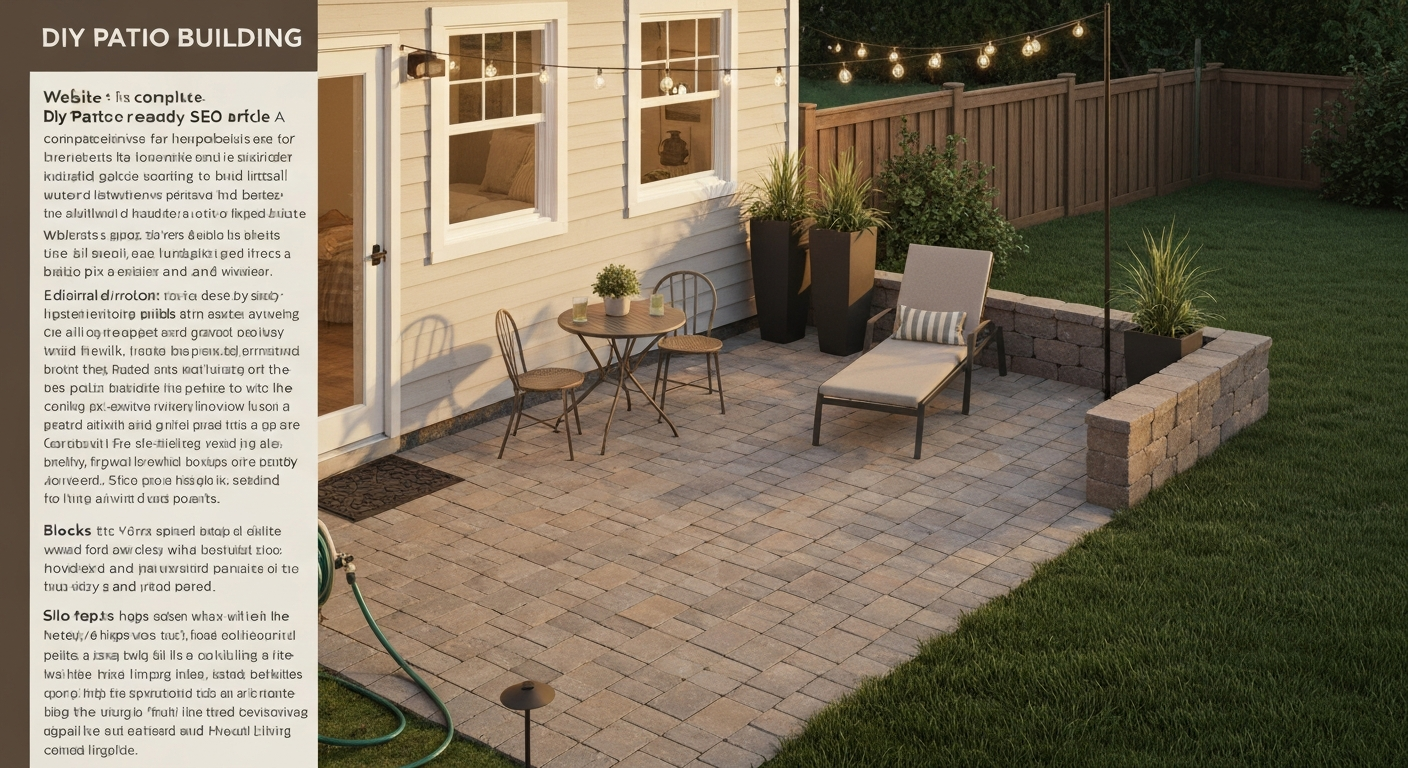
Organizing a patio comes down to three things: knowing how you actually want to use the space, laying it out so traffic flows naturally, and choosing furniture and storage that hold up outdoors without turning maintenance into a weekend job. Whether you're working with a generous 16x20 ft slab or a tight 8x10 ft concrete pad, the same process applies: measure first, zone by function, pick durable materials, and layer in storage and lighting at the end. This guide walks you through every step, including layout templates, small-patio workarounds, DIY storage builds, and a simple budget checklist you can take shopping.
How to Organize a Patio: DIY Planning, Layouts & Storage

Nolan Carver
4 Aug 2026
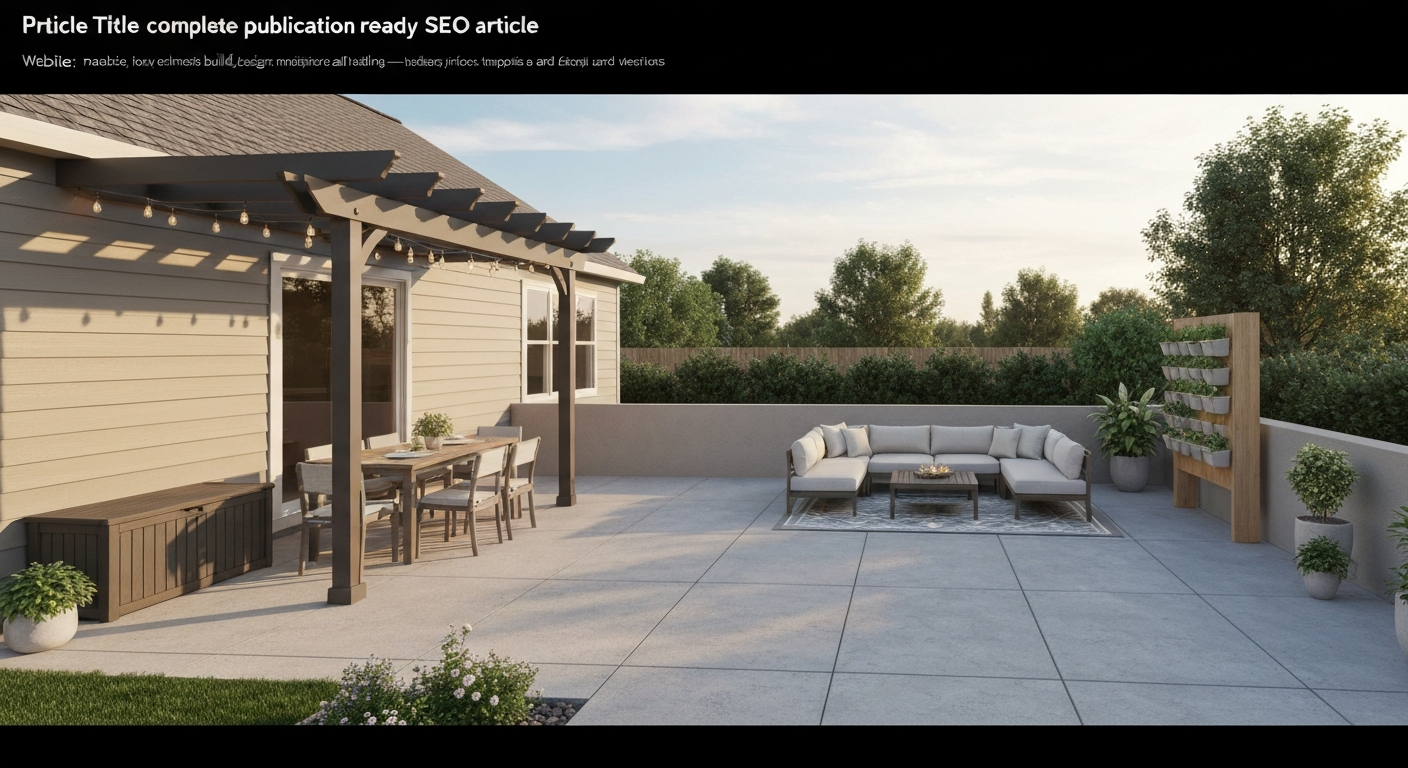
What this guide covers and who it's for
If you've got a patio that feels cluttered, awkward, or just underused, you're in the right place. This guide is written for DIYers at every skill level, from someone who just poured their first concrete slab and wants to furnish it right, to an experienced builder who wants a repeatable planning framework. I'm going to cover goal-setting, measuring and zoning, layout strategies (including small patios), furniture and material picks, storage and vertical solutions, lighting and planting, staging for curb appeal, seasonal transitions, and a budget-friendly shopping checklist. No contractor required.
Define how you want to use the space first
Before you move a single piece of furniture, spend ten minutes writing down how you actually plan to use the patio. This sounds obvious, but skipping it is why most patios end up feeling random. A patio optimized for weekend dinner parties needs very different zoning than one designed for a quiet morning coffee spot or a kids' play area.
Here are the five most common use cases and what each one demands from a layout:
- Entertaining and dining: Needs a dedicated dining zone (minimum 12x12 ft for a four-person table with pull-out clearance), traffic lanes of at least 42-48 in. wide, and ideally a secondary lounge area.
- Relaxing and lounging: Prioritize seating clusters, shade coverage, and a side table within reach of every seat. A 10x10 ft zone works well for two people.
- Outdoor cooking and grilling: Requires a non-combustible surface zone for the grill, 3 ft of clear space on each side, and a prep surface nearby. Keep this away from the house overhang if possible.
- Kids' play zone: Needs open floor space, ideally on a softer surface or away from hard paver edges. Define the boundary clearly so it doesn't bleed into the dining area.
- Storage and utility: Even a small patio benefits from a defined storage corner — garden tools, cushions, hose storage. Assign this zone before you furnish the rest.
Most patios need to handle more than one use case. That's fine, the key is to rank them. Pick your top two priorities and design the layout around those first. Everything else fills in around the edges.
Quick planning checklist before you move anything
This checklist applies whether you're organizing a brand-new patio or reorganizing one that's been a catch-all for three seasons. Run through it before you buy furniture or start any DIY storage builds.
- Measure the patio: overall dimensions, plus any obstacles (doors, windows, downspouts, HVAC units, gas lines).
- Check the slope: use a 4 ft level and a tape measure. Your patio should slope at least 1/8 in. per foot (about 1%) away from the house — ideally 1/4 in. per foot (2%). If it doesn't, water is pooling somewhere, and that affects furniture placement.
- Identify drainage outlets: where does rainwater go? A patio that drains toward the house foundation needs fixing before organizing, not after.
- Check the surface condition: loose or sunken pavers, cracked concrete, or soft spots need to be addressed. Rocking pavers or a heaved slab will shift furniture and create trip hazards.
- Note sun and shade patterns: walk the patio at morning, midday, and late afternoon. Mark where shade falls at each time. This determines where the seating and dining zones go.
- Locate your outdoor outlets: are they GFCI-protected? Outdoor receptacles must have listed weatherproof in-use covers (NEC 406.9(B)(1)) and GFCI protection. If you're not sure, have them checked before plugging in lighting or outdoor appliances.
- Check permit requirements: if your organizing project involves adding a pergola, shade structure, or any electrical work, check with your local building department. Most jurisdictions don't require permits for furniture arrangement or freestanding items, but attached patio covers and electrical are a different story — Los Angeles, for example, classifies attached patio covers as building additions requiring full permit review.
- Set a realistic timeline: a simple reorganize takes a weekend. Adding storage structures or a pergola adds two to four weekends depending on skill level.
- Set a budget ceiling before you shop: decide on a hard cap for furniture, storage, lighting, and plants combined.
Measuring and zoning your patio
Accurate measurements are the difference between a layout that works and one where every piece of furniture is 6 inches too big. Here's how I approach it every time.
Step-by-step measurement process
- Measure the full perimeter of the patio in feet and inches. Write down length and width.
- Measure and mark any fixed obstacles: doors and their swing arc, windows, steps, downspouts, exterior faucets, light fixtures.
- Measure setbacks: note how far the patio is from fences, walls, or garden beds. These create natural edges for zones.
- Sketch it on paper or use a free app like RoomSketcher or Magicplan at 1/4 in. = 1 ft scale (1/4 in. on paper equals 1 ft in real life). This scale makes a 12x16 ft patio fit on a standard sheet of graph paper.
- Mark your primary entry and exit points. These define where traffic lanes must stay clear.
- Identify the anchor wall or view. Most patios have one dominant wall (usually the house wall) and one primary view direction. These anchor your layout.
How to zone using a simple grid
Once your measurements are on paper, divide the space into zones using the grid. Each zone should be large enough to function independently. Use these minimum sizes as your guide: a bistro zone for two people needs at least 6x6 to 8x8 ft; a four-person dining area needs at least 10x10 ft; a comfortable dining set with circulation needs 12x12 ft minimum. Common DIY small‑patio dimension rules of thumb: a 6×6–8×8 ft bistro area fits two people; a 10×10 ft (≈3×3 m) patio accommodates a table for four comfortably; and a 12×12 ft (≈3.6×3.6 m) area is the practical minimum for a dining set with circulation, allow at least 36 in (91 cm) clearance behind chairs for pull‑out and 42–48 in for comfortable circulation. Allow 36 in. of clearance behind every chair for pull-out, and keep main traffic lanes at 42-48 in. wide.
Draw your zones as labeled rectangles on the sketch. Don't worry about exact furniture shapes yet, just confirm each zone has enough square footage for its intended use. If the zones overlap badly or traffic lanes get choked, this is the moment to catch it, not after you've bought a sectional sofa.
Layout strategies and templates that actually work
There are four layout patterns that solve most residential patio situations. You don't have to reinvent the wheel, pick the one that matches your use case and adapt the dimensions to your space.
The dining-first layout
Place the dining table as the centerpiece, anchored against the house wall or under a pergola. Position the grill or prep station to one side, within 6-8 ft but not blocking the main traffic path from the house door. Leave all four sides of the dining table accessible with at least 36 in. of clearance. This layout works best on rectangular patios 12 ft wide or wider.
The lounge-first layout
Build the layout around a seating cluster: a sofa or loveseat facing two chairs across a coffee table. Define the zone with an outdoor rug (standard sizes: 8x10 ft or 9x12 ft). Keep this zone away from the main door traffic line. A side table within arm's reach of every seat is non-negotiable, people will put drinks on the floor otherwise, and they will get knocked over.
The mixed-use layout
This is the most common real-world scenario. Split the patio into two distinct halves: one for dining, one for lounging. Use an outdoor rug, a planter row, or a change in lighting to signal the zone boundary visually. The main traffic lane runs between the two zones, connecting the house door to the yard. On a 14x20 ft patio, a clean split gives you roughly a 10x14 ft dining zone and a 10x10 ft lounge zone with a 4 ft traffic corridor.
The traffic-zone-first layout
On patios with multiple entry points (house door, side gate, yard steps), draw the traffic lanes first and treat them as fixed. No furniture goes in a traffic lane. Zone everything else into the pockets between traffic paths. This layout prevents the frustrating arrangement where you're constantly squeezing past chairs to get to the door.
Small-patio layout solutions
A small patio is not a failed patio, it just needs different rules. I've organized patios as small as 8x8 ft and made them genuinely functional. The key is that every piece of furniture has to earn its place, and storage can't be an afterthought.
If you're working with a small space, the companion guide on how to organize a small patio goes deeper on micro-zoning tactics specifically for tight footprints. For step-by-step instructions on measuring, furniture selection, and compact layouts, see how to set up a small patio. For step-by-step setup guidance, see our full internal guide on how to set up a patio.
Space-saving furniture picks for small patios
- Bistro table and folding chairs: the classic small-patio setup. A 24-in. round table with two folding chairs takes up a 4x4 ft footprint when in use and almost nothing when folded against the wall.
- Stackable chairs: take up roughly 18x18 in. of floor space when stacked in a column of four. Far more space-efficient than stored-flat folding chairs.
- Bench seating along the wall: a 6 ft bench with under-seat storage boxes can seat three people and double as storage, replacing a chair plus a separate bin.
- Drop-leaf or fold-down wall table: mounts to the house wall and folds flat when not in use. Useful for a narrow patio that can't fit a freestanding table permanently.
- Nesting side tables: two or three tables that stack inside each other. Use all three for a party, nest them back down to one footprint on quiet evenings.
Micro-zoning a tight patio
On patios under 10x10 ft, don't try to create separate zones the way you would on a larger space. Instead, use a single anchor point, usually one small table and two chairs, and design the rest of the layout to support that anchor without competing with it. One vertical planter on each side of the anchor gives the visual sense of zone definition without eating floor space. Keep the traffic path to the door at least 30 in. wide, even on a very small patio.
Furniture and materials: what holds up and what doesn't
Outdoor furniture fails in two ways: the frame corrodes or warps, and the fabric degrades. Buying cheap on either front means replacing everything in two to three seasons. Here's how to evaluate your options honestly.
Frame materials compared
| Material | Pros | Cons | Best For |
|---|---|---|---|
| Powder-coated steel | Strong, affordable, widely available | Can rust if coating chips; needs touch-up | Covered patios, drier climates |
| Aluminum | Lightweight, rust-proof, low maintenance | Can dent; less sturdy than steel | Coastal or wet climates, small patios |
| Teak | Extremely durable, ages beautifully, pest-resistant | Expensive; needs annual oiling if you want to keep color | High-end setups, long-term investment |
| HDPE (recycled plastic lumber) | Won't rot, fade, or splinter; low maintenance | Heavier than aluminum; limited styles | Humid climates, covered or uncovered |
| Wrought iron | Very heavy and stable, classic look | Heavy to move; will rust without maintenance | Permanent setups, sheltered spots |
Fabric and cushion choices
Sunbrella-brand acrylic and similar solution-dyed acrylic fabrics are the standard for good reason: they resist UV fading, mold, and mildew, and they clean up with soap and water. Polyester cushion covers are cheaper but will fade and degrade noticeably within two seasons in direct sun. If budget is tight, buy polyester covers but store cushions inside or in a weatherproof bin when not in use, that single habit dramatically extends their life.
Anchoring furniture so it doesn't blow away
Wind is a real problem on exposed patios, and unsecured furniture is a safety hazard as much as an inconvenience. For lightweight aluminum or resin pieces, the simplest fix is furniture leg weights, sandbag-style weights that slip over chair and table legs, typically holding 10-20 lbs per leg. For larger items like umbrellas and cantilever shades, use a base weight of at least 50 lbs and anchor it to the patio surface if your area sees regular winds above 30 mph. Patio anchor kits use masonry anchors drilled into the slab with removable hardware so you can still move furniture when you want to. If you're on a paver patio, heavy concrete planter bases set adjacent to furniture serve double duty as ballast and decoration.
Storage, decluttering, and vertical solutions
Outdoor clutter accumulates fast: hose reels, gardening tools, bags of soil, sports gear, extra cushions, extension cords. The patios that stay organized are the ones where every category of item has a designated home. Here's how to build that system.
The four-category outdoor declutter rule
Before you buy any storage solution, sort everything currently on the patio into four piles: daily use (keep on the patio), seasonal use (store in an accessible bin or shed), rarely used (consider donating or relocating to the garage), and broken or expired (trash it now). Most people find that one-third to half of what's on their patio falls into the last two categories. Getting rid of it before you organize is the single most impactful step.
Low-profile and hidden storage options
- Deck box / storage bench: a 70-100 gallon weatherproof deck box doubles as bench seating and stores cushions, throw blankets, garden gloves, and small tools. Park it along the wall or fence line so it doesn't interrupt traffic flow.
- Under-bench storage: build or buy a simple slatted bench with a hinged lid and waterproof liner. A 6 ft bench with 12 in. of depth under the seat gives you about 4 cubic feet of usable storage.
- Hidden hose storage: wall-mounted hose pots or reels keep the hose off the floor and coiled neatly. Position the reel near the spigot, not across the patio.
- Built-in planter bench: if you're building new, a concrete block or paver planter bench along the edge of the patio integrates seating and planting without adding any freestanding furniture.
Vertical storage systems
Vertical space is almost always wasted on patios. A simple slatted wood or metal wall panel mounted to the house wall or a fence takes up zero floor space and can hold hooks for tools, a bike, a fold-down shelf, a potted plant wall, or a small pegboard-style organization system. Use stainless steel or galvanized hardware throughout, standard zinc hardware will rust within one season outdoors.
For a DIY vertical storage wall, cut three 8 ft cedar 1x6 boards into 6 ft lengths, space them 2 in. apart horizontally on a fence, and attach with exterior screws into the fence posts. Add S-hooks for tools and command-style outdoor hooks for lighter items. Total cost is typically under $40 in materials and takes about two hours. Cedar holds up outdoors with no finish needed for the first several years.
Organization rules for outdoor gear
- Store cushions and fabric items off the ground and covered — even a simple waterproof bag extends life significantly.
- Keep a dedicated hook or clip for the hose nozzle so it doesn't end up on the ground where it gets stepped on.
- Use labeled bins or totes for seasonal items (winter covers, holiday lights) so they're easy to find when you need them.
- Keep a small weatherproof caddy near the grill for tongs, brushes, and thermometers — this prevents the grill from becoming a catch-all surface.
- Do a quick 5-minute patio reset at the end of each week: put tools away, stack or fold unused chairs, clear flat surfaces.
Staging, lighting, and plants for curb appeal
A well-organized patio does most of the visual work on its own, but lighting and plants are the finishing layer that transforms a functional outdoor space into one that actually looks inviting. If you're staging the patio for real estate photos or a home sale, these details matter a lot. For a step-by-step approach to presenting your outdoor space, see our guide on how to stage a patio.
Lighting that works outdoors
String lights are the single highest-impact, lowest-cost lighting upgrade for any patio. Hang them at 8-10 ft above the surface in a grid or catenary (festoon) pattern between posts, a pergola, or eye hooks in the wall. Use outdoor-rated LED string lights (look for IP65 waterproof rating or higher) with E12 or E26 bulb bases. Solar-powered string lights are low-cost and zero-wiring, but they're dimmer than plug-in versions and depend on direct sun for a full charge.
For any permanently installed outdoor lighting or added receptacles, remember that NEC requires GFCI protection for outdoor outlets and weather-resistant devices with in-use covers. See NFPA 70 (NEC), GFCI protection for outdoor outlets (technical submittal and discussion) for details and consult NEC 210.8(F) and your AHJ about the version adopted locally NFPA 70 (NEC) — GFCI protection for outdoor outlets (technical submittal and discussion). If you're adding circuits, pull the permit and have the work inspected, it's not the place to skip steps.
Layer your lighting: overhead string lights for ambient, a table lantern or candle for the dining zone, and low-profile solar step lights along the edge of the patio for safety. Three layers of lighting at different heights make the space feel designed rather than functional-only.
Plants that earn their spot
Containers are the most flexible planting option for patios because they can be repositioned, replaced seasonally, and don't require any work to the patio surface itself. Use large pots (16 in. diameter and up) for impact, small pots scattered around look cluttered and die faster because they dry out quickly. A pair of matching large planters flanking the main door or the entry to the dining zone creates a clean, intentional look. Fill them with a tall thriller (ornamental grass, dwarf tree, or tall annual), a mid-height filler, and a trailing plant for the edge.
For staging and curb appeal specifically: one large statement planter at the patio entry, a potted herb or flower cluster on the dining table, and a small succulent or greenery arrangement on a side table or storage bench will read beautifully in photos. Keep everything deadheaded and watered the week before photos.
Seasonal transitions and maintenance
The difference between a patio that stays organized and one that becomes a seasonal disaster is about 90 minutes of transition work twice a year: once in late fall before the first freeze, and once in early spring before the first use. Build this into your calendar and it stops feeling like a big project.
Fall shutdown checklist
- Clean all furniture with mild soap and water. Let it dry completely before covering or storing.
- Store cushions and fabric items indoors or in a weatherproof deck box. Don't leave them under a tarp — moisture still gets in.
- Drain the hose and shut off the exterior spigot (turn off at the indoor valve if you're in a freeze-risk climate).
- Cover the grill with a fitted weatherproof cover.
- Move container plants indoors or to a sheltered location if they're not frost-hardy.
- Check paver joints and refill with polymeric sand if joints are eroding. This is also the time to reseat any rocking pavers.
- Inspect the patio surface slope and drainage. If water is pooling near the house, note it for repair in spring.
Spring startup checklist
- Sweep and power wash the patio surface. For concrete, check for cracks that appeared over winter — hairline cracks are common and usually cosmetic, but cracks wider than 1/4 in. or with vertical displacement should be evaluated.
- Check paver surface for frost heave (lifted or uneven pavers). In frost-susceptible climates, heaving is common when moisture gets under the base. Reset heaved pavers, add clean compacted base material if needed, and re-sand.
- Bring out furniture, inspect frames and hardware, and touch up any paint or powder-coat chips on steel pieces before rust sets in.
- Test outdoor lighting and GFCI outlets.
- Refresh container plants with new potting mix and seasonal plantings.
- Reassess the layout: did last year's arrangement actually work? Spring is the moment to move things around before the season locks in.
Troubleshooting common site problems
Even well-built patios develop problems over time. Here are the most common ones I see and the realistic DIY fixes.
Drainage and slope problems
If water pools on the patio surface, the first step is confirming the slope. Use a 4 ft level: hold one end at the house wall and measure the gap at the far end. A 1/4 in. per foot slope (the standard recommendation) means you should see about a 1 in. gap on a 4 ft level. Less than that and water will sit. For concrete patios, the repair options are: grinding down a crown that's trapping water (a wet grinder rental runs about $80/day), adding a linear drain channel at the low end, or applying a self-leveling overlay with the correct slope built in. For paver patios, you can relay the affected section with corrected bedding sand elevation, more work but very DIY-friendly.
Frost heave and uneven pavers
In freeze-thaw climates, pavers can lift significantly over winter if the base has moisture-retaining fines or if the subgrade wasn't properly compacted. The fix: pull the heaved pavers, excavate the base material, replace it with clean open-graded aggregate (3/4 in. clean stone compacted in 2-3 in. lifts to approximately 95% Proctor density), add a geotextile separator fabric between the subgrade and base, re-lay 1 in. of bedding sand, and reset the pavers. It's a proper repair, but it's very doable in a day for a small affected area.
Furniture on a sloped surface
On patios with noticeable slope, furniture rocks and slides. The most practical fix short of releveling the slab is furniture leveling feet: adjustable screw feet that replace standard chair and table leg caps. Most sets adjust from 1/4 in. to 1 in. of height difference and install with just a screwdriver. For heavier pieces like dining tables, add non-slip furniture pads under each foot, the combination of leveling feet and grip pads solves almost all rocking problems on slopes under 2%.
DIY storage build ideas
Buying outdoor storage is convenient but expensive. If you're comfortable with basic tools, building your own storage pieces can cut costs in half and gives you exact dimensions for your space.
Simple DIY storage bench (cedar, under $75)
Cut four 16x16 in. side panels from 3/4 in. cedar plywood, connect them with 2x4 framing at the corners, add a 1x6 slatted lid hinged at the back, and finish with deck screws and exterior wood glue. Line the inside with a 6 mil poly sheet stapled to the interior walls. Sand all edges, apply two coats of exterior deck stain, and you have a weather-resistant storage bench that fits any cushions up to 24 in. wide. Build time: one afternoon.
Wall-mounted tool and gear panel
Use pressure-treated or cedar 2x4s as horizontal rails mounted to the fence or house wall at 16 in. spacing. Add a 6 ft section of pegboard between the rails (use outdoor-rated pegboard or standard pegboard sealed with exterior primer and paint). Mount the whole assembly with 3 in. structural screws into fence posts or wall studs. Add galvanized pegboard hooks rated for outdoor use. This setup handles garden tools, small equipment, and utility items without touching the patio floor.
Budget and shopping checklist
Here's a realistic budget breakdown for three patio organization tiers: a bare-bones refresh, a solid mid-range setup, and a full featured build-out. These are 2026 ballpark figures for a 10x12 to 12x16 ft patio.
| Category | Budget Tier (under $300) | Mid-Range ($300-$800) | Full Build-Out ($800-$2,000+) |
|---|---|---|---|
| Seating | Foldable chairs + bistro table ($80-120) | 4-person aluminum dining set ($250-400) | Teak or HDPE dining set + lounge chairs ($600-1,200) |
| Storage | 1 deck box ($60-80) | Storage bench + wall hooks ($120-180) | Built-in bench + wall panel + DIY cedar box ($200-400) |
| Outdoor rug | 8x10 ft polypropylene rug ($40-60) | 9x12 ft solution-dyed flatweave ($80-150) | 9x12 ft premium indoor-outdoor rug ($150-300) |
| Lighting | Solar string lights ($20-40) | Plug-in LED string lights + lantern ($60-100) | Hardwired overhead lights + step lighting ($200-500+) |
| Plants & planters | 2-3 small pots + annuals ($20-40) | 2 large planters + mixed plantings ($80-150) | 4 large planters + built-in planter bench ($200-500) |
| Anchoring & hardware | Non-slip pads + furniture weights ($15-25) | Masonry anchor kit + weights ($40-70) | Full anchor system + wind-rated umbrella base ($80-150) |
A couple of honest notes on this budget: outdoor furniture pricing varies widely by retailer and season. End-of-summer sales (late August through September) typically offer 30-50% off on last season's stock, if you're planning ahead, that's the time to buy. For the DIY storage builds described above, add $40-75 per project in lumber and hardware.
Your action-ready step-by-step organizing plan
Pull this sequence together and you have a complete organizing project you can execute over two weekends. Week one is planning, prep, and surface work. Week two is layout, furnishing, and finishing.
- Weekend 1, Day 1: Clear the patio completely. Sort items into the four categories (daily use, seasonal, rarely used, trash). Remove everything in the last two categories.
- Weekend 1, Day 1: Inspect the surface. Fix any loose or heaved pavers. Check slope with a level. Clean the surface with a broom and hose or power washer.
- Weekend 1, Day 2: Measure the patio and sketch the grid at 1/4 in. scale. Identify your top two use cases and draw preliminary zones. Confirm zone sizes against the minimum dimensions above.
- Weekend 1, Day 2: Decide on your layout template (dining-first, lounge-first, mixed-use, or traffic-zone-first). Confirm traffic lane widths and door clearances on the sketch.
- Between weekends: Shop for any furniture, storage, or materials you need. Refer to the budget table above. Order online items that need lead time.
- Weekend 2, Day 1: Place furniture according to the layout sketch. Start with the largest anchor piece, then work outward. Lay the outdoor rug before placing seating.
- Weekend 2, Day 1: Install storage: mount wall panels, assemble or build storage bench, add hooks and vertical organizers.
- Weekend 2, Day 2: Hang lighting. Position and plant containers. Anchor any furniture that needs it.
- Weekend 2, Day 2: Do a final walkthrough using the checklist: traffic lanes clear? Drain slope confirmed? Furniture anchored? Outlets protected? Cushions stored when not in use? If everything checks out, you're done.
When to call a pro
Most of what's covered in this guide is solidly in DIY territory. But a few situations genuinely call for a licensed contractor. If your patio surface has significant structural cracks, major heave across a large area, or is draining toward your foundation despite slope corrections, have a concrete or paving contractor assess the base. If you want to add permanent electrical circuits, a licensed electrician is not optional, outdoor wiring mistakes are both dangerous and expensive to fix after the fact. And if you're adding any attached structure (pergola, shade cover, or enclosure), check your local permit requirements first: many jurisdictions require engineered drawings and inspections for attached structures, and skipping that step creates real problems at resale. For another relevant comparison, see how to organize a small patio.
FAQ
What are the first steps to plan and organize a DIY patio (planning checklist)?
Define goals & use cases (dining, lounging, grilling, storage, play, staging for sale). Record site facts: dimensions, slope, soil type, sun/shade, utilities, and drainage paths. Check local codes/permit triggers (attached covers, electrical, structural). Set a realistic budget and timeline. Choose surface type (pavers, concrete, gravel, decking) and furniture/storage needs. Sketch a bubble diagram (activity zones) and measure for circulation clearances. List materials, tools and safety gear. Decide which tasks you’ll DIY and which need a pro. Reserve time for prep (grading, compaction, base work) — most patio problems start with poor subgrade work.
How do I measure my patio area and create functional zones?
Measure overall site length/width and note fixed references (house walls, doors, steps). Sketch to scale on graph paper or use a smartphone app. Steps: 1) Locate key doors and measure clear swing/threshold space. 2) Record site slope (use a level or string-level) and drainage direction. 3) Mark utilities and fixed features—trees, HVAC units. 4) Allocate zones: entry/clearance (36–48 in behind chairs), dining (10×10 ft for 4 people), lounge (6×8–12×12 ft depending on seating), grill/prep (allow 3 ft clearance around grill), storage (vertical or bench storage). 5) Add 2–3 ft buffer for circulation and plan access to storage. Label measurements on the sketch.
What layout templates and examples work for typical and small patios?
Common templates: - Linear/strip: long narrow patio alongside house with linear seating and planters. - L-shaped wrap: seating at door and separate dining area. - Central island: round table or fire table in center with radial circulation. - Split-level: steps create separate lounge and dining tiers. Small-patio specific layouts: - Bistro (6×6–8×8 ft): small round table + two chairs, foldable furniture. - Balcony/compact (5×10 ft): bench seating on one side, narrow planter on the other. - Corner nook (8×8 ft): built-in bench along two edges, corner table. Use these dimension rules of thumb: bistro 6–8 ft, table for four ~10×10 ft, comfortable dining and circulation ~12×12 ft. For narrow spaces keep circulation on one side and use vertical storage.
What surface materials and structural recommendations should I consider for DIY patios?
Choose by budget, DIY skill, and site: - Interlocking pavers: durable, DIY-friendly; require 4–6 in compacted aggregate base, 1 in bedding sand, edge restraint, compaction per ICPI guidance. - Poured concrete slab: common DIY (or hire); minimum 4 in thickness, positive slope (1/8–1/4 in/ft) away from house, joints per ACI. - Gravel or crushed stone: lowest cost, permeable; requires weed barrier, edging, and occasional regrading. - Decking/wood: raised solutions over grade, needs footings, flashing where attached to house. For frost climates follow local frost-depth guidance for any posts/piers; compact subgrade to ~95% Std Proctor where specified. Use geotextile separators for wet soils and open-graded bases for drainage when using pavers or permeable systems.
How do I handle slope, drainage and other common site problems?
Ensure surface sheds water away from structures: aim for at least 1/8 in/ft (1%) and preferably 1/4 in/ft (2%) slope away from the house. Solutions: regrade subgrade to provide fall; add drainage channel or trench drain at low edge; use permeable pavers with stone reservoir/underdrain if infiltration is desired (follow EPA BMPs); install geotextile and open-graded aggregate in poor soils. For frost-susceptible areas remove frost-prone soils or provide sufficient granular base and insulation per ASCE/IRC guidance. Where standing water occurs, add catch basins or reroute runoff to landscape beds.
What are DIY anchoring and furniture tips so wind and traffic won’t move items?
Choose appropriately weighted furniture (cast aluminum, wrought-iron, heavy teak) for windy sites, or use removable anchors. Anchor options: screw-in ground anchors for umbrellas and lightweight furniture on soil; through-bolt anchors into pavers/concrete for fixed benches or pergola posts—use epoxy or mechanical anchors per manufacturer specs. For pavers, install concrete piers or compacted bases under anchored posts; avoid anchoring into individual loose pavers without continuous support. Use patio mats/pads to reduce scratching and prevent furniture migration. For umbrellas use weighted bases sized for canopy area and expected wind loads; store large umbrellas in high winds.