The best patio steps follow the 7-11 rule: keep risers at or under 7 inches tall and treads at least 11 inches deep.
Steps for Patio Ideas: Design and DIY Build Guide

Nolan Carver
2 May 2026
That single formula handles safety, comfort, and code in one shot. From there, the work is measuring your total rise, choosing a material that matches your patio, prepping a solid compacted base so nothing shifts, and building each step with a slight forward pitch so water runs away instead of pooling.
Whether you want a single grand step down to the lawn or a full flight of stacked-stone stairs, the process is the same, and it's very doable for a DIYer with a weekend and the right plan. If you're planning how to patio your garden, these same measurements and drainage steps will help your new patio stairs and landing stay safe and stable over time patio steps.
Choose the right patio-step style for your space
Before you pick a material or crack open a measuring tape, spend a few minutes thinking about how the steps will actually be used and what they'll look like from 20 feet away. Steps that fit the scale and style of the patio feel intentional. Steps that don't look like an afterthought, and they're usually a safety problem too.
Here are the main styles worth considering for a home patio, with a quick note on where each one works best:
- Stacked paver steps: The most popular DIY choice. You stack rows of concrete or clay pavers on a compacted gravel base, use the same material as the patio surface for a seamless look, and edging keeps everything locked. Works for 1 to 4 steps in most residential situations.
- Natural flagstone or steppers: Large flat stones set on a gravel base create a relaxed, organic look. Great for garden-adjacent patios or when the patio itself uses natural stone. Irregular shapes need more fitting time but look stunning.
- Precast concrete block steps: Solid, heavy, and durable. These are manufactured units (like retaining wall block or dedicated step blocks) that stack easily and hold up under heavy foot traffic. Good for moderate slopes or when you want a clean, modern edge.
- Poured concrete steps: The most permanent option. A formed and poured concrete step is incredibly strong, but it requires formwork, mixing or ordering concrete, and finishing skills. Best for front entries or high-traffic areas where you want zero movement ever.
- Timber-and-gravel steps: Landscape timbers or sleepers define each riser and gravel or decomposed granite fills the tread. A budget-friendly, naturalistic option for garden-side patios, though wood eventually needs replacement.
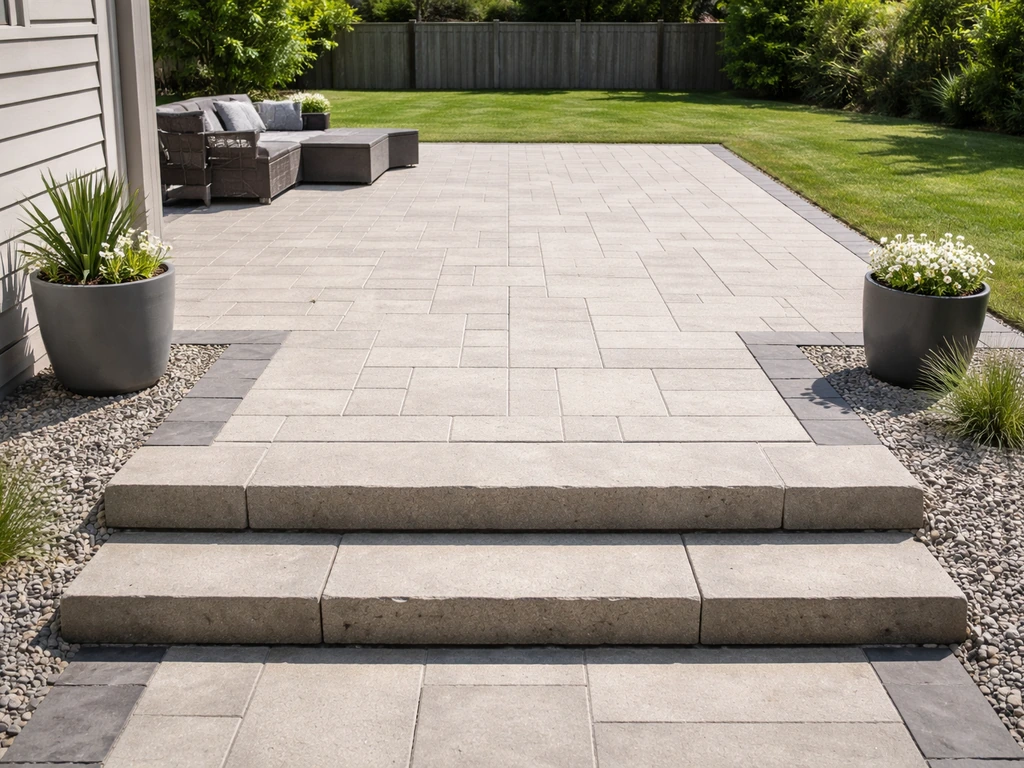
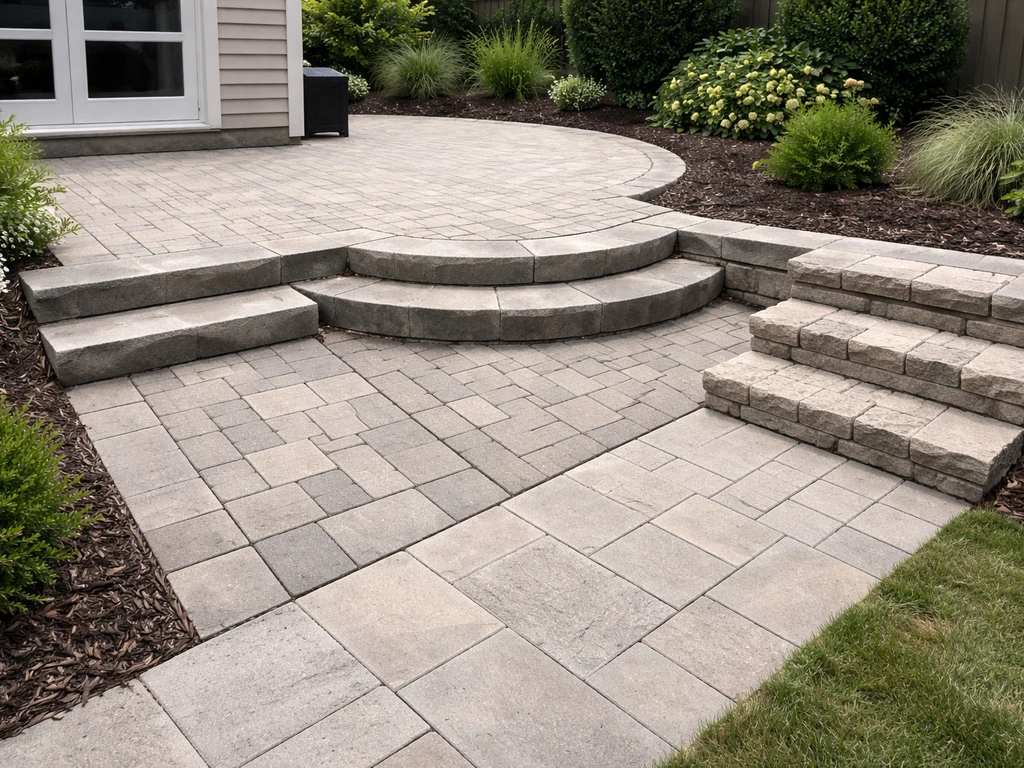
- Wraparound or curved steps: Any material can be adapted for a curved or wide-landing layout. These styles work especially well when a patio opens directly onto a yard and you want a welcoming, broad entrance. They require more planning but are not dramatically harder to build.
Match the step style to the patio's primary material first. If you're building a paver patio, stacked paver steps are the easiest path. If you're pouring a concrete slab, poured steps or precast block steps fit naturally. When the patio borders a planting area or vegetable garden (topics worth exploring separately), a softer stepstone or timber-and-gravel approach often reads better in that setting. If you are planning a patio vegetable garden, choose steps and edging that also leave room for containers, soil depth, and easy watering access.
Measure and plan: layout, run/height, and step count
Getting the measurements right before you touch a shovel saves you from the most common patio step problems: steps that are too tall to climb comfortably, treads that are too shallow to stand on safely, and a flight of stairs that doesn't actually land where it needs to. Here's how to work through it.
Find your total rise
Total rise is the vertical distance from the patio surface (or landing) down to where the steps will finish at grade. Use a long level and a tape measure, or a line level and string, to measure straight down from the patio edge to the ground. If the slope is uneven, measure at multiple points and use the greatest height. Write that number down in inches, you'll divide it in the next step.
Calculate riser count and tread depth
Divide your total rise by your target riser height to get the number of steps you need. The math is straightforward: if your total rise is 21 inches and you aim for 7-inch risers, you get exactly 3 steps. If the number doesn't divide evenly, adjust the riser height slightly so every riser is identical. For example, a total rise of 22 inches divided by 3 steps gives you a riser height of 7.33 inches per step, which is within the acceptable range. Never vary riser heights across the flight, even a half-inch difference is a trip hazard.
Once you have riser count, multiply by your tread depth to find total run (how far out from the patio edge the steps will extend). With 11-inch treads and 3 steps, the total run is 33 inches (just under 3 feet). Make sure you have that much horizontal space before the steps reach a walkway, lawn, or fence.
| Total Rise | Riser Height | Number of Steps | Total Run (11" treads) |
|---|---|---|---|
| 7 inches | 7 inches | 1 step | 11 inches |
| 14 inches | 7 inches | 2 steps | 22 inches |
| 21 inches | 7 inches | 3 steps | 33 inches |
| 28 inches | 7 inches | 4 steps | 44 inches |
| 35 inches | 7 inches | 5 steps | 55 inches |
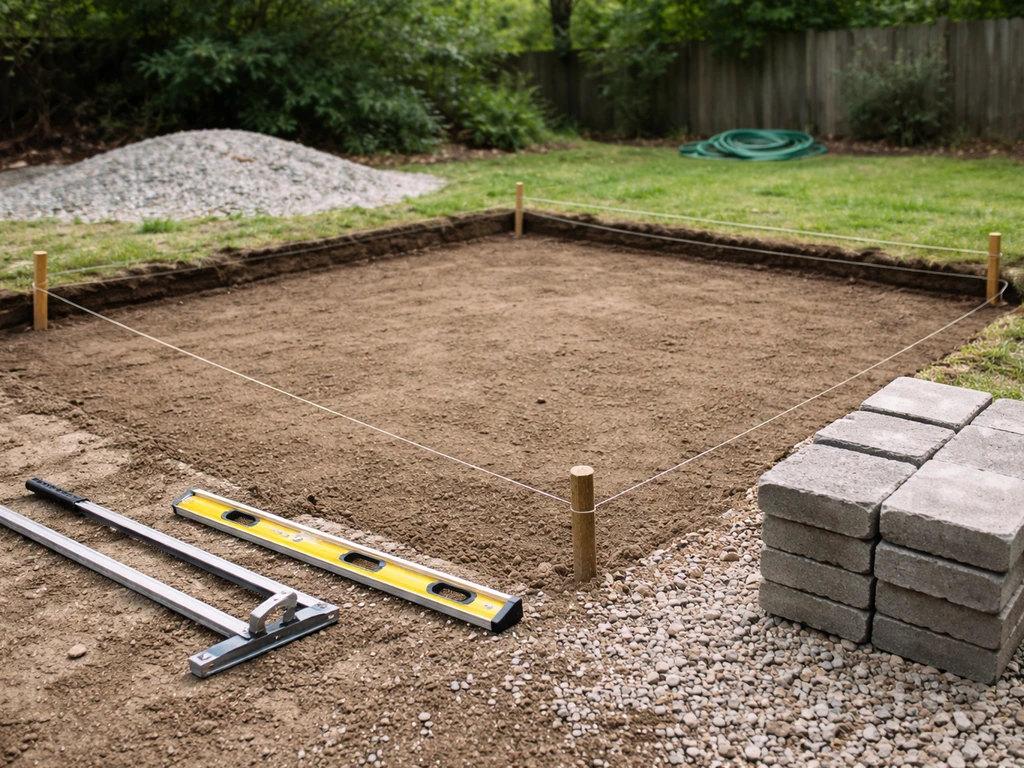
Mark the layout on the ground
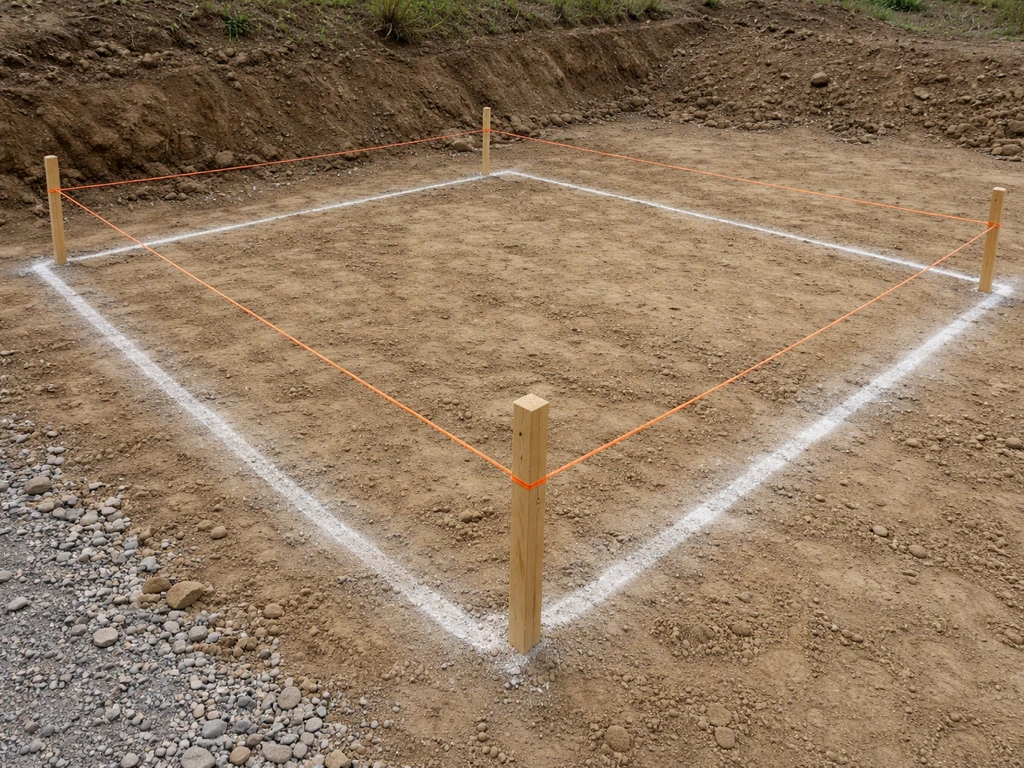
Use stakes and string or marking spray paint to outline the full footprint of the steps before you dig. Mark both the width of the steps (generally at least as wide as the door or opening they serve, with 4 feet being a comfortable minimum for two people) and the total run out from the patio edge. This is the moment to catch problems: a step landing in a flower bed, a riser that lines up awkwardly with a gate, or a total run that extends past your property line.
Base and drainage prep to prevent settling and water issues
A beautiful set of patio steps that shifts, sinks, or holds water in the first winter is the most disheartening outcome in outdoor building. The good news: it's almost entirely preventable with proper base prep. This is the step most beginners skip or rush, and it's the step that matters most.
Excavate and compact the subgrade
Dig out the step footprint to a depth that accommodates your gravel base plus your first course of material. For paver or block steps, you typically need 4 to 6 inches of compacted gravel base beneath the first course. A proper paver base should include at least 4 inches of compacted gravel base, consistent with the recommended paver-base build-up layers 4 to 6 inches of compacted gravel base.
Compact the native soil at the bottom of your excavation with a plate compactor before adding any gravel, loose soil beneath gravel will still settle. If the soil is clay-heavy or has poor drainage, lay a non-woven geotextile fabric on the compacted subgrade before adding gravel. This prevents fine soil particles from migrating up into your base over time.
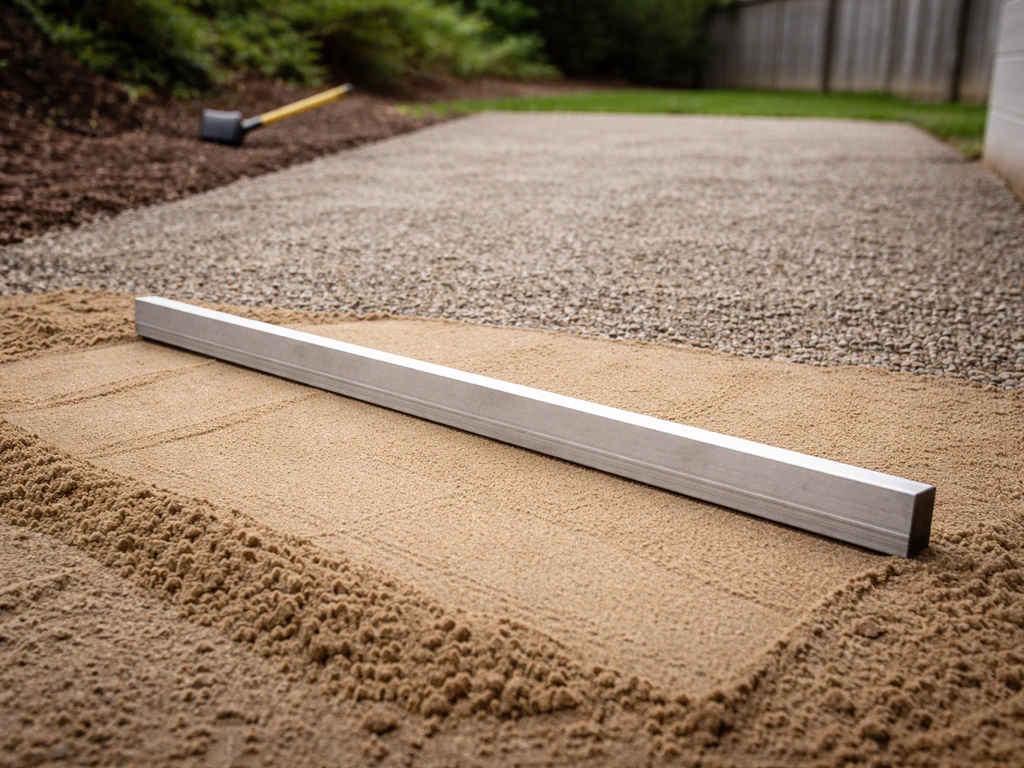
Build the gravel base in lifts
Add crushed gravel (also called compactable gravel or road base) in 2-inch layers, compacting each layer before adding the next. Dumping all 4 to 6 inches in at once and running one pass with a plate compactor doesn't work, the bottom layers don't get properly compressed. Two-inch lifts compact fully and give you a stable, load-bearing foundation. Extend the base a few inches beyond the outer edge of the steps on all sides, and make sure the base extends at least 6 inches past any edge restraint you'll be setting.
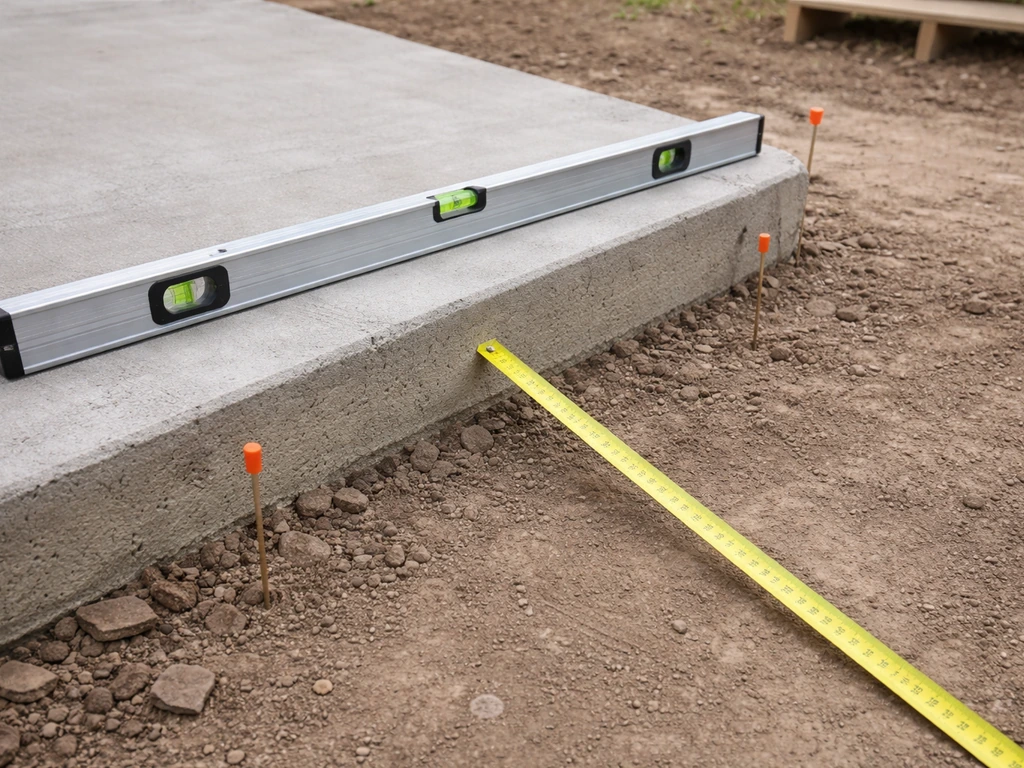
Set the drainage slope
This is critical and easy to overlook: the base under and around the steps needs to slope away from the house, not toward it. Target a 2% slope (roughly 1/4 inch of drop per linear foot) on the base surface and on the finished step treads. Each tread should pitch very slightly forward, toward the descending direction, so water sheds off the front of each step rather than sitting on it and eventually working into your base. You're not building a ramp; a 2% pitch is barely visible but makes a huge difference in long-term drainage.
For paver-based steps and patios, add a 1 to 1.5 inch layer of bedding sand over the compacted gravel before setting pavers. This layer helps you fine-tune level and grade. Use edge restraints along the sides and bottom of the step run to contain the bedding sand and prevent the edges from spreading under foot traffic.
Build options by material: pavers, concrete, stone, and block
Each material has a distinct build approach, cost range, and skill ceiling. Here's an honest comparison so you can pick what matches your project, your budget, and your skill level.
| Material | Approx. DIY Cost per Step | Skill Level | Durability | Best For |
|---|---|---|---|---|
| Concrete pavers | $30–$80 | Beginner | Excellent | Paver patios, any size step run |
| Natural flagstone | $50–$150 | Intermediate | Excellent | Garden patios, organic aesthetics |
| Precast block/wall block | $40–$100 | Beginner–Intermediate | Excellent | Clean lines, sloped yards |
| Poured concrete | $80–$200+ | Advanced | Best | Permanent, high-traffic entries |
| Timber and gravel | $20–$60 | Beginner | Moderate | Garden areas, soft landscapes |
Paver steps
Stack full-depth pavers or patio slabs on your prepared gravel base to form each riser. The tread is formed by the top surface of each course. Use construction adhesive between courses and between the tread pavers and the riser layer below to prevent shifting. Edge restraints on the sides hold everything tight. This is the most forgiving DIY method because you can adjust as you go, and the same materials match your patio field.
Natural stone steps
Large flat stones (bluestone, limestone, sandstone) make striking steps when set properly on a compacted base. Each stone should be at least 2 inches thick and ideally seat on a thin mortar or compacted stone dust bed. The irregular edges look great but require more fitting time, plan for pieces that need cutting or selective swapping to get a stable, non-rocking surface. A flatness tolerance of plus or minus 3/8 inch across a 10-foot span is a good target to prevent rocking.
Precast block steps
Retaining wall block or dedicated step block units are heavy (often 60 to 80 pounds each) but very easy to work with. Set the first course on compacted gravel, use a level, add construction adhesive, and stack subsequent courses. The mass of the block provides inherent stability. These work well for 2 to 4 steps and hold up beautifully in freeze-thaw climates.
Poured concrete steps
If you want something that genuinely never moves, poured concrete is the answer. Build wooden forms to your riser and tread dimensions, pour and vibrate the concrete, then float the surface with a slight forward pitch on each tread for drainage. This is the most labor-intensive and least forgiving option, once it cures, it's permanent. Best reserved for front entries or high-traffic side entries where long-term maintenance matters most. If you also want to add plants or seating around the stairs, our guide on how to make patio garden will help you plan the layout.
Which material should you pick?
For most DIYers building a backyard patio: go with pavers or precast block. They're forgiving, match most patio styles, require no special tools beyond a plate compactor and rubber mallet, and they look great. If you're building a garden patio where aesthetics are front and center, natural stone is worth the extra fitting time. Save poured concrete for permanent front-of-house applications where you're willing to invest the most time and skill.
Step construction: risers, treads, edging, and alignment
With your base prepped and your material chosen, here's how to build the steps from bottom to top. Starting from the bottom is the key, every course above depends on the first course being perfectly level and correctly positioned.
- Set your first riser course on the prepared gravel base. This is the bottom step's front face. Check for level side to side. Check that the course is at the correct height — the top of this first tread should sit at your calculated riser height above grade. Use a rubber mallet to tap individual pieces into adjustment.
- Fill behind the first riser with compacted gravel up to the height of the riser, then add your bedding sand or stone dust layer. This forms the base for the first tread.
- Lay the first tread pavers or stone on the bedding layer. Pitch them very slightly forward (toward the descending direction) by about 1/4 inch over an 11-inch tread. Check with a level — a bubble just barely off center toward the front edge is exactly right.
- Set the second riser course on top of and behind the front edge of the first tread. Each riser course steps back one full tread depth. Apply construction adhesive between courses for paver and block steps.
- Repeat the process: fill behind the riser with compacted gravel, add bedding, lay tread with forward pitch. Keep checking riser height with a tape measure from the tread below — every riser must be the same height, within 1/4 inch.
- Install edge restraints along both sides of the full step run, pinning them into the base with spikes. This keeps the steps from spreading sideways over time.
- Once all steps are set, sweep polymeric sand or jointing sand into all the joints, compact lightly with a hand tamper, and mist with water to activate (for polymeric sand). This locks the joints and prevents ant intrusion and weed growth.
- Check your work: stand back and look at the step faces — all risers should appear the same height. Walk up and down slowly and feel for any rocking or wobble. Tap any wobbly unit with a mallet and add more bedding beneath it before the project is fully done.
One detail worth calling out: the nosing, which is the front edge of each tread that overhangs the riser below. When your tread depth is at least 11 inches, a nosing isn't required by code. If you do add a decorative nosing, keep any bevel to 1/2 inch or less. A sharp overhang beyond that becomes a toe-catch and a trip risk, exactly what you're trying to avoid.
Budget, tools, DIY timeline, and troubleshooting
What it costs
A 3-step paver staircase on a backyard patio typically runs $200 to $500 in materials for a DIYer, depending on material choice and regional pricing. Precast block steps fall in the same range. Natural stone climbs quickly, a 3-step flagstone entry can hit $600 to $1,000 in stone alone if you're using premium material. Poured concrete for a 3-step entry typically costs $300 to $600 in materials if you're renting forms and mixing yourself. In every case, the big cost variable is width: a 6-foot-wide step set costs roughly twice as much as a 3-foot-wide one.
Tools you'll need
- Tape measure, long level (4-foot), and string line with line level
- Spade shovel and square-nose shovel for excavation
- Plate compactor (rent one — don't skip this)
- Rubber mallet
- Circular saw with diamond blade or angle grinder for cutting pavers/stone
- Construction adhesive and caulk gun
- Hand tamper for jointing sand
- Stakes and marking spray paint for layout
- Wheelbarrow for moving gravel and bedding material
Realistic timeline
A 3-step paver stair run on a prepared patio is a solid one-day project for a capable DIYer, including excavation, base prep, and step setting. Add a second day if the base is deep, the soil is tough to compact, or you're cutting a lot of irregular stone. Poured concrete adds a full day of formwork plus cure time, plan 3 to 5 days minimum before you're walking on concrete steps. Precast block steps land in the middle: typically one long day with a helper to move the heavy units.
Common problems and how to fix them
- Uneven riser heights: Usually caught during construction if you measure every riser from the tread below. If you notice it after the fact, the fix is removing the affected course, adjusting the bedding depth, and resetting. Do not ignore it — uneven risers cause trips.
- Steps shifting or spreading sideways: Almost always an edge restraint problem. Add or reinforce edge restraints along the sides and spike them more aggressively into the base. Re-compact the base beside the steps if they've moved significantly.
- Water pooling on treads: The tread pitch is insufficient. On a completed paver step, you can sometimes gently tap the front of the tread pavers down slightly to increase the forward pitch. On concrete, you may need to apply a concrete resurfacer with a slight slope built in.
- Steps sinking or settling on one side: The base under that side wasn't compacted evenly, or the soil has a softer spot. Remove the affected courses, excavate, re-compact the subgrade, add fresh gravel in 2-inch compacted lifts, and rebuild.
- Jointing sand washing out: This usually means water is running across the steps too fast — a drainage or pitch issue — or polymeric sand wasn't activated properly. Re-sweep with polymeric sand and mist correctly. Also check that there's no concentrated runoff from a downspout or slope aimed directly at the steps.
- Pavers rocking after jointing: A paver that rocks almost always has a void under it or a high spot in the bedding sand beside it. Pull it, check the bedding, add or screed the sand level, reset, and re-check.
What to do right now
Start outside with a tape measure: find your total rise from the patio edge to grade, divide by 7 to get your step count, and mark the total run on the ground with spray paint. Once your measurements are set, you can use the same planning approach to learn how to start a patio garden by preparing soil, choosing plants, and planning sun and water needs.
That five-minute exercise will tell you immediately how many steps you need, whether you have enough horizontal space, and which material makes sense for the scale of the project. Once you have those numbers, material shopping and base prep planning become straightforward. The design decisions, style, width, material, shape, are genuinely the fun part. The measurements make sure the fun part actually works.
FAQ
What if my total rise doesn’t divide cleanly into equal risers at 7 inches?
Use the adjustment method the math implies: change the riser height slightly so every riser is identical, and keep the risers within the safe comfort range. Also recheck the run against where the stairs land (walkway or gate opening), because changing riser count or height can shift the landing location.
How do I handle uneven ground when measuring total rise for patio steps?
Measure at multiple points along the planned step width and use the greatest height, then build to that reference. If the slope changes a lot, consider stepping down in separate flights or adding a landing rather than trying to force one uniform run.
How wide should patio steps be if my doorway or path is narrow?
Match the step width to the clear path users need, not just the visual symmetry of the patio. If two people will meet on the stairs, a wider run (around 4 feet) feels safer and reduces awkward side stepping, but even with less width you should keep the tread depth and riser consistency strict.
Do I need a landing, and how do I decide between a single flight vs. multiple flights?
Use a landing when the total run would reach into a functional area (walkway, lawn edge, or fence) or when you cannot maintain a comfortable tread/run relationship without crowding. If you expect frequent use, a landing also reduces strain and gives you a safer place for bags, tools, or seating access.
What’s the most common base-prep mistake that causes steps to shift later?
Skipping proper subgrade compaction or compacting the gravel in thick single lifts. Compact in 2-inch layers, and extend the base slightly beyond the restraint edges so lateral movement has less chance to start at the sides.
Should the drainage pitch be on the base, the finished treads, or both?
Do both. The base should slope away from the house, and each finished tread should have only a barely noticeable forward pitch so water sheds off the tread front. If you pitch only one layer, water can still migrate toward the base and undermine it over time.
Can I build patio steps without a geotextile fabric if my soil is clay?
If your soil is clay-heavy or drains poorly, geotextile under the gravel is a worthwhile safeguard. The goal is to reduce fine soil migration into the gravel over freeze-thaw cycles, which can otherwise turn your “stable base” into a shifting one.
How do I keep paver steps from rocking or spreading at the edges?
Install edge restraints and use bedding sand to fine-tune grade, then set pavers carefully so the course is level before moving to the next. After setting, confirm the surfaces are flat across each tread, and check that restraints are continuous on both sides and the bottom of the run.
When using natural stone for steps, how do I prevent an uneven, unsafe surface?
Pick stones that are at least 2 inches thick and plan for selective fitting, even if it takes extra cutting time. After installation, check flatness tolerance across the stone surface, and avoid relying on thick mortar that can crack or settle unevenly.
Is construction adhesive required for stacked paver or block step systems?
It’s strongly recommended for the stability details your build depends on, especially between riser courses and between the tread paver and the riser layer below. Adhesive alone does not replace base prep, so still prioritize correct compaction, pitch, and restraint.
What’s the nosing rule of thumb, and when does it become a safety issue?
If your tread depth is at least 11 inches, a nosing is usually not required by code. If you add decorative nosing, keep the bevel small (about 1/2 inch or less), because a sharper overhang increases toe catch risk.
How long should I wait before using newly built steps, especially poured concrete?
Concrete needs time to cure before normal foot traffic. Plan extra days beyond pour day, and avoid “testing” the surface early, because premature loading can cause micro-cracking or surface damage that shows up as uneven settling later.
What’s the safest way to estimate total cost for patio ideas involving steps?
Treat width as the primary cost driver, then estimate by material type. Even when the step run count is the same, doubling width roughly doubles material and labor, so confirm your required clear width before shopping or ordering stone units.