You can add a patio to your house yourself in a weekend or two, even if you've never done it before. The basic process is: pick a spot and size, prep the ground (excavate, compact, grade for drainage), lay a compacted gravel base, add bedding sand or pour concrete, set your surface material, and finish the edges.
How to Add a Patio to Your House: DIY Step-by-Step Guide

Nolan Carver
25 Jun 2026
If you want to expand an existing patio, the steps are similar, but pay extra attention to matching elevation and drainage so the new section blends in correctly build a patio extension. The tricky parts are getting the slope right so water runs away from your foundation, and building a solid base so nothing shifts or settles unevenly over time. Get those two things right and your patio will last for decades.
Decide on patio type, location, and size
Before you buy a single bag of gravel, figure out where the patio goes, how big it needs to be, and what style fits your yard and budget. These decisions shape every step after this.
Picking the right spot
Most people build their patio directly off a back door, sliding glass door, or French doors, and that's usually the right call. Direct access from the house makes the space feel connected and usable. Walk out your door and look at what you're working with: How level is the ground? Before you commit, you can also plan for how to extend backyard patio later by checking how level and accessible the ground will be for future extra sections. Is there existing slope running toward or away from the house? Are there underground utilities, tree roots, or drainage paths you need to avoid? Call 811 (the free US utility locating service) before you dig anything, this is non-negotiable.
Sun exposure matters more than most people expect. A south-facing patio gets intense afternoon sun in summer, which can make it uncomfortable without shade. A north-facing spot stays shady and cool. Think about when you actually use outdoor space and orient accordingly. Proximity to the kitchen is a huge practical plus if you plan to cook or entertain outside.
How big should your patio be?

A good rule of thumb: plan for at least 12x12 feet (144 sq ft) for a simple seating area for two to four people. For a dining table that seats six, you want closer to 16x16 feet or 12x20 feet. If you're adding a grill station or fire pit, budget another 10 feet of clearance around those features. It's very easy to undersize a patio on paper and regret it once the furniture is out. If your yard allows it, go a little bigger than you think you need. If you want to make a patio bigger, start by recalculating the dimensions, clearance needs, and drainage slope before you excavate make patio bigger.
Patio types: ground-level vs. raised
If your yard is relatively flat and close to the house threshold, a ground-level patio is the easiest and most budget-friendly approach. If there's a significant elevation drop from your door to the ground, you have two options: step down with a simple stair, or build a raised patio with a retaining structure to bring the surface up to near-door level. Raised patios involve more work (wall construction, backfill, compaction), so if you're a beginner, start with a ground-level slab or paver patio unless the grade forces otherwise. A raised patio is one way to build a more extended outdoor space when your grade or doorway height makes a ground-level patio difficult.
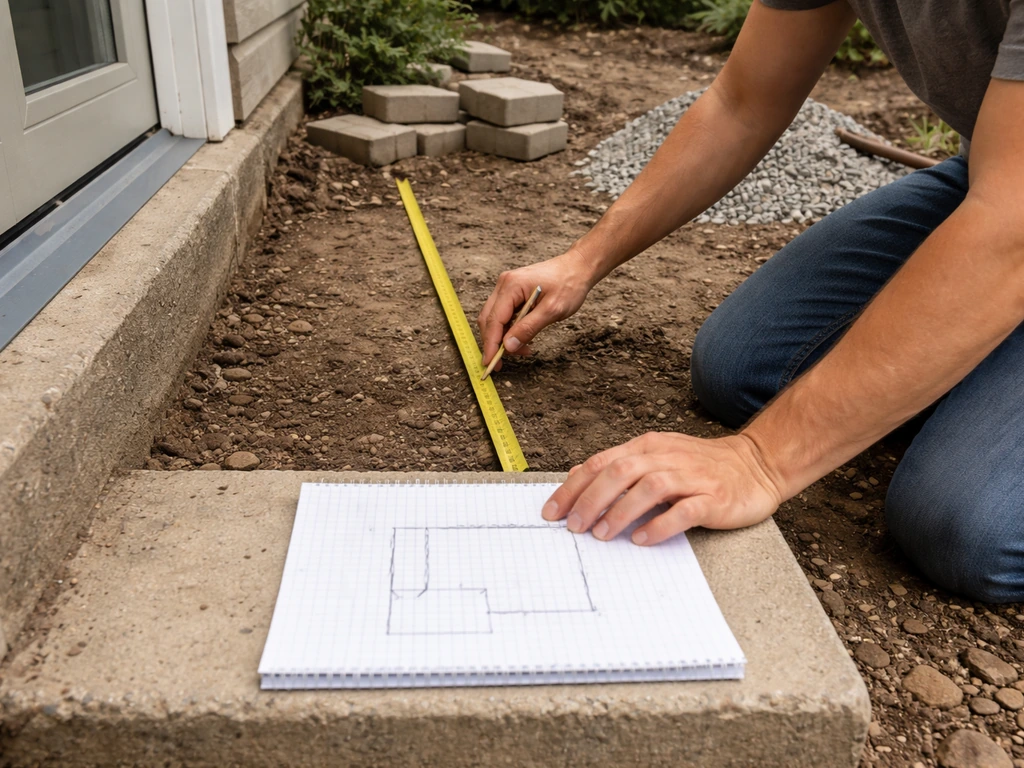
Plan the layout and connect safely to the house
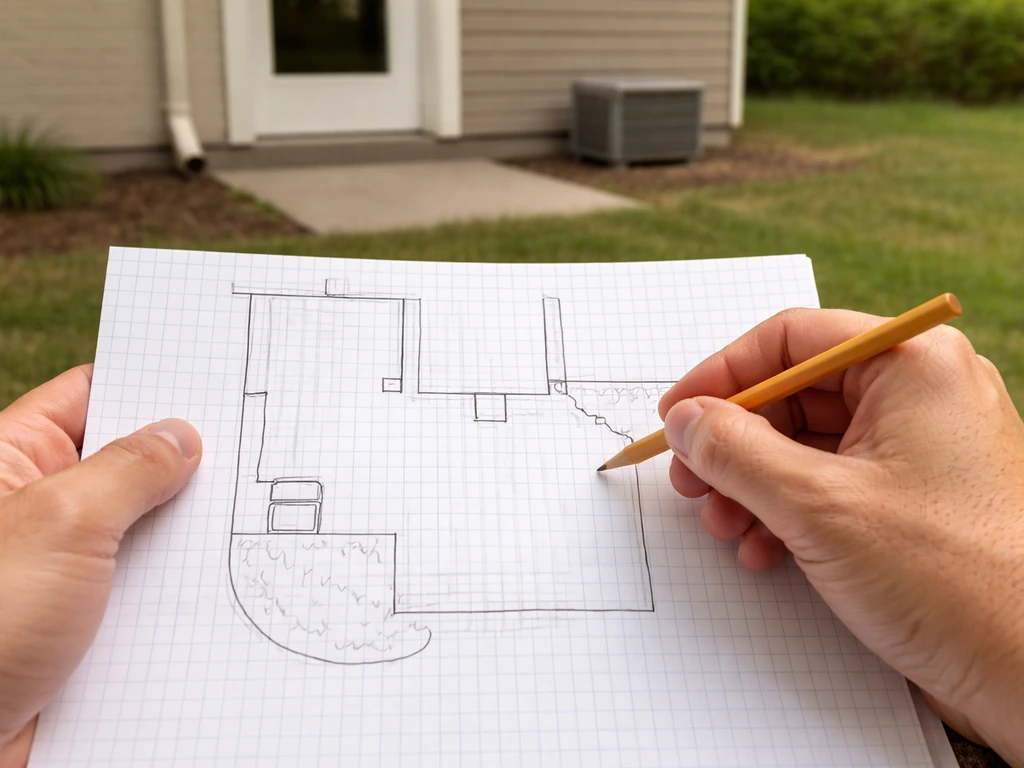
Sketch it out before you dig
Grab graph paper or a free online design tool and sketch your patio to scale. Mark the house wall, door opening, and any existing features like downspouts, AC units, or garden beds. Define your patio rectangle (or L-shape, curve, whatever you're planning) and mark setbacks. Most municipalities require patios to sit at least 3 to 5 feet from property lines, but check your local zoning rules, some areas also require permits for patios over a certain size or those with roofs.
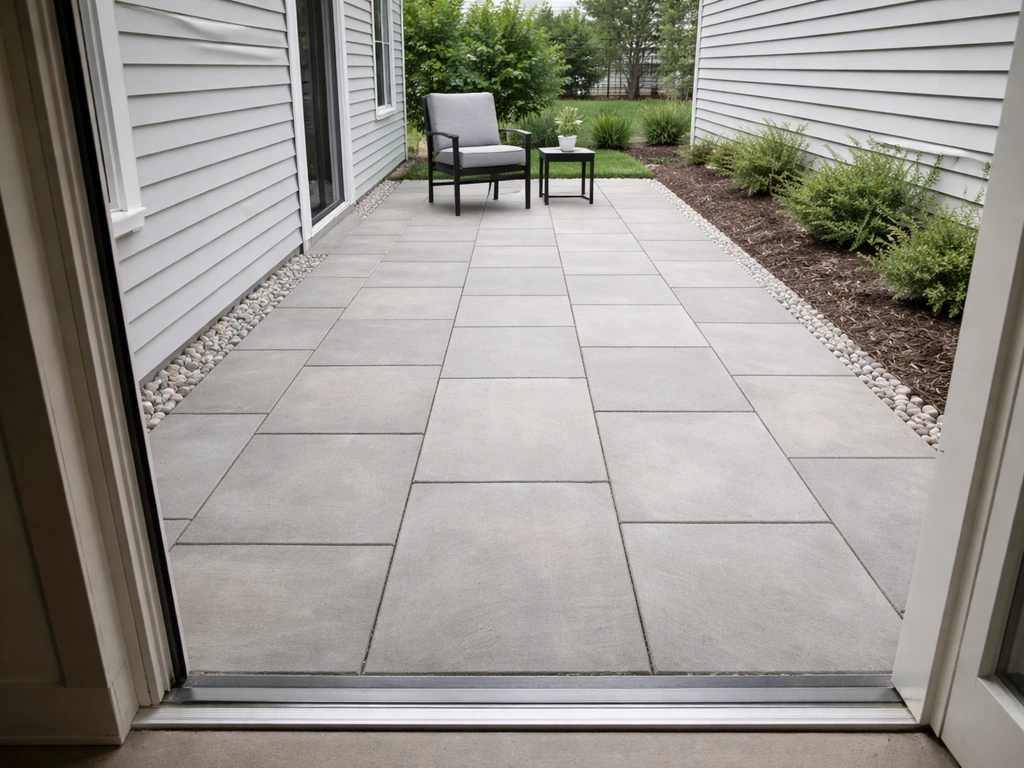
Connecting to the house: what to get right
This is where a lot of DIY patios go wrong. If you're planning to extend an older deck or slab, the connection and drainage rules are similar, see how to add on to existing patio for the key steps. The patio surface needs to sit below the house's interior floor level and below any door threshold. A good target is to keep the patio surface at least 1 inch below the door threshold and at least 6 inches below the top of your foundation or siding. This prevents water from wicking into the wall or under the door, and keeps the foundation exposed so it can breathe and shed moisture.
If you're pouring a concrete slab, don't tie it structurally to the house foundation. According to structural engineering guidance, every effort should be made to avoid tying a slab to other structural elements of the building. The reason is differential movement: your house and patio slab will expand, contract, and settle at different rates. Tying them together causes cracking. Instead, leave a small gap (about 1/2 inch) between the patio slab and the house, or install a foam expansion joint strip to fill the space.
Drainage slope: the most critical number in this whole project
Every patio surface needs to drain away from your house. The standard target is 1/4 inch of drop per foot of patio length, running away from the foundation. This is also written as a 2% grade. So if your patio is 12 feet deep, the far edge should be 3 inches lower than the house edge. According to Building America Solution Center guidelines, impervious surfaces installed within 10 feet of the home must slope away from the foundation by at least 1/4 inch per foot, and your foundation wall should maintain at least a 6-inch downward slope within the first 10 feet after all materials are installed and tamped. Set this slope during base prep, not as an afterthought.
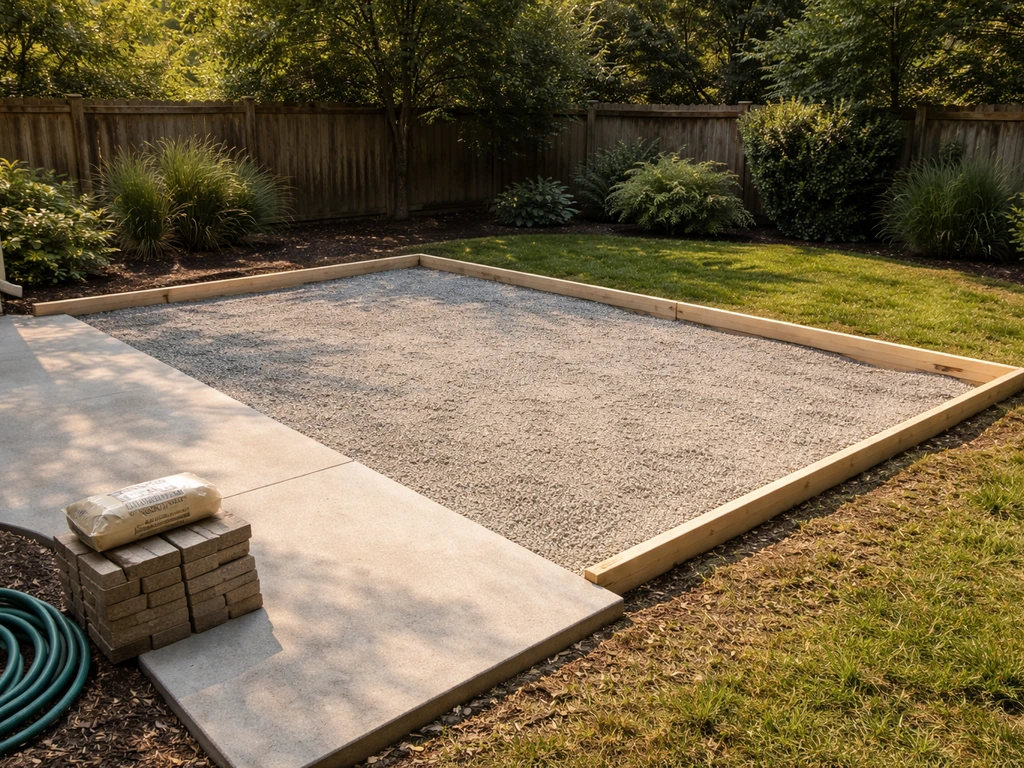
Site prep: mark, excavate, grade, and manage drainage
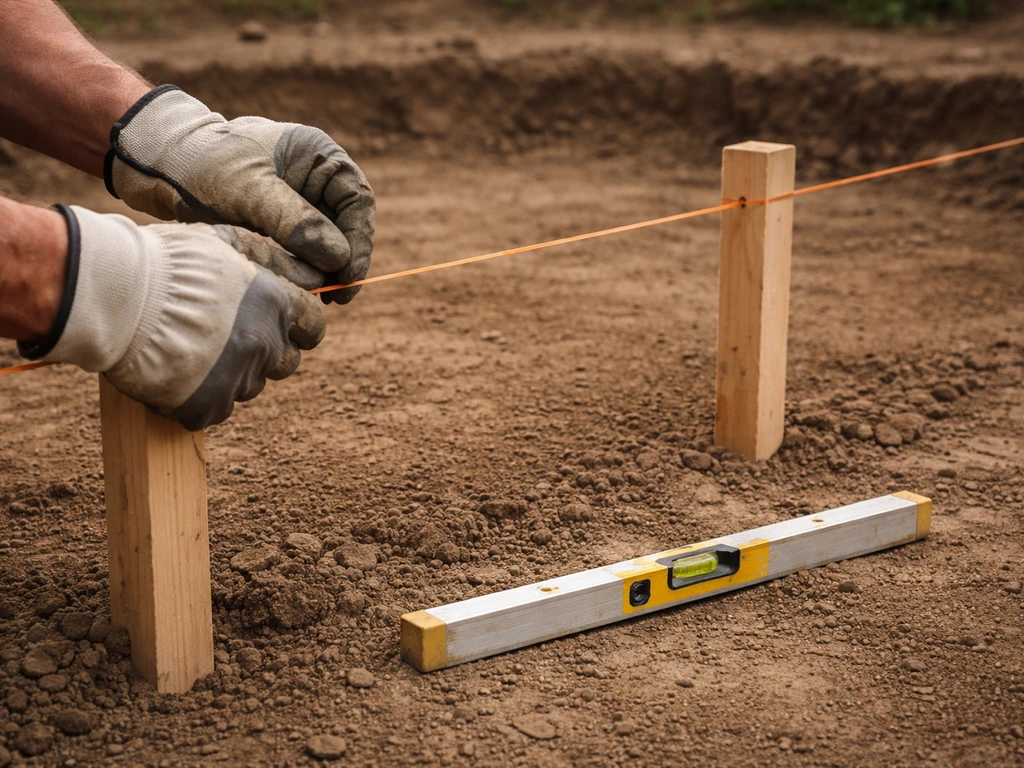
Mark your layout
Use stakes and mason's line to mark the perimeter of your patio. Pull the lines tight and check for square using the 3-4-5 triangle method: measure 3 feet along one string and 4 feet along the adjacent string, if the diagonal between those two points is exactly 5 feet, your corner is square. Spray marking paint on the ground to outline the excavation area. Add 6 inches beyond your finished patio on each side to leave room for edge restraints.
Excavation depth
How deep you dig depends on what you're building. For a typical ground-level paver patio, plan on excavating 8 to 10 inches below your desired finished surface level. That accounts for 4 to 6 inches of compacted gravel base, 1 inch of bedding sand, and the paver thickness (usually 2 to 3 inches depending on paver type). For a poured concrete slab, dig 6 to 8 inches deep: 4 inches of compacted gravel base plus 4 inches of concrete. Remove all organic material, grass, and roots from the excavation area, organic material compresses and rots, which causes settling.
Grading and compaction
Once you've dug down, roughly grade the subgrade (the native soil at the bottom of your excavation) to your 1/4-inch-per-foot slope before adding any base material. Use a long level and a tape measure to check slope across your strings. Compact the native soil with a plate compactor (rent one for about $50 to $80 per day), two to three passes is usually enough for undisturbed soil. If your soil is clay-heavy or very soft, you may need to add a couple extra inches of base material to compensate.
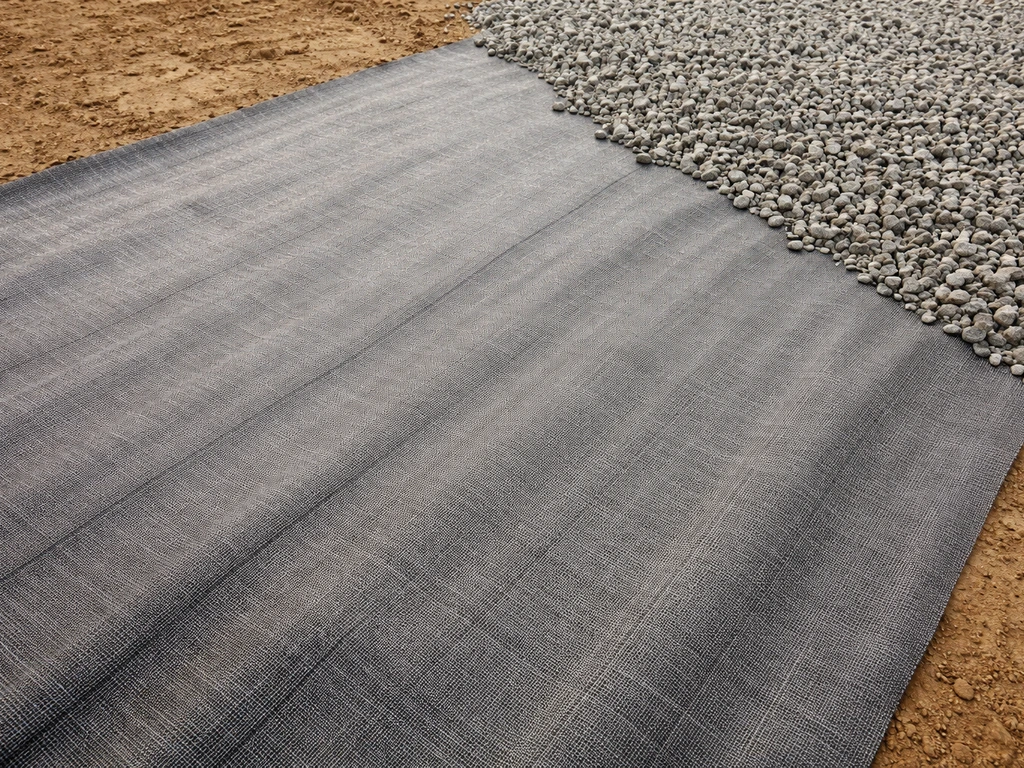
Geotextile fabric and drainage management
On soft or clay soils, lay a woven geotextile landscape fabric over the compacted subgrade before adding your gravel base. This fabric keeps soil particles from migrating up into the base material over time (a process called pumping), which is a leading cause of base failure and surface settling. The fabric doesn't stop water, it filters it. Overlap seams by at least 12 inches. On well-draining sandy or gravelly soils, geotextile is optional but still a good insurance policy.
If your yard has serious drainage issues, standing water after rain, for example, consider running a perforated drain pipe along the low edge of the patio before you backfill. Tie it into a dry well or daylight it at the edge of the yard. This is much easier to do now than after the patio is built.
Choose your materials: cost, durability, and DIY difficulty compared
The four most common DIY patio materials are concrete pavers, poured concrete, natural stone (flagstone), and decomposed granite or gravel. Each has a different cost range, look, and skill requirement. Here's a practical comparison:
| Material | Cost (installed DIY) | DIY Difficulty | Durability | Best For |
|---|---|---|---|---|
| Concrete pavers | $8–$20/sq ft | Beginner-friendly | Excellent | Most DIYers; easy to repair |
| Poured concrete | $4–$10/sq ft | Moderate | Very good | Clean/modern look; large flat areas |
| Natural flagstone | $15–$30/sq ft | Moderate–Hard | Excellent | Rustic/organic look; irregular shapes |
| Decomposed granite / gravel | $1–$4/sq ft | Very easy | Fair (needs refresh) | Budget builds; informal style |
Which material should you pick?
For most beginners, concrete pavers are the best starting point. They're forgiving: if one settles or cracks, you pull it up and relay it without touching the rest of the patio. They come in consistent thicknesses (making leveling straightforward), and there are dozens of shapes and colors to choose from. Poured concrete is cheaper per square foot but less forgiving, cracking is almost inevitable over time in freeze-thaw climates, and repairs are more visible. Flagstone looks beautiful but requires more skill to set evenly because every piece is a different thickness. Gravel and decomposed granite are ultra-budget options that work great for informal areas but shift underfoot and need periodic topping off.
Build the base and install the surface, step by step
Step 1: Install the gravel base
Spread your crushed stone or crusher-run gravel in 2-inch lifts, compacting each layer before adding the next. Don't dump it all in at once, compacting in thin layers is what creates a truly solid base. Aim for a total compacted depth of 4 to 6 inches for a residential patio. Four inches is the minimum for well-draining soils in mild climates; go to 6 inches if you have clay soil or significant freeze-thaw cycles in winter. Check your slope with a level after each compacted lift, correcting as you go. The finished base surface should mirror the 1/4-inch-per-foot slope you need at the top.
Step 2 (pavers): spread and screed the bedding sand
For paver installations, add a 1-inch layer of coarse bedding sand (not fine beach sand, use concrete sand or washed coarse sand) over the compacted base. Lay two 1-inch-diameter metal pipes or conduit parallel across the base as screed guides, spaced about 6 feet apart. Pull a straight 2x4 across the pipes to level the sand to a uniform 1-inch depth. Pull the pipes out when you're done and fill the grooves with sand. Don't compact the bedding sand before laying pavers, the pavers do that themselves as you set and tamp them.
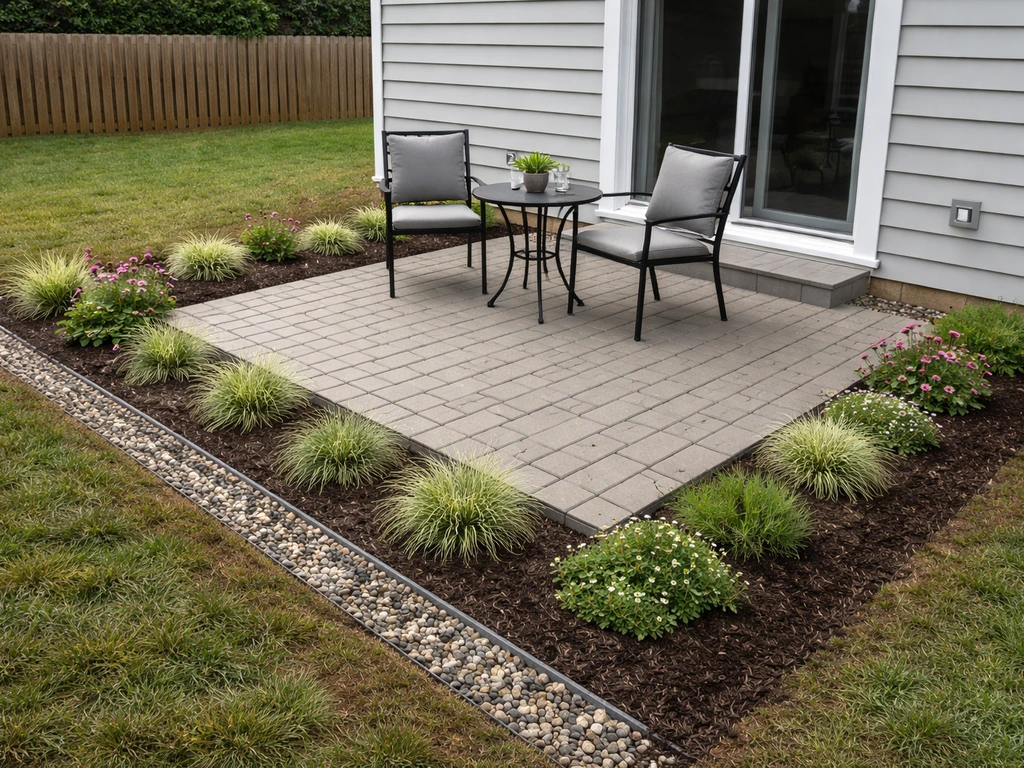
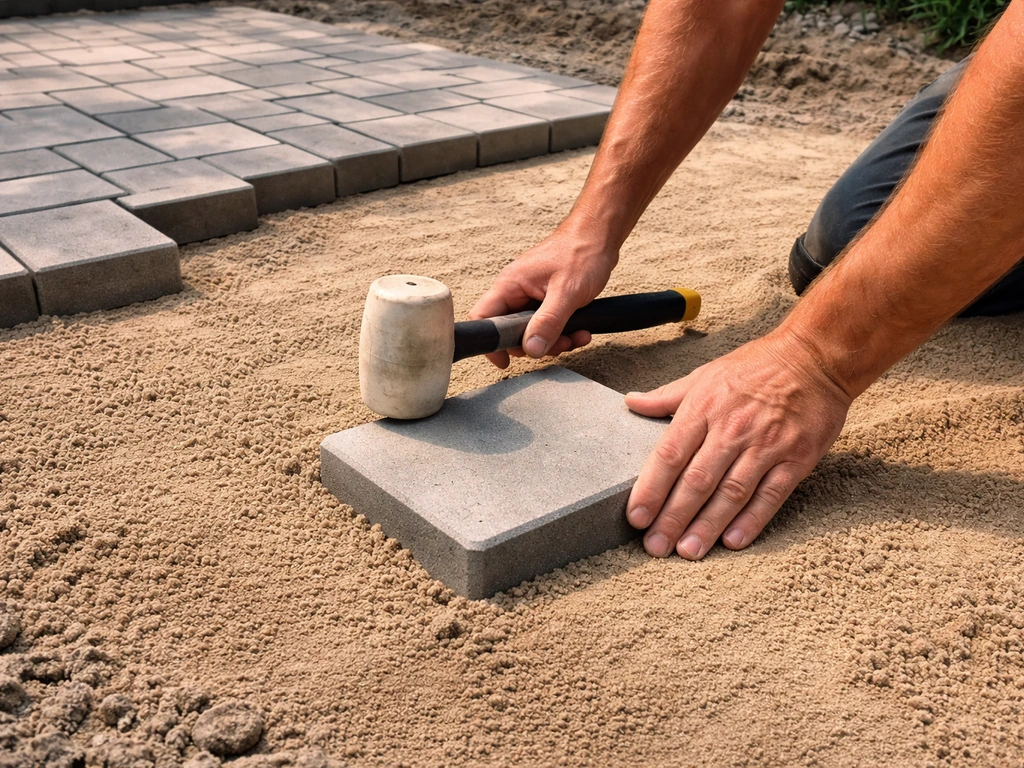
Step 3 (pavers): lay your pattern and tamp
Start in a corner of the patio, working from the house outward. If you plan to extend a small patio later, use the same base thickness and drainage slope so the new section settles similarly. Lay pavers tightly together with consistent 1/8- to 3/16-inch gaps between them. Work from a kneeling board on top of completed pavers so you don't disturb the sand bed.
Check your lines frequently with a string and a level. Once a section is laid, run the plate compactor over the pavers (put a rubber pad or piece of carpet under the plate to avoid scratching). The [Pavestone specification calls for the finished surface to not deviate more than plus or minus 3/8 inch from your target grade elevation](https://www. pavestone.
com/professional-services/resources/Pavestone-Specifications/Paver-Granular-Base-Spec. pdf), use a long straightedge to spot-check this as you go.
Step 3 (concrete): form, pour, and finish
For a poured concrete patio, install 2x4 or 2x6 lumber forms around the perimeter, staked and leveled to your target slope. For a 4-inch slab, use 2x4s; for a thicker slab, use 2x6s. Mix concrete (pre-mixed bags work for small patios; order ready-mix by the yard for anything over about 50 square feet to save time and back pain). Pour into the forms, spread with a screed board, and float the surface smooth.
Add control joints every 8 to 10 feet using a groover tool, these intentional weak lines control where the concrete cracks. Cure the concrete by keeping it moist for at least 7 days: cover with plastic sheeting or apply a curing compound, especially in hot or windy weather. Don't let it dry out fast, slow curing means stronger concrete.
Step 4 (pavers): fill the joints
Sweep joint sand (regular sand) or polymeric sand into the gaps between pavers. Polymeric sand contains a binder that hardens when wet, locking the pavers together and resisting weed growth and ant excavation. It costs more but performs significantly better long-term. For polymeric sand, follow the manufacturer's instructions exactly: sweep it in dry, compact the pavers again, sweep off excess, then mist gently with water to activate the binder. Avoid overwatering, it washes the binder out of the joints.
Edges, leveling, and finishing details
Edge restraints: don't skip these
Plastic or aluminum paver edge restraints are installed around the perimeter of a paver patio and spiked into the base with 10-inch spikes every 12 inches. They prevent the outermost pavers from spreading laterally over time, which would cause the entire patio to loosen and gap. This is one of the steps DIYers most commonly skip to save money, and then wonder why their patio looks terrible after two winters. Edge restraints cost about $1 to $2 per linear foot and are worth every penny.
Final leveling checks
After installation, walk the entire patio and press on each paver. Any rocking or hollow sound means it's not fully supported by the sand bed below. Pull those pavers up, add a bit of sand to fill the low spot, and relay them. Use a 6- or 8-foot straightedge to check for high or low spots across the surface. For a concrete slab, check slope with a level and bucket of water before the concrete sets, you have about 30 to 45 minutes of working time after it's poured.
Optional upgrades worth considering
Once the base patio is done, there are several upgrades that make the space dramatically more functional. A built-in fire pit (either a prefab kit or stacked stone design) transforms the patio into a year-round gathering space. Low-voltage landscape lighting installed around the perimeter costs $100 to $300 for a basic system and dramatically extends how much you actually use the space. If you're planning to expand later, adding a pergola, extending the patio size, or connecting an adjacent garden area, it's worth planning the layout now so future work ties in cleanly. The techniques for extending a patio later are closely related to what you've already done here, so the knowledge transfers directly.
Troubleshooting common issues and a practical project checklist
Common problems and how to fix them
- Water pooling on the patio surface: Your slope is insufficient or reversed in spots. For pavers, pull up the affected section, re-grade the base, and relay. For concrete, a surface grinder can remove high spots, or you can apply a skim coat to raise low areas. Easier to fix during build than after.
- Pavers sinking or settling unevenly: Insufficient base compaction is almost always the cause. Pull up the settled pavers, add and compact more base material, and relay. In cold climates, heaving from frost is also common—a deeper base (6 inches) reduces this significantly.
- Pavers spreading apart or edges blowing out: Missing or improperly spiked edge restraints. Install restraints and drive 10-inch spikes every 12 inches to lock everything back in. Re-sweep joint sand to fill gaps.
- Joint sand washing away: Either the slope is funneling water through the joints, or you used too-fine sand. Switch to polymeric sand for joints, and make sure surface drainage is routing water across the surface (sheet flow) rather than channeling through joints.
- Concrete cracking beyond control joints: Usually caused by insufficient base, lack of control joints at proper spacing (aim for joints every 8 to 10 feet, or roughly 2 to 3 times the slab thickness in feet), or the slab drying too fast. Hairline cracks are cosmetic; structural cracks (wider than 1/4 inch) may need professional evaluation.
- Moss or algae growing on the surface: Common in shaded or perpetually damp areas. Treat with a diluted bleach solution or commercial patio cleaner. Improve drainage and consider sealing the surface to reduce moisture absorption.
Your patio project checklist
- Call 811 to mark underground utilities before any digging
- Check local zoning and permit requirements for your patio size and type
- Choose location, size, and material based on site conditions and budget
- Sketch the layout to scale and verify access, sun exposure, and drainage path
- Mark the perimeter with stakes and mason's line; confirm square corners with the 3-4-5 method
- Excavate to proper depth (typically 8–10 inches for pavers, 6–8 inches for concrete)
- Remove all organic material from the excavation area
- Grade the subgrade to a 1/4-inch-per-foot slope away from the house
- Compact the subgrade with a plate compactor
- Install woven geotextile fabric if soil is soft or clay-heavy
- Add crushed stone base in 2-inch lifts, compacting each layer (total 4–6 inches compacted)
- Verify slope is maintained through base construction
- For pavers: spread and screed 1 inch of bedding sand
- Install edge restraints around the perimeter before or during paver laying
- Lay pavers/flagstone from the house outward; check lines and levels constantly
- Compact paver surface with plate compactor (rubber pad on plate)
- Check that finished surface doesn't deviate more than 3/8 inch from target grade
- Fill joints with polymeric sand and activate per manufacturer instructions
- For concrete: install forms, pour, screed, add control joints, and cure for 7 days minimum
- Walk the finished patio and fix any rocking or hollow pavers before calling it done
That checklist covers every major failure point. If you work through it in order, you'll avoid the most common DIY patio mistakes. If you want to extend a raised patio later, the key is to match the existing elevation and drainage slope so the new section ties in without settling. The most important things: get your slope right from day one, don't shortchange the base depth, and use polymeric sand in the joints if you're doing pavers. Everything else is manageable as you go.
FAQ
How do I choose between pavers, poured concrete, and flagstone for my specific climate?
If you have freeze-thaw winters, pavers are usually the safest DIY choice because individual units can be replaced, while poured concrete will likely develop visible cracking over time. Flagstone can work anywhere but requires careful sorting by thickness so the surface stays flat. If your area stays wet or has poor drainage, pick a system where you can maintain the 1/4-inch-per-foot slope and consider paver joints filled with polymeric sand to reduce weed and washout issues.
What should I do if the patio site already has a lot of old concrete or broken pavers?
For an easy, durable DIY result, remove the existing concrete or pavers down to stable subgrade instead of building over them. Old, uneven layers cause rocking and settlement, which then breaks the new drainage grade. If full removal is impractical, you need a contractor-grade leveling solution and proper slope reconstruction, otherwise the water path you rely on will be wrong.
Can I build a patio without a permit or inspection?
Sometimes, but it depends on your jurisdiction and the patio features you add. Many areas only require permits above certain square footage, with any roof/pergola, retaining structures, or electrical work, and setbacks can apply. Before digging, verify zoning and whether you need an inspection for base depth, drainage slope, or any connections to house openings.
How do I keep water from pooling on the patio after it rains?
Recheck slope at multiple points, not just one. Use a long level to confirm the entire surface falls 1/4-inch per foot away from the house, and make sure the base is compacted and graded before materials go in. Also ensure downspouts or grading elsewhere on the property are not discharging onto the patio, or you may get runoff that defeats your drainage plan.
What’s the best way to connect a new patio to a door or existing step without water intrusion?
Keep the patio surface lower than the door threshold by at least the recommended gap, and leave that clearance consistently across the whole doorway area. If you are transitioning to an existing exterior landing, use expansion separation at the house side rather than trying to “lock” concrete together. This avoids water wicking and reduces cracking caused by differential movement.
Is it really necessary to avoid tying the concrete slab to the house foundation?
Yes, in most DIY-friendly situations you should not bond a new slab to the foundation. Even small movement differences between concrete and the house can cause cracking right along the connection line. Instead, plan for a small gap with an expansion joint strip so the slab can move independently while still maintaining drainage.
What thickness of base should I use under pavers if my soil is clay-heavy?
Start by excavating enough to build a compacted gravel base toward the upper range, then verify slope after each compacted lift. For clay-heavy or freeze-thaw areas, aim closer to the deeper end of the base guidance (around 6 inches compacted total for many residential paver patios). Skipping depth or failing to compact lifts usually shows up as settlement, uneven pavers, and joint sand washout.
How can I tell if my base is compacted enough before I add bedding sand or pour concrete?
A quick check is to look for firm, non-rutting ground when you walk and to confirm the compaction doesn’t feel spongy. More reliably, compact in thin lifts and verify grade after each one, because poor compaction tends to “hold shape” briefly then settle later. If you repeatedly see low spots appearing after compaction, your base likely needs more passes or thicker total base.
What’s the most common mistake with polymeric sand in paver joints?
Overwatering during activation. Polymeric sand should be misted gently according to the product label, because excessive water can wash out the binder and leave joints weak, which then leads to weeds and shifting. Also do not use it over wet joints or during rainy conditions, plan the job for a dry window so it sets correctly.
Should I leave expansion gaps around the perimeter of a paver patio?
You need edge control and room to move. Perimeter edge restraints prevent lateral spreading, and a proper gap pattern allows the base and pavers to accommodate minor movement without buckling. If you run pavers tightly to rigid structures, you can get stressed edges that lift or crack as temperatures change.
How do I prevent pavers from settling unevenly after installation?
Use a kneeling board while laying, keep the bedding sand at the correct thickness, and after installation press and recheck for rocking or hollow sounds with a straightedge. Fix issues immediately by lifting affected pavers and adding sand to the low spots. If you discover settling months later, that usually means base compaction, slope, or debris in the excavation was off during the build.
Can I add a patio extension later, and how do I avoid a visible mismatch?
Yes, but you must keep the same drainage grade and base thickness so both sections settle similarly. Plan the extension perimeter at the same slope line and consider using the same bedding and joint approach as the original patio. If you tie elevations together without a proper expansion gap or if the new base compacts differently, the seam will show up as a ridge or depression.