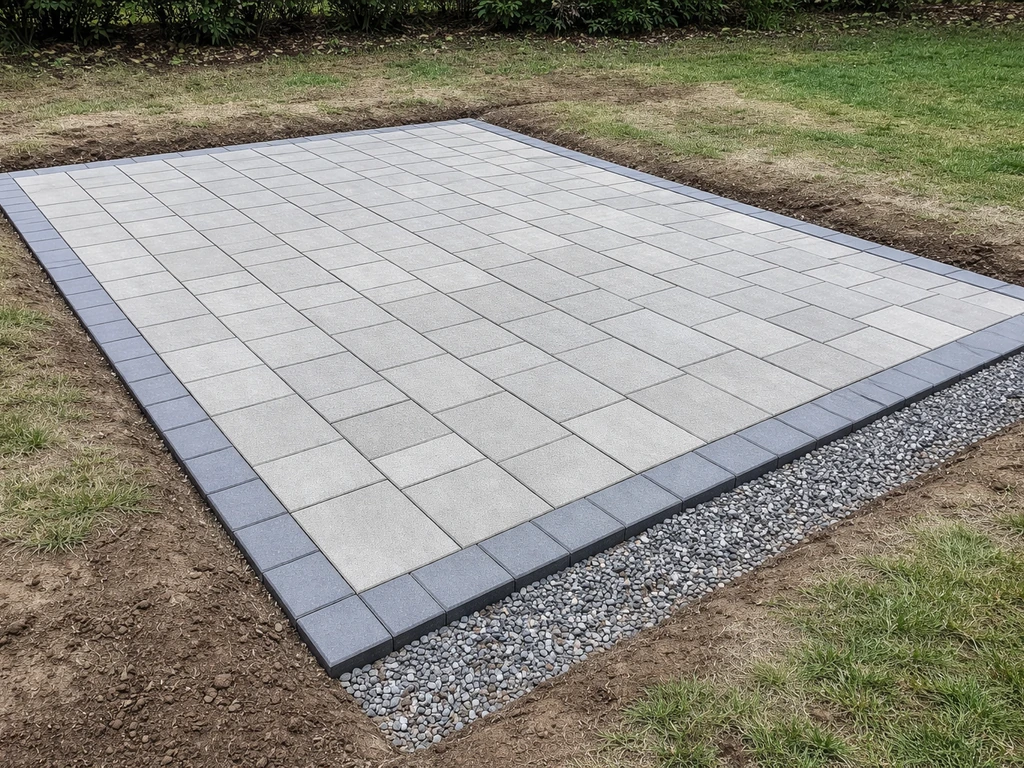
A 12x12 patio is 144 square feet of outdoor living space, and you can absolutely build one yourself over a weekend or two. Whether you choose interlocking pavers, poured concrete, gravel, or flagstone, the basic process is the same: mark the area, excavate 6 to 10 inches down, compact a gravel base, install your surface material, and finish the edges. The total cost typically runs $300 to $1,800 in materials depending on what you pick, and you do not need contractor experience to pull it off.
How to Build a 12x12 Patio: Complete DIY Guide, Costs & Time

Nolan Carver
6 Aug 2026
What this guide covers and who it's for
This guide is written for homeowners who want to build a 12x12 patio from scratch without hiring a crew. For step-by-step instructions on how to build a patio from scratch, see this detailed guide. It walks through every stage: planning, permits, material selection, tool lists, excavation, base prep, surface installation, drainage, finishing, and maintenance. I have built patios with all four major DIY materials covered here, and I will share what actually works, what trips beginners up, and where you can save money without cutting corners. If you are newer to this kind of project, you will find the beginner-friendly sections and common mistake warnings especially useful. If you have already laid a smaller patio and want to step up to a 12x12, this guide gives you the exact measurements, material quantities, and sequencing you need.
Should you DIY or hire a pro?
Most homeowners can handle a 12x12 patio on their own, but the honest answer depends on three things: your site conditions, your available time, and which material you choose. A gravel or paver patio on flat ground is one of the most beginner-friendly outdoor projects there is. A poured concrete slab on a sloped site with clay soil is a different animal, and it can go wrong in ways that are expensive to fix.
Good reasons to go DIY
- You save 40 to 60 percent compared to hiring a contractor, which on a 12x12 project can mean $800 to $2,000 in labor savings.
- Pavers, gravel, and flagstone installations are genuinely forgiving — a misaligned paver can be lifted and reset without any special equipment.
- The tools needed are either rentable or already in most garages (shovel, plate compactor, level, rubber mallet).
- You set the schedule and can work in stages over multiple weekends.
- Building it yourself gives you firsthand knowledge of every layer, which makes future repairs easy.
When hiring a pro makes more sense
- You are pouring a concrete slab and have no experience with concrete finishing — mistakes like crazing, scaling, or improper joint placement are hard to reverse.
- Your yard has significant slope (more than 2 inches of drop across 12 feet) that requires drainage engineering or retaining structures.
- Soil testing reveals expansive clay, fill soil, or high water table conditions that affect base depth and design.
- Local permits require a licensed contractor for work above a certain project value.
- You simply do not have 16 to 30 hours to dedicate across two weekends.
The sweet spot for DIY is a paver or flagstone patio on reasonably flat ground with stable native soil. If that describes your yard, keep reading. If you are dealing with major slope or drainage problems, tackle those site issues first, or get at least one professional consultation before you dig.
Planning, permits, and site prep checklist
Skipping this stage is the number one cause of expensive do-overs. Spend an hour here before you spend a dollar on materials. I have had to stop mid-project because of a buried utility line I did not call in, trust me, this checklist is worth it.
- Call 811 (the national 'Call Before You Dig' number in the US) at least three business days before any excavation. Underground gas, electric, water, and cable lines will be marked for free.
- Check your local building department's website or call them to find out if a patio permit is required. Rules vary widely — some jurisdictions require permits for any hardscape over 200 sq ft or any impervious surface, others do not require them for ground-level patios at all.
- Look up your property's setback requirements. Most municipalities require patios to sit at least 5 to 10 feet from property lines, and sometimes farther from easements or drainage corridors.
- Verify HOA rules if applicable. Many HOAs regulate patio size, materials, and color.
- Assess your frost depth. In cold climates, frost depth determines how deep your base needs to go. The local building department or the National Weather Service frost maps are the fastest way to find your design frost depth. In deep-freeze climates (frost depth over 24 inches), a floating paver installation that can shift and self-level each spring is often smarter than a rigid concrete slab.
- Evaluate your soil. If you dig a test hole 12 inches deep and find sandy loam or well-draining native soil, you are in good shape. If you find clay, organic fill, or soil that holds water, plan for a deeper base or improved drainage.
- Determine drainage direction. Your patio surface must slope away from the house at a minimum of 1/8 inch per foot (ideally 1/4 inch per foot) to move water away from the foundation.
- Mark the 12x12 area using stakes and mason's line. Square the corners using the 3-4-5 triangle method: measure 3 feet along one side and 4 feet along the adjacent side — the diagonal between those two points should be exactly 5 feet if your corner is square.
Comparing your four main material options
Each material has a genuinely different feel underfoot, a different installation process, and a different long-term maintenance story. Here is an honest side-by-side comparison for a 12x12 patio, followed by my recommendation based on skill level.
| Material | DIY Difficulty | Typical Material Cost (12x12) | Durability | Drainage | Repairability | Best For |
|---|---|---|---|---|---|---|
| Interlocking Pavers | Beginner-Intermediate | $400–$900 | Excellent (30+ years) | Good with proper base slope | Excellent — individual units lift and reset | Most DIYers; best balance of looks and ease |
| Poured Concrete | Intermediate-Advanced | $200–$500 (mix only) | Very good (20–30 years) | Needs control joints and surface slope | Poor — cracks are difficult to repair invisibly | Flat, stable sites; those comfortable with concrete work |
| Gravel / Crushed Stone | Beginner | $100–$300 | Good (needs occasional raking/topping) | Excellent — drains freely | Excellent — just add more material | Budget builds; casual or informal spaces |
| Flagstone | Beginner-Intermediate | $500–$1,800 | Excellent (decades) | Good with sand or gravel joints | Good — individual stones can be reset | Natural, organic looks; irregular or rustic designs |
My recommendation
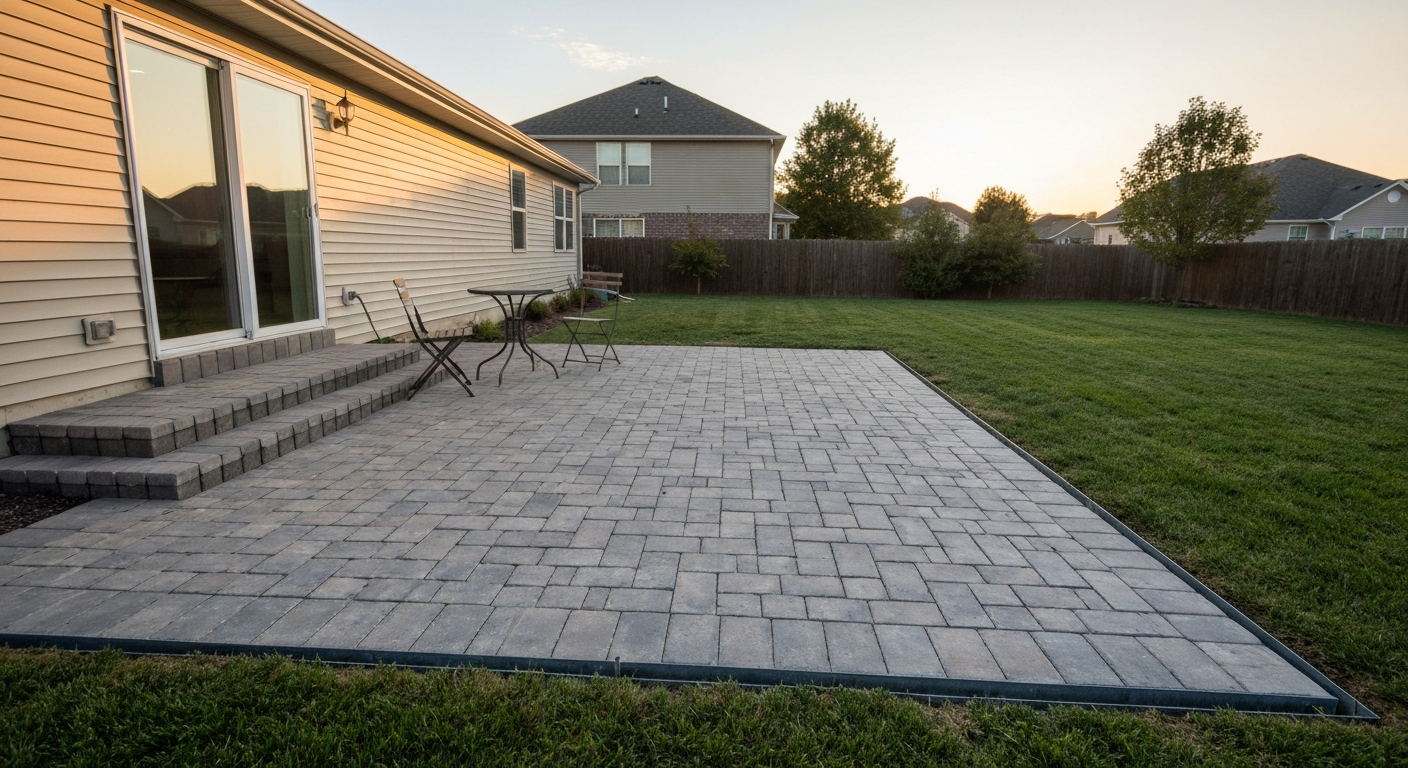
For most first-time patio builders, interlocking concrete pavers are the best choice. They are forgiving (you can pull and reset any unit that does not look right), they last decades with minimal maintenance, they handle freeze-thaw cycles better than a rigid slab, and they look great. Gravel is the right call if budget is the primary driver or if you want a weekend-done project. Save poured concrete for your second or third outdoor project when you have a feel for working with wet mix under time pressure. Flagstone is beautiful but requires more patience laying irregular shapes, not impossible for beginners, just slower.
Tools and safety gear by material
You do not need to own everything on this list. Most plate compactors, wet tile saws, and concrete mixers are available at equipment rental shops for $50 to $100 per day. Always wear safety glasses and work gloves regardless of material, concrete is caustic, cut stone edges are razor sharp, and a plate compactor will chew through a boot.
Universal tools for any 12x12 patio
- Measuring tape (at least 25 feet)
- Mason's line and line stakes
- Line level or laser level
- Flat spade and round shovel
- Steel rake and landscape rake
- Wheelbarrow
- Plate compactor (rent — critical for base stability)
- 4-foot level and 2-foot level
- Rubber mallet
- Safety glasses, work gloves, steel-toed boots
Additional tools for pavers
- Paver splitter or angle grinder with diamond blade (for edge cuts)
- Screed pipes or 1-inch diameter conduit (for setting sand depth)
- Broom for sweeping in joint sand
- Plate compactor pad attachment (rubber) to protect paver surface during final compaction
Additional tools for poured concrete
- Concrete forms (2x4 lumber staked in place)
- Concrete screed board (a straight 2x4 works)
- Bull float and hand trowel
- Edger tool and groover (for control joints)
- Concrete saw or circular saw with diamond blade for post-pour joint cutting
- Mixing drum or ready-mix delivery truck (for 1.78 cu yd you will want ready-mix delivery)
Additional tools for flagstone or gravel
- Angle grinder or masonry chisel for shaping flagstone
- Sand bedding materials and a straight screed
- Landscape fabric (for gravel patios to suppress weeds)
- Hand tamper (for gravel; a plate compactor is better for larger areas)
Materials list with quantities for a 12x12 patio
Your 12x12 patio covers exactly 144 square feet. All the quantities below are calculated from that number. I always order 10 percent extra to account for cuts, breakage, and minor miscalculations, factor that into your order.
For a paver patio
| Material | Depth / Spec | Quantity (no waste factor) | Order Quantity (+10%) |
|---|---|---|---|
| Crushed stone / Class II base (3/4-inch minus, angular) | 4–6 inches compacted | 2.2–3.3 cubic yards | 2.5–3.7 cu yd |
| Coarse bedding sand (concrete sand) | 1 inch screeded | 0.44 cubic yards (~0.6 tons) | 0.5 cu yd |
| Interlocking concrete pavers | 144 sq ft surface | 144 sq ft | 160 sq ft |
| Polymeric joint sand | Fills joints between pavers | 1–2 bags (50 lb) per 50 sq ft | 4–6 bags |
| Plastic or steel edge restraint | All perimeter edges | ~48 linear feet | 52 linear feet |
| Edge restraint spikes (10-inch) | Every 12 inches | ~48 spikes | 60 spikes |
For a poured concrete patio
| Material | Spec / Notes | Quantity |
|---|---|---|
| Ready-mix concrete (3,000–4,000 psi) | 4-inch slab; air-entrained in freeze-thaw climates | 1.78 cu yd (order ~2.0 cu yd) |
| Crushed stone sub-base | 4 inches, compacted | ~1.8 cu yd |
| Welded wire reinforcement (WWR) or #3 rebar | Placed in upper third of slab | ~160 sq ft of mesh or rebar grid at 18-inch spacing |
| 2x4 lumber for forms | Perimeter forming | ~50 linear feet |
| Concrete release agent or form oil | Applied to forms before pour | 1 can/small bottle |
| Concrete sealer | Applied after cure (28 days) | 1 gallon covers ~200 sq ft |
For a gravel patio
| Material | Depth / Spec | Quantity |
|---|---|---|
| Compacted crushed stone sub-base | 4 inches | ~2.2 cu yd |
| Decorative gravel surface (pea gravel or crushed stone) | 2–3 inches | ~1.1–1.7 cu yd |
| Landscape fabric | Under gravel surface layer | ~160 sq ft (one roll) |
| Plastic edging / bender board | Perimeter | ~50 linear feet |
To adjust these quantities for a different size, divide the total area by 144 and multiply each quantity by that ratio. For example, a 10x12 patio (120 sq ft) is 120/144 = 0.83x these quantities. You can read about a 10x10 build for a smaller-scale version of this same process.
Realistic cost and time estimates
These ranges are for DIY material costs only (no labor). Tool rental, delivery fees, and permit costs are separate and typically add $100 to $300 to any project. Prices vary by region and supplier, so treat these as planning numbers and get local quotes before you finalize your budget.
| Material | Low-End DIY Cost | Mid-Range DIY Cost | High-End DIY Cost | DIY Time (Weekend Hours) | Cure / Settle Time |
|---|---|---|---|---|---|
| Gravel | $150–$250 | $250–$400 | $400–$600 | 8–12 hours | Ready to use immediately |
| Poured Concrete | $250–$450 | $450–$700 | $700–$1,000 | 12–18 hours over 2 days | Walk on at 24–48 hrs; full cure 28 days |
| Interlocking Pavers | $400–$600 | $600–$900 | $900–$1,400 | 16–24 hours over 2 days | Ready to use in 24 hours after joint sand sets |
| Flagstone | $500–$800 | $800–$1,200 | $1,200–$1,800 | 20–30 hours (irregular shapes take time) | Ready to use after mortar cures (if mortared): 24–48 hrs |
The time estimates assume one person working, with a helper for mixing or moving heavy materials. Having a second person for the base compaction and screeding stages cuts the time significantly and makes the job much less exhausting. A concrete pour especially needs at least two people, wet concrete does not wait for you to take a break.
Step-by-step build sequence
This sequence applies to all four materials. I will note where the steps diverge for each one. Follow this order every time, skipping steps to save time (especially compaction) is the most common cause of a patio that sinks, shifts, or develops drainage problems in year two.
Step 1: Mark and measure your 12x12 area
Drive stakes at all four corners and run mason's line around the perimeter. Use the 3-4-5 triangle method to verify square corners: from one corner, measure 3 feet along one string and 4 feet along the adjacent string, then check that the diagonal between those two points is exactly 5 feet. If it is not, adjust your stakes. A patio that is even 2 inches out of square is noticeable and will complicate edge cuts throughout the project.
Step 2: Excavate to depth
For pavers: excavate 7 to 8 inches below the finished surface height (6 inches of compacted base plus 1 inch of bedding sand plus paver thickness, typically 2.375 to 3.125 inches, so total excavation depth is usually 9 to 11 inches). For a concrete slab: excavate 8 to 9 inches deep (4 inches of compacted stone base plus 4 inches of concrete). Check the local frost penetration (design frost depth) before setting footing or slab depths; authoritative frost depth data are available from Frost Depth, National Weather Service / NWS (NOAA) frost depth resources blank" rel="noopener noreferrer">Frost Depth — National Weather Service / NWS (NOAA) frost depth resources. For gravel: 6 to 7 inches is sufficient. Remember to account for your 1/4-inch-per-foot drainage slope, your excavation should mirror the finished slope. Remove all organic material, roots, and soft spots. If you find soft or wet soil at the bottom, compact it with a jumping jack tamper or hand tamper before adding base material.
Step 3: Install and compact the base
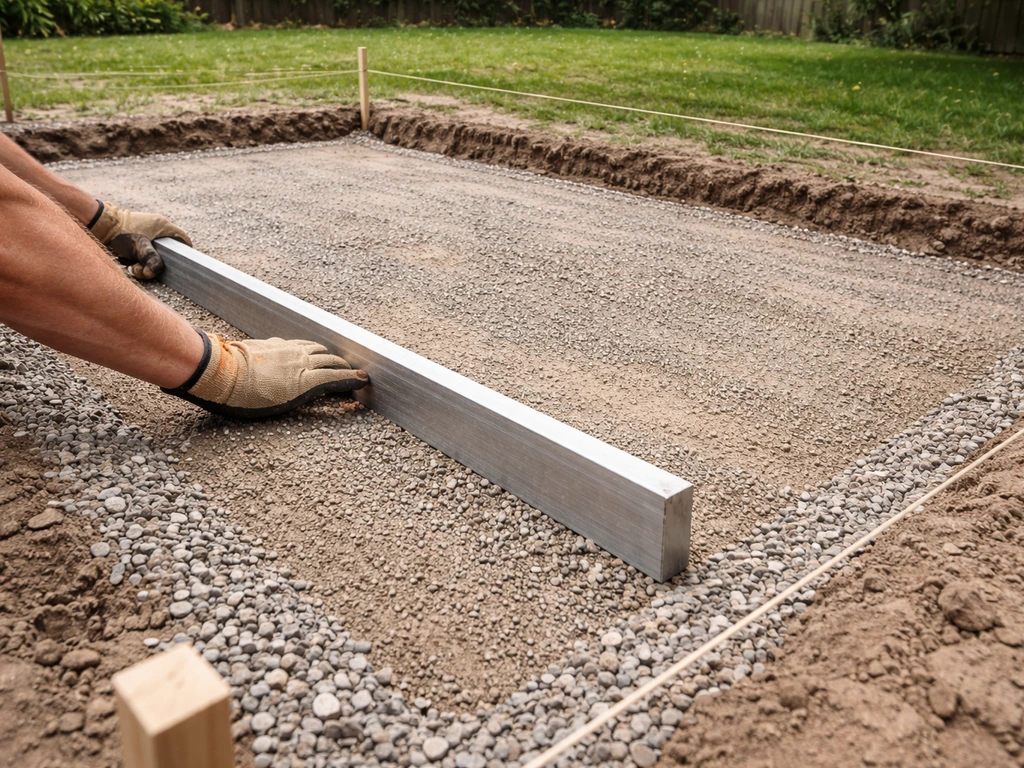
Add angular crushed stone (3/4-inch minus, crusher run, or Class II road base, not rounded river rock, which will not compact into a stable layer) in maximum 3-inch lifts. Compact each lift with a plate compactor before adding the next. Industry guidance targets compaction in the range of 95 to 98 percent Standard Proctor density. The Soil Survey Manual, Natural Resources Conservation Service (NRCS) explains Proctor compaction testing and how Standard and Modified Proctor values are used to set field compaction acceptance criteria and interpret percent compaction results Soil Survey Manual — Natural Resources Conservation Service (NRCS). You cannot measure this at home without lab equipment, but a well-compacted base feels firm under foot and does not leave boot prints. Run the plate compactor over each lift at least twice in perpendicular directions. A skipped or under-compacted base is the single biggest cause of pavers sinking or a concrete slab cracking prematurely.
Step 4 (Pavers only): Screed the bedding sand
Lay two 1-inch diameter pipes or conduit pieces parallel to each other on the compacted base, exactly 1 inch above the base surface. Fill between them with coarse concrete sand (not play sand, concrete sand has the right particle size). Drag a straight 2x4 screed board across the pipes to level the sand to a perfect 1-inch depth. Remove the pipes and fill the channels with sand. Do not walk on the screeded sand before laying pavers.
Step 5: Install the surface material
For pavers: start at a fixed corner (usually the house or most visible edge) and work outward. Set each paver firmly into the sand with a slight downward push and a tap from a rubber mallet, do not slide them in horizontally, as this disrupts the screeded sand. Maintain consistent joint spacing (most pavers have built-in spacer lugs). Make cut pieces using an angle grinder with a diamond blade or rent a paver splitter for straight cuts. For concrete: set your 2x4 forms to the correct height and slope, install reinforcement on chairs in the upper third of the slab, and call the ready-mix truck. For a 12x12 slab you need about 1.78 cubic yards, always order a minimum of 2 cubic yards to allow for spillage and slightly thicker spots. Screed, float, and finish the surface before it sets. Cut control joints at 8 to 12-foot spacings (for a 12x12 that means one joint in each direction) to 1/4 of the slab depth, about 1 inch deep on a 4-inch slab. For flagstone: dry-lay all stones first to plan the arrangement, then set them in a 1-inch sand bed or mortar base. Aim for 1 to 2-inch gaps between stones for joint filling.
Step 6: Install edge restraints (pavers)
This step is non-negotiable for paver patios. Without edge restraints on all free edges, the pavers will gradually migrate outward under foot traffic and freeze-thaw pressure. Tap the plastic or metal restraints tight against the last course of pavers and drive 10-inch spikes through the predrilled holes every 12 inches. On curves, use flexible plastic restraints and score the back of the sections to allow bending. The restraint top edge should be flush with or just below the paver surface.
Step 7: Fill joints and compact
For pavers: pour polymeric joint sand over the finished surface and sweep it into the joints with a stiff broom. Run the plate compactor (with the rubber pad attachment) over the entire patio at least twice to seat the pavers and vibrate sand into the joints. Add more sand and repeat until joints are filled to within 1/8 inch of the top. Then lightly mist the surface with water to activate the polymer binder in the sand, this locks the joints and reduces weed growth. For flagstone: fill joints with polymeric sand, regular sand, or a mortar mix depending on your aesthetic preference. For concrete: control joints are either tooled during finishing or saw-cut within 24 hours of the pour.
Step 8: Seal the surface (optional but recommended)
Pavers and concrete both benefit from a penetrating sealer applied after installation. For concrete, wait a full 28 days before sealing, the slab needs to complete its cure cycle first. A penetrating silane or siloxane sealer protects against water intrusion and freeze-thaw damage without changing the surface appearance. Film-forming sealers give a wet look but require more frequent reapplication. For pavers, sealer also locks the joint sand in place and enhances color. Apply sealer with a pump sprayer or roller on a dry day when temperatures are above 50 degrees Fahrenheit.
Drainage, slope, and foundation troubleshooting
Most patio problems trace back to water management. Here are the issues I see most often and how to fix them.
- Water pooling on the patio surface: Your slope is insufficient. The minimum is 1/8 inch per foot away from the house; 1/4 inch per foot is better. If you discover this after installation, individual pavers can be lifted and the base regraded — one advantage of flexible paving systems over concrete.
- Water draining toward the house foundation: This is a serious error. Stop and regrade the base before continuing. If you are mid-pour on concrete and realize the slope is wrong, you need to act fast — wet concrete can be raked to adjust grade before it sets.
- Soft or spongy spots in the base: You hit a soft soil area or skipped a compaction pass. Excavate the soft area, fill with crushed stone, and re-compact before proceeding. Do not just add more base on top.
- Pavers rocking or shifting after installation: Either the sand bed was too thick (more than 1.5 inches compacted) or the base was under-compacted. Lift the affected pavers, fix the underlying cause, re-screed the sand, and reset.
- Concrete slab cracking between control joints: Shrinkage cracking in slabs is normal and expected — control joints are designed to direct where cracks occur, not to eliminate them. Cracks wider than 1/4 inch at the surface may indicate base failure; cracks narrower than that are typically cosmetic.
- Frost heaving pavers: If your base does not extend below the local frost depth (or if water is pooling in the base layer and freezing), heaving will occur. In freeze-thaw climates, a free-draining base that extends to or below the frost line significantly reduces movement.
The easiest method for beginners
If this is your first patio and you want to maximize your chances of success, go with a gravel patio or a basic paver patio on flat ground. The gravel version requires the least skill: excavate 6 to 7 inches, compact the subsoil, add 4 inches of crushed stone base (compacted), lay landscape fabric, then top with 2 to 3 inches of decorative gravel or pea gravel and install edging. The whole thing can be done in one weekend with tools you likely already own. It is not the most polished look, but it is functional, well-draining, and cheap, and you can always upgrade it to a paver or concrete surface later by removing the gravel and building on the existing base. For a structured beginner walkthrough, a step-by-step patio building guide or a patio-for-beginners resource can help you build confidence before you tackle more complex installs.
Upgrade options once the base is in
A solid 12x12 patio is also a great launching pad for future upgrades. Once you have your base dialed in and the surface installed, these additions are all within DIY reach.
- Fire pit: A built-in or freestanding fire pit at the center or corner of a 12x12 patio is a natural upgrade. Use heat-resistant pavers or concrete block rated for fire exposure, and leave a minimum 10-foot clearance from structures.
- Retaining wall: If your patio meets a slope on one or more sides, a small retaining wall (under 4 feet tall in most jurisdictions) can create a level surface and clean edge. Segmental retaining wall blocks from any masonry supplier stack without mortar.
- Raised patio level: If you want to go from ground level to a deck-height patio, the same base-building principles apply but you will use taller retaining block courses to form the raised platform.
- Pergola footings: Plan the post locations before you pour or lay the center of your patio so you can position footings at the perimeter where they do not compromise the surface.
- Outdoor kitchen or built-in seating: A 12x12 patio is tight for a full outdoor kitchen, but a single run of countertop with a grill station fits well along one edge.
Deciding factors: pick your method with this checklist
Run through these five factors and the right material will become obvious. If you are still weighing options after this, pavers are almost always the safest bet for a first-time builder.
| Factor | Gravel | Poured Concrete | Interlocking Pavers | Flagstone |
|---|---|---|---|---|
| Budget under $400 | Best choice | Possible at low end | Tight but doable | Unlikely unless stone is free/cheap |
| Beginner skill level | Easiest | Not recommended alone | Good choice | Manageable with patience |
| High-traffic, durable surface | Requires raking/topping | Excellent | Excellent | Very good if set in mortar |
| Best natural drainage | Excellent | Needs slope and joints | Good with permeable options | Good with open joints |
| Easy future repairs | Excellent | Difficult | Excellent | Good |
| Clean, modern look | No | Yes | Yes | Depends on stone |
| Natural or rustic look | Somewhat | No | No | Best option |
| Freeze-thaw climate | Good if free-draining | Needs air-entrained mix + joints | Best (flexible system) | Good if sand-set |
The fastest way to use this table: circle your top two or three factors, look down those columns, and pick the material with the most favorable marks. A $300 budget with beginner skills points squarely at gravel. A first-timer who wants a polished look that lasts 30 years and can stretch to $700 should choose pavers. Someone who has done concrete flatwork before and wants a seamless surface can go with a poured slab. If you want to keep things as simple as possible from start to finish, check out resources focused specifically on simple and easy patio builds, they reinforce the same fundamentals with even fewer moving parts. For a clear step-by-step primer, see our beginner-friendly guide on how to build a patio for beginners. For a step-by-step primer with fewer moving parts, see our short guide on how to build a patio easy. For a straightforward, step-by-step walkthrough, see our guide on how to build a simple patio.
Maintenance and long-term care
A well-built 12x12 patio is low maintenance, not no maintenance. For pavers, re-apply polymeric joint sand every 3 to 5 years as it breaks down, and re-seal every 2 to 3 years if you used a film-forming sealer. For concrete, re-seal every 2 to 5 years depending on climate and traffic, and monitor control joints for debris that can cause spalling. For gravel, rake periodically to redistribute material and top up with a fresh inch of gravel every few years as particles compact and migrate. For flagstone, check that individual stones have not shifted or tipped and re-level any that have, a lifted stone is a trip hazard. Regardless of material, keep the perimeter edging tight and intact. A loose edge restraint on a paver patio is the beginning of a cascade failure, catch it early and drive in replacement spikes before the whole edge row migrates.
FAQ
What are the absolute, must‑have measurements and simple calculations for a 12×12 patio?
Area = 12 ft × 12 ft = 144 sq ft. Concrete volume for a 4‑inch slab = 144 sq ft × (4/12) ft = 48 cu ft ≈ 1.78 cubic yards (round up and add ~10% waste/order allowance). Paver/flagstone base: plan on a compacted aggregate base 4–6 in (for typical pedestrian patios) plus a 1 in screeded bedding sand for pavers. Use these base depths and the 144 sq ft area when calculating material quantities.
What planning and permit checks should the article include and what sources should readers check?
Advise readers to: check local zoning setbacks and impervious surface limits, verify building‑permit requirements for patios and any footings/retaining walls, and confirm local frost depth. Sources: local city/county building department, NRCS Web Soil Survey for soils, and NOAA/NWS or local code for frost depth. Recommend calling the local permit office early and checking utility locations (811).
Which material and tool choices must be covered and what specific specs are important?
Materials: concrete (specify 3,000–4,000 psi mix, entrained air for freeze‑thaw areas), crushed angular aggregate (Class‑2/3/4/3/4"‑minus/‘crusher run’) for subbase, bedding sand (1 in screed for pavers), pavers/flagstone choices, joint material (polymeric sand or mortar), edge restraints (plastic/metal/curb), geotextile if poor soils. Tools: plate compactor, hand tamper, level/laser or transit, string and stakes, concrete tools (float/trowel/edger), masonry saw or paver splitter, wheelbarrow, measuring tape, shovel, rake. Important specs: base gradation (DOT/Class‑2), bedding sand >=1 in, compaction targets (≥95% relative density where specified), control‑joint spacing (see concrete guidance).
What exact base depths, bedding thickness, and compaction guidance should be given for pavers vs concrete?
Pavers: typical compacted aggregate base 4–6 in for pedestrian patios; increase to 6–8+ in in freeze‑thaw or poor subgrade. Bedding sand: 1 in screeded layer. Compact in lifts (≤3 in) and aim for high relative density; manufacturer guides (Belgard/Unilock) recommend ≥95–98% where specified. Concrete: typical slab 4 in thickness for pedestrian loads (increase to 5–6 in for heavier loads or poor soils). Place reinforcement (wire mesh/rebar/chairs or synthetic fibers) in upper third of slab if used. Sources: Belgard, Unilock, ACI guidance references.
How many control joints and where for a 4‑inch concrete slab this size?
Rule of thumb: control‑joint spacing for unreinforced 4 in slab ≈ 8–12 ft. For a 12×12 patio, place joints so no panel exceeds this spacing — typically a single central joint dividing the slab into two 6×12 panels or two joints to create four 6×6 panels depending on layout and aesthetics. Cut joints to about 1/4 slab depth soon after finishing. Reference ACI/industry control‑joint guidance.
What are the calculated material quantities homeowners need (quick list for 144 sq ft)?
Concrete (4 in slab): ~1.78 cu yd → order ~2.0 cu yd (10% allowance). Crushed stone base (if replacing topsoil to 6 in compacted): 144 sq ft × 0.5 ft = 72 cu ft ≈ 2.67 cu yd. Bedding sand for pavers (1 in): 144 sq ft × (1/12) ft = 12 cu ft ≈ 0.44 cu yd. Pavers: depends on unit size — calculate coverage by unit area + 3–5% cutting waste. Edge restraint length = perimeter = 48 ft. Polymeric sand quantity depends on joint width/depth — follow manufacturer coverage charts. Note: adjust volumes for compaction (order more) and site‑specific base depth.