You can build a simple ground-level patio yourself in a weekend or two. The basic sequence is: pick your size and material, mark the area, dig out 7 to 9 inches of soil, lay compacted gravel, add a 1-inch sand bed, set your surface (pavers or concrete), edge it, and let it settle or cure. If you follow this basic sequence, you'll know exactly how to build a patio from scratch, even as a first-timer. If you want a more detailed, beginner-friendly walkthrough, follow these steps for how to build a patio for beginners from start to finish. No structural engineering, no retaining walls, no special contractor license needed for a straightforward flat pad against your house.
How to Build a Simple Patio: Step-by-Step DIY Guide

Nolan Carver
16 Jun 2026
This guide walks you through every step from an empty backyard to a finished patio you can actually use. If you want to go deeper on any single phase, there are more detailed guides on building a patio step by step, building a patio from scratch, and patio builds at specific sizes like 10x10 and 12x12. But if you want one complete walkthrough right now, keep reading.
Choosing the right simple patio type and size
A 'simple patio' in real terms means a ground-level, flat surface with no roof structure, no raised platform, and no retaining walls holding back a slope. A retaining wall is designed to restrain soil to a slope that it would not naturally keep to blank" rel="noopener noreferrer">retaining walls holding back a slope. It sits on grade. That distinction matters because raised patios require a completely different structural approach. What we're building here is a paved pad directly on prepared ground, and that's the right starting point for most DIYers.
For surface material, you're really choosing between two options: concrete pavers or poured concrete. Pavers are modular, individual units you lay one at a time. They're easier to fix later (swap out one cracked piece), but they require more precise base work and more hands-on leveling. Poured concrete is faster to finish once you're ready to pour, gives you a single seamless surface, but mistakes are much harder to undo. For most first-time builders, pavers are more forgiving during installation because you can adjust as you go.
| Feature | Concrete Pavers | Poured Concrete |
|---|---|---|
| Skill level | Beginner-friendly | Moderate (requires forming and finishing) |
| Repair ease | Easy (replace individual units) | Difficult (patch or full re-pour) |
| Base work required | More critical (sand bedding + compaction) | Less layering, but formwork needed |
| Typical cost (materials) | $3–$8 per sq ft | $4–$8 per sq ft |
| Cure/wait time | Usable same day | 28 days to full cure (walkable in 24–48 hrs) |
| Drainage | Gaps allow some natural drainage | Requires slope; can pool if flat |
| DIY adjustability | High (move pieces during install) | Low (once poured, it sets) |
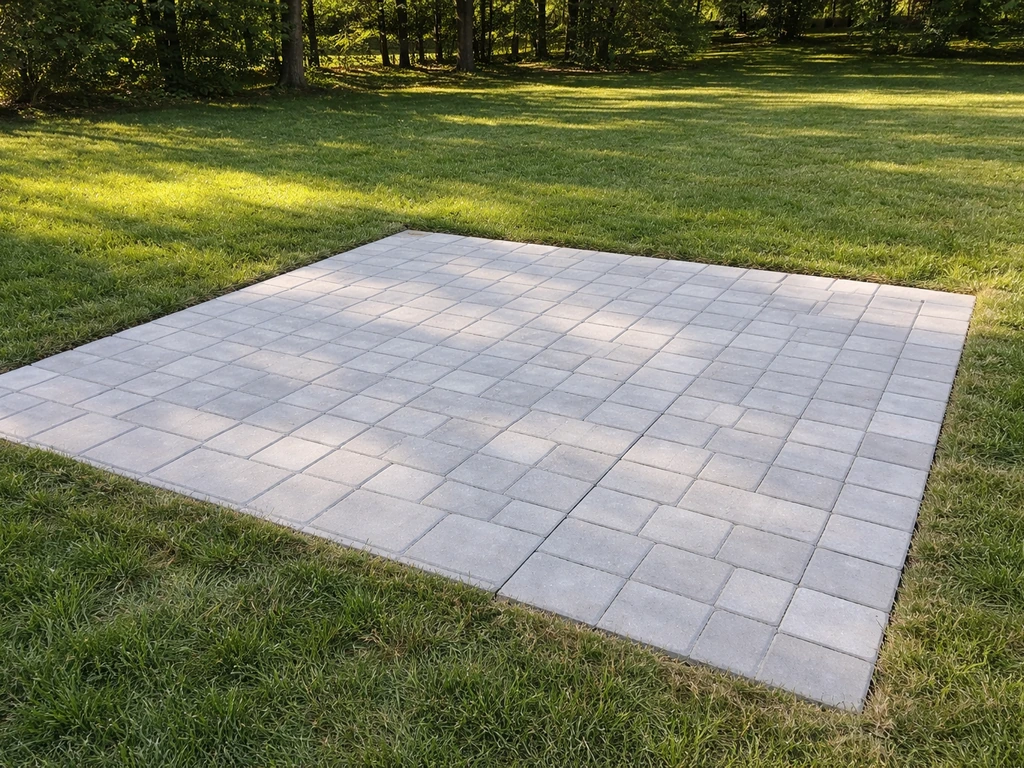
For size, a 10x10 foot patio (100 sq ft) is a good starting point for one table and a couple of chairs. Once you have the right size in mind, you can follow the steps here to learn how to build a 10x10 patio that stays level and drains correctly 10x10 foot patio (100 sq ft). A 12x12 (144 sq ft) gives you more breathing room. Most backyards can handle a 10x16 or 12x20 without feeling cramped. Start with what you actually need, not what looks big on paper. You can always expand later.
Planning layout, measurements, and permits basics
Before you dig a single shovelful, check whether you need a permit. This is one area where I can't give you a universal answer because the rules vary wildly by location. In some municipalities, a flat ground-level concrete or paver pad with no roof requires no permit at all. In others, any new patio installation or expansion triggers a permit requirement regardless of size or material. Call your local building department or check their website. It takes 10 minutes and can save you a serious headache later.
Also call 811 (in the US) before any digging. This is the national dig-safe number, and they'll mark underground utilities for free. You only need to go about 8 to 10 inches deep for a patio base, but hitting a gas line at any depth is not worth skipping the call.
For layout, keep it rectangular or square for your first patio. Curves and angles add complexity fast. Measure your space, sketch it on paper, and mark the corners with stakes. Then use batter boards and string lines to create a flat, square reference grid. To confirm square, use the 3-4-5 triangle rule: measure 3 feet along one string line from a corner stake, then 4 feet along the perpendicular line. The diagonal between those two points should measure exactly 5 feet. If it doesn't, adjust until it does. This is how you guarantee a perfectly square layout before any digging starts.
- Stakes and mallet for marking corners
- Tape measure (at least 25 ft)
- Mason's string line and line level
- Spray paint or marking chalk for the perimeter
- Notepad with your measurements and a simple sketch
Site prep: clearing, grading, and drainage slope
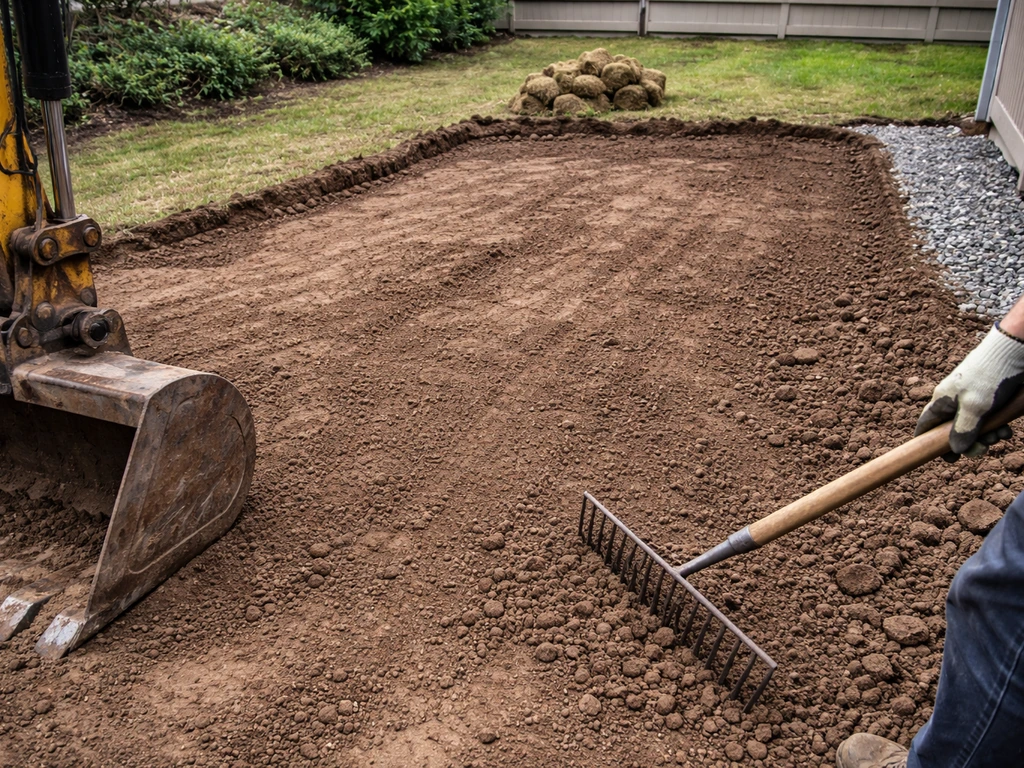
Site prep is the part most beginners underestimate, and it's where most patio failures start. Get this right and everything on top of it works. Rush it and you'll be relaying pavers in two years.
Start by removing all vegetation, sod, and topsoil within your marked area. Topsoil is organic, which means it compresses and shifts over time. You don't want any of it under your base. You need to dig down roughly 7 to 9 inches below where your finished patio surface will sit. That depth breaks down as: 4 to 6 inches of compacted gravel base, 1 inch of bedding sand, and the paver thickness (typically 2 to 2.5 inches for concrete pavers). If you're pouring concrete, the slab itself is usually 4 inches thick, so your gravel base depth adjusts accordingly.
Drainage slope is non-negotiable. Water pooling on or under your patio will eventually heave, crack, or shift the surface. The standard rule is a slope of 1 inch per 8 feet away from your house (or away from any structure). If your patio is 12 feet deep, the far edge should be 1.5 inches lower than the edge nearest the house. Set your string lines to reflect this grade before you start compacting anything, and check it with a level and tape measure as you build up each layer.
Building the base: subbase, base materials, and compaction
The base is what holds everything steady. For a standard paver patio, you want a 4-inch layer of compacted crushed stone or gravel (also called road base, Class II base, or crusher run depending on your region). This is not decorative gravel. You want angular, crushed aggregate that locks together when compacted, not round river rock that just rolls around.
Spread the gravel in 2-inch layers and compact each one before adding the next. Renting a plate compactor from a hardware store for a day (typically $60 to $100) is worth every penny. Make multiple passes in different directions. The goal is a base that doesn't shift when you stand on it and doesn't leave footprints. After compaction, check your grade again with a level across your string lines. Recheck the drainage slope at this stage.
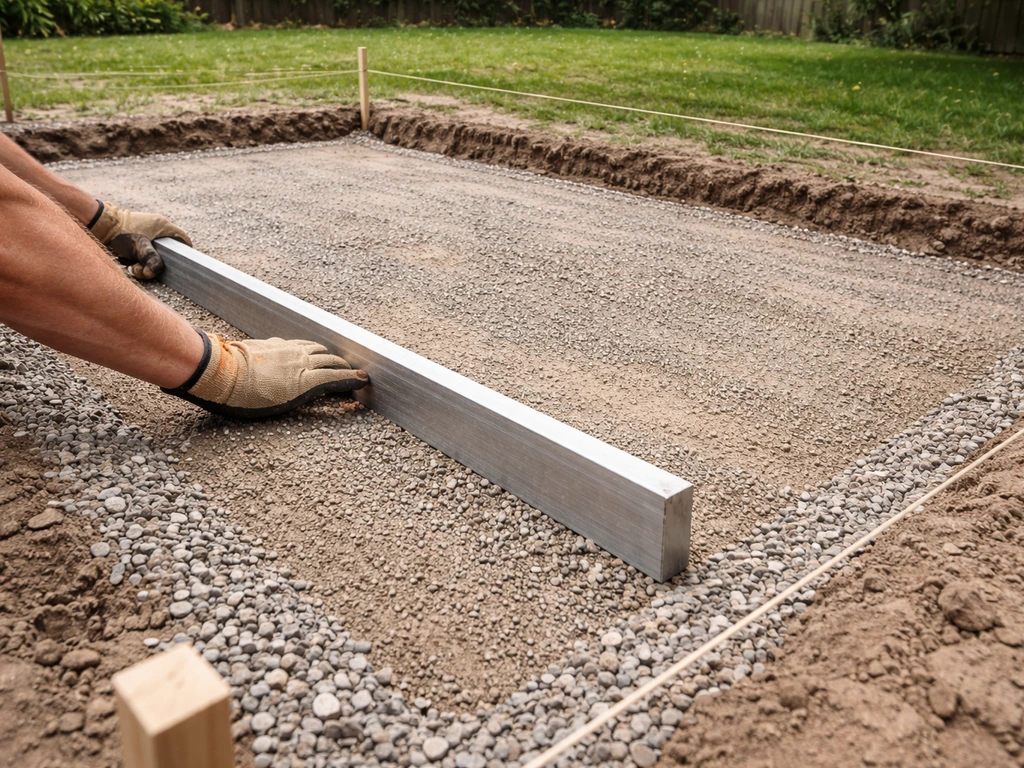
Once the gravel base is compacted and graded, spread a 1-inch layer of coarse bedding sand (not fine play sand) over the entire surface. Use 1-inch diameter pipes or conduit as screed guides: lay them parallel across the base at your desired sand depth, then drag a straight 2x4 across them to create a perfectly even 1-inch sand bed. Do not compact the sand at this point. It needs to stay loose so the pavers can settle into it during installation.
Installing the patio surface (pavers or concrete)
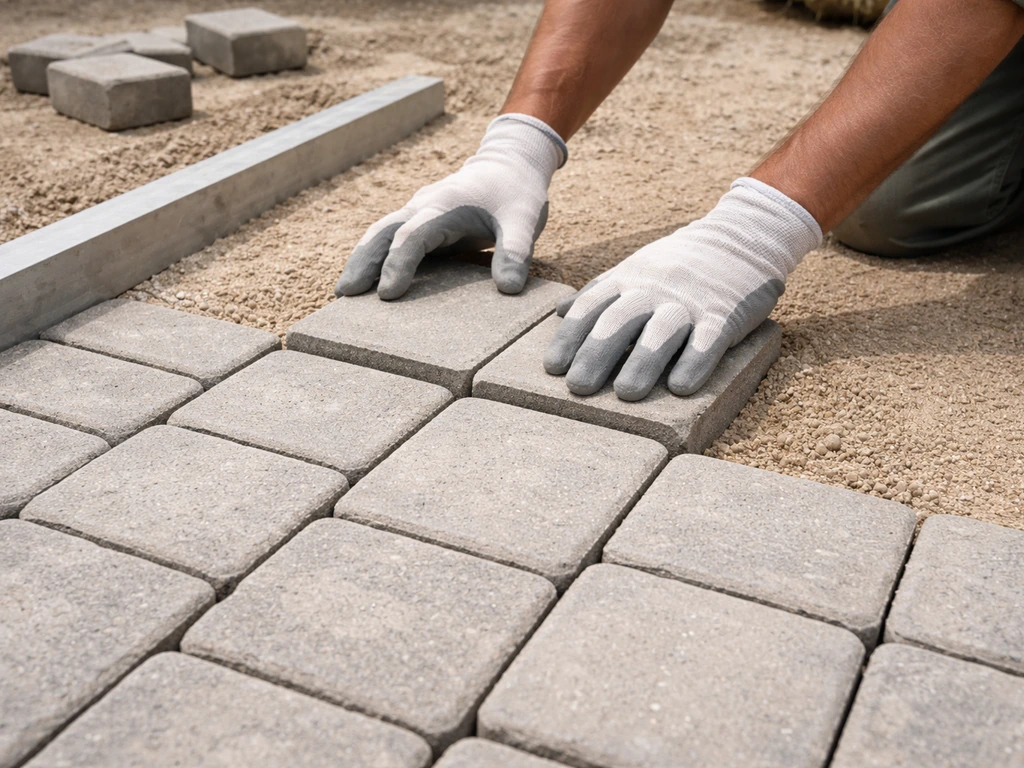
Laying pavers
Start at the corner closest to your house (or a fixed straight edge) and work outward. Set each paver gently onto the sand bed, don't slide them. Keep consistent spacing using plastic paver spacers or by eye if you want a tighter joint. Check level every 3 to 4 pavers using a level and rubber mallet. Tap down high spots gently. If a paver sits low, lift it and add a little sand underneath.
You'll almost certainly need to cut some pavers at the edges. A wet saw or angle grinder with a diamond blade handles this well. Mark your cut line with a pencil or chalk, make the cut slowly, and dry-fit before setting permanently. Keep a handful of extra pavers for cuts and future repairs.
Pouring concrete
For a poured concrete slab, build a wood form around your patio perimeter using 2x4 lumber staked into the ground. The top of the form is your finished slab height, so set it carefully and check level/slope before you pour. Add rebar or wire mesh inside the form for a 10x10 or larger slab to reduce cracking. Mix and pour concrete, screed it flat with a 2x4 board using a sawing motion, then float the surface smooth.
Add control joints every 6 to 8 feet (score about 1 inch deep) to direct any future cracking to a predictable line. Keep it out of direct sun and mist it lightly for 3 to 7 days to slow the cure and reduce surface cracking.
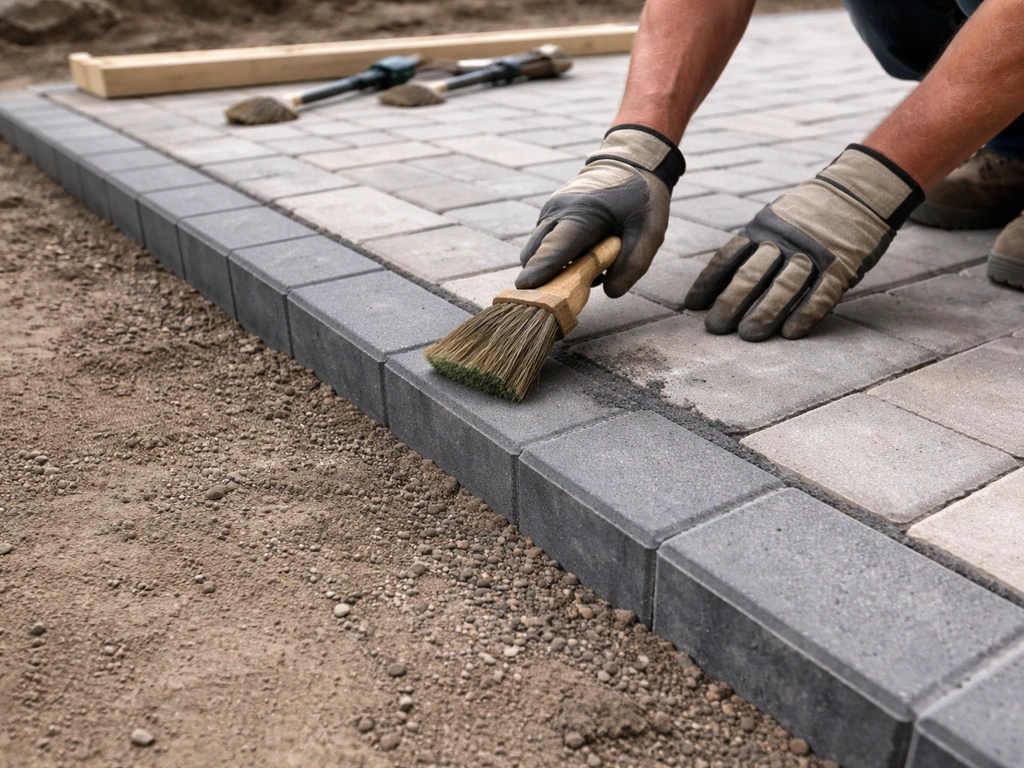
Edging, finishing, and cleanup or cure steps
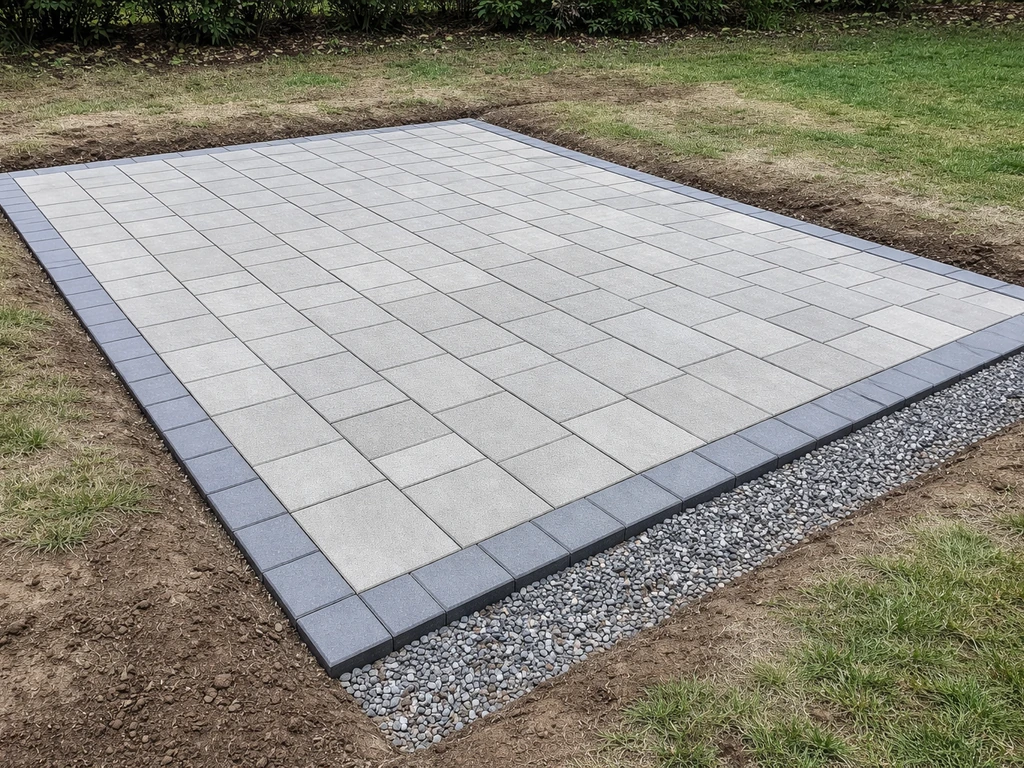
Edging keeps your pavers from shifting outward over time, especially at the perimeter where there's no lateral pressure from neighboring pavers. Plastic paver edging (also called restraint edging) is the standard choice. Spike it into the ground along the outside edge of your last row of pavers, driving spikes every 12 inches. For a concrete slab, the form itself acts as edge restraint during the cure, and you remove it after 24 to 48 hours.
For pavers, after all the edging is in place, spread polymeric jointing sand across the entire surface. Sweep it into the joints with a push broom, then compact the whole surface one more time with the plate compactor to lock everything down. Sweep again to refill any joints that need it. Finally, blow or sweep off excess sand and mist the surface lightly to activate the polymeric sand's binding agent. Avoid heavy rain for 24 hours after this step.
For a concrete slab, the surface is walkable in about 24 to 48 hours but doesn't reach full strength for 28 days. You can set lightweight furniture on it after 3 to 5 days. Don't park vehicles on it for at least a week, preferably longer in cool or humid weather. Strip the wood forms after 24 to 48 hours and backfill the gap alongside the slab with soil or mulch.
Troubleshooting common DIY issues and a practical next-step checklist
Problems you might run into
| Problem | Likely Cause | Fix |
|---|---|---|
| Pavers rocking or uneven | Sand bed not screeded consistently or base not fully compacted | Pull the affected pavers, add or remove sand, relay and check with level |
| Water pooling on surface | Drainage slope too shallow or running toward house | Re-check slope with a level; you may need to relay a section to correct grade |
| Pavers shifting outward | No edge restraint or spikes pulled out of soft soil | Add or resecure edging; use longer spikes or stake into compacted gravel |
| Concrete cracking randomly | No control joints; cured too fast in heat | Add saw-cut joints within 12 hours of pour; mist surface during cure |
| Layout not square | Skipped the 3-4-5 check | Reset string lines and re-check diagonals before continuing |
| Base settling unevenly | Topsoil not fully removed or base not compacted in layers | Excavate, remove organic material, rebuild base in 2-inch compacted lifts |
| Joints washing out | Used regular sand instead of polymeric sand, or rained before activation | Remove surface sand, re-apply polymeric sand, compact, and mist on a dry day |
Your practical next-step checklist
- Decide on patio size and surface material (pavers or concrete) and sketch it on paper
- Check local permit requirements with your building department and call 811 to mark utilities
- Buy or rent tools: plate compactor, level, tape measure, string line, and stakes
- Order materials: crushed gravel base, bedding sand, pavers or concrete, edging
- Mark the layout with stakes and string lines, confirm square with the 3-4-5 rule
- Excavate 7 to 9 inches, remove all topsoil and organic material
- Lay and compact gravel base in 2-inch layers, check drainage slope throughout
- Screed a 1-inch sand bed flat (pavers only)
- Set pavers or pour and screed concrete, checking level as you go
- Install edge restraint, sweep in polymeric sand (pavers), or strip forms and cure (concrete)
- Backfill edges, clean up, and let everything set before heavy use
If at any point something looks off, stop and fix it before moving to the next layer. A bad base covered with nice pavers is still a bad base. The reassessment points are: after excavation (is the ground solid and clear of roots?), after base compaction (does it feel solid underfoot with no give?), and after screeding sand (are your string lines still showing the right slope?). Catch problems at these three checkpoints and the rest of the build goes smoothly.
A 10x10 paver patio typically costs $300 to $800 in materials depending on paver style and local prices, and takes one to two weekends for a first-timer. Concrete in the same size runs similar in material cost but can be done in a single long day once the base is ready. Either way, you're building something that lasts 20 or more years if the base work is solid. That's what makes this project worth doing right.
FAQ
How do I figure out the correct drainage direction for a patio that’s not perfectly square to the house?
Choose a slope that moves water away from your house, but make it consistent across the whole pad. If you are near a downspout or grading that already sends water somewhere specific, adjust the low edge to avoid creating a new puddling spot at a gutter outlet or property line.
Can I build a simple patio now and expand it later without ruining the leveling?
Yes, but do it in phases. If you want to extend later, keep the original base compacted and stable, then build the extension with its own edge restraint and drainage grade, leaving a small joint line between old and new surfaces so expansion and settling don’t fight each other.
What should I do if the base feels spongy after I compact the gravel?
If you see pumping, footprints, or soft spots after compaction, stop and remove the suspect base section. Add base material in thin lifts, compact again, and recheck grade. Over compacted sand or topsoil trapped under gravel is a common reason patios settle unevenly.
How can I tell early that my pavers are going down unevenly, and how do I correct it?
For pavers, stop trying to “fix it later” and correct it during laying. Lift the out-of-level pavers, add or remove bedding sand, then reset them, because joints and polymeric sand will not compensate for an uneven plane.
When is the best time to install polymeric jointing sand, and what weather mistakes should I avoid?
Use polymeric jointing sand only after pavers are set on the proper sand bed and the pattern is fully tight. In cold weather or if you expect rain soon, wait, because polymeric sand needs specific conditions to activate and can fail if rinsed or washed out too early.
What are the biggest mistakes that cause concrete patios to crack or scale, even when the base looks fine?
For concrete slabs, don’t rely on just a single pour day decision. Plan to mix and place continuously, keep the slab covered from harsh sun, and include control joints as instructed, because most cracking happens along stress points you can direct.
Why should I not compact the bedding sand layer under pavers?
No, because the 1-inch sand bed needs to stay loose so pavers can seat. If you compact the sand, you can create localized high spots and make it harder for the surface to settle into a flat plane during installation.
Do I need to do anything special for patios built on clay soil or loose fill?
Yes, and it’s usually worth it. If the ground is sandy, rocky, or has roots you missed, the base can still be stable, but you should verify depth and firmness across the entire footprint. If you can push a stake in easily after excavation, you likely need more excavation and/or a better base.
How do I edge a simple patio if it borders a slope, walkway, or driveway?
You can, but choose a restraint approach that fits. For pavers, plastic edging spiked on a firm base helps prevent outward movement, and you may want to add edge support along doorways or steps. For concrete, the form works during the pour, but you still need proper subgrade prep so the slab isn’t set on migrating soil.
Can I tie a patio into an existing driveway or sidewalk without creating a trip hazard?
Yes, but plan the transitions. If you connect to an existing concrete slab, align your drainage slope and consider a joint at the meeting line so differential movement doesn’t crack the patio or create a lip that traps water and debris.
How long do I need to wait before using the patio after sealing or after jointing?
After joint sand activation, avoid washing the patio and avoid placing heavy objects for about the stated curing window. Even after the surface looks set, polymeric sand can wash out if hit by a strong hose or rain before it fully binds.
What’s the simplest way to estimate how many pavers I need so I don’t run short at the edges?
Before you lay pavers, confirm you have the right spacer size and enough extra material for cuts and breakage. A common failure is running short on paver quantity for the final row, which forces uneven cuts and makes leveling harder near edges.