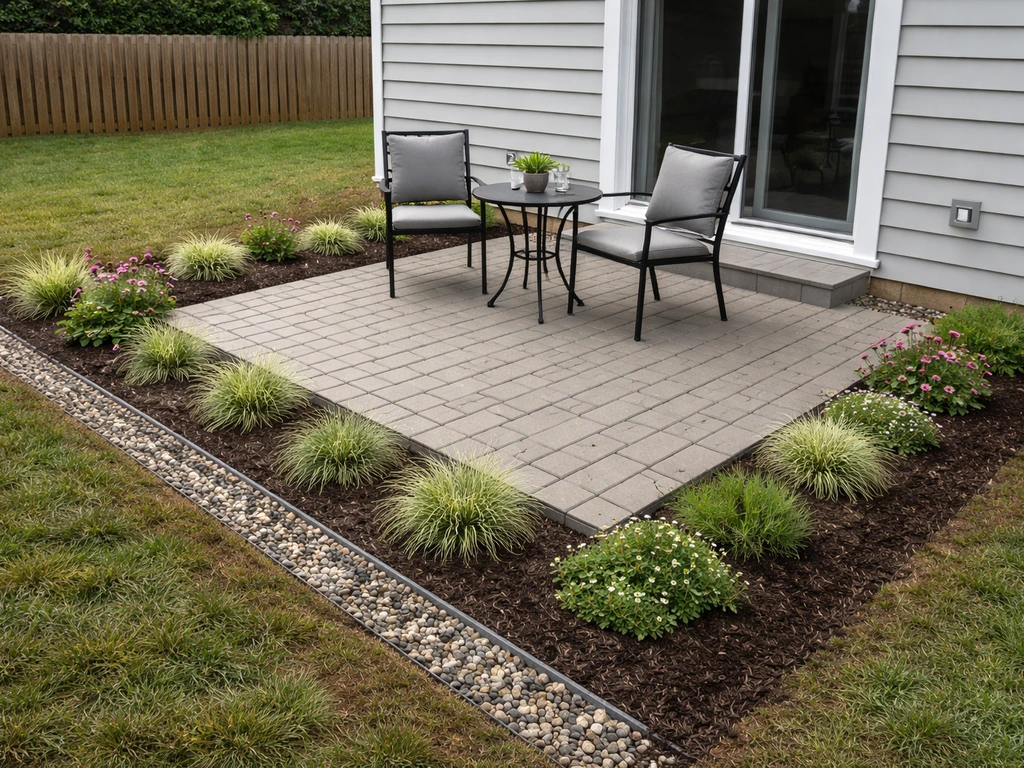
You can build a solid, well-drained corner patio yourself in a weekend or two by excavating 8 to 10 inches deep, laying a compacted gravel base, and setting pavers or concrete slabs outward from the corner. The key to making it look sharp and stay stable is nailing the corner geometry first, pitching the surface slightly away from the house, and never skimping on base compaction. Everything else follows from those three fundamentals. If you want a covered patio, you can follow the same corner patio build steps, then plan posts and roof framing before you finalize the surface.
How to Build a Corner Patio: DIY Step by Step Guide

Nolan Carver
28 Jun 2026
Designing the corner layout
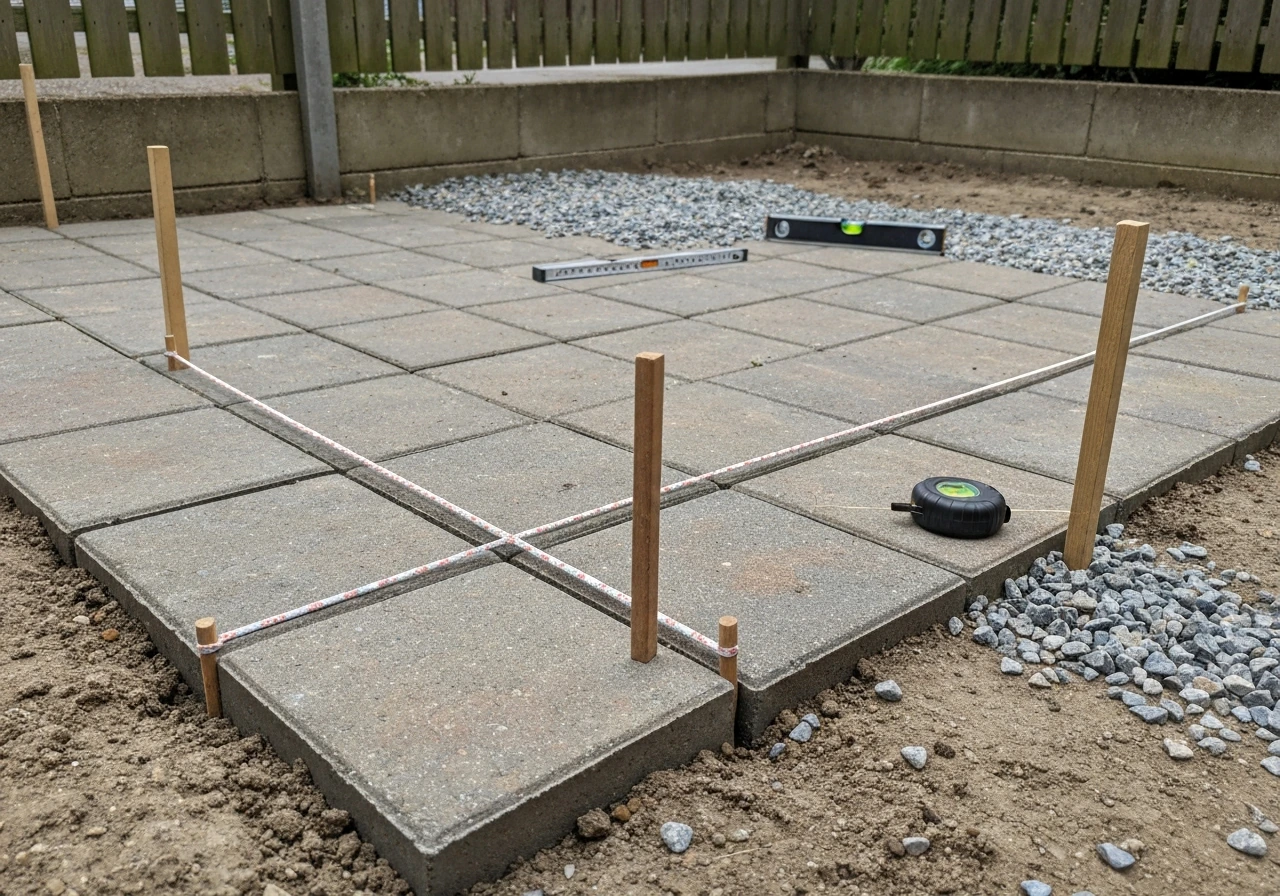
Before you touch a shovel, spend real time on your layout. A corner patio is typically tucked into an inside corner of a house, fence, or garden wall, which gives you two reference lines to work from. The challenge is that those two walls or structures are rarely perfectly square to each other, and even a small angle error compounds badly over a 12-foot or 15-foot run. Start by measuring out from the corner of the house to establish where the patio edges will land, then use stakes and mason's string to mark those edges on the ground.
To check that your corner is a true 90 degrees, use the 3-4-5 method: from the corner stake, measure 3 feet along one string line and mark it, then measure 4 feet along the other string line and mark it. Using the [3-4-5 method](https://www. homedepot. ca/en/home/ideas-how-to/outdoors/patio/how-to-install-patio-pavers.
html? msockid=1022569f1fa5630a39f4403a1ef4626f), you mark points 3 ft and 4 ft from the corner along the two perpendicular sides, and the diagonal between those points should measure 5 ft when the corner is truly 90°. The [diagonal distance between those two marks should be exactly 5 feet](https://www. quikrete.
com/PDFs/Projects/LayoutBasicsForSlabsAndFooters. pdf). If it is not, adjust one of the string lines until it is. For larger patios, scale this up, such as 6-8-10 or 9-12-15, because bigger triangles reduce the compounding alignment error you get when small string-stretch mistakes scale across a 16-foot layout.
Once your perimeter strings are squared, run two diagonal strings from opposite corner stakes to form an X across the whole layout. Those diagonals should be equal in length. If they are not, one corner is off. This X also becomes your ongoing reference as you build: you can drop a plumb bob from it at any point to check that your base and surface stay true as you work outward.
Not every corner is 90 degrees. If you are fitting the patio into an irregular corner, say a 120-degree angle between a fence and a garden bed, measure both angles carefully with a digital angle finder or a large framing square, then transfer those angles to your string layout. Mark the patio footprint on the ground with marking paint or sand before digging so you can walk the space and confirm it feels right.
Planning drainage and slope at patio corners
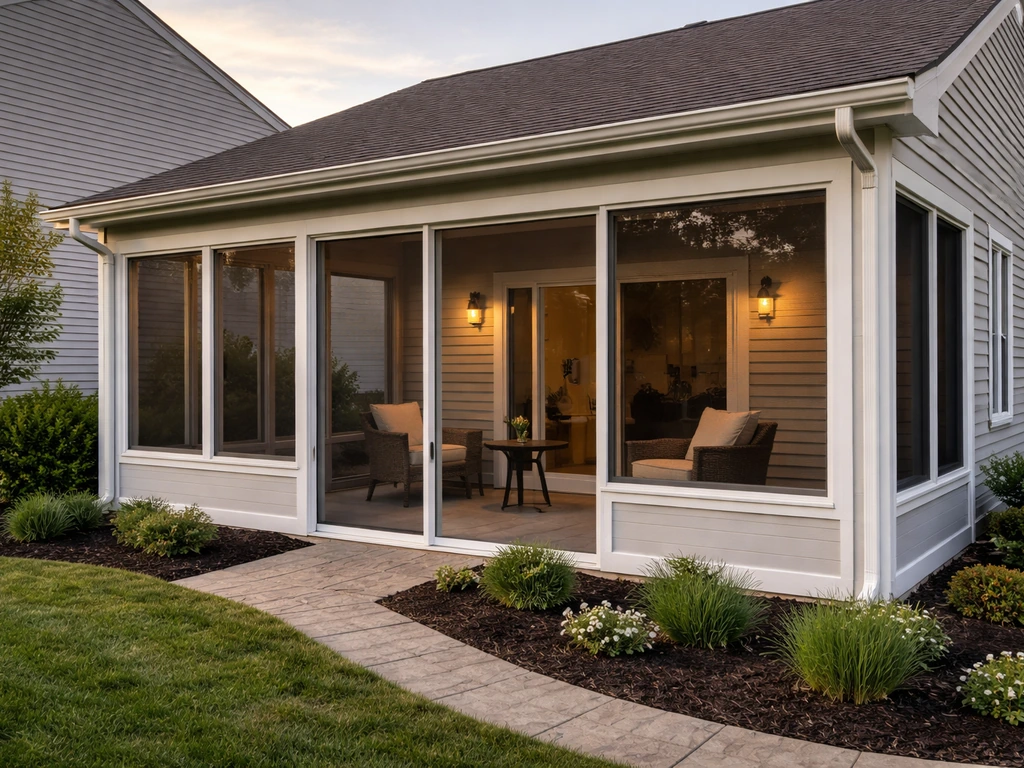
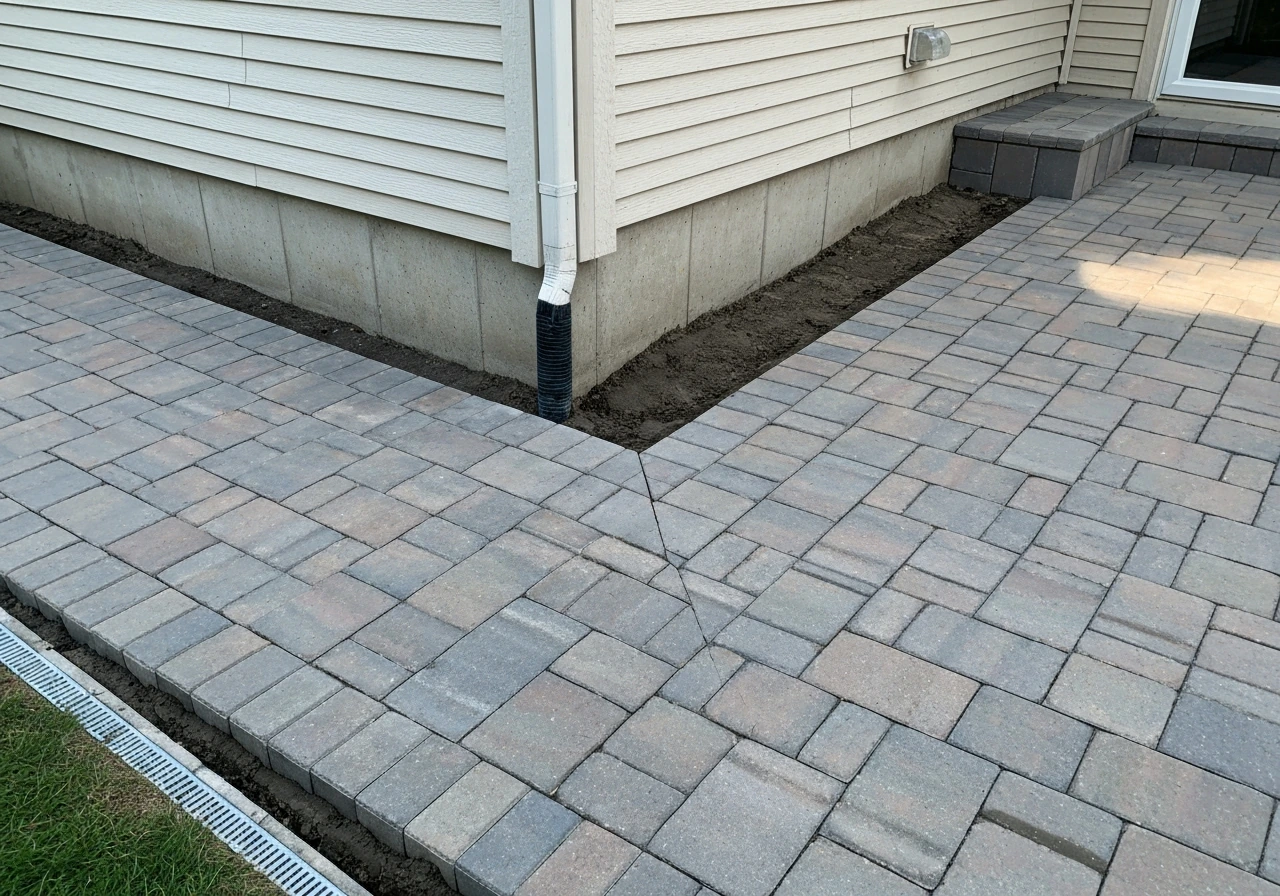
Water is the single biggest threat to a patio, and corners concentrate that threat. If you want to learn how to build a patio room, start by planning the site layout, drainage, and the floor foundation before you frame anything. When two patio runs meet at an inside corner next to a house, runoff from both directions funnels right toward the foundation. You need to slope the surface away from any structure by at least 1 inch per 8 feet, which works out to roughly a 1 percent grade. A steeper pitch of 1.5 to 2 percent is even safer in regions with heavy rain.
Set your slope at the string-line stage. Tie the string at the correct finished surface height at the house end, then drop it by 1 inch for every 8 feet as it runs toward the outer edge. Use a line level or a digital level to measure this consistently. At the actual corner point, where the two sloped planes meet, you want water to drain toward the outer corner and away from the house, not pool in the center.
The easiest way to achieve this is to let both sloped planes run independently and meet at the outer corner edge, which becomes the natural low point. From there, plan a gravel channel, dry creek bed, or pop-up emitter to carry that water somewhere useful, not toward a neighbor's yard.
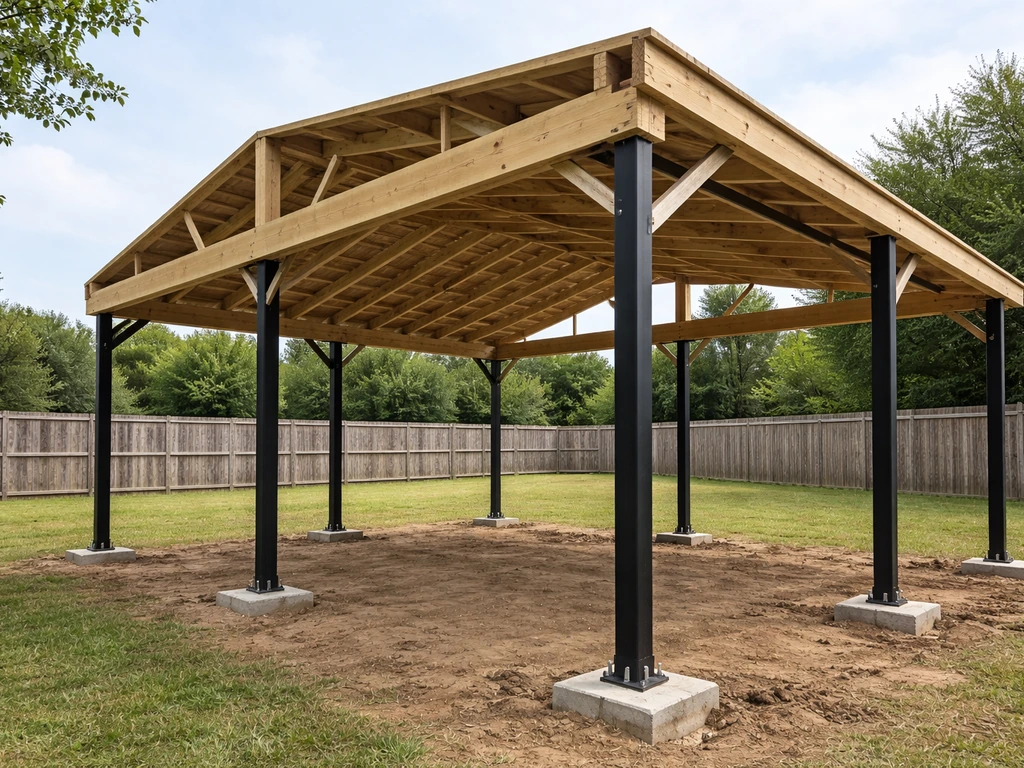
A freestanding covered patio uses a lot of the same patio-base leveling and drainage thinking, but with framing and support posts added on top how to build a freestanding covered patio.
If your yard slopes toward the house rather than away from it, you have a grading problem to solve before you build the patio, not after. Regrading the subsoil around the patio footprint so that it drops away from the foundation is the correct fix. Adding a French drain or channel drain along the outer edge of the patio is a smart backup, especially in low-lying yards. If you also want extra storage, use the same site-prep and drainage mindset when planning how to build a patio shed on a stable base.
Choosing your patio material

Three materials dominate DIY corner patio builds: concrete pavers, natural stone pavers, and poured or precast concrete slabs. Each one handles differently and requires a different base depth. Here is a straightforward comparison to help you choose.
| Material | Cost (approx.) | DIY Difficulty | Base Depth Needed | Durability | Maintenance |
|---|---|---|---|---|---|
| Concrete pavers | $3–$8/sq ft materials | Beginner-friendly | 6–8 in. gravel + 1 in. sand | High, individual units replaceable | Low, re-sand joints every few years |
| Natural stone (flagstone) | $5–$15/sq ft materials | Moderate | 4–6 in. gravel + 1 in. sand | Very high, long-lasting | Moderate, joints need weeding/re-sealing |
| Poured concrete slab | $4–$8/sq ft materials + forming | Advanced, needs forming/finishing | 4 in. gravel + 4 in. concrete | High, but cracks over time | Low initially, patching cracks later |
| Precast concrete slabs | $2–$6/sq ft materials | Beginner-friendly | 4–6 in. gravel + 1 in. sand | Good, but heavier to handle | Low, re-level settled slabs as needed |
For most DIYers tackling a corner patio, concrete pavers are the best starting point. They are forgiving: if a section settles or a paver cracks, you pull up the affected units, re-level the base, and reset them. Poured concrete is harder to get right, and once it cracks at the corner, which it often does due to differential settling where two slabs meet, the repair is ugly and permanent. If budget is tight, precast concrete slabs in 16x16 or 24x24 inch sizes are a solid alternative that install almost identically to pavers.
Tools, materials, and build checklist
Gather everything before you start. Running to the hardware store mid-project when your base is half-compacted and it looks like rain is not fun. Here is what you need for a standard paver corner patio.
Tools
- Tape measure (at least 25 ft)
- Mason's string and line level
- Wooden or metal stakes (8 to 10 minimum)
- Marking paint or marking flour
- Flat spade and square-point shovel
- Hand tamper or plate compactor (rent the plate compactor for anything over 100 sq ft)
- Rubber mallet
- Long screed board (straight 2x4 works fine)
- Torpedo level and 4-foot level
- Paver saw or angle grinder with diamond blade (for corner cuts)
- Stiff-bristle broom
- Wheelbarrow
- Safety glasses and work gloves
Materials (per 100 sq ft as a baseline)
- Pavers or slabs: measure your square footage and add 10 percent for cuts and waste
- Crushed gravel (3/4 inch clean or compactible): roughly 2 cubic yards for a 6-inch base over 100 sq ft
- Coarse bedding sand: about 0.5 cubic yards (1-inch layer) per 100 sq ft
- Polymeric sand for joints: one 50-lb bag covers approximately 50–75 sq ft depending on joint width
- Plastic paver edging with spikes (every 12 inches): enough linear footage to cover all outer edges
- Landscape fabric (optional, place under gravel only): helps suppress weeds without trapping drainage
- Geotextile filter fabric (under gravel if soil is clay-heavy): improves drainage and prevents base migration
Pre-build checklist
- Call 811 (or your local utility marking service) at least 3 business days before digging to mark underground lines
- Check local building permit requirements — most ground-level patios under 200 sq ft do not need a permit, but verify
- Confirm your layout with marking paint and walk it before excavating
- Calculate and order all materials so delivery arrives before you start digging
- Check the weather forecast — avoid starting if rain is expected within 48 hours
Preparing the site: excavation, compaction, and base installation
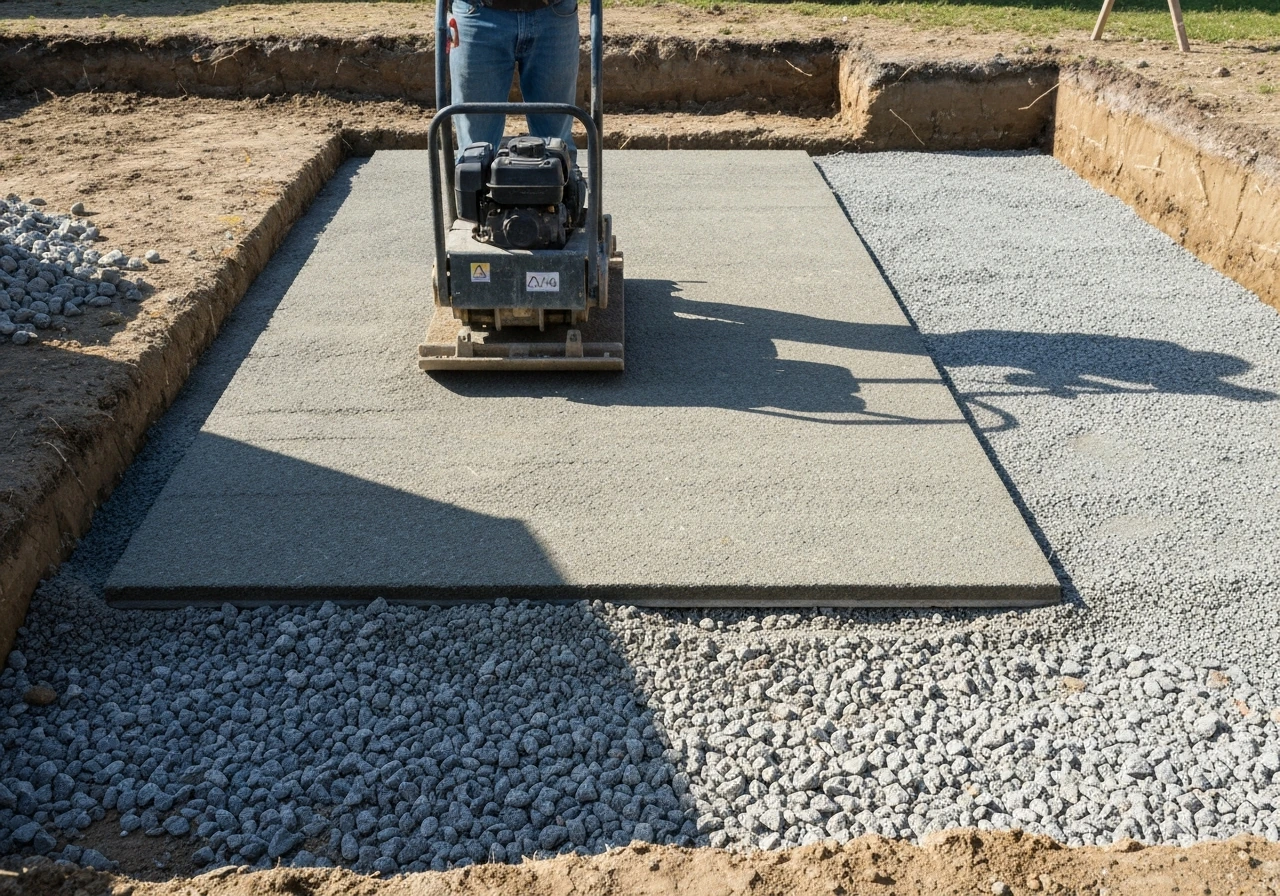
Excavate the entire patio footprint to a depth of 8 to 10 inches below the finished surface height you want. That accounts for 6 inches of compacted gravel, 1 inch of bedding sand, and roughly 2.375 inches for a standard 60mm (2.375 in.) paver. Adjust for your material thickness, but always err deeper rather than shallower, high spots can be removed, low spots cannot easily be raised once the base is compacted.
Once you are at depth, compact the native soil with a plate compactor. Make two passes in opposite directions. If you are working in an inside corner, do not forget to compact all the way into the corner, which is easy to miss. If the soil feels soft or spongy, that is a sign of organic material or high moisture content, and you should dig out another inch or two and add more gravel. Soft spots under a patio will settle into humps and valleys within a season.
Add your gravel base in two layers of 3 inches each, compacting after every layer. Using two thinner lifts compacts more reliably than one thick dump. Wet the gravel lightly before compacting if it is dry, as moisture helps the particles lock together. Once both gravel layers are compacted and you are within 1 inch of finished grade, screed a 1-inch layer of coarse bedding sand over the surface. Do not compact the sand. It should stay loose so you can fine-tune paver height as you set them. Use your screed pipes (1-inch diameter EMT conduit works perfectly) to pull the sand to a flat, consistent depth.
Building from the corner out
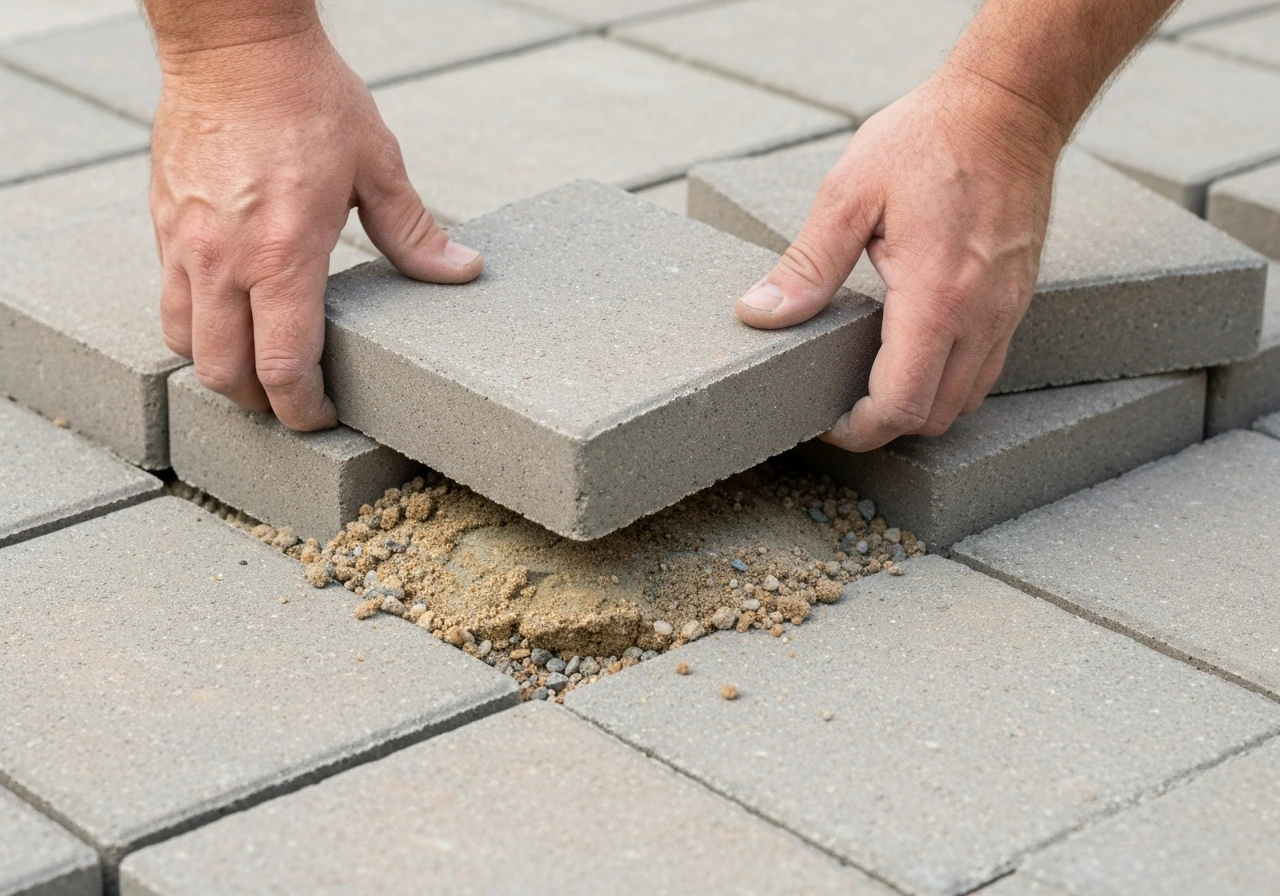
Start setting pavers from the inside corner, not from an outer edge. This is critical for corner patios. If you start from an outside edge and work inward, your last course at the corner is where all your measurement errors pile up, and it will look terrible. Starting from the corner means any small cuts or adjustments happen at the outer edges where they are less noticeable.
Place your first paver tight into the corner, then work outward along both legs of the L-shape simultaneously. Keep checking that your paver courses stay parallel to your string lines. Tap each paver into the sand bed with a rubber mallet and use a level to confirm it sits flush with its neighbors. Any paver that rocks or wobbles needs to be pulled, sand adjusted underneath, and reset. Do not chase a problem paver with more mallet hits; you will just displace the sand around it and create more problems.
Install your paver edging restraint along the outer perimeter as you go, not all at once at the end. Spike it in every 12 inches with the manufacturer's spikes. Edging keeps the paver field from slowly migrating outward over time, which is one of the most common reasons patios start looking tired after a few years. At corner joints in the edging, overlap pieces or use flexible edging that bends around curves and angles. Make sure the edging sits just below the paver surface so it is not a trip hazard.
When you reach the outer edges and the patio boundary, you will almost certainly need to cut pavers to fill partial spaces. Measure each cut individually rather than assuming they are all the same size, small discrepancies accumulate. Use a paver saw with a diamond blade and wear safety glasses. For curved or angled cuts at an irregular corner, score the cut line with a chisel first, then make the final cut with the saw.
Finishing details: leveling, jointing, sealing, and your final check
Once all pavers are set, do a final sweep with a long straightedge across the entire surface, including diagonally across the corner. Any high or low spots greater than 3/16 inch need to be corrected now, before you lock everything in with jointing sand. Pull those pavers, add or remove sand underneath, and reset. This step separates a patio that looks professional from one that just looks okay.
Spread polymeric sand over the surface and work it into the joints with a stiff broom, sweeping in multiple directions to fill every gap. Blow or brush off excess sand from the paver tops, then lightly mist the surface with water. The polymeric sand will activate and harden into a firm, weed-resistant joint compound over the next 24 hours. Do not let it rain on the surface during that curing window. Once cured, the joints should feel firm when you press a fingernail into them.
Sealing is optional but recommended if you have natural stone or lighter-colored concrete pavers. If you want the project to hold up even longer, learning how to build a patio porch can help you plan the same slope, drainage, and foundation details for a raised, weather-resistant space Sealing is optional but recommended. Apply a penetrating paver sealer with a roller or sprayer once the polymeric sand has fully cured, usually 24 to 48 hours. Sealer helps repel stains, slows fading, and extends joint life. Reapply every 3 to 5 years depending on your climate and traffic.
Before you call it done, run through this quick inspection routine. Pour a bucket of water on the patio surface at the house-side corner and watch where it flows. It should move toward the outer edges, not pool against the house wall. Check that no pavers rock when you step on them. Walk the outer edge and confirm the edging restraint is flush and fully spiked. Look at the corner joint lines and make sure no paver has drifted. If everything checks out, you are done.
Troubleshooting common corner patio problems
Even with a solid build, issues come up. Here is how to handle the most common ones.
Pavers rocking or settling unevenly
This almost always means the sand bed or gravel base was not compacted properly, or there is a soft spot in the subsoil. Pull the affected pavers, dig down to identify the problem layer, re-compact or add fresh material, and reset. Do not just add sand on top of the problem.
Water pooling at the corner
If water collects right where the two patio runs meet, your slope was not aggressive enough or the corner point is too high relative to the outer edge. You may need to pull a section of pavers near the corner, shave down the sand and gravel slightly at the corner, and re-level with a steeper pitch toward the outer edge. Adding a small channel drain at the outer corner can be a practical fix if regrading is not feasible.
Weeds growing through joints
If you used regular sand instead of polymeric sand, weeds will find their way in. Clear the joints, blow out the old sand, and reapply polymeric sand. Make sure you activating it fully with water. Also check that landscape fabric was not installed above the gravel layer, where it can trap fine particles and actually encourage weed growth in the accumulated debris.
Misaligned courses at the corner joint
This happens when you start both legs of the L-shape independently without a shared reference point. Prevention is the fix: always start from a single corner paver and maintain a chalk snap line or string reference that spans both legs. If you are already built out and the courses do not align, you may need to pull back one leg to the corner and relay it with a consistent joint offset.
Cracks at seams or next to the house foundation
With poured concrete, cracking at the corner is almost inevitable without proper control joints every 8 to 10 feet and an isolation joint (a strip of expansion foam) between the slab and the house foundation. If you have existing cracks, fill hairline cracks with a polyurethane caulk rated for concrete, and wider cracks with a concrete patching compound. For pavers, gaps opening up at the house-side edge usually mean the edging was not installed there or the first course is migrating. Install a metal or plastic L-shaped edge restraint along the house wall side and re-seat those pavers.
Edges spreading or pavers migrating outward
This is an edging failure. Pull out any loose edging spikes, check that the edging is fully engaged against the paver face, and re-spike every 12 inches. In freeze-thaw climates, use longer 10-inch or 12-inch spikes for better hold in frost-heaved soil.
Planning your build in phases
If the full corner patio feels overwhelming or your budget needs to stretch, break it into phases. Build one leg of the L first, getting that section fully finished with edging and jointing sand. Then come back in a few months and build the second leg, matching the paver pattern and surface height at the corner junction. This approach works well with pavers but is harder with poured concrete, where a fresh-pour seam next to a cured slab will always be a weak point.
To estimate materials, calculate the square footage of each rectangular section of your L-shape separately (length times width for each arm), add them together, then add 10 percent for cuts and waste. For the gravel base, multiply total square footage by the base depth in feet (0.5 feet for a 6-inch base) to get cubic feet, then divide by 27 to get cubic yards. Most suppliers sell gravel and sand by the cubic yard, and one cubic yard covers roughly 100 square feet at a 3-inch depth.
If you are thinking about adding a roof or cover over your corner patio later, keep that in mind during the build. A covered corner patio will need posts, and those posts need footings that go below the frost line, typically 12 to 36 inches deep depending on your climate. Plan the post footing locations before you set any pavers so you are not cutting a hole through a finished surface later. That kind of planning ahead is what separates a patio that stays beautiful for 20 years from one that needs a redo in five.
FAQ
Do I need a drain under a corner patio if I already slope the surface?
If it is within an inside corner and you are using pavers, you can usually skip a separate sub-surface drainage layer, as long as you keep the 1 inch per 8 feet slope and compact the base tightly. If the site stays wet, consider digging 6 to 12 inches deeper in a narrow strip along the outer edge and adding a perforated drain or dry creek gravel there, then feather it back to the main base so water has somewhere to go.
What should I do if my corner is not 90 degrees and the strings never line up perfectly?
Yes, and the common mistake is assuming “close enough” angles will be fine. For irregular corners, lock your layout by building your string lines from one fixed reference, then check the corner again after you stake the perimeter. If your patio will be bigger than about 12 feet along the longest run, re-check squareness using the scaled triangle method before you dig.
How much space should I leave between pavers and the house (or fence)?
Plan for expansion and edge movement: leave a small gap at transitions, for example 1/4 inch to 1/2 inch between pavers and the house wall, then fill with a flexible material like foam backer rod plus exterior-rated sealant. This helps when the ground heaves or the pavers expand slightly, which prevents the house-side edge from buckling or opening.
What is the right way to fix low or high spots if I notice them after I start setting pavers?
Do not rely only on sanding “on top” to fix level issues. If you discover unevenness after a dry layout, correct it by re-screeding bedding sand only in thin adjustments, typically no more than about 1/2 inch. If you need more than that, pull pavers, adjust gravel, compact again, then re-set so you do not create soft spots under the thicker areas.
How do I avoid lots of awkward tiny cuts at the edges in an L-shaped corner patio?
A good rule is to maintain consistent joint depth, and keep paver cuts small at the outer edges. Measure and cut each row independently, then do a “fit check” row-by-row dry before you commit to bedding. If the pattern requires a lot of tiny slivers in one spot, adjust your starting position by shifting the layout slightly before digging, so the cuts stay more uniform.
What is the best way to activate polymeric sand without ruining the paver surface?
Polymeric sand requires firm compaction of the joint fill without over-saturating. Use a stiff broom to pack it in, sweep off the tops, then mist lightly in stages until it looks evenly damp. If you flood it, you can wash sand out of the joints or haze the pavers, so always test on a small section first.
How can I tell whether a patio is truly set or if a few pavers will keep sinking?
After curing, do a simple fingernail test at multiple joints and then check for movement by stepping on random pavers near the house corner and along the outer perimeter. If any paver rocks, it is a base or bedding issue, not a joint-sand issue. Remove that area, correct the base or sand, and reset, because rocking will usually worsen as the patio settles.
Is sealing necessary for concrete pavers, and when should I apply it?
Sealer is most helpful when you have lighter concrete pavers or natural stone that can stain easily. If your pavers are dark and already have a uniform surface color, you may skip sealing, but you should still plan for reapplication in wet or high-traffic areas. Also, apply sealer only after polymeric sand has fully cured to avoid trapping moisture in the joints.
What should I do if the yard slopes toward the house and water pools after it rains?
If the entire yard slopes toward the house, regrading is the first choice, because surface slope alone may not overcome subsurface water pressure. A practical backup is a channel drain at the outer edge tied into a daylight or suitable discharge point, plus careful grading of the surrounding soil so runoff does not wrap around the patio. Avoid sending water into a neighbor’s yard, redirect it to a safe area.
Can I build a corner patio in phases, and how do I keep the joint at the L-turn looking right later?
If you want to build in phases, establish a clean “stop line” that you can match later, keep the base and edging fully complete for the first leg, and do not leave loose pavers without restraints. When you return, align the second leg to the original corner paver reference and verify the final slope again before locking jointing sand.