You can build an enclosed patio yourself by framing a roof structure over an existing or new slab, closing in the sides with your chosen wall system (screens, panels, or insulated framing), and adding doors and windows to turn the space into a true room. If you want a simpler backyard upgrade, the same basics also apply when you learn how to create a covered patio. The project ranges from a straightforward screen room weekend build to a multi-week four-season addition depending on how enclosed you want it, but the construction sequence is the same every time: plan and permit, prep the site, frame the structure, close in the walls, then finish with electrical and weatherproofing.
How to Build an Enclosed Patio: Step-by-Step DIY Guide

Nolan Carver
24 May 2026
Start with a solid plan before you touch a single board

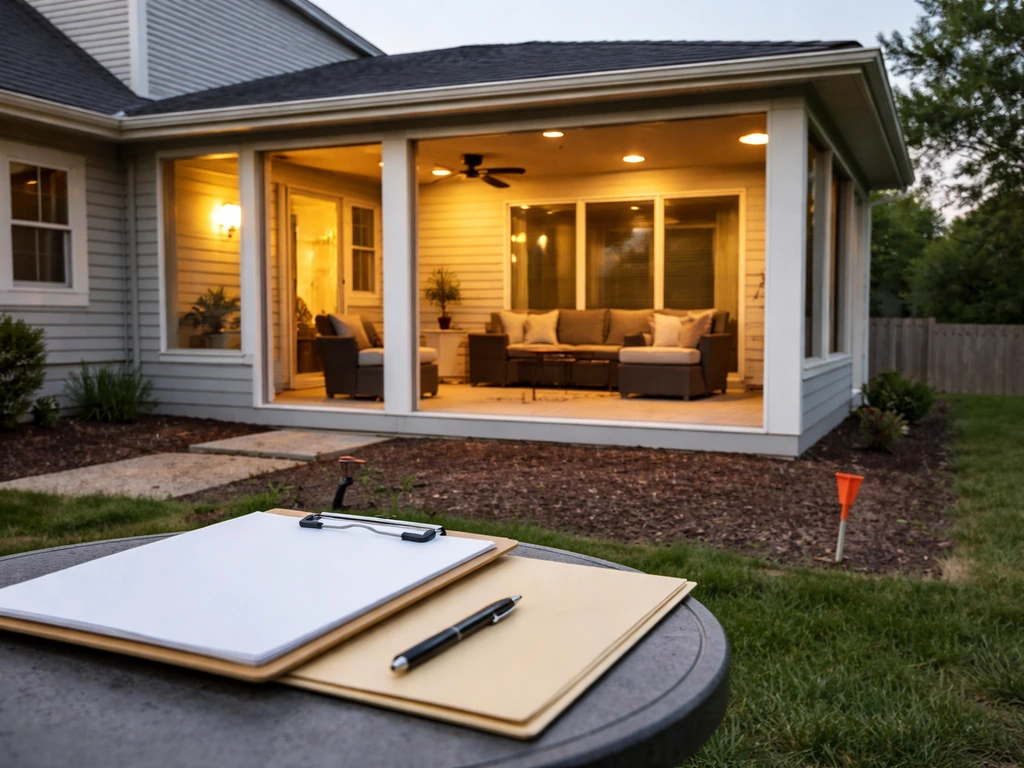
Good planning keeps an enclosed patio project from turning into an expensive correction job halfway through. Before you price materials, answer three questions: How big does it need to be, how will you connect it to the house, and how enclosed do you actually want it?
Layout and size
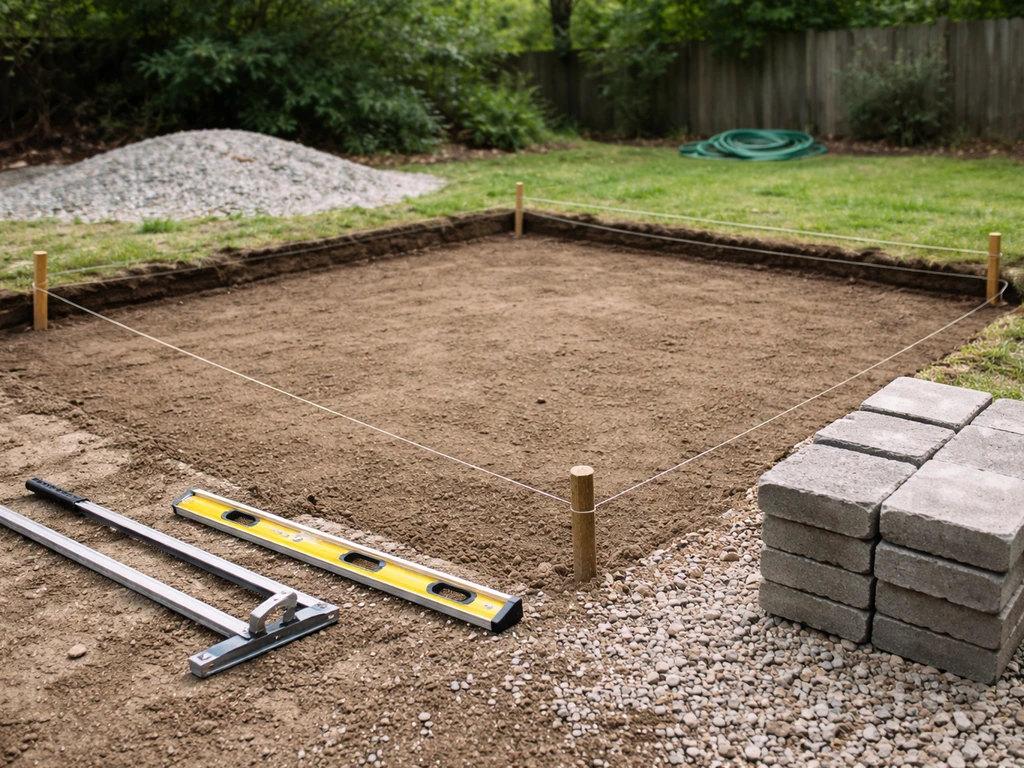
A comfortable enclosed patio for a table, a few chairs, and some breathing room starts at around 200 square feet (roughly 12x16 ft). Anything under 150 sq ft feels cramped once furniture is in. Sketch your layout on graph paper at 1/4 inch per foot and note where the house door and any existing windows are, because those will drive your framing layout. Mark the corners with stakes and string before you commit, walk around inside the string outline with your furniture in mind. It almost always needs to be bigger than you think.
Zoning, permits, and HOA
An enclosed patio with a permanent roof and walls is almost always considered a structure addition in the eyes of your local building department, which means a permit. Pull the permit. Skipping it creates headaches at resale and can require you to tear it down. Most jurisdictions require a site plan, a foundation plan, and a framing/roof plan.
Some also require a separate electrical permit if you add circuits. Call your local building department (most now have online portals) and ask specifically whether your project triggers setback requirements from the property line. Common residential setbacks run 5 to 10 feet from side and rear property lines. If you have an HOA, submit your site plan to them before you apply for the permit, they often have aesthetic rules about roof pitch and materials.
Budget reality check
Be honest with yourself about budget before you fall in love with a design. A DIY screen room enclosure on an existing concrete slab can come in at $3,000 to $8,000 in materials. Step up to a three-season room with aluminum-framed panels and you're looking at $10,000 to $25,000.
A fully enclosed four-season room with insulated walls, proper glazing, and HVAC runs $200 to $400 per square foot when professionally done, but a skilled DIYer can cut that labor cost significantly. HomeGuide similarly reports that professionally built “4-season” enclosed patios typically cost $200 to $400 per square foot, including items like insulated glass and HVAC/insulation connections four-season room costs $200 to $400 per square foot. For reference, [contractor-built patio enclosures typically run $10,000 to $40,000](https://homeadvisor.
com/cost/sunrooms) depending on scope, and full glass sunroom additions from specialty companies can reach $80,000 or more. Set your budget first, then pick the enclosure type that fits it.
Pick the right enclosure type for your climate and budget
This is the single most important decision you'll make because it determines every other material choice downstream. There are three main types, and they are not interchangeable mid-project.
| Enclosure Type | Best Climate | DIY Difficulty | Approx. Material Cost (200 sq ft) | Key Features |
|---|---|---|---|---|
| Screen Room | Mild/warm, no harsh winters | Beginner | $2,000–$6,000 | Aluminum frame, fiberglass or aluminum screen panels, basic roof |
| Three-Season Room | Mild springs/falls, no freezing temps | Intermediate | $8,000–$20,000 | Aluminum or wood frame, glass or vinyl panels, no HVAC |
| Four-Season (Fully Enclosed) | Any climate including cold winters | Advanced | $20,000–$50,000+ | Insulated walls, double-pane glass, full HVAC, code-compliant framing |
If you live where winters are cold and want to use the space year-round, go four-season from the start. Retrofitting insulation and HVAC into a three-season structure almost always costs more than building it right the first time. If you're in a mild climate and just want bug-free outdoor living, a screen room is an excellent, budget-friendly choice. Three-season rooms are the sweet spot for moderate climates where spring and fall use is the priority.
This project is closely related to building a covered patio or a patio room, the main difference is that an enclosed patio specifically closes in the sides, not just the top. If you are specifically planning a patio shed, the same fundamentals for layout, permits, and foundation prep will apply, but with a more enclosed storage-focused plan.
If you want a similar look and feel, the same planning, framing, and weatherproofing basics apply when you learn how to build a patio porch. If you are still deciding on the enclosure, it helps to compare your plan against how to build a freestanding covered patio and its post, roof, and drainage requirements.
Site prep and foundation: get this right and everything else is easier
Drainage and slope first
Water is the enemy of any enclosed patio, and most problems I see come from skipping drainage planning. The slab or patio surface needs to slope away from the house at a minimum of 1/8 inch per foot, and ideally 1/4 inch per foot. If you're pouring new concrete, work this slope into the form setup from the start.
If you're working on an existing slab that drains toward the house, you have two options: grind a channel drain across the width and route it out through a sleeve in the stem wall, or add a self-leveling overlay that corrects the slope. Don't just close in a slab that drains poorly and hope for the best, enclosed spaces trap moisture and you will end up with mold and rot.
Leveling uneven ground
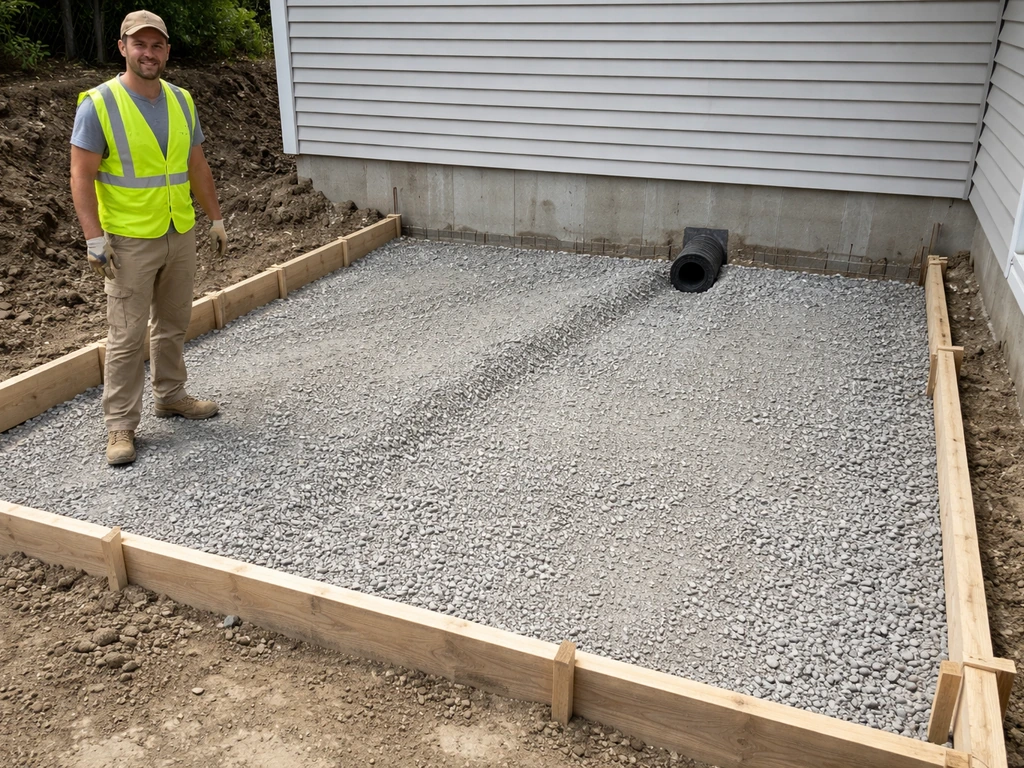
If you don't have an existing slab, you need one, or at minimum a compacted gravel base with concrete piers. For a fully enclosed patio, a concrete slab is almost always the right answer. Excavate 4 inches deep for the slab area, compact the subgrade, add 4 inches of compacted gravel base (crushed stone, not pea gravel), then pour a 4-inch concrete slab reinforced with 6x6 welded wire mesh or #4 rebar on 18-inch centers. On unstable or clay-heavy soil, go 6 inches thick. Use a laser level or a water level to establish a consistent reference height across the entire slab perimeter before you pour.
Footings for posts

Corner posts and any intermediate posts supporting the roof load need proper footings, not just post bases anchored to the slab surface. In most climates, footings need to extend below the frost line (check your local frost depth, which ranges from 12 inches in the South to 48 inches or more in northern states).
Dig footing holes with a power auger, typically 10 to 12 inches in diameter for a 4x4 or 6x6 post, pour concrete to within a few inches of grade, and set a post base anchor while the concrete is wet. Let footings cure at least 48 hours before loading them.
If the slab is already poured, you'll install surface-mount post bases using wedge anchors rated for the load, just be aware this is a weaker connection than an embedded footing in cold climates.
Framing the structure: posts, beams, and roof
Post and beam layout
For most enclosed patios, 4x4 posts work fine for screen rooms and light three-season structures. Go to 6x6 posts anywhere you're carrying significant roof load, dealing with snow loads, or building a four-season room. Space posts no more than 8 feet apart on center for a clean framing bay that also conveniently matches standard lumber lengths. Set posts plumb (use a level on two adjacent faces), brace them temporarily with 2x4 diagonal braces staked into the ground, and don't remove the braces until the beam is in place and fastened.
Beams, headers, and the ledger
Where the patio attaches to the house, you'll attach a ledger board, typically a 2x8 or 2x10 pressure-treated board, directly to the house rim joist or band joist using structural lag screws (1/2-inch diameter, minimum 3-inch embedment into framing). Flash the ledger-to-house connection aggressively with self-adhering membrane flashing, lapped properly so water runs over, not behind, the flashing. This connection is where rot starts if you cut corners.
On the outer edge, your beam spans between posts: size the beam based on the span and load. A common rule of thumb is that the beam depth in inches should equal the span in feet divided by 2, so a 10-foot span needs a roughly 5-inch-deep beam, use a double 2x6 (which gives you 5. 5 inches of depth) or a 4x6. Your permit drawings will specify the engineered sizing.
Roof framing and pitch
A simple shed roof (single slope) is the easiest to build and is the right choice for most DIY enclosed patios. Pitch the roof away from the house at a minimum of 1/4:12 for a flat-style roof with TPO or EPDM membrane roofing, or 3:12 or steeper for asphalt shingles. Rafters are typically 2x6 or 2x8 on 16-inch centers depending on span and local snow load.
Notch the rafters with a bird's mouth cut where they sit on the top plate or beam, this seats the rafter firmly and transfers load properly. At the house side, rafters can either tie into the ledger or sit on a ledger-mounted hanger using metal rafter ties. Use hurricane ties at every rafter-to-beam connection. Check your local wind and snow load requirements because these directly determine rafter size, span, and connector requirements, your building department will have the span tables.
Permits and structural loads
Your building inspector will check that the roof framing can handle the dead load (the weight of the roofing materials themselves, roughly 10–15 psf for shingles) plus the live load (snow, maintenance workers, etc., which can range from 20 psf in warm climates to 50+ psf in heavy-snow areas). They'll also check wind uplift connections. Don't try to estimate this yourself for a fully enclosed structure, use the IRC span tables or have a local engineer stamp the drawings if your jurisdiction requires it. The permit fee is almost always worth it to avoid a costly re-frame.
Closing in the walls: screens, panels, and weatherproofing
Screen room wall systems
For a screen room, you'll build a knee wall (typically 36 inches high) with pressure-treated 2x4 framing, then fill the upper portion of each bay with a screen panel system. Prefabricated aluminum screen panel systems like Screeneze or Super Screen are beginner-friendly and look clean. The screen panels clip or spline into aluminum channels fastened to the framing. Use 18x14 fiberglass mesh for standard insect screening or 20x20 no-see-um mesh in areas with tiny biting insects. Staple-and-paint screen installation works too but doesn't hold up as long. Add a base trim board to cover the slab edge and protect screen edges from damage.
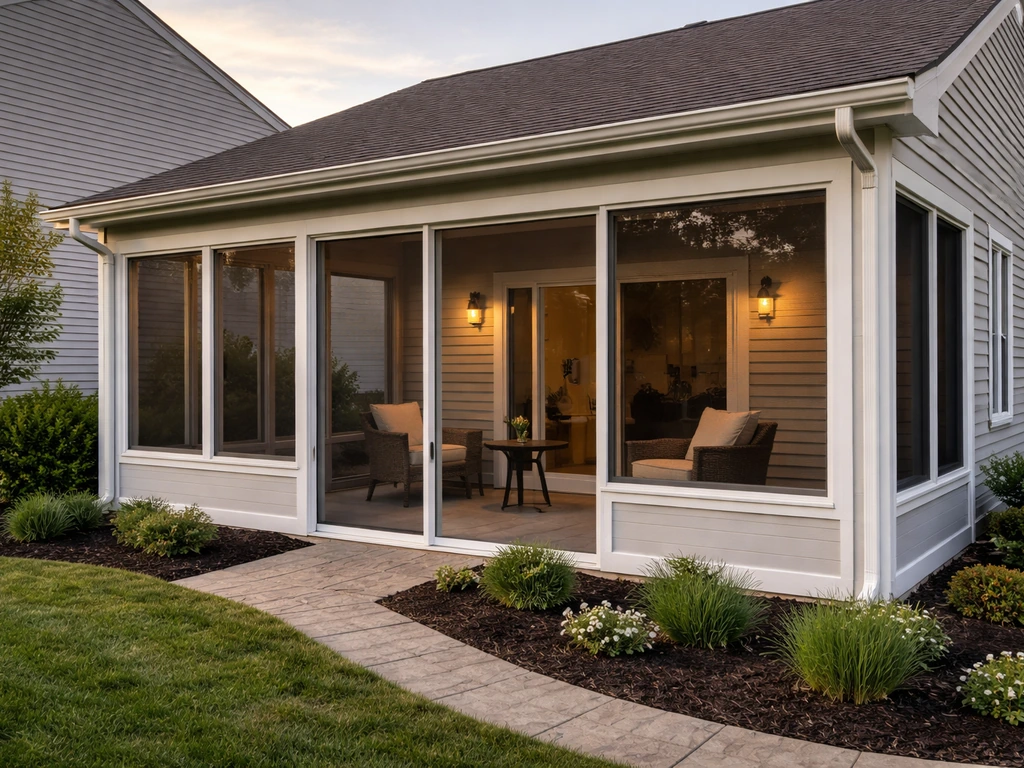
Three-season and four-season wall panels
Three-season rooms typically use aluminum-framed single or double-pane glass panels or vinyl-framed windows filling the bays between posts. You can source these as prefab patio room kits (EZE-Breeze, LLumar, or similar) or frame out standard window rough openings and order windows to fit. For four-season enclosures, the wall system becomes a fully insulated assembly: 2x4 or 2x6 stud walls with batt insulation (R-13 for 2x4, R-19 for 2x6), rigid foam sheathing on the exterior for added R-value, and double-pane low-E windows with a U-factor of 0.30 or lower. Don't skip the housewrap (like Tyvek) on the exterior sheathing, this is your drainage plane and it matters in a wind-driven rain.
Doors and windows
Plan at least one door that swings outward (for egress and to avoid blocking interior space). For screen rooms, a hinged or sliding screen door in an aluminum frame works fine. For enclosed rooms, use a prehung exterior door with a proper threshold and weatherstripping. Frame the rough opening 2 inches wider and taller than the door size to allow for shimming and leveling.
Flash the door rough opening with self-adhering membrane before setting the door, wrap the sill, then the sides, then the head. Install windows the same way: flash sill first, then sides, then head. Caulk the exterior perimeter with a paintable polyurethane or silicone caulk after installation. These flashing details are the most common place DIYers skip steps and then wonder why they have leaks a year later.
Electrical, lighting, and keeping the space comfortable
Electrical basics
At minimum, run one dedicated 20-amp circuit to the enclosed patio. This gives you room for a ceiling fan, lighting, and a few outlets without tripping breakers. If you plan to add HVAC or an electric heater, add a separate circuit (a mini-split typically needs a dedicated 240V circuit, 15 to 30 amps depending on the unit). Use weatherproof outlet boxes and covers rated for wet or damp locations even in a fully enclosed room, outdoor-adjacent spaces get humid.
Route electrical through conduit if running it on the surface, or through the framing cavity before you close the walls. If you're not comfortable doing your own electrical work, this is the one part of the project where hiring a licensed electrician is smart and usually required for the permit anyway.
Lighting choices
Ceiling fans with integrated lights are the workhorse fixture for enclosed patios, they handle airflow in shoulder seasons, reduce cooling load, and provide ambient light. Add a couple of recessed cans on the perimeter for task lighting if the space will be used for dining. Dimmer switches on all circuits make the space much more versatile. LED strip lighting along the knee wall or under the beam adds a lot of atmosphere for very little cost.
Heating and cooling: think mini-splits
For a four-season enclosed patio, a ductless mini-split heat pump is almost always the best comfort solution. A mini-split has an outdoor condenser/compressor unit and an indoor air-handling head that mounts high on the wall. It heats and cools efficiently and doesn't require ductwork. Size it carefully: a properly sized unit for a 200 sq ft insulated room is typically 6,000 to 9,000 BTU.
Oversizing is a common mistake, an oversized unit short-cycles, which means it turns on and off too frequently and doesn't run long enough to dehumidify the space properly, leaving you with a clammy room even when it's technically the right temperature. Follow the manufacturer's placement guidelines for the indoor head (usually 7 feet or higher on the wall, away from direct sunlight) and make sure the outdoor unit has clearance on all sides for airflow.
For a three-season room, a plug-in infrared heater and a ceiling fan will often get you through spring and fall without installing a full system.
Finishing, sealing, and fixing the problems most DIYers run into
Sealing and weatherproofing
Once framing, walls, and windows are in, do a full perimeter inspection before any interior finishing. Check every transition: where the roof meets the house (step flashing and counter flashing if tying into siding), where posts meet the slab (caulk the base and use post base covers), and every window and door perimeter. Use backer rod in gaps larger than 1/4 inch before caulking, caulk alone bridges a gap but doesn't bond well in a wide joint.
On the roof, seal around any penetrations (vents, electrical conduit) with roofing mastic or a compatible sealant. If you used asphalt shingles, make sure the ridge cap is properly nailed and sealed. For a slab-to-wall joint on the interior, use a flexible floor-to-wall caulk rather than grout, it accommodates seasonal movement without cracking.
Interior finishing touches
For screen rooms, the interior is mostly done once the screens and trim are in. For enclosed rooms, you'll add drywall or a moisture-resistant wall panel (like fiber cement board or exterior-grade plywood with a painted finish), baseboard trim, and your flooring choice over the slab. If the slab is new, wait at least 28 days before installing tile or other flooring to let the concrete fully cure and dry. A moisture vapor barrier under any floating flooring is not optional on a concrete slab.
Troubleshooting common DIY problems
- Water pooling near the foundation: The slab slope is the culprit 90% of the time. Cut a channel drain across the width of the slab near the outer wall and pipe it through the stem wall to daylight. Self-leveling overlay can correct a poorly sloped slab if the correction needed is less than about 1 inch.
- Posts not plumb after concrete sets: Don't panic. Adjust the post base slightly before the concrete fully cures (you have about 20 minutes of workability). If the concrete is already set, slightly off-plumb posts can often be corrected with careful shimming at the beam connection before the roof load is applied.
- Roof rafters out of alignment: Snap a chalk line across the top of all rafter tails before you nail them off. If one rafter is low, add a shim at the bird's mouth. If one is high, you may need to deepen the bird's mouth cut slightly—mark it, remove the rafter, correct the cut, and reset.
- Gaps and air leaks around windows: Almost always a flashing or caulk failure. Remove the interior trim, check the rough opening flashing, and re-flash if needed. Never caulk the sill flashing—water needs a path to drain out at the bottom.
- Screen panels sagging or pulling away from the frame: This happens when the screen is installed with too little tension or the spline is undersized. Remove the spline and re-spline with the correct diameter (usually 0.140" for aluminum frames) and apply even tension with a spline roller as you work.
- Condensation on windows in an enclosed room: This usually means the space is not heated enough to maintain dew point or the windows have too low an insulation value. Upgrade to low-E double-pane glass (U-factor 0.30 or lower) and make sure your HVAC system is correctly sized and running during cold weather.
- Foundation settling or cracking slab: Small hairline cracks (under 1/4 inch) are common in concrete slabs and usually cosmetic. Fill them with a flexible polyurethane concrete crack filler. Larger cracks or uneven settlement indicate a soil compaction problem—consult a structural engineer before proceeding.
Your construction sequence from start to finish
- Finalize layout and design, sketch site plan and framing plan
- Check setbacks, zoning rules, and HOA requirements
- Apply for building permit (and electrical permit if needed)
- Mark and excavate footing locations, pour footings, set post bases
- Pour or repair slab with correct drainage slope (1/4 inch per foot minimum away from house)
- Set and brace posts, install ledger board with proper flashing
- Install beams and top plates, then frame rafters with correct pitch
- Install roof sheathing, underlayment, and roofing material; flash all transitions
- Frame wall bays, install housewrap or vapor barrier as required
- Install windows and door(s) with correct flashing sequence (sill, sides, head)
- Rough-in electrical: run circuits, install boxes
- Install wall panels, screens, or insulation depending on enclosure type
- Electrical finish: devices, fixtures, ceiling fan
- Install mini-split or other HVAC if applicable
- Caulk and seal all exterior penetrations, transitions, and joints
- Interior finish: drywall or panels, trim, flooring
- Schedule building inspection
- Final cleanup, furniture in, enjoy the space
Building an enclosed patio is one of the most satisfying home improvement projects you can tackle yourself because the result is a genuinely new living space, not just a cosmetic upgrade. If you want to take the next step, follow this guide on how to build a patio pavilion from start to finish enclosed patio. Take the planning seriously, pull the permit, and don't rush the foundation and flashing steps, those are the ones that bite people later. Everything else in this project is learnable and forgiving. Once you've built one, you'll wonder why you didn't do it sooner.
FAQ
Do I need a permit for an enclosed patio if I’m only adding screens or panels?
Often, yes. Even “screen room” enclosures can be treated as a structural addition if you’re adding a permanent roof and enclosing openings. If the roof is new or the walls alter the building footprint, expect a permit. Check whether your jurisdiction classifies screens as a non-structural shade versus an enclosure tied to the existing structure.
How do I handle a yard slope or uneven slab when building an enclosed patio?
Plan your framing reference level before you set posts. If the slab is uneven, you may need leveling adjustments at the post base or a different beam line so the roof stays level. Avoid building a “twisted” frame to match the slab, it leads to gaps that are hard to flash and increases water leakage risk.
Can I build an enclosed patio directly on my existing slab?
Only if the slab can support the new loads and drains correctly. You also need adequate anchorage for posts, beams, and the ledger connection. If the existing surface slopes toward the house or has cracks, fix those first (including drainage corrections), then consider adding piers or interior reinforcement instead of relying only on post bases anchored to the surface.
What’s the best way to prevent condensation in a three-season or four-season patio?
Control moisture with proper ventilation and an airtight, insulated envelope where needed. For three-season builds, keep the enclosure reasonably vented (screens, operable windows, or vents) so humid indoor air can escape. For four-season rooms, focus on sealing penetrations and using insulated, low-E glazing to reduce cold-surface condensation.
Should I use siding, panels, or foam board for the walls, and what’s the main decision?
The main choice is your wall system and how it affects drainage and insulation. Regardless of material, you need a continuous water-resistant exterior layer (housewrap or equivalent) as the drainage plane. For four-season walls, rigid foam should be paired with proper air sealing and weatherproof detailing so wind-driven rain doesn’t find its way into stud bays.
How do I choose screen mesh if I have gnats or small biting insects?
If insects are your main concern, consider upgrading from standard insect screening to no-see-um mesh (typically 20x20). Also, prioritize door fit and keep gaps at trims minimal. Even perfect mesh fails if door perimeter gaps let insects bypass the screen.
What size roof overhang should an enclosed patio have?
Use enough overhang to protect the walls and door/window trim from rain splash and direct exposure. If you don’t have an overhang or it’s very small, you’ll rely more heavily on flashing, caulk, and wall weatherproofing. Many installers aim for a practical balance with wind considerations and local design rules.
How far should the patio be from the house to manage expansion and water?
You need a plan that maintains proper flashing and allows for movement. Where the patio ties into the house, follow details that prevent water from getting behind the ledger flashing, and leave room for seasonal movement at joints. If the patio is separate or has control joints, design the interface so it drains away and doesn’t trap runoff at the wall line.
Can I run electrical for lights and outlets without a licensed electrician?
Sometimes DIY is allowed, but many jurisdictions require electrical work to be performed by a licensed electrician, especially if a permit is involved. Even when allowed, outdoor-adjacent enclosures require wet/damp-rated boxes and correct conduit or in-cavity routing. If you’re adding HVAC or a 240V circuit, plan on hiring a pro.
What’s the most common mistake with flashing around doors and windows?
Skipping the flashing order. The typical correct sequence is sill first, then sides, then the head so water sheds outward. Also, ensure you flash before installing the door or window, and use compatible membrane materials. Caulk alone is not a substitute for correct flashing.
How do I know my roof framing can handle snow and wind loads?
Don’t estimate from guesswork. Use your building department span tables or have engineered drawings if required. Snow and wind can change required rafter sizes, spacing, and connector types, even if the patio design seems similar to another project you saw online.
Do I need footings below frost depth if my patio has a slab?
Yes, for posts that carry roof load in cold climates. A slab by itself does not guarantee adequate frost resistance for the vertical load path. Where frost heave risk exists, footings should extend below the frost line, with post base anchors or embedded settings that transfer load properly.
How long should I wait before finishing flooring on a new concrete slab?
Concrete typically needs at least 28 days to cure for many flooring applications, especially tile. If you’re installing moisture-sensitive flooring, confirm dryness requirements and use a moisture barrier where required. Waiting less than recommended can lead to trapped moisture and failures under finished surfaces.
What’s the best way to plan the enclosed patio size and layout around furniture?
Add more space than your dining footprint alone. Consider aisle width for doors, circulation around seating, and clearance in front of the closest door swing. A good practice is to mock up your table and chair positions at full scale inside the taped outline so you can adjust the framing bay layout before locking in dimensions.