You can absolutely build a freestanding covered patio yourself, and it's one of the most rewarding outdoor projects you can tackle. Follow the steps in this guide to plan the size, choose a roof style, and build your own covered patio with confidence how to create a covered patio. The basic workflow goes like this: plan your size and roof style, check permits, dig and pour footings, set posts, install beams and rafters, then put on your roof covering.
How to Build a Freestanding Covered Patio Step by Step

Nolan Carver
30 May 2026
If you want to build a patio porch, the same steps for planning, permits, footings, and framing will help you get a sturdy, code-compliant structure how to build a patio porch. A modest 12x16 structure with wood framing and a polycarbonate roof will run you roughly $1,500 to $3,500 in materials depending on where you live. A larger cedar or steel setup with corrugated metal roofing can push $6,000 to $10,000.
Either way, it's a fraction of what a contractor charges, and the process is very manageable if you work through it section by section.
What a freestanding covered patio actually is (and how it differs from other structures)
A freestanding (also called detached) covered patio is a roofed outdoor structure that stands entirely on its own posts and footings, completely independent of your house. It's not bolted to your home's wall or ledger board. That distinction matters a lot: when you attach a cover to your house, you're transferring loads into the house framing, which triggers different structural and permitting requirements. A freestanding cover handles all its own loads through its own posts and foundations, which gives you more flexibility on placement but means every post needs a proper footing.
Under IRC 2024 Appendix BF, patio covers are defined as structures used for blank" rel="noopener noreferrer">recreational, outdoor living purposes, and they can be either detached from or attached to a dwelling. The code explicitly notes they are not to be used as carports, garages, storage rooms, or habitable rooms. Los Angeles County guidance on patio covers reiterates that they are limited to recreational, outdoor living purposes and are not for habitable rooms, storage rooms, garages, or similar uses blank" rel="noopener noreferrer">not to be used as carports, garages, storage rooms, or habitable rooms. That definition shapes the load requirements and the permitting pathway you'll use. Knowing this upfront saves a lot of confusion when you walk into the permit office.
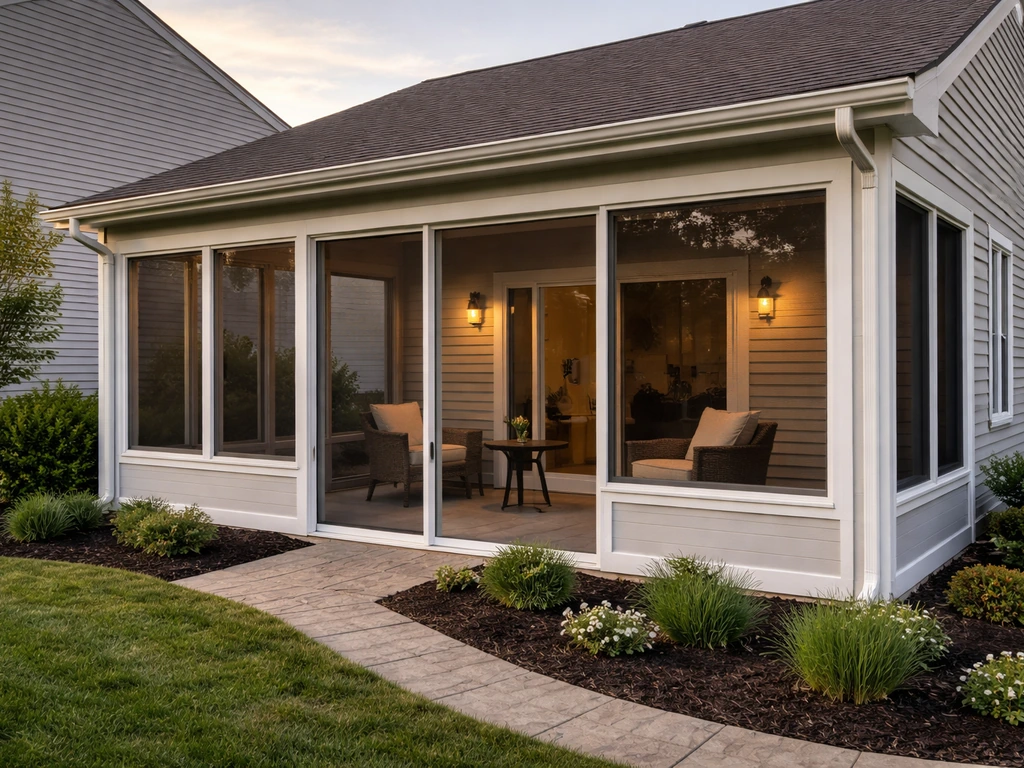
A freestanding covered patio is different from a pergola (which has an open-lattice roof that doesn't shed water), a patio pavilion (which usually implies a more decorative or permanent gazebo-style structure with a fully enclosed roof), and an enclosed patio room (which has walls and often qualifies as conditioned space). If you want a fully enclosed option instead, the approach is closer to how to build a patio room, with additional wall framing and often different permitting rules.
If you’re wondering how to build a patio pavilion specifically, the biggest difference is that pavilion-style structures are often more decorative and more permanently framed than a basic open-sided cover. If you ultimately want an enclosed patio, you will need to plan for walls, ventilation, and whether the space becomes conditioned. If you want something fully walled in, that's a different project with its own complexity. This guide focuses specifically on the open-sided, roofed, freestanding version.
Plan your layout, size, and roof style before you buy anything
The most common mistake I see is buying lumber before finishing the design. Spend a weekend nailing down these decisions first, because they drive every material quantity and cost estimate you'll make.
Choosing your size
A good starting size for most backyards is 12x16 feet or 14x20 feet. The first covers a small dining set comfortably; the second handles a full outdoor living setup with a grill area. Keep your dimensions in multiples of 2 feet to align with standard lumber lengths and minimize waste. Post spacing typically runs 8 to 10 feet on center for wood framing, which means a 16-foot-wide structure has posts at each corner plus one intermediate post on each long side if needed. Sizing to 12 or 16 feet in the beam direction often lets you span post-to-post without an intermediate support using a doubled 2x10 or LVL beam.
Picking a roof style
You have three practical options for a DIY freestanding cover: a single-slope (shed roof), a gable roof, or a flat roof with a slight pitch. A single-slope roof is by far the easiest to build and the best choice for beginners.
You just run the rafters from a higher beam on one side to a lower beam on the other, typically targeting a 1:12 to 3:12 pitch (which means the roof rises 1 to 3 inches per foot of horizontal run). A gable roof looks more finished and sheds water symmetrically but requires a ridge beam and more precise framing. Avoid a truly flat roof, because water will pond and find any weakness in your seams within a season or two.
Clearance and placement
Plan for at least 8 feet of clear headroom at the lowest point of the roof. Most people find 9 feet feels more comfortable for a larger structure. Check your local zoning for setback requirements from property lines: a common rule is 5 feet from a rear or side property line, but this varies. Measure twice before you stake anything, because post footings are difficult to move once poured. Also think about sun orientation: a structure running east-west with the low side of a shed roof facing south will shade the space better during afternoon hours.
Site prep, layout, and getting drainage right
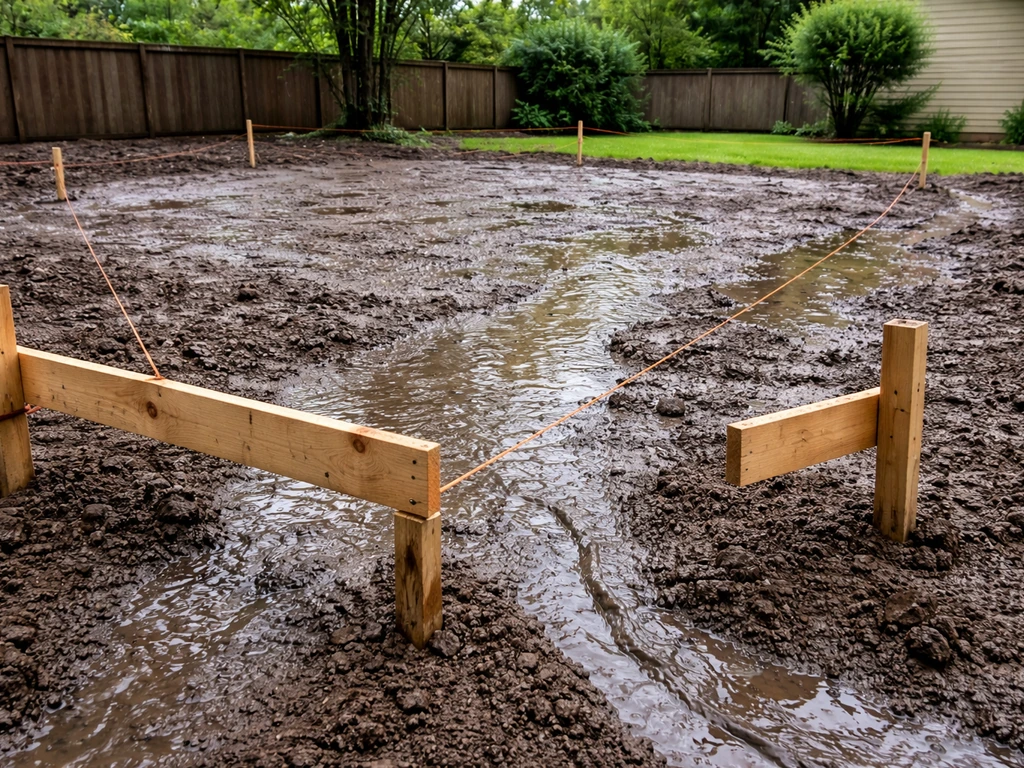
Before you dig a single hole, walk the site after a rain. Watch where water collects and where it flows. Your covered patio shouldn't sit in a low spot that pools, and your finished grade under the structure should slope away from the center at a minimum of 1/8 inch per foot, ideally 1/4 inch per foot. If you're pouring a concrete slab under the patio, that slope needs to be built into the form before you pour.
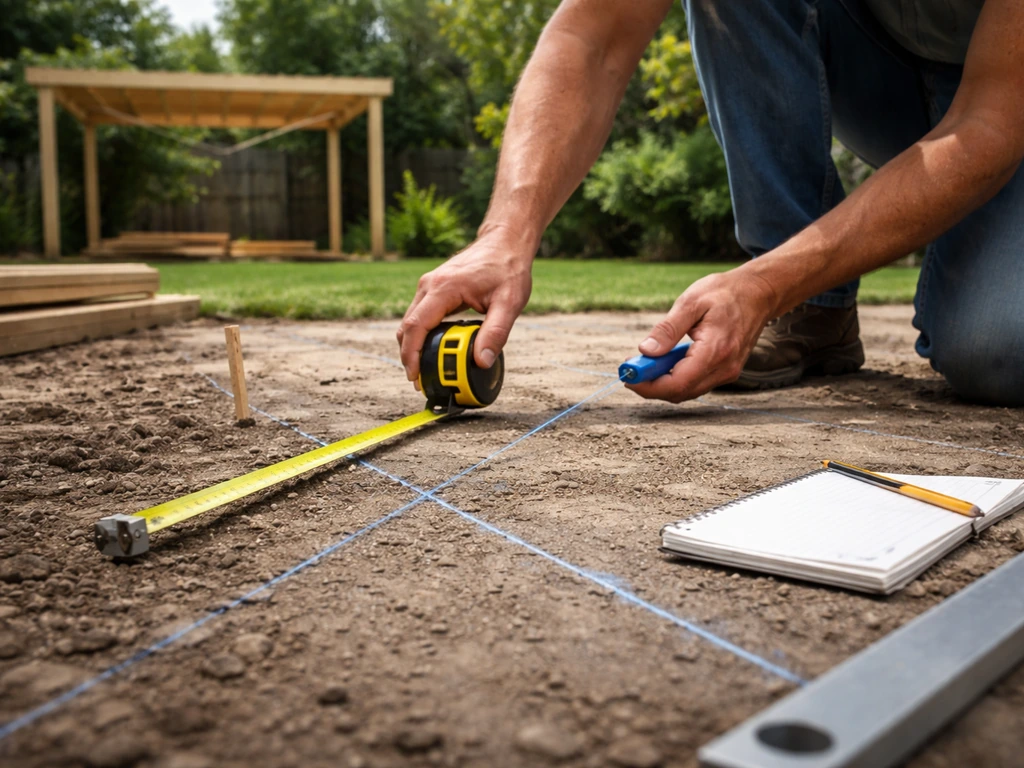
For layout, use batter boards and mason's line to establish your four corners. This is the step that separates a structure that goes together easily from one that fights you at every stage.
Set your batter boards about 2 feet outside where your posts will go so you can pull the string lines and check square using the 3-4-5 triangle method: measure 3 feet along one string, 4 feet along the adjacent string, and the diagonal between those two points should be exactly 5 feet if the corner is square.
After you establish the layout and square up your corners, you can apply the same process to a corner patio design by planning the intersecting sides and post locations carefully. For larger structures, use 6-8-10 or 9-12-15 for better accuracy.
Once your layout is square and your corners are marked, mark the center of each post hole with a stake and spray paint. Now is also the time to call 811 (the national dig-safe line in the US) to have underground utilities marked before you start digging. This is free, takes about 3 days for them to respond, and skipping it is genuinely dangerous.
Permits, loads, and the engineering basics you need to know
Most jurisdictions require a building permit for a covered patio structure, especially once you're adding a roof. Permit requirements vary by location, but a standard application typically needs a site plan showing the structure's footprint and setbacks, a simple elevation drawing showing post heights and roof pitch, and a materials list. Some jurisdictions use IRC Appendix BF as their patio cover pathway, which includes relaxed structural requirements compared to full residential building code, but you need to confirm that your jurisdiction has adopted Appendix BF. Call your local building department first thing and ask specifically about patio cover permits. It's usually a straightforward process once you know what they want.
On the load side, IRC Appendix BF requires patio covers to handle dead load (the weight of the structure itself) plus a minimum vertical live load of 10 psf (pounds per square foot). If your local snow load exceeds 10 psf, use the snow load figure instead. The structure also has to resist the minimum wind loads specified in IRC Section R301.2.1. What this means practically: don't skimp on post size, footing depth, or bracing. A 10 psf live load on a 12x16 structure is about 1,920 pounds distributed across the roof. That's not trivial, and it's why footings and post connections matter.
For rafter and beam sizing at a practical level, here's a useful starting point. A doubled 2x10 beam can typically span 10 to 12 feet between posts carrying roof loads in a residential patio application. Rafters made from 2x6 lumber at 24 inches on center can span up to about 10 feet for a light roof (polycarbonate or corrugated metal). For heavier roofing like asphalt shingles or pavers, step up to 2x8 rafters. Always verify with a span table for your specific lumber species (southern yellow pine and Douglas fir have different allowable spans), and your permit reviewer will usually check this as part of the application.
Footings and post foundations: don't cut corners here
The foundation is the most critical part of a freestanding patio cover, and it's where a lot of DIYers under-invest. If the footings move, everything above them moves too. Here's how to do it right.
Footing depth and diameter
Your footings need to go below the frost line in your area. In northern climates (Minnesota, upstate New York), that can be 42 to 48 inches deep. In warmer climates (Georgia, Arizona), 12 to 18 inches is often sufficient. The frost line depth for your zip code is listed in IRC Table R301.2(1) or you can look it up through your county building department. As a rule of thumb for a patio cover post, dig your holes 12 inches in diameter for 4x4 posts and 16 inches in diameter for 6x6 posts. The footing should extend at least 6 inches below the frost line if your soil is sandy or highly expansive.
Soil types and what to watch for
Dense, undisturbed native soil (gravel, compacted clay) is good footing substrate. Loose fill, topsoil, or expansive clay (soil that swells when wet and shrinks when dry) is problematic. If you hit loose or expansive soil, dig deeper until you hit stable material, add 4 to 6 inches of compacted gravel at the bottom of the hole, then pour your concrete. In very soft soil, consider widening the footing bell to 18 or 24 inches at the base to spread the load.
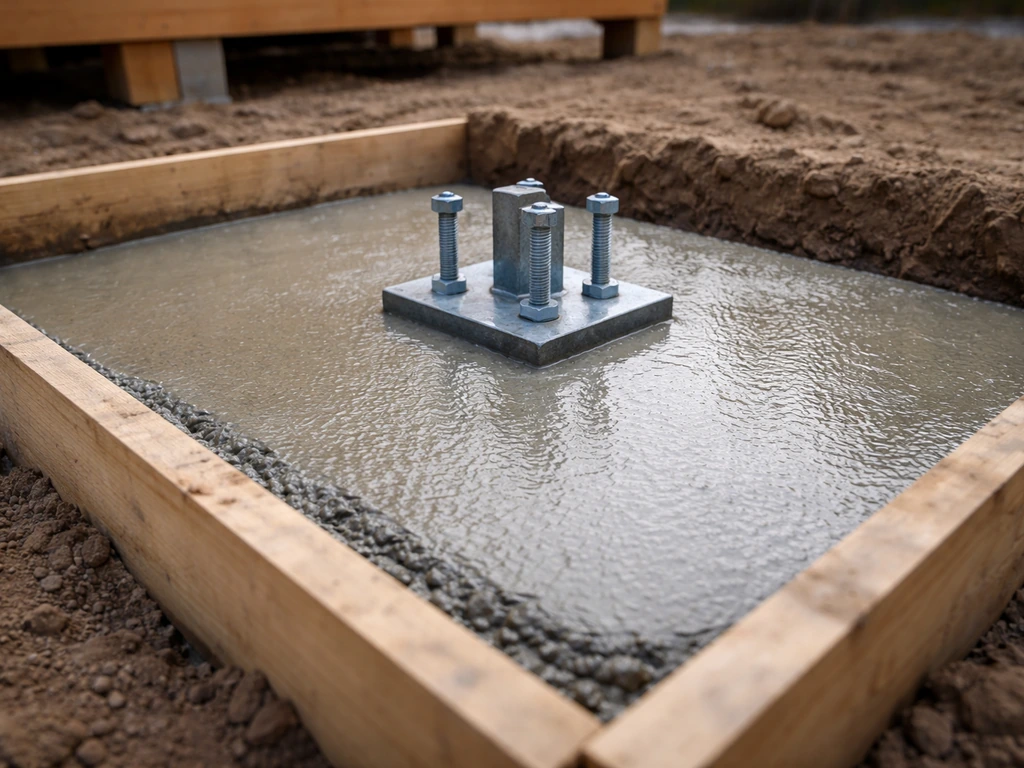
Post anchors vs. embedded posts
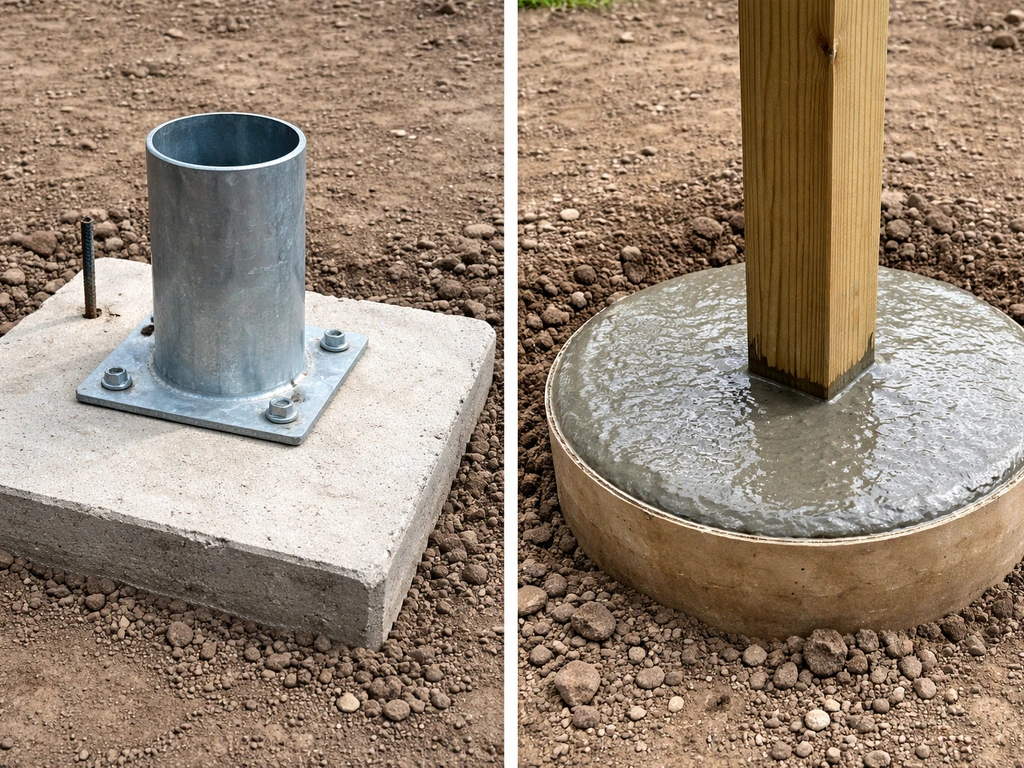
You have two main options for connecting posts to footings: embedded posts (the post sits in concrete) or surface-mounted post bases (concrete footing cures first, then a metal post anchor is attached). Embedded posts are stronger for lateral (horizontal) loads like wind, but if the post rots, the whole footing is compromised.
Surface-mounted post anchors are easier to replace if a post is damaged, keep the wood above grade (which dramatically reduces rot risk), and are the preferred approach for pressure-treated lumber in most modern builds. Use Simpson Strong-Tie ABA or ABU series post bases or equivalent hardware rated for the post size you're using.
Seat the anchor bolt in the wet concrete while it's still plastic, check alignment against your string lines, and let the concrete cure fully (at least 3 days, ideally 7) before loading the anchor with the post.
Dealing with slope
If your site slopes, don't try to level it all with fill dirt under the posts. Instead, adjust post heights to bring everything to the same top-of-post elevation. This is actually easier than it sounds: set your deepest footing at grade level, then pour your other footings at varying heights to compensate for slope, or use adjustable post bases that allow a few inches of height adjustment after the concrete cures. Either way, confirm that all footings are at the same elevation using a builder's level or a laser level before you start framing.
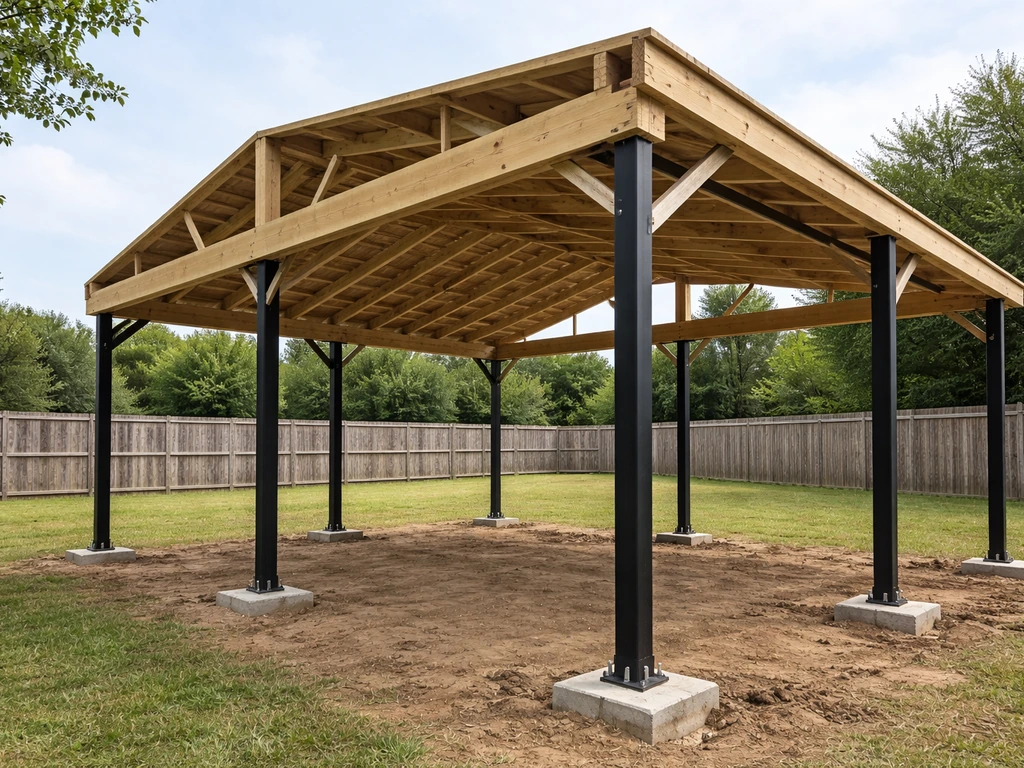
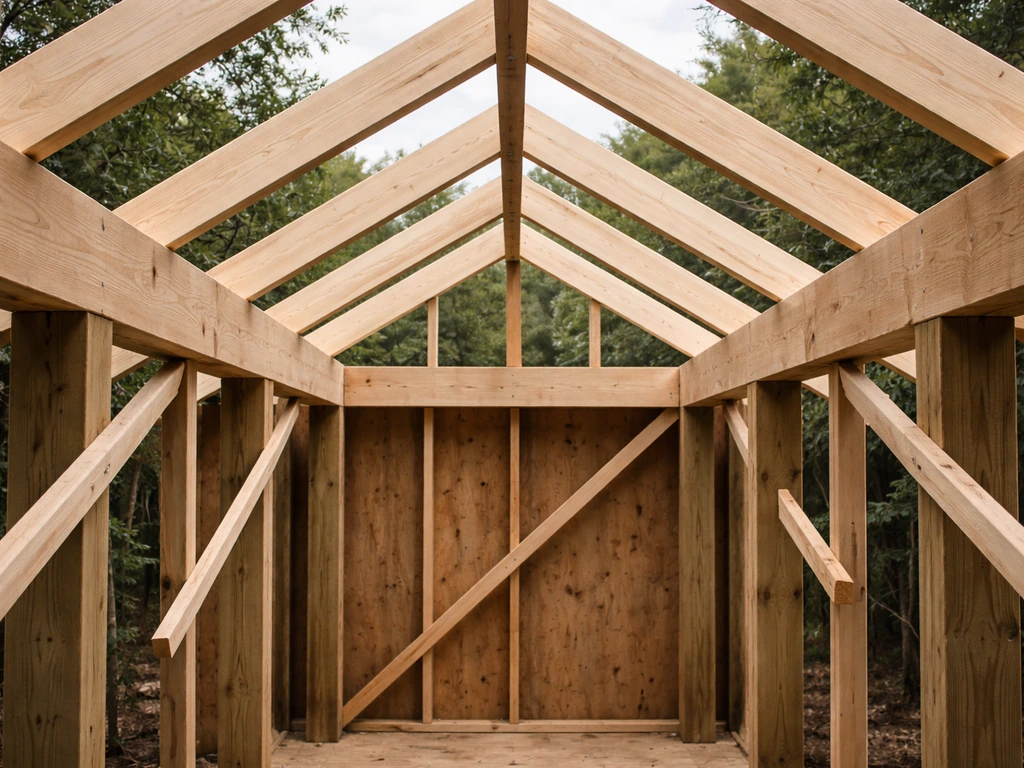
Framing the structure: posts, beams, rafters, and bracing
Once your footings are cured and your post anchors are set, framing moves quickly. Plan to have a helper for this phase, because holding posts plumb while also connecting hardware is genuinely a two-person job.
Setting posts
Use 6x6 posts for any structure 12 feet or larger. 4x4 posts are acceptable for very small covers (under 10x10) in low-wind areas, but 6x6 is the better long-term choice for stability and lateral resistance. Cut posts to height, seat them in the post anchors, and use temporary bracing (diagonal 2x4 braces screwed into stakes in the ground) to hold each post plumb in both directions while you work. Check plumb with a long level on two adjacent faces. Once all posts are set and plumb, install all the connector hardware before removing the bracing.
Installing beams
Beams run across the tops of posts and carry the rafters. For a 12x16 structure with posts at each corner, you'll have two beams running the 12-foot direction (each spanning 12 feet between posts) and rafters running across the 16-foot direction. Double up your beam lumber (two 2x10s sandwiching a 1/2-inch plywood spacer, or a true 4x10 or LVL) for any span over 8 feet. Connect beams to posts using notched posts or metal post caps (Simpson PC or BC series). Post caps are stronger and easier for most DIYers. Toenailing alone is not sufficient for beam-to-post connections that need to resist wind uplift.
Adding rafters
Rafters run from beam to beam and create the roof slope. For a shed roof, one beam is higher than the other: to get a 2:12 pitch on a 12-foot-wide structure, the high side beam would be 2 feet higher than the low side (12 feet x 2 inches per foot = 24 inches). Space rafters at 24 inches on center for most lightweight roofing. Cut bird's-mouth notches where rafters seat on the beams for a solid, non-rocking connection, and use hurricane ties or rafter clips at each rafter-to-beam connection. These metal connectors are cheap (about $1 to $2 each) and add enormous resistance to wind uplift, which is the primary way patio covers fail in storms.
Bracing
A freestanding structure needs diagonal bracing to resist racking (the tendency of a square frame to become a parallelogram under lateral loads). Add knee braces at each post-to-beam connection: these are diagonal members, typically 2x6 or 4x4 stock, cut at 45 degrees and connecting the post to the beam about 24 to 36 inches from the joint. Secure them with structural screws or bolts, not just nails. In high-wind zones, add X-bracing (diagonal cables or steel rod) in the roof plane between rafters as well.
Installing the roof and making it weatherproof
The roof covering is where your structure becomes a functional outdoor room instead of just a fancy pergola. The right choice depends on your climate, budget, and aesthetics.
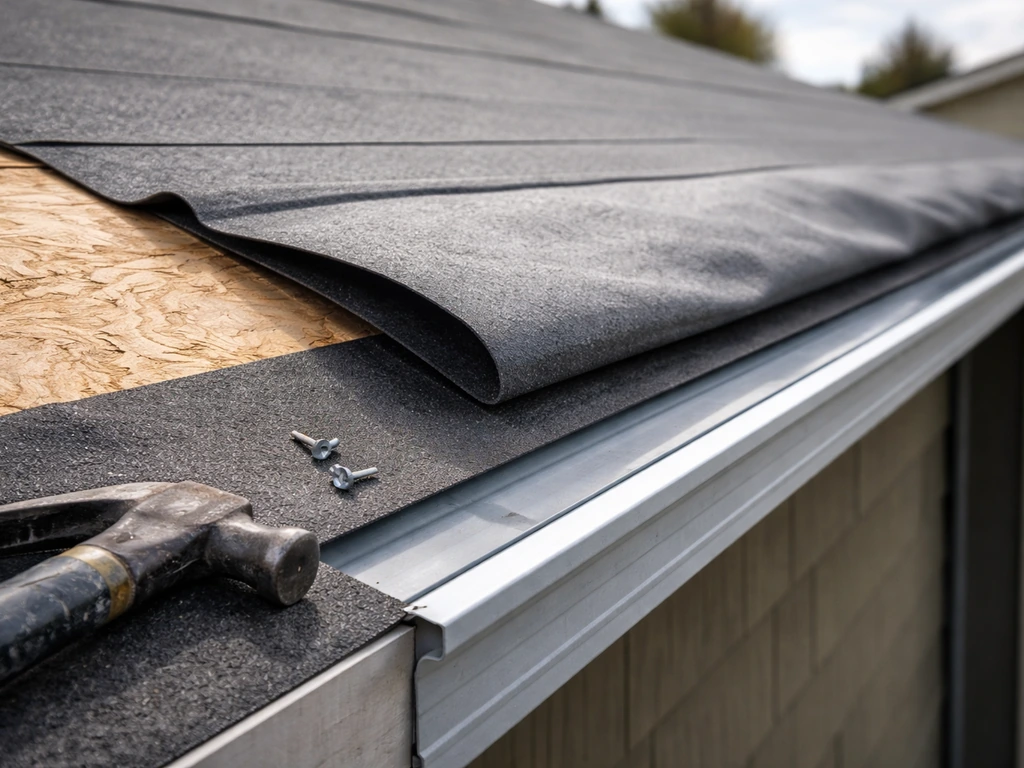
Decking and underlayment
If you're using asphalt shingles, you need solid roof decking first. Install 1/2-inch OSB or 5/8-inch plywood sheathing across the rafters, then cover it with a layer of 30-lb felt paper or synthetic underlayment (Titanium UDL30 or similar), lapping each row 6 inches over the row below and starting at the low edge of the roof. This underlayment is your backup waterproofing layer. It's not the last line of defense, but you want it there.
Roofing material options
For freestanding patio covers, the most practical roofing materials are corrugated or standing-seam metal panels, polycarbonate panels, and asphalt shingles. Metal and polycarbonate can be installed directly over purlins (horizontal nailers spanning between rafters) without full sheathing, which saves weight and cost. Asphalt shingles require sheathing and underlayment but blend in best with an existing house roof. Polycarbonate lets in diffused light, which many people love, but it can be noisy in heavy rain and tends to yellow over 10 to 15 years.
Edge details and water management
This is where most DIY roof leaks actually start: at the edges and penetrations, not in the middle of the field. Install drip edge metal along the eave (low edge) and rake (side edge) of the roof before the underlayment goes on at the eave, and over the underlayment at the rake. Seal any exposed fastener heads with butyl tape or roofing caulk.
For corrugated metal, use closure strips (foam or rubber infill strips that conform to the panel profile) at the eave and ridge to block insects and wind-driven rain. At the ridge of a gable roof, install a ridge cap or seal with a compatible flashing product.
If your structure butts up against a fence, wall, or house (even though it's freestanding, the low edge might be close to something), plan that detail carefully so water doesn't collect against the adjacent surface.
Gutters and downspouts
Gutters are optional but highly recommended if the eave drip line falls near a patio surface, garden bed, or foundation. A standard 5-inch K-style aluminum gutter attached to a fascia board on the low side of the roof will handle most residential rainfall events. Slope it 1/4 inch per 10 feet toward the downspout. Extend downspouts at least 4 feet away from any footing or foundation.
Materials, costs, and budget-friendly alternatives
Here's an honest breakdown for a typical 12x16 freestanding covered patio with a shed roof. These are material costs only, not labor, and are based on mid-2026 pricing in a typical US market. Prices in coastal or high-cost-of-living areas can run 20 to 30 percent higher.
| Component | Standard Option | Approx. Cost | Budget Alternative | Budget Cost |
|---|---|---|---|---|
| Posts (4) | 6x6 pressure-treated, 10 ft | $180–$240 | 4x4 PT (small builds only) | $80–$120 |
| Beams | Doubled 2x10 PT or LVL | $150–$250 | Doubled 2x8 PT | $100–$160 |
| Rafters (10 at 24" OC) | 2x6 PT, 14 ft | $120–$180 | 2x6 standard pine | $80–$130 |
| Footings (4) | 80-lb bags concrete + tube forms | $80–$120 | Same (no real shortcut) | $80–$120 |
| Post anchors + hardware | Simpson post bases, rafter ties, bolts | $120–$180 | Budget brackets (use fewer cut-outs) | $70–$100 |
| Roofing | Corrugated metal panels + purlins | $400–$700 | Polycarbonate panels | $300–$500 |
| Fasteners, drip edge, sealants | Screws, caulk, tape, flashing | $100–$150 | Same category | $80–$120 |
| Gutters (optional) | 5" aluminum K-style + 1 downspout | $80–$150 | Skip gutters initially | $0 |
| Total | $1,230–$1,970 | $790–$1,250 |
If you want a more finished look with cedar posts and beams instead of pressure-treated pine, add roughly $400 to $800 for the upgrade. Cedar is naturally rot-resistant and looks great stained, but it does cost more and needs periodic maintenance. Steel post frames (square tube steel welded or bolted together) are another option that's very popular in high-wind or fire-prone areas, but fabrication and finish work add complexity for most DIYers. If you go metal framing, budget an extra $500 to $1,500 for the steel components and appropriate fasteners.
Budget-friendly approach: use 6x6 pressure-treated posts (don't cut this corner), go with polycarbonate panels over 2x4 purlins instead of full sheathing and shingles, and skip the gutters for now. If you want storage space while you’re building, you can also follow a step-by-step approach for how to build a patio shed that fits under or beside the cover. A 12x16 structure can be built for under $1,500 in materials this way if you shop the big-box lumber yards and catch a sale on panels. The trade-off is that polycarbonate won't last as long as metal, and it transmits more heat in summer.
Finishing your structure: wood treatment, metal protection, and trim
Pressure-treated lumber doesn't need a sealer to prevent rot, but it will crack and check as it dries unless you apply a penetrating wood sealer or stain within the first year. Use a product rated for exterior use with pressure-treated wood (not all deck stains are compatible with PT wood chemistry). Apply it after the wood has had 3 to 6 months to dry out slightly, or when the wood no longer beads water when you splash it. Cedar and redwood look beautiful with a semi-transparent stain applied every 2 to 3 years.
For metal framing or metal roofing, check all cut edges and drilled holes for exposed bare metal and touch them up with cold galvanizing spray or a rust-inhibiting primer. This is especially important in coastal or humid environments. Exposed cut edges of corrugated metal panels can rust from the inside out within a few seasons if left unsealed. Stainless steel or hot-dipped galvanized fasteners throughout will also dramatically extend the life of the whole structure.
Checklist, common mistakes, and what to do this week
Pre-build checklist
- Finalize dimensions and roof style on paper before buying any materials
- Check zoning setbacks and HOA rules for your specific lot
- Call your local building department and ask exactly what documents they need for a patio cover permit
- Call 811 at least 3 business days before digging
- Look up your frost line depth and local snow/wind load requirements
- Order or sketch a simple site plan and elevation drawing for the permit application
- Confirm footing diameter and depth with your permit reviewer
- Buy materials in full once permit is approved, not before
Construction checklist
- Layout is square (verified with 3-4-5 triangle method at every corner)
- All footing holes are below frost line and bottoms are compacted/firm
- Anchor bolts are plumb and positioned correctly before concrete sets
- Concrete cured minimum 3 days before loading with posts
- All posts are plumb in both directions and temporarily braced before hardware installed
- All beam-to-post and rafter-to-beam connections use rated metal connectors, not just toenails
- Roof pitch is at least 1: 12 (1 inch rise per foot of run)
- Underlayment laps correctly (each row overlaps the one below it, working up from the eave)
- Drip edge installed before underlayment at eave, over underlayment at rake
- All exposed fastener heads and panel edges are sealed
Most common mistakes and how to fix them
- Posts out of plumb: Catch this before the concrete cures. Use two levels on adjacent faces and diagonal temporary bracing. If you discover it after curing, you can shim the post base slightly on adjustable anchors, but prevention is much easier.
- Roof pitch too shallow or uneven: Measure your beam heights carefully before cutting posts. A 2-foot difference in beam height across a 12-foot span gives you a 2:12 pitch. Mark both beam heights on the posts before cutting.
- Water pooling on the roof: Usually caused by a pitch under 1:12 or by a sagging rafter mid-span. Add a mid-span rafter support, or re-pitch by shimming the low-side beam up slightly. Prevention: don't go below 1:12 pitch ever.
- Post movement after installation: Almost always a footing problem, either too shallow, too small a diameter, or poured in unstable soil. Dig and repour if a post moves noticeably.
- Leaks at roof edges: Install proper drip edge and closure strips. Most leaks are edge or penetration issues, not field failures.
- Racking (the frame leans sideways): Diagonal knee braces at post-to-beam joints fix this. Add them if you skipped them. They're easy to add retroactively.
- Hardware corrosion: Use hot-dipped galvanized or stainless fasteners throughout. Regular zinc screws will fail within 3 to 5 years in outdoor exposure.
Your plan for this week
If you're a beginner, start by sketching your layout on paper with real dimensions, then call your building department tomorrow to ask about the permit process. That single phone call will tell you more about your local requirements than any guide can. If you're an experienced builder who just needed a reference framework, use the checklist above, nail down your beam sizing with a span table for your lumber species, and order materials once the permit is in hand. Either way, the single most valuable thing you can do today is get your dimensions on paper and your permit conversation started. The rest follows logically from those two steps.
FAQ
Do I need a permit to build a freestanding covered patio if it is not attached to my house?
Usually, yes. Even when a structure is detached, many jurisdictions still expect a permit for any roofed patio cover. Ask your building department whether your project is treated under a patio cover pathway (for example, Appendix-style allowances) and what drawings they want, such as a footprint with setbacks and a roof pitch/elevation view.
How deep should I pour footings for a detached patio cover?
Do not bury the posts in whatever soil is available. Footings need to go below your local frost depth and you must account for your soil type, especially expansive clay. If you hit loose or swelling-prone soil, dig deeper and add compacted gravel, or widen the footing base to spread load before you pour concrete.
What should I do if my yard drains toward the patio location?
The safe approach is to start by planning drainage first. Walk the site after a rain, then slope the finished grade away from the structure under the patio (at least 1/8 inch per foot, ideally more). If you plan a concrete slab, build the slope into the form before pouring.
How do I keep a detached patio from racking in wind?
For a freestanding cover, you want diagonal bracing to prevent racking. Plan knee braces at the post-to-beam joints and, in higher-wind areas, add additional X-bracing in the roof plane. If you skip bracing, frames can shift even when posts and beams look plumb.
Can I build a freestanding covered patio with a nearly flat roof?
You should not treat roof pitch as an aesthetic choice only. A pitch that is too flat tends to pond water and increases the chance of leaks at seams and edges. Aim for a shed-roof pitch in the 1:12 to 3:12 range and confirm it will shed water away from the patio surface.
What happens if my area has heavier snow than the default load?
Yes, but you still need load checks. If you live where snow loads exceed the default minimum, use the local snow load requirement for the design. Your rafters, beam spans, and footing and post sizing all change when snow load is higher than the minimum assumption.
Where do detached patio cover leaks usually come from, and what should I do to prevent them?
It depends on the roofing system, but penetrations are often leak points. If you run screws or bolts through the wrong spot, fail to use proper sealing, or do not add flashing where the material meets a wall or fence surface, leaks can start quickly. Plan any edge conditions before roofing, then use compatible sealing and metal details at penetrations.
Is calling 811 enough, or are there other steps I should take before I dig post holes?
Call 811 before digging, but also verify the exact locations on-site. Mark utilities clearly and keep your layout strings visible while you dig. If you discover a utility after you started, stop and adjust your post locations rather than forcing footings around underground lines.
Should I use embedded posts or surface-mounted post bases?
Often you can, using post bases that let wood sit above grade and are easier to replace. For lateral resistance in wind, embedded posts can be stronger, but post bases can work very well when they are correctly rated for your post size, properly anchored in wet concrete, and aligned to your layout.
Can I enclose my freestanding patio later, and will it require a different build approach?
Yes, but you need different framing and wall details, and it can change permitting requirements. A roof-only cover is not the same as an enclosed space that could become habitable or conditioned. If you plan to add walls later, plan roof clearances, ventilation approach, and structural capacity now, or your future enclosure could be underbuilt.
Should I install gutters on a detached covered patio?
Gutters are optional, but they become important when the drip line falls near your patio slab, garden beds, or foundation area. If you add gutters, slope them toward a downspout, and route the downspout discharge at least several feet away from footings to prevent undermining soil.
What is the biggest planning mistake DIYers make when building a freestanding covered patio?
Plan the lumber order based on the design, not the other way around. The most expensive DIY mistake is buying material before locking in dimensions, beam direction, roof pitch, and post spacing, because those decisions directly determine quantities, waste, and span requirements.
What roof style is easiest for a beginner to build on a detached patio cover?
If you want a cleaner DIY experience, consider a single-slope shed roof. It is typically easier to frame because you run rafters between two beams at different heights. Gable roofs look more symmetrical but require more precise ridge and rafter framing work.