You can build a curved patio yourself using pavers, natural stone, or poured concrete, and it is genuinely not harder than a straight-edged patio once you know how to mark the curve accurately and handle the extra cutting at the edges. The real skills involved are laying out the arc with a string and stake (or a trammel), digging and compacting a solid base, and cutting pavers to fit the curve. This guide walks you through every step, from picking a shape and calculating your measurements to laying the last paver and sweeping in the joint sand.
How to Build a Curved Patio: Step-by-Step DIY Guide & Plans

Nolan Carver
5 Aug 2026
Who this guide is for and what you will end up with
Whether you have never swung a tamper or you have already built a straight patio and want to try something more interesting, this guide covers all skill levels. By the end you will be able to plan, mark out, and physically build a curved patio in any of these forms: a full circle, a round patio that sits flush against the house, a semicircle that fans out from a back door, a gentle arc on one or more sides of an otherwise rectangular space, or a partial ring around a fire pit. You will also find the math formulas, sample sizing tables, a materials comparison, and a cost reference so you can plan your project before you ever pick up a shovel.
Curved patio shapes and which one suits your yard
There is a whole family of curved patio shapes, and choosing the right one early saves you a lot of re-planning later. Here is a quick breakdown of the main options.
- Full circle: A completely round patio. Works beautifully as a standalone destination in the middle of a lawn or as a fire pit surround. Every edge follows the same radius from a single center point.
- Round patio (circle butted against the house): Technically a circle whose straight chord sits against the house wall. The curved edge faces the yard. This is one of the most popular layouts for back-door patios.
- Semicircle: Exactly half a circle. The flat (chord) side typically aligns with the house wall or an existing straight edge, and the curved half fans out into the yard. Clean and symmetrical.
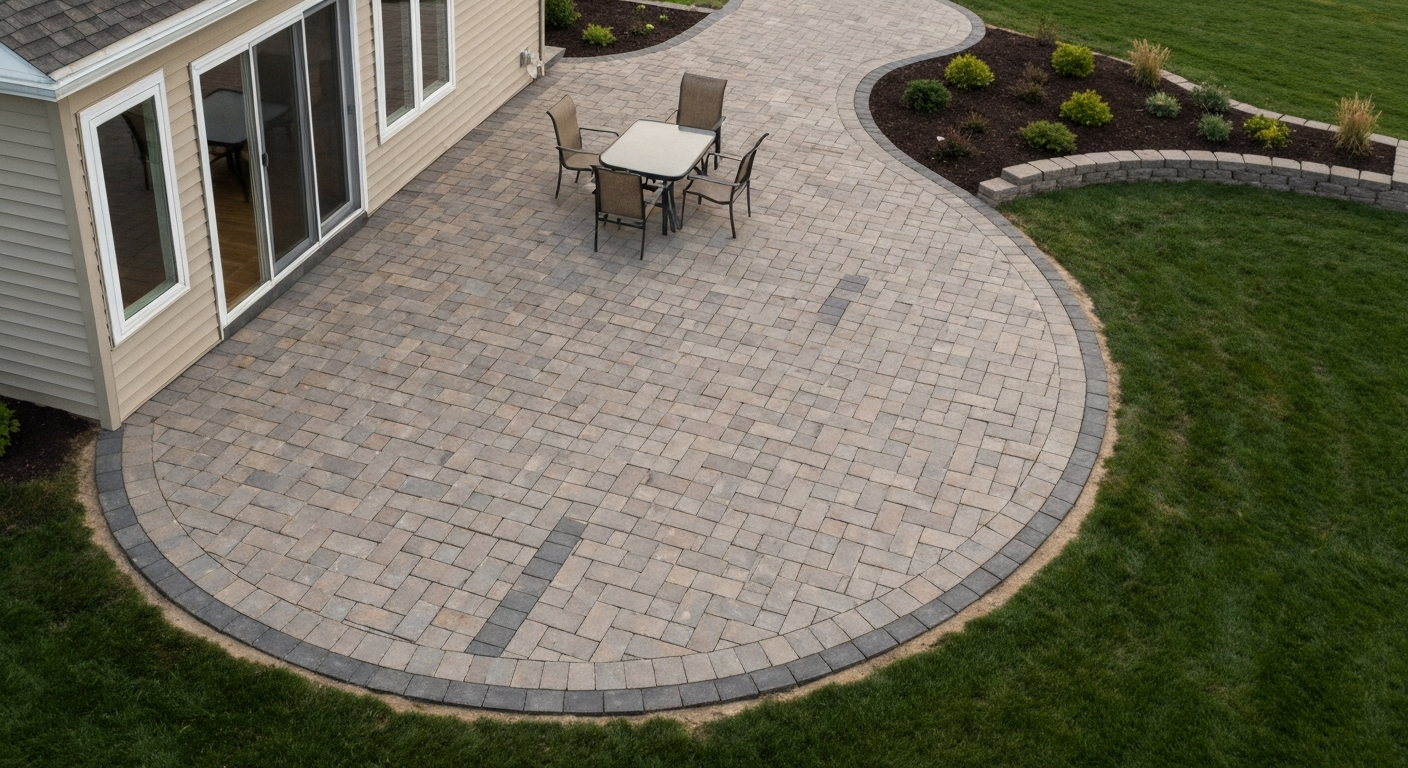
- Arc or curved edge on a rectangular patio: One or more sides of a square or rectangular patio are replaced with a smooth outward or inward curve. This softens the geometry and works well on sloped or irregularly shaped lots.
- Partial ring or annular segment: A curved band that wraps around a central feature like a fire pit, fountain, or tree. The ring has an inner radius and an outer radius, creating a doughnut-shaped seating area.
- Compound curves: Multiple arcs with different radii that blend together. More complex to mark out but achievable by chaining the single-center-point method for each section.
If you are deciding between a semicircle and a full circle, keep in mind that a semicircle is quicker to build and wastes fewer pavers because you are cutting along one straight line rather than shaping an entire perimeter. If you are specifically after a round or circular shape, the techniques for marking out and laying both are closely related, the key difference is just the amount of arc you are forming.
Planning your curved patio: function, scale, and the boring-but-important checks
Start with how you will actually use the space
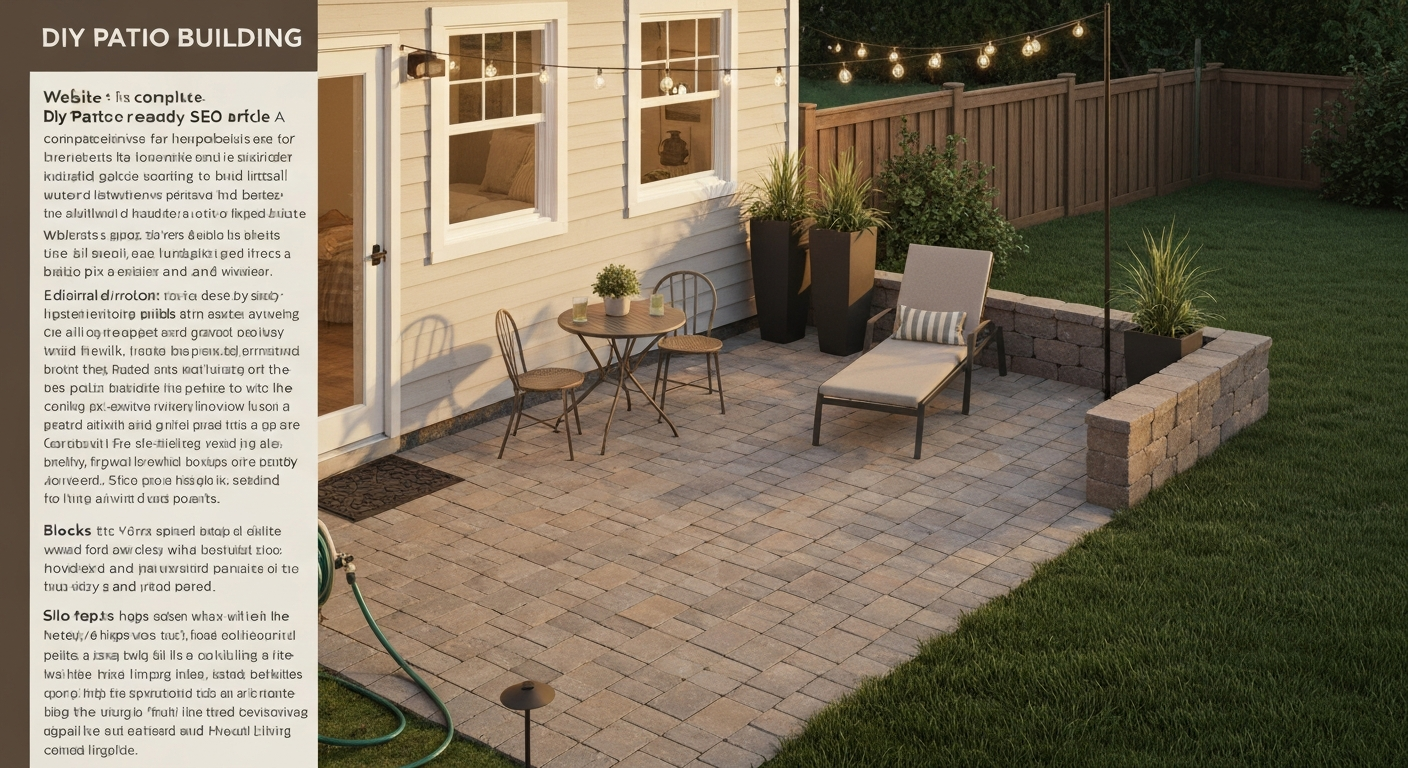
Before you think about radius, think about furniture. A four-person dining set needs roughly a 10 ft x 10 ft footprint minimum, and that is before you allow people to push chairs back. A comfortable conversation circle with four chairs around a fire pit typically needs a patio at least 12 ft in diameter (about 113 sq ft). A compact bistro table for two can work on a patio as small as 8 ft in diameter (about 50 sq ft). Add 2 ft of clearance beyond any furniture edge to the patio edge as a baseline, and then build up from there.
Sightlines, proportions, and how the shape fits the yard
Stand at your back door and look out. The patio should not feel like a postage stamp pasted onto a large yard, and it should not crowd every square foot of grass either. A useful rule of thumb is that the patio diameter should be no less than the width of the door or opening that leads to it. For a 6 ft sliding door, a 10–12 ft radius semicircle looks balanced. If the yard is large, you can go up to 14–16 ft radius and the shape still reads as a defined space rather than an endless expanse of pavers. Mark the outline with spray paint or a garden hose before you commit, live with it for a day and view it from upstairs if you can.
Code, permits, and utility checks
Call 811 (the US national 'Call Before You Dig' number) or your local equivalent at least three business days before excavating. Underground utilities are everywhere, gas, electric, fiber, irrigation, and hitting one is dangerous and expensive. On the permit side, ground-level patios generally do not require a permit in most US jurisdictions, but raised patios (anything with a step up), retaining walls over about 30 in., and projects in HOA communities often do. Check with your local building department before you dig; it takes one phone call and can save you from having to tear out finished work.
Measurement formulas and how to use them
You do not need a math degree for this, just a few formulas that tell you how much material to order and how to mark the arc accurately. Here they are in plain terms, followed by worked examples.
The core formulas
- Circumference (full circle): C = 2 × π × r, where r = radius. Example: r = 6 ft → C = 2 × 3.1416 × 6 = 37.7 ft.
- Arc length (any portion of a circle): s = r × θ, where θ is the angle in radians. Convert degrees to radians by multiplying by π/180. Example: a 90° arc at r = 6 ft → θ = 90 × (π/180) = 1.5708 rad → s = 6 × 1.5708 = 9.42 ft.
- Semicircle arc length: s = π × r. Example: r = 6 ft → s = 3.1416 × 6 = 18.85 ft.
- Chord length (straight-line distance across an arc): c = 2 × r × sin(θ/2). Example: for a semicircle (180°), sin(90°) = 1, so c = 2 × 6 × 1 = 12 ft (the diameter — that checks out).
- Sector area (pie-slice area for any arc angle): A = ½ × r² × θ (θ in radians). Example: full circle at r = 6 ft → θ = 2π → A = ½ × 36 × 6.2832 = 113.1 sq ft.
- Semicircle area: A = ½ × π × r². Example: r = 6 ft → A = ½ × 3.1416 × 36 = 56.5 sq ft.
- Offset method for marking: For a trammel or chord-offset layout, divide the chord into equal segments and calculate the perpendicular rise at each point using the formula: offset = r − √(r² − x²), where x is the horizontal distance from the chord midpoint to that segment.
For a printable template, draw your arc on graph paper at a scale of 1 inch = 1 foot. Mark the center point, draw the radius line, then use a compass (or string set to the radius length) to swing the arc across the paper. Transfer the key points to the ground using the string-and-stake method described in the layout section below. If your patio is larger than a standard sheet, tape sheets together or use the offset grid method: mark a straight baseline, measure offsets at regular intervals (every 12–18 inches works well for most curves), and connect the dots with a flexible garden hose before spraying the line.
Suggested layouts and sizing examples
Here are three common use-case layouts with sample dimensions so you have a starting point rather than guessing from scratch.
| Use Case | Suggested Radius | Diameter | Approx. Area (full circle) | Notes |
|---|---|---|---|---|
| Bistro/two-person seating | 4 ft | 8 ft | 50 sq ft | Compact; good for small urban yards |
| Four-person conversation seating | 6 ft | 12 ft | 113 sq ft | Fits 4 chairs + small table comfortably |
| Six-person dining table | 7–8 ft | 14–16 ft | 154–201 sq ft | Allows chair pull-back clearance |
| Fire pit surround (partial ring) | 8–10 ft outer radius, 4–5 ft inner radius | 16–20 ft outer | Ring ~160–240 sq ft | Inner radius keeps seating back from heat |
| Large entertaining space | 10–12 ft | 20–24 ft | 314–452 sq ft | Works as a primary backyard patio |
For a semicircle, cut the full-circle area in half. A 6 ft radius semicircle gives you about 56.5 sq ft, enough for a small bistro set fanning out from a back door. A 10 ft radius semicircle gives about 157 sq ft, which is generous for a dining set. Keep in mind that paver quantities are calculated on actual square footage plus a waste allowance of 10% for straight cuts along the arc and up to 15% for intricate patterns or natural stone.
Materials you can use for a curved patio
Each material handles curves differently. Some bend to the shape naturally; others require careful cutting. Here is an honest rundown of your main options.
Concrete pavers
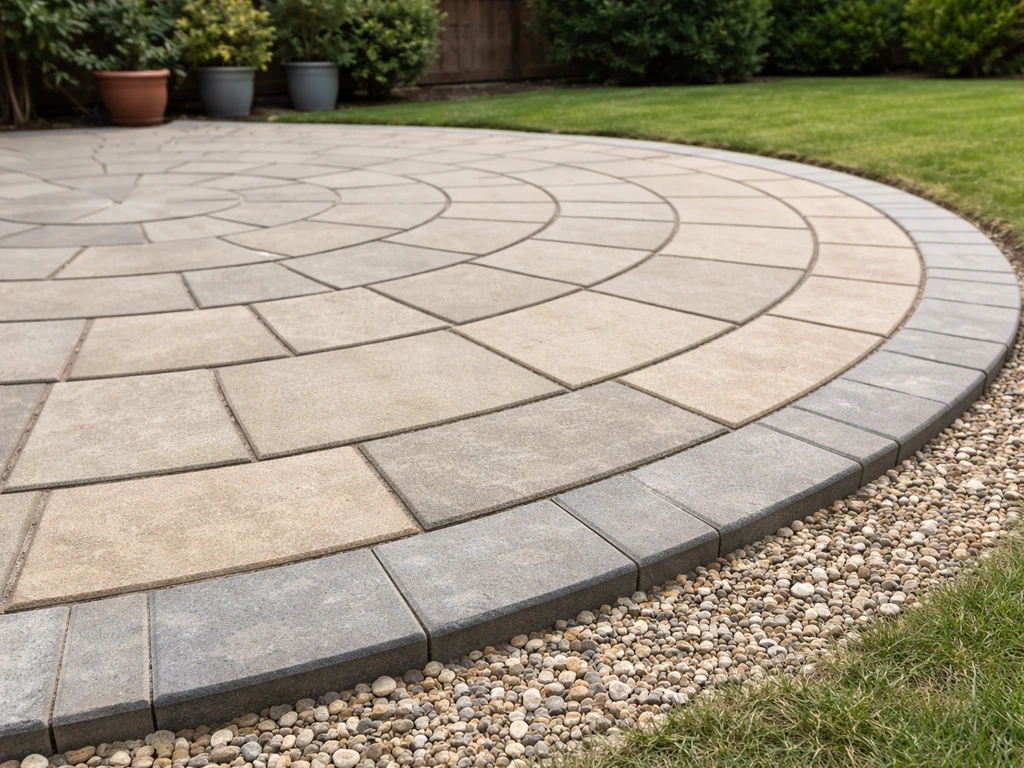
Concrete pavers are the most forgiving material for curved patios and the one I recommend for most DIYers. They come in uniform sizes and thicknesses, typically 60 mm (about 2-3/8 in.) for pedestrian patios, which makes estimating, cutting, and laying predictable. The curve is formed by the edge restraint and the cut pieces at the perimeter; the field of the patio lays just like any other sand-set paver job. A wet-saw or angle grinder with a diamond blade handles the curved cuts cleanly. Fan-shaped or wedge-shaped pavers designed specifically for circular patterns are also available from several manufacturers and can dramatically reduce the number of cuts needed.
Natural stone (flagstone, bluestone, travertine)
Natural stone looks stunning in curved patios and ages beautifully, but it demands more patience than concrete pavers because every piece is unique in size and thickness. You dry-lay the field first, fitting pieces together like a puzzle and marking cuts before any mortar or sand goes down. For a curved edge, you score and snap thin flagstone or use an angle grinder for thicker slabs. Natural stone typically goes down on a compacted base with a 1 in. bedding layer, just like concrete pavers, or it can be mortar-set on a concrete slab for a more permanent installation.
Poured concrete
Poured concrete gives you a seamless surface and total design freedom on the curve, but it introduces forming work that pavers do not require. You build a curved form from flexible 1/4 in. formboard or thin plywood (kerf-cut on the back face to allow bending), stake and brace it tightly so it does not bow outward under the weight of wet concrete, then pour, screed, and finish. Standard residential patio slabs are 4 in. thick on a 4–6 in. compacted aggregate base. For exterior patios in freeze-thaw climates, specify an air-entrained mix (4–7% air content) at 3,000–4,000 psi. Control joints should be cut or tooled every 8–12 ft (roughly 2–3 times the slab thickness in inches, per ACI guidance) to manage shrinkage cracking.
Brick
Brick works well for curved patios when laid in a running bond or herringbone pattern. The small unit size actually helps you follow a curve more easily than large-format pavers because less material needs to be cut. The tradeoff is that brick requires more pieces per square foot, which means more installation time. For the curved perimeter, soldier-course bricks (laid on edge, perpendicular to the curve) create a clean border that doubles as a visual edge restraint.
Gravel and decomposed granite
Loose gravel or decomposed granite is the easiest material to form into any curve because it just fills the space defined by the edging. It is also the least expensive option. The downside is maintenance, gravel migrates underfoot, needs periodic top-up, and does not provide a solid surface for furniture. If you want a low-effort, budget-friendly curved patio, gravel with a good metal or plastic curved edge restraint is a legitimate choice, especially for informal spaces around a fire pit.
Materials at a glance: pros, cons, and lifespan
| Material | Pros | Cons | Typical Lifespan |
|---|---|---|---|
| Concrete pavers | Easy to cut and replace; wide variety of shapes including fan/circle kits; DIY-friendly | Uniform look may not suit all styles; color fading over time | 25–50+ years |
| Natural stone (flagstone, bluestone) | Unique, natural appearance; durable; ages gracefully | Variable thickness requires skill to bed evenly; heavier; higher material cost | 50–100+ years |
| Poured concrete | Seamless surface; very durable; can be stamped or colored; no joints to maintain | Forming curves adds labor; cracks over time without joints; harder to repair | 30–50 years (with joints) |
| Brick | Classic look; small unit size suits curves well; replaceable | More pieces per sq ft = longer install time; some types absorb water and spall in freeze-thaw | 50–100 years (quality brick) |
| Gravel / decomposed granite | Lowest cost; easiest to install; drains naturally | Migrates underfoot; not stable for furniture; needs periodic replenishment | Ongoing maintenance; edge restraint life 10–20 years |
Quick cost reference
| Material | DIY Material Cost (per sq ft) | Contractor Installed (per sq ft) | Main Cost Variables |
|---|---|---|---|
| Concrete pavers | $3–$8 | $12–$22 | Paver style, base depth, edge restraints, cutting complexity |
| Natural stone (flagstone) | $5–$15 | $18–$35 | Stone type and origin, thickness variation, mortar vs. sand-set |
| Poured concrete (plain) | $4–$7 (materials) | $8–$18 | Reinforcement, forming complexity, finish type, control joints |
| Poured concrete (stamped/colored) | $6–$10 (materials) | $15–$30 | Stamp pattern, colorant, sealer, forming |
| Brick | $4–$9 | $14–$25 | Brick grade, pattern complexity, mortar vs. sand-set |
| Gravel / decomposed granite | $1–$3 | $4–$8 | Depth, edging material, weed barrier |
DIY savings are significant, typically 40–60% of the total contractor price, but factor in tool rental (wet saw: $50–$80/day; plate compactor: $60–$100/day) if you do not already own them. On a 150 sq ft curved paver patio, doing it yourself versus hiring a contractor typically saves $1,200–$2,100 after tool rental costs.
Tools and materials checklist
Layout and marking
- Wooden or metal stake for the center point
- Mason's line (string) cut to your desired radius
- Marking paint or flour/chalk line for transferring the arc to the ground
- Tape measure (25 ft minimum)
- Long straight-edge or chalk line for the chord (straight side of semicircles)
- Trammel bar or plywood trammel arm for large radii (optional but helpful above 10 ft radius)
- Graph paper and pencil for planning
Excavation and base
- Spade or square-nosed shovel
- Garden mattock or pickaxe for hard ground
- Wheelbarrow
- Plate compactor (rental) — do not skip this for any paver or concrete job
- Hand tamper for edges and tight spots
- Compactable aggregate (crushed stone, Class II base, road base) — enough for 6 in. compacted depth
- Landscape fabric (optional; placed between subgrade and aggregate base to limit vegetation)
- Torpedo level and 4 ft spirit level
For sand-set pavers
- Coarse concrete sand (ASTM C33) for 1 in. bedding layer — do not substitute mason sand or stone dust
- Screed pipes or wooden rails (1 in. diameter) for screeding the sand layer flat
- Curved plastic or aluminum spiked edge restraints rated for pedestrian patio use
- Galvanized 10-in. spikes at 6–10 in. spacing on curves (tighter spacing on tight radii)
- Polymeric joint sand for filling joints
- Rubber mallet
- Wet-saw with diamond blade or angle grinder with segmented diamond blade for cutting pavers
- Safety glasses, ear protection, dust mask (N95 minimum for cutting concrete or stone)
For poured concrete
- Flexible 1/4 in. formboard or kerf-cut 3/4 in. plywood for curved forms
- 2x4 stakes and screws for bracing forms
- Welded wire mesh (6x6 W1.4/W1.4) or synthetic fiber reinforcement for shrinkage control
- Chairs or dobies to hold mesh at mid-depth (approximately 2 in. up from bottom of 4 in. slab)
- Ready-mix concrete truck or bagged mix (3,000–4,000 psi; air-entrained in freeze-thaw zones)
- Screed board (straight 2x4 slightly longer than the form width)
- Bull float
- Magnesium hand float and steel trowel for finishing
- Groover tool or circular saw with diamond blade for cutting control joints
- Concrete sealer (acrylic, penetrating, or epoxy depending on desired finish)
How to mark out a curved patio on the ground
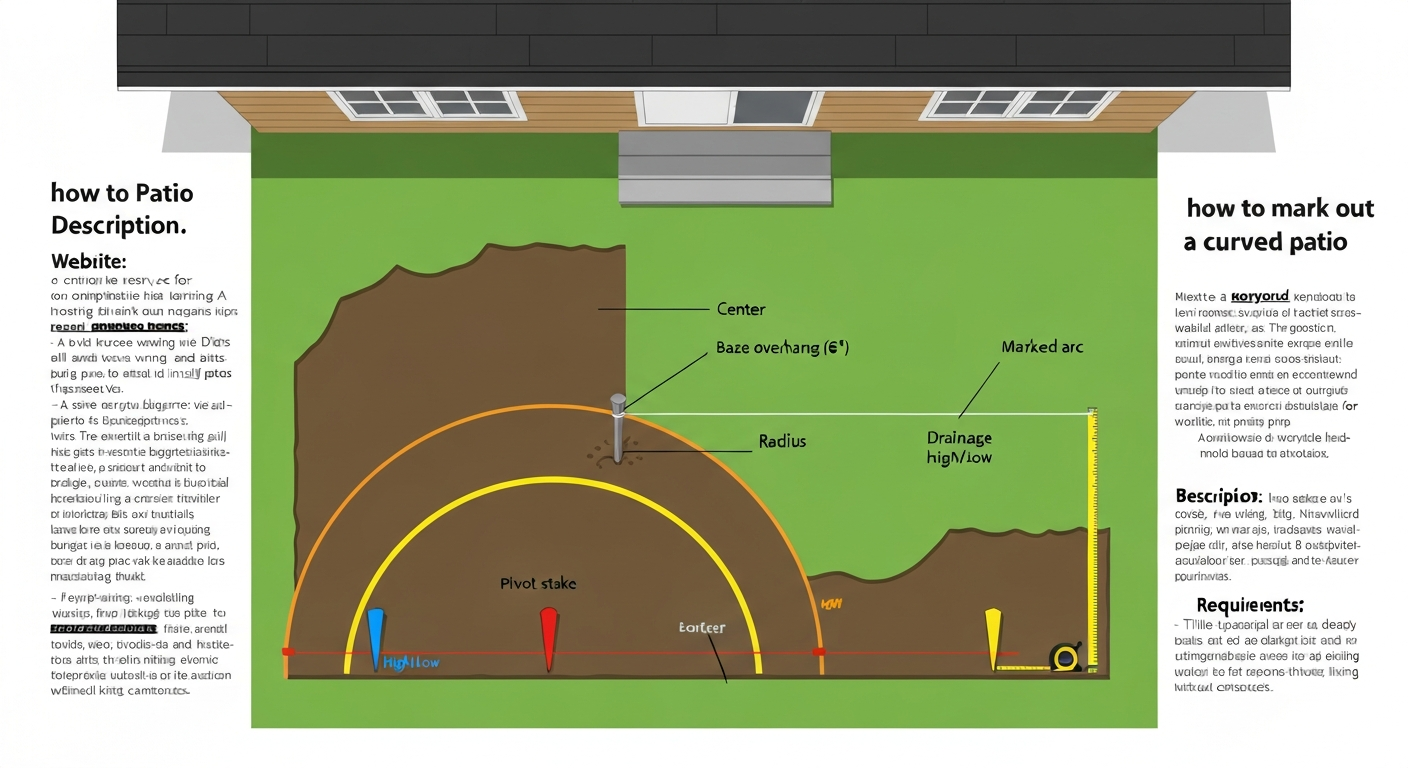
Getting the curve onto the ground accurately is the step that intimidates most beginners, but there are several methods and you can choose the one that fits your situation. For a focused, step-by-step walkthrough on how to curve a patio, see our detailed how to curve a patio guide. All of them rely on the same principle: a fixed center point and a consistent radius. For step-by-step instructions on how to mark out a curved patio, see this detailed layout guide (ID: 2421d08a-e135-4b30-8837-5bd1b6bc7815).
Method 1: String and stake (the go-to method for most patios)
- Drive a stake firmly into the ground at the center point of your circle or arc. For a semicircle off the back of the house, the center point is typically at the midpoint of the house wall, set back from it by whatever gap you want between the wall and the patio edge.
- Tie a mason's line to the stake and measure out your desired radius along the string. Mark that point on the string with tape or a knot.
- Pull the string taut and hold a can of marking paint or a sharp stick at the marked radius point. Walk slowly in an arc, keeping the string taut, and mark the ground as you go.
- For a full circle, walk all the way around 360°. For a semicircle, mark from one end of the chord to the other (180°). For any other arc angle, calculate the chord endpoints using the chord formula and mark between them.
- Double-check the radius at several points by measuring from the center stake to the painted line — it should be consistent within about 1/4 in.
Method 2: Trammel bar (best for large radii or hard surfaces)
A trammel is just a rigid bar or piece of plywood with a pivot hole at one end and a marking hole at the other, spaced exactly the radius apart. It works like a giant compass. For radii over about 10 ft, a trammel is more accurate than string because string can sag and give you inconsistent tension. Cut a 1x2 furring strip to your radius length, drill a pivot hole at one end, and drill a marking hole at the other. Pin the pivot to the center stake, insert a marker in the outer hole, and swing the arc. This is also useful when marking out a curve on a concrete slab you plan to cut with a saw.
Method 3: Chord-and-offset grid (good for compound curves or when access is limited)
Mark a straight baseline (the chord) across the intended curve. Divide it into equal segments, every 12 to 18 inches works well. At each division point, calculate the perpendicular offset to the arc using the formula: offset = r − √(r² − x²), where x is the distance from the chord midpoint to the division point. Mark those offset distances perpendicular to the baseline, then connect the dots with a garden hose or flexible rod and spray the line. This method is particularly helpful when you cannot easily access the center point because of a wall, planting bed, or other obstruction.
Method 4: Batter boards (for larger, more precise projects)
Batter boards are temporary frames set outside the excavation area that hold reference strings at the correct elevation and position. They are overkill for a simple ground-level curved patio but come into their own when you are building a raised curved patio where you need to maintain precise grades across the whole area. Set up batter boards at the perimeter, run strings at the finished surface height with the correct slope (1/4 in. per foot away from the house), and use them as a reference for both layout and depth control throughout the build.
Site preparation and base construction
Excavation depth
For a sand-set paver patio, your total excavation depth equals the compacted base thickness (6 in. is the standard for residential pedestrian patios) plus the 1 in. screeded sand bedding layer plus the paver thickness (typically 2-3/8 in. for 60 mm pavers). That adds up to about 9.5 in. below finished grade, call it 10 in. to be safe. For a poured concrete patio, excavate to 4 in. for the base (minimum) plus 4 in. for the slab = 8 in. below finished grade. In soft soils or areas with poor drainage, increase the base to 8 in. and re-check your totals.
Mark the curved outline on the ground first, then excavate from the inside of the line outward, keeping the cut walls as vertical as possible. The edge restraints for sand-set pavers need to be driven into the compacted base, not into loose native soil, so the base material must extend about 6 in. beyond the finished patio edge. Excavate that extra border as you go.
Slope and drainage
Build in a minimum slope of 1/4 in. per foot (about 2%) away from the house or toward a designated drainage point. Do not go below 1/8 in. per foot, that is the absolute minimum and it will leave you with standing water in low spots and potential ice in winter. Set your grade stakes or string lines at the correct slope before you add a single inch of base material, then follow that slope all the way through base compaction, sand screeding, and paver laying. It is much easier to correct slope at the subgrade stage than after you have compacted 6 in. of stone.
Base compaction
Add compactable aggregate in 2–3 in. lifts (loose), compact each lift with a plate compactor before adding the next. Do not dump all 6 in. in at once, it will not compact properly in the middle and you will end up with a soft base that allows settlement. On the curve, use the plate compactor in a circular motion following the arc, then overlap passes across the full area. Use a hand tamper in the 6 in. or so along the very edge that the plate compactor cannot reach. Check the compacted surface with a level and string line, it should match your target grade within about 1/4 in.
Installing edge restraints for curved pavers
Edge restraints are not optional for sand-set pavers, without them the pavers at the perimeter migrate outward over time, gaps open up in the joints, and the whole installation starts to look ragged. For curved patios, use flexible plastic or aluminum edge restraints that can be bent to follow the arc. Most products have perforated flanges that let you bend them smoothly; for tight radii under about 5 ft, score the flange in a few extra places to help it follow the curve without kinking.
Spike the restraints into the compacted base (not the native soil below) using galvanized 10 in. spikes. Space spikes at 6–10 in. on center along curves, the tighter the radius, the closer the spikes. On straight runs you can go to 12 in. spacing. The top of the restraint should sit at or just below the finished paver surface so it does not create a trip hazard. After installing restraints, double-check the arc one more time with your string and stake before laying any pavers.
Laying curved pavers step by step
- Screed the 1 in. sand bedding layer: lay two 1 in. diameter screed pipes parallel across the base (or along the curve for a semicircle), pour ASTM C33 coarse concrete sand between them, and drag a straight board across the tops of the pipes to create a flat, even 1 in. layer. Remove the pipes carefully and fill the channels with sand patted smooth. Do not walk on screeded sand.
- Establish your starting point: for a full circle patio, start at the center and work outward in a fan pattern. For a semicircle or arc pattern, start at the straight edge (chord side) and work toward the curved perimeter. For a field pattern (pavers running in rows across the patio), snap chalk lines as guides and start from the most visible corner.
- Lay full pavers first, leaving the curved perimeter rough. Set each paver firmly on the screeded sand and tap it level with a rubber mallet. Use spacers or the manufacturer's built-in spacer lugs to maintain consistent joint width (typically 1/8–3/16 in. for concrete pavers).
- Mark and cut the perimeter pavers: once the field is laid, hold or dry-fit each perimeter paver in position and mark the cut line using a pencil or chalk — the curved edge of the restraint is your guide. Cut with a wet saw for clean, smooth curves, or use an angle grinder with a segmented diamond blade for tighter curves. For natural stone, score the cut line with a grinder and break along the score, or cut fully through with the wet saw.
- Lay the cut perimeter pieces and check the arc one more time before moving on.
- Compact the pavers: run the plate compactor over the entire paved surface (with a rubber pad or rubber-soled attachment to protect the paver face) to seat the pavers into the sand and level any minor high spots.
- Apply joint sand: spread dry polymeric joint sand over the surface and sweep it into the joints. Make at least three passes, blowing or sweeping off the excess each time. Compact the surface again lightly to vibrate the sand deeper into the joints. Follow the polymeric sand manufacturer's instructions for moisture activation — this step is critical and varies by product. Do not get the surface wet before you are ready to activate.
Forming and pouring a curved concrete patio
Building the curved form
The form defines the entire shape, so take your time building it right. For gentle curves (large radius), 1/2 in. or 3/4 in. plywood will bend to follow the arc if you make kerf cuts (shallow saw cuts across the back face every 2–3 in.) to allow flexibility. For tighter curves, use 1/4 in. flexible formboard or purpose-made plastic concrete forms that snap together into curves. Bend the form to your marked arc line, stake it firmly into the ground every 12–18 in. (closer on tight bends), and add diagonal braces outside the form to resist outward pressure from the wet concrete. Wet concrete at 4 in. depth exerts real outward force, I have seen improperly braced forms bow badly mid-pour, which ruins the curve and wastes a whole truck of concrete.
Reinforcement and pouring
Place welded wire mesh (6x6 W1. For guidance on reinforcement choices and proper mesh elevation (mid-depth for 4 in. slabs) consult CalStack, Concrete slab reinforcement summary (references ACI 360R) blank" rel="noopener noreferrer">CalStack — Concrete slab reinforcement summary (references ACI 360R). 4/W1.4) or lay synthetic fiber reinforcement across the base before pouring. If you use mesh, support it on chairs or broken pieces of paver at approximately 2 in. from the bottom of the slab, mid-depth is where reinforcement actually works. Mesh sitting on the subbase does almost nothing for crack control. Start the pour at the far end from the truck and work back. Rod or vibrate the concrete into the form edges, especially along the curved form face where air pockets can form. Screed across the top, bull-float, and finish to the level of the form tops (which you have set to your desired slope). Tool control joints while the concrete is still green (within the first few hours), or saw-cut them the next day. Space control joints roughly every 8–12 ft in a 4 in. For more on recommended joint spacing and saw-cut depths summarized from ACI guidance, see How to Cut Expansion Joints in Concrete, ConcreteCuttingPro (summarizes ACI guidance) blank" rel="noopener noreferrer">How to Cut Expansion Joints in Concrete — ConcreteCuttingPro (summarizes ACI guidance). slab. Cut them to a depth of at least 1 in. (one-quarter of the slab thickness).
Curing and sealing
Concrete gains most of its strength in the first 28 days, and adequate moisture during that period is critical. Cover the slab with curing compound sprayed immediately after finishing, or cover with plastic sheeting and wet burlap kept moist for at least 7 days. Do not walk on the slab for 24–48 hours and do not allow vehicle traffic for at least 7 days. Once cured, apply a penetrating or acrylic sealer to protect the surface from staining and freeze-thaw damage, and reapply every 2–3 years depending on the product.
Cutting and fitting techniques
Cutting is the part of curved patio work that slows most beginners down, but with the right blade and a little practice it becomes straightforward. The key is marking cuts accurately before you cut, not trying to eyeball it freehand at the saw.
- Wet saw with a continuous-rim diamond blade: the cleanest option for concrete pavers and smooth stone. Set the paver on the table, push slowly through the blade with a steady feed rate. Keep the water flowing — it cools the blade and suppresses dust.
- Angle grinder with segmented diamond blade: more portable than a wet saw and works well for curved cuts on individual pavers. Mark the curve with a pencil, make multiple shallow passes deepening with each pass rather than trying to cut through in one go. Wear eye protection, hearing protection, and a minimum N95 dust mask.
- Chisel and hammer (score-and-snap): works for straight cuts on thin pavers and some flagstone. Not suitable for curved cuts — use a saw.
- Angle grinder with a masonry scoring disc: useful for scoring a line before snapping natural stone along a natural fracture plane.
- Template method: for repeating curved perimeter cuts (which is what you have on a full circle patio), cut a cardboard template of the required shape from the first piece, then use it to mark all subsequent cuts. This keeps the curve consistent and saves time.
Drainage solutions, raised patios, and fire pit integration
Drainage
Beyond the 2% slope built into the patio surface, think about where the water goes when it leaves the patio. Directing runoff toward a lawn or planted bed is usually fine. Directing it toward a neighbor's property or a foundation is not. If your yard has limited fall or slopes toward the house, consider a perimeter channel drain at the low edge of the patio that ties into a dry well or a yard drain. For patios near the house, the 2% slope away from the foundation is non-negotiable, pooling water against a foundation leads to basement moisture issues and, in cold climates, frost heave under the patio.
Raised curved patios and retaining walls
If your yard slopes significantly, a raised patio brings the surface up to a usable level. A raised patio involves a retaining wall (or several) on the downhill side to hold back the filled area. For walls over 24–30 in., most jurisdictions require a permit and engineered design, check before you build. For walls under 24 in., segmental retaining wall blocks (the interlocking concrete variety) are a common DIY solution. Curved retaining walls are actually easier to build with segmental blocks than straight ones because the blocks are designed to step back slightly with each course, and rounding the front face is a simple matter of adjusting the batter angle. The base course must be buried at least partially below grade and compacted drainage fill (clean crushed stone) should be placed behind the wall for drainage.
Integrating a fire pit
A fire pit at the center of a circular patio or at the focal point of a curved seating area is one of the most satisfying things to build. If you are laying a partial ring (annular) patio around a fire pit, the inner edge of the patio should sit at least 3–4 ft from the fire pit edge for safety, ideally 5 ft or more. Do not use standard concrete pavers directly adjacent to the fire pit opening (high heat can cause them to spall); use a ring of heat-rated fire brick or a purpose-built steel fire ring as the transition between the fire feature and the patio surface. Make sure the fire pit has a gravel or sand base beneath it, not combustible material, and check local ordinances on open burning before you install.
Common mistakes and how to avoid them
- Skipping the utility check: the single most dangerous mistake on any digging project. Call 811 every time, even for shallow excavations.
- Inadequate base compaction: the most common cause of paver settlement, rocking, and joint opening. Compact every 2–3 in. lift. If you rent a plate compactor, get it for at least one full day — rushing compaction is false economy.
- Wrong sand in the bedding layer: mason sand or stone dust will not compact properly under pavers and can cause long-term instability. Use ASTM C33 coarse concrete sand.
- Edge restraints not spiked into the base: if spikes only go into native soil below the base, they will pull out as the soil moves. Make sure the base extends past the restraint and spikes penetrate that base material.
- Not building in slope: a perfectly level patio is a puddle-forming patio. 1/4 in. per foot away from the house is not a guideline — it is a requirement for long-term performance.
- Cutting too many pieces at the perimeter before dry-fitting: always dry-fit a section of the curve before cutting. The actual required cut angle often differs slightly from the theoretical calculation.
- Pouring concrete without adequate form bracing: stake forms every 12–18 in. and add diagonal braces. Wet concrete is heavy and will push a lightly staked form outward.
- Applying polymeric joint sand on a damp surface: the sand will clump and bond to the top of the pavers rather than going into the joints. Surface must be completely dry when applying, and follow the manufacturer's water activation instructions precisely.
- Ignoring freeze-thaw in mix design: for outdoor concrete in cold climates, air entrainment is not optional. Non-air-entrained concrete on an exterior slab will scale and deteriorate within a few winters.
Safety reminders
- Wear safety glasses any time you are cutting, chiseling, or using power tools. One paver chip to the eye is a serious injury.
- Wear a dust mask rated N95 or better when cutting concrete pavers or stone — silica dust causes permanent lung damage with repeated exposure.
- Use hearing protection with angle grinders and plate compactors. Both exceed 85 dB and cause cumulative hearing damage.
- Wet concrete is caustic — wear waterproof gloves and rubber boots when handling it, and rinse any skin contact immediately.
- Use proper lifting technique for paver bundles and large slabs. Pavers are deceptively heavy (a standard 12x12 concrete paver weighs about 11–13 lbs; a 24x24 flagstone slab can be 40–80 lbs). Use a paver cart or two-person carry for anything heavy.
- Keep children and pets away from the work area, especially during cutting operations and concrete pours.
Troubleshooting common problems
- Pavers rocking after installation: usually indicates a soft spot in the base or an uneven screeded sand layer. Remove the affected pavers, add and compact more base material, re-screed, and relay.
- Joints opening up at the curve: typically caused by edge restraint failure or insufficient spike spacing. Drive additional spikes through the existing restraint at closer intervals and refill joints with polymeric sand.
- Standing water on the patio: check your slope — use a level and tape measure to verify that it is at least 1/4 in. per foot. If a low spot has developed, it may indicate base settlement. Lift the affected pavers, address the base, and relay.
- Concrete cracking between control joints: if cracks appear within control joint panels, they may indicate insufficient base compaction, a subgrade void, or the slab was loaded before curing was complete. Narrow cracks (hairline) can be filled with penetrating concrete sealer. Wider cracks may require routing and filling with polyurethane caulk, or slab replacement in severe cases.
- Polymeric sand washing out: it was either applied to a damp surface, not fully swept into joints, or not properly activated with water per manufacturer instructions. Sweep out the remaining sand, let the surface dry completely, and re-apply.
- Curved form bowed outward on a concrete pour: if the bow is minor, push the form back from the outside and add more bracing before the concrete sets. If the concrete has already set, a slightly imperfect curve may be correctable by grinding the edge — or in severe cases the form section needs to be saw-cut and a new edge cast.
Budget vs. quality tradeoffs worth knowing
The base is where you should never cut corners. Spending an extra $50–$100 on more compacted aggregate and a proper plate compactor rental will prevent hundreds of dollars in repair work later. That said, there are places where you can reasonably manage costs. Plain concrete pavers from a home improvement center cost $2–$4 per sq ft and look perfectly fine; designer pavers in tumbled or textured finishes run $6–$12 per sq ft for essentially the same function. Regular joint sand ($0.50–$1 per sq ft installed) will work in a sheltered area with low foot traffic and no weed pressure; polymeric sand ($1.50–$2.50 per sq ft installed) is a worthwhile upgrade if the patio is exposed to rain, has gaps from tree roots, or sees heavy use. For concrete, bagged mix is fine for small patios under about 50 sq ft; for anything larger, a ready-mix truck delivers better consistency and is often cheaper per cubic yard than bagging it at the store.
What to tackle next
Once you have the core construction process down, the design variations open up. If you are focused on getting the marking-out step exactly right before you break ground, the process of laying out the arc accurately using different site conditions and tools is worth exploring in more depth. If you are deciding between a full semicircle versus other arc configurations, the specific considerations around half-circle layouts, including how to align the chord against a house wall and manage the straight edge, are worth a closer look. For step-by-step instructions specific to a half-circle layout, see our guide on how to make a semi circle patio. And if you are working with a completely round freestanding patio out in the yard rather than one anchored to the house, the full circular layout approach has its own specific sequencing for starting the lay pattern from the center outward. For a complete step‑by‑step on a free‑standing circular patio, see how to build a round patio (434cde52-46e4-4e94-ab5c-e745bbcccd81). For step-by-step instructions on laying a freestanding round patio from the center outward, see our guide on how to make a circular patio.
FAQ
What are the basic design and sizing rules for circular and semicircular patios?
Choose radius and layout based on use: seating areas often need a 10–14 ft diameter for a small intimate circle, 16–24 ft for larger gatherings. Use circle formulas: circumference = 2·π·r; arc length s = r·θ (θ in radians); chord length c = 2·r·sin(θ/2); sector area = 0.5·r²·θ. For a semicircle set θ = π (radians). Sketch several radii on paper and on-site with stakes or a center‑point to visualize scale.
How do I mark out accurate curves on site? (methods and when to use each)
Four reliable methods: 1) Center‑point/compass: drive a stake at center and run a string to desired radius—best for full circles and semicircles. 2) Trammel (beam compass): good for large radii when a center string is impractical. 3) String‑and‑stake (multiple radius arcs): quick for partial arcs or when center point isn't available. 4) Batter boards and offset strings: ideal near foundations or where you need fixed reference lines. For tight radii (<3–4 ft) use a flexible curve board or trammel; for radii >15–20 ft a long string or laser/rotary laser with layout points improves accuracy.
Which materials and tools should I choose for pavers, natural stone, and poured concrete patios?
Materials: - Pavers: 60 mm (≈2‑3/8") for pedestrian patios; polymeric or joint sand; edge restraints. - Natural stone: flagstone with compatible base and tighter joints or mortar bedding. - Concrete: 4" typical slab (increase to 5–6" for heavy loads), 3,000–4,000 psi mix; air‑entrained in freeze‑thaw climates. Tools (checklist): shovel, wheelbarrow, plate compactor, level, string line, tape, carpenter's square, mason’s line, edging tool, circular saw with diamond blade or angle grinder for cutting, concrete float/trowel, screed board, rebar or welded wire mesh, form stakes, flexible formboard or plywood, rubber mallet, jointing tools, safety gear (glasses, gloves, ear protection).
What are the step‑by‑step site preparation and base construction steps?
1) Mark and stake the layout with chosen curve method. 2) Excavate to allow final surface + bedding + base (pavers often: 1" bedding + 4–6" compacted aggregate + paver thickness). For concrete: remove to accommodate slab thickness + 4–6" base. 3) Confirm drainage slope: target 1/4" per foot (≈2%) away from structures. 4) Compact subgrade; add geotextile fabric if needed. 5) Place and compact aggregate base in 2–3" lifts until compacted depth reached (typically 4–6"). 6) For pavers add and screed 1" of concrete sand bedding; for concrete set forms and reinforcement (mesh or rebar) held at mid‑depth. 7) Install edge restraints anchored into compacted base.
How do I form and pour curved concrete patios? Any special form tips?
Use flexible form materials: 1/4" flexible formboard, thin plywood, or purpose plastic/steel forms. Secure with close‑spaced stakes and heavy bracing on the outside to resist concrete pressure—tight radii require more stakes and shorter brace spans. Set forms to the required slope. Place reinforcement (wire mesh or fibers). Pour concrete in sections if needed, consolidate with a vibrator or tamping, screed to grade using a straightedge that follows the curved forms, then bullfloat and finish. Cut control joints at spacing ≈ 2–3 × slab thickness (in feet) — e.g., 4" slab → joints ~8–12 ft. Use air‑entrained mix in freeze climates and keep forms moist as required for curing.
What are the step‑by‑step instructions for laying curved pavers or natural stone?
1) Confirm base and bedding are correct and compacted. 2) Snap guide lines or use a template for curve reference. 3) Start from the most visible straight edge or the center for circular patterns. Lay full units first and work out toward the curved edge. 4) For true curves, use radial or fan patterns—lay stones so joints radiate from the center to reduce cutting. 5) Cut edge pieces to fit the curve using angle grinder or wet saw. 6) Compact finished pavers with a plate compactor using a protective pad. 7) Sweep joint sand or polymeric sand into joints and compact again. 8) For natural stone, dry‑lay first to fit irregular shapes, then set on mortar or compacted sand per chosen method and grout or joint with sand/polymeric material.