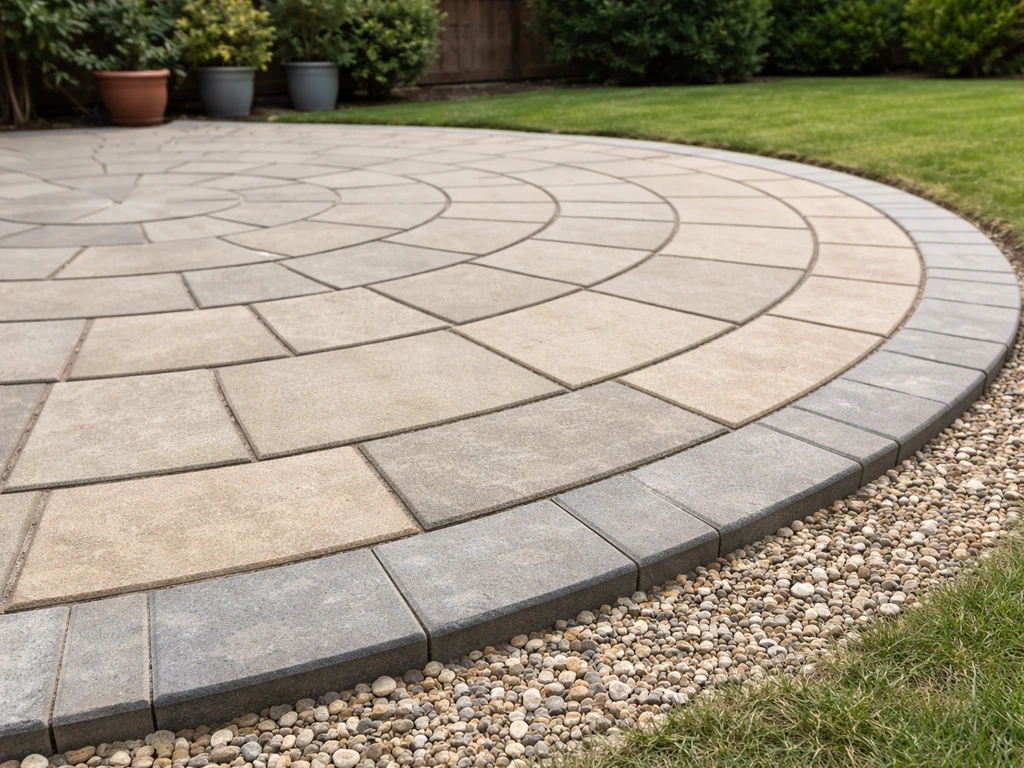
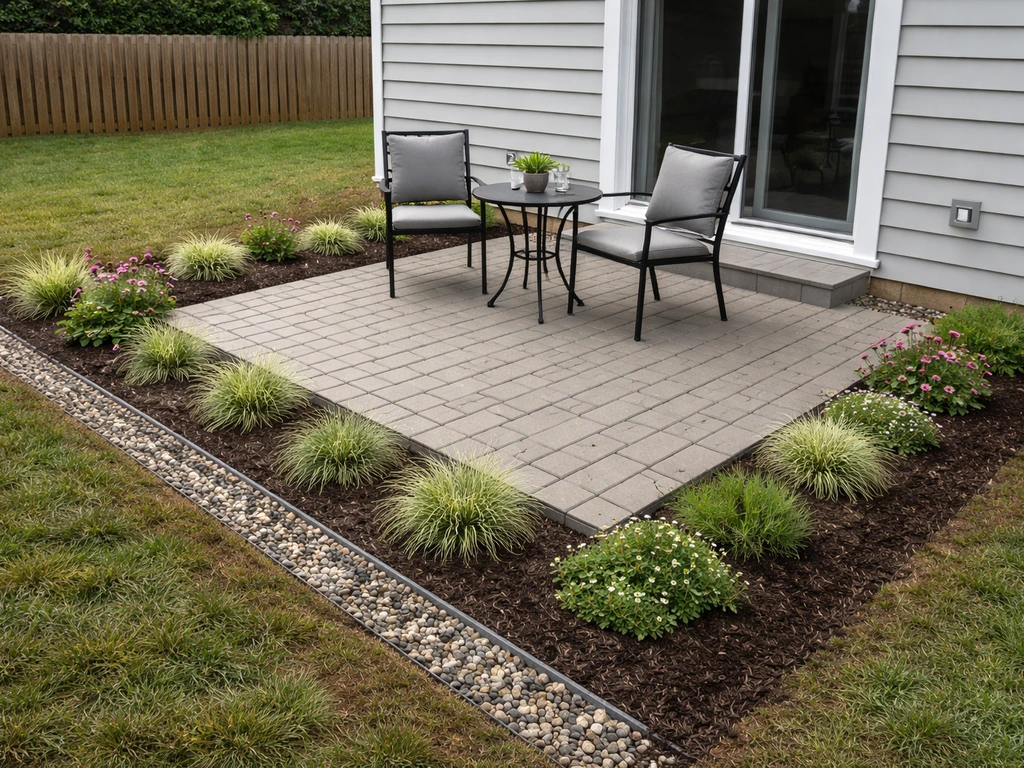
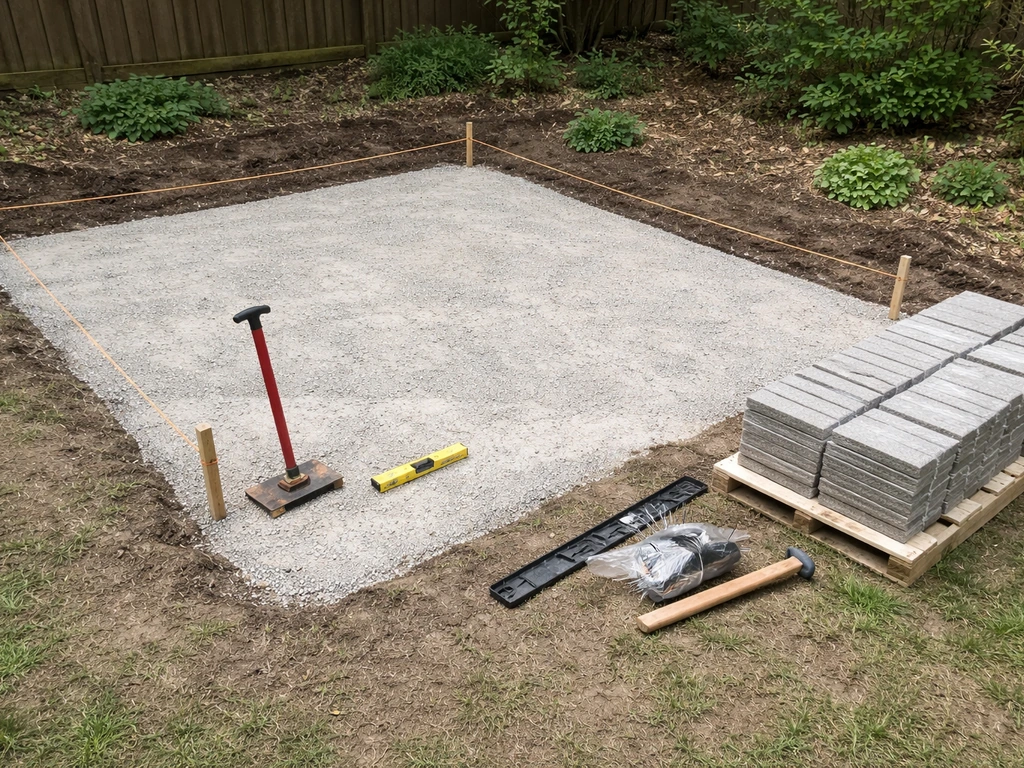
To mark out a curved patio, you pick a center point, drive a stake there, and swing a string or beam compass at the exact radius you need to scratch or spray-paint the arc onto the ground. That one sentence covers the core idea, but getting it right in practice takes a bit of planning, the right tools for your radius size, and a clear grasp of how to set drainage fall and edge positions before you ever pick up a shovel. Here's how to do all of it cleanly, step by step.
How to Mark Out a Curved Patio: Step-by-Step Layout Guide

Nolan Carver
19 Jul 2026
When and why an accurate layout actually matters
A sloppy layout wastes materials and creates problems you can't easily fix later. If your arc wanders even 2–3 inches off the intended line, your edge restraints won't land where you planned, cut pavers at the perimeter will be inconsistent sizes, and a poured concrete form could shift before the pour. On curved patios specifically, small deviations compound around the arc, so a 2-inch error at one point can mean a 6-inch mismatch by the time you complete the circle. Getting the line accurate before excavation also lets you confirm the patio fits the yard as designed, check that it drains away from the house at 1%–2% (about 1/8"–1/4" per foot), and position edge restraints so they anchor into compacted base rather than loose soil. Do this work on paper and on the ground before digging anything.
Quick planning checklist before you start
Run through these decisions on paper first. Changing your mind after stakes are in the ground is easy. Changing it after excavation is not.
- Size and shape: decide your finished diameter (e.g., 12 ft full circle, 14 ft semicircle), then add 6 in on all sides for the base overhang beyond the paver edge
- Center location: walk the site and mark the approximate center on the ground; check that the full radius clears any structures, fences, or trees
- Drainage direction and fall: plan for a minimum 1% slope (1/8" per foot) away from any structure, or 2% if ponding is a concern; mark the high and low sides before you mark the arc
- Material choice: sand-set pavers, flagstone, or poured concrete each affect how you mark edge restraint positions and whether you need form boards
- Call 811 before any excavation: the national "Call Before You Dig" service will mark buried utilities for free — do this at least 3 business days before you plan to dig
- Permit check: raised patios with retaining walls over roughly 4 ft typically require a permit and engineered design in most U.S. jurisdictions; confirm with your local building department before starting
- Sketch your plan to scale on graph paper with all dimensions noted — this becomes your reference throughout the build
Tools and materials you'll need for marking
You don't need expensive equipment. Most of these items cost under $10 each, and you likely own several already.
- Mason's line or heavy twine (bright color is easiest to see): 50–100 ft for most residential patios
- Wood stakes or metal landscaping pins (10–20): 12"–18" stakes for soft soil, 18" for harder ground
- Trammel or beam compass: two adjustable trammel heads clamped to a length of lumber, conduit, or pipe; for a 6 ft radius you need a beam at least 6 ft long — buy trammel point kits from woodworking suppliers or make your own with scrap wood
- Batter boards: pairs of horizontal boards nailed to stakes set just outside the patio footprint; used to hold string positions after the center stake is removed for digging
- Flexible garden hose or rope (for visualizing curves on site): lay it on the ground, adjust the shape, then trace it with marking paint
- Plywood template (for small repeating curves or tight radii): cut the arc from 1/4" plywood and trace around the edge
- Line level or 4 ft spirit level: for checking fall across the layout
- Tape measure (25 ft minimum)
- Marking paint or flour: to spray or pour the arc line on the ground once the string sweeps it
- Pencil, permanent marker, and notepad for recording measurements
- Calculator or phone (for radius/arc math)
Simple math you need to know
Curves involve three numbers you'll use repeatedly: radius, diameter, and arc length. The radius is the distance from the center point to the edge of the patio. The diameter is twice the radius (so a 12 ft wide circular patio has a 6 ft radius). Arc length is the actual distance along the curved edge itself, which matters when you're ordering edging material or calculating how many pavers fit around the perimeter.
The formulas are straightforward. For a full circle: circumference = 2 × π × radius, or roughly 6.28 × radius. A 6 ft radius circle has a perimeter of about 6.28 × 6 = 37.7 ft. For a semicircle, the curved arc is half that (18.85 ft), but add the straight diameter edge (12 ft) to get total perimeter. For a partial arc (say, a 90-degree quarter circle), multiply the full circumference by the fraction: 37.7 × (90/360) = 9.4 ft of curved edge. These numbers help you order edge restraints, flexible plastic edging, or linear feet of concrete form boards without running short.
Drainage fall math is even simpler. At 1% slope, for every 1 foot of patio you drop 0.12 inches (roughly 1/8"). At 2% you drop 0.24 inches (roughly 1/4"). So a 10 ft patio sloping at 2% drops 2.4 inches total from high side to low side. Mark this at the layout stage by measuring that drop from your intended finish surface level at the high end, it affects where your screed rails and form tops land.
| Patio radius (ft) | Full circumference (ft) | Semicircle arc (ft) | 2% fall over diameter (in) |
|---|---|---|---|
| 4 | 25.1 | 12.6 | 1.9 |
| 6 | 37.7 | 18.8 | 2.9 |
| 8 | 50.3 | 25.1 | 3.8 |
| 10 | 62.8 | 31.4 | 4.8 |
| 12 | 75.4 | 37.7 | 5.8 |
Which layout method should you use?
There are five practical methods for marking a curved patio, and the right one depends on your radius size, the complexity of the shape, and what tools you already own. Use the table below to choose, then follow the matching step-by-step section.
| Method | Best for | Radius range | Skill level | Cost |
|---|---|---|---|---|
| String and stake | Full circles and semicircles | 3–20 ft | Beginner | Under $5 |
| Trammel / beam compass | Precise small-to-medium arcs, compound curves | 1–12 ft | Beginner–intermediate | $15–$40 for trammel kit |
| Batter boards with string pivot | Large radii, compound curves, forms for concrete | 8 ft+ | Intermediate | $10–$20 for lumber |
| Flexible hose template | Freeform or irregular curves, design prototyping | Any | Beginner | $0 (use existing hose) |
| Plywood template | Tight, repeating, or symmetrical curves; small patios | Up to ~4 ft radius | Beginner–intermediate | $5–$15 for plywood |
My recommendation: for most DIY circular or semicircular patios up to about 20 ft across, start with the string-and-stake method. It's fast, accurate enough for pavers and flagstone, and requires nothing you don't already own. For a focused how-to on laying out, scribing, and fine-tuning curved edges, see how to curve a patio. If you're pouring concrete and need a repeatable, precise form, or if you're dealing with a compound curve that has multiple centers, upgrade to batter boards with a trammel. The flexible hose method is best used as a design step before you commit to a specific radius, walk the hose around the yard, stand back, adjust until you're happy, then measure what radius that shape actually is and switch to a string-and-stake or trammel for the final mark.
Step by step: marking a full circle or semicircle with string and stake
This is the simplest method and works for the vast majority of residential curved patios. It takes about 20–30 minutes to mark a complete layout. For a step-by-step guide, see how to make a semi circle patio. For a full step-by-step guide on how to build a round patio, consult our detailed walkthrough. For a full guide to tools, measurements, and step‑by‑step construction, see how to build a curved patio. For a full guide on how to make a circular patio, see how to make a circular patio.
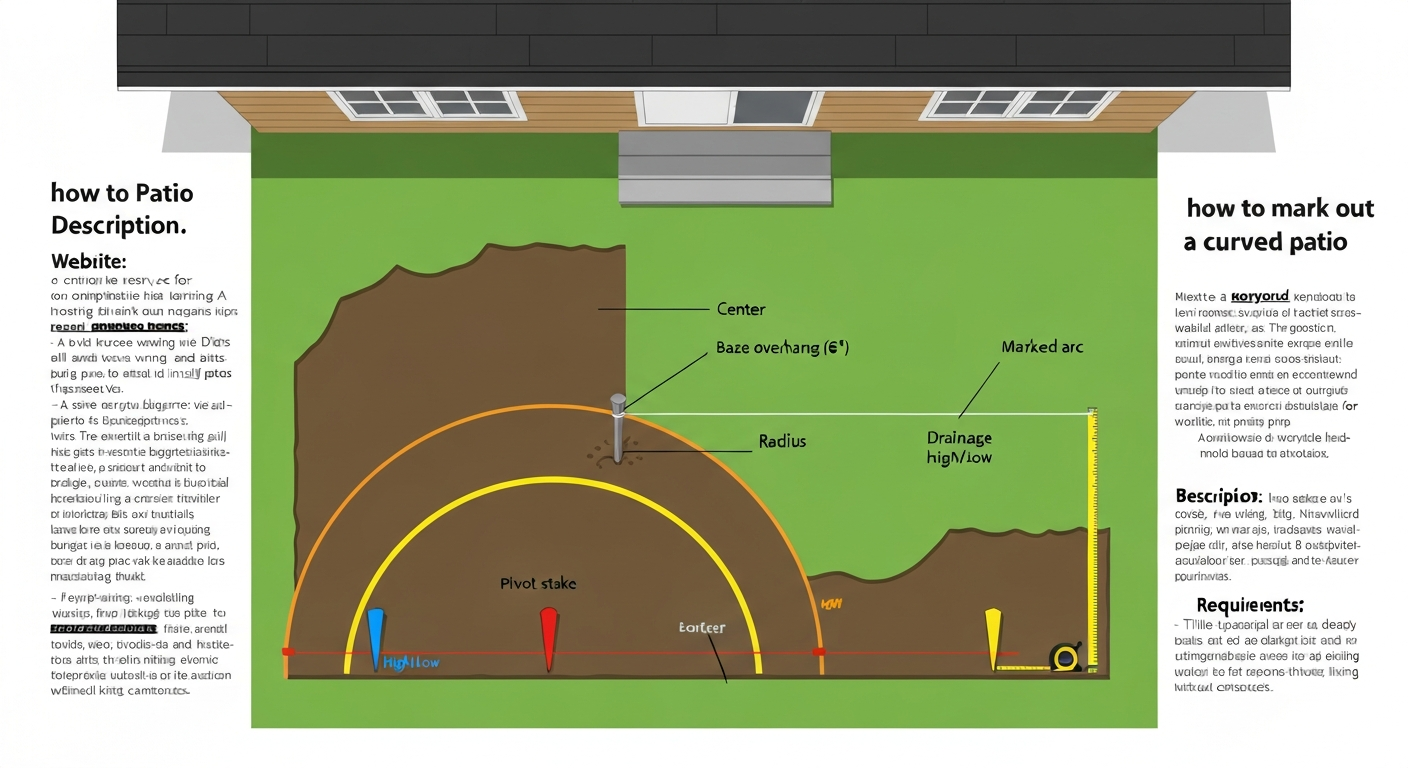
- Locate and drive your center stake. Push a 12"–18" wood stake firmly into the ground at the exact center point of your planned patio. For a semicircle against a house wall, the center stake often sits right at the edge of the house foundation or patio door threshold — measure and confirm this position against your sketch before proceeding.
- Cut your string to radius length plus about 18" extra. Tie one end securely to the base of the center stake, as close to ground level as possible. Keeping the string low prevents arc deviation from the string lifting off the ground.
- Attach a marking stick or stake to the free end. A short sharpened stick works well. Pull the string taut and hold it at ground level — this is your compass arm.
- Walk the arc. Keep the string taut and drag the marking stick along the ground in a continuous sweep. For a full circle, walk the complete 360 degrees. For a semicircle, swing only 180 degrees from one end point to the other.
- Mark as you go. Either hold a can of marking paint in your free hand and spray along the arc, or have a helper follow immediately behind you with flour or chalk. You want a continuous, clearly visible line.
- Mark the straight edge for a semicircle. Stretch a separate string between the two arc endpoints to define the flat diameter line. Spray this line too.
- Add 6 inches outward for the base overhang. This is where your aggregate base will extend beyond the paver edge. Tie a second string 6" longer than your radius to the center stake and sweep it again — mark this outer line with a different color of paint.
- Check the drainage direction. With the arc marked, place a long level or straight edge across the diameter and confirm which side is higher. The patio should fall at least 1/8" per foot away from the house. If your ground is flat, you'll build this slope into your base layer during excavation.
- Mark the high and low points on the ground. Drive a colored flag or stake at the highest intended edge point and another at the lowest. Write the elevation difference on each — this keeps your drainage plan visible during excavation.
- Photograph the layout before excavating. Take several overhead photos from a ladder or upper window if possible. These are your insurance if a stake gets kicked.
Troubleshooting the string-and-stake method
- String sags in the middle on large radii: use a heavier line (braided mason's line, not lightweight twine) and keep it as close to the ground as possible while sweeping
- Center stake keeps moving: drive it deeper, or brace it with two additional stakes driven at angles on either side
- Arc looks lopsided when viewed from above: check that your string is tied to the base of the stake, not halfway up — any height adds effective length and makes the arc larger
- Marked line is too faint: re-spray with marking paint using slower passes; on dry ground, flour or sand works as a quick backup
Step by step: using a trammel or beam compass
A trammel (also called a beam compass) is essentially two adjustable clamps on a long beam or pipe, one for the pivot and one for the marking point. It's more rigid than string, which makes it better for smaller, precise radii and for marking inside a confined space where a loose string would tangle. You can buy trammel point kits for $15–$40, or build your own from a straight piece of 1×2 lumber.
- Build or assemble your beam compass. If using a shop-made version, cut a straight 1×2 to a length slightly longer than your intended radius. Drill a small hole at one end for a pivot nail and another hole at the exact radius distance for a pencil, scribe pin, or marking spike. Double-check the pivot-to-point distance with a tape measure before using it.
- Drive a small finish nail or pin at the center point. This becomes your pivot. Keep it tight to the ground so the beam rides as flat as possible.
- Set the beam's marking end to the exact radius. Measure carefully from the pivot hole to the marking hole — this is the number that determines your arc size, so measure twice.
- Swing the beam in your desired arc. Hold the pivot end firmly on the nail (or have a helper hold it) while you push the marking end around the arc. Press the marking spike firmly into the ground or use it to guide a marking paint can along the line.
- For a full circle, complete the full 360-degree rotation. For a semicircle, mark from one edge of the diameter to the other and then connect the endpoints with a straight chalk line.
- For compound curves (two or more different radii blending into each other), complete one arc, move the pivot to the new center point for the adjacent curve, adjust the beam to the new radius, and swing the second arc until it meets the first. The transition point where the two arcs meet should be marked and verified — use a straight edge to confirm the tangent flows smoothly.
- Mark the outer base overhang line. Extend the pivot-to-point distance by 6 inches and sweep the beam again for the aggregate base boundary.
- Verify by measuring from the center stake to five or six points around the arc. Each should match your intended radius within 1/4". If any point is off, re-mark that section.
For radii longer than your available beam (say, a 15 ft radius), extend the method by splicing two boards with a metal strap connector, or switch to the batter-board method described next. The trammel works best for radii up to about 10–12 ft before beam flex becomes a problem.
Step by step: batter boards and offset arcs for large radii and compound curves
Batter boards are horizontal boards nailed to stakes driven outside the patio area. They let you hold exact string positions even after the center stake is removed for digging. For large curved patios and poured concrete work especially, this method gives you a stable reference you can return to throughout the build.
Setting up batter boards
- Drive pairs of stakes about 2–3 ft outside the planned patio perimeter at the major axis points (think north, south, east, west of the circle). Each pair should be roughly 2–3 ft apart and set to the same height — use a line level to confirm they match.
- Nail a horizontal 1×4 or 2×4 batter board to each pair of stakes at a consistent elevation. This elevation should represent your intended finished surface height at that location (accounting for your drainage fall).
- Establish the center point. Stretch strings from opposite batter boards across the center of the patio. Where two diagonal strings cross is your center. Drop a plumb bob from that crossing point to mark the exact center on the ground. Drive a nail or pin at that point.
- Set your pivot. Tie a string to the center nail, measure out to your intended radius, and anchor the string end to a small peg. This is your new compass arm, operating from a center that can remain in place because your batter boards hold all the reference elevations.
- Swing the radius string around the full arc and mark the ground with paint or flour as described in the string-and-stake method.
- For compound curves with multiple centers, repeat the center-finding step for each segment: mark the first arc, then move to the new center point (established by the same batter-board string-crossing method), adjust your radius string, and swing the second arc to meet the first. Mark each transition point clearly.
- Mark offset arcs for inner and outer edges. If you're marking a concrete form, you need both the inner finished edge and the outer form board position. Adjust your pivot string length by the form thickness (typically 1.5" for dimensional lumber) and swing additional arcs.
- Set drainage fall into the batter boards. After your arcs are marked, go back to each batter board and adjust its height to reflect the fall direction. On the high side of the patio, the batter board surface sits at the high-side finish elevation. On the low side, it sits lower by the calculated drop (e.g., for a 12 ft radius patio at 2% slope, the drop across the 24 ft diameter is about 5.8 in — see the table earlier). Stretched strings between adjusted batter boards then give you a slope reference for setting screed rails or form boards.
- Protect batter boards from disturbance. Mark each board's string notch with a permanent marker so you can re-string exactly after construction activity disturbs the strings.
Establishing centers with multiple arcs (compound curves)
Sometimes a curved patio has no single center point, it's a gentle S-curve or a flowing edge that blends multiple arcs. The trick is to find the center of each individual arc segment separately. For each section of curve, identify three points on the line you want, then bisect the chords between them: draw a straight line (chord) between points 1 and 2, find its midpoint, draw a perpendicular from that midpoint. Repeat for points 2 and 3. Where the two perpendiculars intersect is the center of that arc. Drive a stake there, measure out to your curve line to confirm the radius, and use that stake as your new pivot. Repeat for the next curve segment. This method works for any freeform curve and is the professional approach to laying out flowing compound curves accurately.
Marking transitions to straight edges
Where a curved patio meets a straight section (a house wall, a straight path, or a square step), the transition needs to be tangent, meaning the curve meets the straight edge smoothly without a kink. To achieve this, the straight edge must be perpendicular to the radius at the meeting point. Set your straight-edge string first, then swing the arc so its endpoint hits the straight line at exactly 90 degrees. Check this with a square. If you're building a semicircle off a house wall, the diameter line should run parallel to the wall; confirming this with a tape measure to two points on the wall catches any misalignment before you start digging.
Setting drainage into your layout
Drainage needs to be designed into the layout, not fixed after the fact. Aim for at least 1% fall (1/8" per foot) across the patio surface, away from any structure. For most residential patios, 2% (1/4" per foot) is the practical target, it drains reliably without being noticeable underfoot. If your patio must also serve as an accessible route, ADA guidelines limit cross-slope to 2% (1:48) and running slope to 5% (1:20) unless the surface is treated as a ramp with handrails. Plan drainage direction and mark the high and low points clearly with stakes during your layout step, this is the information your base grading will follow.
Positioning edge restraints in the layout
For sand-set pavers, the edge restraint line is one of the most important marks you'll make. The restraint needs to sit at the outer edge of the paver field, and the compacted aggregate base must extend at least 6 inches beyond that restraint so the spike-down anchors bite into solid compacted material rather than loose backfill. Mark three lines during your layout: the finished paver edge (your primary arc), the outer edge restraint position (same arc), and the base overhang line 6 inches further out. This last line defines your actual excavation boundary. During installation, the edging should cover at least two-thirds of the paver side for adequate support, and on curves you'll need to use flexible plastic edging or precut concrete edging pieces, rigid straight edging won't follow the arc cleanly.
Material-specific notes for marking
The core marking process is the same regardless of material, but each surface type has a few specific layout considerations worth knowing before you finalize your lines.
| Material | Edge restraint needed? | Form boards needed? | Base overhang mark | Extra layout notes |
|---|---|---|---|---|
| Concrete pavers (sand-set) | Yes — flexible plastic spike-down edging | No | 6 in beyond paver edge | Mark joint lines on base after screeding; control joints not required but consider expansion gaps at abutting structures |
| Natural flagstone (sand-set) | Yes — troweled concrete or spike-down edging | No | 6 in beyond stone edge | Mark individual stone positions on the sand bed; irregular shapes mean layout is approximate until dry-fit |
| Natural flagstone (mortar-set) | No (mortar bed acts as restraint) | No | Stone edge only | Mark mortar bed boundary; allow for 1–2" mud bed depth in your excavation calculation |
| Poured concrete | No (form boards replace restraints) | Yes — bent plywood or Masonite for curves | Form board outer face | For a 4" slab, plan control joints at 8–12 ft spacing; mark joint lines at layout stage; cut joints to at least 1" depth within 4–12 hours of pour |
Raised patios and retaining wall interfaces
If your curved patio is raised, meaning it sits above the surrounding grade with a retaining wall or block border holding the fill, your layout needs to account for the wall footprint as well as the patio surface. Mark the outer face of the retaining wall as a separate arc line inside your overall excavation boundary. Most residential retaining walls under 4 ft (measured from the bottom of the footing to the top of the wall) don't require a permit or engineered design, but check your local code, this threshold varies by jurisdiction, and walls supporting a surcharge (like a patio load) may trigger permit requirements at lower heights. For specific requirements and submittal items for retaining walls in Dublin, see the Retaining Walls, Plan Submittal Checklist (City of Dublin, municipal plan submittal guidance) Retaining Walls — Plan Submittal Checklist (City of Dublin — municipal plan submittal guidance). If the finished patio surface will be more than 30 inches above the adjacent grade, the IRC requires guards of at least 36 inches high, mark the guard post locations during layout so you don't accidentally position a paver seam or joint where a post base will land.
Verifying your layout before you dig
Before breaking ground, run through these checks. They take 10 minutes and can save you from expensive corrections later.
- Measure the radius from the center stake to at least 8 points around the arc — they should all match within 1/4"
- Confirm the diameter at two or more crossing points is consistent (diameter = 2 × radius)
- Check that any straight edges are parallel or perpendicular to reference structures as intended — measure from two points on the reference wall to two points on your layout string
- Verify drainage fall: stretch a string from the high-side edge mark to the low-side edge mark and use a line level; confirm the drop matches your intended fall (e.g., 2.4" over 10 ft at 2%)
- Walk the arc and look for any obvious bumps or kinks in the painted line — these usually mean a momentary string sag or center stake movement; re-mark those sections
- Confirm the base overhang line (6" beyond the paver edge) is marked clearly and that this line defines where your excavation stops
- Take photos from multiple angles for reference during the build
Common mistakes and how to avoid them
- Measuring radius from the top of the center stake instead of the ground: the string must run at ground level or the effective radius is longer than intended, making the arc too large
- Skipping the 811 call before excavation: buried gas, electric, or water lines are a serious hazard — call at least 3 business days before any digging, every time
- Marking only the finished paver edge and forgetting the base overhang: without that 6-inch extension, your edge restraints will anchor into loose backfill and fail over time
- Not accounting for drainage fall until after excavation: if the ground is flat and you haven't planned where to build up or cut down, achieving 1%–2% fall in the base layer becomes much harder
- Using lightweight twine that stretches under tension: stretchy string gives a smaller-than-intended arc on the far side and a larger one on the near side; use non-stretch mason's line
- Making a compound curve transition without verifying tangency: a kink at the junction between two arc segments looks wrong and can cause paver alignment issues; always check the transition with a square
- Jumping to excavation without photographing the layout: one kicked stake or an overnight rain can erase your marks — photos and measurements on paper are your backup
What comes next: from marked layout to excavation and forming
Once your layout is marked and verified, excavation follows the outer base overhang line, not the finished paver edge. Refer to Trenching and Excavation Safety (OSHA, 29 CFR 1926 Subpart P overview and eTool) for regulatory requirements, including cave‑in protection options (sloping/benching, shoring, or shielding), a competent‑person requirement for evaluating excavations, and appendices on soil classification and protective systems Trenching and Excavation Safety (OSHA — 29 CFR 1926 Subpart P overview and eTool). Dig to the depth that gives you your base layer (typically 4 inches of compacted aggregate for pedestrian patios over stable soil, per ICPI guidance), plus 1 inch of bedding sand for pavers or flagstone, plus your paver or stone thickness. For a standard 2-3/8" concrete paver on 1" sand on 4" base, your total dig depth is about 7.5 inches below finished grade. Add any extra depth needed to create your drainage slope. If you're pouring concrete, set curved form boards along your marked arc lines using bent 1/4" plywood or Masonite strips for clean curves, stake them firmly at 12-inch intervals on the outside of the curve, and check form top elevations with a level before the pour. From this point, the hard work of marking is done, you have accurate lines to follow, a drainage plan built in, and edge positions confirmed. The rest is just following the marks.
FAQ
What are the basic methods to mark out a curved patio and when should I use each?
Common methods: 1) String-and-stake (best for quick, small-to-medium arcs and checking radii) — tie string at measured radius to a center stake and swing; 2) Beam compass / trammel (best for accurate full circles or large radii when a rigid bar can span the radius); 3) Batter boards with a pivot (best for poured concrete forms and when you need elevation control and repeating arcs); 4) Flexible hose or garden hose (fast visual layout for trial shapes and gentle compound curves); 5) Plywood / template cutouts (best for repeatable complex or freeform curves and for laying out pavers/flagstone). Choose based on required accuracy, radius size, whether you need elevation/fall, and the substrate (lawn, compacted base, or soil).
What tools and materials do I need to mark a curved patio?
Essential tools: measuring tape (50 ft+), long straightedge or beam (2–12 ft as needed), stakes and hammer, mason’s line or bright string, adjustable beam compass / trammel or pipe and two trammel points, spray paint or marking chalk, marking pins/powder, wooden battens or plywood for templates, hose for visual curves. Optional but helpful: batter boards and screws, plumb bob, line level or laser level, long radius templates (OSB or 1/2" plywood), spray adhesive for template alignment, level and transit or builder’s level for setting fall, utility knife, permanent marker. Safety: gloves, eye protection, Call 811 before digging.
How do I mark a perfect circle or semicircle using the string-and-stake method?
Step-by-step: 1) Find and mark the center point of the circle. 2) Drive a center stake; tie a durable string to the stake to the required radius length (measure from stake head to pencil/marker). 3) Keep string taut and use a marker, paint, or stake to scribe the arc by walking a full circle or half-circle while keeping tension. 4) For a semicircle, mark the straight baseline between the arc endpoints using a chalked line. Tips: keep the string at the same vertical plane (use a low stake head or nail) and re-check radius at a few points. For larger radii use heavier cord or a wire rope and a cartwheel reference if needed.
How do I lay out a large radius or multiple connected arcs (compound curve) using a beam compass or trammel?
Procedure: 1) Build or buy a beam (pipe or hardwood) long enough for the largest radius. 2) Attach two adjustable trammel heads or clamped stops — one marks the center pivot and the other holds the pencil/scribe at the radius. 3) Fix the pivot point at the center location (stake through pivot or clamp to batter board). 4) Swing the beam to mark the arc. For compound curves, repeat from different centers and overlap arcs, then fair the transitions with a flexible template or hose. For very long radii, set the pivot on a temporary tripod or batter board to maintain a stable, repeatable center.
How do I transfer a layout center and set elevation/fall when using batter boards?
Steps: 1) Install batter boards outside the planned patio footprint, at grade or at the finished top-of-slab elevation. 2) Use a plumb bob or string from the batter board pivot to transfer the center to the ground and set a pivot point. 3) Tie the radius string to the pivot on the batter board and swing the arc at the finished elevation; mark points where the arc intersects grade. 4) To set slope, use a level, line level, or laser level on the batter-board strings and adjust the pivot height or mark a second offset arc representing the fall. 5) For poured slabs, swing the form line at the finished top-of-slab elevation, factoring engineered fall (typically 1%–2%).
What simple geometry do I need to convert diameter, radius, or arc length for marking?
Key formulas: radius = diameter ÷ 2. To get arc length (L) for a given central angle θ in degrees: L = 2πR × (θ/360). To find central angle from chord length (c) and radius (R): θ (radians) = 2 × arcsin(c / (2R)); convert radians to degrees by ×(180/π). For most DIY work you’ll only need radius from diameter and chord checks: measure radius from center to several points to verify. Use a long tape to measure chord endpoints to confirm consistency and re-center if inconsistent.