You can build a circular patio yourself in a weekend or two by picking a center point, scribing a radius with a stake and string, excavating to the right depth, compacting a gravel base, screeding a 1-inch sand bed, and then laying pavers or slabs outward from the center in concentric rings. The shape looks complicated but it actually simplifies a lot of layout decisions because everything revolves around one fixed point.
How to Make a Circular Patio: Step-by-Step DIY Guide

Nolan Carver
13 Jun 2026
Planning the layout and choosing your materials
Start by deciding on the diameter. A 10-foot circle gives you a small accent pad, fine for a bistro table and two chairs. A 16-foot circle comfortably fits a six-person dining set. A 20-foot circle is a generous outdoor room. Work backward from how you plan to use the space, then add at least 12 inches to that functional diameter to account for edging and border courses.
For materials, you have three practical choices: concrete pavers, natural stone slabs, or poured concrete with a circular form. Concrete pavers are the most forgiving for a DIYer because you can cut and adjust individual pieces without disturbing the whole surface. Natural flagstone gives a more organic look but requires more cutting skill. Poured concrete is fast but demands rented formwork and finishing experience to look good on a curve. For most homeowners doing this for the first time, concrete pavers are the right call.
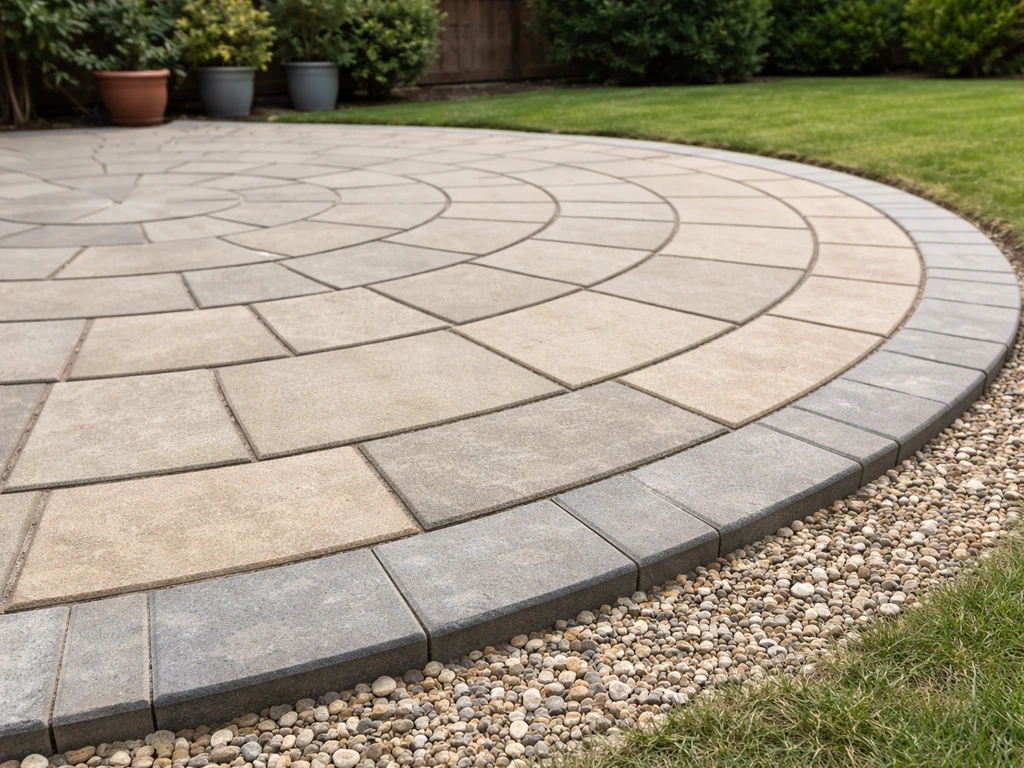
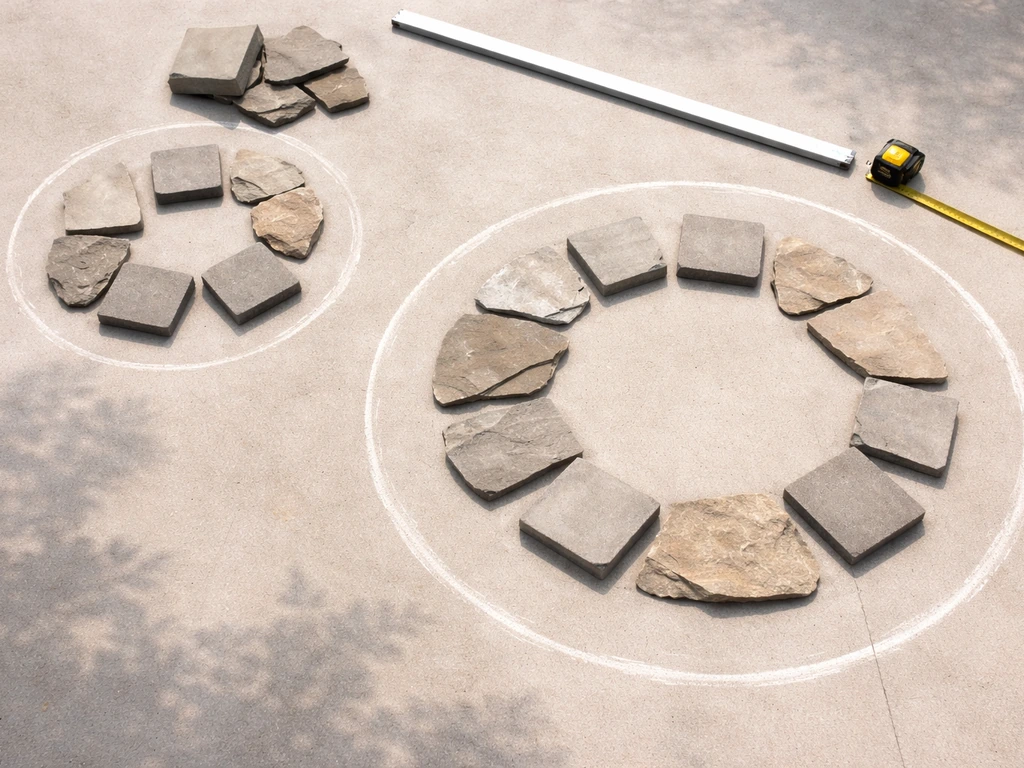
The two main paver layout styles for a circle are concentric rings (pavers follow the curve in arcs around the center) and radial lines (pavers fan outward like spokes from a central focal point). Concentric rings tend to look cleaner and waste less material. Radial layouts are striking but generate a lot of tapered cuts at the outer edge. Pick the pattern before you order material because it affects how much you buy and how many cuts you need to budget for.
How much material to order
Calculate your circle's square footage with the formula: radius x radius x 3.14. A 10-foot radius (20-foot diameter) circle is roughly 314 square feet. Add 10 percent for cuts and breakage, and another 5 percent if you are doing a contrasting soldier course border. Order gravel base material by the ton: for a 4-inch base over 314 square feet, you will need roughly 5 to 6 tons of compactable gravel depending on your supplier's coverage rates.
Tools and materials for accurate circle work
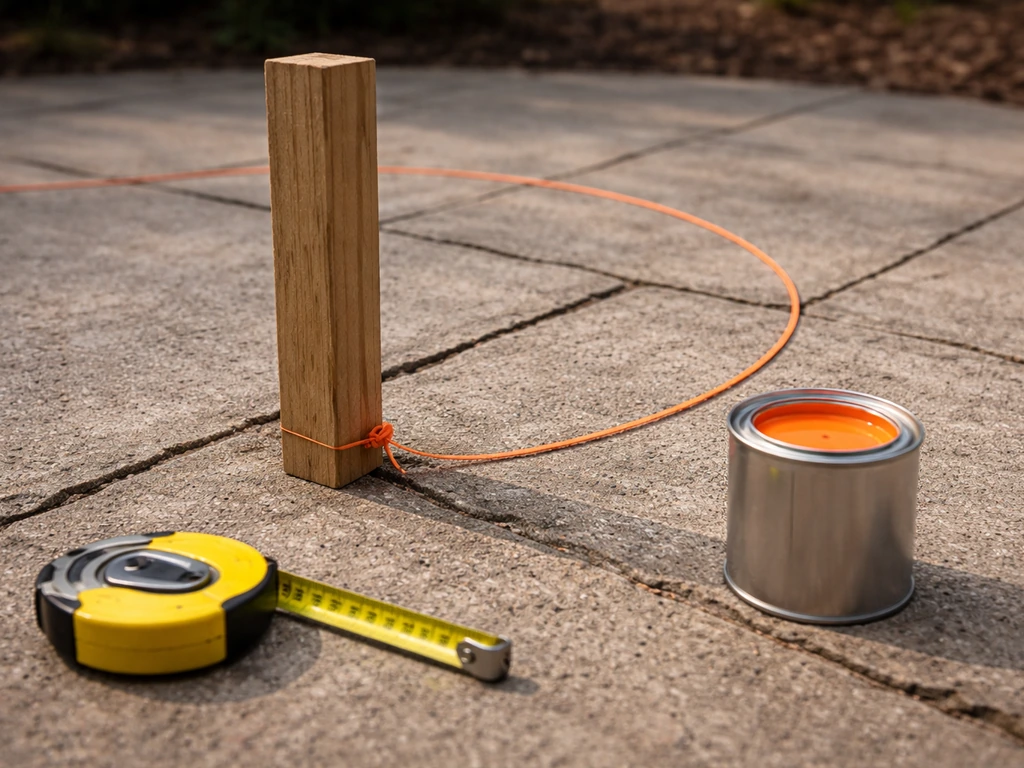
Circles demand a few specific tools that rectangle patios do not. The most important is your radius jig: a wooden stake, a measured length of mason's line, and a can of marking paint or a nail at the far end. Everything else is standard patio work. Here is the full list:
- Wooden center stake (a 2x2 cut to 18 inches works well)
- Mason's line or braided string (non-stretching) cut to your exact radius
- Marking paint or ground chalk for scribing the circle onto the soil
- Tape measure and carpenter's level
- Rotary laser level or line laser for establishing slope across the patio
- Plate compactor (rent one — hand tampers are not sufficient for base work)
- Straight screed rails or pipes (set to your bedding sand depth)
- Rubber mallet and dead-blow hammer
- Angle grinder with a diamond blade or a wet saw for cutting curved paver edges
- Fine bristle push broom for sweeping polymeric sand
- Geotextile landscape fabric
- Compactable gravel base (crusher run or road base)
- Coarse bedding sand (concrete sand, not mason's sand)
- Polymeric jointing sand
- Plastic or metal paver edge restraints rated for curved installation
- Galvanized spikes (10-inch) to anchor edge restraints
The rotary laser is worth renting even if you have never used one before. It lets you set a consistent slope across the entire circle without constantly checking with a level and tape measure. The target slope for a patio is 1/4 inch per foot away from the house or any structure. Without a laser, maintaining that slope accurately over a 16-foot circle is genuinely difficult.
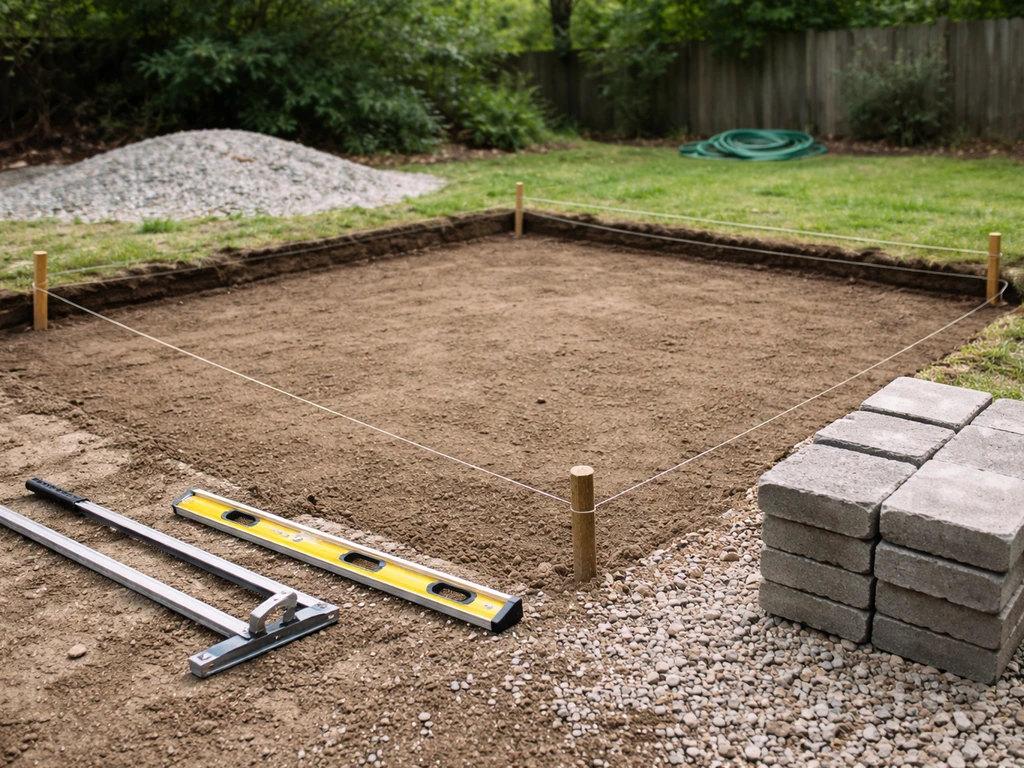
Site prep: excavation, grading, and drainage
Mark your circle on the ground first (details on how to do that are in the next section), then excavate the full area. The total excavation depth depends on your paver thickness and base design, but the formula is straightforward: paver or slab thickness plus 1 inch of bedding sand plus 4 to 8 inches of compacted gravel base. For a standard 2.375-inch concrete paver on a pedestrian patio, that comes to roughly 7.5 to 11.5 inches of total depth. In most residential situations, 4 inches of gravel base is sufficient for a foot-traffic-only patio. If your soil is clay-heavy or stays wet, go 6 inches.
Excavate a few inches beyond your circle's edge all the way around. You need room to install edge restraints and compact the base without losing material at the perimeter. Dig your floor as level as possible, then establish your slope by pulling soil from the high side (the house side) rather than adding fill to the low side. Never build a patio on uncompacted fill if you can avoid it, that is the number one cause of settlement and rocking pavers.
Once excavated, lay geotextile fabric on the floor of the excavation before adding any gravel. The fabric separates the subgrade soil from your gravel base, which prevents fine particles from migrating up into your base layer over time and softening it. Overlap seams by at least 12 inches and run the fabric up the sidewalls a few inches.
For drainage, the slope direction matters. Water needs to run away from any structure, foundation, or wall. A 1/4-inch-per-foot pitch (about a 2 percent grade) is the standard target. If the patio is freestanding in the yard away from the house, you can slope it in any direction, or you can crown it very slightly in the center so water sheds to all sides, though a consistent single-direction slope is simpler to build and maintain.
Building the base and subbase for a circular footprint
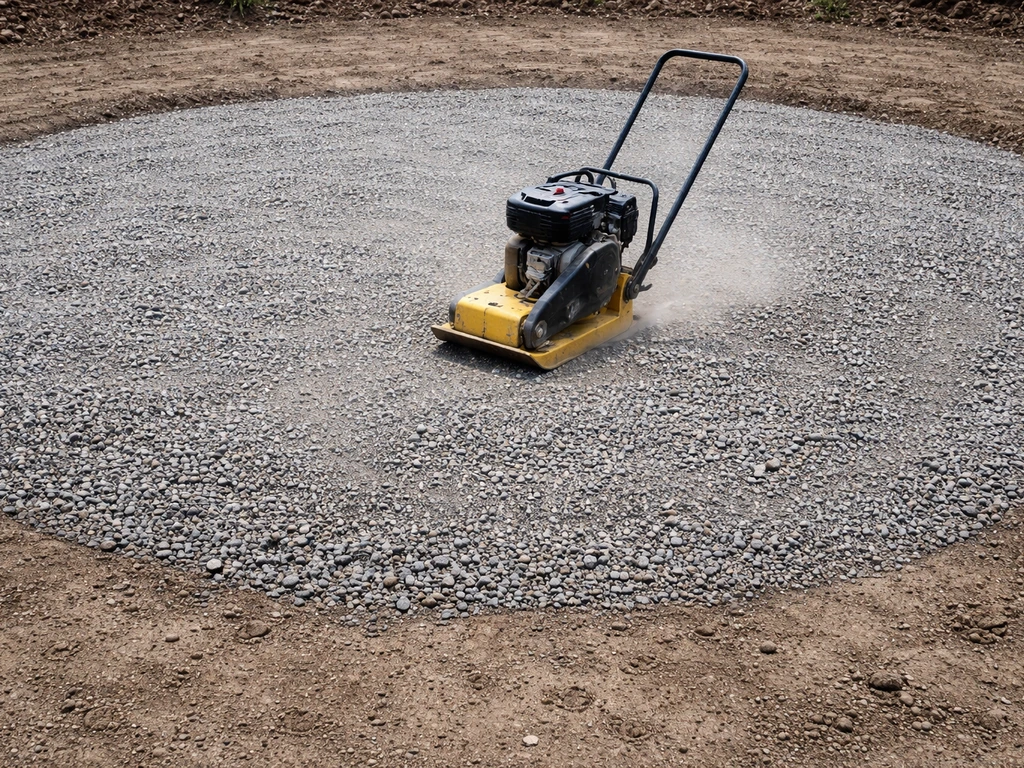
Add your compactable gravel in lifts, not all at once. Pour 2 to 3 inches of crusher run or road base gravel, compact it with the plate compactor, then add another 2 to 3 inches and compact again. Each lift needs to be compacted separately because the compactor cannot drive particles together through 6 or 8 inches of loose material. You will know a lift is properly compacted when the plate compactor stops sinking and the surface feels firm underfoot without any bounce.
Working in a circle is actually easier than working in a rectangle at this stage because you can run the plate compactor in overlapping arcs around the center point. Start at the outside edge and work inward in concentric passes, overlapping each pass by about half the compactor's plate width. Give extra attention to the perimeter, which tends to stay a little looser than the middle.
After your gravel base is fully compacted, check your slope. Set a rotary laser to project at your desired grade (1/4 inch per foot from high point to low point) and use a grade rod or a screed rail and level to verify the surface is tracking that slope consistently across the whole circle. Fix any low or high spots now in the gravel, before you pour your bedding sand. It is much harder to correct slope issues after the sand goes down.
Once the gravel base checks out, add 1 inch of coarse bedding sand (concrete sand, not fine mason's sand) and screed it level. Use two screed pipes or rails set to the correct elevation and drag a straight board across them. The sand layer should be exactly 1 inch deep and should mirror your target slope. Leave it a fraction proud of finished height because it will compress slightly when pavers are compacted into place. Do not walk on the screeded sand, set kneeling boards to protect your surface as you work.
Marking the circle and setting your edge restraints
Drive your center stake at the exact center point of the patio. Tie your mason's line to the stake at ground level, measure out to your exact radius, and tie or hold a piece of marking paint or a nail at that distance. Walk the full circumference slowly, keeping the line taut, and mark the ground. You now have your circle scribed. Walk it once more and check: the line should look like a smooth, consistent arc with no flat spots or kinks. If it wobbles, the stake is probably moving, drive it deeper or brace it.
If you are doing a border or soldier course around the outside (which looks great and gives you a clean edge), mark a second circle at the inside edge of that border. Most soldier course pavers are 4 inches wide, so your inner circle mark would be 4 inches inside the outer mark.
Install your plastic or metal paver edge restraints along the outer circle before you lay any pavers. Flexible edge restraint comes in sections and can be bent to follow the curve. Stake it into the compacted gravel base with 10-inch galvanized spikes every 12 inches around the curve, closer spacing (every 8 inches) on tight curves with a radius under 6 feet. The edge restraint is what keeps your pavers from spreading outward over time, so do not skip stakes or space them too far apart. The top of the restraint should sit at finished paver height so it disappears once the job is done.
Building a circular or curved patio shares a lot of DNA with other curved patio projects. Building a circular or curved patio shares a lot of DNA with other curved patio projects how to build a curved patio. The edge restraint and radius marking process here is essentially the same whether you are doing a full circle, a semi-circle, or a gentle freeform curve.
These same marking tips also apply when you need to mark out a curved patio rather than a perfect circle full circle, a semi-circle, or a gentle freeform curve. The main difference is that a full circle has no straight edges to reference, so the center stake and string method is the only reliable way to stay true to your radius.
Installing pavers in a circular pattern
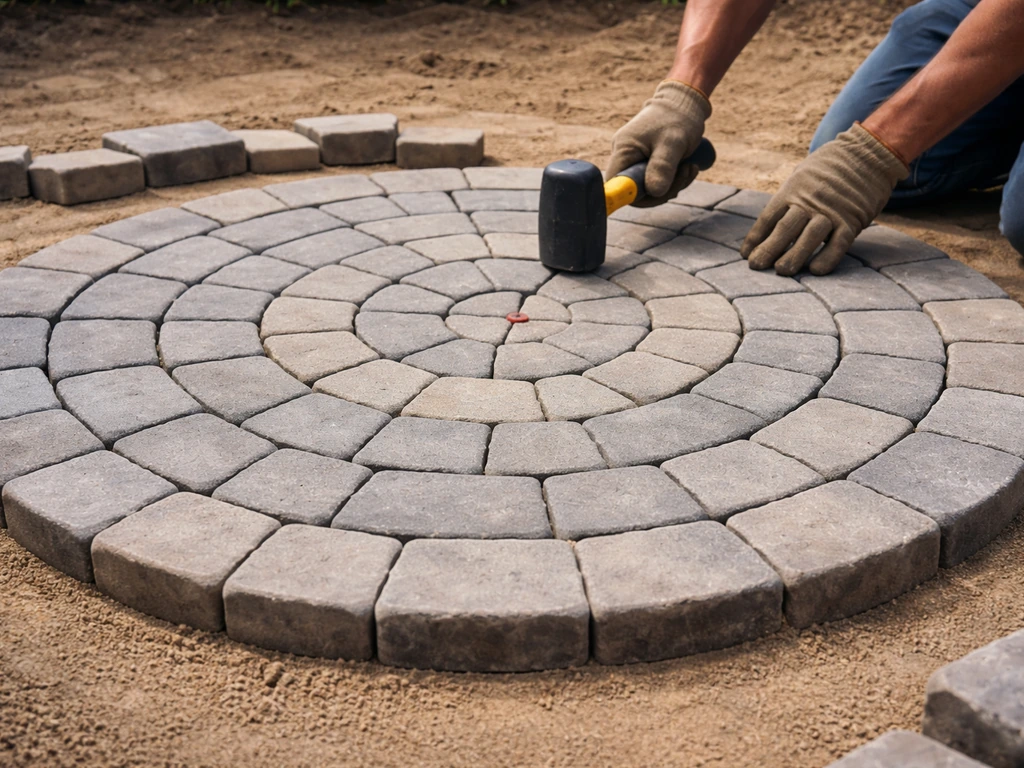
Starting from the center
For a concentric ring layout, start at the center and work outward ring by ring. Place a single paver (or a small decorative cap stone) at the center point, then build your first ring around it. Keep your mason's line attached to the center stake and use it as a constant reference to check that each ring stays at a consistent radius. Tap each paver into the sand bed with a rubber mallet, firm, even taps, not hard blows. The goal is to seat each paver uniformly without disturbing the surrounding sand.
Maintain consistent joint spacing as you go. Joints between 1/16 and 3/16 of an inch are the standard range for most concrete pavers. On a circle, the joints on the outside of each ring will be slightly wider than on the inside because you are bending a straight product around a curve. This is normal and expected. If the outer joints are getting close to 3/8 of an inch or wider, you need to either use a slightly smaller paver, add a cut filler piece, or adjust your ring spacing. Joints wider than 3/8 inch should be filled with a cut piece of paver, not just extra sand.
Cutting curved edges and perimeter pieces
The last ring or two before the edge restraint will almost certainly require cut pieces to follow the curve. Hold each paver in position over the gap, mark the cut line by scribing from underneath with a pencil against the edge restraint or adjacent paver, then cut with an angle grinder fitted with a diamond blade or a wet saw. Wear eye and hearing protection. For tight curves, make multiple straight relief cuts first and then snap off the waste before cleaning up the curve with the blade. Take your time here, rushed cuts at the perimeter are the most visible mistakes on the finished patio.
Check your surface regularly as you work. Lay a long straightedge or a 6-foot level across the installed pavers every few rings and look for high or low spots. The tolerance to aim for is no more than 1/8 inch variation across the surface. If a paver is high, lift it and remove a little sand. If it is low, lift it and add a pinch of sand, then re-tamp. Small corrections are easy at this stage and nearly impossible once everything is locked in with polymeric sand.
A quick pattern comparison
| Layout Style | Visual Effect | Cut Complexity | Best For |
|---|---|---|---|
| Concentric rings | Clean, classic circular look | Moderate (perimeter only) | Most DIYers, first-time builders |
| Radial / fan pattern | Dramatic, spoke-like design | High (tapered cuts throughout) | Experienced builders, focal-point patios |
| Soldier course border + field pattern | Defined edge, flexible interior | Low to moderate | Any skill level; great finishing detail |
Finishing: leveling, jointing, sealing, and fixing common problems
Final compaction and leveling
Once all pavers are placed, run the plate compactor over the entire surface with a rubber or foam pad attached to the plate (or rent a compactor with a paver pad attachment). This seats every paver firmly and evenly into the sand bed. Make two or three passes in different directions. After compaction, re-check your surface with a straightedge and look for any pavers that are still proud. Tap them down with a rubber mallet. The finished surface should vary no more than 1/8 inch from paver to paver.
Filling joints with polymeric sand
Sweep polymeric jointing sand across the entire surface with a stiff push broom, forcing it into every joint. Make multiple passes in different directions. Blow off or sweep away all excess sand from the paver faces, polymeric sand that dries on a paver surface will leave a haze. The sand level in each joint should sit approximately 1/8 inch below the top of the paver surface (or just below the chamfer edge if your pavers have one). That small gap prevents the sand from being washed out by rain hitting the surface directly.
Once the joints are filled and the faces are clean, mist the entire surface with water using a garden hose on a gentle spray setting. Do not blast the joints, you want to activate the polymeric binder, not wash the sand out. Let the surface dry fully for the time specified on your polymeric sand product (usually 24 hours) before allowing foot traffic. Barkman’s paver installation instructions also emphasize blank" rel="noopener noreferrer">fully drying the polymeric sand for the product’s specified time before allowing foot traffic. Do a second round of filling and misting if you see joints that are not quite full after the first application.
Sealing (optional but recommended)
Sealing is not required for concrete pavers to function, but it does protect color, resist staining, and harden the joint sand surface. Wait at least 30 days after installation before sealing, the polymeric sand needs time to fully cure. Apply a paver-specific penetrating sealer or a wet-look acrylic sealer with a pump sprayer or roller. Two thin coats beat one thick coat every time. A thick coat traps moisture and can peel. Clean the surface thoroughly before sealing and only apply when temperatures are between 50 and 90 degrees Fahrenheit with no rain expected for 24 hours.
Troubleshooting the most common circular patio problems
- Radius drift or lumpy circle: Usually caused by a loose center stake or a stretchy string line. Fix it before you lay any pavers by re-scribing the circle with a non-stretch braided line and a firmly driven stake.
- Rocking pavers: Almost always a sand bed problem — either the sand was too wet, too dry, too thick, or you walked on it and disturbed it before laying pavers. Lift the rocking paver, correct the sand depth, and re-set it.
- Water pooling on the surface: Your slope is either flat or running the wrong direction. Re-check grade with a level and laser before the sand bed goes in. Once pavers are laid, the only fix is to lift and relay a section.
- Wide outer joints on curves: Normal to some degree, but if joints exceed 3/8 inch, fill with a cut sliver of paver rather than extra sand. Very wide gaps will allow sand to wash out and pavers to shift.
- Polymeric sand haze on paver faces: Caused by sweeping too much excess sand across wet or damp pavers, or by applying water too aggressively. Use a paver cleaner/efflorescence remover to strip the haze after it dries.
- Settlement in one area: Usually means a soft spot in the subgrade was not compacted properly. Lift the affected pavers, dig down, add and compact more gravel, relay the sand bed, and re-set the pavers.
- Edge restraint pulling away from the curve: Spikes were spaced too far apart or not driven fully into the compacted base. Add more spikes and use a maul to drive them fully home.
A circular patio is genuinely one of the most satisfying DIY hardscape projects you can do because the finished result looks like it required professional skill, but the geometry is actually simpler than it appears. Once you have your center stake locked in and your radius set, every decision on this project traces back to that one point. Take your time on the base, check your slope twice before laying sand, and keep a straightedge handy throughout the paver installation. Do those three things and the rest is just patience and careful cuts at the edges.
FAQ
Can I build a circular patio on compacted fill or existing ground?
Yes, but only if the soil underneath is stable. Before you excavate, probe the area for soft or pumping spots, and if you find clay that holds water or areas that rut under foot traffic, increase the gravel base thickness (for example from 4 inches toward 6 inches) and consider improving drainage with a slightly deeper, wider subgrade and better slope away from the structure.
What’s the biggest layout mistake that ruins a circular patio?
For a paver circle, keep the center as the one true reference, and build ring by ring rather than trying to place whole arcs at once. If your center stake shifts during marking or paver placement, the entire circle can drift, so brace the stake and avoid bumping it with the compactor or wheelbarrow.
Why are my paver joints staying too wide, and what should I do?
Use polymeric sand labeled for your joint width and follow the application timing. If you have joints wider than about 3/8 inch, don’t try to “fix” them by adding more sand, cut filler pieces are the correct approach because oversized joints can prevent proper binder activation and lead to sand loss.
How do I correct uneven spots before jointing sand is installed?
If you still have a few high or low pavers after compaction, address them before polymeric sand goes in. Lift a high paver and remove a thin slice of sand, lift a low paver and add sand, then re-tamp. Once joints are locked with polymeric sand, lifting and re-leveling is much harder.
Can I mix paver sizes or use different thicknesses in a circular patio?
You can, but only if you can keep the edge restraint and paver heights consistent around the curve. Install the restraint along the outer circle, then compensate for thickness differences by adjusting the sand elevation and keeping the restraint top at finished paver height. If the pavers vary a lot in thickness, sort them into batches before laying.
Do I have to slope the patio away from the house, or can I crown the center?
Yes, but the safest way is a constant single-direction slope. If the patio is freestanding and you want a slight crown, keep it very subtle so water sheds evenly without creating a “ridge” that pushes joints open. A laser check is still recommended because the curve makes visual leveling misleading.
What’s the cleanest way to cut pavers for the last ring near the edge restraint?
A steel blade guide is better than forcing a cut. For tight curves, make relief cuts first (stopping short of the final line), then clean up. Also ensure the paver is fully supported during cutting, unsupported pavers can chip or crack at the cut line.
How do edge restraints prevent the circle from spreading, and do I need to stake them every section?
Lock it down. Use geotextile with sufficient overlap, then keep edge restraint spikes at the spacing used for your curve radius, closer spacing for smaller radii. After pavers are installed and compacted, do not remove or loosen restraints, and avoid dumping soil or rocks against the edges that could push restraint positions.
What should I do if polymeric sand leaves a haze on the paver surface?
If you see haze, it usually means polymeric sand dried on the paver faces. Wait until the sand is fully dry, then brush it off with a stiff broom and use the manufacturer-recommended cleaner if needed. Avoid wet scrubbing early, it can smear binder into the surface pores.
Does a circular patio need special considerations in freeze-thaw climates?
Plan for freeze-thaw. In cold climates, keep joints filled and avoid pooling water, and consider using a paver design intended for exterior freeze-thaw conditions. Also, if you’re sealing, ensure you wait long enough for polymeric sand to cure because sealing too early can trap moisture in the joints.
Should I seal a circular patio, and will sealing affect the joints?
Sealing is optional, but it matters most if you want consistent color and stain resistance. If you seal, use a penetrating sealer on joints-friendly products rather than a coating that can trap moisture, apply thin coats, and make sure the patio has been cured and fully dry after polymeric sand activation.
How do I choose the right patio diameter for furniture without ending up with an awkward space?
If your goal is a dining space, measure clearances for chairs at the far edge and plan for at least the functional diameter plus room for edging and cuts. A practical approach is to prototype with string or a temporary hose outline at the exact diameter plus border width, then sit and simulate chair movement before ordering materials.