You can absolutely build a freestanding patio yourself, and it's one of the most rewarding weekend projects a homeowner can tackle. A freestanding patio sits detached from the house on its own prepared base, so it gives you full flexibility over placement, size, and shape without dealing with wall connections or ledger bolts. The full build breaks down into six stages: plan and lay out the patio, excavate and grade the site, build a compacted gravel base, set edge restraints and establish your slope, install the surface pavers or slabs, then fill joints and clean up. Done right, a freestanding paver patio will stay flat, drain cleanly, and last decades.
How to Build a Free Standing Patio: Step-by-Step DIY

Nolan Carver
1 Jul 2026
Step 1: Decide on patio type, layout, and where to put it
Because this patio is freestanding, you have real freedom in siting it. It can go at the far end of the yard, beside a garden bed, or anywhere with a reasonably level starting grade. Start by deciding how you'll use it: dining table and chairs typically needs at least 12x14 feet, a simple seating area works at 10x10, and a fire pit zone is comfortable at 14x14 or larger.
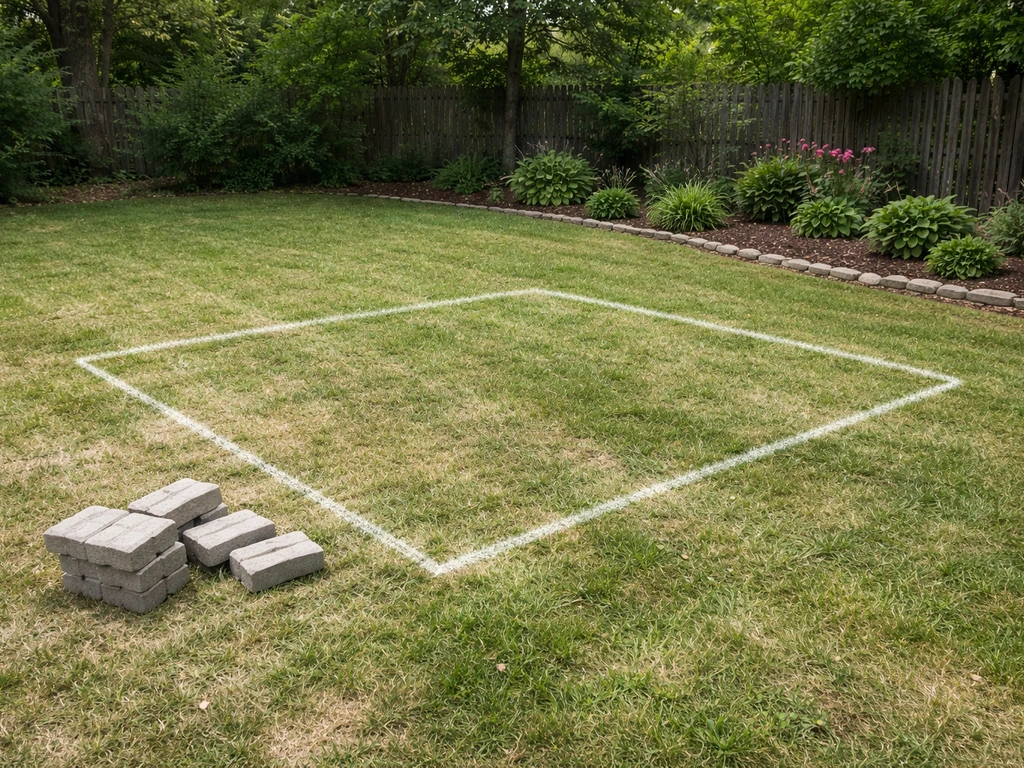
Sketch it on paper, measure it out with stakes and string in the yard, and live with that outline for a day before you dig. Yes, if you can measure, dig, and follow the steps carefully, you can build your own patio without hiring a crew can you build your own patio.
For material, interlocking concrete pavers are the most DIY-friendly surface. They come in standard thicknesses (usually 2.375 inches or 3.125 inches), are forgiving to lay and re-lay, and handle freeze-thaw cycles well. Concrete slabs, natural flagstone, and patio block are all options too. Installed paver patios typically run $10 to $50 per square foot when hired out, but doing it yourself can cut that by 50 percent or more, with most of the cost going into materials and base gravel.
A freestanding patio is not attached to the house, so you don't need to match a ledger height or worry about moisture contact with the foundation. That said, if you're building it near the house or adding steps to connect it, keep landing sizing in mind: exterior stair landings typically need to be at least 36 inches wide and as deep as the door swing requires, per standard residential building codes. Check your local permit requirements early because some jurisdictions require permits for patios above a certain size or within setback zones.
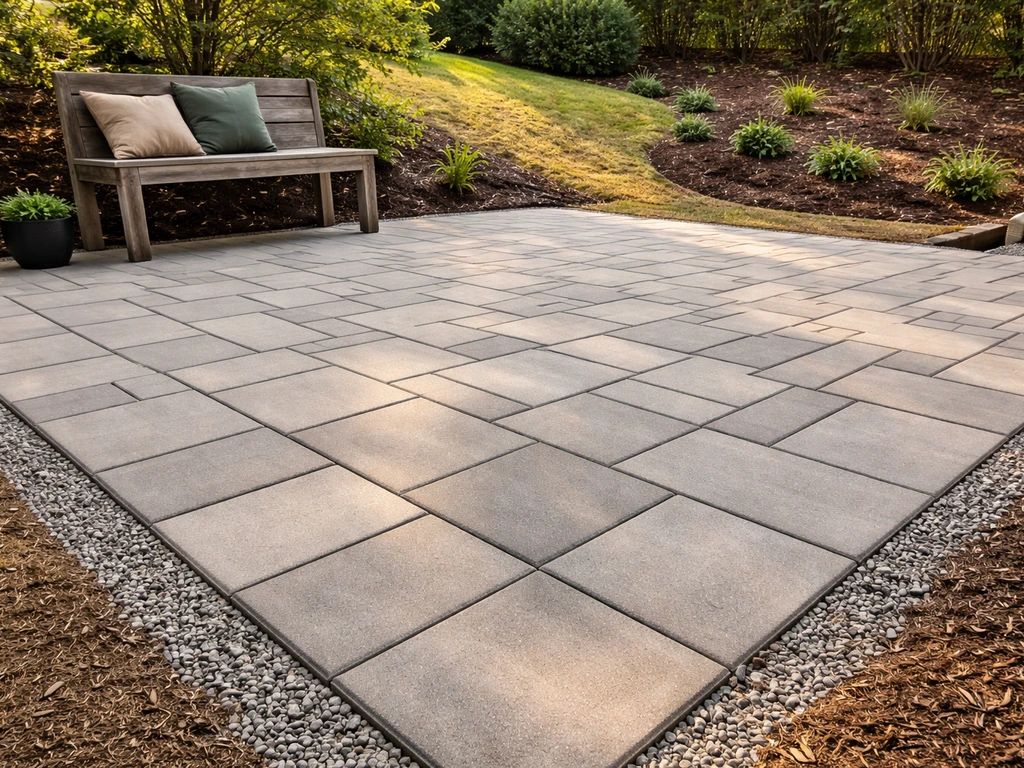
For shape, rectangle and square layouts are the most efficient to build and cut pavers for. L-shapes, curves, and circles are achievable but add cut complexity. Pick a paver pattern before you start so you can plan layout and minimize waste cuts. Running bond (offset brick), herringbone (45 or 90 degrees), and stack bond are the most common. Herringbone at 45 degrees gives the most structural interlock but requires more diagonal cuts along the edges.
Step 2: Site prep, measuring, marking, and excavating for drainage
Before you put a shovel in the ground, call 811. This is not optional and in most states it's the law. Call at least two business days before you dig (Washington state, for example, mandates this under RCW 19. 122, and Colorado state law requires it as well).
811 is free, and they'll send out locators who spray-paint or flag the approximate locations of gas, electric, water, and telecom lines in your dig zone. Note that those marks are approximate, not exact. When you're excavating near a marked utility, mechanical equipment like a skid steer or mini excavator must stay at least 18 inches away from the marked line; within that zone, hand dig to verify exact depth and location before proceeding.
Once utilities are cleared, mark out the patio perimeter with stakes and mason's line. Add 6 inches on all sides beyond your finished patio size to allow room for edge restraints. Use batter boards set back from the corners to keep your string lines stable through the excavation process. Check for square by measuring diagonals: both should be equal.
Now calculate your excavation depth. For a standard interlocking paver patio you need: 6 to 8 inches of compacted gravel base, 1 inch of bedding sand, and the paver thickness (usually 2. The JLC Online structural slabs PDF includes guidance for concrete slabs, including a rule-of-thumb relationship between slab thickness and control-joint depth and spacing [For a standard interlocking paver patio you need: 6 to 8 inches of compacted gravel base, 1 inch of bedding sand, and the paver thickness](https://www.
jlconline. com/wp-content/uploads/sites/4/2023/structural-slabs. pdf). 375 to 3.
125 inches). That puts your total excavation at roughly 9. 5 to 12 inches below finished grade. Mark this depth on your stakes and excavate within the outline.
A sod cutter speeds up the top layer removal significantly, and a mini excavator rental is worth it for anything over 200 square feet.
Slope is the most important thing you set during excavation. A freestanding patio still needs to drain, and the standard is 1/4 inch of drop for every foot of horizontal run, which works out to about 1 to 2 percent grade. Over a 12-foot-wide patio, that's a 3-inch drop from high side to low side. Set that grade in the subgrade itself so the entire base system follows it. A 4-foot level and a tape measure are enough to check this, or use a laser level for larger areas. Water should drain away from any structures or toward a planned low point in the yard.
Step 3: Build the base, subgrade, gravel, compacting, and weed barrier
The base is where most DIY patios succeed or fail. A poorly compacted base is the number one reason pavers sink, tilt, or develop drainage problems over time. Take your time here even if it feels tedious.
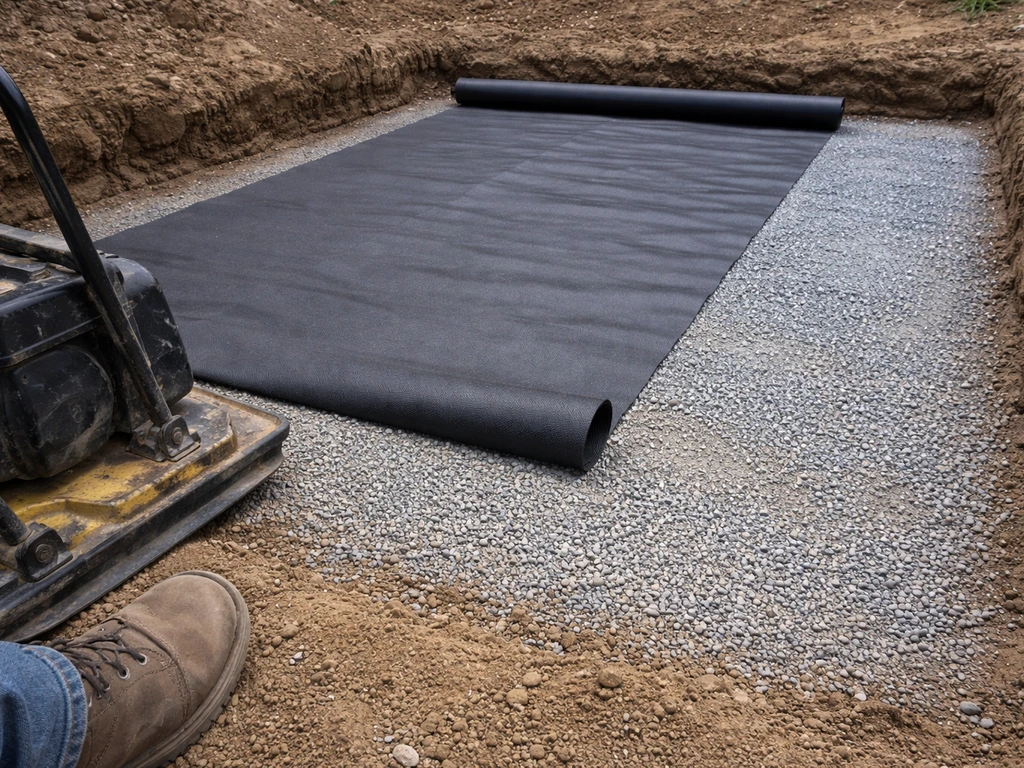
Start by compacting the native subgrade soil at the bottom of your excavation with a plate compactor. Make two passes in perpendicular directions. A hand tamper is acceptable for very small areas under about 50 square feet or for tight spots near edges, but it won't give you the compaction depth a plate compactor does. You can rent a plate compactor from any home improvement store for around $75 to $100 per day.
Next, lay your base material. Use clean crushed stone, sometimes called road base, crusher run, or Class II base depending on your region. Avoid base materials with a lot of fine particles or clay content because fines can migrate with water movement and reduce long-term stability. Add the gravel in lifts of no more than 3 to 4 inches, compact each lift before adding the next.
Trying to compact one deep 8-inch pour in a single pass leaves poor compaction at depth where it matters most. A little moisture in the material helps compaction, but it shouldn't be muddy. Total compacted base depth should be 6 inches for residential foot traffic patios, 8 inches if you have soft or clay-heavy soil.
After the final base lift is compacted and graded to your slope, install a geotextile weed barrier fabric. It won't stop every weed forever, but it dramatically slows intrusion from below. Cut it to fit inside your excavated area and overlap seams by at least 6 inches. The barrier goes on top of the compacted base gravel, under the bedding sand.
Step 4: Set edges and forms, establish levels and slopes, and plan for utilities
Edge restraints are what hold the whole patio together. Without them, pavers migrate outward over time, joints widen, and the surface starts to look like a jigsaw puzzle someone knocked off the table. Install your edge restraints before you screed the bedding sand. Flexible plastic paver edging (like Snap Edge or similar brands) is the most common DIY choice. It gets spiked into the compacted base at the perimeter of the patio, outside the field pavers. Set it tightly against where the outer pavers will land and spike it every 12 inches on straight runs, closer on curves.
Before installing edge restraints, double-check your slope across the entire excavated area using a long straightedge or a string line with a line level. Your string lines from the layout stage are your reference: the finished paver surface should sit at a consistent 1/4 inch per foot slope across the whole patio. Adjust the base if needed before setting edges or screeding, because it's much harder to fix after sand is down.
If you plan to run any utilities under or near the patio, now is the time. Conduit for outdoor lighting, irrigation sleeves, or gas line runs need to be buried before you add bedding sand. Run PVC conduit through the base gravel layer and stub it out at the edge so you can pull wire later. This is much easier to do now than cutting a trench through a finished patio later.
Once edges and utilities are handled, screed the bedding sand to a uniform 1-inch depth across the entire area. Use 1-inch diameter steel pipes or conduit laid parallel on the base as screed rails. Pull a straight 2x4 across the rails to create a flat, consistent 1-inch bed. The bedding sand should conform to ASTM C33 coarse sand (sometimes called concrete sand) or a clean, open-graded chip like ASTM #8 stone. Do not use play sand or fine beach sand, which compact unevenly. Once screeded, don't walk on the sand bed.
Step 5: Install the pavers, patterns, spacing, and leveling as you go
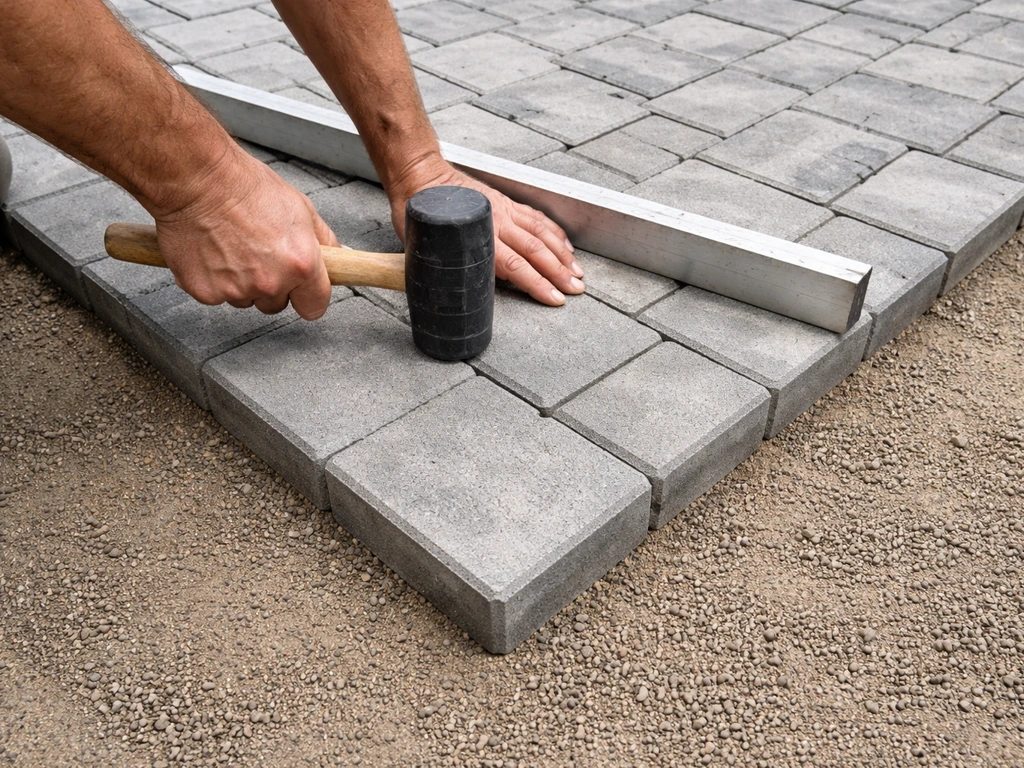
Start laying pavers from one corner, typically the corner that will be most visible when looking at the finished patio. Work outward in an L-shape along two edges, then fill in. This keeps your pattern aligned and avoids having to kneel on freshly laid pavers.
Most concrete pavers have built-in spacer nubs that create consistent joint gaps automatically. Aim for joints between 1/16 and 3/16 of an inch wide (roughly 2 to 5mm). Do not force pavers together with no gap at all: the joints are what allow polymeric jointing sand to lock the surface together and allow minor movement without cracking. Set each paver by placing it straight down and tapping it lightly with a rubber mallet to seat it in the sand. Check level frequently using a straightedge across 4 to 6 pavers at a time. Small adjustments are easy at this stage; large corrections get harder the more pavers are down.
If a paver sits high, pull it up, remove a little sand underneath, and reset it. If it sits low, add a small amount of sand and re-tamp. A 3mm high or low difference feels minor but shows clearly in the finished surface and can become a trip hazard. Keep checking as you go rather than doing a correction lap at the end.
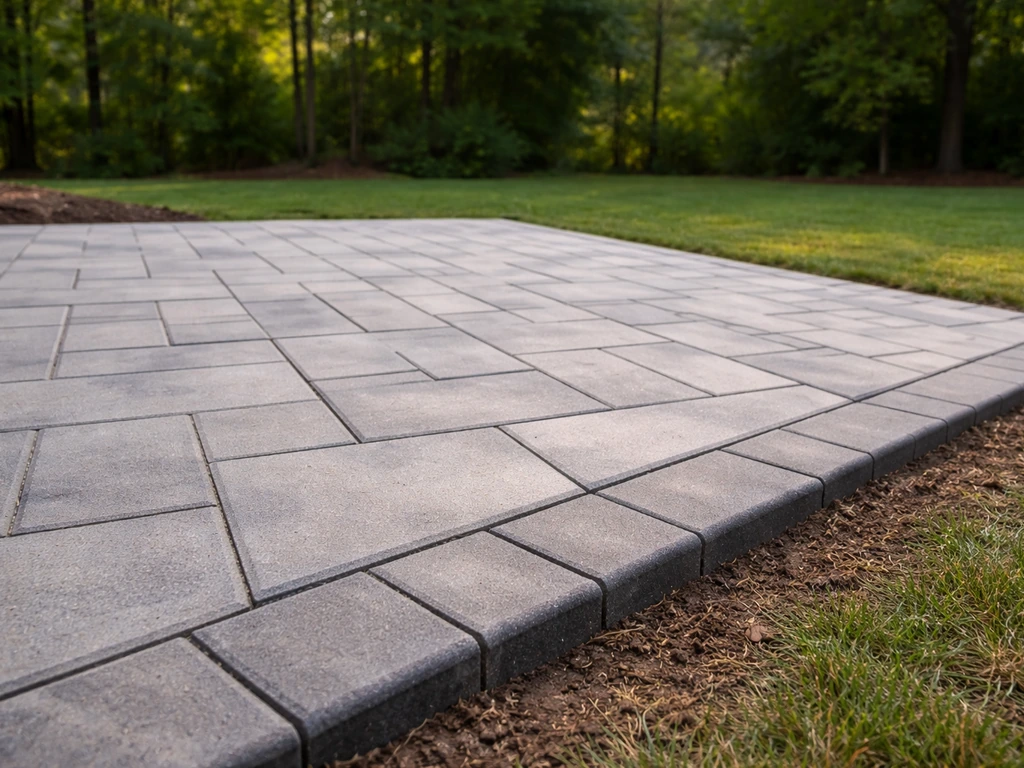
For border or accent courses, follow the same process. If you're doing a soldier course (pavers turned perpendicular to the field) around the perimeter, lay those last after the field is complete.
Common paver patterns at a glance
| Pattern | Difficulty | Best for | Cut complexity |
|---|---|---|---|
| Running bond (offset rows) | Easy | Rectangular patios, beginner builds | Low—cuts mostly on edges |
| Stack bond (grid) | Easy | Modern/contemporary look | Low—but requires perfect alignment |
| 90° herringbone | Medium | High foot traffic areas | Medium—edge cuts at 90° |
| 45° herringbone | Hard | Maximum structural interlock | High—lots of diagonal edge cuts |
| Basketweave | Medium | Classic look with standard brick pavers | Medium |
Step 6: Finish and stabilize, cutting, joint filling, edge restraint, and cleanup
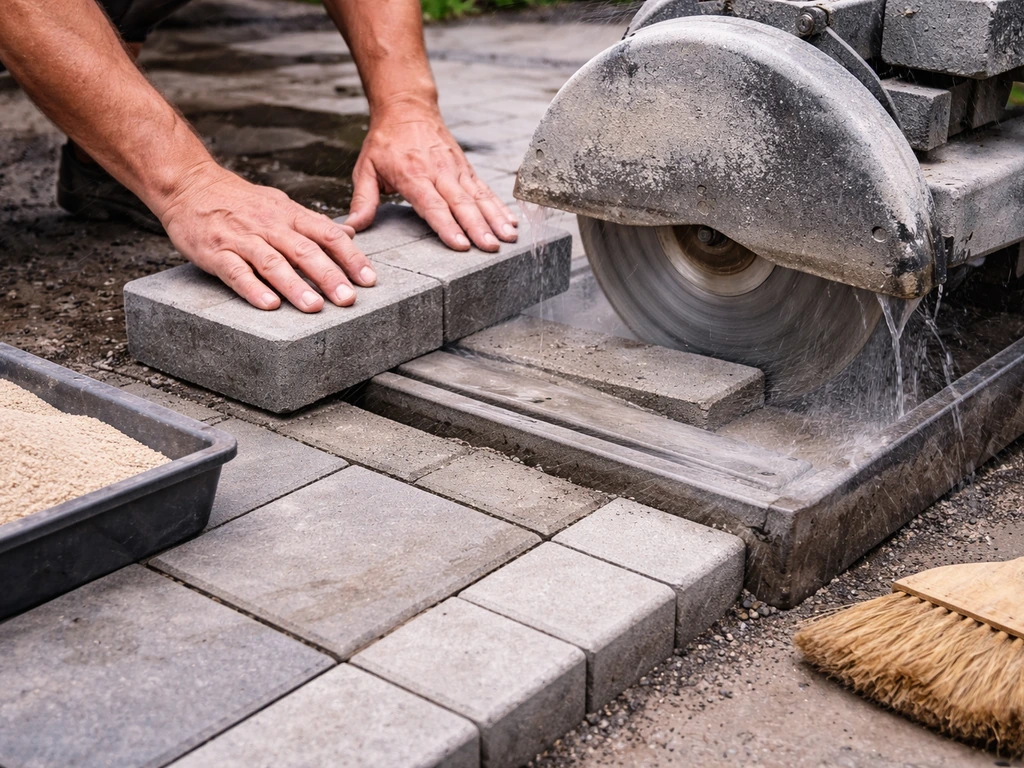
Once all full pavers are placed, it's time to cut the edge pavers to fit. A diamond blade wet saw gives the cleanest, most accurate cuts and is the right tool for anything more than a few cuts. An angle grinder with a diamond blade works for straight cuts in a pinch. Score the line with a pencil or chalk, make the cut, test fit the piece, and set it in place. Safety gear is non-negotiable here: eye protection, hearing protection, and a dust mask rated for silica dust (an N95 at minimum). Concrete paver dust contains respirable crystalline silica, which is a serious lung hazard.
After all pavers are cut and placed, do a final check of the entire surface with a long straightedge or level. Tap down any high spots and add sand under any low spots now, before jointing. Once polymeric sand is installed and set, making leveling adjustments means pulling pavers up and starting that section over.
Pour dry polymeric sand over the paver surface and sweep it into the joints with a stiff push broom. Make multiple passes at different angles. Use a plate compactor (with a protective pad on the bottom) to vibrate the sand deeper into the joints. Add a second round of sand, sweep again, compact again, and top off joints to within about 1/8 inch (3mm) of the paver surface. Don't leave joints flush to the top because polymeric sand needs a small recessed area to cure and bond correctly. Blow or brush excess sand completely off the paver faces before activating. Residue left on the surface when you wet it will leave a haze.
Activate polymeric sand by misting the surface gently with a garden hose set to a fine spray. Soak the joints thoroughly without creating puddles or washout. Most polymeric sand products need 24 to 48 hours to cure before the patio takes foot traffic. Check the specific product instructions because activation times and water amounts vary by brand.
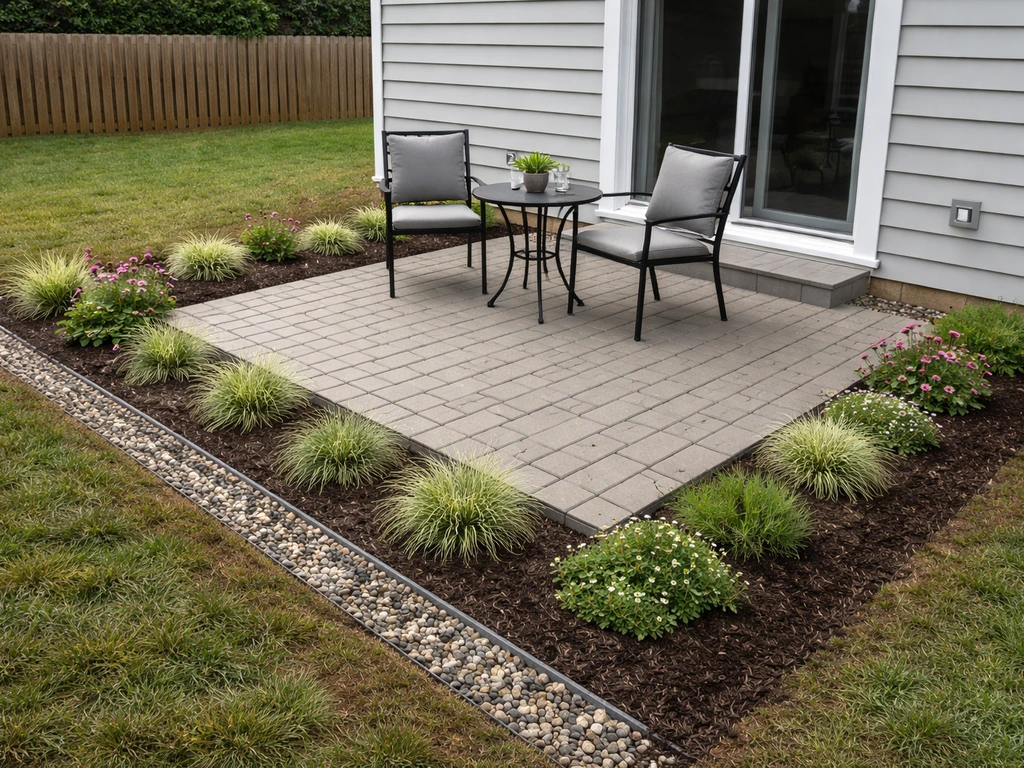
Finally, confirm edge restraints are fully spiked and seated. Any restraint that got bumped or shifted during installation should be re-spiked. Backfill the area around the outside edge of the restraints with soil or mulch to lock them in place and give the edge a finished look.
Troubleshooting common DIY patio problems
Water pooling on the surface
If water pools, your slope is insufficient or reversed somewhere in the patio. The fix is to pull the affected pavers, re-grade the bedding sand to restore a minimum 1/4 inch per foot slope toward the low edge, and reset the pavers. This is annoying but not difficult. A laser level helps identify exactly where the grade reversal is.
Uneven settling and sunken sections
Localized sinking almost always means the base wasn't compacted evenly, or a soft spot in the subgrade wasn't addressed. Pull the sunken pavers, dig out the area, add base gravel, compact it in lifts, re-screed the bedding sand, and reset. If the same area keeps settling, you may have an underground drainage issue or a soft clay pocket that needs a deeper base or geotextile fabric between subgrade and base.
Pavers shifting and joints opening up
Wide opening joints and migrating pavers mean edge restraints failed or were never installed. Pull the outer course of pavers, install proper restraints spiked into the base, reset the pavers, and re-sand the joints. This is why edge restraints go in before you lay a single paver.
Weeds growing through joints
Polymeric sand significantly reduces weed intrusion compared to regular joint sand, but it's not a permanent barrier. If weeds break through, spot-treat with a non-selective herbicide, allow to dry, then sweep fresh polymeric sand into affected joints and re-activate. Re-sealing the patio every two to three years also helps maintain joint integrity.
Your start-to-finish checklist
Use this as your project roadmap. If you're wondering how to install your own patio, follow the steps below for planning, site prep, base building, and paver installation. Work through it in order and don't skip steps to save time: the steps you skip are almost always the ones that cause problems later.
- Measure and stake patio layout; confirm size and shape on paper
- Call 811 at least two business days before digging; wait for utility marks
- Check local permit requirements and setback rules
- Set batter boards and string lines at finished grade elevation with correct slope (1/4 inch per foot)
- Excavate to correct depth (typically 9.5 to 12 inches below finished grade)
- Compact native subgrade soil in two perpendicular passes with plate compactor
- Install base gravel in 3 to 4 inch lifts, compacting each lift; total 6 to 8 inches compacted
- Check and recheck slope across entire base after each compacted lift
- Lay geotextile weed barrier on top of final compacted base
- Install edge restraints around full perimeter, spiked every 12 inches
- Run any conduit for utilities through base before screeding
- Screed 1-inch bedding sand (ASTM C33 coarse sand) using pipe screed rails
- Lay pavers starting from the most visible corner, working outward in an L-shape
- Check level across every 4 to 6 pavers as you go; adjust in real time
- Cut edge pavers with a diamond blade wet saw; wear silica dust PPE
- Final surface check with a long straightedge; fix high/low spots before jointing
- Sweep polymeric sand into joints, compact, add second round, compact again
- Blow or brush all excess polymeric sand off paver faces
- Mist joints with fine spray to activate polymeric sand; allow 24 to 48 hours to cure
- Backfill and tidy edges; allow full cure before heavy furniture or traffic
Materials and rough budget to plan around
For a 12x14-foot (168 square foot) freestanding paver patio, here's a realistic material estimate to help you plan. Prices vary by region and material choice, but this gives you a working baseline.
| Material | Quantity (approx.) | Rough cost range (DIY) |
|---|---|---|
| Concrete pavers (standard 4x8 or similar) | ~190 sq ft (includes 10–15% waste) | $300–$750 |
| Crushed stone base (road base / Class II) | ~3–4 tons | $120–$220 |
| Bedding sand (ASTM C33 coarse) | ~0.5 ton | $30–$60 |
| Polymeric joint sand | 2–3 bags | $40–$90 |
| Geotextile weed fabric | 200 sq ft roll | $20–$40 |
| Plastic paver edge restraints + spikes | ~60 linear ft | $60–$100 |
| Plate compactor rental (1 day) | 1 day | $75–$100 |
| Wet saw rental (half day) | Half day | $50–$80 |
| Total DIY estimate | 168 sq ft patio | $695–$1,440 |
For comparison, hiring this same patio out would typically run $1,680 to $8,400 or more depending on your market and material choices (based on a range of $10 to $50 per square foot installed). The DIY savings are real and substantial, but you're investing a full weekend of physical labor, so plan accordingly.
If you're just starting to think through the broader scope of building outdoor living space yourself, the planning principles here connect directly to other DIY patio approaches, whether you're working with a basic slab, natural stone, or a more elaborate multi-level design. If you want the full step-by-step, see this guide on how to make your own patio building outdoor living space yourself. The base prep, slope management, and edge restraint concepts stay the same across all of them. Get those fundamentals right and the surface work becomes much more straightforward.
FAQ
Can I build a freestanding patio on uneven ground or a slope?
Yes, but only if you can achieve a consistent 1/4 inch per foot slope and keep the base thickness system intact (compacted gravel, bedding sand, and paver thickness). If the ground is sloped, you usually either (1) step the patio into multiple levels with level “terraces,” or (2) cut and fill to create a single sloped plane without low spots. Avoid “smoothing” only with extra bedding sand, bedding sand is not structural and will lead to uneven settling.
What if I already have an old patio or driveway slab where I want to build the freestanding patio?
Do not pour concrete over an existing patio base and then set pavers on top expecting it to behave like a new base. A freestanding paver patio needs flexible bedding sand plus properly compacted base so it can drain and distribute loads. If you have old concrete, the safer DIY option is usually to remove it back to suitable subgrade, then rebuild the base, or convert to a full slab patio instead of pavers.
How do I make a freestanding patio hold up in cold or freeze-thaw climates?
For paver patios, freeze-thaw performance depends on drainage and base stability more than on brand. Use clean crushed stone (road base/Class II) with minimal fines, compact in 3 to 4 inch lifts, and keep the slope correct. Also avoid over-saturating polymeric sand, activate it only when the forecast allows proper curing, and do not seal too early because some polymeric products require curing time before any coatings.
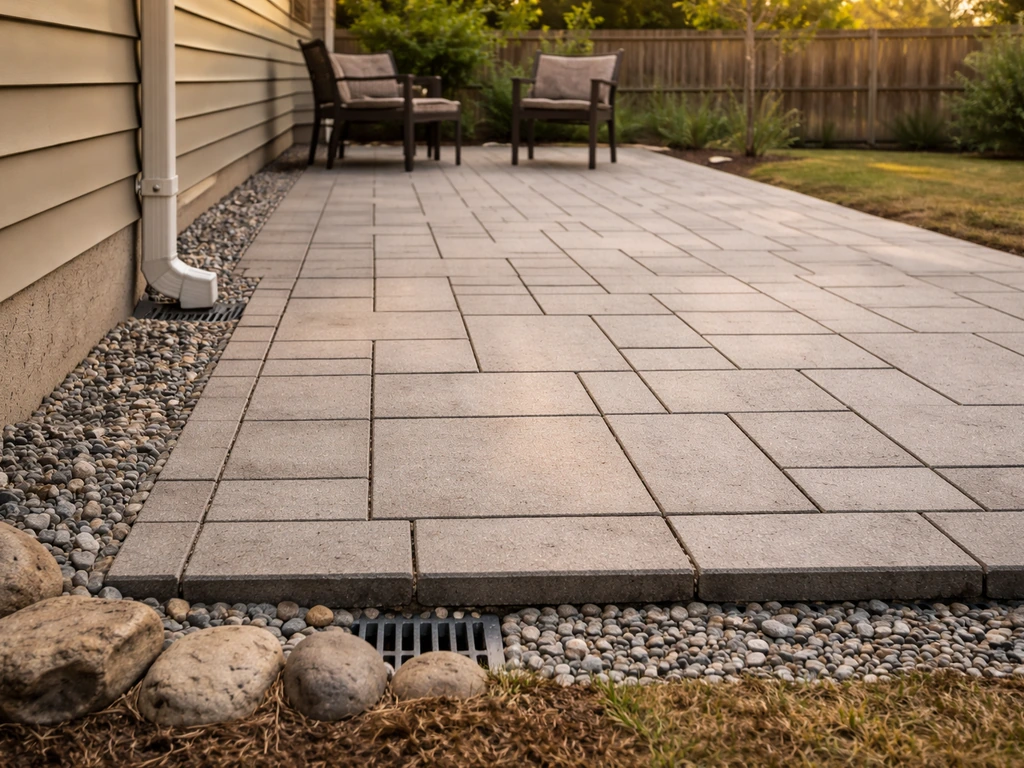
What should I do about drainage if my patio is near gutters or a downspout?
If the patio is within about 5 to 10 feet of a downspout or gutter discharge, plan to route the water away before you set pavers. A common mistake is letting roof runoff create a soaking zone that overwhelms drainage, causing localized settling. Consider extending downspouts, adding a swale, or directing flow toward a low point you control with proper grade.
Can I connect a freestanding patio to steps, a deck, or another rigid structure?
You generally can, but design for joints and movement. Use an extra-clear margin at the connection, do not lock pavers tightly against rigid elements, and keep expansion gaps consistent with your edging plan. Also, if you’re adding steps to reach the patio, confirm the landing size and door swing clearance early so you do not end up redoing the finished height.
Is polymeric joint sand always the right choice for freestanding pavers?
Polymeric sand can be used with most interlocking pavers, but you must confirm your product is compatible with your joint width and paver type, and you must get the joint depth right (do not leave joints flush). If your joints are wider than the sand system is designed for, it may not lock properly. When in doubt, follow the sand manufacturer’s target joint width and perform a small test section.
Can I put a hot tub, heavy furniture, or a grill on a freestanding paver patio?
Yes, but base depth and reinforcement matter. For heavier uses like a hot tub, grill island, or frequent vehicle loads, increase compacted base depth, consider a thicker paver or a different surface system, and plan for a stiffer base that resists bending. The safest DIY approach is to treat it like a structural area, not a standard walking patio, and consult local requirements for dead load and allowable deflection.
What’s the best way to handle recurring weeds between pavers?
If you see weeds returning, first check for a drainage problem and standing water, because moisture pathways help weed growth. Then verify the geotextile was installed correctly (overlaps, covered properly, and not torn). For ongoing control, spot-treat weeds after misting and drying, then sweep in fresh polymeric sand and re-activate. Avoid re-sanding repeatedly without fixing the underlying saturation or edge gaps.
When is the latest point I can fix uneven pavers before polymeric sand is installed?
If a small area is high or low, correct it before jointing. After polymeric sand is activated, resetting becomes significantly harder because joint sand has locked the surface. The practical rule is, do straightedge checks and paver height adjustments while everything is still “dry,” then run jointing only after the entire field passes level checks.
Can I build a freestanding patio in an area that gets vehicle traffic occasionally?
Yes, but you need a plan to maintain slope and avoid water collecting in the wheel path. For seating pads near roads, a common error is reducing slope to “level it” and then creating puddles. If you’re crossing a transition, treat it like drainage-critical work, use a full compacted base under the entire footprint, and keep the lowest edge positioned away from foundations and walkways.