You can absolutely make your own patio without hiring a contractor. The basic path looks like this: pick a patio type, mark out the area, dig down 7 to 9 inches, compact a gravel base, add 1 inch of bedding sand, lay your surface material, and lock everything in with edge restraints and joint sand. That's the whole job. The details matter a lot, especially slope and base compaction, but nothing here is beyond a motivated DIYer with a free weekend and a few rented tools.
How to Make Your Own Patio: DIY Step-by-Step Guide

Nolan Carver
28 May 2026
Pick a patio type and set a simple design goal
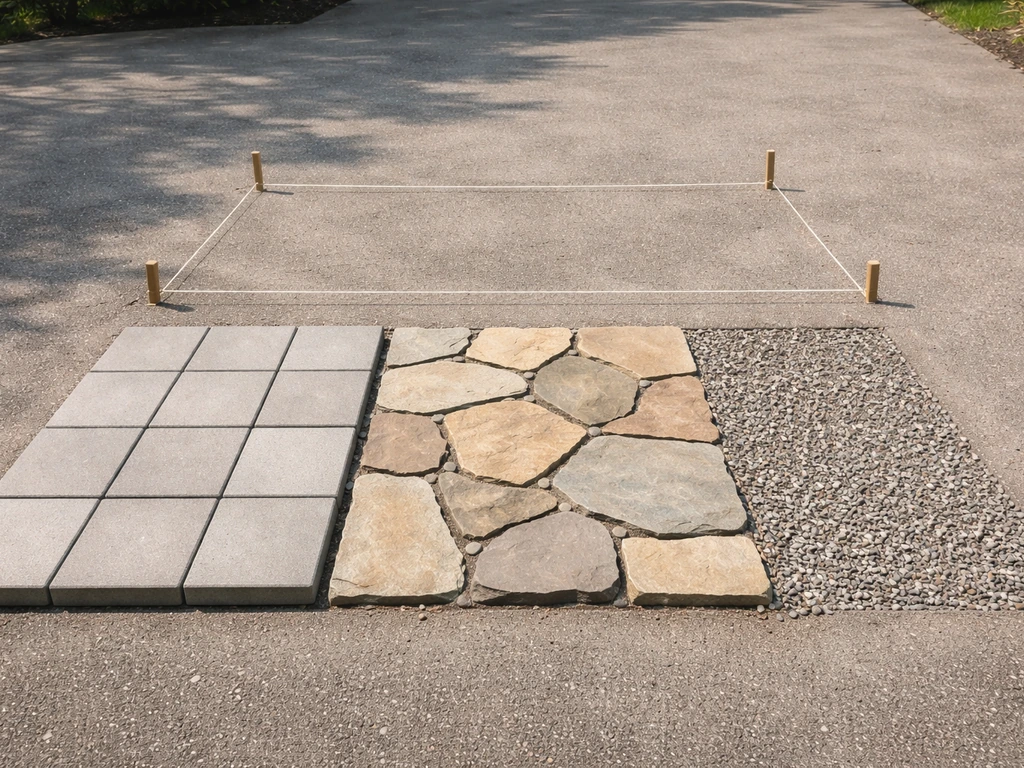
Before you buy a single bag of gravel, decide what you're actually building. This choice drives every other decision: how much you'll spend, how long it takes, and how difficult the build is. The three most common DIY options are concrete pavers, poured concrete, and loose-fill gravel. Each has a real trade-off.
| Material | Skill Level | Typical Cost (materials) | Repairability | Best For |
|---|---|---|---|---|
| Concrete pavers | Beginner to intermediate | $3–$8 per sq ft | Easy (replace individual pieces) | Most DIYers, best balance of looks and durability |
| Poured concrete | Intermediate to advanced | $4–$8 per sq ft | Hard (must patch or replace slabs) | Smooth, low-maintenance surfaces |
| Gravel/crushed stone | Beginner | $1–$3 per sq ft | Very easy (rake and add more) | Budget builds, informal spaces, drainage-heavy yards |
| Flagstone | Intermediate | $5–$15 per sq ft | Moderate (reset individual stones) | Natural look, irregular shapes |
For most first-time builders, concrete pavers are the best starting point. They're forgiving (you can pull and relay them if something goes wrong), widely available, and the installation process is well-documented. Poured concrete is harder to get right and unforgiving once it cures. Gravel is the fastest and cheapest option if you just need a functional outdoor surface quickly. Flagstone looks great but takes more time to level properly.
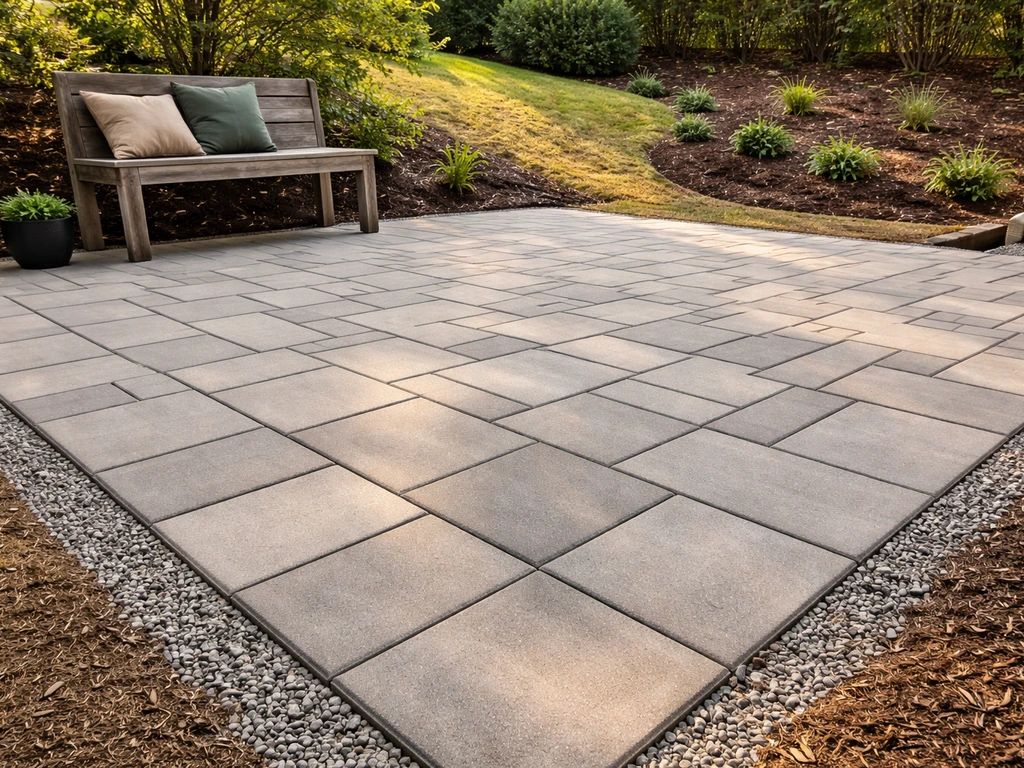
Set one simple design goal before you start: what is this patio actually for? Dining table and chairs for six people? A fire pit hangout spot? A side yard path that doubles as overflow parking? Your function goal determines your minimum size. A comfortable dining area for six needs at least 12 x 12 feet. A lounging area with a couple of chairs works fine at 10 x 10 feet. Sketch it out on paper, even roughly, before you touch the ground.
Measure the site, check drainage and slope, and plan the layout
Measure twice, dig once. Use stakes and string lines to mark the exact footprint of your patio on the ground. A can of marking spray paint works well for tracing the outline after you've confirmed the dimensions with a tape measure. Square your corners using the 3-4-5 triangle method: measure 3 feet along one edge, 4 feet along the adjacent edge, and the diagonal between those two points should be exactly 5 feet if your corner is 90 degrees.
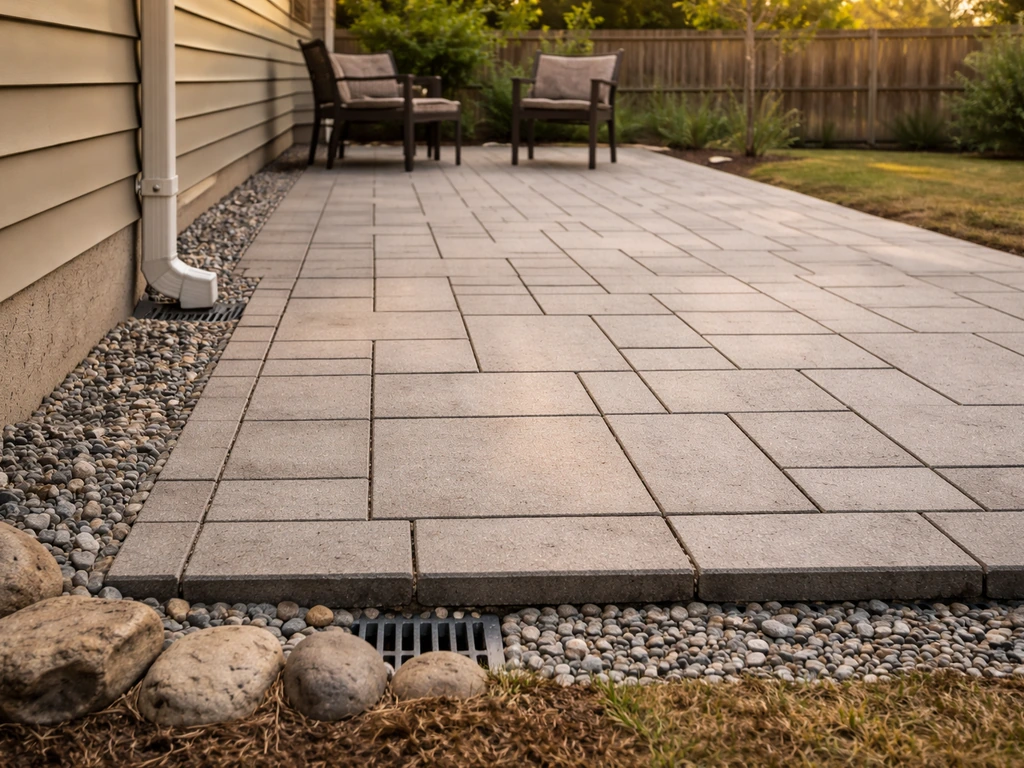
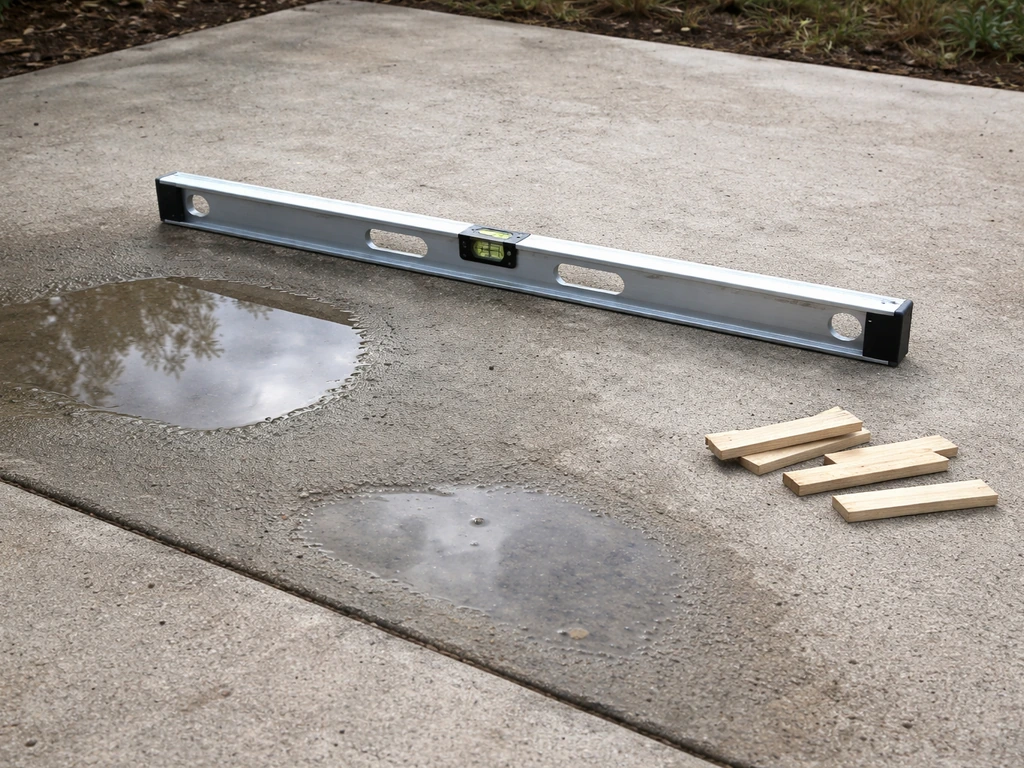
Slope is the part most beginners skip, and it's the reason patios end up with puddles. Your finished patio surface needs to slope away from your house at a minimum of 1/4 inch per foot (roughly 2%). That means a patio that extends 10 feet out from your house should drop about 2.5 inches from the house edge to the outer edge. You build this slope into your base, not just the surface. Use a 4-foot level with a 1/2-inch shim under the uphill end to check a 2% grade as you work.
Also check where water currently goes when it rains. If your yard already drains toward a low spot at the edge of your planned patio area, great. If water pools or runs toward your foundation, you may need to address that before building. A patio installed over a drainage problem won't fix it, it'll usually make it worse by concentrating runoff.
Choose materials and estimate your budget
Here's a realistic material breakdown for a standard 10 x 12-foot (120 sq ft) concrete paver patio. These numbers are rough guides, not quotes. Prices vary by region and supplier.
| Material | Quantity (for 120 sq ft) | Estimated Cost |
|---|---|---|
| Concrete pavers (standard 4x8 or 12x12) | 120–130 sq ft (add 10% for cuts/waste) | $360–$960 |
| Crushed gravel base (4–6 inch depth) | 1.5–2.5 tons | $60–$150 |
| Bedding/paver base sand (1 inch) | ~0.4 cubic yards | $30–$60 |
| Polymeric jointing sand | 2–4 bags | $40–$80 |
| Plastic edge restraints + spikes | ~45 linear feet | $40–$80 |
| Plate compactor rental (half day) | 1 rental | $60–$100 |
| Miscellaneous (marking paint, level, etc.) | — | $20–$50 |
Total material cost for a basic 120 sq ft paver patio: roughly $600 to $1,500 depending on paver style and local prices. The wide range comes mostly from paver choice. A standard concrete block paver runs $3 to $4 per square foot. A tumbled or textured architectural paver can hit $7 to $8 or more. If budget is tight, go with the basic block paver and spend the savings on a good base and polymeric sand. A patio with a cheap surface and great base will outlast a fancy-looking patio with a bad one.
For a gravel patio, you can cut your material cost to $150 to $400 for the same 120 square feet. Add landscape fabric, a few tons of crushed stone or pea gravel, and metal or plastic edging. It's the fastest build and a totally valid choice, especially for backyard casual spaces.
Tools, materials list, and how to prep the base correctly
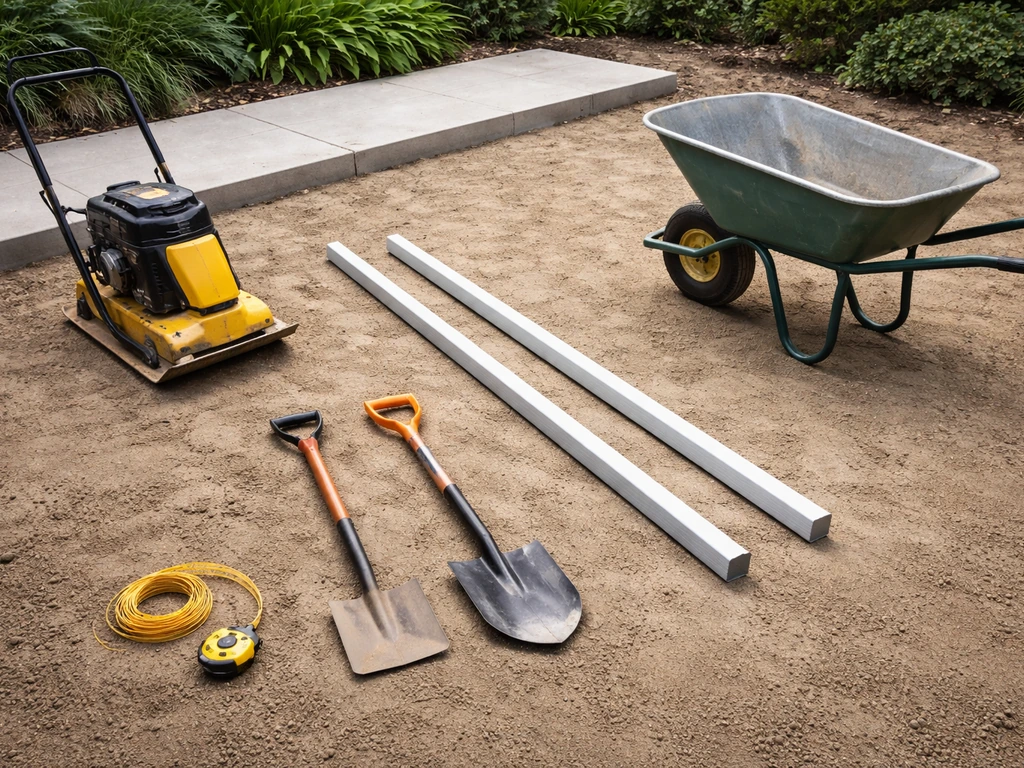
What you'll need
- Tape measure, stakes, and string line
- Marking spray paint
- Flat spade and garden spade for digging
- Wheelbarrow
- Plate compactor (rent this — don't skip it)
- Screed pipes or 1-inch PVC pipe (2 sections) for leveling sand
- Long straight board or 2x4 for screeding
- 4-foot level and a long straightedge (8–10 feet)
- Rubber mallet
- Hand tamper (for edges the plate compactor can't reach)
- Circular saw or angle grinder with a diamond blade (for cutting pavers)
- Push broom and garden hose with a gentle spray setting
Base prep: the most important part of the whole job
Bad base prep is the cause of nearly every patio failure: sunken spots, rocking pavers, pooling water, shifting edges. Do this part right and the rest of the job is mostly straightforward. If you want the full walkthrough, you can build your own patio by following the steps for measuring, slope, base prep, and finishing Do this part right.
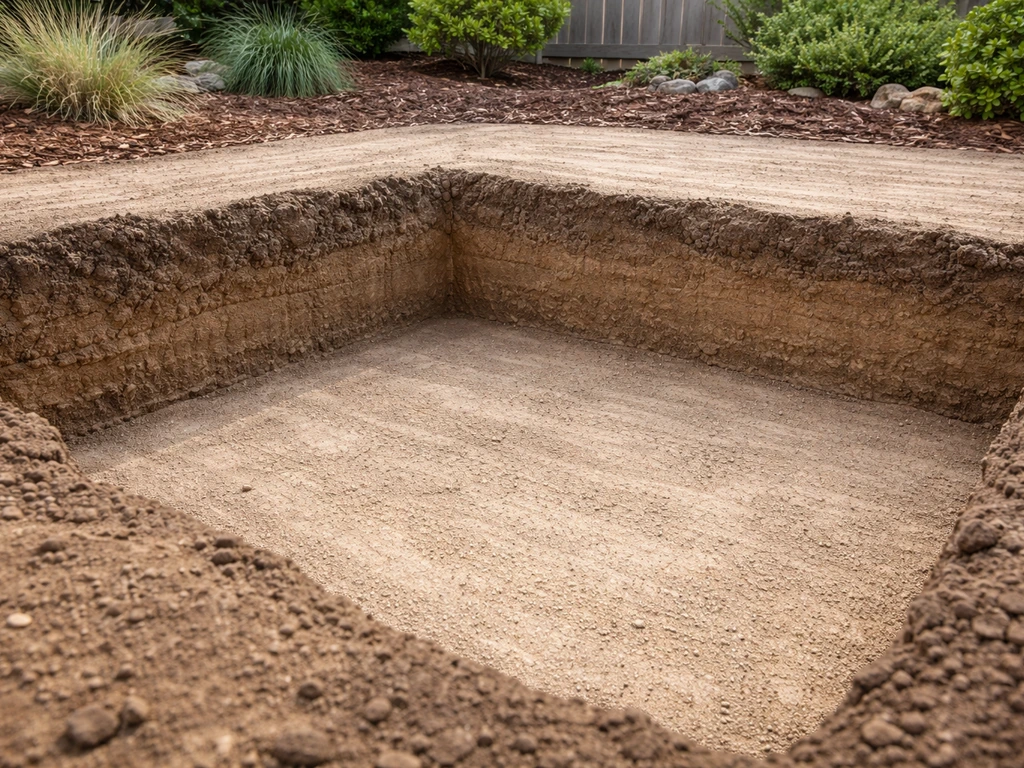
Excavate to a depth of 7 to 9 inches below your finished patio grade. That depth accounts for: 4 to 6 inches of compacted gravel base, 1 inch of bedding sand, and roughly 2.375 inches for a standard concrete paver. If you're using thicker pavers or flagstone, adjust accordingly. Remove all sod, roots, and organic material. Organic material compresses over time and causes settling.
Once excavated, compact the native soil (the subgrade) with your plate compactor before adding any gravel. Then add your gravel in layers, no more than 4 inches at a time, compacting each layer before adding the next. Compacting in lifts like this is essential. A single 6-inch pour of gravel compacted all at once will not compact evenly through the full depth. Use crushed angular gravel (often called road base, Class II base, or crusher run), not round pea gravel. Angular stone locks together when compacted. Round stone doesn't.
Optional but worth considering: lay a geotextile fabric between the native soil and your gravel base. It prevents the base material from mixing down into the subgrade over time, which is one cause of long-term settling. It doesn't replace compaction, but it helps the base hold its structure.
Step-by-step patio build process from edges to surface install
- Mark and excavate: Stake your layout, confirm square corners, and dig to your target depth (7–9 inches for standard pavers). Remove all organic material and compact the subgrade.
- Install gravel base in lifts: Add crushed gravel in 4-inch layers, compact each layer with a plate compactor. Your finished, compacted base should be 4 to 6 inches thick. Check slope as you go — build that 1/4 inch per foot drop away from the house into the base surface.
- Set edge restraints: Install your plastic or metal edge restraints along all perimeter edges before you add bedding sand. Stake them into the compacted gravel every 12 inches. This locks the pavers in from day one and prevents them from spreading outward over time.
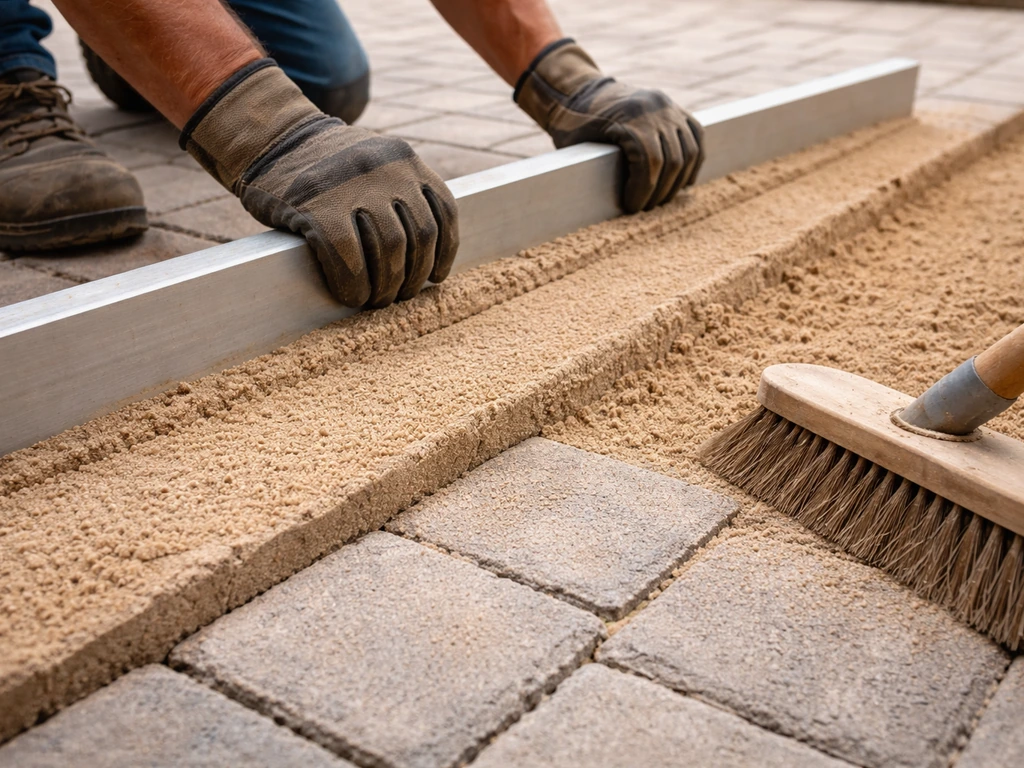
- Spread and screed the bedding sand: Pour paver base sand (not jointing sand — these are different products) over the compacted gravel and screed it to a consistent 1-inch depth. Use two sections of 1-inch PVC pipe as depth guides, lay your straight 2x4 across them, and drag it flat. Pull the pipes out and fill those channels with sand, smoothing lightly.
- Lay the pavers: Start from a corner or a straight edge and work outward. Set each paver with a firm push straight down — don't slide it into position or you'll disturb the sand bed. Use a rubber mallet to tap pavers level as you go. Maintain consistent joint spacing (typically about 1/8 to 3/8 inch between pavers for polymeric sand joints). Check your surface level frequently with a straightedge — finished pavers should not deviate more than 3/8 inch over a 10-foot run.
- Cut pavers for edges: Use a circular saw or angle grinder with a diamond blade to cut border pieces. Measure each cut individually — patio edges are rarely perfectly consistent. Always wear eye protection when cutting pavers.
- Compact the finished surface: Once all pavers are laid, run the plate compactor over the entire surface (with a protective rubber pad attached) to seat the pavers firmly into the sand bed. This is not optional. It locks everything in and closes up minor inconsistencies.
Leveling, compaction, and finishing details
Jointing sand
Polymeric jointing sand is worth the extra cost over regular sand. It hardens when activated with water, resisting washout, weed growth, and ant tunneling. Sweep it dry into the joints with a push broom, working it into every gap. Blow off the excess with a leaf blower before activating, any polymeric sand left sitting on the paver surface when you wet it will leave a haze.
Fill joints to about 1/8 inch below the paver surface (not flush to the top). Once the surface is clean and dry, activate with a gentle mist from a garden hose on the shower or fan setting, not a direct stream. Let it cure fully, usually 24 hours before foot traffic and longer before heavy use.
Edge restraints
If you installed your edge restraints correctly before laying pavers, this is just a check step. Make sure no gaps have opened between the pavers and the restraint. Any visible gap at the perimeter allows sand to migrate out and weeds to move in. Drive additional spikes if needed. For a cleaner look, you can backfill along the outside of the restraint with topsoil and grass seed, or use a decorative border stone.
Sealing (optional but smart)
Sealing your paver surface is not required, but it enhances color, reduces staining, and helps lock the jointing sand in place. Wait at least 30 to 60 days after installation before sealing to let the polymeric sand fully cure and let any efflorescence (white mineral deposits) surface and be cleaned off. Apply sealer with a roller or pump sprayer on a dry surface.
Common DIY problems and how to fix them
Water puddles on the surface
This almost always means the slope isn't right. Check your grade with a level and shim. If you've got low spots that are trapping water, you can sometimes fix minor cases by lifting that section of pavers, adding a small amount of bedding sand, and resetting. For a more significant slope problem, you may need to relay a full section. The fix is easier than it sounds because pavers are fully removable and resettable.
Pavers shifting or spreading apart
Spreading at the edges is almost always an edge restraint failure. Either the restraints weren't staked at close enough intervals, the spikes pulled out of soft soil, or the restraints weren't installed before the pavers. Reset the affected edge, reinstall restraints with more spikes (try going to 8-inch spacing instead of 12), and refill the joints with polymeric sand.
Rocking or wobbly pavers
A paver that rocks means it's bridging a low spot in the sand bed below it. Lift the paver, add a small amount of bedding sand to the low area, smooth it flat, and reset the paver. Tap it level with a rubber mallet and check it against the surrounding pavers. Wobbling pavers are a trip hazard, so fix these as soon as you notice them.
Uneven surface after compaction
If your finished surface has low or high spots larger than 3/8 inch over 10 feet, you need to relay that section. Home Depot’s paver and patio installation instruction sheets also recommend limiting undulations in the final installation to under 1/4 inch and provide bedding sand placement guidance for leveling and surface control low or high spots larger than 3/8 inch over 10 feet. High spots usually mean too much bedding sand in that area. Low spots mean not enough, or the base itself settled. Pull the pavers in that zone, correct the sand depth, and relay. It's annoying but not difficult, and it's one of the big advantages pavers have over poured concrete.
Joint sand washing out
If rain is consistently washing jointing sand out of the joints, you either used regular sand instead of polymeric sand, or the polymeric sand wasn't activated properly. Clean out the affected joints by blowing or rinsing, let everything dry completely, and refill with polymeric sand following the dry-surface activation steps carefully.
Your realistic build timeline and next steps
A 10 x 12-foot paver patio is a realistic two-day project for one or two people. Day one: mark, excavate, compact the base, and set edge restraints. Day two: screed sand, lay pavers, make cuts, compact the surface, and fill joints. Add a third half-day if you need to rent equipment and source materials. Here's what to do right now:
- Sketch your patio footprint and confirm the dimensions work for your intended use.
- Check your local building department — some jurisdictions require a permit for patios above a certain size or proximity to property lines.
- Call 811 (in the US) to have underground utilities marked before you dig anything.
- Get material quotes from at least two suppliers (big-box store vs. local landscape supply yard). Landscape yards often have better pricing on bulk gravel and sand.
- Reserve a plate compactor rental for your project weekend.
- Order or buy pavers and have them delivered at least a day before you start so you can verify quantity and inspect for damage.
If this is your first time building a patio, starting with a simple rectangular shape and basic concrete pavers is the smartest move. Once you've done one, you'll have the base prep and leveling process internalized, and you can tackle more complex projects like raised patio sections, retaining wall borders, or freestanding patio structures from a much stronger position. For a freestanding patio, the core steps still apply, but you’ll need extra attention to base depth, drainage, and solid edge restraint so it stays stable as it settles freestanding patio structures. Every experienced patio builder started exactly where you are right now.
FAQ
What patio depth should I use if I’m not using standard concrete pavers?
Use the same logic as the 7 to 9 inch target, but recalculate your layers. Total excavate depth should equal your compacted gravel base thickness plus bedding sand depth plus the finished thickness of your paver/stone, then subtract anything that will sit above grade (for example, a slightly raised edge). If your pavers are thicker than standard, you need either a deeper excavation or a thinner bedding sand layer to keep the finished surface aligned with the desired grade and slope.
Can I build a patio over existing concrete, pavers, or asphalt?
Usually you should not. Most patio failures come from movement and drainage issues when the new base is built on top of an old surface that can shift or hold water. If you must reuse an existing slab for something like a base pad, you still need to address drainage, check for cracking and elevation changes, and understand that you may be effectively creating a “floating” installation. For a typical DIY patio, the reliable approach is to excavate to proper base depth and build the gravel and sand system from scratch.
Do I need geotextile fabric under pavers or is compacted gravel enough?
Compacted gravel is the primary requirement, geotextile is optional. Use geotextile when you have clay-heavy soil or you’ve had long-term settlement problems, because it helps reduce base material mixing into the subgrade. If your soil is already clean and well-draining, fabric may not add much, but it can still help stabilize the base. Do not skip compaction just because fabric is installed.
How do I tell if I’ve compacted the base enough?
A practical DIY check is to compact in lifts and then walk the area in different spots. If you see pumping, visible ruts that keep changing, or the gravel shows uneven “soft” spots that don’t firm up after additional passes, you likely need more compaction. Also keep each gravel lift limited (no thick single pour), because uneven compaction is what creates rocking pavers later.
What’s the correct way to make cuts around a door, step, or irregular edge?
Dry-lay pavers and mark cut lines from the installed layout, then cut only what you need to maintain the slope. Avoid “filling” narrow wedges with bedding sand, that tends to wash or settle. For tight borders, plan on using the appropriate edge restraint and leaving enough space for jointing sand so the cut pieces lock in and don’t create a low channel where water can accumulate.
How much space should I leave for joints between concrete pavers?
Follow the spacing built into the paver design, typically small gaps intended for joint sand. Don’t set pavers tight to the point where there’s no room for joint sand, because joint sand needs a small depth to lock pavers together. If you find yourself with gaps that are too wide, it usually means the base or laying pattern is off, and widening joints can reduce stability and increase weed growth risk.
If polymeric sand fails, what are the most common causes?
The two biggest causes are using the wrong product (regular sand instead of polymeric) and not activating it correctly. Polymerics require a dry installation, then a gentle mist activation, and adequate curing time. If you overapply water or use a direct stream, it can pre-cure unevenly or leave haze. If rain hits before activation is complete or before you’ve swept it fully into joints, washout becomes much more likely.
How soon can I walk or put a grill on the patio after installing pavers?
Joint sand needs time to cure. Plan for light foot traffic after about 24 hours under typical conditions, but heavy use like moving grills, furniture, or running equipment should wait longer until the polymeric joints have fully cured. If conditions are cool, windy, or very humid, extend curing time and avoid dragging heavy items across the surface.
Should I seal my pavers immediately after installation?
No, wait. Sealing too soon can trap moisture and interfere with how polymeric sand cures, and it can make haze or efflorescence more visible. A practical rule is to wait at least 30 to 60 days, then clean the surface, check that the joints are fully set, and seal only after everything is dry.
What should I do if water pools at the patio edge even though I built the 2% slope?
First, verify the grade in multiple directions, because it’s common to correct slope away from the house but miss a low spot running along the edge. If pooling is localized, you may be able to lift and relay a smaller section by adjusting bedding sand thickness. If pooling is consistent across the whole edge, reassess subgrade and base compaction and check that edge restraint is not creating a “dam” that prevents runoff from exiting the patio area.
How do I prevent weeds and ants at the joints?
Weeds usually mean joint sand is missing, washed out, or never activated properly. Use polymeric sand and make sure it fills joints to just below the surface, then activate with a light mist and let it cure. For ants, polymeric jointing helps by hardening in place and reducing tunneling routes, but if your perimeter planting touches the edge restraint, keep mulch and soil pulled back so there’s no easy pathway to the joints.
Is a paver patio safe if it’s slightly uneven but only in a small area?
Fix it if you feel it underfoot. Small rocking or wobbling pieces are a trip hazard and often indicate a localized low spot or missing base support. The quickest fix is usually to lift the affected paver(s), correct bedding sand depth, reset, and re-check with a level against surrounding pavers.