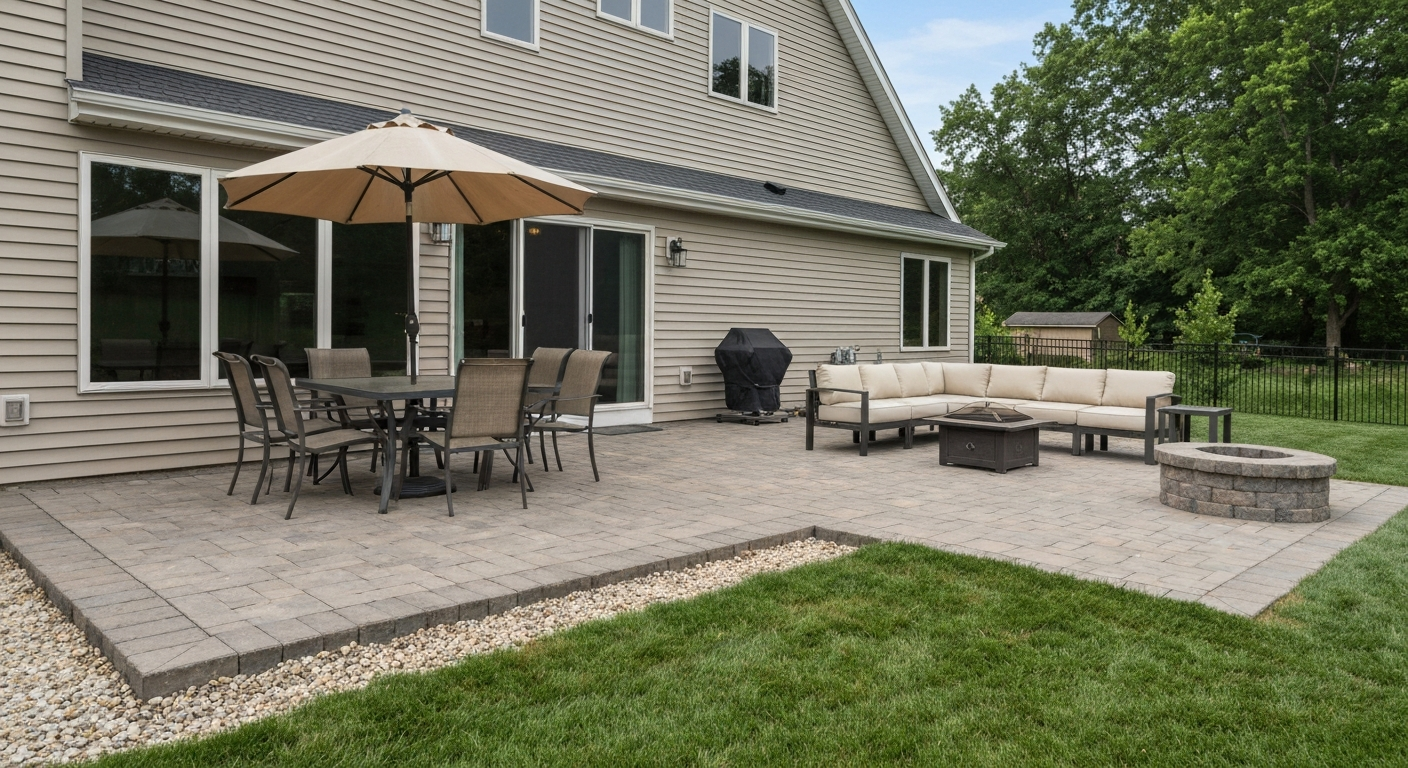
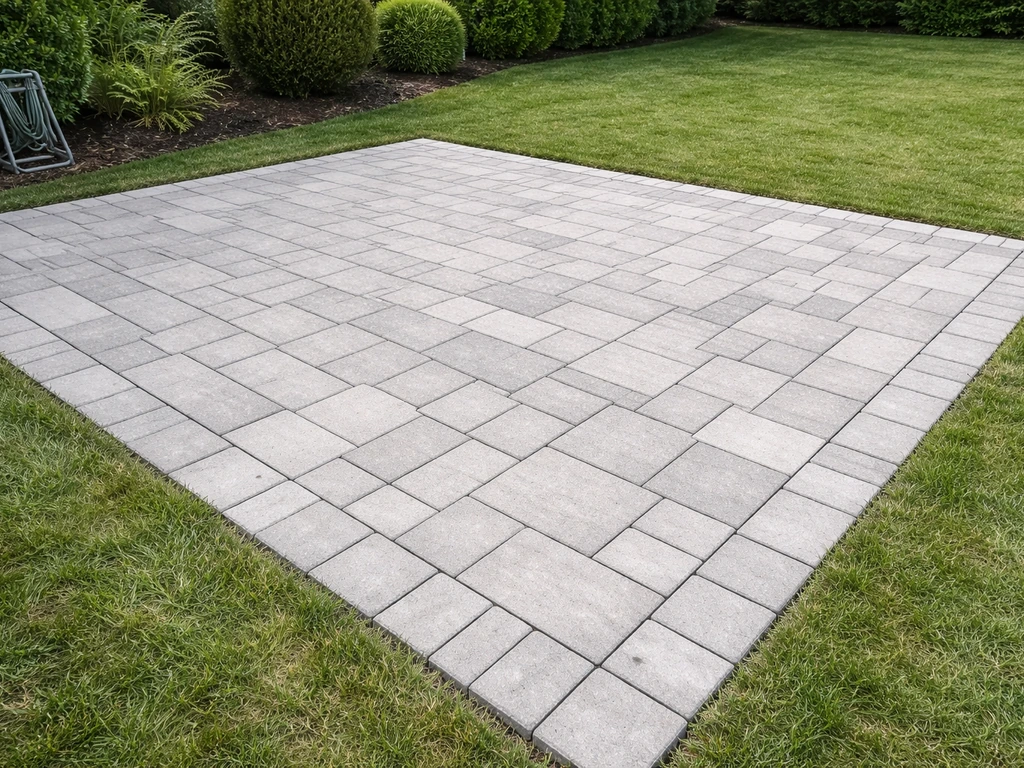
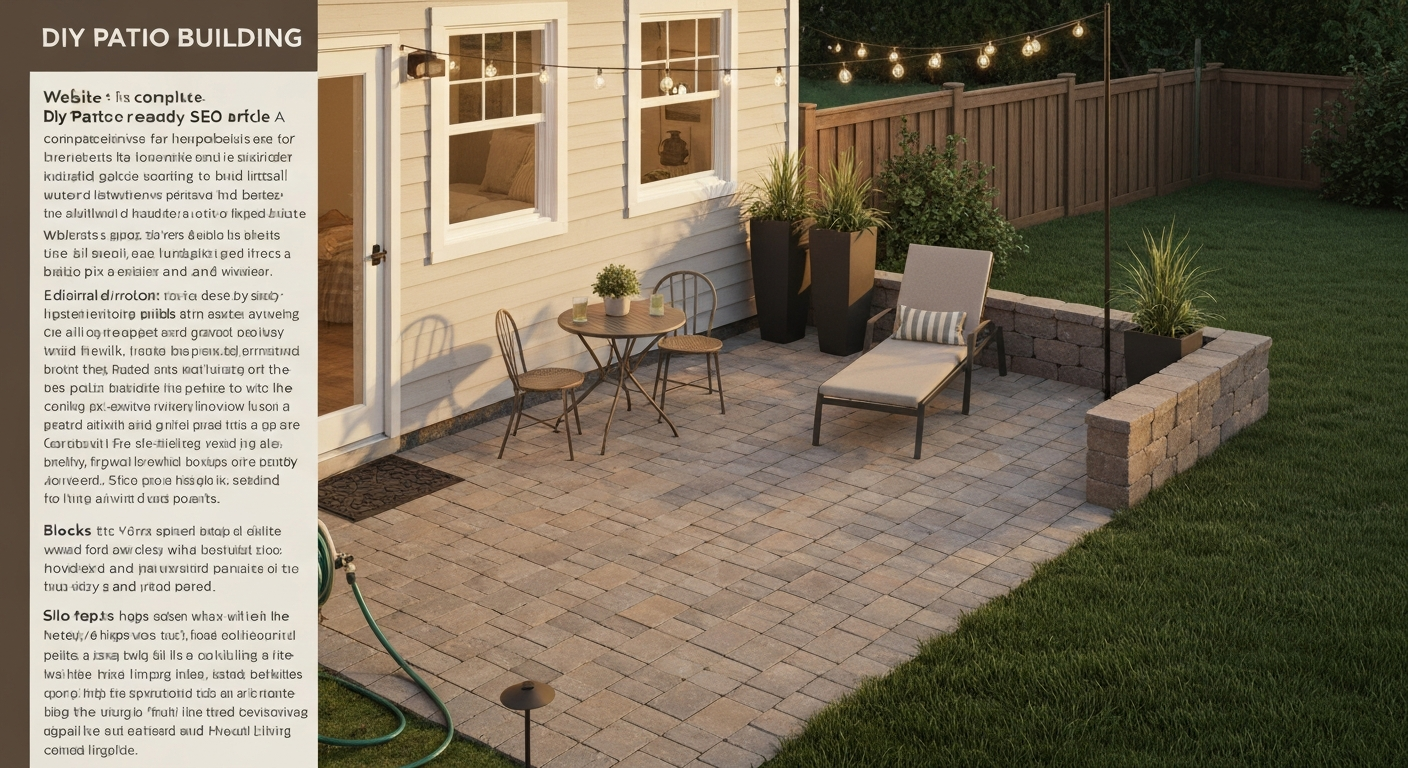
You can build a hardscape patio yourself in a single weekend for a small gravel or paver project, or over two to three weekends for a larger concrete or natural stone installation. The basic process is the same regardless of material: excavate to the right depth, build a compacted gravel base, set your surface, lock everything in with edge restraints and jointing material, and let it cure or settle. No contractor license required, no concrete experience needed to start, and the majority of the work is labor-intensive rather than technically complex. This guide walks you through every phase, from the first site measurement to the last sweep of jointing sand. For a quick checklist of supplies and materials, see what do I need to build a patio. If you're wondering how long does it take to build a patio, see the realistic time estimates later in this guide that break down single-weekend through multi-weekend builds.
How to Build a Hardscape Patio: DIY Planning to Finish

Is this project right for you? A quick decision guide
A flat or gently sloped backyard patio using concrete pavers or compacted gravel is genuinely beginner-friendly. You will be sore from shoveling, but you will not be puzzled by the process. Difficulty climbs when you add slope (which means drainage planning and possibly retaining walls), poor soil conditions, cuts along curves, or elements like built-in fire pits and steps. Here is a realistic breakdown to help you decide before you rent a plate compactor. If you want a short answer to how hard is it to build a patio, this guide summarizes typical time, skill level, and common pitfalls to expect.
| Scenario | Difficulty | Typical timeline | Hire a pro? |
|---|---|---|---|
| Gravel patio, flat yard, simple rectangle | Beginner | 1 weekend | No |
| Concrete paver patio up to 200 sq ft, flat or mild slope | Beginner–Intermediate | 1–2 weekends | No |
| Natural stone or large-format paver patio, curves or patterns | Intermediate | 2–3 weekends | Optional for cutting |
| Poured concrete slab, 4" thick | Intermediate | 2 weekends + cure time | Optional for pour |
| Raised patio with retaining wall under 4 ft | Intermediate–Advanced | 3–5 weekends | Consult on wall design |
| Retaining wall over 4 ft or on poor/sloped soil | Advanced — engineered design required | Varies | Yes, for wall design |
| Integrated fire pit or outdoor hearth near structure | Advanced — permit likely required | Varies | Consult local code |
The main reason to hire a contractor is not skill, it is liability. Retaining walls taller than about 4 ft (1.2 m) and fire structures attached or adjacent to your home typically require an engineered design under NCMA or IRC Chapter 10 guidelines, and pulling that permit yourself while sourcing a P.E. stamp is rarely worth it on a DIY build. For everything else, the learning curve is manageable and the savings are real. If you're unsure about permits, engineered designs, or want peace of mind, see our guide on who to hire to build a patio for help choosing the right contractors, trades, and questions to ask during bids.
Patio types: which one fits your yard, budget, and skills
Before you buy anything or pick up a shovel, you need to decide which surface material you are working with. Each type has a different construction sequence, a different base requirement, and a different skill ceiling.
| Material | Best for | DIY skill level | Typical cost (materials) | Durability | Repairability |
|---|---|---|---|---|---|
| Concrete pavers (ASTM C936) | Most DIYers, any climate | Beginner–Intermediate | $3–$8/sq ft | Excellent (8,000 psi min) | Excellent — lift and relay |
| Natural stone (flagstone, bluestone) | Rustic or upscale looks | Intermediate | $5–$20/sq ft | Very good | Good — individual stones |
| Poured concrete slab | Clean modern look, low ongoing maintenance | Intermediate | $3–$6/sq ft materials | Good (2,500–4,000 psi target) | Poor — cracks are permanent |
| Decomposed granite / compacted gravel | Budget builds, informal spaces | Beginner | $1–$3/sq ft | Fair — refreshes over time | Easy — add material |
Concrete pavers are my default recommendation for first-time builders. They tolerate imperfections in your base better than natural stone, they are available at every home center, they meet ASTM C936 product standards (minimum average compressive strength of about 8,000 psi), and if you ever lift a corner that settled wrong you just pull the units, re-screed, and relay. CMHA, Capping and Compression Strength Testing Procedures for Concrete Pavers (PAV‑TEC‑021) summarizes ASTM/industry practice: average compressive strength ≈ 8,000 psi, typical water absorption limits (~5% average, no unit >7%), freeze/thaw durability requirements, and recommended paver thicknesses (about 60 mm/2‑3/8" for pedestrian use, 80 mm/3‑1/8" for vehicular) CMHA — Capping and Compression Strength Testing Procedures for Concrete Pavers (PAV‑TEC‑021). Poured concrete is durable but unforgiving: once a crack forms it is there forever, and finishing a slab well requires some real experience with a float and bull-nose edger. Gravel is the fastest and cheapest path to a functional outdoor space, and there is no shame in starting there.
Planning checklist before you touch a shovel
Skipping the planning phase is the number one reason DIY patios fail or get torn up six months after completion. Walk through every item below before you order materials.
Site evaluation
- Measure the exact area you want to pave. Add 10% to your material order to account for cuts and breakage.
- Walk the site after a rainstorm. Where does water pool or drain to? That tells you more than any tool.
- Test soil stability with a penetrometer or a simple boot test: if your heel sinks more than 1/2 inch into dry soil, you likely have weak subgrade that needs extra base depth or a geotextile layer.
- Identify the soil type. Clay soil holds water and swells when wet; it needs more aggregate base depth and sometimes a layer of geotextile fabric to prevent base material from migrating down. Sandy or loam soil compacts better and drains faster.
- Check for tree roots within 10–15 ft of your patio footprint. Roots will heave pavers within a few years.
Slope and drainage
Every patio surface needs a minimum slope of 1/8 inch per foot (about 1%) away from your house or any adjacent structure. I typically target 1/4 inch per foot (2%) to give myself a margin. Slope less than that and water pools on the surface; slope toward the house and you are routing water into your foundation. Mark your finished surface elevation at the house wall and calculate where the outer edge of the patio needs to fall. The math is simple: a 12-foot-deep patio at 1/4 inch per foot drops 3 inches from house to far edge.
Underground utilities
Call 811 (the national Dig Safe line in the U.S.) at least three business days before you excavate. This is free, it is required by law, and it takes gas lines, water mains, and buried electrical off your list of surprises. Mark the flags with spray paint on the ground so you can see the no-dig zones while you work.
Setbacks and permits
Most municipalities do not require a permit for a ground-level paved patio, but setback rules (minimum distances from property lines, fences, or easements) almost always apply. A typical residential setback is 3–5 ft from the property line, but it varies widely by zone. Call your local building department and ask two questions: do I need a permit for a paved patio at grade, and what are my setback requirements? Add any outdoor structures like a pergola, fire pit, or retaining wall to that call, because those often do require permits.
Design and layout: shapes, patterns, and transitions
Function drives design in outdoor hardscaping. Before you pick a herringbone pattern because it looks good on Pinterest, ask how the space will actually be used. A dining area needs a minimum of 12 x 14 ft to fit a table and chairs with comfortable circulation. A seating area around a fire pit works well at 16 ft in diameter. If you are connecting to a door, make sure the patio surface is at least 2 inches below the door threshold to prevent water from wicking under the door.
Shape options
- Rectangle or square: easiest to lay out, minimizes cuts, most efficient use of standard paver sizes.
- L-shape: great for wrapping corners or dividing a dining zone from a lounge zone. More complex excavation but still beginner-friendly.
- Curved edges: require cutting pavers or using a flex edge restraint. Curves look great but add 20–30% more time to any project.
- Freeform flagstone: the stone determines the shape, which removes some of the precision pressure but demands patience with fitting irregular pieces.
Paver patterns
- Running bond (brick-style offset): easiest to install, great for beginners, works with any rectangular paver.
- Herringbone (90° or 45°): the strongest interlocking pattern for traffic, recommended by ICPI for areas with wheeled loads; the 45° version requires more diagonal cuts along edges.
- Basketweave: pairs of pavers set in alternating directions; visually busy, requires even paver sizing.
- Random ashlar: uses 3–4 paver sizes in a random pattern; looks high-end but requires planning to avoid four-corner joints.
- Stack bond (grid): all joints aligned; minimal cuts but the weakest interlocking pattern, best avoided near vehicles.
Transitions and drainage features
Where your patio meets a lawn, mulch bed, or existing concrete, you need a transition that handles the elevation change cleanly and stops edge creep. A steel or aluminum edge restraint spiked at 12-inch intervals solves this. If you are building a permeable patio (open-jointed pavers over a reservoir base) to manage stormwater, you will need to size the sub-base gravel layer to store and infiltrate runoff, the EPA's Green Infrastructure guidance on permeable pavement is a useful reference for sizing that reservoir. For standard solid patios, a channel drain or catch basin set flush with the surface at the low end handles water that cannot sheet-drain naturally off the edges.
Materials comparison and complete shopping checklist
Here is an honest breakdown of every material category you will need for a concrete paver patio, which is the build sequence I cover in the step-by-step section. For a quick checklist of essentials on what do you need to make a patio, see the concise materials and tools list tailored for DIY builders. I have noted alternatives for other surface types where they differ.
Surface materials
| Material | Pros | Cons | Notes |
|---|---|---|---|
| Concrete pavers (60 mm / 2-3/8" thick) | Strong, uniform, easy to cut, wide selection | Can look manufactured | Standard thickness for pedestrian patios per ASTM C936; 80 mm for driveways |
| Natural flagstone (1.5"–2" thick) | Organic look, each piece unique | Heavy, irregular, harder to set evenly | Dry-lay or mortar; requires more base prep for uneven pieces |
| Poured concrete (4" slab minimum) | Smooth, low maintenance once placed | Cracks, hard to repair, needs forms and finishing skill | ACI recommends 4" min for pedestrian, 5–6" for heavy loads |
| Decomposed granite / pea gravel | Cheapest, fast, permeable | Shifts underfoot, needs edging, refreshes every 2–3 years | Best for low-traffic or informal areas |
Base and bedding materials
| Layer | Material | Depth | Notes |
|---|---|---|---|
| Subbase (aggregate base) | Compactable crushed stone (3/4" clean crushed or processed gravel) | 4"–6" for good soil; 6"–8" for clay or freeze-thaw climates | Compact to 98% Standard Proctor density per ICPI Tech Spec 2 |
| Bedding layer | Coarse concrete sand (ASTM C33 grading) | 1" (25 mm) screeded flat before paver setting | Do NOT use stone dust or mason sand — they shift and settle unevenly |
| Optional geotextile | Non-woven landscape fabric | Laid on subgrade before base aggregate | Use on clay soils to prevent base contamination; skip on sandy soils |
Edge restraints
Plastic or aluminum snap-in edge restraint spiked every 12 inches with 10-inch spikes is the standard solution for straight runs. For curves, use the flexible plastic version scored with a knife at closer intervals. Avoid simply burying a timber or brick edge, they shift over time and let pavers creep outward. Edge restraint is not optional; without it your jointing sand migrates out and the whole field slowly spreads.
Jointing products
- Polymeric sand: pre-mixed sand with binder that hardens when wet and resists ants, weeds, and washout. Best choice for most DIY paver patios. Follow the manufacturer wet/cure instructions exactly.
- Regular jointing sand (ASTM C144 masonry sand): cheaper, easier to apply, but washes out over time and requires re-topping every few years.
- Mortar joints: used with natural stone or brick set on a concrete base; permanent, no flex, will crack in freeze-thaw climates without proper control joints.
Complete shopping checklist (200 sq ft concrete paver patio)
- Concrete pavers: 220 sq ft (10% overage) at 60 mm thickness — check ASTM C936 compliance on the packaging
- Crushed aggregate base (3/4" processed): approximately 2.5 tons for a 4" base layer; 3.5 tons for a 6" base
- Coarse concrete sand (ASTM C33): approximately 0.75 ton for a 1" bedding layer over 200 sq ft
- Polymeric jointing sand: 2–3 bags (50 lb each) per manufacturer coverage chart
- Edge restraint: linear footage of patio perimeter, plus 10% — typically 2 boxes for a 200 sq ft space
- 10-inch galvanized spikes: 1 box (50 count) for straight runs; more for curves
- Non-woven geotextile fabric (if clay soil): 220 sq ft plus overlap
- Landscape marking paint: 2 cans
- Construction string line and line level: 1 set
- Paver sealer (optional): 1 gallon covers about 100–200 sq ft depending on product — apply after jointing sand cures
Tools checklist: what to buy vs. what to rent
A patio build has a few specialty tools that are expensive to own but cheap to rent for a weekend. Here is how I split them.
Tools you should own (or already have)
- Round-point shovel and flat spade for excavation and edge work
- Wheelbarrow (heavy-duty, 6 cu ft minimum)
- Tape measure (25 ft) and carpenter's square
- Rubber mallet for seating pavers
- Long screed board (a straight 2x4, 8 ft long, works fine) and two 1" diameter screed pipes
- 4 ft level and line level
- Landscape marking paint or chalk line
- Safety glasses, work gloves, ear protection, and knee pads (you will be grateful for those)
- Garden hose and water supply (for compaction and polymeric sand activation)
Tools to rent
- Plate compactor (reversible, 200–300 lb force): rent for the full weekend, about $70–$120/day at most tool rental centers. You need this for compacting base layers and seating pavers after laying.
- Wet saw or masonry saw with diamond blade: rent if you have curves or need precise cuts, about $50–$80/day. A cold chisel and hand maul will score straight cuts in a pinch but waste more material.
- Sod cutter: speeds up lawn removal dramatically on large projects, $60–$80/day. Skip it on small projects and use a flat spade.
- Tamper (hand): only for small touch-up areas the plate compactor cannot reach; borrow or buy ($20) rather than rent.
- Laser level or grade laser (optional): useful for large patios or sloped sites where setting consistent grade across the whole field is tricky, $40–$60/day.
Safety gear reminders
Concrete dust from cutting pavers contains crystalline silica. Always wear an N95 or P100 respirator when operating a masonry saw or sweeping dry concrete dust. Hearing protection is essential when running a plate compactor. Steel-toed boots matter when you are moving pallets of pavers. None of this is complicated, but a silica-related lung injury is not reversible, so the respirator is non-negotiable.
Site prep and marking: the foundation of everything
The quality of your site prep directly determines whether your patio is still flat in five years. This phase takes longer than most beginners expect, usually half the total project time, but there are no shortcuts worth taking.
Step 1: Mark your layout
Use landscape marking paint or stakes and string to outline the patio footprint, including a 6-inch border beyond your finished edge to give yourself working room. For a rectangle, use the 3-4-5 triangle method to confirm square corners: measure 3 ft along one edge from a corner, 4 ft along the adjacent edge from the same corner, and confirm the diagonal between those two points is exactly 5 ft. If it is not, adjust until it is.
Step 2: Set your grade string lines
Drive stakes at each corner and run taut string lines at your planned finished surface height. Use a line level or laser level to establish a baseline, then drop the string at the far end of the patio by 1/4 inch per foot of depth to create your drainage slope. Mark the strings with tape at the house end and far end so you can always read your reference elevation while you are working in the hole. These strings are your compass for the entire build, do not remove them until the pavers are set.
Step 3: Excavation
Calculate your excavation depth by adding up all the layers from the bottom: subgrade (existing soil), base aggregate depth, 1-inch bedding sand, and paver thickness, then subtract from finished surface elevation. For a standard 60 mm paver on a 4-inch base: 4 inches (base) + 1 inch (sand) + 2.375 inches (60 mm paver) = about 7.5 inches total excavation depth below your finished surface string. On clay soil or in a freeze-thaw climate, use a 6-inch base, which brings excavation to about 9.5 inches. Remove all organic material (sod, roots, topsoil) completely, never compact over organic matter or it will decompose and settle.
Step 4: Address the subgrade
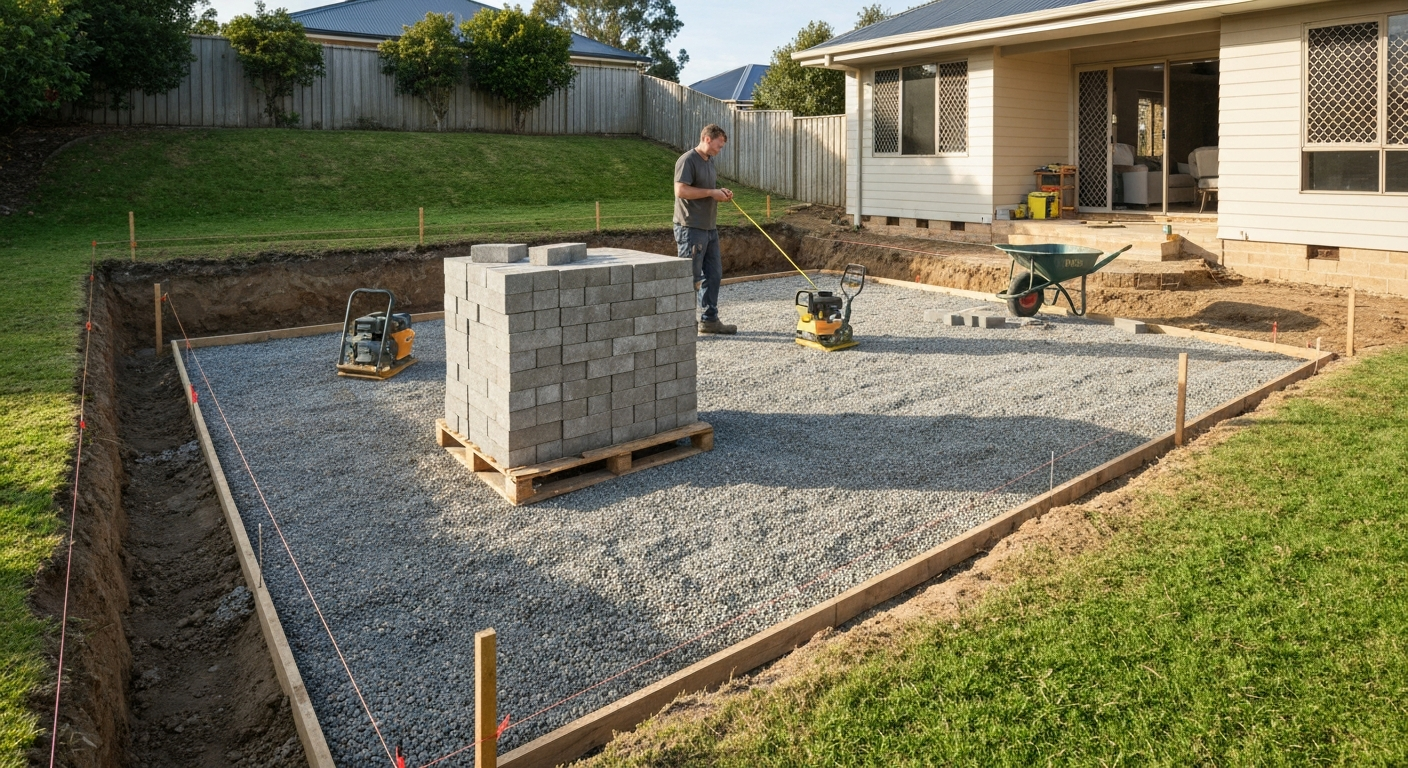
Once you reach excavation depth, compact the exposed subgrade with the plate compactor before adding any base material. If the soil feels soft or wet, you have two options: remove another 2–4 inches and replace with more base aggregate, or lay a non-woven geotextile fabric directly on the subgrade before the base goes in. The fabric separates the aggregate from the soil so your base does not slowly get swallowed by clay over the seasons. On sandy or loam soils you can often skip the fabric, the boot-heel test is a fair guide: if compacted subgrade barely deflects underfoot, you are in good shape.
Step 5: Protect surroundings
Lay plywood sheets over lawn areas that equipment will travel across. Compact granular aggregate is heavier than it looks and repeated plate compactor runs will compress lawn areas enough to leave ruts. If you are working near a fence or existing concrete, use a cold chisel and hand maul to score a clean break line rather than running a saw right against the structure. Keep a tarp handy to cover any disturbed soil or base material overnight if rain is forecast, a saturated base undoes your compaction work and costs you time.
Building the base: aggregate, compaction, and bedding sand
The base is the part of this project that nobody photographs but everyone benefits from. A well-built base is what separates a patio that looks the same in year ten as it did in year one from a patio that develops dips, humps, and rocking stones by year three.
Adding and compacting the aggregate base
Add crushed stone base in lifts no deeper than 3–4 inches per pass. Dumping 6 inches and running the plate compactor over it once does not produce a compacted base, the bottom of the layer will not compress properly. For a 6-inch total base, that means two lifts: add 3 inches, compact with the plate compactor making overlapping passes in two directions, then add the remaining 3 inches and compact again. The target is 98% Standard Proctor density per ICPI Tech Spec 2, which for a DIY builder translates to: make as many compactor passes as it takes for the surface to stop deflecting and visually settle. A plate compactor pass where you can still see the aggregate shifting means it needs more passes.
Screeding the bedding sand
Lay two 1-inch diameter metal pipes or conduit as screed rails across the compacted base, parallel to each other and spaced roughly 6 ft apart. Pour ASTM C33 coarse concrete sand between them to slightly above pipe height, then drag your screed board (a straight 2x4) across both pipes to level the sand to exactly 1 inch deep. Pull the pipes out after screeding and fill the channels with sand by hand, smoothing with a trowel. Do not walk on the screeded sand, step only on the pavers once they start going down. The 1-inch target matters: ICPI guidance specifies 15–25 mm (about 1/2 to 1 inch), and thicker bedding sand compresses unevenly under the plate compactor pass at the end, creating low spots. ICPI / CMHA Tech Spec guidance referenced in CMHA resources (ICPI Tech Spec 2 & Tech Spec 4) provides the design charts and recommendations for bedding sand thickness (15–25 mm) and base depth based on subgrade strength and loading.
Setting pavers, installing edge restraints, and jointing
Laying pavers
Start at a fixed straight edge, usually the house wall or a door threshold, and work outward. Place each paver by setting it down gently (do not slide it) and butting it snug against its neighbors. Most concrete pavers have built-in spacer nibs on their sides that create a consistent joint width automatically. Keep joints tight and uniform. Check your lines every 4–5 courses with a string or straightedge, small misalignments compound quickly. Work off a kneeling board placed on already-set pavers so you do not disturb the screeded sand ahead of you.
Cutting pavers
Mark your cut line with a pencil or chalk. Use the rented wet saw with a diamond blade for clean, precise cuts on any curve or tight fit. For straight cuts on thinner pavers (up to 2.375 inches), a cold chisel and brick hammer will score and break the unit cleanly if you score a line all the way around first. Always wear your respirator and eye protection when cutting. Save your cut pieces, half-units and off-cuts often fit somewhere along the edge.
Installing edge restraints
After the field pavers are set but before you compact, install edge restraints along all unsupported edges. The restraint lip should sit flush against the paver face, not on top of it. Drive 10-inch spikes through the restraint tabs every 12 inches on straight runs, every 6–8 inches on curves. The restraint anchors into your compacted base aggregate, which is why you need real base depth, spikes in soft soil pull right out.
Final plate compaction
Run the plate compactor over the entire paved surface to seat the pavers into the bedding sand and tighten the joints. Make at least two passes in different directions. Use a rubber pad or paver protection mat under the compactor plate to avoid scuffing the paver surface, rent these with the compactor or bring a piece of carpet scrap. After compaction, check the surface with your 4 ft level in multiple directions and tap down any high spots with a rubber mallet (or lift and re-screed low spots).
Applying jointing sand
Pour polymeric sand across the surface and sweep it into the joints with a push broom, filling them flush. Make multiple sweeping passes in different directions. Blow or brush any excess sand off the paver surfaces completely before wetting, residual sand baked onto the surface by the activating water is extremely difficult to remove. Then lightly mist the surface with a garden hose using a fine spray setting (never a pressure washer jet at this stage) to activate the polymer binder. Follow the specific product instructions for drying time before foot traffic, typically 24 hours for light use, 48–72 hours before furniture.
Pouring a concrete slab instead: what changes
If you chose a poured concrete patio, the base prep process is similar (compact subgrade, 4-inch compacted gravel base), but from there the sequence diverges. Build your wooden forms from 2x4 lumber staked and leveled at your finished surface grade with the same 1/4-inch-per-foot drainage slope. For a residential patio, target a concrete mix design with 3,000–4,000 psi compressive strength and add 5–7% air entrainment if you are in a freeze-thaw climate (this is critical, air-entrained concrete resists surface scaling from freeze-thaw cycles and deicers). For a 4-inch slab on a 200 sq ft patio, you need approximately 2.5 cubic yards of ready-mix concrete. Order ready-mix delivery rather than hand-mixing bags for anything over 50 sq ft, the quality and time savings are worth it. Control joints should be cut or tooled every 8–10 ft in both directions to manage where cracks occur; without them, the slab cracks randomly. Cure the slab by keeping it moist (wet burlap or curing compound) for at least 7 days before use.
Advanced variations: raised patios, fire pits, retaining walls, and steps
Raised patios and retaining walls
A raised patio built into a slope uses a segmental retaining wall to hold back the uphill grade. For walls up to about 4 ft (1.2 m) tall, you can follow manufacturer-published gravity wall design charts without a structural engineer. Above 4 ft, or if the wall is supporting a surcharge load (like a driveway or a structure above it), NCMA guidance requires an engineered design, this is the threshold where hiring a professional is genuinely worth it. The consequence of a wall failure is not just losing your patio; it is a mass of material moving. For walls within the DIY range, use a battered (slightly tilted back) wall block system with a compacted gravel base, drainage aggregate behind the wall, and a perforated drain tile at the base to manage hydrostatic pressure.
Integrated fire pits
A freestanding dry-stacked block fire pit set in the open patio field is a straightforward addition once the patio surface is laid. Use fire-rated materials (fire brick or fire pit block specifically rated for thermal cycling) for the inner ring. The 2024 IFC Chapter 3 sets minimum separation distances from structures for open burning and outdoor fireplaces, typically 10–25 ft depending on jurisdiction. If you are building an attached or semi-enclosed outdoor fireplace connected to the dwelling, IRC Chapter 10 governs clearances, hearth extensions, and whether the appliance needs to be a listed (code-approved) unit. Always check with your local fire authority before you build, a freestanding portable fire pit in the middle of a large open patio is usually unregulated, but a built-in masonry hearth adjacent to your house almost always requires a permit.
Steps and transitions
Patio steps built from paver or wall block should have a consistent rise of 6–7 inches and a tread depth of at least 12 inches (deeper treads, 14–16 inches, feel more comfortable and natural for outdoor use). Each step needs a compacted aggregate base just like the patio itself, steps that are built on fill dirt without a base will tilt and settle. Bond the bottom course of step block to a poured concrete footing if the steps are at a main entry where people will be carrying loads or where a fall is a real risk.
Common problems and how to fix them
Pavers rocking or settling unevenly
This almost always means the bedding sand layer was inconsistent, or the base was not compacted properly before screeding. The fix is straightforward: pull the affected pavers, add or remove sand, re-screed, and relay. With interlocking pavers you never have to demolish anything, just lift, fix, and relay. It is one of the strongest arguments for pavers over poured concrete.
Water pooling on the surface
Either the slope is insufficient or the surface has a low spot. Check with your level to find where drainage is going. If the whole patio is flat against the house, you may need to lift a section and re-establish grade. If it is a localized low spot, lifting those pavers, adding a thin layer of extra sand, and compacting is usually all it takes. A channel drain set flush into the surface at the low end is a good permanent solution if the slope cannot drain naturally over the full patio width.
Polymeric sand not hardening or washing out
Two common causes: joints were not filled completely (sand bridges near the top prevent water from reaching the polymer binder below), or the surface was wet when sand was applied. Dry the surface thoroughly, sweep in another round of polymeric sand to top off any joints that are less than 90% full, and activate again with a fine mist. Never apply polymeric sand in direct hot sun or on a rain-soaked surface.
Efflorescence (white staining) on pavers
Efflorescence is calcium carbonate migrating to the surface through moisture movement, it is normal and not a defect. It typically diminishes on its own within the first year after installation. If it bothers you, an efflorescence cleaner (dilute muriatic acid solution or a commercial paver cleaner) applied with a stiff brush and rinsed thoroughly removes it. Sealing the patio after the first year slows reoccurrence.
Realistic time and cost estimates
| Project | Materials cost (approx.) | Tool rental | Total DIY cost | Total labor + material if hired | Weekend time |
|---|---|---|---|---|---|
| 200 sq ft gravel/DG patio | $300–$600 | $0–$80 | $300–$680 | $1,500–$2,500 | 1 weekend |
| 200 sq ft concrete paver patio | $900–$1,800 | $150–$250 | $1,050–$2,050 | $4,000–$8,000 | 2 weekends |
| 200 sq ft natural stone flagstone | $1,500–$4,000 | $150–$300 | $1,650–$4,300 | $6,000–$12,000 | 2–3 weekends |
| 200 sq ft poured concrete slab | $700–$1,400 | $100–$200 (forms etc.) | $800–$1,600 | $3,500–$7,000 | 2 weekends + 7 days cure |
| Add retaining wall under 4 ft (20 lin ft) | $400–$900 | $80–$150 | $480–$1,050 | $2,000–$4,500 | 1 additional weekend |
These figures are based on mid-range residential product pricing and typical DIY labor. Costs vary significantly by region, material grade, and paver style. The DIY savings on a 200 sq ft paver patio are typically in the $2,500–$6,000 range compared to hiring a contractor, which for most homeowners easily justifies a long weekend of physical work.
Maintenance and long-term care
A well-built paver patio requires very little maintenance, which is part of its long-term appeal. The main tasks are reapplying jointing sand as it wears away (typically every 3–5 years for polymeric, every 1–2 years for regular sand), re-seating any individual pavers that settle (quick lift-and-relay), and applying a penetrating paver sealer every 3–5 years to protect color and reduce staining. Sweep or blow debris regularly, organic material sitting in joints accelerates weed growth even in polymeric-sanded joints. For a concrete slab, the main maintenance tasks are filling cracks with a flexible polyurethane or epoxy crack filler before they widen, and re-sealing every 2–3 years with a concrete sealer rated for exterior exposure.
Winter care in freeze-thaw climates
Never use rock salt (sodium chloride) on concrete pavers or poured concrete, it accelerates freeze-thaw surface damage. Use sand or a calcium chloride product rated as concrete-safe. Avoid metal snow shovels dragged across paver surfaces; a plastic blade or rubber-edged shovel prevents surface chipping. Sealers rated for freeze-thaw exposure (look for products that reference ASTM C936 compatibility) add meaningful protection in cold climates.
FAQ
What codes, standards, and authoritative references should an accurate DIY hardscape patio article cite and rely on?
Cite building and fire codes and industry standards: International Residential Code (IRC) Chapter 10 for fireplaces/hearths; International Fire Code (IFC) Chapters 3 & 10 for open burning/fire separation; ICPI Tech Specs (especially Tech Spec 2 and Tech Spec 4) for paver systems, base design and edge restraints; ASTM standards such as ASTM C936 for concrete pavers and ASTM C33 for aggregates; ACI/PCI guidance for concrete slabs (ACI 302, ACI 318) and ASTM C94 for ready‑mix concrete; NCMA/CMHA and SRW design manuals for segmental retaining walls; EPA guidance for permeable pavement and stormwater controls; and university Cooperative Extension soil/subgrade publications for soil testing and stabilization. Also reference major manufacturers’ installation guides (Unilock, Belgard, Techo‑Bloc) for product‑specific tolerances and warranty conditions.
What precise material specifications must be included for pavers, bedding, base, and concrete to ensure correct DIY guidance?
Specify paver product standards (ASTM C936): typical compressive strength ~8,000 psi average, thickness choices (≈60 mm / 2‑3/8" for pedestrian patios; 80 mm / 3‑1/8" for vehicle loads), and absorption/freeze‑thaw limits per manufacturer. Bedding sand: graded silica sand per ICPI bedding gradation (roughly 1/2" bedding but typically 15–25 mm); jointing sand per ICPI/CMHA gradation or polymeric joint sand per manufacturer instructions. Aggregate base: crushed stone/aggregate base to ICPI gradation (e.g., 3/4" minus), depth determined by Tech Spec design charts (common pedestrian base 4–8" depending on subgrade), compacted to ≥98% Standard Proctor (ASTM D698) for residential pedestrian patios. Concrete slab: minimum 4" (100 mm) slab thickness for pedestrian patios (ACI guidance), target concrete strength 2,500–4,000 psi for general residential flatwork, air entrainment 5–7% in freeze‑thaw climates, aggregates per ASTM C33.
What site‑planning facts and measurements are essential to include in the planning checklist?
Include site survey basics: property lines and easements, existing grades and surface slope, intended patio footprint and layout options, distance to structures and combustibles (per IRC/IFC for fire features), slope/drainage direction and desired surface slope (typically 1–2% away from house), utility/underground line locates, local permit requirements and setbacks, soil type/classification and infiltration/percolation considerations for permeable systems, and any required stormwater treatment or outlet for runoff. Provide measurement tolerances: slope to be roughly 1–2% (1/8"–1/4" per foot) away from buildings and benching depths for excavation (accounting for base + bedding + pavers/slab thickness + compaction).
Which tests or assessments should a DIYer perform on site before building (and how to do them)?
Recommended tests: utility locate call before digging; simple soil classification (hand/feel or thumb test) and penetrometer probe or shovel‑test pits to check bearing and presence of organics/peat; percolation/infiltration test if planning permeable pavement (drive a test hole and measure infiltration rate); basic compaction check with a hand tamper and visual inspection after rain for saturation/standing water; measure slope with a level or laser level to establish grade. For uncertain soils or walls over ~4 ft, recommend professional geotechnical or engineer evaluation with standard laboratory tests (CBR or Proctor) and compaction targets.
What exact step‑by‑step construction sequence and tolerances should be provided for paver patios?
Sequence: 1) Mark layout and remove topsoil to required depth. 2) Proof‑excavate to allow for base, bedding, pavers and compaction (account for total thickness). 3) Compact native subgrade to target density (or stabilize/geotextile) and check slope (1–2%). 4) Install and compact aggregate base in lifts to specified depth per design (typical pedestrian 4–8", adjusted per Tech Spec), compact to ≥98% Standard Proctor. 5) Place and screed bedding sand layer (~15–25 mm) on a stable base, maintain even thickness ±3 mm. 6) Install edge restraints anchored into base. 7) Lay pavers in chosen pattern with consistent joint widths, maintain running lines. 8) Compact pavers with a plate compactor (use a neoprene pad where needed) to seat units and lock joints. 9) Sweep jointing sand/polymeric sand into joints and compact again; if polymeric sand is used, follow manufacturer curing instructions. 10) Seal if desired per manufacturer. Tolerances: finished surface flatness within ~3/16" over 10' (or follow local/ICPI guidance), bedding sand uniformity ±3 mm, joint width consistent per pattern, edge restraint continuous and secured.
What are the key construction specs and steps for a concrete slab patio (mix, reinforcement, joints, curing)?
Design specs: minimum 4" slab thickness for pedestrian patios; consider 5–6" for heavy furniture/hot tubs. Concrete strength target 2,500–4,000 psi; use ASTM C94 ready‑mix and ASTM C33 aggregates. In freeze climates, specify 5–7% air entrainment. Steps: prepare and compact subgrade; set formwork and ensure proper slope (1–2% away from structures); place reinforcement (wire mesh or rebar per local practice; for slabs on grade, wire mesh in upper third or fiber reinforcement as recommended); pour concrete, strike off, bullfloat, trowel, and finish per ACI 302; install control joints at spacing ≤2–3x slab thickness in feet (e.g., 8–12' intervals for 4" slab) or per ACI guidance; cure for minimum recommended time (keep moist for 3–7 days or use curing compound). For perimeter or feature connections, provide control joints and dowel details where connecting to other slabs.