A typical DIY patio takes anywhere from 2 to 10 calendar days to build, with most weekend warriors finishing a standard 200–400 sq ft paver patio in 3 to 5 days of actual work. Concrete patios run about 3 to 7 working days plus a mandatory curing window before you can use the space. The range is wide because size, material choice, site conditions, and whether you are solo or have help all push that number dramatically in either direction. Here is how to figure out where your project actually lands.
How Long Does It Take to Build a Patio? Timeline by Steps

Nolan Carver
11 Jun 2026
What a typical patio build looks like in real time
For a solo DIYer building a 200–300 sq ft paver patio on reasonably flat ground with decent soil, expect 3 to 5 calendar days of work. That breaks down to roughly 20 to 35 total labor hours. Add a helper and you can shave that nearly in half on the physically demanding phases like excavation and compaction. A larger patio, 400–600 sq ft, on a sloped or problem site with clay soil can push a solo build to 8 to 10 days and 50+ hours without any major add-ons like a retaining wall or fire pit.
For concrete, the hands-on work time is actually shorter (often 1 to 2 active pour days after prep), but the calendar stretches out because you cannot use the slab for at least 24 to 48 hours after pouring, and you really want to wait a full 7 days before putting furniture on it. Full structural strength takes 28 days. So while you might finish forming, pouring, and finishing a concrete patio in 3 to 5 working days, the calendar from first shovel to first barbecue is more like 2 to 5 weeks when you factor in curing.
How to estimate your own build time
The fastest way to get a realistic number is to work from your square footage, your crew size, and your material choice. To estimate what do you need to make a patio, start with the base materials, edging, pavers or concrete, jointing sand, and any drainage or leveling supplies your material choice. Grab those three inputs first, then use the per-phase estimates below to build your own rough schedule.
Square footage as your baseline
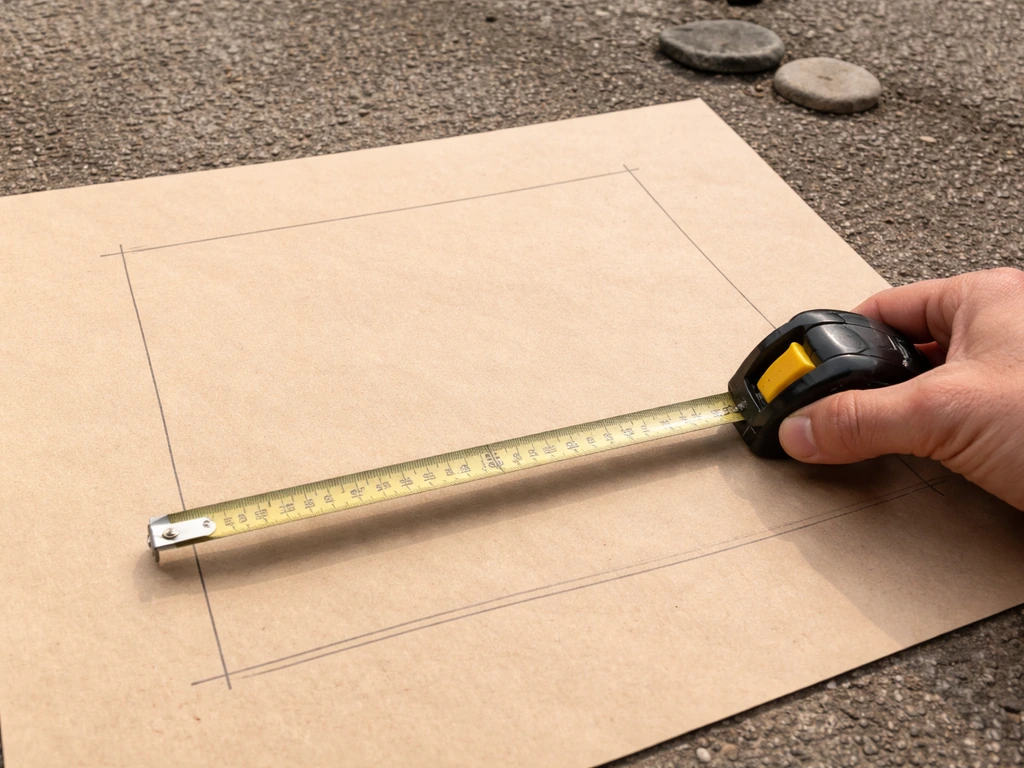
Measure your patio footprint length times width in feet to get square footage. A 16 x 16 ft patio is 256 sq ft. A 20 x 25 ft patio is 500 sq ft. As a general rule, add roughly 1 extra work day for every 150 to 200 sq ft you go beyond a basic 200 sq ft footprint. Complex shapes with lots of curves, angles, or borders multiply cutting time and can add a full day even on a smaller patio.
Crew size matters more than most people expect
Excavation and compaction are the biggest time sinks, and they scale directly with bodies. A solo builder hauling dirt and running a plate compactor on a 300 sq ft patio can spend an entire full day just on base prep. Two people cut that to half a day. For paver laying specifically, one person can typically set 50 to 80 sq ft of pavers per hour once the base is ready. Two people working together can often push that to 100 to 150 sq ft per hour because one person lays while the other cuts and carries.
A simple planning worksheet
Write down your patio square footage, your crew size (you alone = 1, you plus a friend = 2), and your material type. Then multiply the per-phase hour estimates in the next section by the appropriate solo or crew factor. Total up the hours, divide by 8 for full work days, and add buffer days for weather, deliveries, and drying. That number is your realistic calendar estimate.
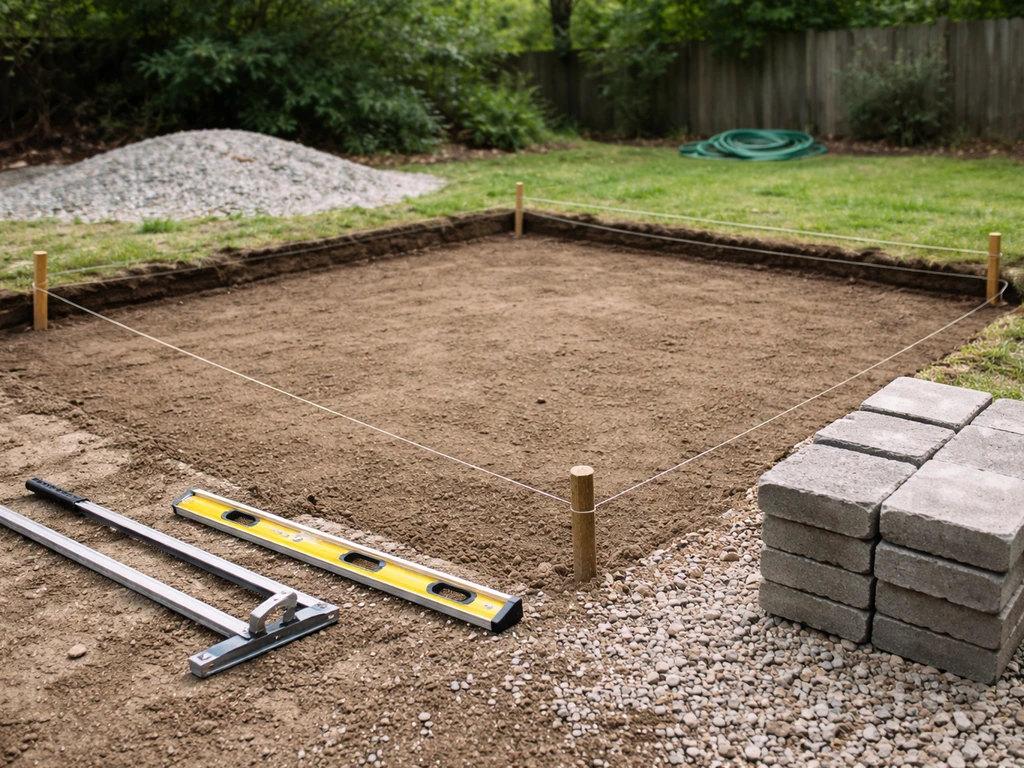
Phase-by-phase time breakdown
Every patio build runs through the same core phases regardless of material. Here is what each one actually takes for a typical 200–300 sq ft project with one person working.
| Phase | Typical Solo Time (200–300 sq ft) | What Slows It Down |
|---|---|---|
| Layout and marking | 1–2 hours | Complex shapes, slopes, string-line adjustments |
| Excavation (6–10 in deep) | 4–8 hours | Clay soil, roots, large area, hand-digging vs. mini-excavator |
| Geotextile fabric install | 1–2 hours | Large area, multiple sheets (6–12 in overlap required) |
| Base gravel fill and compaction | 4–8 hours | Deep base needed, multiple lifts, wet soil |
| Edging installation | 1–3 hours | Curved edges, corner cutting, staking into hard ground |
| Screeding / bedding sand leveling | 2–4 hours | Larger area, repeated slope checks, uneven base |
| Paver or surface installation | 4–10 hours | Complex pattern, cuts, tight joints |
| Jointing sand and final compaction | 1–3 hours | Large area, polymeric sand set time |
| Cleanup and finishing | 1–2 hours | Debris removal, material disposal |
For a 200–300 sq ft paver patio, that adds up to roughly 19 to 42 solo hours. At 8 hours of real productive work per day (which is generous when you factor in breaks, check-ins, and material hauling), that is 2.5 to 5.5 full work days. This matches the real-world range of 3 to 5 days that most DIYers report for a project this size.
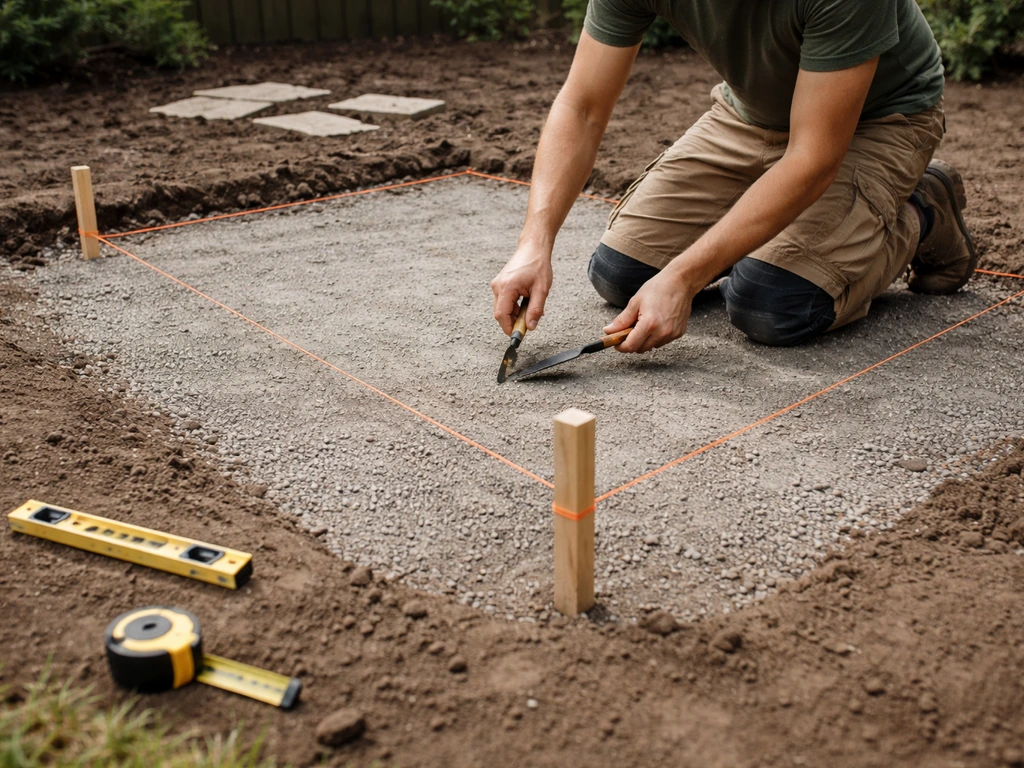
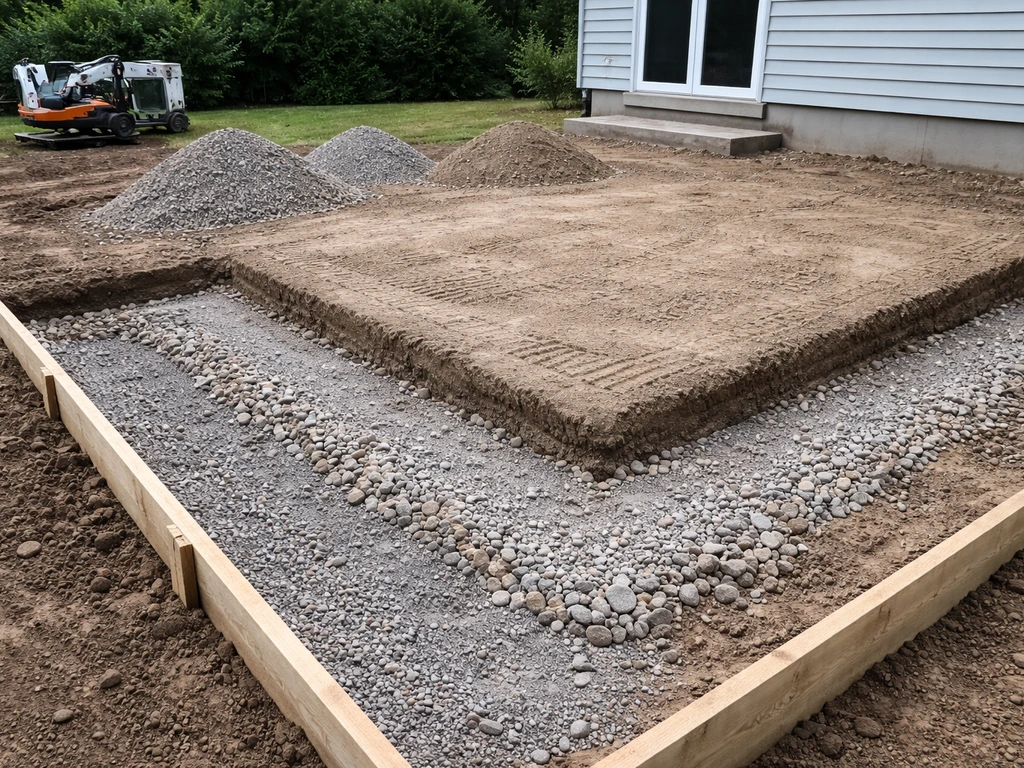
Base prep is the phase people underestimate most
The base is the most important part of any patio build. Skipping or rushing compaction is the number one cause of pavers sinking or concrete cracking years later. Gravel base should be compacted in 3 to 4 inch lifts, not dumped all at once. If your base depth calls for 6 inches of compacted gravel, you are making at least two passes with the plate compactor. Each pass across a 300 sq ft area takes time. Budget generously here rather than compressing it.
Material-specific timing: pavers vs concrete
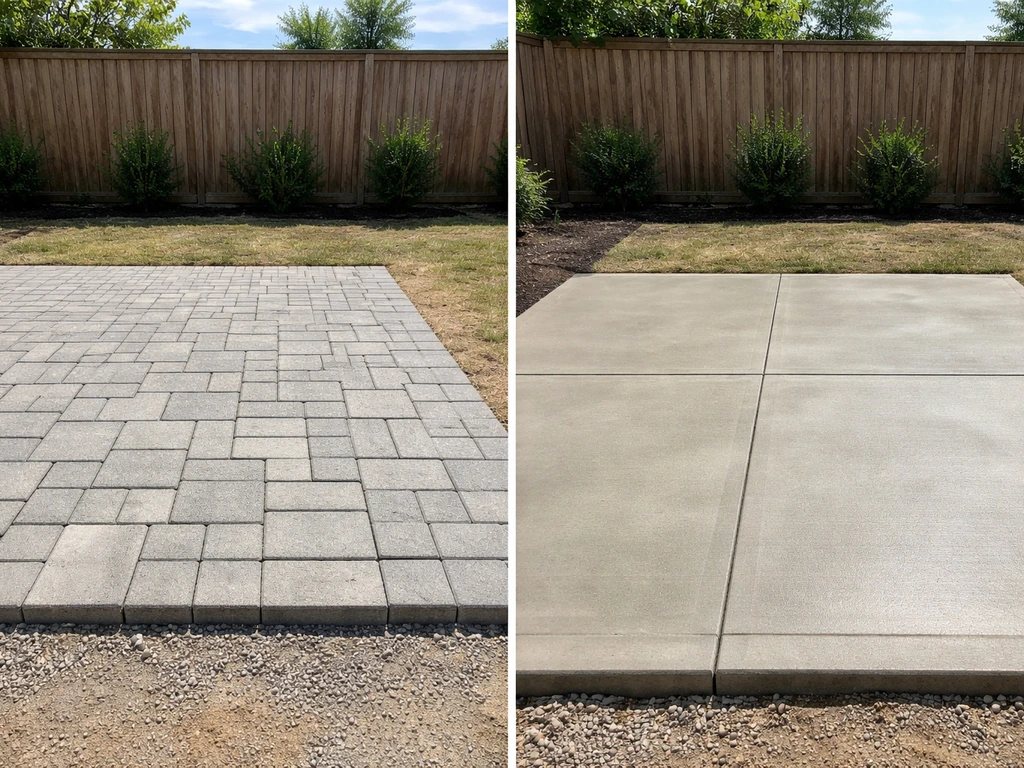
The material you choose changes not just how long the work takes but when you can actually use the patio. Here is how the two most common options compare.
| Factor | Paver Patio | Concrete Patio |
|---|---|---|
| Active work days (200–300 sq ft) | 3–5 days | 3–5 days (prep + pour + finish) |
| Curing / wait time before use | Light foot traffic same day after jointing sand sets | 24–48 hrs for foot traffic; 7 days for furniture; 28 days full strength |
| Calendar days start to finish | 4–6 calendar days | 2–5 weeks (including cure) |
| Weather sensitivity during build | Moderate (avoid rain during screeding) | High (no pour below 40°F or in rain; need 5–7 day wet cure) |
| When sealing is done | Optional; can seal 24–48 hrs after polymeric sand cures | Wait 28 days after pour before sealing stamped concrete |
| Complexity of surface installation | Moderate (cutting pavers, pattern work) | Lower active time but forming, finishing, and stamping take skill |
Concrete curing is a real scheduling constraint
This is where concrete projects catch people off guard. The pour itself might take only one day, but the calendar does not care. You need to wait at least 24 to 48 hours before walking on a new slab, 7 days before placing heavy furniture, and a full 28 days before the concrete reaches its full design strength. For stamped or decorative concrete, sealing is typically done at the 28-day mark after the slab has fully cured and dried. If you pour in cold weather (ambient temps at or below 40°F), you also need to protect the slab with blankets or heaters and maintain it above freezing until it hits at least 500 psi, which adds management time and sometimes delays the schedule by days.
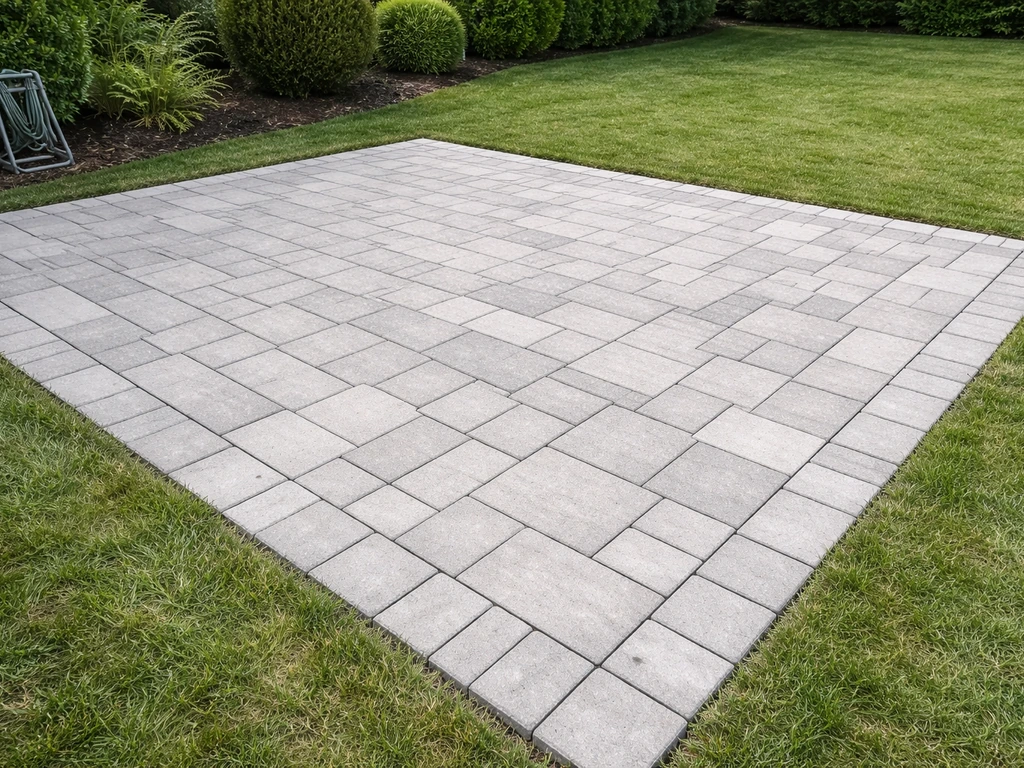
Pavers are more forgiving on timing
With pavers, once the jointing sand has settled and you have done your final plate compactor pass, the patio is essentially usable. Polymeric jointing sand typically needs 24 hours to cure before you want rain or heavy traffic on it, but there is no extended curing window like with concrete. That makes pavers a better choice when you need the space usable quickly or when your build schedule might get interrupted by life.
Site conditions that add days to your timeline
Your site is often the biggest wildcard in the whole schedule. Here are the most common conditions that push timelines out and roughly how much each one adds.
- Slope and drainage issues: A sloped site requires more careful string-line layout, additional excavation on the high end, and sometimes drainage channels or a gravel trench. Budget an extra half to full day for a moderately sloped site (3–5% grade). Steep slopes that require terracing or drainage installation can add 2 to 3 days.
- Clay or expansive soil: Clay holds water and compacts poorly. You may need to over-excavate by 2 to 4 extra inches and add a thicker gravel base to compensate. That means more digging, more hauling, and more compaction passes. Add 1 to 2 days.
- Removing existing concrete or asphalt: Demo is its own project. Breaking up an existing concrete slab with a jackhammer and hauling debris can take a full day or more on its own, plus you will likely need a dumpster or junk-removal coordination, which adds a scheduling day.
- Large roots or obstructions: If you hit large roots or buried debris during excavation, budget a partial to full extra day for removal and re-compaction of the disturbed area.
- Poor drainage requiring extra prep: If water pools in your patio area, you may need to install a French drain or gravel channel before building the base. This can add 1 to 2 full days before the actual patio build even starts.
Before you finalize your timeline, walk your site after a rain. If water sits or flows across your planned patio area, assume you are adding drainage work to the front end of the project. It is much easier to plan for it now than to retrofit a drainage solution under a finished patio.
Add-on features that stretch the timeline for DIYers
A flat ground-level patio is the baseline. Every add-on feature stacks more time on top. Here is a realistic sense of what common DIY upgrades cost in extra days.
Raised patio sections
A raised patio section requires building up the grade with compacted fill, which means multiple lift-and-compact cycles, additional material deliveries, and often a retaining structure on at least one side. Even a modest 12-inch raised section on part of your patio can add 1 to 2 full days just for the fill and compaction work before you start on the surface.
Retaining walls
A retaining wall alongside or supporting a patio is effectively a separate project running in parallel. A simple 2 to 3 course segmental block retaining wall (under 24 inches tall) can add 1 to 3 days to your timeline depending on length. Taller walls, walls with geogrid backfill reinforcement, or walls that require footings move into multi-day territory on their own. Many municipalities also require permits and inspections for retaining walls over a certain height, which adds scheduling days regardless of actual work time.
Fire pit areas
A built-in fire pit section often involves a separate base specification (thicker, heat-tolerant materials), different paver or stone selection around the pit, and sometimes a sand or gravel center. A standalone circular fire pit surround built into the patio adds roughly half a day to a full day if the design is straightforward. If you are building a raised fire pit with block walls and a separate foundation, add 1 to 2 more days.
Curves and complex patterns
Straight rectangular patios are the fastest to build. Every curve, radius, or diagonal pattern line you add means more cuts. Cutting pavers takes time, especially if you are renting a wet saw by the day. A patio with a lot of curves or a herringbone/running bond border pattern can add 4 to 8 hours of cutting time over a simple grid layout.
Scheduling tips to keep your project on track
Check the weather forecast before you start
The ideal window for a patio build is a stretch of 5 to 7 dry days with temperatures between 50°F and 90°F. Rain during the screeding and bedding sand phase washes out your leveled base and forces you to re-screed. For concrete, a rain event during or right after a pour can ruin the surface finish. Check a 10-day forecast and try to start your project on a Monday or Tuesday so your most weather-sensitive days fall mid-week, not on a weekend when you might be locked in.
Order materials before you start digging
Pavers, gravel, and polymeric sand all have lead times that catch DIYers off guard. Special-order pavers from a hardscape supplier can take 1 to 2 weeks to arrive. Even bulk gravel delivery from a landscape supply company typically needs 2 to 5 days of lead time in the busy season (spring through early fall). Order everything before you break ground so your materials are waiting for you, not the other way around.
Build in buffer days, not just work days
Real DIY builds rarely go perfectly. A tool that does not start, a delivery that shows up late, a base that needs one more pass to compact properly, these are not failures, they are just how outdoor construction works. Build at least 1 to 2 buffer days into your calendar beyond your estimated work time. If you finish early, great. If something goes sideways, you are not scrambling.
Permits and inspections: plan for the scheduling gap
Many municipalities require a permit for patios above a certain size, for any patio attached to a structure, or for any concrete work with footings. If your project triggers a permit requirement, the permit itself can take 1 to 3 weeks to be approved before you can even start. For permit requirements and approval timing, you can check the national permit portal at permits.gov and your local building department for the specific process in your area permits itself can take 1 to 3 weeks to be approved. On top of that, some jurisdictions require a footing inspection before you pour concrete, which means you need to schedule an inspection visit and wait for the inspector to sign off. That inspection window can be 1 to 5 business days depending on your municipality's workload. Check with your local building department before you start planning dates, not after.
Curing and drying buffers are non-negotiable
If you are building a concrete patio, do not schedule the patio reveal party for the weekend after the pour. Block out at least 7 days from pour date before you plan to use the space at all, and 28 days before any sealing work. For wet curing (covering with burlap and plastic sheeting), you need to maintain that cover for a minimum of 7 days. For pavers, polymeric sand needs roughly 24 hours to set, and some products recommend waiting for a light rain or misting the surface to activate the binding agents. Read the manufacturer's instructions for your specific product before you schedule your finish day.
Putting it all together: your personal timeline estimate
Here is a simple way to build your own estimate. Start with your square footage: under 300 sq ft is a 3 to 5 day base estimate for pavers, 300 to 500 sq ft is 5 to 8 days, and over 500 sq ft should start at 8 to 10 days. Add 1 to 2 days for slope or drainage issues. Add 1 to 2 days for clay soil or demo of existing hardscape. Add 1 to 3 days per major add-on like a retaining wall or raised section. Divide by your crew size to adjust labor hours per day. Then add 1 to 2 buffer days, plus whatever your curing window requires if you are using concrete.
Most DIYers who plan this way end up with a realistic 5 to 14 calendar day window for a complete patio build with at least one add-on feature. That might sound like a lot, but the majority of those days involve genuine physical work that pays off every time you walk out onto a patio you built yourself. The planning you do now is what keeps that timeline from doubling. Once you have your material list, site measurements, and schedule in hand, you are ready to start. If you are worried the timeline will get away from you, that is also where it helps to review who to hire to build a patio versus trying to do every phase yourself. If you want to go deeper on any part of this, the guides on what materials you actually need and how hard patio building really is at different skill levels are worth reading before you finalize your plan. If you are ready to start, this guide on how to build a hardscape patio walks through the core steps from layout to finishing paver patio. If you are still figuring out what do i need to build a patio, this material guide will help you choose the right supplies for your exact size and surface what materials you actually need.
FAQ
Can I finish laying pavers one weekend and still use the patio the same week?
Yes, the calendar time for pavers is often shorter only if you can keep the base and sand bed stable. If you have to rework drainage, add fill, or delay after rain, the “ready-to-use” time can stretch by several days even when the paving crew finishes quickly.
Does concrete curing time fully control how long my patio stays unusable?
Concrete timing changes if you use a vapor barrier and how your slab is cured. If you see pooling water, damp ground, or improper base compaction, curing alone will not fix future cracking, so expect extra base or prep time if the subgrade looks questionable.
What are the most common “hidden” reasons a patio takes longer than planned?
Permits are only one cause of delay. Common time gaps come from inspection scheduling (for footings on concrete), specialty deliveries arriving after you have your base excavated, and waiting for dry weather during screeding and leveling sand placement.
What’s the most common mistake that makes pavers sink or shift later?
For pavers, the biggest mistake is rushing the final compaction pass after bedding and joint sand. Skipping it or compacting too soon can leave the surface uneven, which then requires lifting and resetting blocks.
If I pour concrete in cool weather, what part of the schedule usually gets extended?
For concrete, cold weather protection is not just about avoiding freezing the day you pour. You may need to keep the slab covered and maintain temperature through the early curing period, and that can push your usable timeline out even if the pour itself goes smoothly.
How does building next to an existing slab or walkway change the timeline?
If your patio ties into an existing walkway or driveway, plan for extra time to match grades and transitions. You may need saw cuts, removal of old material, and extra base work at the junction to prevent a visible lip or uneven settlement.
Do the square-foot estimates still hold true for patios under 200 sq ft?
Yes, setup and material handling can be a larger share of the time than many DIYers expect. For small patios, layout, cutting, edging, and hauling can take most of a day, so “per square foot” estimates often undercount total calendar days.
Should I schedule the pour and paver work on weekdays or weekends for speed?
Generally, weekends take longer because you spend more time waiting on deliveries, coordinating helpers, and working around shorter effective daylight. If you start mid-week, you can keep weather-sensitive phases from landing on your only free weekend.
What happens if it rains during the leveling sand or bedding sand phase?
If rain hits right before paving, you can often stop and recover by letting the base dry and then rechecking elevation. If rain washes out leveled bedding sand or muddies the sub-base, you may need to reset layers, which is usually a full-day reset rather than a quick fix.
How do I define “done” when estimating, especially for concrete vs pavers?
It depends on how far “complete” is. You might stop major work (paver laying) earlier, but before you call it done you still need base finishing, final compaction, joint sand set, and any sealing or curing steps for concrete.
What if my patio site slopes or has drainage that already runs across the area?
If you have a slope, water movement matters more than the patio size. Expect extra time for verifying drainage direction, adjusting base thickness, and adding solutions like additional gravel underdrain or proper grading, which typically adds days beyond simple leveling.
Does adding lighting, outlets, or a grill-ready area change the timeline?
If you plan to include electrical, lighting, or a power outlet for a grill, count extra time for trenching, conduit placement, and coordinating with local electrical rules. Even if the patio shell is quick, wiring tasks can add a separate mini schedule.