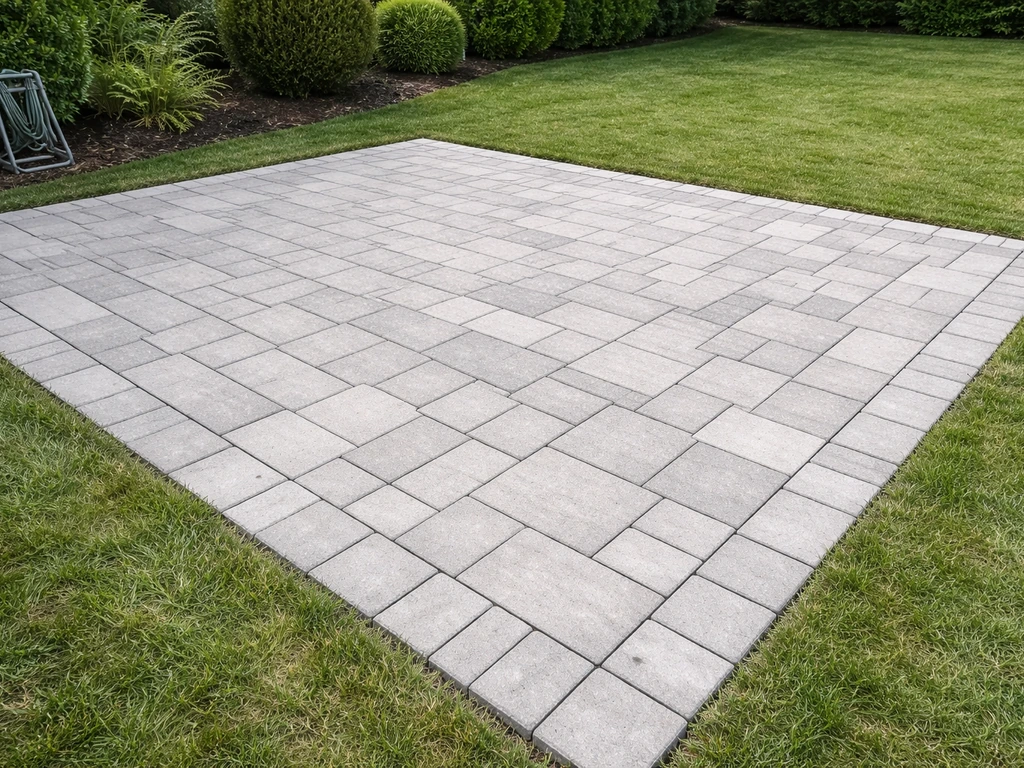
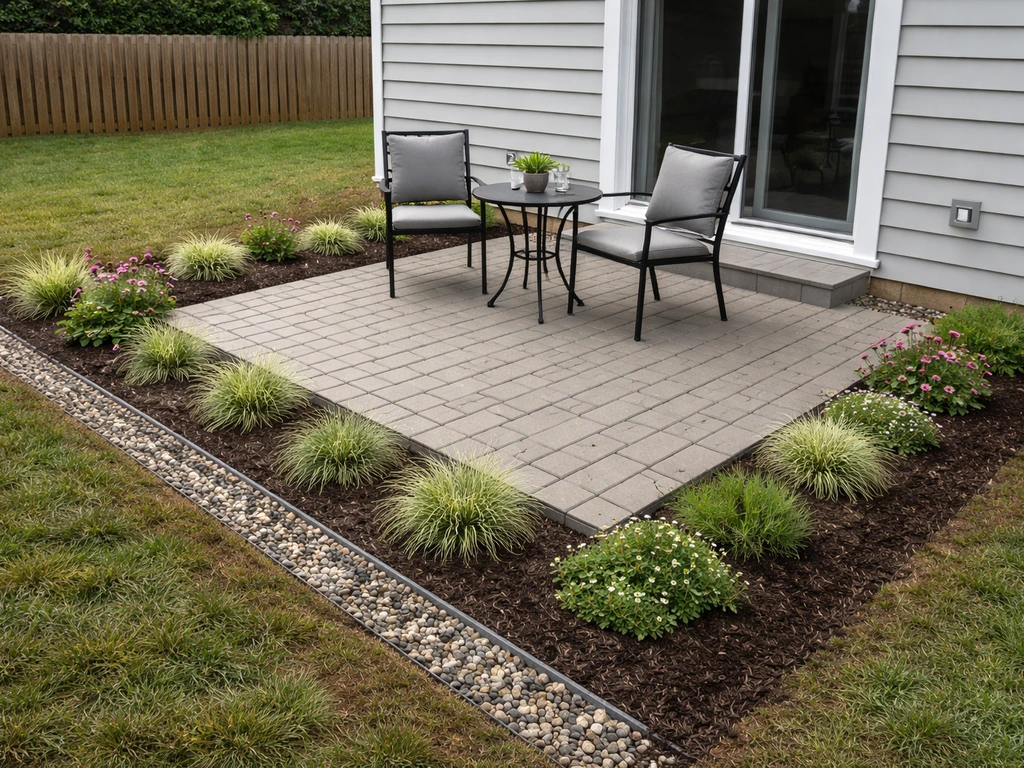
To build a patio you need a clear plan, the right materials for your chosen surface (pavers, concrete, flagstone, gravel, or wood), basic hand and power tools, a properly prepared base, and an understanding of your local permit requirements. The exact list shifts depending on which type of patio you build, but every project shares the same core needs: a graded, compacted subbase, drainage that moves water away from your house, and a surface material laid to manufacturer or code specs. This guide walks you through all of it, from the first sketch to the last finishing touch.
What Do I Need to Build a Patio: DIY Checklist, Tools & Costs

Nolan Carver
26 Jul 2026
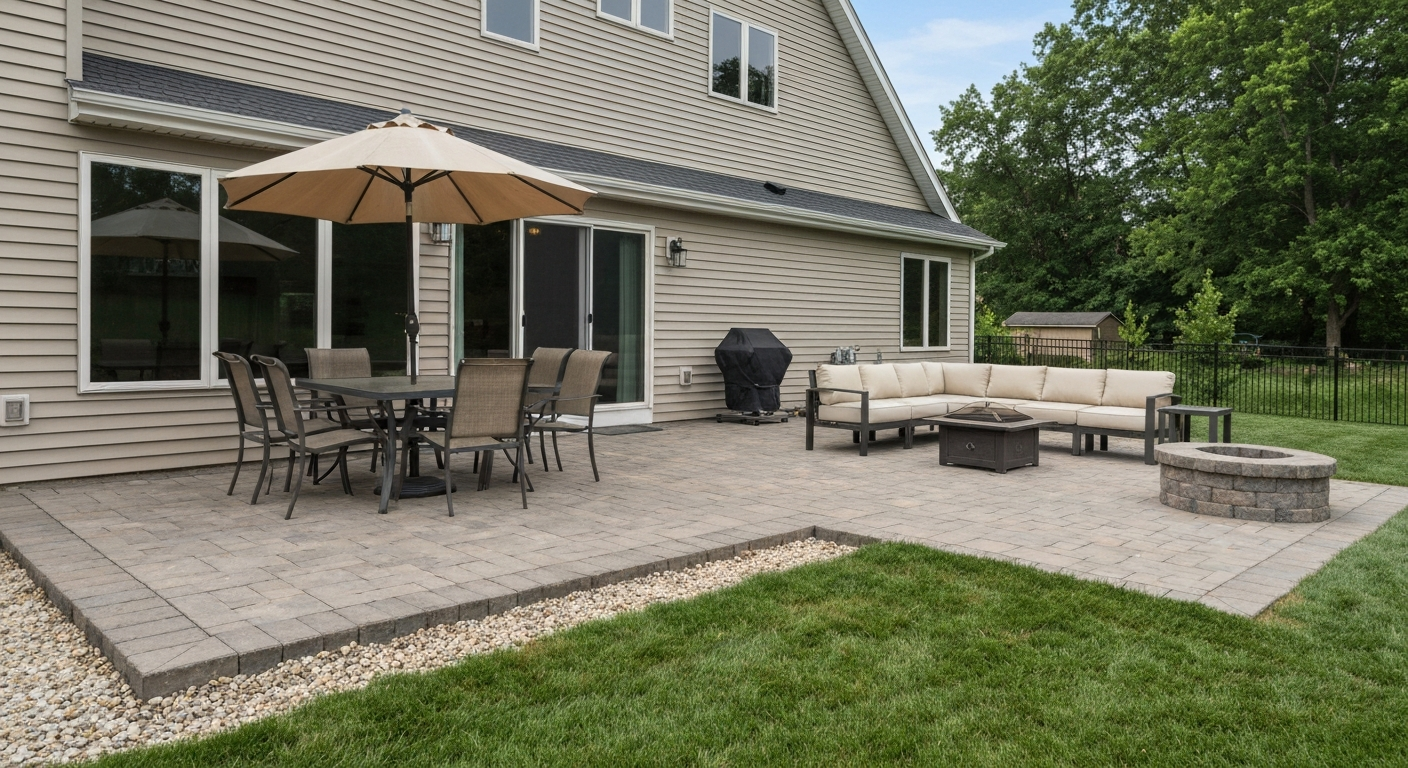
Quick planning checklist before you buy a single thing
Rushing to the hardware store is the most common first mistake. Spend 30 minutes with this checklist first and you will avoid expensive do-overs.
- Goal: What will you use it for? Dining, lounging, entertaining, grilling, a fire pit? Your answer determines size, shape, and surface material.
- Size: A comfortable outdoor dining set needs roughly 12x12 ft (144 sq ft) minimum. A lounge area with a sofa and chairs comfortably fits in 16x16 ft. Sketch it out and mark the footprint in your yard with spray paint or stakes before committing.
- Location: Sun exposure, proximity to the house, view lines, and distance from property lines all matter. South-facing spots get more heat in summer; a shaded north-facing spot may stay damp.
- Budget: Set a hard number before you pick materials. Concrete slabs run roughly $6–$15 per sq ft DIY; pavers run $8–$20+ per sq ft in materials alone depending on the type.
- Timeline: A simple 12x12 gravel or paver patio can be done in a weekend. A poured concrete slab needs 28 days to fully cure before heavy use. Plan accordingly.
- Permits: Most on-grade patios do not need a permit, but attached structures, elevated patios, electrical, or any covered roof almost always do. Check with your local building department before digging.
Define your purpose, layout, and style
The best patio is the one that matches how you actually live outdoors. Before picking pavers or pouring concrete, answer a few honest questions: Will you be eating out there regularly? Do you need a clear path from a door to a garden? Are kids and dogs going to be running across it daily? Function drives layout, and layout drives material choice.
Common patio uses and suggested layouts
| Use | Recommended Minimum Size | Shape That Works Well | Notes |
|---|---|---|---|
| Outdoor dining | 12x14 ft | Rectangle | Needs room to pull chairs out; allow 3 ft clearance around table |
| Lounge/seating area | 14x16 ft | Square or L-shape | Plan for sectional sofa + side tables + traffic path |
| Grilling zone | 8x10 ft | Rectangle off kitchen door | Keep grill 10 ft from structure per most fire codes |
| Fire pit area | 16x16 ft | Circle or square | Fire pit center should be 10–15 ft from any structure |
| Pathway/connector | 3–4 ft wide | Linear or curved | Stepping stones or poured path; edge restraints matter here |
| Multi-zone combo | 20x24 ft+ | L-shape or two connected zones | Use level changes or material shifts to define zones |
For most homes, a simple rectangle attached to the back door is the most practical starting point. If your yard has a slope or an interesting view, consider orienting the patio toward it even if that means it is not directly off a door. A short connecting path solves that problem cheaply.
Site assessment and permit checklist
Walk your site carefully before touching a shovel. Soil type, slope, drainage patterns, and underground utilities all affect how you build and how long your patio lasts. Skipping this step is the number one reason DIY patios crack, settle, or flood.
On-site checks to run before you dig
- Soil type: Clay soil drains poorly and shifts seasonally. Sandy or loamy soil drains better and compacts more predictably. The USDA NRCS Web Soil Survey (free online) gives you site-specific soil mapping and bearing capacity data for your exact address.
- Slope and drainage: Water must drain away from your house. You need a minimum 1/8 to 1/4 inch drop per foot (roughly 1–2% slope) across the patio surface. Watch where water pools during a rainstorm before you finalize your layout.
- Frost depth: In cold climates, footings and edge restraints may need to go below the local frost line. IRC Table R403.1 and your local building department will tell you the required depth. In Atlanta it may be 12 inches; in Minneapolis it can be 42 inches or more.
- Underground utilities: Call 811 (USA) before any digging. Gas, electric, water, and sewer lines can be shallower than you expect. This is not optional.
- Setbacks: Most municipalities require structures to sit a minimum distance (often 5–10 ft) from property lines, easements, and sometimes septic systems. An on-grade patio usually has more flexibility than a raised structure, but confirm with your local building department.
- Tree roots: Large roots within the patio footprint will keep growing and will heave your surface within a few years. Either relocate the patio or factor in a gravel or flagstone surface that can flex.
Do you need a permit?
Most on-grade patios and concrete slabs that sit less than 18 inches above grade do not require a building permit. Seattle's SDCI, for example, explicitly lists 'patio and concrete slabs on the ground (on grade)' as work that does not require a permit, provided they are not over a basement or another story. Los Angeles and most other municipalities follow a similar rule. Municipal permit examples: Los Angeles Department of Building and Safety publishes that patio covers, attached covers or covered structures commonly require building permits and plan review, useful example of permit triggers (attached cover, roof, electrical, plumbing or structural attachments will generally require permits) blank" rel="noopener noreferrer">Los Angeles Department of Building and Safety (example guidance / permit context) notes patio covers, attached covers or covered structures commonly require building permits and plan review.. However, a permit is almost always required if your project involves any of the following:
- An attached patio cover, pergola with a roof, or enclosed structure
- Electrical work (lighting circuits, outlets, hot tub wiring)
- Plumbing (outdoor kitchen, gas lines to a fire pit or grill)
- Any patio more than 18 inches above grade (treated as a deck structurally)
- Ledger attachment to the house (requires IRC R507 compliance)
- Retaining walls over a certain height (commonly 4 ft, varies by jurisdiction)
When in doubt, call or visit your local building department. It takes 10 minutes and can save you from having to tear out work later. Unpermitted structures can also cause problems when you sell.
Materials overview: which surface is right for your project?
There is no single best patio material. The right choice depends on your budget, your climate, how much maintenance you want to do, and the look you are going for. Here is how the main options stack up.
| Material | Approx. DIY Material Cost (per sq ft) | Durability | DIY Difficulty | Maintenance | Best For |
|---|---|---|---|---|---|
| Concrete slab | $2–$6 | Excellent (30+ years) | Moderate | Low (seal every 2–3 yrs) | Large flat areas, budget-conscious builds |
| Concrete pavers | $3–$8 | Very good (25+ years) | Moderate | Low (resand joints annually) | Flexible shapes, easy repairs |
| Natural flagstone | $5–$15 | Excellent if set properly | Moderate–Hard | Low–Medium | Organic/natural aesthetics, irregular shapes |
| Brick | $4–$10 | Very good (20–30 years) | Moderate | Low–Medium | Classic/traditional look, cold climates |
| Gravel/decomposed granite | $1–$3 | Fair (needs topping up) | Easy | Medium (weed control, raking) | Budget builds, informal areas, good drainage |
| Wood (pressure-treated) | $5–$12 | Good (15–25 years w/ maintenance) | Moderate | High (stain/seal annually) | Raised platforms, uneven terrain |
| Composite decking | $8–$18 | Excellent (25–30 years) | Moderate | Very low | Raised patios, low-maintenance preference |
If you are building your first patio and want the best balance of cost, durability, and DIY-friendliness, interlocking concrete pavers are hard to beat. They follow ICPI installation standards (4–6 inches of compacted aggregate base, 1 inch of ASTM No. 8 bedding sand, and edge restraints), they are forgiving of small mistakes, and individual units can be replaced if one cracks. A poured concrete slab costs less in materials but requires more skill to finish well. Gravel and decomposed granite are the easiest and cheapest entry point but need regular refreshing.
Complete tools and materials lists
Below are itemized lists organized by project type. Most of the tools can be rented if you do not already own them. Renting a plate compactor for a weekend typically runs $60–$100, which is far cheaper than buying one for a single project.
Universal tools every patio project needs
- Tape measure (25 ft minimum)
- String line and stakes (for layout and grade)
- Line level or laser level
- Marking paint or chalk
- Spade and flat-blade shovel
- Wheelbarrow
- Plate compactor (rent one; do not skip this)
- Hand tamper (for tight corners)
- Long straightedge or screed board (2x4 or aluminum screed)
- Rubber mallet
- Work gloves, safety glasses, knee pads
- Utility knife
- Landscape fabric (optional, for weed suppression under gravel)
Additional tools and materials for a paver patio
- Paver splitter or angle grinder with diamond blade (for cuts)
- Polymeric jointing sand
- Plastic or aluminum edge restraints with spikes
- Dense-graded aggregate (crushed stone, Class II base): 4–6 in. compacted depth for pedestrian patios
- ASTM No. 8 coarse bedding sand: 1 in. uncompacted depth
- Concrete pavers (order 5–10% extra for cuts and breakage)
- Screed pipes (1-inch diameter PVC or conduit works well for setting sand depth)
Additional tools and materials for a concrete slab
- 2x4 or 2x6 lumber for forms (enough to frame the perimeter)
- Form stakes and duplex nails
- 6x6 W1.4xW1.4 welded wire mesh or #3 rebar on 18-inch grid (for crack control)
- Rebar chairs or wire mesh supports (to hold reinforcement mid-slab)
- Concrete (order ready-mix for slabs over 1 cubic yard; rent a mixer or use bags for small pours)
- Bull float (for large slabs)
- Magnesium hand float and steel finishing trowel
- Groover/jointing tool (for control joints every 8–10 ft on a 4-inch slab)
- Concrete sealer (apply after 28-day cure)
- Curing compound or plastic sheeting (to retain moisture during cure)
- Concrete vibrator (optional but helpful for large pours)
- Safety: rubber boots, concrete-rated gloves, eye protection (fresh concrete is caustic)
Additional tools and materials for a raised wood or composite patio
- Post-hole digger or rented auger
- Concrete tube forms (Sonotube) and pre-mixed concrete for footings
- Pressure-treated 4x4 or 6x6 posts
- Pressure-treated 2x8 or 2x10 joists and beams (or composite framing where specified)
- Decking boards (pressure-treated, cedar, or composite)
- Structural joist hangers and post bases (galvanized or stainless)
- Structural screws or hidden fasteners (for composite)
- Circular saw, miter saw, drill/driver
- Carpenter's square and level
Budget, time, and difficulty: what to realistically expect
One of the biggest frustrations I hear from DIYers is that a project took three times as long or cost twice as much as they expected. The table below uses honest, current numbers. If you have never done this before, use the higher end of the time ranges.
| Patio Type | Size Example | Approx. DIY Material Cost | Approx. Installed Pro Cost | Typical DIY Time | Skill Level |
|---|---|---|---|---|---|
| Gravel/decomposed granite | 12x16 ft (192 sq ft) | $200–$500 | $800–$1,500 | 1 day | Beginner |
| Concrete paver (on-grade) | 12x16 ft | $600–$1,500 | $2,000–$5,000 | 2–3 days | Beginner–Intermediate |
| Poured concrete slab | 12x16 ft | $400–$900 (materials) | $1,500–$4,000 | 2 days pour + 28 days cure | Intermediate |
| Natural flagstone (dry-set) | 12x16 ft | $900–$2,500 | $3,000–$6,000 | 2–4 days | Intermediate |
| Brick patio | 12x16 ft | $700–$1,800 | $2,500–$5,500 | 3–4 days | Intermediate |
| Raised wood/composite deck | 12x16 ft | $1,500–$4,000 | $5,000–$12,000+ | 3–5 days | Intermediate–Advanced |
| Large multi-zone combo | 400+ sq ft | $3,000–$10,000+ | $12,000–$30,000+ | 1–3 weekends | Advanced |
Time estimates assume a helper for most tasks. Solo builds add 30–50% more time. The concrete slab timeline is unique because the two-day pour window is followed by a mandatory 28-day curing period. You can walk on it lightly after 24–48 hours, but do not put furniture on it or drive over it for at least a week, and do not expect full strength for 28 days. If you are weighing whether to DIY or hire out, the difficulty and timeline comparisons covered in the related guides on this site can help you make that call confidently. For a detailed breakdown of timelines by material and project size, see our guide on how long does it take to build a patio.
Foundation, grading, and drainage: the part that makes or breaks your patio
I cannot stress this enough: a beautiful surface on a bad base will fail. Cracked slabs, sunken pavers, and pooling water are almost always a base and drainage problem, not a surface problem. Getting this right is the most important technical part of the whole project.
Excavation and subbase depth
For a standard on-grade paver patio, excavate to a total depth of about 8–10 inches below your finished surface height. That breaks down as: 4–6 inches of compacted crushed aggregate base (ICPI recommends the higher end for residential pedestrian use), 1 inch of uncompacted bedding sand, and 2–3 inches for the paver itself. For a concrete slab, you need 4 inches of compacted subbase plus a 4-inch slab minimum (PCA guidelines for residential flatwork), so plan on excavating roughly 8 inches. Remove all sod, organic material, and soft spots. Organic material left in the subgrade will decompose and cause settlement.
Compaction: do not skip it
Compact your subgrade soil first, then compact your aggregate base in lifts no thicker than 4 inches. The target is approximately 95% of standard Proctor density (ASTM D698), which is the industry standard for structural fills. In practice, this means 3–4 passes with a plate compactor over each 4-inch lift. A reversible plate compactor works best for dense-graded aggregate. Do not try to compact 8 inches at once; it will look compacted on top but stay loose underneath. Rent the compactor. A hand tamper is only acceptable for tight edges and small areas.
Slope and surface drainage
Every patio surface needs to drain. ACI 302.1R and standard flatwork practice call for a minimum 1/8 to 1/4 inch drop per foot (1–2% slope) away from any structure. On a 12-foot-wide patio running away from the house, that means the far edge should be at least 1.5 to 3 inches lower than the house edge. Set your string lines to this slope before you place a single stone or pour any concrete. Getting the slope wrong is one of the hardest things to fix after the fact.
When water still pools: drainage solutions
If your yard slopes toward the house, surface slope alone will not solve your drainage problem. Here are the solutions in order of complexity and cost:
- Channel drain (trench drain): Install a linear drain at the low edge of the patio that directs water to a pop-up emitter or dry well. Easiest add-on for concrete slabs. Cost: $50–$200 in materials.
- Permeable jointing: For paver patios, use permeable jointing sand and a gravel base to let water pass through the surface. Works well in moderate rainfall areas.
- French drain: Dig a trench 12–18 inches deep along the patio perimeter, line it with filter fabric, fill with washed gravel, and run a 4-inch perforated pipe to daylight or a dry well. Effective for high water tables and heavy clay soils. Cost: $200–$600 DIY depending on length.
- Swale: Grade the surrounding lawn to direct water around the patio rather than across it. Free if you are already renting equipment.
Cold-climate frost considerations
In climates where the ground freezes, frost heave is a real threat. IRC R403.1 requires footings to be placed below the local frost depth, which varies from a few inches in the Deep South to 48 inches or more in northern states. Federal Register discussion referencing IRC frost footing tables documents that state/jurisdiction frost‑line and county‑level footing depth compilations are available from adopted IRC tables and locality‑specific maps. For on-grade patios, the best defense against heave is a well-drained aggregate base (water that cannot freeze cannot expand), which is another reason to never skip proper compaction and drainage. Footings for raised or attached structures must legally extend below the frost line in your jurisdiction, no exceptions.
Step-by-step: how to build a concrete slab patio
A poured concrete slab is one of the most durable and cost-effective patio options when done right. It is also unforgiving of rushing. Follow these steps in order, and you will end up with a slab that lasts decades. Difficulty: intermediate. Time: 2 full days of work plus 28 days of curing.
Step 1: Layout and site prep (Day 1, morning, 2–3 hours)
Mark your patio outline with stakes and string, then use spray paint to mark the dig line. Check for square using the 3-4-5 triangle method: from one corner, measure 3 ft along one string and 4 ft along the other; the diagonal between those two points should be exactly 5 ft if the corner is 90 degrees. Call 811 and confirm no utilities run through the area. Excavate 8 inches below your finished slab height (4 inches subbase plus 4 inches slab). Slope the bottom of the excavation 1/8 to 1/4 inch per foot away from the house. Remove all organic material and soft spots, and fill any soft areas with compacted gravel, not loose soil.
Step 2: Subbase and compaction (Day 1, midday, 2 hours)
Add 4 inches of dense-graded crushed aggregate (road base or Class II base rock) and compact it thoroughly with a plate compactor. Make two passes in perpendicular directions. The base should not shift or kick up when you walk on it. If it does, compact it more. A solid, unmoving base here is what prevents cracks later.
Step 3: Build and set your forms (Day 1, afternoon, 2–3 hours)
Cut 2x4 lumber (for a 3.5-inch slab) or 2x6 (for a 5.5-inch slab) to form the perimeter. Stake them firmly every 2–3 feet so they do not move during the pour. Use a level and string line to confirm your 1/8 to 1/4 inch per foot drainage slope across the form. Double-check your measurements and square one more time. This is your last easy chance to adjust.
Step 4: Reinforcement (Day 1, late afternoon, 1 hour)
For a standard residential patio, lay 6x6 W1.4xW1.4 welded wire mesh across the entire slab, overlapping sheets by at least 6 inches. Place it on rebar chairs or small rocks so it sits in the middle of the slab thickness, not on the ground. Alternatively, use #3 rebar (3/8-inch diameter) on an 18-inch grid for a stronger slab. Reinforcement does not prevent cracking entirely but controls crack width and keeps the slab from shifting if it does crack. Do not leave it sitting on the ground; it needs to be embedded in the concrete, not buried under it.
Step 5: Pour the concrete (Day 2, early morning, 2–4 hours)
Order ready-mix concrete if your slab is larger than about 1 cubic yard (roughly a 6x6x4-inch slab). For larger patios, always use a ready-mix truck. For small patios (under 50 sq ft), you can mix bags, but it is exhausting. Use a minimum 3,000 psi mix for exterior residential flatwork; 4,000 psi is better in freeze-thaw climates. Pour concrete into the form starting at the far end and work back toward the truck or mixer. Use a shovel or concrete vibrator to eliminate air pockets, especially around edges. Do not let concrete sit in the chute or wheelbarrow too long; work quickly but carefully.
Step 6: Screed and initial float (Day 2, during pour)
Drag a straight 2x4 screed board across the top of the forms using a sawing back-and-forth motion to level the surface. Work in sections. Then use a bull float (a large, flat trowel on a long handle) immediately after screeding to smooth the surface and push aggregate slightly below the surface. This step has a narrow window: you need to do it before the bleed water (the shiny water that rises to the surface) evaporates. Do not add water to the surface to make it easier to work; it weakens the top layer permanently.
Step 7: Finish the surface (Day 2, a few hours after pour)
Once the bleed water has evaporated and the surface can support your weight on a knee board without sinking more than about 1/4 inch, it is time to finish. Use a magnesium float for a slightly rough, slip-resistant texture (recommended for exterior patios). A steel trowel produces a smoother, denser finish but can be slippery when wet. For a broom finish (the most popular exterior choice), drag a stiff broom lightly across the surface in one direction after floating. The grooves give excellent traction. Avoid over-finishing; working the surface too long brings excess water and fine particles to the top and weakens the concrete.
Step 8: Cut control joints (Day 2, same day or next morning)
Control joints are intentional weak points that tell the concrete where to crack if it wants to. Without them, cracks appear randomly. Space them no more than 2 to 3 times the slab thickness in feet, so for a 4-inch slab that means joints every 8–12 feet maximum. On a 12x16 ft slab, cut joints roughly every 4 ft in each direction, creating a grid. Use a groover tool while the concrete is still workable, or cut with an angle grinder or saw the next morning. Joints should be at least 1/4 the depth of the slab (1 inch deep for a 4-inch slab).
Step 9: Curing (28 days)
Curing is not optional. Concrete gains strength through a chemical hydration reaction that requires moisture. If it dries out too fast, you get a weak, dusty surface. Immediately after finishing, apply a spray-on curing compound or cover the slab with plastic sheeting weighted at the edges. Keep it moist for at least 7 days. Do not let it freeze in the first 48 hours. Remove the forms after 24–48 hours. Light foot traffic is fine after 24 hours. Furniture can go on after 7 days. Full strength (and a sealer application) should wait until 28 days.
Common pitfalls to avoid
- Adding water to the mix on-site to make it easier to work: reduces strength by 10–20% or more per extra gallon of water
- Pouring on frozen or waterlogged ground: fresh concrete must not freeze in the first 24 hours
- Skipping or misplacing reinforcement: mesh resting on the ground does nothing
- Finishing too early (before bleed water evaporates): traps water in the surface and causes scaling
- Skipping control joints: random cracks within 1–2 years are the predictable result
- Rushing the cure: a slab that dries too fast will dust and surface-scale for its entire life
- Not sloping the form: standing water against your house foundation is a long-term problem
When to call a professional
Most on-grade patios are well within DIY reach, but some situations genuinely call for a licensed contractor or structural engineer. Do not try to DIY the following scenarios: your patio will support a hot tub or spa (point loads require engineered footings), you are attaching a covered roof to the house (ledger connections must meet IRC R507 and almost always require a permit and inspections), your site has significant slopes requiring retaining walls over 4 feet, your soil investigation reveals very soft or expansive clay soils with low bearing capacity, or you are in a high-seismic or extreme frost zone with specific code requirements. In those situations, the cost of a professional is far less than the cost of failure. The related guide on hiring a patio contractor covers how to vet and manage a pro if you go that route. See our guide on who to hire to build a patio for tips on vetting and managing contractors.
A few finishing thoughts
Building a patio yourself is genuinely achievable at almost any skill level if you take it one step at a time and do not rush the foundation work. The most expensive mistakes in patio building all happen underground, before the surface ever goes down. Get the base right, get the drainage right, and the surface material almost takes care of itself. Start with a gravel or simple paver project if this is your first time. Once you have that under your belt, a concrete slab or natural stone project feels far less intimidating. For step-by-step instructions on building stone, paver, and other non-plant elements, see our guide on how to build a hardscape patio. If you’re wondering how hard is it to build a patio, this related guide breaks down typical difficulty by material and experience level. Every patio you build teaches you something the next one benefits from, and that first outdoor space you made with your own hands is deeply satisfying to use.
FAQ
What are the primary building codes and standards I must research to write an accurate DIY patio article?
Prioritize the International Residential Code (IRC) for attachments/structural rules (deck/ledger/footing triggers), ACI 302.1R for concrete slab design and jointing, and local adopted code editions (municipal amendments). These define when engineering is required, frost‑depth/footing rules, slab and attachment prescriptive limits, and safety requirements.
Which industry technical guides give installation best practices for common patio materials?
Use ICPI (Interlocking Concrete Pavement Institute) guides for segmental pavers (base, bedding, edge restraints), ACI and PCA resources for cast concrete slabs (thickness, control joints, curing), and the Natural Stone Institute for stone paving (mortar vs dry set, stone thickness). These provide step‑by‑step, dimensioned recommendations.
What geotechnical and soil information should I gather for site‑specific advice?
Consult the USDA NRCS Web Soil Survey for site soil maps and properties, NRCS National Engineering Handbook for bearing capacity and soil evaluation, and local geotechnical reports or state DOT documents. Include guidance on frost susceptibility, bearing capacity, and when lab/field tests are required.
Which standards cover compaction, subgrade acceptance, and field testing?
Reference Proctor compaction standards (ASTM D698, D1557) and common project acceptance criteria (e.g., ~95% standard Proctor for structural fills). Cite public specifications (UFC/agency specs) and explain field tests (nuclear gauge, plate bearing) and typical contractor/rental equipment used for compaction.
What permit and local‑regulatory research is needed?
Research local building‑department rules and published permit checklists to identify permit triggers: attached/covered patios, elevated/decked structures, electrical/plumbing, and retaining walls. Use municipal examples (e.g., Seattle SDCI, LA DBS) to illustrate common exemptions for on‑grade patios and to show how to look up your jurisdiction’s requirements.
Where do I get authoritative drainage, slope and frost‑protection guidance?
Use ACI 302.1R and PCA for recommended exterior slab slopes (typical 1–2%), IRC/frost tables for footing depths or frost protection methods, and NRCS/engineer references for frost heave mitigation and subgrade drainage. Provide practical slope solutions (surface grading, swales, drain pipes) tied to these sources.