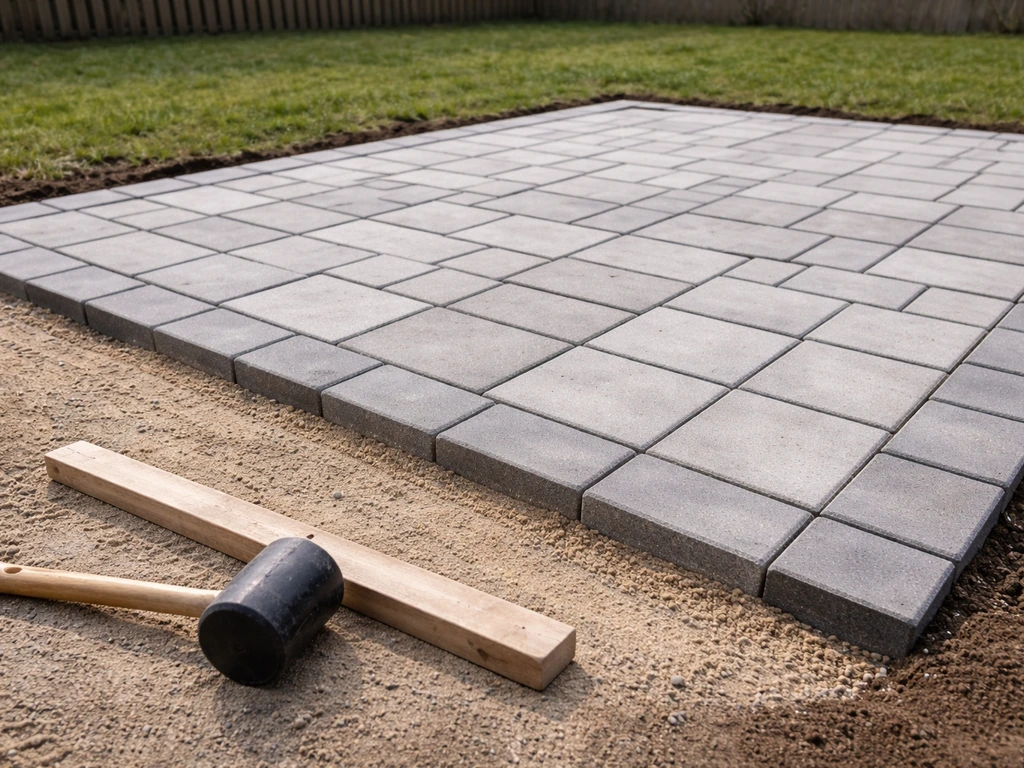
You can build a genuinely nice patio yourself in a single weekend for most standard projects, or across two or three weekends for larger or more complex builds. The key is doing the groundwork right: proper planning, a solid compacted base, the right material for your site, and a little patience on the details. This guide walks you through every stage, from picking your spot and pulling a permit to setting the last paver or finishing the last concrete edge, with real measurements, honest cost ranges, and the troubleshooting tips that save you from the most common failures. For more practical tips for building a patio, see tips for building a patio. For a focused, step-by-step checklist on the best way to build a patio, see resource f933c415-6eb8-432f-84d7-7739a9652730. For a step‑by‑step walkthrough on how to construct a patio, see this detailed guide. For a step-by-step walkthrough on how to build patios, see our detailed patio-building guide.
How to Build a Nice Patio: Complete DIY Guide, Plans & Costs

Who this guide is for and what you'll learn
Whether you've never swung a hand tamper or you've already built a deck and want to try hardscape next, this guide has a place for you. Beginners will find the planning and base-building sections especially useful, since that's where most DIY patios go wrong. If you're more experienced, the material comparison, step-by-step workflows, and specialty add-on sections will help you tackle bigger projects, including raised patios, steps, and integrated fire pits.
By the end, you'll know how to choose a surface material that matches your budget and skill level, how to build a base that won't heave or settle, how to install pavers, pour concrete, lay flagstone, or create a permeable gravel surface, and how to recognize when a job really does need a licensed contractor.
Before you dig: planning and design essentials
Choosing the right site
Start by walking your yard at different times of day. Note where shade falls, where water pools after rain, and how traffic flows between the house and garden. The best patio site is usually within easy reach of a door, on reasonably level ground, and away from areas that collect runoff. Avoid building directly over large tree roots, utility lines, or septic system components. Before any digging, call 811 (USA) to have underground utilities marked. It's free and required by law.
Sizing and layout
A comfortable outdoor dining space needs at least 12 by 12 feet (144 sq ft), and 16 by 16 feet gives you room to push chairs back without stepping off the edge. For a lounging area with chairs and a small table, 10 by 12 feet is workable. Sketch your layout on graph paper with a scale of 1 inch equals 2 feet, mark the house footprint, doors, and any slopes, then use stakes and string lines to preview the shape in the yard before you commit. Rectangles and squares waste the fewest cuts on pavers or concrete forms. Curves and organic shapes look great but add time and material waste.
Permits and local codes
Many homeowners skip this step and regret it. Permit requirements for patios vary by municipality, but a good rule of thumb is: if it's attached to the house, elevated above grade, or over a certain square footage (often 200 sq ft), you probably need a permit. Your local building department is the only reliable source here. Annapolis, MD's building department, for example, requires deck framing inspections when any support member is less than 48 inches from grade and references the IRC; see Deck Construction Requirements | Annapolis, MD. The International Residential Code (IRC) gives building officials authority to set inspection requirements, and local jurisdictions adopt the IRC with their own amendments. Some areas now allow virtual or remote inspections for exterior work, which can save you a trip. Check before you dig, not after.
Grading, slope, and drainage planning
This is the most important detail that most beginners underestimate. Any patio surface adjacent to the house must slope away from the foundation at a minimum of 1/4 inch per foot, which is roughly a 2% slope. That means a 10-foot-deep patio drops 2.5 inches from the house edge to the outer edge. Building America (PNNL) guidance specifically recommends this 0.25 in/ft slope to prevent water pooling against foundations. Industry hardscape guidance accepts a range of 1/8 to 1/4 inch per foot, but I always use 1/4 inch as my minimum because it gives more margin for material settling over time.
Before you plan drainage in detail, check your soil type. The USDA NRCS Web Soil Survey gives county-level soil maps with hydraulic conductivity, texture, and shrink/swell data, all of which affect how you build your base and whether you need added drainage measures. Clay-heavy soils drain slowly and can cause frost heaving. Sandy soils drain well but can shift. Knowing what you're building on before you buy materials saves a lot of rework.
Frost depth is another planning variable that changes your base design. In cold climates, the base needs to sit at or below the local frost line to prevent heaving. Historic frost-depth contour maps can overestimate current depths according to recent ASCE research, so check with your local building department or a local landscaper for current expectations in your specific area rather than relying on old national charts. Recent ASCE research, Assessment of US Frost Depth Maps Considering Climate Change Effects (ASCE Geo-Congress 2023 paper), notes that legacy frost-depth contour maps can overestimate current depths and recommends using site-specific calculations or local engineering guidance when frost action is critical to base or footing design.
Picking the right material: pavers, concrete, flagstone, gravel, or timber
The material you choose affects everything: cost, difficulty, how long the project takes, how it looks in 10 years, and how much maintenance you sign up for. Here's an honest breakdown of each option.
| Material | Cost per sq ft (installed DIY) | Difficulty | Durability | Drainage | Aesthetics | Best For |
|---|---|---|---|---|---|---|
| Concrete pavers | $8–$18 | Moderate | Excellent (50+ yrs with base) | Poor to moderate (joints help) | Versatile, many styles | Most DIYers; best balance of effort and result |
| Poured concrete | $5–$12 | Moderate-hard | Excellent (25–40 yrs) | Poor unless sloped well | Clean, modern | Large flat areas; budget-conscious builds |
| Flagstone (dry-laid) | $12–$25 | Moderate | Good (30+ yrs) | Good (natural gaps) | Natural, premium look | Cottage, garden, or rustic styles |
| Flagstone (mortared) | $15–$30 | Hard | Excellent (30+ yrs) | Moderate | Very refined, permanent | Experienced DIYers; high-end finishes |
| Gravel/decomposed granite | $2–$6 | Easy | Fair (needs topping up) | Excellent | Casual, natural | Budget builds, large areas, permeable needs |
| Timber/composite decking | $15–$35 | Moderate-hard | Good (20–25 yrs composite) | Good (gaps between boards) | Warm, natural | Sloped yards, elevated builds, deck-adjacent areas |
My recommendation for first-time builders: concrete pavers on a compacted aggregate base. They're forgiving because individual units can be lifted and reset if the base settles unevenly. They come in consistent thicknesses, which makes screeding a sand bed straightforward, and they don't require the mixing, forming, or curing expertise that poured concrete demands. For budget-conscious builds over a large area, gravel or decomposed granite is the easiest path and can look excellent with the right edging and plantings.
How to build a patio base: the step everyone tries to skip
A patio is only as good as what's underneath it. Poor bases cause settlement, cracking, heaving, and drainage problems. Take your time here. The good news is that base-building follows the same process regardless of whether you're laying pavers, flagstone, or preparing for a concrete pour. For step-by-step instructions on how to make a base for a patio, see the detailed base-building section.
Step-by-step base construction
- Mark your patio perimeter with stakes and string lines. Add 6 inches on each side beyond your finished patio edge to give room for edge restraints and compaction.
- Excavate to the correct depth. For pavers: 8–10 inches total (6 in. compacted aggregate base + 1–1.5 in. bedding sand + paver thickness, typically 2.375 in.). For a concrete slab: 8–10 inches total (4 in. gravel sub-base + 4 in. concrete). Mark your dig depth on your stakes.
- Check and prepare the subgrade. Remove all organic material, roots, and loose fill. The subgrade (native soil at the bottom of your excavation) must be firm. In clay soils, you may need to over-excavate and bring in compactable fill.
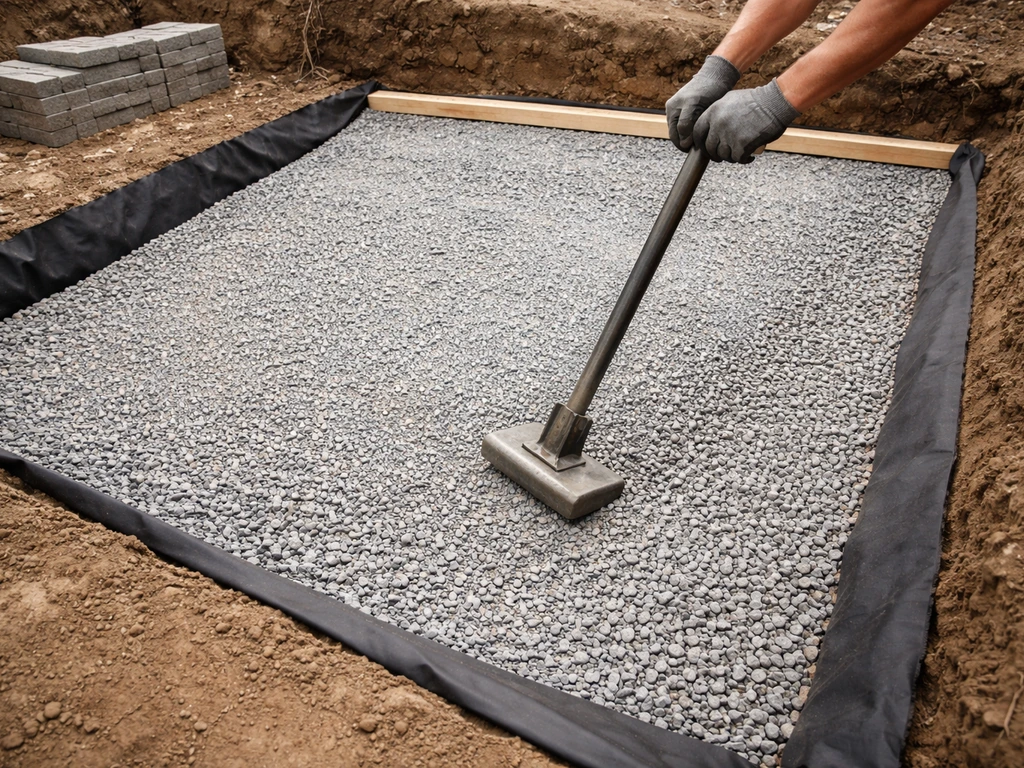
- Add a geotextile fabric (woven landscape fabric, not the cheap non-woven type) directly on the subgrade before adding aggregate. This keeps your aggregate and soil from mixing over time.
- Add crushed aggregate base material in 3-inch lifts. Use Class II base aggregate, crushed limestone, or 3/4-inch crushed stone (not rounded river gravel, which doesn't compact well). Aim for a compacted base of 4–6 inches: 4 inches minimum for good soils, 6 inches for clay or poor-drainage soils.
- Compact each lift with a plate compactor (rent one for about $60–$80 per day). Make two passes in perpendicular directions. Industry standards call for compaction to 95% of maximum dry density (per ASTM D1557). You can't achieve this with a hand tamper over a full patio; plate compaction is essential.
- Check your slope throughout. Set your string lines at the finished surface height and work backward from there. The base surface should maintain the same 1/4 inch per foot drainage slope as your finished patio.
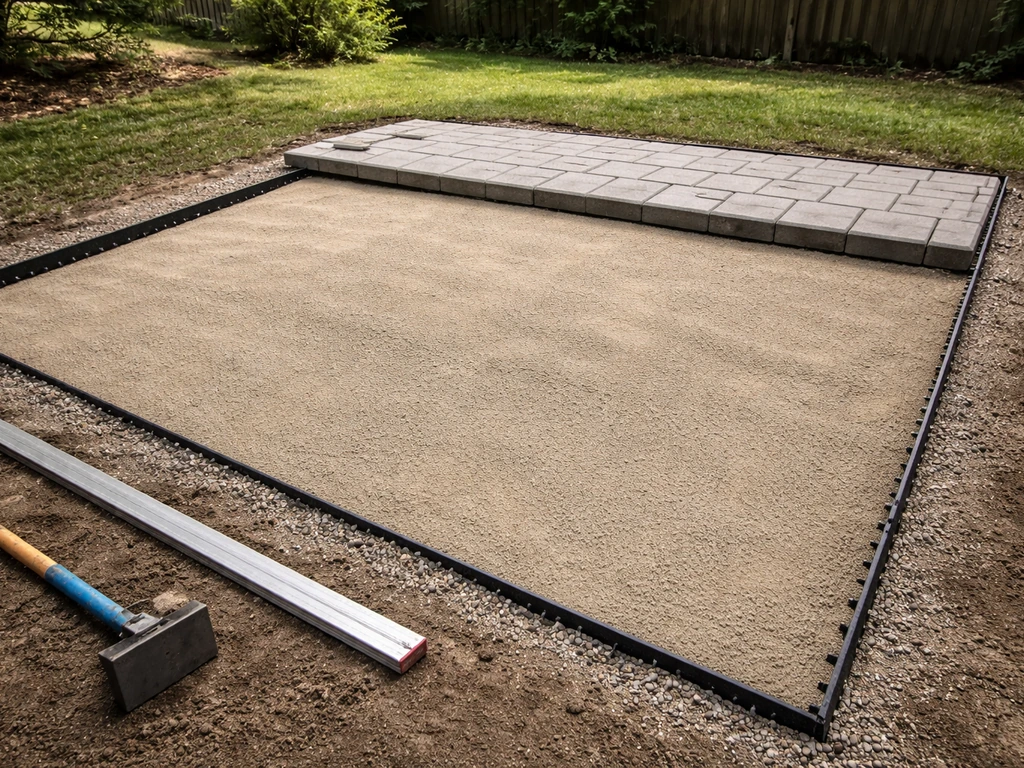
- Install edge restraints before adding your bedding layer. Plastic or metal paver edging should be spiked into the compacted base (not just into loose soil), with spikes every 12 inches on straight runs and every 6 inches on curves.
- For pavers: add 1–1.5 inches of coarse concrete sand (ASTM C33) as a bedding layer and screed it flat and to your slope using two screed rails (sections of conduit work well). Do not compact the bedding sand. For concrete: skip the sand layer; your gravel sub-base is your finished base.
- Do a final check with a long level and tape measure before placing any surface material. Fixing base issues after you've laid pavers is slow, frustrating work.
Base-building checklist
- Utilities marked and cleared
- Excavation depth correct for chosen surface material
- All organic material removed from subgrade
- Geotextile fabric installed on subgrade
- Aggregate added in 3-inch lifts and compacted with plate compactor
- Total compacted base depth: 4 in. (good soils) or 6 in. (clay/poor drainage)
- Slope verified at 1/4 in. per foot away from house throughout
- Edge restraints installed and spiked into compacted base
- Bedding sand (pavers only) screeded to correct depth without compaction
- Final slope and level check complete before surface installation
Installing a paver patio: full workflow
Concrete pavers are forgiving, rewarding, and produce a finished result that looks genuinely professional. The base work above is 80% of the job. Once your sand bed is screeded and sloped, paver installation itself moves quickly.
Laying pavers step by step
- Start from a fixed straight edge, usually the house wall or a chalk line parallel to it. Place pavers from the corner outward, working in a diagonal direction to avoid disturbing laid rows.
- Choose your pattern before you start. Running bond (brick-style offset) is the easiest and looks clean. Herringbone at 45 or 90 degrees is more complex to cut but adds dimensional stability. Basketweave is simple but requires matching paver sizes. Avoid aligning joints from one row to the next for more than two rows, as it weakens the surface.
- Use a rubber mallet and a straightedge or string line to keep rows aligned. Check every 4–5 rows that your alignment hasn't drifted.
- Cut pavers with a wet saw (rental: $60–$100/day) for clean edges. A chisel and hammer can work for rough cuts in casual designs but won't give you tight joints on precision work.
- Once all pavers are placed, spread polymeric sand over the surface and sweep it into the joints. Make sure the paver surface is completely dry, rain is not forecast for at least 24 hours, and joints are packed full before activating. Polymeric sand must be installed on dry surfaces with dry pavers per manufacturer guidance (such as Gator/Alliance Gator), as installation on damp surfaces is a leading cause of failure.
- Compact the finished paver surface with a plate compactor fitted with a rubber pad protector. Make two passes over the entire surface to seat the pavers into the sand bed.
- Apply a second round of polymeric sand if joints are not fully filled after compaction, then activate per manufacturer instructions (typically a light misting).
- Remove screed rails and fill any voids they left with compacted sand before placing border pavers or final edging.
Common paver mistakes to avoid
- Walking on or disturbing the screeded sand bed before laying pavers (use a kneeling board)
- Starting without checking the sand bed slope at multiple points
- Using landscape fabric under the bedding sand (it interferes with compaction and can lift)
- Using rounded pea gravel instead of crushed aggregate for the base
- Applying polymeric sand on a damp surface or before rain clears the forecast
- Skipping the edge restraints and relying on soil alone to hold the border pavers
- Forgetting to account for paver thickness when calculating excavation depth
Paver installation checklist
- Base fully compacted and screeded sand bed in place
- Starting corner and layout lines established
- Pattern chosen and dry-laid test run done on a small section
- Pavers laid from fixed edge outward with consistent joint gaps
- All cuts made, perimeter pavers placed
- Polymeric sand applied on dry surface with dry weather in forecast
- Surface compacted with rubber-pad plate compactor
- Second sand application and activation complete
- Edge restraints fully spiked and flush with paver face
Pouring a concrete patio: formwork to cured slab
A concrete patio is one of the most durable surfaces you can build, and it's perfectly achievable as a DIY project if you plan carefully and don't try to tackle more area than you can pour and finish before the concrete begins to set. For most DIYers working alone or with one helper, 200 square feet is a reasonable single-pour limit. Larger slabs can be divided by control joints into multiple sections.
Concrete patio step by step
- Build your forms from 2x4 lumber staked into the ground at your finished slab height. Set forms to your drainage slope (1/4 in. per foot away from house). Double-check all corners with a square.
- Install a 4-inch compacted gravel sub-base as described in the base section above. The gravel acts as a drainage layer and reduces cracking from sub-grade movement.
- Lay welded wire mesh (6x6-W1.4xW1.4, also called 6x6 10/10 WWF) or #3 rebar on a 18-inch grid over the gravel. Use plastic chairs or dobies to hold reinforcement approximately 2 inches from the bottom of the slab, keeping it centered in the pour. Minimum slab thickness is 4 inches for residential pedestrian use, per ACI guidance and USACE design standards.
- Order ready-mix concrete at a minimum 3,000 psi (28-day compressive strength). Many codes, including the Florida Building Code, specify 3,000 psi minimum for slabs on grade. If you're mixing bags, use a 3,500–4,000 psi mix for a little extra margin.
- Pour concrete starting at the far end and work toward the truck or mixer. Use a screed board across the top of your forms to level the surface, then float it with a bull float. Work quickly but steadily.
- After the bleed water disappears from the surface (usually 30–60 minutes depending on temperature), finish the surface with a magnesium or wood float for a slightly textured (non-slip) finish. A steel trowel gives a smoother finish but is more slippery when wet.
- Cut control joints within 24 hours using a circular saw with a diamond blade, or tool them in while concrete is still workable. ACI/ACI 302 guidance recommends control joint spacing of about 2.5 times the slab thickness in feet, so for a 4-inch slab, joints every 8–10 feet in each direction. Joints should be 1/4 the slab depth deep, or about 1 inch for a 4-inch slab.
- Begin curing immediately. Cover with plastic sheeting or apply a liquid curing compound. Keep the slab moist for at least 7 days. Do not allow foot traffic for 24–48 hours or vehicle traffic for at least 7 days.
- Remove forms after 24–48 hours. Backfill the form edges carefully so water doesn't pool against the slab perimeter.
Concrete patio checklist
- Forms built, leveled, and sloped at 1/4 in. per ft
- 4-inch compacted gravel sub-base in place
- Welded wire mesh or rebar on chairs, elevated 2 inches from bottom
- Concrete ordered at minimum 3,000 psi
- Pour completed and surface bull-floated promptly
- Final surface texture applied after bleed water clears
- Control joints cut or tooled at 8–10 ft intervals
- Slab covered for curing immediately after finishing
- Moist curing maintained for minimum 7 days
- Forms removed and edges backfilled
Laying flagstone and natural stone: dry-laid vs. mortared
Flagstone has a warmth and naturalness that manufactured pavers and concrete can't match. It also forgives irregular shapes and minor base imperfections better than most materials. The two main methods are dry-laid (set on compacted aggregate and sand with no mortar) and mortared (set on a concrete slab or mortar bed with mortar-filled joints). Dry-laid is the better choice for most DIYers; mortared is more permanent but harder to correct once set.
Dry-laid flagstone step by step
- Build the same compacted aggregate base described earlier (4–6 inches, depending on soil type). For flagstone, a slightly coarser bedding layer works well: 1–2 inches of coarse sand or decomposed granite.
- Lay out all your stones on the prepared base in a dry run before committing. Arrange them for good fit, keeping joints between 1/2 inch and 2 inches. Flagstone installation is like a puzzle, and the dry run saves significant frustration.
- Set each stone into the sand bed, pressing and twisting it slightly to seat it. Check each stone with a level and tap down high spots or add a little sand under low spots. Every stone should feel solid with no rocking. A rocking stone will crack under foot traffic.
- Keep a consistent slope matching your overall drainage plan (1/4 in. per foot away from the house).
- Once all stones are placed, fill joints with polymeric sand, decomposed granite, or even low-growing ground cover plants like creeping thyme. Polymeric sand is the most weed-resistant option.
- If using mortar for joints only (not a full mortar bed), mix to a stiff consistency and pack joints, then clean off residue with a damp sponge before it dries.
Mortared flagstone step by step
- Pour or locate an existing concrete slab as your base. The slab must be structurally sound with no significant cracking or movement.
- Dampen the slab surface before setting stones. Mix mortar to a peanut-butter consistency (typically a 1:3 cement-to-sand ratio or use a pre-mixed Type S mortar).
- Apply a mortar bed approximately 1 inch (25 mm) thick to the slab and set each stone, pressing firmly and checking for level and slope.
- Allow the mortar bed to cure for 24 hours before grouting joints.
- Fill joints with a grout or mortar mix, packing fully and striking flush or slightly recessed. Clean stone surfaces promptly with a damp sponge before mortar stains.
Flagstone installation checklist
- Compacted aggregate base installed and sloped correctly
- Bedding layer (sand or DG) screeded to depth
- Full dry-run layout completed before setting stones
- Each stone seated firmly with no rocking
- Consistent drainage slope maintained throughout
- Joints filled and compacted (polymeric sand, DG, or mortar)
- For mortared: base slab sound and mortar bed at correct thickness
- Surface cleaned of mortar or sand haze before it cures
Building a gravel or decomposed granite patio
Gravel and decomposed granite patios are the most budget-friendly option and are genuinely excellent for large casual spaces, garden areas, or as a first patio that you might upgrade later. They're also the most permeable surface option, which is a real advantage in areas with drainage restrictions or high-traffic runoff. The tradeoff is maintenance: gravel migrates, and decomposed granite can compact into ruts over time. Both need occasional topping up.
Gravel patio step by step
- Excavate 4–6 inches deep within your patio perimeter. Gravel patios don't need as deep a base as paver or concrete work, but you still need to remove organic material and establish a firm subgrade.
- Install a woven geotextile fabric (not the thin non-woven fabric sold as 'weed barrier'). The woven type allows drainage while blocking vegetation from below. Overlap seams by at least 12 inches.
- Add 3–4 inches of compacted crushed aggregate (road base or 3/4-inch minus crushed stone). Compact with a plate compactor.
- Install edge restraints: heavy-gauge steel or aluminum edging is best for gravel patios because it contains the material firmly. Timber edging (4x4 or railroad ties) works well and looks natural but needs to be pressure-treated or naturally rot-resistant.
- Add the top dressing: 1.5–2 inches of 3/8-inch pea gravel, pea stone, or decomposed granite. Decomposed granite compacts to a firmer surface than loose gravel and is better for patio furniture. Rake level.
- Optional but highly recommended: install a grid system (plastic honeycomb grid or gravel stabilization panels) under the top layer. This dramatically reduces migration and rutting, especially under furniture. Fill grid cells with gravel or DG.
- For decomposed granite specifically: compact the DG layer with a plate compactor or hand roller. Dampen slightly before compacting. Stabilized DG (pre-mixed with a binder) is available and produces a firmer, more durable surface.
- Rake and check the slope: maintain your 1/4 inch per foot drainage slope. Gravel surfaces are naturally permeable, so this is more about directing water away from the house than preventing pooling on the surface itself.
Drainage note for permeable surfaces
Gravel and DG patios handle rainfall through infiltration, which is their main advantage over concrete and pavers. However, the area around and beneath the patio still needs to drain. If your soil is predominantly clay and doesn't absorb water quickly, a permeable surface on top doesn't help much because the water will sit on the subgrade. In clay sites, slope the subgrade before installing base material, or add a perforated drain pipe running from the low edge of the patio to a suitable outlet.
Maintenance for gravel and DG patios
- Rake the surface back into shape after heavy rain or wind shifts material
- Top up with fresh gravel or DG every 1–2 years as material compacts or migrates
- Remove any weeds that push through promptly before they establish
- Check edge restraints annually for movement or gaps and re-stake as needed
- For stabilized DG: re-apply binder if surface begins to erode after several years
- Inspect geotextile at edges each spring; tuck back any exposed fabric before weeds root in it
Gravel patio checklist
- Excavation to 4–6 inches with all organics removed
- Woven geotextile installed over subgrade
- 3–4 inches compacted crushed aggregate base in place
- Edge restraints installed and anchored
- Optional gravel grid installed if using furniture or high-traffic area
- Top dressing (gravel or DG) applied and raked to 1.5–2 inches
- Drainage slope verified at 1/4 in. per foot from house
- Surface compacted (especially for DG)
Specialty add-ons: raised patios, steps, retaining walls, and fire pits
Once you've mastered the base build and a surface installation, adding features to your patio is mostly about applying the same principles at a different scale. Raised patios on sloped yards require retaining walls to hold the fill, and those walls need their own footings and drainage. Steps connecting levels should match your patio surface material for a cohesive look and use the same compacted base and edge restraint approach.
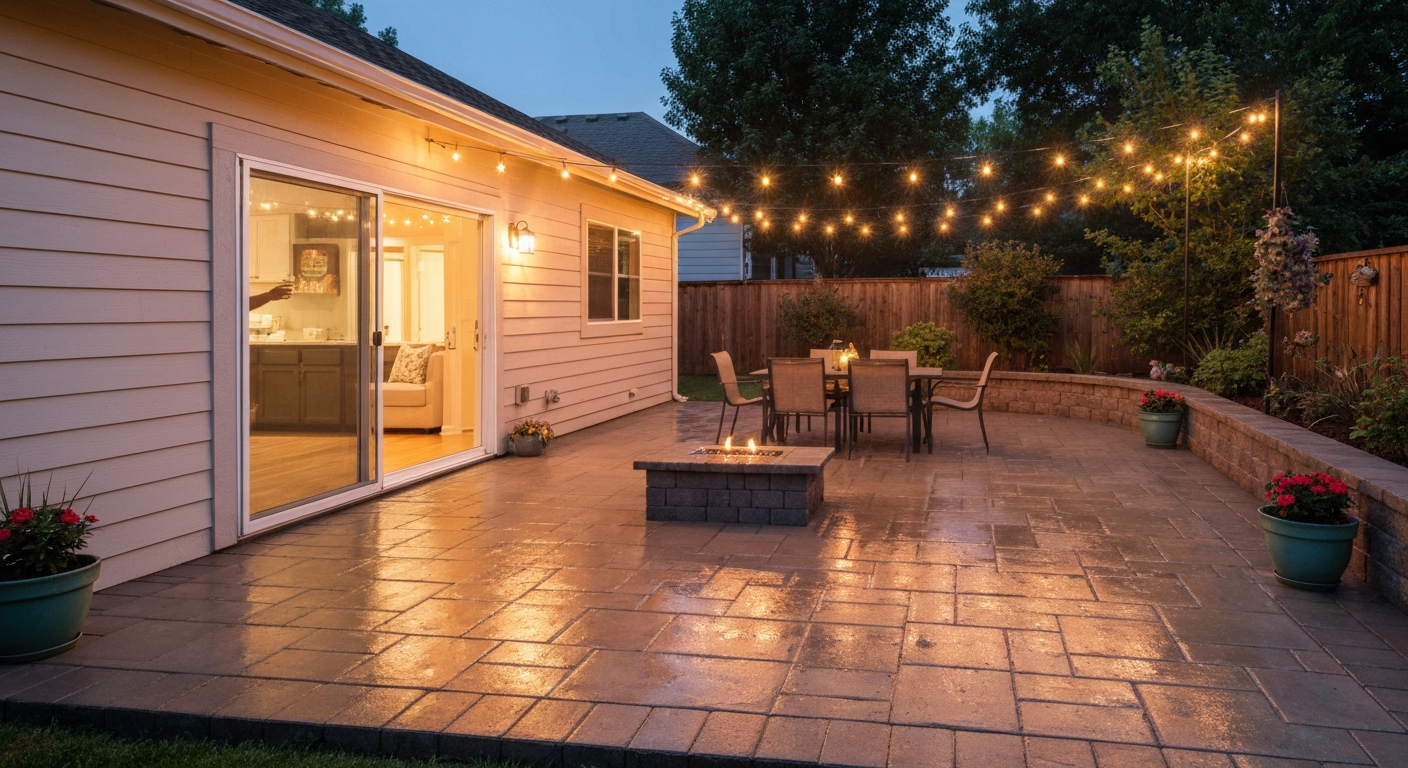
For a fire pit, the most important considerations are material (concrete pavers rated for heat or natural stone, never hollow concrete blocks that can explode when heated), local fire codes (setback requirements from structures and property lines vary widely), and a stable level base. A simple DIY fire pit ring made from retaining wall blocks set in a circle on a compacted gravel base is a beginner-friendly weekend project. Gas fire pit inserts require permits and licensed gas connections in most jurisdictions.
Tools you'll actually need
| Tool | Used For | Buy or Rent | Approximate Cost |
|---|---|---|---|
| Plate compactor | Compacting base and paver surface | Rent | $60–$90/day |
| Wet saw (paver/tile saw) | Cutting pavers, flagstone, concrete masonry | Rent | $60–$100/day |
| Bull float | Smoothing concrete after pour | Buy or borrow | $30–$60 |
| Screed board (2x4 or aluminum) | Leveling sand bedding layer | Buy | $5–$25 |
| Hand tamper | Compacting edges and small areas | Buy | $25–$50 |
| Rubber mallet | Setting pavers and flagstone | Buy | $15–$30 |
| 4-foot level | Checking slope and level throughout | Buy | $25–$60 |
| Mason's string line and stakes | Layout and alignment | Buy | $10–$20 |
| Wheelbarrow | Moving aggregate, sand, concrete | Buy or borrow | $80–$180 |
| Safety glasses, gloves, knee pads | Personal protection | Buy | $30–$60 total |
The plate compactor and wet saw are the two items worth renting rather than buying unless you plan multiple projects. Everything else is worth owning since it'll be useful across other yard and home projects.
Budget and time: what to expect
Material costs vary significantly by region, but here are realistic per-square-foot DIY ranges for a 200-square-foot patio in 2026. These include materials but not tool rentals (add roughly $150–$250 for a weekend rental package including plate compactor and wet saw).
| Surface Type | Est. Material Cost (200 sq ft) | Time (1–2 people) | Skill Level |
|---|---|---|---|
| Gravel/decomposed granite | $400–$1,200 | 1 day | Beginner |
| Poured concrete (bagged mix) | $800–$1,800 | 1–2 days | Intermediate |
| Poured concrete (ready-mix) | $600–$1,400 | 1 day pour + cure time | Intermediate |
| Concrete pavers | $1,600–$3,600 | 2–3 days | Intermediate |
| Dry-laid flagstone | $2,400–$5,000 | 2–3 days | Intermediate |
| Mortared flagstone | $3,000–$6,000+ | 3–4 days | Advanced |
Build in a 10–15% material buffer for cuts, breakage, and miscalculations. Order slightly more sand and aggregate than your calculations suggest because it's much easier to have a small surplus than to make an emergency supply run mid-project.
Troubleshooting: the most common patio problems and how to fix them
Standing water and poor drainage
This is the number-one complaint after a patio is finished. If water pools, the slope is either wrong or insufficient. For pavers, you can lift the low section, add sand beneath, and relay. For concrete, the options are harder: either saw-cut a channel drain, resurface with a sloped overlay, or live with it. Prevention is far easier than repair, which is why checking slope at every stage of the base build is so important.
Settled or sunken pavers
Settlement usually means the base wasn't compacted thoroughly, or organic material was left in the subgrade and has since decomposed. The fix is to pull up the affected pavers, excavate, add fresh compacted aggregate, re-screed the sand bed, and relay. It's tedious but totally doable. This is the single biggest argument for taking your time with compaction the first time around.
Weeds in joints
Weeds in paver joints come from windblown seeds settling into the joints, not from below if your geotextile was properly installed. Polymeric sand dramatically reduces this. If you used regular jointing sand and weeds are an ongoing problem, pull them, blow out the joints with a leaf blower, and replace with polymeric sand. Apply it dry and follow the manufacturer's curing steps exactly.
Cracking concrete
Cracks in concrete patios are almost always either caused by inadequate control joints (cracking follows stress lines predictably), insufficient base compaction, or drying too fast (usually in hot, windy conditions). Hairline cracks in concrete that stay narrow and don't move vertically are mostly cosmetic and can be filled with a concrete crack filler. Wide cracks or vertical displacement (one side higher than the other) indicate a base failure and need more serious intervention.
Finishing, sealing, and maintenance
Sealing is optional but recommended for most patio surfaces. For concrete, a penetrating sealer applied 28 days after the pour protects against staining and extends surface life. Pavers can be sealed with a wet-look or natural-look sealer after the polymeric sand has fully cured (usually 30 days). Flagstone benefits from a penetrating stone sealer, especially if it's a softer stone like sandstone or limestone.
Annual maintenance for any patio type: sweep off debris before it traps moisture, check for joint erosion or weed growth in early spring, and inspect the perimeter edge restraints for movement. Address small issues promptly because small settlement becomes large settlement and a small drainage problem becomes water in your basement.
When to hire a professional
Most patio projects are genuinely DIY-able, but a few scenarios call for a licensed contractor. If your site has significant fill soil, a high water table, or requires deep excavation near the house foundation, get a structural or geotechnical opinion before proceeding. Retaining walls over 3–4 feet tall typically require engineered design and permits in most jurisdictions. Any gas utility connection for a fire pit or outdoor kitchen needs a licensed plumber or gas fitter. If your project requires attaching a covered structure to the house, framing and ledger attachment usually require permits and inspections, and an experienced contractor can navigate that process faster than a first-timer.
A good rule: if you're not sure whether the soil or slope is safe for the design you want, a single hour with a local landscape contractor or civil engineer for a site consult ($75–$200) can save you from a much more expensive mistake later. That's not defeat; that's smart building.
FAQ
What primary regulatory and permitting information do I need to include in a comprehensive patio DIY guide?
Explain how to find and interpret local building-permit requirements (setbacks, attachments to house, guard/handrail rules, footing/frost requirements, inspection timing). Cite the local authority having jurisdiction (municipal building department) and the model code authority (IRC Chapter 1) as the baseline. Recommend readers check municipal websites, call plan intake, and quote examples showing where permits are typically required. Reliable sources: municipal building department webpages, ICC/IRC Chapter 1, and ICC guidance on virtual inspections.
Which authoritative technical standards and industry manuals should the guide rely on for structural and material details?
Use model codes and technical standards for concrete and structural guidance (ACI/ACI 302 for slabs, IRC where applicable). Use ICPI and major manufacturer/installer technical guides (Belgard, EP Henry) for interlocking pavers, bedding, edge restraints, and polymeric sand application. Cite ASTM standards and public agency specs (e.g., compaction to 95% of ASTM D1557) for earthwork and compaction requirements.
What site-specific site information should homeowners gather before planning a patio?
Advise collecting property survey/plot plan, grading and drainage patterns, FEMA flood zone status, utilities (call 811), soil type and drainage (use USDA NRCS Web Soil Survey), frost depth for the location (local code/engineering or ASCE guidance), and existing vegetation/tree protection. These items determine base design, drainage needs, and permit triggers.
What are the recommended slope and drainage criteria to prevent water against the house and pooling on the patio?
Recommend a minimum sheet slope away from the house of about 1/4 in per foot (≈2%), with industry acceptable ranges ~1/8"–1/4"/ft (≈1%–2%) depending on context. Reference Building America/PNNL guidance and hardscape industry guidance (ICPI/National Patio Construction Authority) for these recommendations.
How should the guide present excavation, sub-base choices, and compaction requirements?
Provide step-by-step excavation depth calculations that account for compacted sub-base and bedding (examples: 4–6" compacted aggregate base + 1–1.5" bedding for pavers or 4" concrete slab). Specify compacting to typical targets (95% of maximum dry density per ASTM D1557 for pedestrian pavements) and explain when thicker bases are needed (poor soils, heavy loads, freeze‑thaw). Include how to test/verify compaction (proctor references, plate compactor use) and cite public project specs and ASTM guidance.
What thicknesses and base details should the guide recommend for common patio surfaces (pavers, concrete, flagstone, gravel, timber)?
Give typical, source-backed assemblies: - Interlocking pavers: 4–6" compacted aggregate base + 1–1.5" screeded concrete sand bedding + edge restraint (ICPI/manufacturer guides). - Concrete slab-on-grade: minimum 4" slab for pedestrian patios, appropriate reinforcement/control joints and minimum specified compressive strength (ACI/USACE/locally adopted code). - Natural flagstone: compacted aggregate base (4–6") with either dry-set on compacted base and jointing sand or full mortar bed where required (manufacturer/installer guidance). - Gravel: geotextile + compacted granular base as needed, thickness by use/soil. - Timber decks/boardwalk-style patio: design per prescriptive deck guidelines with footings below frost where required. Cite ACI, ICPI, manufacturer installation manuals and public agency guides.