Building a patio base means digging down 6 to 10 inches, compacting the native soil, laying a crushed stone sub-base in 3- to 4-inch lifts (each compacted separately), adding a 1-inch bedding sand layer, grading everything at a 1/4-inch-per-foot slope away from the house, and locking the edges with restraints before a single paver or slab touches the surface. Do that correctly and your patio stays flat and tight for decades. Following the best way to build a patio starts with getting this base and slope right so your surface stays level for years build a patio base. Skip steps or rush compaction and you'll be pulling up pavers in three years.
How to Build a Patio Base Step by Step for Beginners

Nolan Carver
18 Jun 2026
This guide walks through every stage of patio foundation construction from scratch: choosing the right base approach for your soil and finish material, laying out the site, excavating to the right depth, building up and compacting each layer, setting drainage slope, and installing edge restraints. For a complete walkthrough of the full process, see our guide on how to build patios from start to finish. Whether you're placing concrete pavers, natural stone, or precast slabs, the foundation work is essentially the same, and getting it right is 80% of the battle.
Choosing the right patio base type for your project
Before you dig a single shovelful, you need to know what kind of base your project actually needs. The two main variables are your finish material (pavers vs. concrete slabs) and your soil conditions. Most residential DIY patios use one of three base approaches: a compacted crushed stone base for pavers, a compacted gravel base under a poured concrete slab, or a compacted gravel base with a concrete setting bed for large natural stone. The crushed stone plus bedding sand system is by far the most forgiving and DIY-friendly, so that's what most of this guide focuses on, but the excavation and compaction principles carry over to all of them.
Your soil type matters more than most beginners realize. If you have sandy or gravelly native soil (AASHTO soil class A-1 or A-3), water drains through it easily and your compacted base will be very stable. If you're working over clay or silty soil, those soils hold water, expand and contract seasonally, and will undermine your base over time unless you take extra steps.
If you’re wondering about overall surface planning beyond the base, this overlaps with the wider question of how to build a nice patio so the foundation, drainage, and finish all work together. On clay or silty soil, lay a geotextile fabric (selected to AASHTO M-288 standards) directly on the compacted subgrade before placing any stone.
The fabric separates the clay from your crushed stone so the two don't mix and muddy up your base over years of rain and freeze-thaw cycles. This is a recommendation from ICPI (now CMHA) construction specs, and it's one of the most overlooked steps in DIY patio builds.
| Finish Material | Base System | Bedding Layer | Notes |
|---|---|---|---|
| Concrete pavers (interlocking) | Compacted crushed stone | 1 to 1.5 in. bedding sand (not compacted before pavers) | Most DIY-friendly; forgiving of minor imperfections |
| Concrete poured slab | Compacted gravel sub-base | No bedding sand; pour directly on compacted base | Requires forming and concrete work |
| Natural stone / large slabs | Compacted crushed stone | 1 in. coarse sand or stone dust | Heavy stones need very firm, consistent base |
| Flagstone in mortar | Compacted gravel + concrete base | Mortar setting bed | More permanent; harder to repair if it cracks |
Site prep and layout for a patio foundation
Good layout saves you from expensive corrections mid-project. Start by marking out the full patio footprint with stakes and string line. Use a framing square or the 3-4-5 triangle method to confirm your corners are truly square: measure 3 feet along one edge, 4 feet along the adjacent edge, and if the diagonal between those two points is exactly 5 feet, the corner is 90 degrees. Check all four corners if you're doing a rectangle. For organic or curved shapes, use a garden hose or spray paint to mark the outline, then step back and look at it from different angles and from inside the house before you commit.
Before you start digging, call 811 (the US dig-safe hotline) to have underground utilities marked. This is free, takes a day or two, and can save your life. Once the area is cleared, remove any sod, plants, or debris inside your marked footprint. Use a flat spade to cut clean edges along the perimeter string lines. At this stage you're just clearing the surface layer, not excavating to final depth yet.
Set your string lines at the finished patio surface elevation, accounting for the slope you'll build in (more on that below). String lines at this stage act as your reference for depth throughout the dig and base-building process. A line level or a laser level clipped to the string makes it easy to keep everything referenced to the same datum as you work.
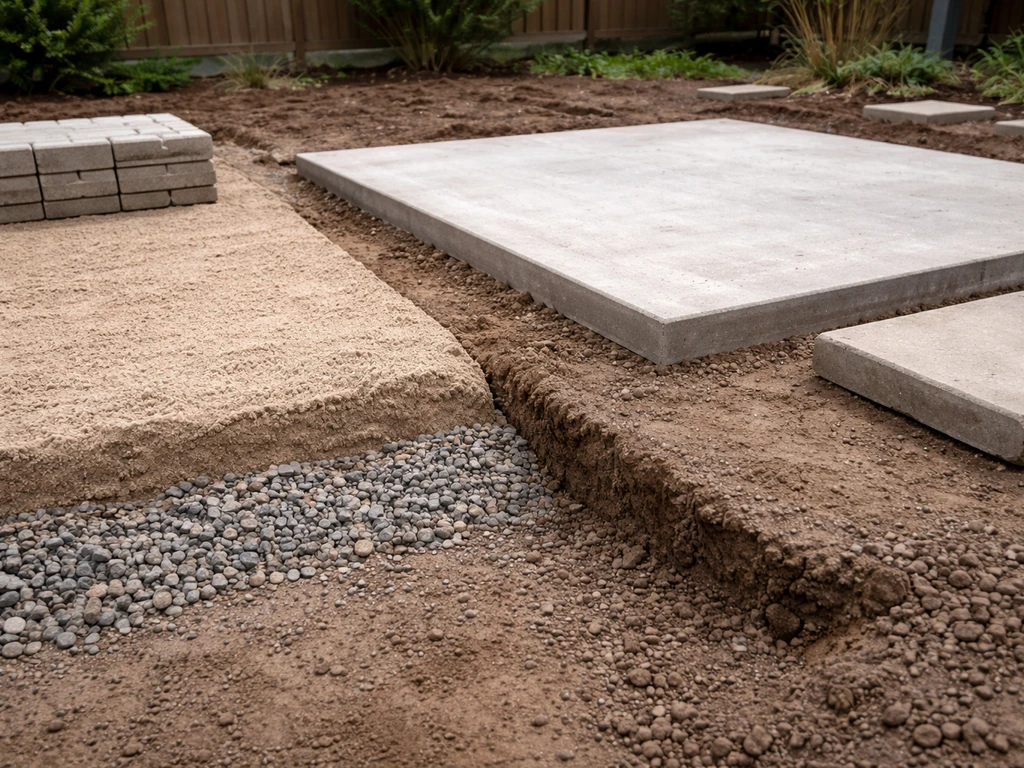
Excavation depth and sub-base/base layer thickness
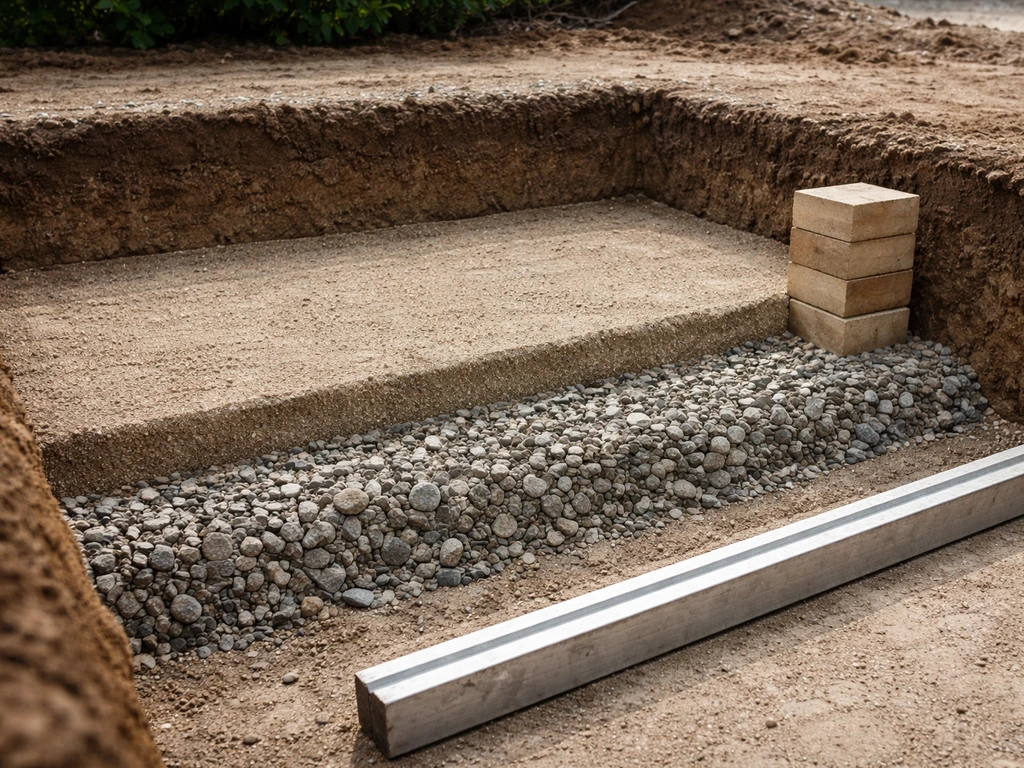
Here's where a lot of DIYers underestimate the work. You need to excavate deep enough to fit every layer of the system plus a little buffer. For a standard residential paver patio on stable soil, that means digging down about 7 to 9 inches below your intended finished surface. If you’re aiming for the right finished thickness and layers, follow this step-by-step approach for how to make a base for a patio paver patio. On clay soil or in freeze-thaw climates, go to 10 to 12 inches to get below the frost action zone and provide enough aggregate thickness to handle the movement.
| Layer | Thickness | Material |
|---|---|---|
| Paver or slab | ~2.375 in. (standard 60mm paver) to 3+ in. | Concrete paver, brick, or natural stone |
| Bedding sand | 1 to 1.5 in. (screeded, NOT compacted) | Coarse concrete sand |
| Compacted aggregate base | 4 to 6 in. (stable soil) / 6 to 8 in. (clay/frost zone) | Crushed stone, ASTM #57 or equivalent |
| Compacted subgrade (native soil) | Top 6 in. compacted to 95% Proctor density | Native soil |
| Geotextile (clay/silt soils) | N/A (fabric, not a thickness layer) | AASHTO M-288 compliant geotextile |
Add those numbers up for your project. If you're using standard 60mm (2.375 in.) pavers with a 1-inch sand bed and a 6-inch compacted base, you're looking at roughly 9.5 inches of total build-up. That means excavating about 9.5 inches below your finished patio surface grade. Always dig a touch deeper than you think you need, because compaction will settle your layers slightly and it's easier to add a little base material than to re-excavate.
After excavating, use a hand tamper or plate compactor to compact the exposed native soil subgrade. The target is at least 95% of standard Proctor density (ASTM D698), which in plain English means the soil should feel firm and not spring underfoot. Any soft spots, organic material (roots, old mulch), or debris should be dug out and replaced with compacted fill. Running your plate compactor over soft spots won't fix them; you have to remove the problem material.
Installing the patio sub-base and base (materials, compaction, grading)
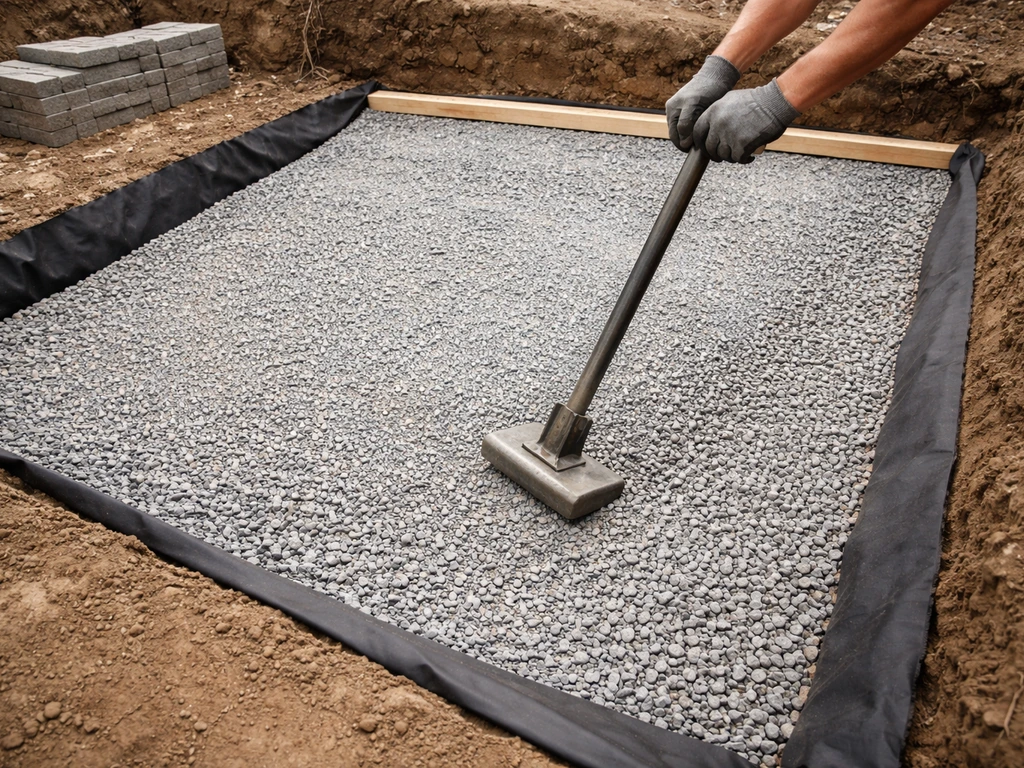
Once your subgrade is compacted and your geotextile fabric is down (if needed), it's time to build up the stone base. Use crushed angular stone, commonly called processed gravel, crusher run, or ASTM #57 stone depending on your region. Avoid round river rock or pea gravel: angular crushed stone locks together under compaction; round stone doesn't and will shift. Ask your supplier specifically for 'paver base material' or 'road base' and they'll know what you need.
The most important rule here: never dump all your stone in at once and compact it in one pass. You have to work in lifts. Each lift should be 3 to 4 inches of loose material, which compacts down to roughly 2.5 to 3.5 inches. FHWA construction guidance recommends lift thicknesses of 6 to 8 inches (loose) for heavy equipment, but for residential plate compactors, stick to 3 to 4 inch loose lifts to ensure the compactor's force reaches the bottom of each layer. Dump the stone, spread it evenly with a rake, then make overlapping passes with your plate compactor in one direction, then make a second set of passes perpendicular to the first.
- Spread the first 3- to 4-inch lift of crushed stone evenly across the excavated area.
- Make 2 to 3 overlapping passes with a plate compactor in one direction across the entire area.
- Make 2 to 3 more passes perpendicular to your first set.
- Check for soft spots and add material to any low points, then re-compact.
- Add the second lift of stone (if your base requires more than one lift) and repeat the compaction process.
- After all lifts are compacted, use a long straightedge or screed board to check that the surface is even and slopes correctly (see the drainage section below).
- Top up any low spots with a small amount of stone and compact again until the surface is consistent.
ICPI/CMHA specs call for the aggregate base to reach at least 98% of standard Proctor density. You won't have a lab on-site, but practically speaking, if you're making 4 or more overlapping compactor passes per lift and the surface no longer visibly moves or deflects under the machine, you're in the right range. A good field check: walk across the compacted base and see if it leaves footprints. A properly compacted base should leave almost none.
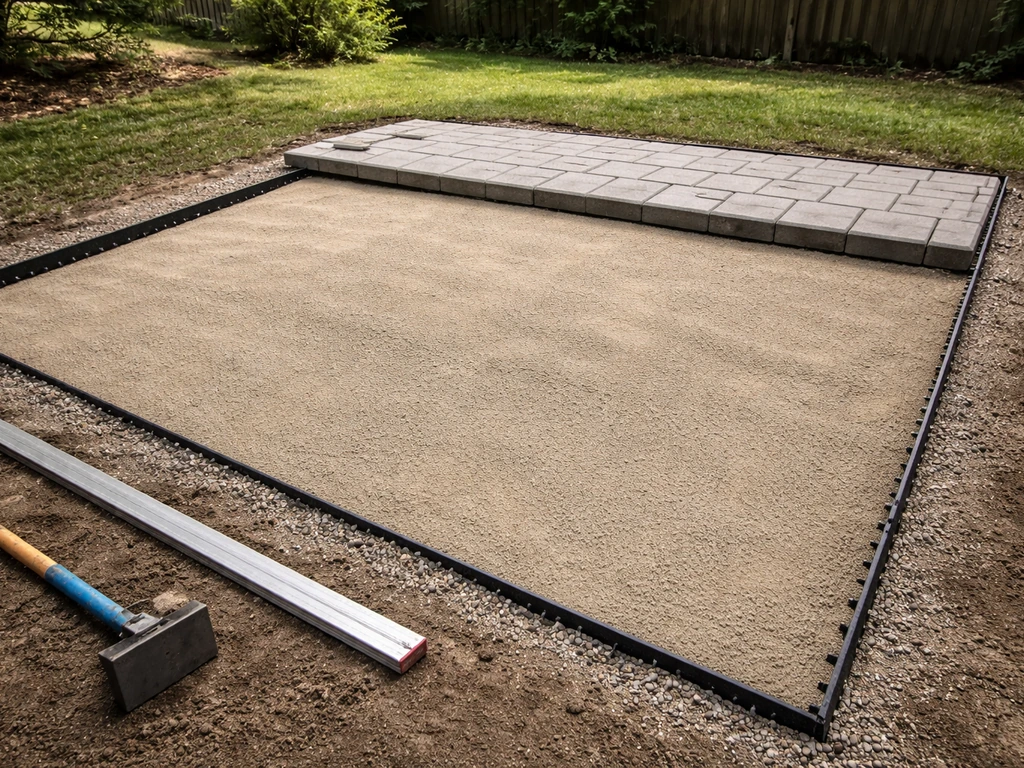
After the base stone is compacted, install your edge restraints before the bedding sand goes down (more on this below). Once restraints are in place, spread your bedding sand layer. Use coarse concrete sand, not fine mason's sand or play sand. Screed it to a consistent 1-inch thickness using two screed rails set at the right height, dragging a straight board across them. Belgard and Western Hardscape Association both note that 3/4 inch to 1.5 inches is the acceptable range, with 1 inch being the standard target. Do not compact the sand after screeding. The pavers themselves will seat it during installation. Compacting it beforehand creates an uneven surface after the pavers go down.
Drainage, slope, and edge restraints for a stable patio base
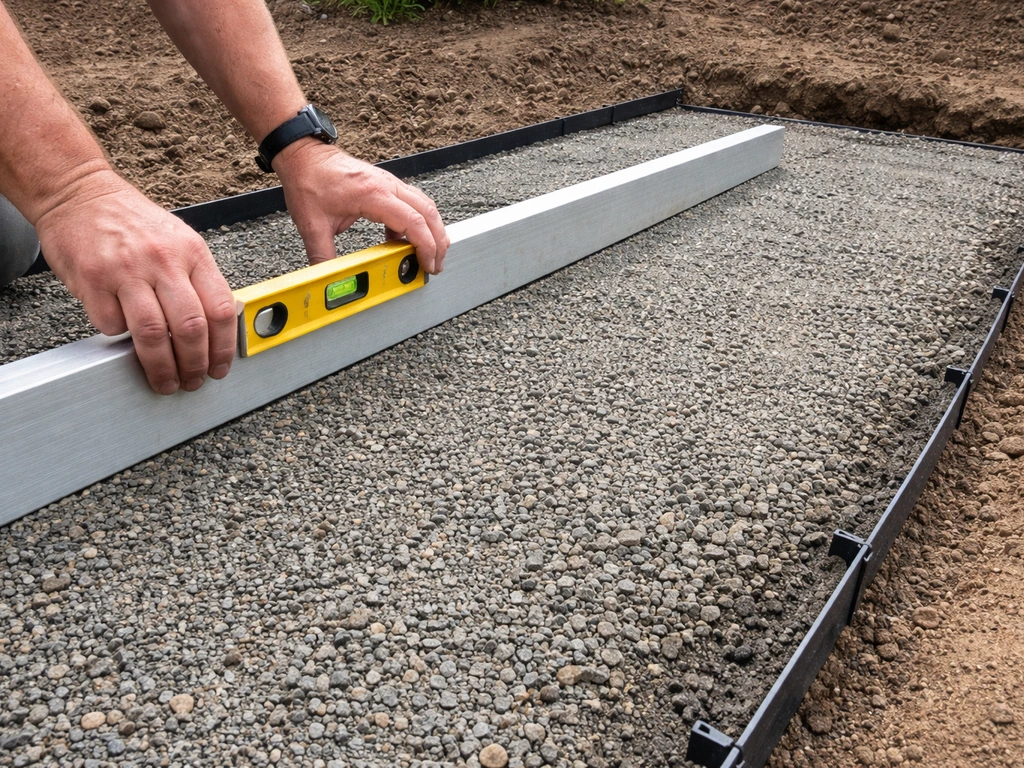
Getting the slope right
A patio that holds water will heave, stain, and eventually fail. You need to build a slope into the base from the very beginning, not try to correct it at the paver surface. The standard benchmark is 1/4 inch of drop per foot of horizontal run, directing water away from the house. So for a patio that's 12 feet deep, the far edge should sit 3 inches lower than the edge against the house.
Building America Solution Center guidance specifically calls for at least 1/4 inch per foot slope for patios, walks, and slabs adjacent to the house. Set this slope in your string lines during layout and maintain it through every layer of your build-up. Use a level with a known offset shim, or a long 4-foot level with a tape reference mark, to check slope regularly as you grade each layer.
If your yard is relatively flat, a 1/4-inch-per-foot slope is subtle enough that it won't be noticeable to the eye once the patio is finished. If your yard already slopes steeply, you may need to address drainage more aggressively with a channel drain or French drain at the patio's low edge. That's a bigger topic, but the key point is: plan for where the water goes before you build, not after.
Edge restraints: don't skip these
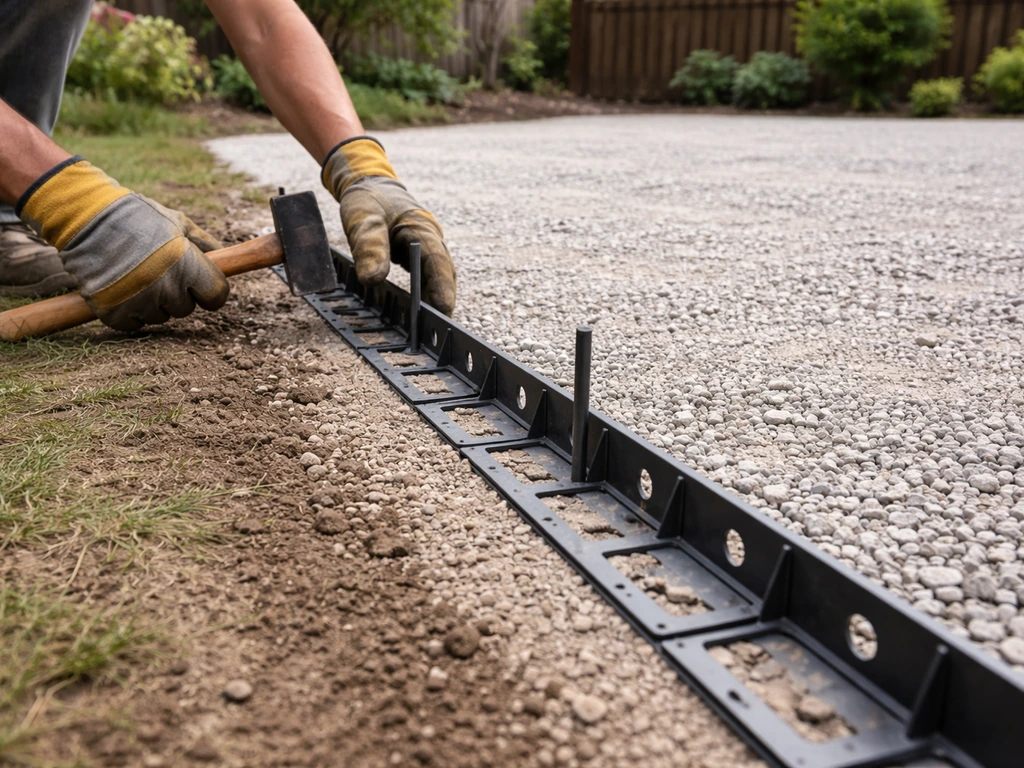
Edge restraints are the plastic or metal channels that get spiked or staked into the base along the perimeter of your patio. Their job is to prevent horizontal movement. Without them, the pavers along your edges will gradually creep outward over time, gaps open up, bedding sand escapes, and the whole perimeter starts to look ragged. The Western Hardscape Association is blunt about this: edge restraints are essential to eliminate horizontal creeping of pavers and loss of bedding sand.
Install edge restraints after your aggregate base is fully compacted but before you spread bedding sand. Spike them into the base with 10- to 12-inch landscape spikes, placing spikes every 12 inches on straight runs and every 6 inches on curves. The restraint should sit tight against the bottom of the future paver surface, so set its height based on your paver thickness plus your 1-inch sand bed. If you're using a geotextile fabric, fold and turn the edges of the fabric up along the outside of the restraint to keep the two materials separated and maintain fabric continuity, as shown in ICPI-53 installation details.
A note on geotextile placement
If you've decided to use geotextile fabric (recommended on clay or silty soils), it goes directly on the compacted subgrade, before any stone. Lay the fabric so it covers the full excavation floor and goes up the sides of the excavation several inches. As you fill in with base stone, the fabric keeps the stone and soil from intermixing. Don't obsess over which side faces up on most fabrics, but do avoid tearing it as you spread stone. Overlap any seams by at least 12 inches. The fabric is inexpensive insurance on problem soils and skipping it on clay is one of the most common reasons DIY paver patios fail within a few years.
Final checks and getting ready to set pavers or slabs
Before your first paver goes down, run through this verification list. You're looking to confirm that everything is right at the base level, because once the pavers are set, fixing a problem means pulling them all back up.
- Slope check: Use your level and a tape or a 4-foot level with shim to verify 1/4-inch-per-foot drop away from the house across every section of the base. Check in multiple directions, especially if your patio has an L-shape or irregular outline.
- Surface consistency: Walk the full compacted base and look for soft spots, high spots, or rocking. Fix high spots by carefully removing a small amount of material; fix low spots by adding stone and re-compacting.
- Edge restraint integrity: Walk the full perimeter and confirm every restraint is fully spiked down with no sections lifting or flexing. Push on them by hand; they should feel immovable.
- Geotextile check: If you used fabric, verify it's not bunched, folded, or exposed above the base surface in a way that could interfere with the sand layer.
- Sand layer readiness: After restraints are confirmed solid, screed your 1-inch bedding sand layer. Do not compact it. Protect the screeded sand from rain until pavers go down.
- Compaction check: As a final sanity check, make one more pass with your plate compactor over the aggregate base before spreading sand. Any remaining soft spots will reveal themselves now.
- Check your measurements: Re-measure the patio footprint one last time. Confirm the area matches your paver layout plan so you're not caught short on materials mid-install.
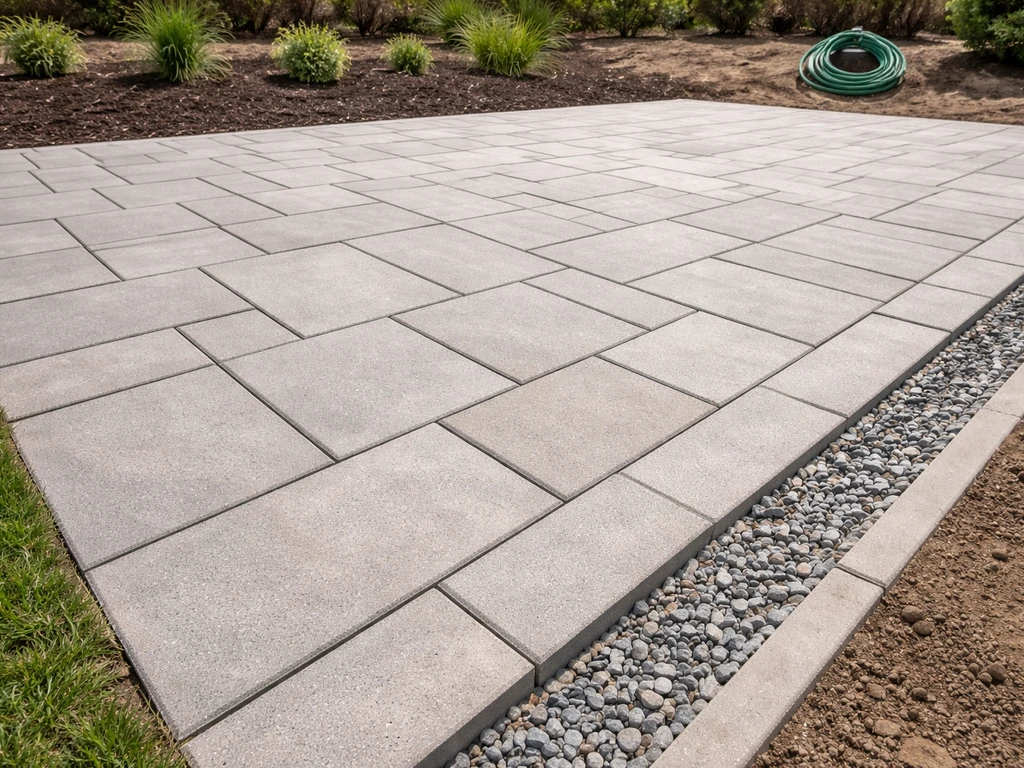
Once you've ticked all those boxes, your patio base is done and you're ready to move to the fun part: setting the pavers or slabs. Start your first paver at the corner or edge that is most visible from the house or yard, work outward in a consistent pattern, and do not disturb the screeded sand as you go. Kneel on a board placed on already-set pavers to keep from scuffing your sand surface as you work.
One last thought: the base work described here applies whether you're building a simple square patio or something more ambitious. If you follow these tips for building a patio, your base and slope will hold up long before the pavers ever see foot traffic base work described here. If you're planning a larger project that involves raised sections, retaining walls, or a fire pit feature, the foundation principles stay the same but the load requirements and drainage planning get more complex. For most standard ground-level patios though, nail these base steps and you've solved the hardest part of the whole build.
FAQ
Can I build a patio base without geotextile fabric if my subgrade is clay?
On clay or silty soils, skipping fabric usually means the fine soil can migrate into the crushed stone and reduce drainage, which leads to soft base spots and movement over freeze-thaw seasons. If you do not use fabric, you must be extra aggressive about removing organic material and keeping the subgrade dry, but for clay, fabric is the safer default. Use fabric laid on the prepared subgrade before any stone, and keep the edges turned up where they meet restraints.
What’s the easiest way to confirm I’m getting the 1/4-inch-per-foot slope at each layer?
Use your string lines as the single reference and check with a level that has a known offset or a laser level tied to a marked datum. Re-check slope after compaction of the subgrade and again after each stone lift, because settling can change the height locally. If you notice low spots after compaction, fix them at the current layer by adding and re-compacting, not later in the sand.
How do I know whether my subgrade compaction is actually good enough?
A visual test like “no more footprints” on the stone is helpful, but subgrade is judged by how the soil behaves before you place aggregate. If you can leave impressions by stepping firmly or the soil feels springy, it’s not tight enough. Remove soft or organic areas and replace with compactable fill, then compact again, since running over it with a plate compactor does not eliminate organic or loose pockets.
Can I use round gravel or pea gravel in the base if it’s cheaper or easier to source?
It’s usually a bad swap. Round rock has less interlock, so under compaction and load it tends to shift and pump, which opens movement in the finished surface. Use angular crushed stone or a specified base material (often called road base or crusher run) so it locks together as you compact in lifts.
How many compactor passes do I really need per stone lift?
There is no single magic number, but the field goal is consistent: after multiple overlapping passes, the surface should not visibly deflect or visibly loosen under the plate compactor. For typical residential builds with 3 to 4 inch loose lifts, that often means at least several overlapping passes, plus perpendicular directions. If you see the surface “moving” when you cross it, add more passes before moving on.
Should I compact the bedding sand after I screed it to 1 inch?
No. Bedding sand should be screeded to grade and left un-compacted so pavers can seat and lock it into an even surface. Compacting sand before pavers go down can create a hardened, uneven layer that telegraphs as humps, dips, or rocking during installation.
How do I calculate how deep to excavate without ending up too shallow?
Start from your intended finished patio elevation, then add up each layer’s thickness, including the sand bed and the compacted base, and include a small buffer because compaction settles material slightly. A practical rule is to excavate slightly deeper than the total build-up, then adjust by adding base in place and re-compacting. Avoid excavating too shallow, since you cannot “add depth” after edge restraints and restraints height are already set.
What’s the most common edge restraint mistake?
Setting restraints incorrectly in height or installing them too late. If the restraints are not tight against the bottom of the future paver surface, edge courses can creep outward or bedding sand can escape. Also, install restraints after the base is fully compacted but before sand so you can set their height precisely using paver thickness plus the sand bed.
Do I need edge restraints for a patio that’s only one paver course thick or a small square patio?
Yes, edge restraints are still important even on small patios, because the perimeter pavers are where lateral movement starts. Without restraint, the outer edge can shift outward as loads and freeze-thaw cycles act on the system, creating gaps and sand loss along borders.
What should I do if my yard already slopes, and the patio slope would make one end too low?
Plan water routing before you build. The standard 1/4-inch-per-foot slope is the minimum to keep water from ponding, but you may need drainage features like a channel drain or French drain at the low end if the natural grade forces water toward the house or into unwanted areas. If you try to “fix” drainage by flattening the patio, expect staining and movement later.
Is it okay to temporarily store pavers or sand on top of the screeded base?
Avoid disturbing the screeded sand. Foot traffic and equipment on the sand layer scuffs it, creates ridges, and can leave depressions that translate into uneven paver heights. If materials must be staged, do it outside the patio footprint or place them so you can keep a clean path that does not contact the screeded area.
How should I handle features like a fire pit, raised sections, or steps?
The basic layering and slope principles still apply, but load-bearing and drainage details change. Raised areas and heavy features generally require thicker, properly compacted base and careful separation of drainage paths so water does not collect at transitions. Plan those sections early so the base depth and restraint placement stay consistent with the finished elevations.