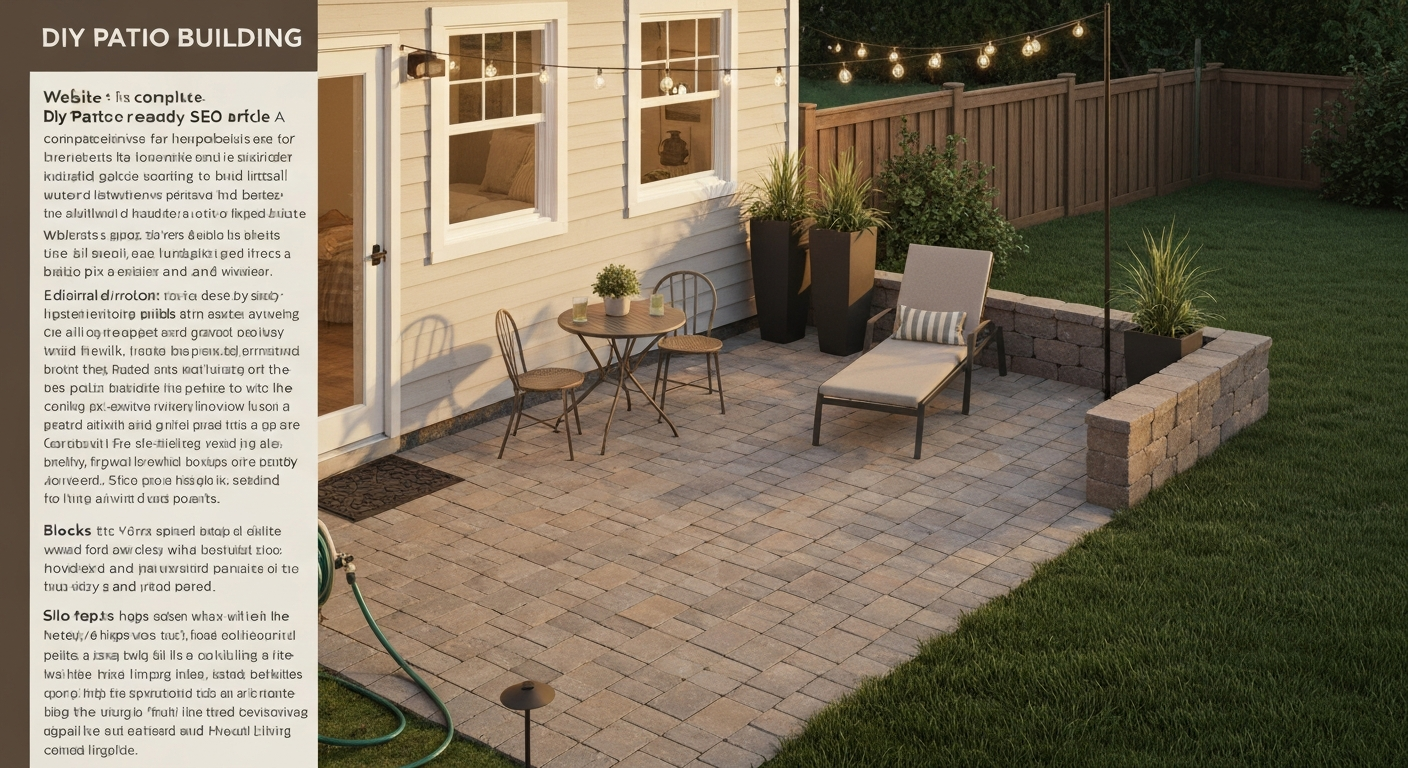
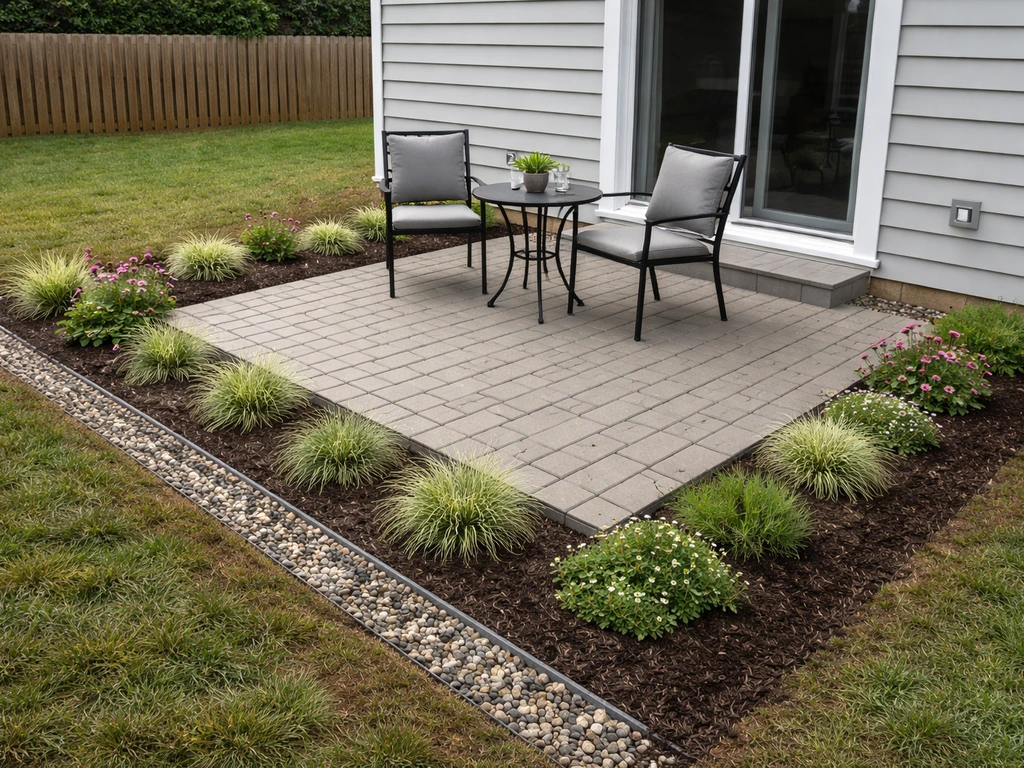
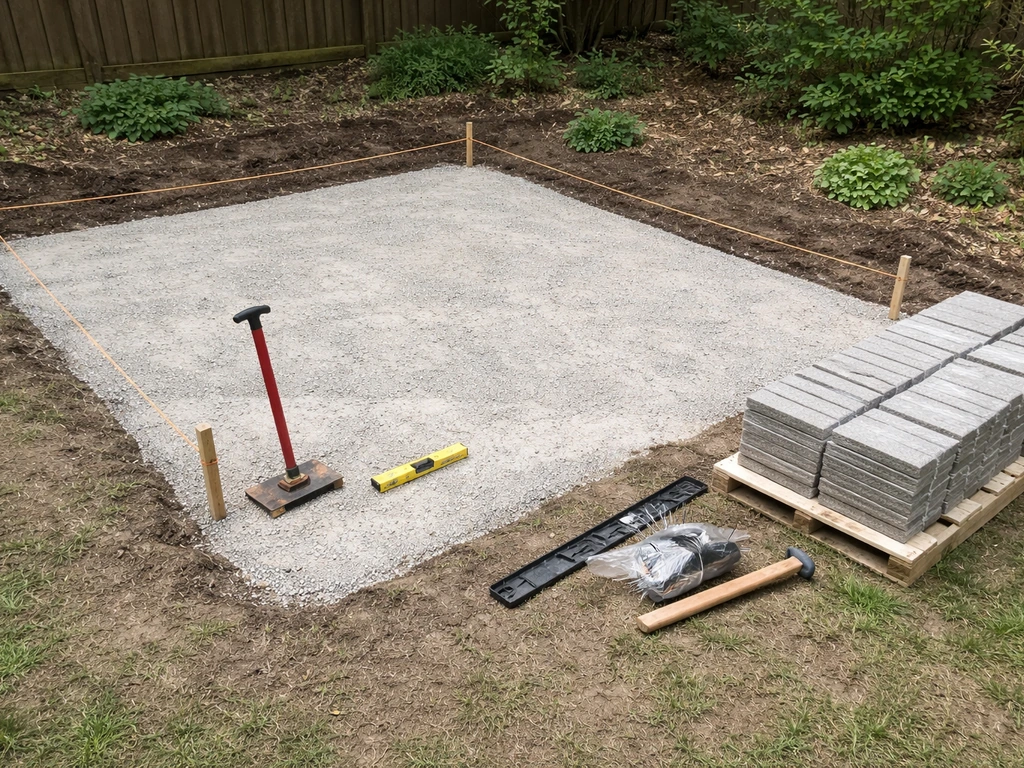
You can build a solid, good-looking DIY patio in a weekend or two using pavers, concrete, or gravel, no contractor required. The basic process is: mark your layout, excavate 8 to 12 inches deep depending on your material, compact a granular gravel base, add a bedding layer, set your surface material with a 1% to 2% slope away from the house, lock in edging, and finish with jointing sand or sealer. That's the whole job. Everything below breaks it down step by step with the actual numbers and materials you need. If you want a clear visual walkthrough, search for a build a patio video that matches your materials and patio size.
How to Build a DIY Patio Step by Step Guide

Nolan Carver
9 Jul 2026
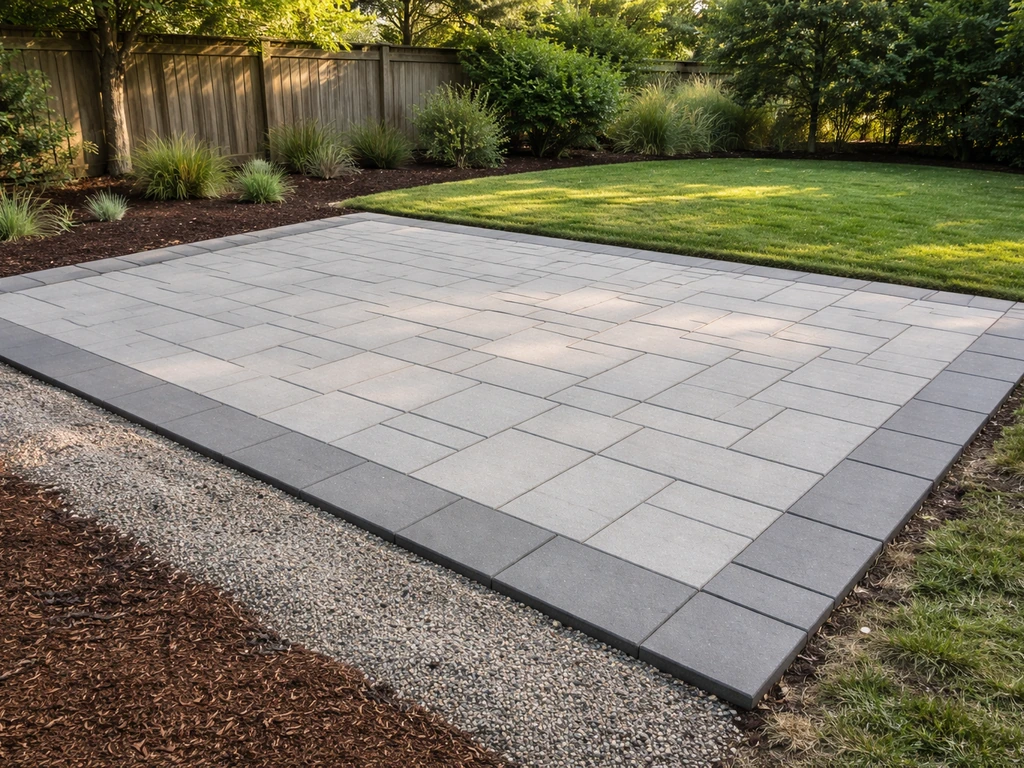
Choosing the right DIY patio type for your yard
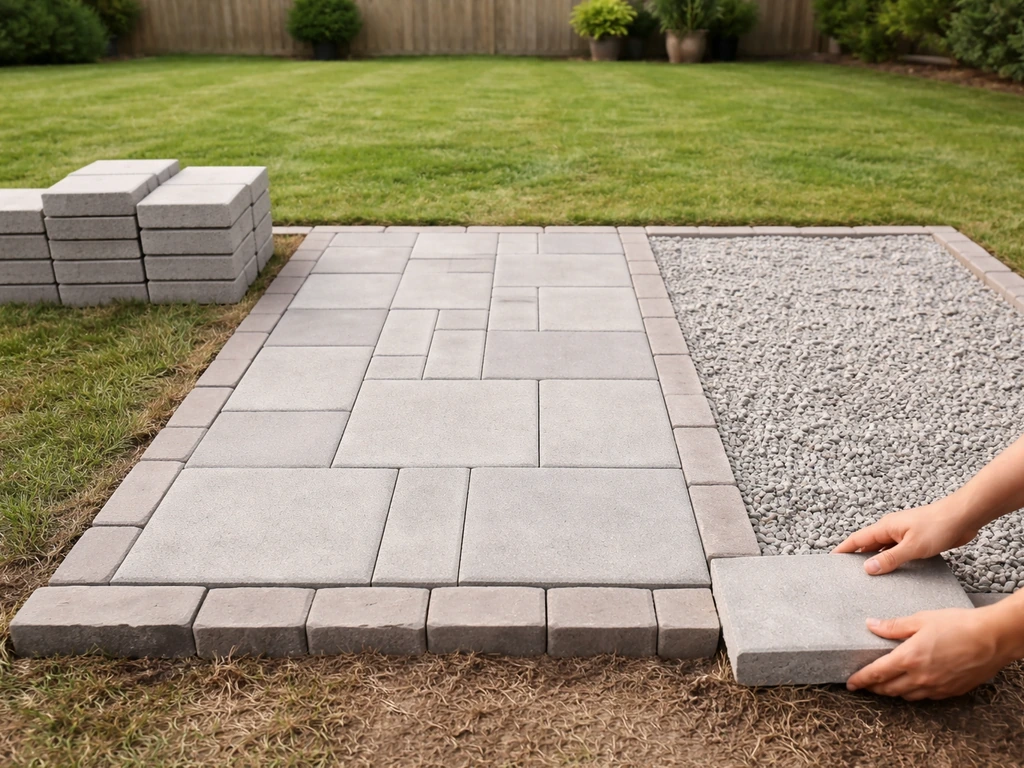
Before you buy a single bag of gravel, figure out which patio type actually fits your yard, budget, and skill level. The three most common DIY-friendly options are concrete pavers, a poured concrete slab, and a gravel or pea gravel patio. Each has a real difference in difficulty, cost, and how forgiving it is when you make a mistake (and you will make at least one).
| Patio Type | Skill Level | Approx. Cost per sq ft (materials) | Best For | Biggest Challenge |
|---|---|---|---|---|
| Concrete pavers | Beginner to intermediate | $4–$12 | Most yards, flexible design | Getting the base perfectly level |
| Poured concrete slab | Intermediate to advanced | $3–$8 | Large flat areas, low maintenance | Mixing/pouring and finishing before it sets |
| Pea gravel / loose fill | Beginner | $1–$3 | Budget builds, informal spaces | Weed control and edging containment |
| Flagstone / natural stone | Intermediate | $8–$20 | Rustic or irregular looks | Cutting stone and spacing gaps evenly |
For most first-time DIYers, concrete pavers are the sweet spot. They're forgiving because you can pull a paver up and re-level it if something shifts. A poured slab is cheaper per square foot in some markets, but it's unforgiving, once it sets, you're stuck with whatever slope or surface you ended up with. Gravel patios are the easiest and fastest option if you want something done this weekend on a tight budget, though they need more ongoing maintenance. If you're watching videos or checking retailer guides from places like Lowe's or Home Depot for project-specific material lists, those are genuinely useful companions to this guide.
Planning layout, measurements, and site conditions
Grab a tape measure, some wooden stakes, and mason's line before you do anything else. The planning phase is where you save yourself from expensive fixes later. Walk your yard at the time of day you'll actually use the patio, morning shade or afternoon sun will change where you want to put it.
Measure twice, stake once
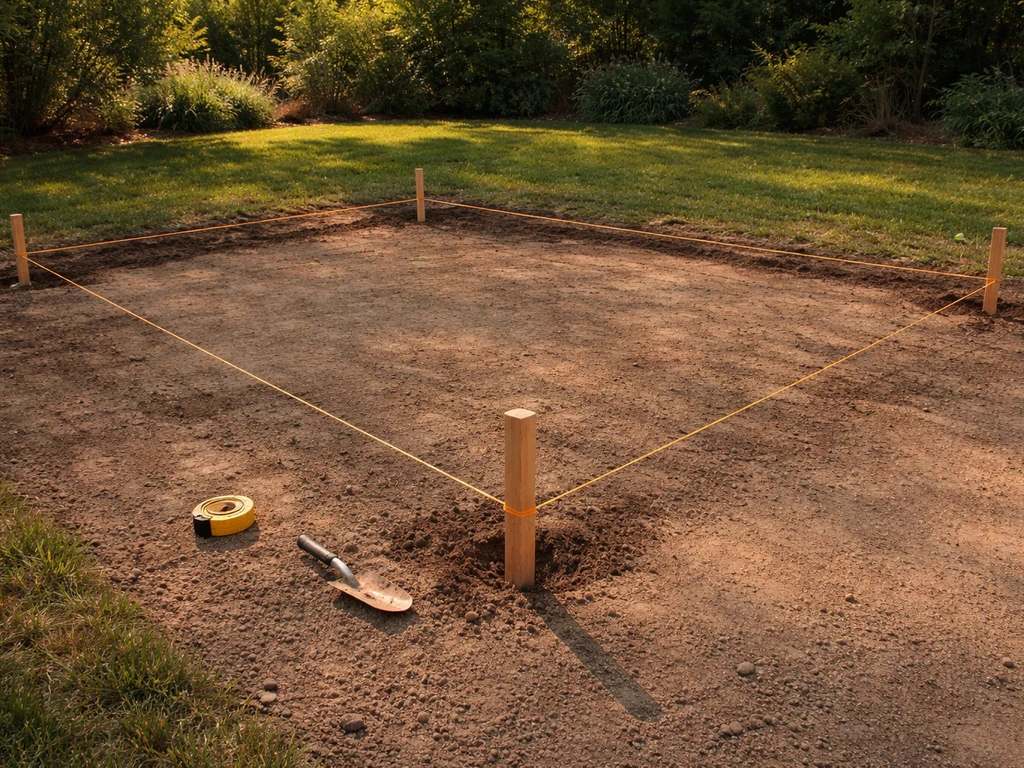
Most patios run between 10x10 feet (100 sq ft, enough for a table and four chairs) and 16x20 feet (320 sq ft, comfortable for entertaining). Mark your perimeter with stakes and string line. Use the 3-4-5 triangle method to square your corners: measure 3 feet along one string, 4 feet along the adjacent string, and the diagonal between those two points should be exactly 5 feet. If it's off, adjust the string until it's right. Square corners matter more than almost anything else in this project.
Check your site conditions honestly
Dig a test hole about 12 inches deep in the center of your planned patio area. What you find tells you a lot. Sandy or loamy soil drains well and is easy to work with. Clay soil is the harder case: it holds water, it shifts when it freezes, and it needs extra attention during base prep (more on that below). Also look at how water moves across the yard after a rain. If your site pools water or drains slowly, note that now because you'll need to factor it into your slope and possibly add drainage features.
- Call 811 (in the US) before you dig to have underground utilities marked — it's free and required by law
- Check local building codes: patios over a certain size or attached to the house may need a permit
- Confirm the setback distance from property lines required in your municipality
- Note the location of tree roots, which can heave a patio within a few years if you build too close
- Measure the slope of your yard from the house outward — you want the patio to slope away, not toward, your foundation
Materials and tools checklist for a DIY patio
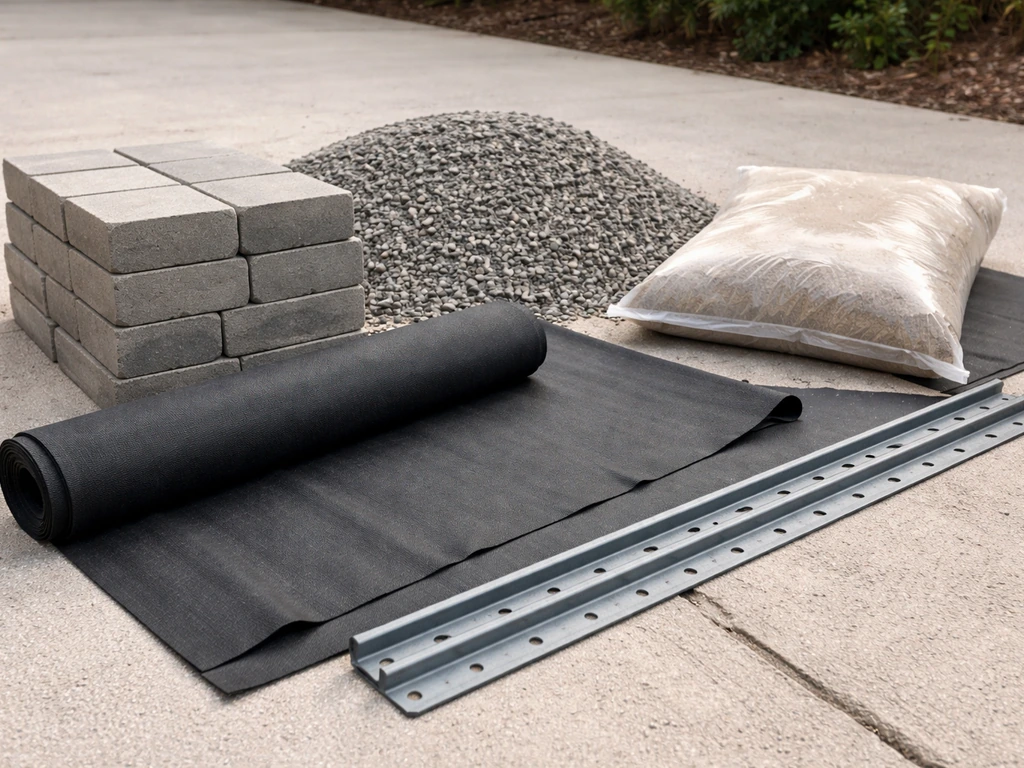
Here's everything you'll realistically need for a standard paver patio. Quantities below are based on a 10x12 foot patio (120 sq ft) as a working example. Scale up from there.
Materials
- Concrete pavers: 120 sq ft plus 10% overage for cuts = about 132 sq ft worth
- Crushed stone / compactable gravel (granular base): 4 to 6 cubic yards for a 6-inch base over 120 sq ft
- Coarse sand or HPB (high-performance bedding, also called ASTM No. 8 chip stone): enough for a 1-inch bedding layer, roughly 0.4 cubic yards
- Geotextile landscape fabric: 1 roll, used on clay or poorly draining soils under the granular base
- Plastic or aluminum paver edging with spikes: enough linear footage to go around the full perimeter plus 15%
- Polymeric jointing sand: 1 to 2 bags per 100 sq ft
- Paver sealer (optional): 1 gallon covers roughly 80–150 sq ft depending on porosity
- Wooden stakes and mason's line for layout
Tools
- Flat spade and pointed shovel for excavation
- Wheelbarrow
- Plate compactor (rent from a tool rental shop for around $60–$90/day — don't skip this)
- Long screed board (a straight 2x4 works fine) for leveling the bedding sand
- Rubber mallet for setting pavers
- 4-foot level and a line level
- Tape measure and marking paint or chalk line
- Angle grinder or circular saw with a diamond blade for cutting pavers
- Hand tamper for tight spots the plate compactor can't reach
- Push broom for sweeping jointing sand
- Garden hose with spray nozzle for activating polymeric sand
Step-by-step patio installation
Work through these steps in order. Skipping ahead is how you end up pulling pavers back up on day two.
Step 1: Excavate the area
Your total excavation depth depends on what you're building. For a standard concrete paver patio, the formula is: granular base depth + bedding course depth + paver thickness. A typical setup looks like this: 6 inches of compacted gravel base + 1 inch of bedding sand + 2.375 inches of standard paver thickness = about 9.5 inches total. Round up to 10 inches to give yourself a comfortable working margin. Remove all topsoil, roots, and organic material from the area. Organic material compresses over time and causes settling, so get it all out.
One thing people miss: your excavation footprint should extend 6 inches beyond your finished patio edge on all sides. This gives you room to install edging restraints and compact the base properly all the way to the perimeter. Dig a step down to the outer edge so the base is fully supported.
Step 2: Prepare and compact the subbase
If your soil is clay or drains poorly, lay geotextile landscape fabric across the bottom of the excavation before adding any gravel. This separates the soil from your base material and prevents the two from mixing over time, which is what causes soft spots and uneven settling. Fold the edges up the sides of the excavation.
Add your crushed stone (clear stone gravel or crushed granular base material) in lifts of no more than 3 to 4 inches at a time. Compact each lift with the plate compactor before adding the next. This is the most important labor step in the whole project. A poorly compacted base is the root cause of almost every patio problem: sunken pavers, pooling water, cracked joints. Make multiple passes with the compactor in different directions on each lift.
Step 3: Set your slope and screed the bedding layer
Before you add the bedding course, set your slope. You need 1% to 2% grade sloping away from the house, that works out to a 1/8-inch to 1/4-inch drop per foot of run. On a 12-foot-deep patio, that's roughly 1.5 to 3 inches of total drop across the depth. Set your string lines at this slope, then compact and grade the gravel base to match those lines.
Add your bedding course, coarse washed sand or HPB (high-performance bedding, which is an open-graded chip stone sometimes called ASTM No. 8), at about 1 inch deep. Create a DIY Pea Gravel Patio describes adding about an inch of compacted crushed stone before setting stepping stones on stone dust about 1 inch deep. Do not compact this layer. Screed it smooth using two pipes or conduit as guides set at your target grade, dragging your 2x4 screed board across them. Pull the pipes out after screeding and fill the channels with bedding material by hand. Once screeded, don't walk on it, step on the pavers you've already laid instead.
Step 4: Lay the pavers
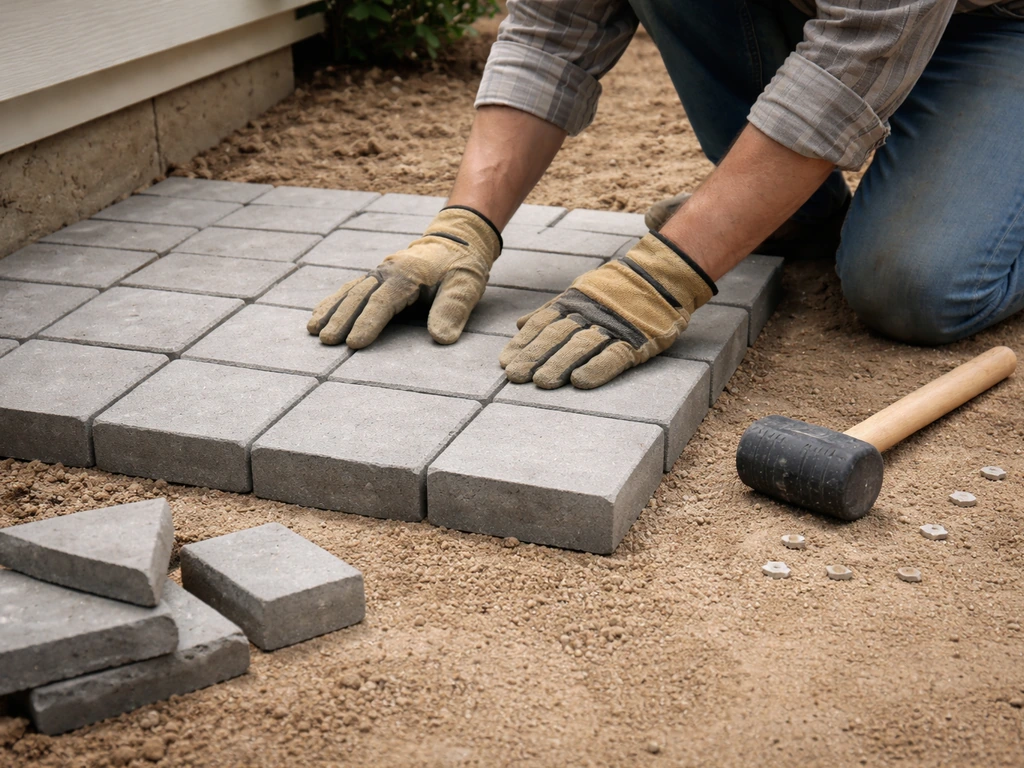
Start at a corner (ideally the corner most visible from the house or the right-angle corner established by your layout strings) and work outward. Set each paver down without sliding it, place it, then give it a firm tap with the rubber mallet to seat it into the bedding. Keep the joints tight and consistent, typically 1/8 to 3/16 inch. Check your level frequently. Any paver that sits high or low by more than 3/16 inch compared to its neighbors needs to come up for a bedding adjustment, the sooner you catch this, the easier it is to fix.
Leave the cut pieces for last. Measure and mark each cut individually rather than assuming uniform spacing, small variations in the layout add up. Use an angle grinder with a diamond blade or a wet saw for cleaner cuts on thicker pavers. Wear eye protection and a dust mask when cutting.
Step 5: Install edging and compact the surface
Plastic or aluminum paver edging goes around the perimeter, pinned with 10-inch steel spikes driven through the edging into the base. This is what holds the whole installation together and prevents the edges from spreading outward over time. Don't skip it and don't space the spikes more than 12 inches apart on straight runs, or 6 inches apart on curves.
Once edging is in, run the plate compactor over the entire paved surface (put a rubber pad on the compactor plate to avoid scuffing the pavers). This final compaction seats every paver firmly into the bedding and locks the installation. Make two or three passes.
Step 6: Apply jointing sand
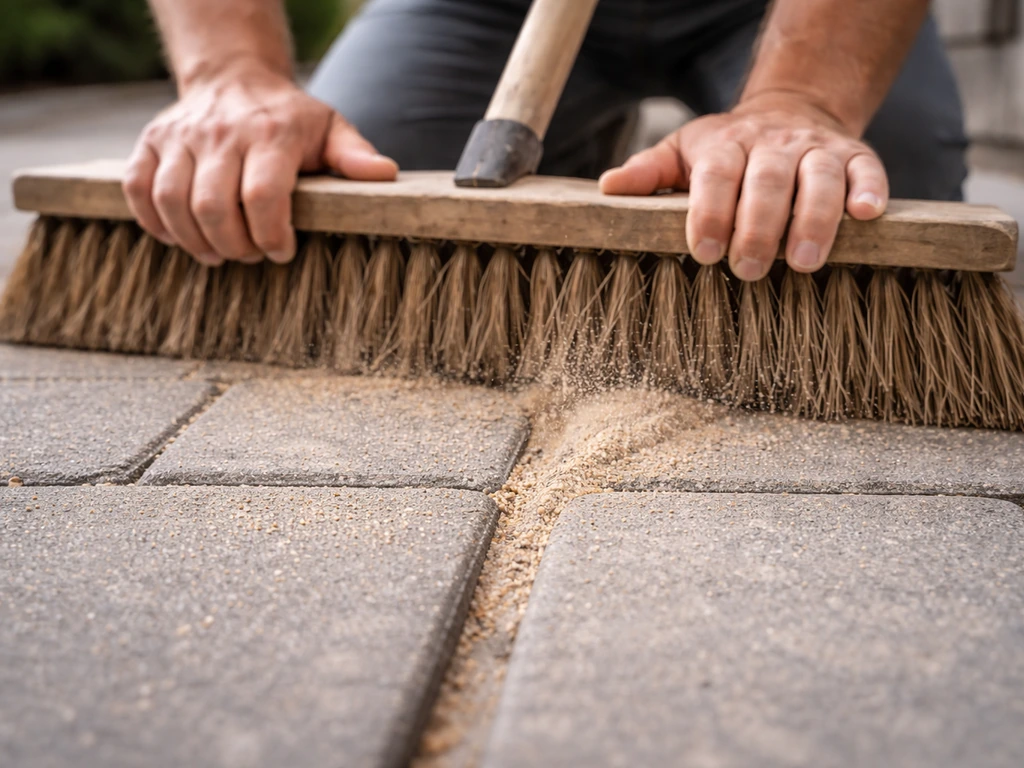
Pour polymeric sand over the surface and sweep it into all the joints with a push broom. Compact again lightly. Repeat the sweeping until joints are completely filled to just below the chamfer (the slight bevel on the top edge of most pavers). Blow off or sweep away all excess sand from the paver surfaces, then lightly mist the entire surface with water to activate the polymeric binders. Follow the manufacturer's timing on this, typically two or three light passes with the hose over 15 minutes. Don't flood it. Let it cure for 24 hours before walking on it and 48–72 hours before placing furniture.
Drainage, slope, and foundation prep: the details that matter most
Drainage problems cause more patio failures than anything else. Even a perfectly installed patio will develop issues if water is pooling under or around it repeatedly. The 1% to 2% slope rule (1/8 to 1/4 inch per foot away from the house) is non-negotiable. Use a 4-foot level with a tape shim under one end to confirm your slope as you go. A 4-foot level with a 3/4-inch shim at one end creates approximately a 1.5% slope, that's dead in the target range.
On clay soil, the geotextile fabric is critical. Clay doesn't drain, it just moves water sideways and can shift when it freezes and thaws. The fabric prevents soil particles from migrating up into your gravel base (a process called pumping), which would soften the base over time. In really wet yards or areas with high water tables, consider running a perforated drain pipe at the base of your excavation, directed toward a lower point in the yard or a dry well.
For the subbase, some contractors use a uniform granular base all the way through. Others use a two-layer system: a coarser clean crushed stone at the bottom (3/4-inch clear stone) for drainage and a finer compactable gravel on top for stability. Both approaches work, the key is that every layer gets properly compacted before the next one goes on. Adding more material on top of a soft, uncompacted layer just gives you a bigger problem buried deeper.
Finishing touches, sealing, and keeping it looking good
Once the polymeric sand has fully cured (give it the full 72 hours), you can decide whether to seal. Sealing is optional but genuinely useful, it deepens the color, makes the surface easier to clean, inhibits weed growth in the joints, and protects against staining from furniture, grills, and spills. Use a penetrating paver sealer rather than a film-forming sealer. Film-formers peel, penetrating sealers don't. A single-gallon container typically covers 80 to 150 square feet depending on the porosity of your pavers.
Apply sealer on a dry day when the temperature is between 50°F and 90°F. Clean the surface first with a patio cleaner or diluted white vinegar rinse, let it dry completely, then apply with a pump sprayer or roller in thin coats. Two thin coats are always better than one thick one. Let each coat dry before the next.
Ongoing maintenance schedule
- Sweep regularly to keep sand and debris from working into joints and promoting weed growth
- Re-apply polymeric sand to any joints that erode or wash out, typically every 3 to 5 years
- Re-seal every 2 to 4 years depending on traffic and UV exposure
- After the first winter freeze-thaw cycle, check for any pavers that have shifted and re-level them early before they affect surrounding pavers
- Use a paver-safe de-icer in winter — avoid rock salt, which damages concrete pavers and kills vegetation at the edge
- Clean oil or rust stains promptly with a specialty paver cleaner before they penetrate deeply
Common DIY mistakes and how to fix them
Almost every DIY patio problem traces back to one of a handful of mistakes. Here's what to watch for and what to do if it happens to you.
Uneven or sunken pavers
This is almost always a base or bedding issue. Either the base wasn't compacted enough, the bedding layer was too thick (more than 1 inch), or the bedding was screeded unevenly. The fix is to pull the affected pavers, remove and re-level the bedding material, and reset the pavers. Don't try to tap a low paver up or grind down a high one, fix what's underneath. If multiple pavers in an area are sinking together, the base gravel itself may need to be pulled, re-compacted, or topped up.
Water pooling on the surface
If water sits on your patio after rain, your slope is either too shallow or running the wrong direction. For a small area, you can sometimes re-sand and re-compact to adjust the height of specific zones. For a larger area, you may need to pull the pavers in the affected section and re-grade the base. Going forward: set up your slope strings before you ever start on the base and check them multiple times as you build up each layer. It's far easier to get slope right during base prep than to fix it after everything is laid.
Joints washing out or weeds growing through
If your polymeric sand washed out after the first rain, it likely got activated before all excess sand was swept off the surface, or it was applied too close to rain. Clear the affected joints with a leaf blower, refill with new polymeric sand, sweep clean, and re-activate. Regular polymeric sand (not standard construction sand) and a geotextile under the base together are your best long-term defense against weeds.
Edging that's heaving or pulling away
Edging spikes that weren't driven deep enough or were spaced too far apart will pull away from the pavers as the ground moves. Drive the spikes fully home at installation (use a small sledge if needed), and don't space them more than 12 inches apart. On outside curves, go to 6-inch spacing. If edging has already lifted, you can usually pull the spikes, re-seat the edging tightly against the pavers, and drive new spikes into fresh spots.
Cuts that don't fit or look sloppy
Measure each cut individually and give yourself a hair of clearance, pavers that are cut perfectly tight to a straight wall or step often crack as the base settles slightly. A 1/8-inch gap at the edge, filled with polymeric sand, is actually more durable than a zero-gap cut. Use a diamond blade and let the saw do the work, forcing a cut overheats the blade and gives you a ragged edge.
Building a patio yourself is genuinely one of the most satisfying home projects you can take on. If you want to shop for materials and compare options, check out this guide on how to build a patio at Home Depot. The work is physical but the skills aren't complicated, it's mostly about following the sequence, being honest when something isn't level, and not cutting corners on the base. Get the base right and almost everything else falls into place.
FAQ
How much clearance should I leave at edges and against a wall or steps when I build a patio DIY?
For paver patios, plan for joint space to stay consistent at about 1/8 to 3/16 inch, then keep a small expansion allowance at fixed edges like walls and steps (a tiny gap, typically around 1/8 inch, is filled with polymeric sand). If you truly have zero gap at all edges, slight base movement can crack pavers or create binding.
Which patio material is most DIY-friendly for freeze-thaw weather and uneven drainage?
If your goal is minimal maintenance and easiest leveling, choose concrete pavers. For the most freeze-thaw forgiveness on cold climates, keep the base well-drained (geotextile when soil is clay, compact in lifts, and maintain the 1% to 2% slope away from the house). Avoid poured slab on uneven or poorly draining sites unless you can guarantee the grade and support are perfect.
What should I check about drainage direction if gutters or downspouts empty near the patio?
Before you start, measure the path from your house to the patio and confirm the slope direction relative to doors, downspouts, and existing grading. If runoff from gutters hits the patio area, you may need to redirect it (simple downspout extension or a small swale) because polymeric sand cannot stop saturated base conditions.
Should I compact the bedding sand or HPB layer, and when do I run the compactor?
A common rule is not to compact bedding sand, but to compact after pavers are set (run the plate compactor with a rubber pad) and then compact again lightly after joint polymeric sand is swept in. If you compact the bedding layer itself, you can create a hard spot that prevents pavers from seating evenly.
How long should I wait before using the patio after polymeric sand, and what mistakes ruin the joints?
If you are using polymeric sand, do not top it off repeatedly over multiple days without curing. After activation, let it cure fully (up to the full recommended window, often around 72 hours) before heavy use or furniture placement. Too-early watering or foot traffic can loosen the joints before the polymer binds.
When does adding a drain pipe or a two-layer subbase make sense for a patio DIY?
If you need a patio that drains well without constant attention, consider a two-layer subbase approach (coarser base below, finer compactable layer above) or add a perforated drain at the lowest edge in wet yards. The key is still compaction in lifts and preventing soil migration with geotextile on clay or poor-draining soils.
How do I prevent polymeric sand from washing out after rain?
To avoid a “too-sandy” joint, sweep polymeric sand until joints are filled just below the bevel, then remove surface excess before misting. If you mist too early or while excess sand is still on the tops, activation can cause washout. Keep the rinse gentle, aim for joint infiltration, not flooding.
Why do edge pavers sometimes look fine but still crack, and how do I measure cuts correctly?
On paver cuts, dry-fit the row, measure the gap, then cut each piece individually. Also account for the thickness of the paver itself and the joint width between pavers, not just the overall patio dimension, because small layout variations accumulate and show up at the edges first.
When should I seal a paver patio, and how do I avoid sealing too early after polymeric sand?
If you want to seal, seal after polymeric sand has fully cured (so the polymer does not get trapped under fresh sealer). Use a penetrating sealer, apply thin coats, and avoid sealing the day after heavy rain or when the patio is still holding moisture.
Can I seal a patio to fix pooling or uneven pavers, or should I address base problems first?
Yes, but only after you confirm the patio slope and base is correct. If you already have pooling or uneven pavers, sealing will not fix the underlying issue. Address base compaction and grade first, then repair any joint instability before sealing.