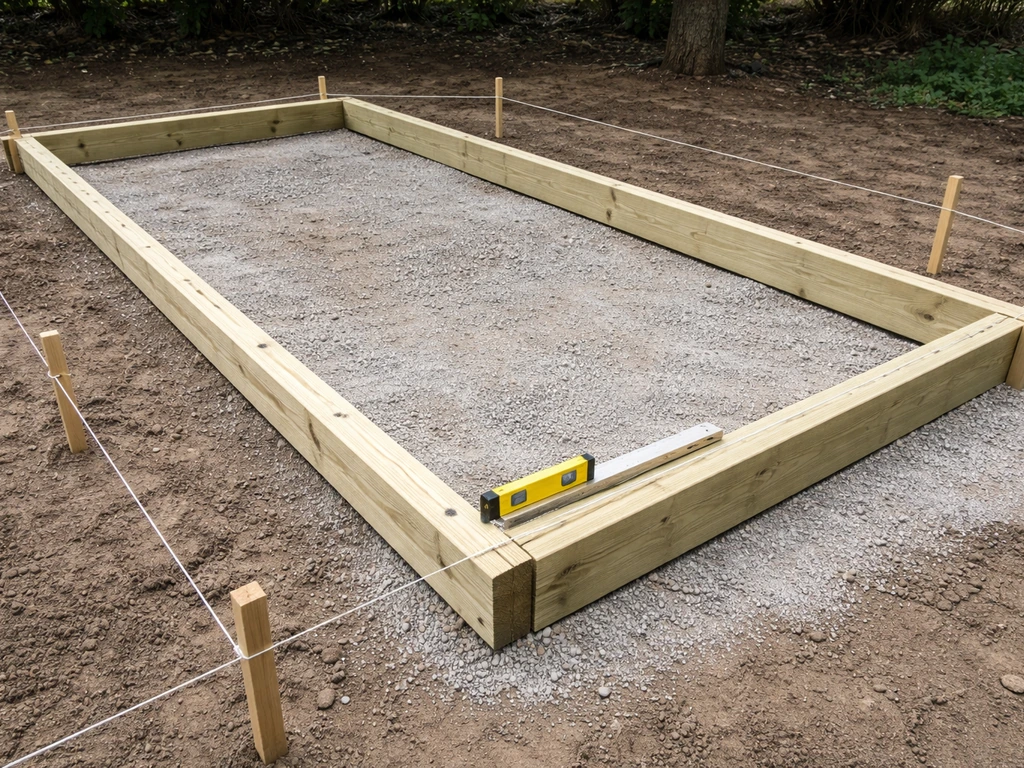
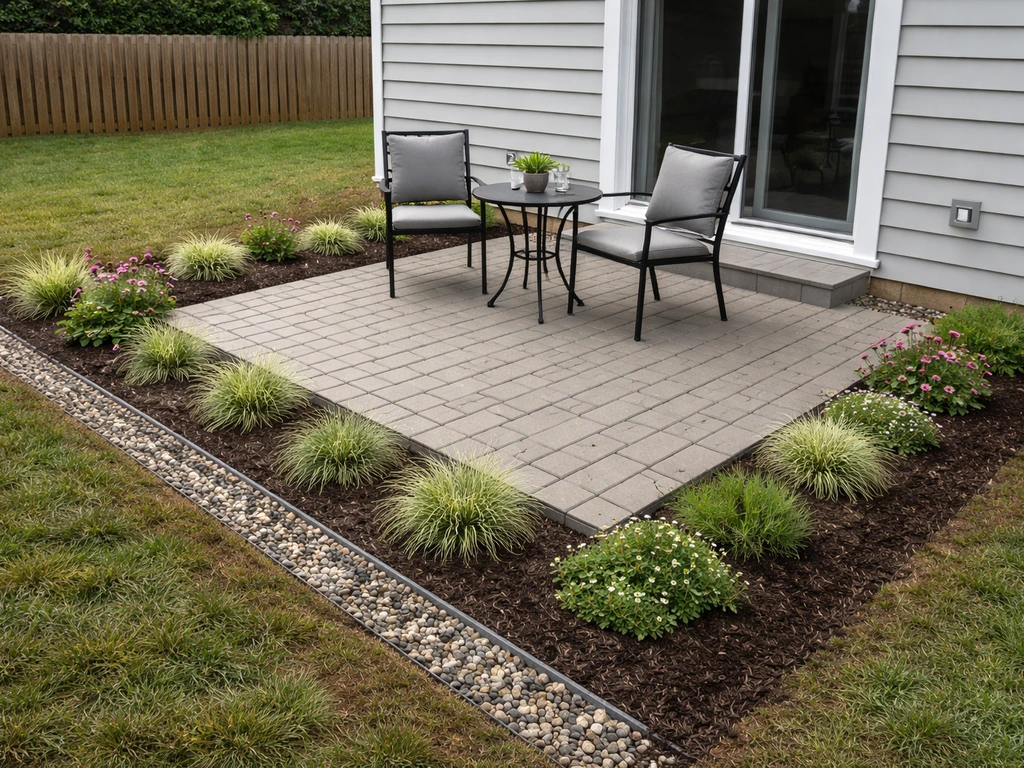
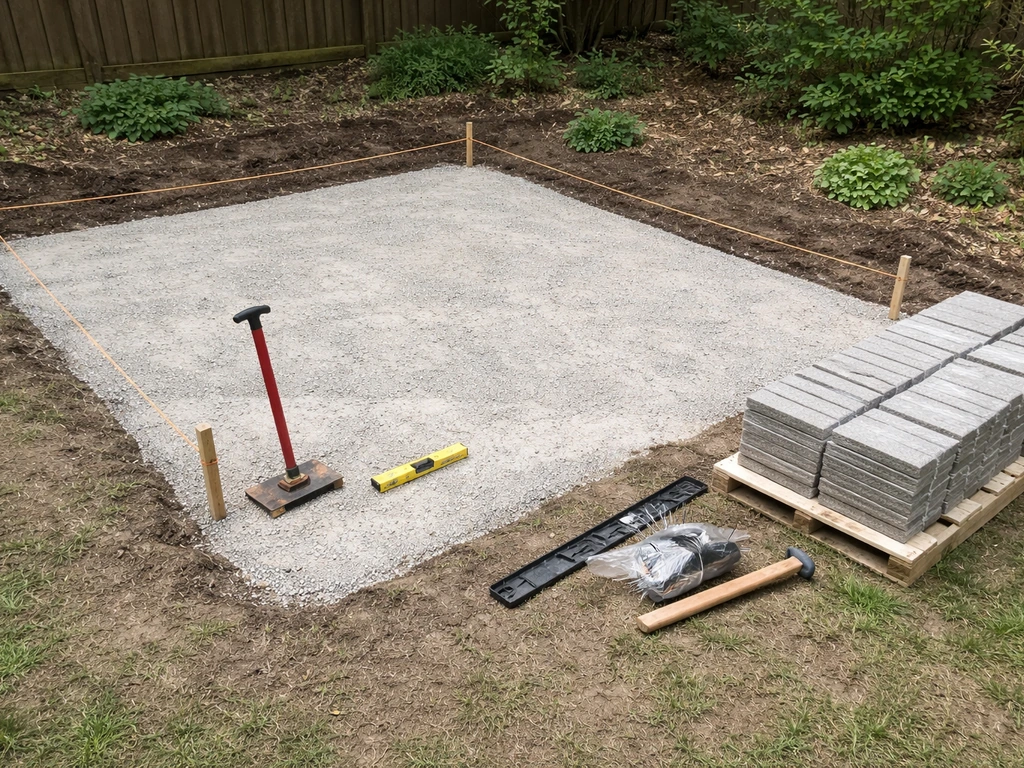
Building a patio frame starts with four decisions: what type of frame you need (ground-level pavers, a deck-style platform, a raised platform, or steel), what material you'll use, what your site demands in terms of drainage and foundation, and whether your local code requires a permit. Get those four things sorted and the rest of the build follows a logical sequence that any motivated homeowner can handle without hiring a contractor.
How to Build a Patio Frame: Complete DIY Planning & Build Guide

Nolan Carver
16 Jul 2026
What this guide covers and who it's for
This guide walks you through the entire process of planning and building a patio frame from scratch. For step-by-step instructions on how to build a patio platform, consult this detailed guide. For a concise step-by-step on how to frame in a patio, see the assembly and layout sections below. Whether you're setting pavers on a compacted base, building a ground-hugging deck-style platform, constructing a raised platform with posts and footings, or going with a steel substructure, the core principles are the same. I'll cover permits and code, site assessment, layout, material choices, hardware, step-by-step framing, drainage, anchoring, and finishing touches like railings, gates, and trellises. If you're a first-timer, start at the beginning and read straight through. If you've framed a deck before and just need a refresher on hardware specs or span tables, jump to the relevant section.
Permits, local code, and what the IRC actually requires
Before you buy a single board, find out whether your project needs a permit. Most municipalities follow the International Residential Code (IRC), and under Section R507, any attached deck-style structure or raised platform typically triggers a permit. Ground-level paver patios that don't attach to the house and stay below a certain height (often under 30 inches) may be exempt, but that threshold varies by jurisdiction, so call your local building department and ask directly.
The IRC sets a minimum design live load of 40 pounds per square foot (psf) and a dead load of 10 psf for residential deck structures. In snow country, you use the greater of the live load or the ground snow load, so a location with a 50 psf ground snow load means your frame needs to be designed to that higher number. These numbers drive every span and fastener calculation in the code tables, so understanding them upfront keeps you from undersizing a beam later.
If your frame attaches to the house via a ledger board, the IRC (R507.9.1.3) prescribes specific fastener types, sizes, and maximum spacings for ledger-to-band-joist connections based on joist span and sheathing thickness. Common requirements include 1/2-inch lag screws or 1/2-inch bolts in patterns shown in code tables. Ledgers must also be flashed per IRC R703.4 to prevent water intrusion behind the ledger, which is one of the most common causes of structural rot I've seen on older decks. A freestanding frame bypasses ledger requirements entirely, which is one reason I often recommend going freestanding even when you're building right next to the house.
For attached frames, the IRC (R507.2.4) also requires a lateral-load connection between the deck and the house. The prescriptive option calls for at least two hold-down tension devices placed within 24 inches of each end of the deck, each rated at a minimum of 1,500 lbf allowable capacity. An alternate option uses four devices rated at 750 lbf each. These resist the kind of lateral (sideways) movement that can rack a frame over time. Don't skip this detail, it's a code requirement and a genuine safety item.
- Call your local building department before starting — ask whether your specific project type and height require a permit
- Find out your local frost depth for footing placement (it ranges from zero in warm climates to 4-plus feet in cold northern states)
- Ask about setback requirements from property lines, easements, and the house foundation
- Check HOA rules if applicable — some restrict materials, colors, or height
- Budget roughly $100-$300 for a typical residential permit, though fees vary widely
Site assessment: soil, slope, utilities, drainage, and access
The single most important thing you can do before digging anything is call 811. That's the national Call Before You Dig number, and it's required in all 50 states before any excavation. A utility locator will come out (usually within a few business days) and mark buried gas, water, electric, and telecom lines with paint or flags. This is free and non-negotiable, a mis-hit utility line is dangerous and expensive.
Once utilities are marked, walk the site and assess the soil. Dig a test hole about 18 inches deep in the center of your planned patio area. Sandy or gravelly soil drains well and compacts predictably. Clay soil holds water, expands when wet, and can cause significant heaving under paver bases or footing piers. If you hit clay, you'll need a more aggressive base prep (more depth and better aggregate) and possibly deeper footings for any raised sections. Organic topsoil (dark, loose, full of roots) must be stripped from any area that will support a structural load.
Measure your slope. Use a level and a long straight board or a laser level to find the high and low points of your site. A gentle slope away from the house (a minimum of 1/8 inch per foot, ideally 1/4 inch per foot) is actually what you want for drainage. Steeper slopes require either terracing, a raised frame with variable-height posts, or retaining solutions. If your site slopes toward the house, that's a drainage problem you need to solve before building, not after. I've repaired more than a few patios where water pooled against a foundation because nobody addressed slope at the planning stage.
Check access for material delivery. Pressure-treated 4x4 and 4x6 posts, concrete bags, and aggregate base material are heavy. Know where your delivery truck can drop materials and how far you'll need to carry them. If you're working in a backyard with a narrow gate, you may need to factor in hand-carrying bags of concrete or base gravel, which adds time to your estimate.
Layout, measurements, and setting elevation reference points
Accurate layout is the foundation of a frame that goes together without frustrating gaps or out-of-square corners. Start by marking your overall rectangle using batter boards and string lines set well outside the actual patio footprint, so you can pull stakes without losing your reference. Use the 3-4-5 triangle method to verify square: measure 3 feet along one string, 4 feet along the perpendicular string, and confirm the diagonal is exactly 5 feet. For larger patios, scale up to 6-8-10 or 9-12-15 for better accuracy.
Set your elevation reference point (also called a datum or benchmark) at the highest corner of the site, typically where the frame meets the house. For attached frames, this is the bottom of the ledger board. The ledger should sit so that the finished deck surface ends up at least 1 inch below the interior floor or door threshold, giving you a step-down that prevents water from entering the house. From that reference point, run level string lines to all other corners and measure down to the ground to determine post heights or excavation depths at each corner.
Mark all footing locations with stakes or spray paint before digging. Double-check diagonal measurements (corner to corner) one more time after all stakes are in. If both diagonals are equal, your layout is square. A layout that's even a couple of inches out of square will cause problems when you set joists and add decking or pavers, so take the extra ten minutes to verify this before you touch a shovel.
Which type of patio frame is right for your project
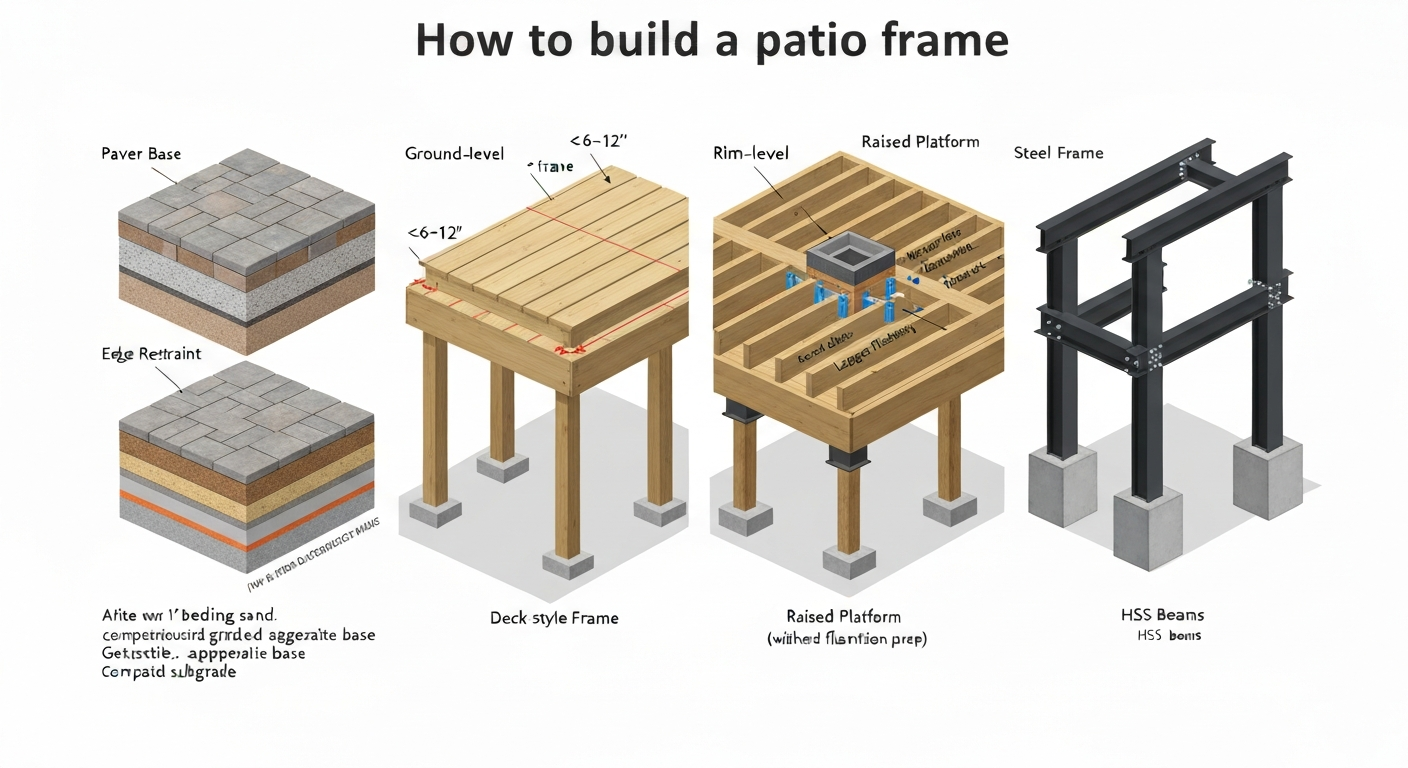
There are four main patio frame approaches, and the right one depends on your site, your budget, and how you want to use the space. Here's a practical breakdown of each.
Ground-level paver base frame
For a traditional paver patio, the 'frame' is really a layered base system rather than a structural lumber frame. You excavate 6-10 inches of soil, install compacted graded aggregate base (ASTM D2940 conforming crushed stone, typically compacted to at least 98% modified Proctor density per ICPI technical specs), then add a 1-inch layer of ASTM C33 bedding sand, and set your pavers on top. Edge restraints (plastic or aluminum bender board pinned with spikes) form the perimeter frame that holds everything in position. This is the most accessible approach for beginners and typically the least expensive.
Deck-style platform (ground-level wood frame)
A deck-style platform uses a wood or composite frame with a rim joist perimeter, interior joists, and a beam-and-post or concrete pad foundation. When the frame sits close to grade (under 12-18 inches off the ground), many builders use concrete piers or precast deck blocks rather than full poured footings. This style suits projects where you want a wood or composite decking surface rather than pavers, or where the ground isn't suitable for a simple paver base. Ventilation under a low-to-ground frame matters, leave at least 6 inches of clearance between the bottom of the frame and the ground to reduce rot risk.
Raised platform (elevated wood frame)
A raised platform uses full footings (poured concrete or helical screw piles) below the frost line, posts, beams, rim joists, and joists at a height that may require railings and stairs. This is the most code-intensive approach and almost always requires a permit. The upside is that you can build over sloped or uneven ground, create a level surface at any elevation, and integrate features like built-in seating, storage below, or a patio gate and railing system. The American Wood Council's DCA-6 guide is the standard prescriptive reference for this type of build.
Steel frame patio
Steel framing uses structural steel tubing (HSS sections) or light-gauge steel framing in place of wood members. Steel spans farther, handles higher loads, and resists rot and insects, but it costs more, requires welding or bolted connections, and typically needs an engineer's sign-off on member sizing. The AISC provides preliminary beam and girder sizing tables for span-to-depth ratio estimates, but for a residential project, most builders consult an engineer to size steel members rather than relying on prescriptive tables. Steel frames are a great fit for contemporary designs, sloped lots, and projects where long spans (over 16 feet) are needed.
| Frame Type | Best For | Typical Cost Range (materials) | Permit Likely? | Skill Level |
|---|---|---|---|---|
| Paver base frame | Level to gently sloped lots, traditional look | $4-$10/sq ft | Often no (ground-level) | Beginner |
| Deck-style platform | Low-to-ground wood surface, moderate slopes | $8-$18/sq ft | Sometimes | Beginner-Intermediate |
| Raised platform | Sloped lots, elevated decks, attached to house | $15-$30/sq ft | Yes | Intermediate-Advanced |
| Steel frame | Long spans, modern design, heavy loads | $20-$45/sq ft | Yes | Advanced / Engineer required |
Choosing your framing material: real pros and cons
The framing material you choose affects cost, longevity, maintenance requirements, and how the frame behaves in your climate. Here's an honest look at each option.
| Material | Pros | Cons | Typical Lifespan | Relative Cost |
|---|---|---|---|---|
| Pressure-treated lumber (PT) | Widely available, code-accepted, prescriptive tables exist, easy to cut and fasten | Requires corrosion-resistant fasteners, can warp if not kiln-dried after treating, contains copper-based preservatives (ACQ, CA-B) | 25-40+ years with proper fasteners | Lowest |
| Cedar | Naturally rot-resistant, lightweight, aesthetically warm, no copper treatment concerns with standard fasteners | More expensive than PT, softer than PT (dents more easily), harder to find in structural grades | 20-30 years (exposed) | Moderate |
| Composite / PVC framing | Low maintenance, no rot, no splinters, consistent dimensions | More expensive, requires closer joist spacing (check manufacturer specs), can sag if undersized | 30-50 years | High |
| Steel (structural tube / HSS) | Very high strength-to-weight ratio, long spans, no rot or insects | Expensive, requires welding or engineered bolted connections, can corrode without proper coating | 50+ years (galvanized or powder-coated) | Highest |
| Aluminum | Lightweight, corrosion-resistant, low maintenance | Lower strength than steel (larger sections needed), can deform under point loads, limited standard structural sections | 30-50 years | High |
For most DIY patio frames, pressure-treated lumber (PT) is the default and the right call. It's the most code-supported material, the least expensive, and the one with the deepest library of prescriptive span tables. Just make sure you use the correct AWPA Use Category (UC4A or UC4B for ground contact, UC3B for above-ground applications) and pair it with hot-dip galvanized or stainless-steel fasteners, more on that in the hardware section.
Tools and equipment you'll actually need
You don't need a professional tool collection to build a patio frame, but a few key items make a significant difference in accuracy and speed. Here's what I'd consider essential versus nice-to-have.
Essential tools
- Circular saw (7-1/4 inch blade) — for cutting framing lumber
- Cordless drill/driver with extra batteries — you'll drive hundreds of screws
- Impact driver — essential for lag screws and structural bolts
- Speed square and combination square — for marking and verifying 90-degree cuts
- Tape measure (25-foot minimum) — two if possible, one always at your waist
- Chalk line — for snapping straight layout lines over long distances
- 4-foot level and 8-foot level (or longer) — for checking frame levelness
- Laser level or water level — critical for setting elevation across larger spans
- Post hole digger or gas-powered auger (rent for the day) — for footing holes
- Tamper or plate compactor (rent) — essential for paver base compaction
- Hammer (20-oz framing hammer or pneumatic framing nailer)
- Pry bar — you'll use it more than you expect
- Safety glasses, hearing protection, and work gloves
Helpful but not strictly required
- Miter saw (compound sliding miter saw) — faster and more accurate for repeat cuts
- Reciprocating saw — useful for trimming posts after setting
- String line level — inexpensive backup for leveling string lines
- Magnetic torpedo level — handy for checking post plumb in tight spots
- Concrete mixer or power mixer paddle on a drill — saves time mixing concrete
- Wheelbarrow — for moving concrete, gravel, and soil
- Knee pads — you'll spend a lot of time on the ground
- Generator (if no outdoor outlet is accessible)
Hardware and fasteners: don't cut corners here
Hardware failures cause more patio frame problems than any other single factor, and almost all of them trace back to using the wrong fastener for the material or exposure. Modern pressure-treated lumber uses copper-based preservatives (ACQ, CA-B, MCA) that are significantly more corrosive to metal than the older CCA treatments. Electroplated or electro-galvanized fasteners, the kind sold in bulk at most big-box stores, are not adequate for contact with copper-treated wood in outdoor applications. IRC R317.3.1 and industry guidance from Simpson Strong-Tie both require hot-dip galvanized (HDG), stainless steel, silicon bronze, or copper fasteners for treated wood in exposed conditions. See Selecting Hardware for Use With Treated Wood (Journal of Light Construction article summarizing AWPA/code guidance) for a concise summary of AWPA and IRC fastener requirements blank" rel="noopener noreferrer">See Selecting Hardware for Use With Treated Wood (Journal of Light Construction article summarizing AWPA/code guidance) for a concise summary of AWPA and IRC fastener requirements..
For structural connectors (joist hangers, post bases, post caps, hurricane ties), use products specifically rated for ACQ or CA-B treated lumber. Simpson Strong-Tie and USP Structural Connectors both make ZMAX or equivalent hot-dip galvanized lines for this purpose. Don't mix a stainless-steel fastener with a standard galvanized connector, the dissimilar metals create a galvanic reaction that accelerates corrosion at the contact point.
| Application | Recommended Fastener / Connector | What to Avoid |
|---|---|---|
| Joist to rim joist / beam | Hot-dip galvanized joist hanger (ZMAX or equivalent) + 1.5" HDG joist hanger nails | Electroplated (zinc) hangers, drywall screws |
| Ledger to house band joist | 1/2" hot-dip galvanized lag screws or bolts per IRC Table R507.9.1.3 spacing | Standard zinc-plated lag screws, wood screws |
| Post base to concrete footing | Simpson ABU / ABA or equivalent HDG or SS post base + anchor bolts | Uncoated post bases, standard J-bolts with light zinc coating |
| Decking to joists | #10 stainless steel or HDG deck screws (2.5" to 3") | Bright zinc screws, drywall screws, roofing nails |
| Beam to post cap | HDG post cap (Simpson BC or LPC series) + HDG structural nails or bolts | Standard galvanized post caps rated for non-ACQ lumber only |
| Lateral hold-down devices | Hold-down tension devices rated ≥1,500 lbf each (two per deck) per IRC R507.2.4 | Skipping lateral connections entirely |
| Steel frame connections | Grade 5 or Grade 8 bolts with HDG nuts and washers, or welded connections | Electroplated hardware at exposed steel joints |
A note on screw length: for face-fastening 1.5-inch framing lumber to another piece of 1.5-inch framing lumber, a 3-inch screw gives you about 1.5 inches of penetration into the second member, which is the minimum you want. For structural connections like rim joist to beam, use through-bolts or properly rated structural screws, not standard deck screws, and follow the connector manufacturer's load tables.
Foundations: footings, piers, and ground screws
Every raised or platform frame needs a foundation that transfers the load to the ground and resists frost heave. The IRC (R507 and R403) requires footings sized to carry the tributary load and placed below the local frost depth. Frost depth is not a national number, it ranges from zero inches in parts of the Deep South to 48 inches or more in Minnesota and New England. Look up your local frost depth through your building department or state code before pouring a single footing.
For typical residential patio frames, 10-inch to 16-inch diameter concrete piers (poured in Sonotube forms) are the most common prescriptive solution. The right diameter depends on your tributary area (the square footage of frame each post supports) and your soil's bearing capacity. Most residential soils are assumed at 1,500 to 2,000 psf bearing capacity for prescriptive designs, but if you have soft or expansive clay, you may need larger footings or a geotechnical assessment.
Helical screw piles (also called ground screws) are an increasingly popular alternative to poured concrete, especially for DIYers who want to avoid mixing concrete or waiting for cure time. They're installed by torquing a steel helix into the ground using a hydraulic drive head. Capacity is verified using the torque-correlation method (Qu = Kt x T) per ICC-ES AC358, and manufacturer capacity tables provide allowable loads by screw diameter and installation torque. The key limitation is that they require soil conditions suitable for torque installation, rocks, dense gravel, or large roots can make installation difficult. Rent a hydraulic torque driver from the manufacturer or a rental center; hand installation is not practical for structural applications.
Step-by-step patio frame assembly
The sequence below applies to a deck-style or raised platform wood frame. Adjust for your specific frame type using the notes in each step.
- Mark and excavate footing locations. Dig below your local frost line. Add 6 inches of gravel at the bottom of each hole for drainage before placing Sonotube forms. Keep forms 2-4 inches above grade to protect post bases from pooling water.
- Pour and cure concrete. Mix to a 3,000 psi minimum mix. Set J-bolts or post base anchors while concrete is wet, verifying position and alignment against your string lines before the concrete sets. Allow 24-48 hours before loading.
- Install post bases and set posts. Snap a chalk line across all post base locations to verify alignment. Cut posts to rough length (slightly long — you'll trim to final height later). Plumb each post in two directions and brace temporarily.
- Set and attach the beam. For built-up beams (two or three 2x members nailed together), assemble on the ground and lift into post caps. For single-member beams, use a temporary support or a second person. Confirm beam level before fastening.
- Install the rim joist (perimeter frame). Attach the two end rim joists first (perpendicular to the joists), then the front rim joist. For attached frames, the ledger board on the house acts as the rear rim joist. Flash the ledger per IRC R703.4 before attaching.
- Install joist hangers and interior joists. Snap chalk lines across the top of the rim joists to mark joist spacing (typically 12 inches on center for 5/4 decking, 16 inches on center for 2x decking). Install hangers first, then drop joists into place and nail through the hanger flanges with proper HDG hanger nails.
- Add blocking and bridging. Install solid blocking between joists at mid-span for spans over 8 feet, and at the beam line if joists are cantilevered. Blocking keeps joists from rolling or twisting under load and is required by code for most spans.
- Trim posts to final height. Once the frame is fully assembled and level, snap a chalk line at the correct post height and cut with a reciprocating saw or circular saw. Install post caps after trimming.
- Install lateral hold-down connections (attached frames only). Install at least two hold-down tension devices per IRC R507.2.4, placed within 24 inches of each end of the ledger, each rated at 1,500 lbf minimum.
- Install decking or surface material. For wood or composite decking, fasten from the house outward. Leave a 1/8-inch gap between boards for drainage. For pavers or tile over a frame, install appropriate underlayment and drainage membrane per manufacturer specs.
Paver base prep: the non-negotiable steps
If you're building a paver patio rather than a wood frame, the base system is your structure. Get it wrong and you'll be resetting pavers every spring. The ICPI (Interlocking Concrete Pavement Institute) technical specifications require graded aggregate base conforming to ASTM D2940, compacted to at least 98% modified Proctor density using a plate compactor. For most residential patios, that means a 4-6 inch compacted base on stable native soil, or 6-8 inches on softer soils, with compaction done in 2-3 inch lifts (layers), not all at once.
The bedding layer on top of the compacted base is a 1-inch layer of ASTM C33 coarse sand (not stone dust, not mason's sand). Screed it flat using two pipes or conduit as guides, set 1 inch apart. Pavers go directly on the screeded sand, do not compact the sand before laying pavers. Edge restraints go in before or immediately after laying pavers, pinned every 12 inches with 10-inch landscape spikes. Once all pavers are placed, run a plate compactor over the surface and sweep dry joint sand into the gaps.
Span and load: sizing joists and beams correctly
Undersized joists or beams are a safety issue, not just an aesthetic one. The American Wood Council's DCA-6 guide (Prescriptive Residential Wood Deck Construction Guide) is the go-to reference for prescriptive joist and beam sizing. It provides span tables organized by species group (Southern Pine, Douglas-Fir, Hem-Fir, SPF), joist spacing, and load assumptions that match the IRC's 40 psf live load and 10 psf dead load basis. Use these tables rather than guessing.
As a practical reference, a 2x8 Southern Pine joist at 16 inches on center can span approximately 12 feet under those loads. A 2x10 gets you to about 15 feet. A 2x12 reaches roughly 18 feet. But these numbers vary by species, grade, and spacing, so always check the actual DCA-6 or Southern Pine span tables for your specific material. The Southern Pine Inspection Bureau publishes species-specific maximum span tables that are the most precise resource for Southern Pine joists and rafters.
For beam sizing, the tributary area each beam supports determines the required size. A built-up 3-ply 2x10 beam in Southern Pine, for example, can typically span 9-10 feet when supporting joists with a 9-foot tributary width, but again, check the prescriptive beam tables in DCA-6 for your exact configuration. Steel frames use AISC preliminary sizing tables or engineer-calculated sections based on span-to-depth ratios and tributary load.
Drainage solutions for sloped sites
Slope is your friend when it's working for you and a persistent headache when it's not. For wood frame platforms, build in a slight pitch (1/8 inch per foot minimum) away from the house to allow surface water to run off. For attached frames, make sure the ledger flashing directs water outward, not behind the ledger. If your site collects water under the frame, install a French drain or channel drain at the uphill edge of the patio to intercept water before it reaches the foundation.
For paver patios on sloped sites, establish your finished grade slope during base prep, it's much easier to set the slope in the aggregate base than to try to correct it with thicker bedding sand (which creates an unstable base). A 2% slope (about 1/4 inch per foot) is the standard recommendation for paver surfaces. On steeper slopes, consider a stepped design with retaining features between levels rather than one large sloped paver field.
Adding railings, gates, privacy screens, and trellises
Once your frame is built, the additions that define the space, railings, gates, privacy fencing, and trellises, all connect back to the structural frame. Get the frame right and these elements install cleanly. The IRC requires guards (railings) on any deck or platform where the walking surface is 30 inches or more above grade, and those guards must be at least 36 inches high (R312. For step-by-step instructions on how to build a patio railing, see our guide on how to build a patio railing. 1.2). The top rail must resist a 200-pound concentrated load applied at any point, that's the code load used for rail design, and it's why a 4x4 railing post that's only toenailed to the rim joist will fail an inspection.
Railing posts should be bolted through the rim joist with two 1/2-inch bolts per post, or use a code-compliant surface-mount post base (like the Simpson APBW series) that's rated for the required moment load. Space posts no more than 6 feet apart (4-6 feet is typical) and verify your specific post connection can resist the required loading per your local code or the connector manufacturer's load table.
Patio gates, privacy fences, and trellises all benefit from dedicated posts that are independently anchored, don't rely on railing posts to also support a heavy gate or a trellis loaded with climbing plants. A trellis covered in wisteria or a gate swinging repeatedly puts sustained and dynamic loads on its support posts that are different from static railing loads. For detailed plans and anchoring tips, see how to build a patio trellis (5113a07e-4ce0-4e73-96f3-8a64e736ba98). Set those posts in concrete footings sized for the additional load, and use post bases rated for the application.
Common problems and how to fix them
Even experienced builders run into issues. Here's what I see most often on DIY patio frames and what to do about it.
- Frame is out of square after setting posts: Loosen post base fasteners slightly and shift the rim joist until diagonals match, then re-fasten. Easier to fix before joists are in.
- Paver base settling unevenly: Usually caused by inadequate compaction or skipping compaction between lifts. Remove pavers and edge restraints, re-compact the base in proper lifts, and relay.
- Ledger pulling away from house: Almost always inadequate fasteners or spacing. Remove ledger, verify band joist behind sheathing is solid, and re-attach per IRC Table R507.9.1.3.
- Posts not plumb after concrete cures: Rebuild the temporary bracing system. Once concrete is fully cured, you can use a come-along (ratchet strap) to pull the post back to plumb and add diagonal knee bracing if needed.
- Water pooling under wood frame: Install gravel fill under the frame, slope the grade away from the house, or add a French drain uphill. Do not leave standing water under a wood frame.
- Fastener corrosion appearing in year two or three: This means electroplated fasteners were used with treated wood. Replace with proper HDG or stainless hardware. Catch it early before the corrosion compromises structural connections.
- Joists bouncing or feeling springy: Either the joists are undersized for the span, the blocking is missing, or joist spacing is too wide for the decking material. Add mid-span blocking first — it often resolves the issue without replacing joists.
Realistic cost and time estimates
Budget planning matters as much as build planning. These ranges are for materials only, DIY labor is your time, not a cost line, but factor in that a first-time builder will typically take 2-3 times longer than an experienced one.
| Project Type | Materials Cost (per sq ft) | Typical Weekend Hours (200 sq ft) | Permit + Inspection |
|---|---|---|---|
| Paver patio (DIY base prep) | $4-$10 | 16-24 hours (2 weekends) | Often not required |
| Ground-level wood platform | $8-$18 | 20-30 hours (2-3 weekends) | Sometimes required |
| Raised wood platform (attached) | $15-$30 | 30-50 hours (3-5 weekends) | Almost always required |
| Steel frame patio | $20-$45 | 40-60+ hours, plus engineer review | Required |
Tool rental adds $100-$300 for a typical weekend project (plate compactor, auger, mixer). Permit fees range from $100 to $500 depending on jurisdiction and project scope. Inspections are typically included in the permit fee but may add scheduling time to your project timeline, build in a day or two for inspection scheduling before you can proceed with each phase.
Maintenance: keeping your frame in good shape for decades
A well-built patio frame with the right materials and fasteners needs relatively little maintenance, but skipping annual checks will cost you eventually. For wood frames, inspect all structural hardware once a year, look for rust staining, loose fasteners, or soft wood around post bases (a screwdriver pushed into the wood should meet firm resistance, not sink in easily). Clear debris from between deck boards and from under the frame to prevent moisture accumulation.
Pressure-treated lumber doesn't need to be painted or stained to maintain its structural integrity, but if you want to protect the appearance, use a penetrating deck sealer every 1-2 years after the wood has dried out from initial treatment (usually 6-12 months after install). Cedar benefits from a UV-blocking oil or sealer annually to prevent graying and checking. Composite and aluminum framing requires almost no maintenance beyond occasional cleaning.
For paver patios, re-sweep polymeric sand into joints every 2-3 years or whenever joints start looking hollow. Check edge restraints annually, any that have heaved or pulled away from the paver field should be re-staked immediately before the edge row starts to shift. A paver patio that's maintained this way can last 30-50 years without a major rebuild.
FAQ
What building codes and official standards should I research and cite for a patio-frame DIY article?
Primary codes: International Residential Code (IRC) — Chapter 5 (floors/decks) for loads, ledger/attachment, lateral‑load connections, guards (e.g., R507, R312). Secondary/industry standards: American Wood Council (AWC) DCA‑6 (Prescriptive Residential Wood Deck Construction Guide) and AWC span tables/WFCM excerpts for joist/beam sizing; American Institute of Steel Construction (AISC) guidance for steel framing; ICC‑ES acceptance criteria for helical piles (AC358). Also cite local building department requirements where jurisdictional differences (frost depth, permits) apply.
What load and design values must I reference for sizing members and demonstrating safety limits?
Use the IRC prescribed design loads: 40 psf live load (residential deck) and 10 psf dead load as baseline (use greater of live load or local ground snow load). For guard/handrail design cite I‑Code/ASCE requirements (200‑lb concentrated load, 50 plf uniform horizontal). For member sizing use AWC span tables (L/360 deflection criteria) or the NDS allowable stresses; for steel use AISC preliminary tables or an engineer for non‑prescriptive spans.
Which code tables and details are needed for ledger attachments, lateral restraint, and fastener selection?
Cite IRC prescriptive ledger/attachment tables (Table R507.9.1.3 / R507.2 depending on edition) for fastener type/size/spacing and IRC R703.4 for flashing ledgers. For lateral‑load connections reference IRC R507.2.4 (hold‑down/tension device requirements and capacities or prescribed alternative). Also reference Simpson Strong‑Tie or connector manufacturers for product load ratings and corrosion guidance.
What foundations/footing information should I include (types, sizing, frost, soil)?
Explain footing options: poured concrete footings/sonotubes, concrete piers, helical/ground screws. State IRC/IBC rules to place footings below local frost depth and size them for tributary loads and soil bearing capacity. Recommend checking local frost-depth maps, contacting AHJ, and performing soil borings or using conservative footing diameters (common prescriptive ranges 10–16") or geotech guidance for weak soils.
What do I need to know and cite about helical/ground‑screw foundations?
Reference ICC‑ES AC358 and manufacturer technical manuals for torque‑capacity correlation (Qu = Kt × T), recommended Kt factors, allowable capacities, and installation procedures. Advise on proof testing, site verification, and using manufacturer tables or an engineer for critical loads.
What guidance is required for paver‑base vs. deck‑style base preparation?
For pavers cite ICPI technical specifications: ASTM D2940 graded aggregate base, compaction targets, edge restraint requirements, and ASTM C33 bedding sand for paver bedding. For deck‑style frames cite AWC DCA‑6 for substructure, joist spacing, ledger/beam/joist details, and recommended clearances/drainage for wood/composite decks.