Building a patio porch is one of the most rewarding DIY projects you can tackle as a homeowner. A basic concrete slab patio can cost as little as $800 to $2,000 in materials and take a single weekend, while a fully covered, screened porch with a shingled roof runs $5,000 to $15,000 or more depending on size and materials. Either way, you do not need to hire a contractor to get there. This guide walks you through every decision point from picking the right type of patio porch for your yard to pouring concrete, laying pavers, framing a roof, running electrical, and finishing with stairs and lighting. Whether you are starting from scratch on a flat backyard or wrestling with a sloped lot, there is a path forward here.
How to Build a Patio Porch: Complete DIY Plan & Guide Materials, Permits & Costs

Nolan Carver
9 Aug 2026
What this guide covers and who it is for
This article is written for homeowners of all skill levels who want to plan, permit, and build their own patio porch without hiring a general contractor. If you have never mixed concrete before, you will find the beginner steps here. If you have already built a basic slab and want to add a covered roof, framed walls, or a screened enclosure, those sections are here too. The guide covers open patios, covered attached patios, freestanding covered patios, enclosed patio rooms, pavilions, corner patios, and patios with attached sheds. It includes material and foundation comparisons, a full tools and materials checklist, permitting guidance, drainage and grading solutions, and rough cost and timeline ranges throughout.
Pick the right type before you dig anything
The single biggest mistake I see beginners make is starting to dig or pour before they have decided what they are actually building. Spend an afternoon answering these checklist questions first. They will save you from tearing out work later.
- Do you want shade and weather protection, or just a defined outdoor floor? (Open patio vs. covered patio)
- Is this attached to the house, or do you want it freestanding in the yard? (Attached vs. freestanding covered patio — freestanding builds skip the ledger-board attachment step entirely)
- Do you want to use the space year-round in cold or bug-heavy climates? (Enclosed patio room or screened porch)
- Is this a large gathering space in a corner of the yard or against a fence? (Corner patio — these use two anchor walls and need special drainage planning)
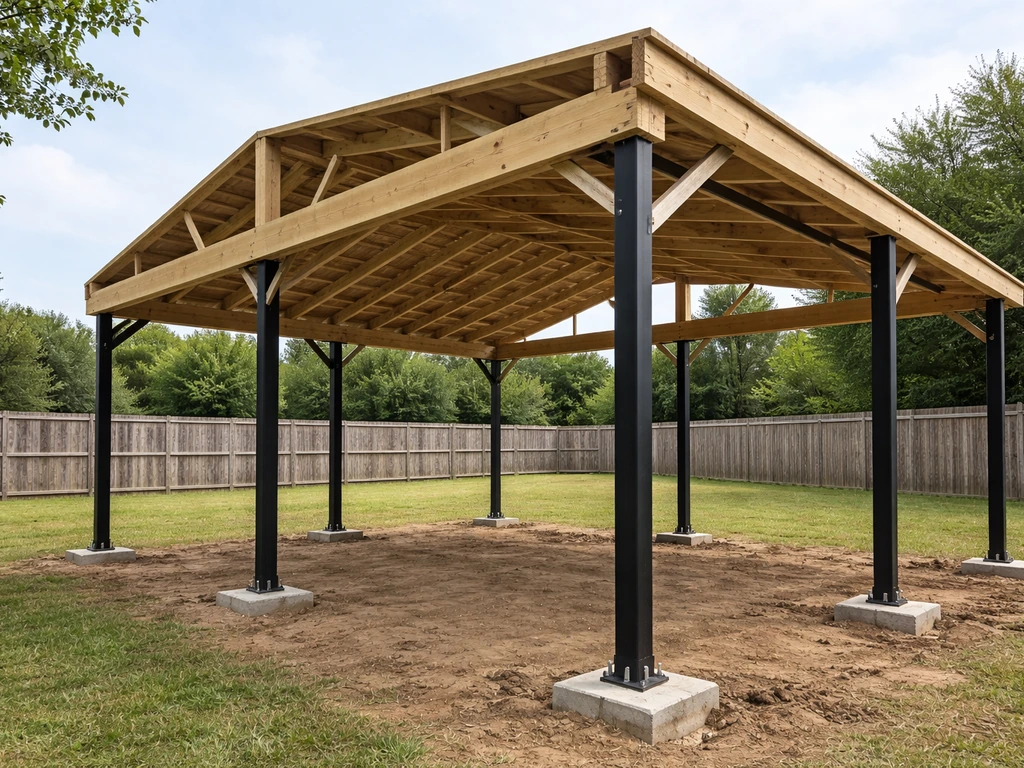
- Do you want a formal, open-roof structure for entertaining? (Patio pavilion — a freestanding roofed structure, typically with open sides)
- Do you need storage integrated into the patio design? (Patio with an attached shed — combines a slab or deck with a shed structure at one end)
- What is your realistic budget? (Open slab: $800–$3,000; covered attached porch: $4,000–$12,000; fully enclosed/screened room: $8,000–$20,000 in DIY materials)
- How much square footage do you need? (Under 200 sq ft keeps you in prescriptive IRC/DCA-6 scope, which means no engineer required in most jurisdictions)
- Does your HOA restrict roof styles, materials, or proximity to the property line?
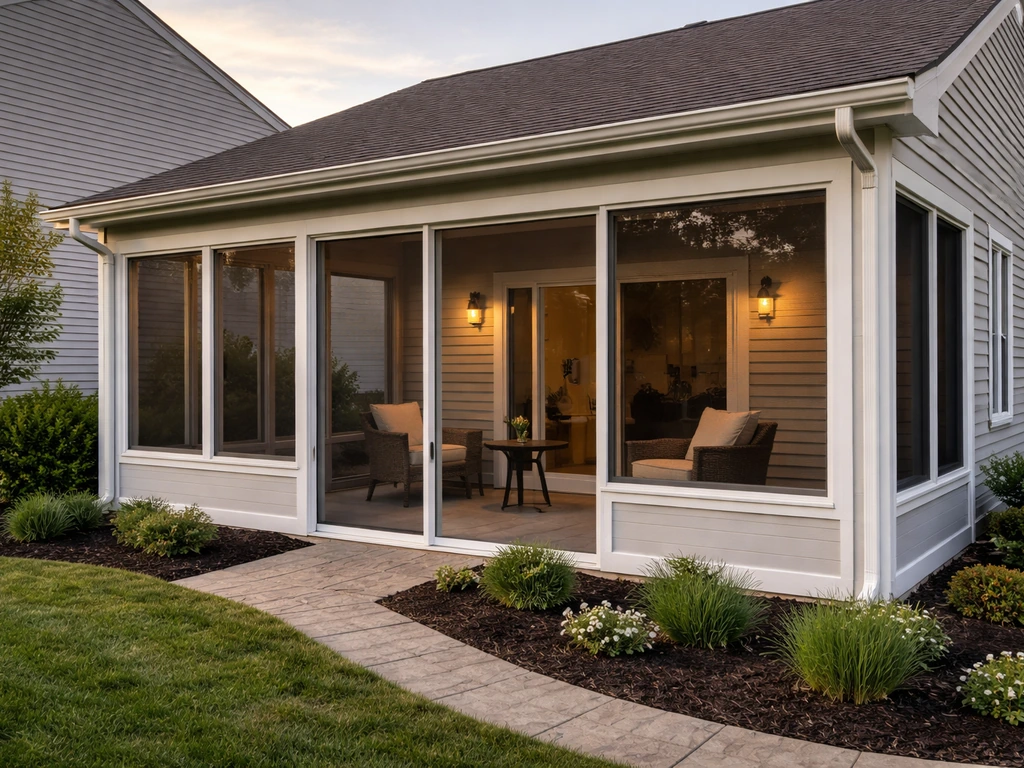
If you land on a freestanding covered structure, that is a pavilion build. For step-by-step plans on freestanding covered structures, see how to build a patio pavilion. If you want full walls and a roof tied to the house, you are building an enclosed patio room. If you want screens but not solid walls, you are building a screened porch. Each of these has its own permitting and structural requirements, which the sections below address specifically.
Site assessment: measure twice, dig once
Before you pick up a shovel, spend two hours assessing your site. I promise it saves days of rework. Here is exactly what to check.
Dimensions and layout
Measure your available space and mark it with spray paint or stakes and string. A comfortable dining patio is at least 12 ft x 14 ft (168 sq ft). A lounging patio for four chairs fits in 10 ft x 12 ft. If you are attaching the porch to the house, measure the wall length you have to work with and decide whether the patio runs the full wall length or a portion of it. Note any existing doors, windows, hose bibs, or electrical outlets on that wall. They affect your ledger placement and roof attachment.
Slope and drainage
Check your grade with a long level and tape measure. IRC R401.3 requires finished grade to slope away from foundation walls. Many jurisdictions enforce a minimum 2% slope (about 1/4 inch per foot), and some require 6 inches of drop in the first 10 feet from the house. Your patio surface itself needs a minimum 1/8 inch per foot slope away from the structure for drainage. On sloped lots, you may need a retaining wall on the downhill side to create a level pad. If your yard slopes more than 12 inches across the patio footprint, plan for that wall before you finalize your design.
Soil and bearing capacity
Use the USDA NRCS Web Soil Survey (free at websoilsurvey.nrcs.usda.gov) to look up your parcel's soil type, drainage class, and bearing capacity indicators before you design footings. Sandy, well-drained soils are ideal. Clay-heavy or expansive soils cause slab cracking and heaving and may require deeper footings or a thicker gravel base. If your lot was previously graded with fill dirt, or you find soft or wet soil when you dig test holes, talk to your building department about whether a soils report is required before they issue a permit.
Utilities, setbacks, sun, wind and privacy
- Call 811 (Dig Safe in the U.S.) at least three business days before digging to have underground utilities marked. This is free and legally required.
- Check your local zoning code for setback requirements. Covered structures commonly require 5 to 10 ft from side and rear property lines; attached porch additions may be treated as building additions and require larger setbacks.
- Note where the sun hits your yard in morning and afternoon. A south- or west-facing patio bakes in summer — plan for shade structures or pergolas accordingly.
- Identify prevailing wind direction. If you are in a high-wind zone, your roof framing will need to meet ASCE 7 wind load values and your permit may require engineering sign-off.
- Consider neighbor sight lines and fence heights when deciding whether to add a privacy screen, pergola lattice, or planted border.
Permits, HOA rules, inspections, and when you must pull a permit
Most homeowners I talk to either assume they need a permit for everything or assume they need one for nothing. The reality sits in the middle and depends on your jurisdiction. Here is the practical breakdown.
An open patio slab at grade (no roof, no walls, no electrical) often does not require a building permit, though you still need to meet setback and drainage rules. The moment you add a roof, even a pergola attached to the house, most jurisdictions treat it as a building addition and require a permit. Any electrical work (outlets, lighting, ceiling fans) triggers a separate electrical permit and inspection in virtually every jurisdiction, because the NEC (2020 edition, Section 210.8) requires GFCI protection for all outdoor dwelling receptacles. Enclosed walls or screens that create a habitable or semi-habitable room almost always require a building permit and inspections.
Municipal permit packages for a covered porch or attached patio room typically require a site plan showing the structure's location and distance from all property lines, a foundation/footing plan with depth and rebar details, a framing plan, and sometimes structural calculations if the design falls outside the IRC prescriptive scope. Example municipal checklists, such as City of San Diego, Information Bulletin 140: Residential Addition/Remodel Submittal Requirements, list a site plan, foundation/footing plans with size/depth/rebar, framing plans, structural calculations when required, and soils/geotechnical report triggers for work on fill or problematic soils City of San Diego — Information Bulletin 140: Residential Addition/Remodel Submittal Requirements (example municipal permit checklist). The City of San Diego, for example, requires all of these plus a soils report trigger if you are building on fill. New York City's Department of Buildings explicitly lists decks, porches, and porch enclosures as work requiring permits when structural elements or MEP (mechanical, electrical, plumbing) systems are involved. Your city is not New York or San Diego, but the pattern holds almost everywhere: structure plus roof plus electrical equals permit required.
- Open slab at grade, no roof, no electrical: Permit often not required, but confirm setbacks and drainage with your local planning office.
- Attached covered porch (roof tied to house): Building permit almost always required. Expect a foundation inspection, framing inspection, and final inspection.
- Freestanding covered structure (pavilion): Building permit usually required if over a certain square footage (commonly 200 sq ft). Check local threshold.
- Screened or enclosed porch/room: Building permit required. May also require energy code review in colder climates.
- Any electrical outlets, fans, or lighting: Electrical permit and GFCI inspection required.
- HOA: Submit your site plan and any elevation drawings to the HOA architectural review committee before you pull a permit — HOA approval and municipal permit are separate processes.
One thing that trips people up: if you build without a permit and then try to sell your house, the unpermitted structure can kill the sale or force you to tear it down. Pull the permit. It is worth the $150 to $500 fee.
Concrete measurements, spacing, and code-aware design notes
Whether you are pouring a simple slab patio or setting footings for a covered porch, these are the numbers that matter. Use them as your starting point, then verify against your local code.
Slab thickness and base
The American Concrete Institute's ACI 302.1R guide and Portland Cement Association (PCA) guidance both call for a minimum 4-inch-thick slab for pedestrian patio use. If you expect vehicle loads (like a driveway apron leading to the patio), go 5 to 6 inches. Below the slab, install a compacted gravel base of at least 4 inches (6 inches on clay or poorly drained soils) to aid drainage and reduce frost heave. Tamp the base in 3-inch lifts using a plate compactor until it is firm enough that a boot heel leaves less than a half-inch impression.
Control joints
Concrete shrinks as it cures and will crack. Control joints are intentional weak lines that direct cracks where you want them. The ACI 302.1R rule of thumb is to space control joints at 2 to 3 times the slab thickness in feet. For a 4-inch slab that means a joint every 8 to 12 feet. Cut control joints to a depth of one-quarter the slab thickness (1 inch for a 4-inch slab) using a groover tool within the first hour of finishing, or saw-cut within 24 hours of pouring. For a 12 ft x 16 ft slab, you need at minimum one joint running lengthwise and one crosswise.
Footings for covered structures
Post footings for covered patios and pavilions must extend below the local frost line per IRC Section R403. Look up your local frost depth at your building department or on the IRC frost depth map. Common depths range from 12 inches in the Deep South to 48 inches or more in Minnesota. If you are in a climate where full frost-depth footings would mean digging 3 to 4 feet, ask your building department whether Frost-Protected Shallow Foundation (FPSF) methods are accepted under IRC R403.3. FPSF uses rigid insulation panels around a shallow footing to prevent frost penetration, with dimensions specified in IRC Table R403.3(1). Not every municipality has adopted this provision, so confirm locally before designing to it.
Common clearances and spacing
| Design Element | Typical Dimension | Code/Standard Reference |
|---|---|---|
| Patio slab thickness (pedestrian) | 4 in. minimum | ACI 302.1R |
| Gravel base under slab | 4 in. (6 in. on clay) | ACI 302.1R / PCA |
| Control joint spacing (4 in. slab) | 8–12 ft on center | ACI 302.1R (2–3× slab thickness in feet) |
| Control joint depth | 1 in. (1/4 slab thickness) | ACI 302.1R |
| Post footing depth | Below local frost line | IRC R403 |
| Post footing diameter (common 4x4 post) | 12 in. minimum | IRC R507 / local code |
| Post footing diameter (6x6 post, covered roof) | 16–18 in. minimum | IRC R507 / local code |
| Ledger lag screw spacing (2x10 ledger) | Per IRC R507.9 table | 2024 IRC R507 |
| Minimum patio surface slope away from house | 1/8 in. per foot (1%) | IRC R401.3 / general practice |
| Finished grade slope away from foundation | 2% minimum (some jurisdictions: 6 in. in 10 ft) | IRC R401.3 |
Material and foundation options compared
This is the question I get most often: what should I build my patio floor out of? The honest answer depends on your budget, your soil type, your climate, and how much ongoing maintenance you want. Here is a side-by-side breakdown of every realistic option.
| Material | Installed Cost (DIY, per sq ft) | Durability | Freeze-Thaw Performance | Maintenance | Best For |
|---|---|---|---|---|---|
| Concrete slab | $6–$10 | Excellent (30+ years) | Good with control joints | Low (seal every 3–5 yrs) | Budget builds, large flat areas, covered patios |
| Concrete pavers | $10–$18 | Excellent (25+ years) | Excellent (individual units flex) | Low-medium (re-sand joints) | DIY-friendly, design flexibility, easy repairs |
| Natural stone (flagstone) | $15–$30 | Excellent (50+ years) | Good (dry-set) / Variable (mortared) | Medium (reset shifting stones) | High-end aesthetics, irregular layouts |
| Wood decking (pressure-treated) | $12–$20 | Good (15–25 yrs PT) | Good if ventilated | Medium-high (stain/seal every 2 yrs) | Sloped lots, raised decks, DIY deck builds |
| Composite decking | $20–$35 | Excellent (25–30 yrs) | Excellent | Low (wash annually) | Raised patios, premium finish, low maintenance |
| Gravel / permeable system | $3–$8 | Moderate (resurface over time) | Excellent (drains freely) | Low-medium (rake, top up) | Budget patios, excellent drainage sites, informal areas |
| Raised concrete slab (on grade beam) | $10–$16 | Excellent | Good with insulated forms | Low | Sloped lots, crawl-space transitions |
Concrete slab
A poured concrete slab is the most common patio foundation because it is durable, low maintenance, and relatively affordable. Order ready-mix concrete rated at 3,500 psi or higher for exterior slabs. Use 3/8-inch rebar on 18-inch centers or 6x6-inch 10/10 welded wire reinforcement (WWR) for a standard 4-inch residential patio. Keep the concrete wet for at least 7 days during curing (cover with plastic sheeting or use a curing compound) to reach design strength. Do not pour when temperatures are below 40°F without cold-weather protection measures.
Concrete pavers
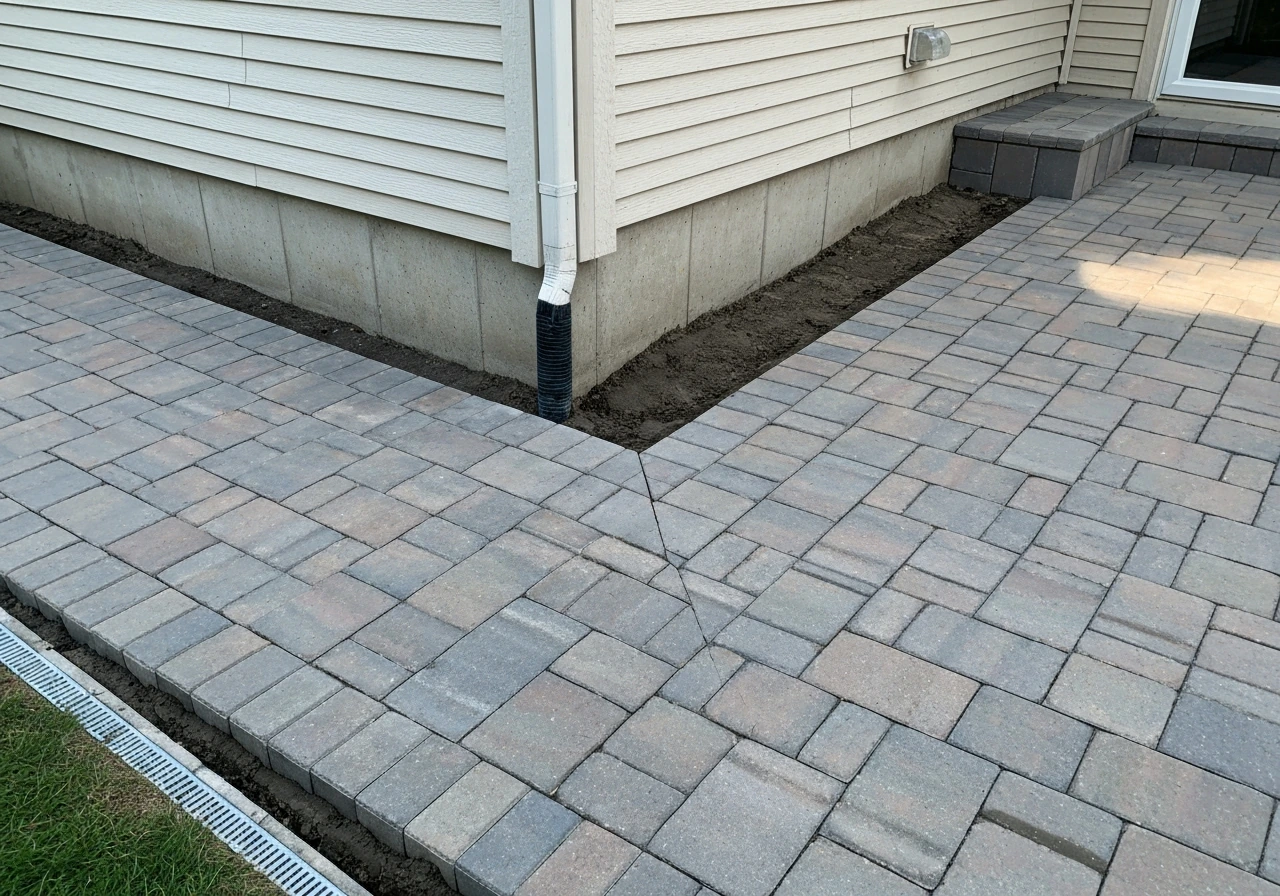
The Interlocking Concrete Pavement Institute (ICPI) specifies a standard pedestrian paver installation as: 4 inches of compacted aggregate base (6 inches for heavy foot traffic), 1 inch of bedding sand (screeded level), pavers set on top, then polymeric joint sand swept and compacted into the joints. See Interlocking Concrete Pavement Institute (ICPI), Tech Specs & installation guidance for concrete pavers and PICP for official installation specifications, including ~1 in. bedding sand and recommended base thicknesses for pedestrian and vehicular use Interlocking Concrete Pavement Institute (ICPI) — Tech Specs & installation guidance for concrete pavers and PICP. Plastic or aluminum edge restraints spiked into the base every 12 inches keep the field from creeping outward over time. Pavers are forgiving for beginners because you can pull and reset individual units if you make a mistake or a tree root causes heaving.
Natural stone
Flagstone and cut stone can be installed dry-set (on a sand-and-aggregate base, similar to pavers) or mortar-set on a concrete slab. Dry-set is better for freeze-thaw climates because it allows ground movement without cracking. The Natural Stone Institute recommends testing stone for freeze-thaw durability (absorption rate matters) and using a minimum 3/4-inch-thick stone for pedestrian paving. Mortar-set stone on a slab follows TCNA/ANSI A108 standards: use a latex-modified mortar and leave expansion joints at slab control-joint locations.
Wood and composite decking
Wood decking on a raised frame is the right choice when your yard has significant slope, or when you want to transition from indoor floor height to the outside with minimal step down. Use pressure-treated (PT) lumber rated for ground contact (UC4B or UC4C) for any members within 6 inches of grade. Joists for a residential deck typically run 2x8 or 2x10 at 16-inch on-center spacing, span tables in the American Wood Council's DCA-6 guide give you the exact allowable spans for your species and grade. Composite decking costs more upfront but eliminates annual sealing and resists moisture and insects for 25 or more years.
Gravel and permeable systems
A gravel patio is the fastest and cheapest build, clear the area, install landscape fabric, add 4 inches of compacted crushed stone base, top with 2 inches of pea gravel or decomposed granite, and install edge restraints. Permeable interlocking concrete pavement (PICP) is a more engineered version that handles stormwater on-site. ICPI's permeable design guidance calls for a minimum 8-inch aggregate base (12 inches on low-permeability clay soils) with an optional underdrain system. PICP is an excellent choice in jurisdictions that incentivize or require on-site stormwater retention.
Step-by-step build sequences
Basic concrete slab patio
- Mark the patio perimeter with stakes and string. Confirm corners are square using the 3-4-5 triangle method (measure 3 ft on one side, 4 ft on the other, and the diagonal should be exactly 5 ft).
- Excavate 8 inches deep (4 in. gravel base + 4 in. slab). Slope the excavation floor away from the house at 1/8 in. per foot.
- Compact the subsoil with a plate compactor. Fill low spots with gravel, not dirt.
- Install 4 inches of compacted crushed stone (3/4-inch clean gravel). Compact in two 2-inch lifts.
- Set 2x4 or 2x6 form boards around the perimeter, staked every 4 ft. Use a level to confirm the 1/8-in.-per-foot drainage slope.
- Lay 6x6-10/10 WWR or 3/8-inch rebar on 18-inch centers. Support reinforcement on plastic chairs so it sits in the middle third of the slab (about 1.5 in. from the bottom for a 4-in. slab).
- Order ready-mix concrete (3,500 psi, 4-inch slump for patio work). Calculate cubic yards: length x width x 0.333 ft (4 in.) / 27. Add 10% for waste.
- Pour, screed with a 2x4 strike-off board, bull-float the surface, then edge and cut control joints every 8–12 ft with a grooving tool.
- Broom-finish the surface for slip resistance. Cover with plastic sheeting and keep moist for 7 days.
- Strip forms after 24–48 hours. Backfill edges and slope grade away from the slab.
Paver patio
- Excavate 6 inches deep (4 in. base + 1 in. sand + ~1 in. paver height above grade for drainage).
- Compact subgrade. Install 4 inches of compacted aggregate base in two lifts.
- Set plastic or aluminum edge restraints on all sides and stake every 12 inches.
- Screed 1 inch of coarse bedding sand (ASTM C33) level across the base. Do not walk on screeded sand.
- Lay pavers in your pattern, keeping joints tight (1/8 in. maximum). Use a rubber mallet to tap each paver level. Check with a level every 4–5 pavers.
- Cut border pavers with a diamond-blade circular saw or wet saw.
- Sweep polymeric joint sand into joints, compact with a plate compactor (use a rubber pad to protect pavers), and sweep a second application of sand.
- Mist with water to activate polymeric sand. Allow to cure 24 hours before foot traffic.
Raised wood deck/patio
- Dig footing holes to local frost depth. Diameter: 12 inches for 4x4 posts, 16 inches for 6x6 posts.
- Set tube forms, pour concrete footings, and set post-base hardware while concrete is wet. Let cure 48 hours minimum.
- Install posts. Brace plumb in both directions until beams are attached.
- Attach a ledger board to the house rim joist using lag screws per the IRC R507.9 fastener table. Install flashing above the ledger to waterproof the wall-ledger junction.
- Install beam(s) across the posts using post-cap hardware.
- Hang joists on joist hangers at 16-inch on-center spacing. Reference DCA-6 span tables for your lumber species, grade, and span.
- Install blocking between joists at the midspan for any joist over 8 ft.
- Lay decking boards with 1/8-inch gaps for drainage. Fasten with 3-inch deck screws or hidden fasteners.
- Install stairs (minimum 36-inch wide, 7-inch rise, 11-inch run per IRC), railings (required when deck is 30 inches or more above grade), and skirt boards.
Covered attached porch
- Complete the slab or deck floor as above.
- Install a pressure-treated sill plate on the slab (anchor with concrete anchors 6 in. from ends and 24 in. on center) or secure posts directly to deck post bases.
- Set posts (typically 6x6 PT) at patio corners and intermediate points. Brace plumb.
- Attach a ledger or beam to the house wall at the roof attachment point. Follow IRC R507 and manufacturer flashing details to prevent water intrusion.
- Install roof rafters from the house ledger down to the beam on the outer posts. For a simple lean-to (shed roof), a slope of 2:12 to 4:12 (2–4 inches rise per 12 inches of run) is sufficient for rain shedding and code compliance in most areas.
- Sheath the roof with 1/2-inch plywood or OSB, install felt or synthetic underlayment, then finish with shingles, metal roofing, or polycarbonate panels.
- Add fascia and gutters on the outer edge. Route downspouts away from the patio slab.
- Optional: install ceiling fan blocking in rafters, run electrical conduit, and call for inspection before closing up any electrical rough-in.
Screened or enclosed porch
- Start with a completed covered porch frame (posts, beams, roof).
- Frame walls between posts with 2x4 studs at 16-inch on-center spacing. Include rough openings for a door (minimum 32-inch clear width) and any windows.
- For a screened porch, install screen frames (1x4 or screen spline systems) between the studs or use pre-made screen panel kits between posts.
- For an enclosed room, sheathe the walls, install windows with proper flashing, and apply exterior cladding to match the house.
- Insulate if needed (required in many jurisdictions for enclosed conditioned spaces). Add vapor retarder per local energy code.
- Install interior finish (drywall or T&G boards), then door hardware and weatherstripping.
- Run electrical (GFCI-protected outlets, ceiling fan, and lighting per NEC 210.8). Schedule electrical rough-in inspection before closing walls.
- Install flooring finish (paint, stain, tile, or composite porch boards) after rough inspections are complete.
Roof and cover options compared
The roof type you choose affects your permit requirements, structural loads, maintenance, drainage, and the year-round usability of the space. Here is how the main options stack up.
| Roof/Cover Type | Typical Pitch | Waterproof? | Attached or Freestanding | Relative Cost (DIY) | Best Use Case |
|---|---|---|---|---|---|
| Attached lean-to (shed roof) | 2:12 to 4:12 | Yes (with shingles or metal) | Attached to house | Low | Simple covered porch addition, small footprints |
| Gable roof (pavilion or porch) | 4:12 to 8:12 | Yes | Either | Medium | Larger patios, better headroom, classic look |
| Open pergola (no deck boards) | Flat (posts and beams) | No (provides shade only) | Either | Low-Medium | Shade structure, plant support, informal use |
| Polycarbonate panels | 2:12 minimum | Yes (UV-filtering) | Either | Low | Budget covered porch, greenhouse feel, light transmission |
| Metal roofing (corrugated or standing seam) | 1:12 to 2:12 minimum | Yes | Either | Medium | Modern look, durability, easy over existing framing |
| Asphalt shingles | 4:12 minimum (3:12 with ice-and-water shield) | Yes | Attached | Medium | Matching house roof, traditional look, proven durability |
| Fabric shade sail / tensile | Varied (must slope to drain) | Partial (shade, light rain) | Freestanding posts | Very Low | Temporary or seasonal shade, rental properties |
Attachment and drainage details that matter
The most common failure point on attached covered porches is water intrusion at the ledger-to-house junction. When you attach a roof to the house wall, the top of the ledger or the roof-to-wall flashing must be installed under the house's water-resistant barrier (house wrap or building paper) and over the ledger so water cannot run behind the ledger and into the wall cavity. Use step flashing, counter flashing, or a continuous Z-flashing depending on your siding type. This single detail prevents rot that can cost thousands to repair.
In high-snow-load areas, your covered porch roof must be engineered or designed per ASCE 7 ground snow load values for your location. A 4:12 or steeper pitch sheds snow more reliably than a 2:12 lean-to. In high-wind zones (coastal or tornado-prone areas), rafters and posts must be connected with rated hurricane ties and post caps, and the design may require a licensed engineer's stamp on the permit drawings. Your local building department will tell you if your location triggers these requirements.
Adding features: fire pits, retaining walls, stairs, lighting
Fire pit
A built-in fire pit should sit on its own concrete pad at least 4 inches thick, separate from the main patio slab so heat does not crack the main slab at the joint. Center the pit at least 10 feet from the house, any wood structure, or overhanging trees. Most municipalities require a spark arrestor screen and some ban wood-burning fire pits within city limits, check before you build. Gas fire pits require a gas line permit and inspection.
Retaining walls
If your patio is cut into a slope, you need a retaining wall on the uphill side. Segmental retaining wall block (like Allan Block or Versa-Lok) can be DIY-installed for walls up to 24 to 36 inches tall depending on the manufacturer's specs. Taller walls or walls with surcharge loads (driveways, structures behind them) typically require engineering. Always install a perforated drain pipe at the base of the wall, covered with gravel, to relieve hydrostatic pressure. Walls that retain water behind them fail faster than almost anything else in a patio build.
Stairs
IRC stair geometry for exterior stairs: maximum 7-3/4-inch riser height, minimum 10-inch tread depth, minimum 36-inch width. Keep all risers within 3/8 inch of the same height across the flight, uneven risers are a tripping hazard and a code violation. Stringers are typically cut from 2x12 PT lumber. The bottom of the stringer must be supported on a concrete pad or footing, not resting directly on soil, to prevent rot and settling.
Outdoor lighting
Plan lighting rough-in before you pour your slab or close up your roof. Conduit embedded in a slab is far easier to install before the pour than after. Low-voltage landscape lighting (12V) does not require a permit in most jurisdictions. Line-voltage lighting (120V) for ceiling fans, overhead fixtures, or wall outlets requires a permit and GFCI protection per NEC 210.8. Run conduit from the house panel to a weatherproof subpanel on the porch, then branch to each outlet and fixture location.
Drainage and grading solutions for common problems
Drainage is the problem that comes back to haunt you if you ignore it at the start. I have seen beautifully finished patios that pond water against the house foundation because the builder did not verify slope before pouring. Here are the most common drainage challenges and how to fix them.
- Flat or back-sloping yard: Install a trench drain (channel drain) at the outer edge of the patio to collect runoff and route it to a pop-up emitter or dry well at least 10 ft from the foundation.
- Clay soil that holds water under the slab: Increase your gravel base to 6 inches and consider a perforated drain pipe in the gravel layer, sloped to daylight.
- Patio surrounded by grade on three sides (common with corner patios): Install a perimeter drain on the two enclosed sides and direct it to a downhill exit point.
- Existing patio that ponds: Cut a trench drain into the existing slab with a diamond blade wet saw. It is a lot of work but less work than replacing the slab.
- Frost heave under pavers: This almost always means inadequate base compaction or insufficient base depth. Pull the affected area, add base material, recompact, and reset.
Rough cost and timeline ranges
| Project Type | Typical DIY Material Cost | DIY Timeline | Skill Level |
|---|---|---|---|
| Open concrete slab (12x16 ft) | $800–$1,800 | 1–2 weekends | Beginner |
| Paver patio (12x16 ft) | $1,500–$3,500 | 2–3 weekends | Beginner-Intermediate |
| Gravel patio (12x16 ft) | $400–$900 | 1 weekend | Beginner |
| Raised wood deck patio (12x16 ft) | $2,500–$5,000 | 2–4 weekends | Intermediate |
| Attached covered porch (12x16 ft, lean-to roof) | $4,000–$9,000 | 3–5 weekends | Intermediate-Advanced |
| Freestanding covered pavilion (14x18 ft) | $5,000–$12,000 | 4–6 weekends | Intermediate-Advanced |
| Screened/enclosed porch (12x16 ft) | $7,000–$18,000 | 6–10 weekends | Advanced |
| Patio with attached shed | $5,500–$13,000 | 4–7 weekends | Intermediate-Advanced |
These ranges assume you are doing all the labor yourself and purchasing materials at retail prices. Permit fees ($150 to $600 typically), tool rentals (plate compactor at $80 to $120/day, concrete mixer at $50 to $80/day), and delivery charges for concrete or bulk materials add to the total. Budget a 15% contingency for every project, unexpected extras like discovering soft soil or needing more base material are extremely common.
Tools and materials checklist for each patio variant
Basic concrete slab
- Tape measure, string line, line level, stakes
- Shovel, wheelbarrow, tamper or plate compactor (rent)
- 2x4 or 2x6 form boards, duplex nails, form stakes
- Level (4 ft), rubber mallet
- Concrete screed (2x4 x length of form), bull float, edger, groover
- Welded wire reinforcement (6x6-10/10) or 3/8-inch rebar + wire ties
- Plastic chairs (rebar supports)
- Ready-mix concrete (3,500 psi) or bags + mixer
- Concrete broom (for finish texture)
- Plastic sheeting (for curing), duct tape
- Concrete sealer (apply after 28-day cure)
- Safety: gloves, rubber boots, eye protection, knee pads
Paver patio
- All tools from slab list above (minus concrete-specific tools)
- Plate compactor with rubber pad attachment
- Screed pipes (1-inch OD steel conduit), screed board
- Rubber mallet, hand tamper
- Paver saw with diamond blade, or angle grinder with diamond blade
- Compacted aggregate base material (3/4-inch crushed stone)
- Coarse bedding sand (ASTM C33)
- Interlocking concrete pavers (order 5–10% extra for cuts)
- Plastic or aluminum edge restraints + 10-inch spikes
- Polymeric joint sand
- Garden hose with spray nozzle
Raised deck patio
- Post-hole digger or power auger (rent)
- Tube forms (12 or 16 in. diameter)
- Post-base hardware (ABA or similar), concrete anchors
- Circular saw, miter saw, jigsaw
- Drill/driver, impact driver
- Level, speed square, framing square
- Pressure-treated lumber: 6x6 posts, 2x10 beams and joists, 2x12 stair stringers
- Joist hangers, post caps, hurricane ties, structural screws
- Ledger board + lag screws/through bolts per IRC R507 table
- Ledger flashing (self-adhering membrane + Z-flashing)
- Decking boards (PT, cedar, or composite)
- 3-inch deck screws or hidden fastener system
- Concrete (for footings)
- Safety: hard hat when working overhead, fall protection for elevations over 6 ft
Covered porch (roof addition)
- All framing tools from raised deck list
- Rafter square (speed square or framing square)
- Chalk line
- Circular saw with rafter blade
- Roofing nail gun or hammer, roofing nails
- Pry bar, utility knife
- Roof sheathing (1/2-inch plywood or 7/16-inch OSB)
- Synthetic underlayment or #15 felt
- Roofing material: asphalt shingles, metal panels, or polycarbonate sheets
- Ridge cap, drip edge, step flashing
- Fascia boards, soffit (optional), gutters + downspouts
- Exterior-rated paint or primer for exposed wood
- Ladder, roof jacks or scaffolding for safety on slopes over 4: 12
Screened or enclosed porch
- All tools from covered porch list
- Router or spline roller (for screen installation)
- Caulk gun, exterior caulk, backer rod
- Screen material (fiberglass or aluminum mesh) + spline
- 2x4 stud framing lumber for knee walls and screen bays
- Pocket door or hinged screen door + hardware
- Exterior-rated electrical boxes, conduit, GFCI outlets, weatherproof covers
- Wire (12/2 or 14/2 NM or conduit with THWN) for lighting and outlets
- Ceiling fan rated for damp or wet locations (check label)
- Insulation batts (if enclosing for year-round use)
- Drywall or tongue-and-groove porch boards for interior finish
- Primer, exterior and interior paint
Safety and common troubleshooting tips
Mistakes are part of the process, and most of them are fixable. Here are the issues I see most often and how to handle them.
- Concrete poured too dry (stiff, hard to screed): Add a small amount of water at the truck, but do not exceed the design water-cement ratio. Over-watered concrete is weak. Better fix: order concrete with a plasticizer (water reducer) additive next time.
- Paver patio not draining (low spot): Pull the pavers and re-screed the sand in that area. This is one of the great advantages of pavers — you can fix it without demo.
- Post footing cracked or tilted before concrete set: Brace posts immediately in two directions before pouring. Do not let go until the concrete has set overnight.
- Ledger flashing leaking: This is serious — stop using the space until repaired. Remove the siding above the ledger, install self-adhering membrane flashing, then Z-flashing under the siding and over the ledger top.
- Slab cracked between control joints: If the crack is hairline and not moving, it is cosmetic. Fill with a flexible concrete crack filler. If it is wider than 1/4 inch or offset vertically, investigate the cause (tree roots, soil settlement) before patching.
- Deck boards cupping or warping: Ensure adequate airflow under the deck (minimum 18 inches of clearance to grade is ideal). Also confirm decking was installed bark-side down to minimize cupping.
- Working near electrical: Always shut off the circuit at the breaker and verify with a non-contact voltage tester before drilling into walls for ledger bolts or running conduit.
Where to go next with your patio porch
Once your basic patio porch is built, there are natural next projects that build on what you have already done. If you built an open slab or raised deck and want to add a roof, the covered porch sections above are your next step. For step-by-step instructions on how to create a covered patio, consult the dedicated guide on how to create a covered patio. If you want to take a covered porch and convert it to a year-round living space, that is an enclosed patio room project, which adds framed walls, windows, insulation, and sometimes HVAC. If you want a completely separate outdoor structure in the yard, perhaps a dining pavilion away from the house, that is a freestanding covered patio or a full patio pavilion build, both of which follow the same footing and framing principles covered here but without the ledger attachment to the house. And if storage is a priority, adding an attached shed to one end of your patio slab is a logical extension that shares the existing foundation and roof line. Any of these follow-on projects use the same tools, the same permitting process, and the same framing logic you have already learned here. Each one gets easier.
FAQ
What building codes and standards must I research to ensure a DIY patio porch article is code‑accurate and safe?
Identify and reference the current International Residential Code (IRC) for foundations, decks/porches (including R507/R5xx deck prescriptive provisions), and finished‑grade/drainage rules; the International Building Code (IBC) and Chapter 16/ASCE 7 where projects exceed prescriptive scope or need engineered design; and local municipal code amendments. Note any local adoptions or deviations from the model codes.
Which structural design and load standards are essential to cover covered‑patio and porch roofs?
Use ASCE/SEI 7 (or locally adopted load standards) for snow, wind and seismic load values and load combinations. For engineered details reference IBC Chapter 16 and applicable structural design references; for prescriptive wood framing use the American Wood Council DCA‑6 and IRC joist/beam span tables.
What geotechnical and soil information must be gathered for foundation and slab guidance?
Consult USDA‑NRCS Web Soil Survey for site soil mapping, drainage classes, and indicators of bearing capacity or high seasonal water table. Note when a formal geotechnical report or site‑specific soil testing (borings/soil classification) is required—e.g., on fills, expansive clays, high water table, steep slopes or where code/engineer mandates exist.
Which authoritative resources define patio slab and concrete practices (thickness, joints, reinforcement, base)?
Reference ACI 302.1R (Guide for Concrete Floor and Slab Construction), PCA guidance and local best practices. Include minimum slab thickness (typical 4" for pedestrian patios), control‑joint spacing rules (approx. 2–3× slab thickness in feet), reinforcement options and base/compaction specs.
What sources cover paver, permeable pavement and segmental unit installation details?
Use Interlocking Concrete Pavement Institute (ICPI) technical specifications and PICP manuals for bedding, base thickness (4" for pedestrian up to 8–12" for vehicular loads), edge restraints, joint‑sand and permeable design/stormwater sizing. Complement with EPA green‑infrastructure references where relevant.
What references are needed for natural stone, flagstone and tile installations on patios?
Consult the Natural Stone Institute for dimension‑stone design and installation, and the Tile Council of North America (TCNA) plus ANSI A108/A118 standards for mortar/thin‑set installations, membranes, and joint/sealant recommendations to prevent freeze‑thaw and movement failures.