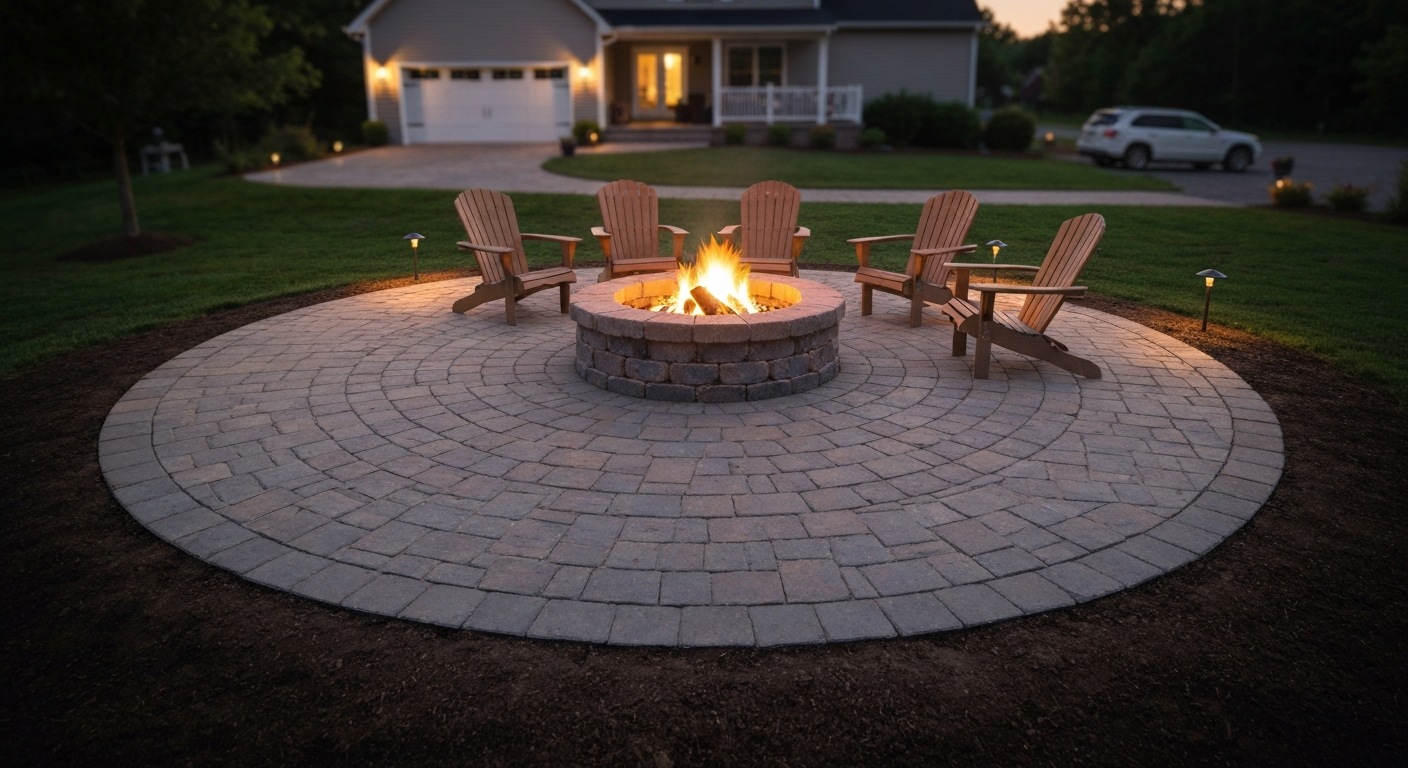
You can absolutely build a round patio with an integrated fire pit yourself, and the result looks far more impressive than the effort required once you break it into stages. The basic process is: mark your circle, excavate 8 to 10 inches, compact a gravel base, lay your chosen paving surface, then build or set your fire pit at the center or one edge. The whole project costs roughly $1,500 to $6,000 in materials depending on size and what you choose to pave with, and most homeowners with a free weekend can complete a 12 to 16-foot diameter patio in two to three days of real work. This guide walks through every decision and every step, from measuring your yard to lighting the first fire.
How to Build a Round Patio With a Fire Pit: Step-by-Step Guide

Nolan Carver
25 Jul 2026
What this guide covers and who it's for
This is a full construction guide for building a new round patio that includes a fire pit, written for DIY homeowners at any skill level. If you have never laid a paver before, the early sections on site prep and layout will give you the foundation you need. If you have already built a basic patio and want to add a fire feature, you can jump ahead to the fire pit types and retrofit sections. Along the way I also cover the pea gravel patio approach (a genuinely beginner-friendly option), the chimney and patio fireplace upgrade, whether you can add a fire pit to a patio you already have, and all the code and safety rules you need to know before you dig.
Project overview and key decisions before you start
Before you order a single paver or bag of sand, make four decisions: how big the patio will be, what material you'll pave it with, what type of fire pit you want, and what your real budget is. Each choice affects every other one, so it's worth spending an afternoon on paper before you spend money.
Choosing the right diameter
A patio that seats four to six people around a fire pit comfortably needs a minimum diameter of 14 feet. That gives you a 3-foot fire-pit ring at the center, roughly 4 feet of open space between the pit edge and the first chair, and enough room to pull a seat back without stepping off the patio. For six to eight people, aim for 16 to 18 feet. If you go smaller than 12 feet, seating becomes cramped and the minimum setback distance between the fire and any combustible structure becomes harder to satisfy. Sketch the circle on paper with a rough furniture plan before you commit.
Material, fire pit type and budget snapshot
Here is a realistic cost range for a 14-foot-diameter round patio (about 154 square feet) paired with a mid-range fire pit. These figures cover materials only; if you hire out any labor, add roughly $6 to $15 per square foot for installation depending on your region.
| Patio Material | Approx. Material Cost (154 sq ft) | Fire Pit Option | Fire Pit Cost Range | Rough Total Materials |
|---|---|---|---|---|
| Pea gravel | $150–$300 | Prefab steel ring | $200–$600 | $350–$900 |
| Concrete pavers | $600–$1,200 | DIY masonry block ring | $300–$700 | $900–$1,900 |
| Brick | $700–$1,400 | Prefab gas burner insert | $800–$2,000 | $1,500–$3,400 |
| Natural stone | $1,200–$2,500 | Built-in masonry + gas | $1,500–$5,000+ | $2,700–$7,500+ |
| Poured concrete | $800–$1,500 | Metal bowl/portable | $200–$500 | $1,000–$2,000 |
The pea gravel plus steel ring combo is the most budget-friendly and genuinely achievable in a single weekend. Concrete pavers with a DIY masonry block fire pit is the sweet spot for most homeowners: durable, attractive, and buildable without specialized tools. Natural stone with a gas fire pit is the premium end and involves a licensed gas plumber for the supply line, which adds $500 to $1,500 depending on your home's gas connection distance.
Site assessment and laying out a round patio
A round patio lives or dies by its site prep. The two most common mistakes I see are choosing a low spot where water collects and underestimating how much slope correction is needed. Walk your yard after a rain before you pick a spot.
Picking the location
- Sun and shade: morning sun feels pleasant by a fire; afternoon sun in summer can make a west-facing patio unbearable. Walk the site at different times of day.
- Views: position the patio so your best sightline is the one you face when seated at the fire, not a fence or an AC unit.
- Drainage: the ground should slope away from the house at least 1 inch per 8 feet. If water pools here now, it will pool under your patio later.
- Utilities: call 811 (in the U.S.) at least three business days before you dig. Gas, electric, water and cable lines are buried in most yards. This is not optional.
- Setbacks from structures: see the codes section below, but plan for at least 10 feet from your house for a gas fire pit and 25 feet for a wood-burning fire pit as a starting point. Always verify your local rules.
Marking the circle
To lay out a perfect circle, drive a stake at the exact center point of your planned patio. Tie a string to the stake and measure out to your desired radius (half the diameter, so 7 feet for a 14-foot patio). Walk around the stake holding the string taut and spray marking paint or pour a thin line of sand at the end of the string as you go. That is your excavation line. Mark a second inner circle for the fire pit location at this stage too: for a centered fire pit, the inner circle is typically 2 to 3 feet in radius from the center stake. Keep the stake in place through the entire excavation process as your reference point.
Handling slope
If your site slopes more than 2 inches across the patio diameter, you have two options. You can cut into the high side and build up the low side with compacted fill, creating a level pad. Or, for a slope greater than 6 inches across the diameter, a short retaining wall on the low side makes the project far more stable long-term. For slopes steeper than that, seriously consider a raised patio design, which is a different (though related) project. For this guide, I'm assuming a site with manageable slope that can be leveled during excavation.
Codes, permits and fire safety rules you need to know
This section is not optional reading. Getting the safety requirements wrong can result in a fire hazard, a failed inspection, or a municipality ordering you to tear out what you built. The rules are not that complicated once you understand the framework.
Fire setback distances
The 2021 International Fire Code (IFC) is the baseline that most U.S. jurisdictions adopt (often with local amendments). It sets minimum distances between a fire feature and any structure: open burning requires at least 50 feet, recreational wood fires require at least 25 feet, and portable outdoor fireplaces must be at least 15 feet from a structure. See IFC 2021, Section 307 (Open Burning, Recreational Fires, Portable Outdoor Fireplaces) for the baseline setback requirements cited here IFC 2021 — Section 307 (Open Burning, Recreational Fires, Portable Outdoor Fireplaces). Many cities amend these numbers, and gas-fired listed appliances often qualify for reduced setbacks (commonly 10 to 15 feet) when installed per the manufacturer's instructions. Always look up your specific municipality's adopted code, because the national baseline is just the starting point.
| Fire Feature Type | IFC Minimum Setback from Structure | Notes |
|---|---|---|
| Open burning (large fires) | 50 ft | Often requires a permit or is banned outright in many jurisdictions |
| Recreational wood fire pit | 25 ft | Most common backyard rule; local amendments may vary |
| Portable outdoor fireplace | 15 ft | May be reduced per manufacturer instructions for listed appliances |
| Gas fire pit (listed appliance) | 10–15 ft typical | Confirm with local AHJ; ANSI Z21.97-listed appliances follow manufacturer specs |
When you need a permit
Many municipalities require a building permit for any permanently installed fire pit or outdoor fireplace. Portable or prefab steel rings sitting on top of a patio are often permit-free, but the moment you pour a concrete footing or run a gas line, a permit is almost always required. Gas line work specifically falls under NFPA 54 (the National Fuel Gas Code) and typically requires a licensed plumber and a separate gas permit with inspection. Do not run your own gas supply line unless you are licensed to do so in your state.
Spark arrestors and chimney requirements
If your fire pit includes a chimney or flue (covered later in this guide), NFPA 211 governs the spark arrester requirements. The screen must have openings sized so a 1/2-inch sphere cannot pass through but a 3/8-inch sphere can, ensuring sparks are blocked without the screen clogging too quickly. The net free area of the screen must be at least three times the flue outlet area. Use 19-gauge galvanized or 24-gauge stainless steel mesh; both are corrosion and heat resistant. The cap must be removable for cleaning.
Burn ban days and air quality rules
Even a properly permitted fire pit cannot be used on a declared no-burn day. The U.S. EPA and regional air quality authorities (for example, Maricopa County in Arizona) issue burn bans when particulate matter levels threaten public health. Check your local air quality agency's website or app before lighting any wood fire. Gas fire pits are typically exempt from burn bans because they produce far less particulate matter than wood.
Local permit checklist
- Call your local building department and ask specifically about permits for a permanent fire pit and patio installation.
- Ask whether a gas permit is required separately if you plan a gas fire pit.
- Check zoning setbacks (from property lines, not just structures).
- Ask whether a licensed contractor is required for gas work or if owner-builder rules apply.
- Confirm whether a final inspection is required before use.
- Check with your HOA if applicable, as covenants can be stricter than local codes.
- Look up your air quality district for burn-day restrictions and prohibited fuel types.
Patio material options: pros, cons and best uses
The paving material you choose affects cost, difficulty, longevity, and how the finished patio feels underfoot. Here is an honest breakdown of each option for a round patio specifically.
| Material | Cost (per sq ft, materials) | DIY Difficulty | Durability | Round-Patio Fit | Best For |
|---|---|---|---|---|---|
| Pea gravel | $1–$2 | Very easy | Moderate (needs edging) | Excellent (cuts no units) | Budget builds, casual aesthetic, quick install |
| Concrete pavers | $4–$8 | Moderate | High | Good (cut edges with wet saw) | Most DIYers; best value/effort balance |
| Brick | $5–$9 | Moderate–Hard | High | Moderate (curved cuts are tedious) | Traditional look, matches older homes |
| Natural stone (flagstone/bluestone) | $8–$16 | Hard | Very high | Excellent (irregular shapes work well in rounds) | Premium finish, natural look |
| Poured concrete | $5–$10 | Moderate–Hard | High (if reinforced) | Good (forms create the curve) | Clean modern look; hard to repair sections |
Pea gravel: the beginner-friendly option
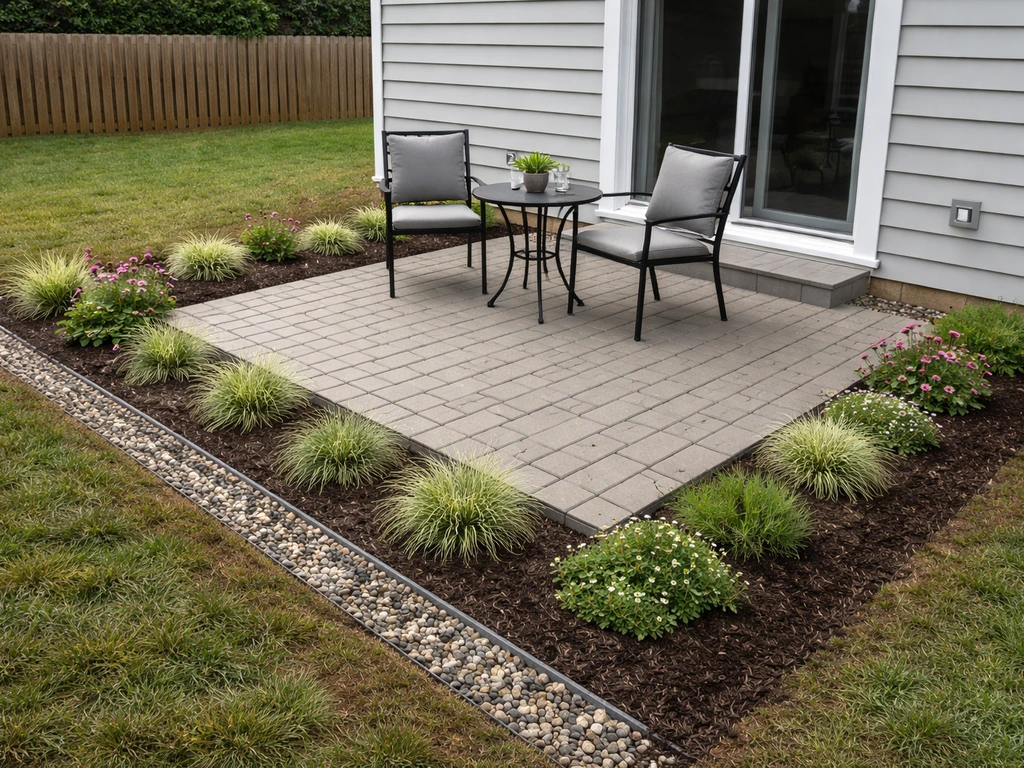
Pea gravel is the simplest patio surface you can install around a fire pit. You excavate 4 to 6 inches, lay landscape fabric, install a steel or aluminum edge restraint at your circle perimeter, and fill with 3/8-inch pea gravel. It drains perfectly (no pooling), requires no cutting, and costs almost nothing in materials. The downsides are real: gravel migrates underfoot, is uncomfortable in bare feet, can scatter into the lawn, and is not suitable as the base for heavy furniture on wheels. Use a sturdy edge restraint and add a few stepping stones through the gravel to improve walkability. This approach pairs beautifully with a simple steel fire pit ring and makes an excellent first patio project.
Concrete pavers: the sweet spot for DIY
Concrete pavers are what I recommend to most homeowners tackling this project for the first time. They are consistent in thickness (usually 2 3/8 inches or 3 1/8 inches), easy to cut with a rented wet saw or angle grinder with a diamond blade, and available in a wide range of colors and textures. For a round patio, a circular or fan-shaped paver pattern like a radial design handles the curved edge naturally. If you use standard rectangular pavers, you will need to cut the perimeter pieces at an angle to follow the circle, which adds time but is very manageable.
Brick, natural stone and poured concrete
Brick gives a classic look but cutting brick for a curved perimeter is slow work, and you need a masonry wet saw. Budget extra time. Natural flagstone or bluestone is actually easier to fit to a curved perimeter than brick because irregular shapes give you built-in flexibility. The challenge is that flagstone varies in thickness, so you spend time shimming and adjusting each piece on your sand bed. Poured concrete creates a seamless surface and the circular form is easy to build, but if it cracks (and concrete cracks), patching a circle is difficult to make invisible. If you go with poured concrete, use 4-inch thickness with #3 rebar on 18-inch centers and add fiber reinforcement to the mix.
Fire pit types: what to build, buy or retrofit
The fire pit is the reason you are building this patio, so choose the type that matches how you actually plan to use the space, not just what looks good in photos.
Built-in masonry fire pit
A built-in masonry fire pit is the most permanent and visually integrated option. The basic structure is a circular ring of fire brick or concrete block set on a concrete footing, typically 3 to 4 feet in diameter and 12 to 24 inches tall. The firebox walls should be built with fire brick (rated for high heat) or with standard concrete retaining wall blocks, keeping in mind that standard CMU block can crack under sustained high heat. Mortar joints in the firebox must use refractory mortar, not standard Portland cement mortar. A masonry pit is heavy, permanent, requires a permit in most jurisdictions, and takes a weekend to build correctly including cure time. The payoff is that it looks completely custom and adds real value to the outdoor space.
Metal ring or bowl (prefab)
A prefab steel or cast iron fire pit ring or bowl is the fastest way to add a fire feature to your new patio. Prices range from about $200 for a basic steel bowl to $600 or more for a heavy-gauge cast iron unit with a spark screen and cooking grate. These sit on top of the patio surface, require no footing, and can be moved if needed. The downsides are that lighter-gauge steel warps and rusts after a few seasons, and they never look as integrated as a built-in pit. If you go this route, buy the heaviest gauge you can afford (3/16 inch or thicker) and use a fire pit mat or noncombustible pad underneath if your surface is anything other than concrete or stone.
Gas fire pit (natural gas or propane)
A gas fire pit gives you instant-on fire at the turn of a knob, no wood to haul, no ash to clean up, and typically lower particulate emissions. The appliance itself, whether a tabletop burner insert or a built-in bowl with glass media, must be listed to ANSI Z21.97/CSA 2.41 for outdoor decorative gas appliances. Installation requires running a gas supply line (18-inch minimum burial depth for protected piping per the IFGC, and always confirm local requirements), connecting to a shutoff valve, and in most areas, having the work inspected by a licensed gas technician. Budget $500 to $1,500 for gas line work on top of the appliance cost. Natural gas is more convenient for permanent installs; propane with a concealed tank works well where gas is not available.
Portable fire pit models
A portable propane fire table or standalone bowl that runs off a 20-pound propane cylinder is the lowest-commitment option. It requires no gas line, no permit in most jurisdictions, and can be moved to different spots or stored in winter. Clearances for portable outdoor fireplaces under the IFC are a minimum of 15 feet from a structure, though listed manufacturer instructions may allow closer placement. The limitation is that a 20-pound cylinder gives you roughly 4 to 10 hours of burn time depending on BTU output, and refills add up over a season. These work well as a temporary solution while you plan a permanent installation.
Adding a patio chimney or outdoor fireplace
A chiminea, patio fireplace, or full masonry outdoor chimney is a meaningful upgrade over a standard open fire pit. It contains sparks more effectively, can direct smoke away from seating, and creates a dramatic focal point. Whether this is worth adding depends on your site, your budget, and how often you actually plan to use a wood fire. For step-by-step instructions on how to build a patio chimney, see our detailed guide on how to build a patio chimney.
Design options
The simplest chimney option is a cast-iron or clay chiminea, a freestanding unit with a narrow neck and chimney that sits on the patio surface. These cost $150 to $600 and require no construction. A step up is a prefab steel outdoor fireplace with a factory-built flue, which costs $800 to $3,000 and is installed on a noncombustible pad. At the top end, a fully custom masonry outdoor fireplace with a brick or stone firebox, smoke chamber, and masonry chimney is a multi-day masonry project and a significant investment. 2021 International Residential Code, Chapter 10: Chimneys and Fireplaces contains mandatory construction and clearance requirements for chimneys and fireplaces that many jurisdictions adopt for residential built‑in fireplaces and masonry chimneys 2021 International Residential Code — Chapter 10: Chimneys and Fireplaces. It requires a footing sized for the load, refractory materials throughout, proper flue sizing, and in most jurisdictions a building permit and inspection under IRC Chapter 10.
Chimney height, termination and spark arrestors
Per NFPA 211, a chimney must terminate at least 3 feet above the point where it exits the structure, and at least 2 feet higher than any portion of a building or other obstruction within 10 feet. For a standalone patio chimney, the termination height is measured above the chimney collar. A spark arrester must be installed wherever required by the local authority, with screen openings sized between 3/8 inch and 1/2 inch, a net free area at least three times the flue outlet area, and construction from 19-gauge galvanized or 24-gauge stainless steel mesh. The cap must be removable for cleaning and flue inspection.
When to add a flue or skip it
Add a proper flue or chimney if: you plan to use wood fires regularly, your seating area is downwind, you have neighbors close by, or you want to contain sparks in a dry climate with fire risk. Skip the chimney and use an open ring if: you primarily burn gas, you have ample space and good airflow, or the added construction cost and complexity is not justified by your use case. A draft problem (smoke blowing back toward seating) in an open fire pit is usually solved with the right wood, dry fuel, and seating arrangement, not necessarily a chimney.
Can I build a fire pit on my existing patio?
The short answer is yes, in most cases, with the right fire pit type and a few checks first. For detailed retrofit instructions and safety checks, see can i build a fire pit on my patio. Whether a specific existing patio can safely support a fire pit depends on the patio material, its condition, and how close it sits to your house and other structures.
Decision flowchart: retrofit or start fresh?
- What is your existing patio made of? Concrete, pavers, and natural stone are all noncombustible and can support a fire pit. Composite or wood decking is combustible and requires a noncombustible pad or a deck-rated listed appliance at minimum.
- Is the patio surface in good condition? Cracked or heaving pavers near a built-in masonry fire pit will get worse as heat cycles stress the substrate. Repair or replace damaged sections before adding any fire feature.
- Does the existing patio meet setback distances from your house? Measure from the patio edge to the nearest combustible structure. If you cannot place a fire pit 25 feet from the house (wood burning) or 10 to 15 feet (gas, per manufacturer specs), a fire pit on that patio is not code-compliant.
- Is the patio large enough? You need adequate space between the fire pit edge and the seated guests (at least 4 feet) and still meet setback rules.
- Are you adding a permanent built-in pit? If yes, a permit is likely required regardless of whether the patio is new or existing.
- Do you just want a portable unit? A portable steel ring or propane table on an existing concrete or paver patio is generally straightforward and often permit-free. Check local rules.
If you are working with an existing concrete or paver patio that is in good shape and large enough, adding a prefab fire pit is genuinely simple. A built-in masonry pit on an existing patio requires you to cut out and remove a section of pavers or concrete, pour a new concrete footing (typically 6 inches of 3,000 PSI concrete), and build up from there. The patio surface around the pit footprint may need to be re-laid after the footing cures. For a deeper look at retrofitting, the guide on how to build a fire pit on an existing patio covers this in full detail.
Tools and materials list
Here is what you need on site before the first shovelful of dirt. Rent anything you will use only once; buy what you will use again.
Tools
- Measuring tape (at least 25 ft) and marking paint or chalk line
- Wooden stake and string for circle layout
- Flat spade and square shovel for excavation
- Plate compactor (rent: $60–$100/day) for base compaction
- Hand tamper for tight spots and around the fire pit ring
- Level (4-ft and 2-ft versions) and rubber mallet
- Wet saw or angle grinder with diamond blade for cutting pavers
- Masonry trowel and jointing tool if laying mortar
- Wheelbarrow and garden rake
- Safety glasses, hearing protection and knee pads
- Torpedo level for individual paver checks
- Broom for sweeping in joint sand
Materials (for a 14-ft diameter patio with a built-in masonry fire pit)
- Crushed stone base (3/4-inch clean crushed stone): approximately 2.5 cubic yards for an 8-inch depth under 154 sq ft
- Concrete sand (bedding layer): approximately 0.75 cubic yards for a 1-inch bed
- Concrete pavers (2 3/8-inch thick): approximately 170–180 sq ft worth to account for cuts and waste
- Polymeric sand: approximately 2–3 bags (50 lb each) for joint filling
- Plastic edge restraints with spikes: enough linear feet to complete the circle perimeter (about 44 linear feet for a 14-ft circle)
- Fire brick: approximately 50–80 bricks for a 36-inch diameter fire pit ring 18 inches tall
- Refractory mortar: 1 to 2 buckets (50 lb)
- Concrete mix (80 lb bags): 6–8 bags for the fire pit footing pour
- Rebar (#3, 3/8-inch): two pieces cut to cross the footing for reinforcement
- Steel fire pit ring liner (optional): 36-inch diameter to protect masonry from direct flame contact
- Gravel drainage layer (if needed at base of fire pit): 6 inches of 3/4-inch stone
Step-by-step construction: building the round patio and fire pit
These steps cover the full build from raw ground to finished surface using concrete pavers with a built-in masonry fire pit at the center. Adapt the steps as needed if you are using a different material or fire pit type.
Step 1: Mark, excavate and check slope
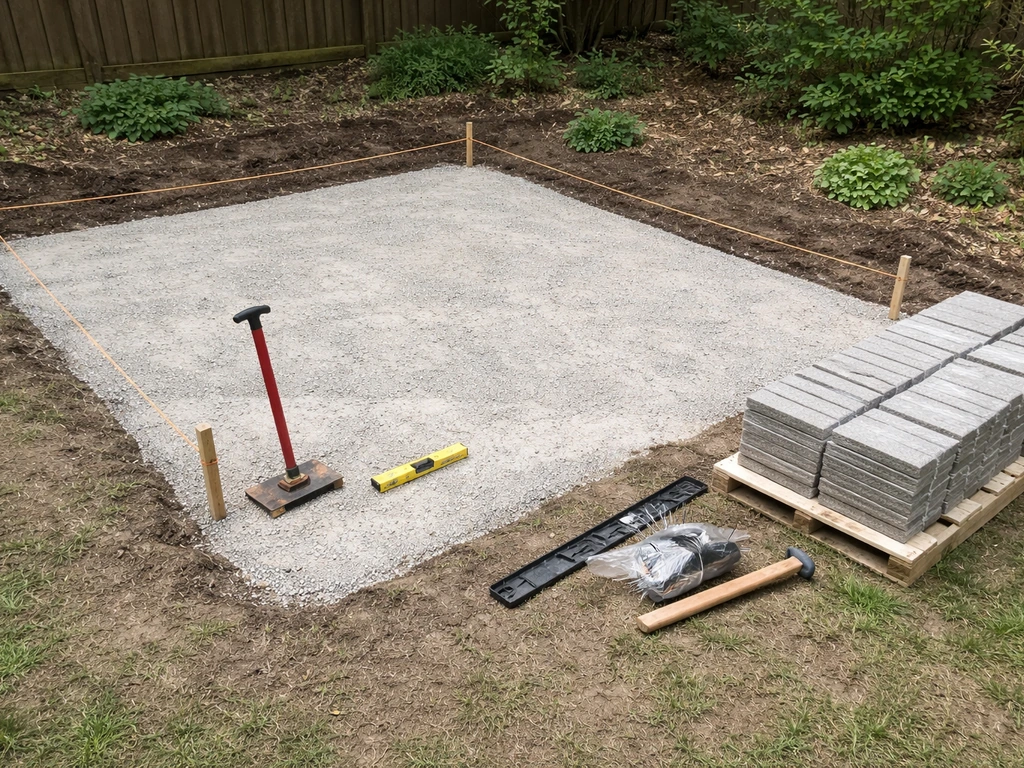
Drive your center stake and mark your circle perimeter as described earlier. Excavate to a depth of 9 inches within the circle: 8 inches for the gravel base plus 1 inch for the sand bed (the paver thickness sits above grade). Slope the excavated floor away from the house at 1/8 inch per foot minimum so any water that gets under the pavers drains outward. If you hit clay, excavate an additional 2 inches and add extra gravel. Remove all organic material, roots, and soft soil. The subgrade must be undisturbed or well-compacted native soil.
Step 2: Compact the subgrade and pour the fire pit footing
Before adding any base material, compact the subgrade with a plate compactor making at least two passes in perpendicular directions. This is the step most beginners skip and then wonder why their patio settles. For the fire pit, dig an additional 6-inch-deep, 42-inch-wide circular hole at the center point (slightly larger than your planned fire pit outer diameter). Set rebar in a cross pattern and pour 3,000 PSI concrete to ground level. Let it cure for at least 24 hours (48 is better in hot weather) before building on it.
Step 3: Install the gravel base
Add 3/4-inch clean crushed stone in two lifts of 4 inches each, compacting thoroughly after each lift. This two-lift approach achieves far better compaction than dumping 8 inches at once. Check that the surface maintains your outward drainage slope after compaction. The finished gravel surface should be 1 inch below your desired paver height (to accommodate the sand bed). Do not use pea gravel or round stone as a base: it does not compact properly and your patio will shift.
Step 4: Lay the edge restraints
Install your plastic or steel edge restraints around the circle perimeter before laying the sand bed. This defines the shape and gives you a rigid border to work against. Spike the restraints into the ground through the gravel base every 12 inches on curves. For a clean arc, use flexible plastic edging designed for curves, not rigid straight sections.
Step 5: Screed the sand bedding layer
Spread a 1-inch layer of concrete sand (not mason's sand, not play sand) over the compacted gravel base. Use 1-inch diameter conduit pipes set at your slope as screed guides, then drag a straight 2x4 board across them to create a perfectly even, sloped sand bed. Pull the conduit pipes out and fill the troughs left behind. Do not walk on the screeded sand. Lay the pavers directly from the unsanded side, working across.
Step 6: Lay pavers from center outward
Start at the fire pit footing and work outward in a radial pattern. Place full pavers first and leave the perimeter cuts for last. Tap each paver with a rubber mallet and check level frequently, both individually and across several pavers at once. Maintain a 1/16 to 1/8-inch joint between pavers for the polymeric sand. Keep a gap of at least 3 inches around the fire pit footing perimeter to allow for the masonry wall base.
Step 7: Cut the perimeter pavers
Once the field pavers are down, cut the perimeter pieces to follow your circle edge. Mark each cut with a pencil, score first with an angle grinder, then make the final cut with a wet saw. Work in small sections around the circle. Aim for cut pieces no smaller than half a paver; tiny slivers at the edge look bad and pop out over time. If a gap is less than half a paver wide, shift the entire adjacent row slightly to avoid it.
Step 8: Build the masonry fire pit ring
With the footing cured and the surrounding pavers in place, build up your fire brick ring. Lay the first course in refractory mortar on the concrete footing, checking level and plumb as you go. Stagger the brick joints with each course (running bond pattern). Use a 36-inch inside diameter for a comfortable fire pit. Build to 18 to 24 inches in height: 18 inches is the comfortable hand-reach for tending a fire; 24 inches provides better spark containment. Leave a small drainage gap or weep hole at the base of the first course so any rain that collects in the pit can drain out. Cap the top course with fire brick set flat for a finished ledge.
Step 9: Fill joints with polymeric sand
Spread polymeric sand over the finished paver field and sweep it into the joints with a broom. Apply two or three passes, vibrating the sand down into joints with the plate compactor (use a protective rubber pad under the plate to avoid scratching the pavers). Blow or sweep off any excess sand from paver faces. Mist the surface lightly with water to activate the polymeric binder. Do not over-water; you want the sand damp, not saturated. Allow to cure per the product instructions (typically 24 hours) before heavy use.
Step 10: First burn and curing
The refractory mortar in your masonry fire pit needs to cure with a series of small, low fires before you build a full fire. Light a small kindling fire for 20 to 30 minutes on day one and let it cool completely. Repeat with a slightly larger fire on day two. This progressive curing drives moisture out of the mortar slowly and prevents cracking from thermal shock. Do not skip this step.
Finishing touches: seating, lighting and sealing
Once the base build is complete, the finishing details transform a functional patio into an actual outdoor living room. None of these steps are complicated, but they make a huge difference to how the finished space feels.
- Seating layout: leave at least 4 feet between the fire pit edge and any chair or bench. For a 14-foot patio with a centered 3-foot pit, that gives you 2.5 feet of usable seating zone on each side, which is workable for 4 to 5 chairs. For more seating, push to a 16-foot diameter.
- Paver sealing: apply a penetrating concrete paver sealer 30 days after installation (not sooner, to allow full curing). Sealing reduces staining, enhances color, and slows efflorescence (the white salt deposits that appear on new concrete pavers). Reapply every 3 to 5 years.
- Lighting: low-voltage LED path lights around the perimeter and string lights overhead are the two most effective and affordable options. A 15-watt LED path light on a 12-volt system is safe to install yourself; anything line-voltage requires an electrician.
- Edging plants or border: a ring of low ornamental grasses, lavender, or creeping thyme just outside the patio edge softens the transition from hardscape to lawn and reduces weed intrusion into the joints.
- Fire pit accessories: a steel spark screen that fits your pit opening (with a handle), a log grate to elevate wood for better airflow, and a long-handled ash tool all make regular use easier and safer.
Routine maintenance to keep it looking good
- Sweep pavers and re-sweep polymeric sand into joints each spring; refill any joints that have washed out.
- Clean ash from the fire pit after every few uses. Do not let ash accumulate deep in the bowl; it holds moisture and degrades the refractory mortar over time.
- Inspect mortar joints in the masonry fire pit annually. Repoint any crumbling joints with refractory mortar before the next season.
- Check edge restraints each spring for movement or frost heave. Re-spike any sections that have lifted.
- If using a gas burner, have a licensed technician inspect the gas connections and valve annually.
- Reapply paver sealer on the schedule recommended by the product manufacturer, typically every 3 to 5 years.
- On a natural stone surface, check for loose or rocking stones and re-bed them with fresh sand before the joints get worse.
Troubleshooting common problems
Pooling water on the patio surface
This almost always means the drainage slope was not maintained during installation, or the base compacted unevenly and created a low spot. Identify the low area, pop up the affected pavers, add or remove sand to correct the level, and relay them. It is fixable. If the entire patio slopes toward the house, it is a more serious problem: the base needs to be re-graded, which means lifting all the affected pavers. Easier to get the slope right the first time.
Settling and shifting pavers
Localized settling (one or two pavers dropping) is usually caused by inadequate subgrade compaction at that spot or by organic material that has decomposed under the base. Lift the settled pavers, excavate to the problem area, add compactable fill or extra gravel, compact, re-screed the sand bed, and relay the pavers. Widespread settling across the whole patio means the base compaction was insufficient and you may need to relay larger sections.
Cracking in the masonry fire pit
Hairline cracks in mortar joints are normal after the first season of heating and cooling. Repoint them with refractory mortar; they are cosmetic. Structural cracks through the brick itself usually indicate thermal shock from wetting a hot fire pit with water (never do this) or from using standard Portland mortar instead of refractory mortar. In severe cases, you may need to disassemble and rebuild the affected section with the correct materials.
Smoke blowing toward seating
Smoke follows the person who just complained about it, as every campfire veteran knows. More practically: smoke problems from an open wood fire pit are usually caused by wet or unseasoned wood, low air pressure conditions, or seating that is too close and downwind. Burn only dry, seasoned hardwood split to 4 to 6-inch diameter pieces. If smoke is consistently a problem, a taller fire pit ring (24 inches instead of 18) or a simple chimney cone insert raises the smoke column above head height. A gas fire pit eliminates the problem entirely.
Brick alignment issues during the build
If your fire pit ring is going out of plumb or the courses are drifting, stop and check your work every three courses rather than at the end. Use a 4-foot level on the outside face and a circular template (a piece of plywood cut to the inner diameter works perfectly) to check the roundness of each course. Correct small drifts with slightly thicker or thinner mortar joints; do not try to compensate for three courses of drift in one course.
FAQ
What are the first steps to plan a round patio with an integrated fire pit?
Start with site assessment (sun/wind, grade, utilities, distance from structures), confirm local codes and permit needs, decide patio diameter and fire‑pit placement/clearances, choose materials and fire‑pit type (wood vs gas, built‑in vs metal), and create a scaled layout. Mark utilities before digging (call 811 in the U.S.). Sketch the seating arc, path access, and any retaining or edge restraints needed for a true round layout.
How do I check codes, permits and safety rules before building?
Contact your local building/fire department to confirm permit requirements for permanent masonry or gas‑connected fire pits. Use adopted code guidance as baseline: recreational wood fires are commonly required ≥25 ft from structures, portable units often ≥15 ft, and listed gas appliances may be sited closer per manufacturer. Follow NFPA 211 and NFPA 54/IFGC for chimneys and gas piping; check local burn‑ban and air‑quality rules. Manufacturer manuals supersede generic guidance for listed appliances.
What minimum clearances and fire‑safety features should I plan for?
Maintain required setback from buildings, overhead combustibles and property lines per local rules/manufacturer specs. Provide a noncombustible surface or heat‑resistant ring under the pit. For wood fires, plan for a spark arrestor/cap on chimneys per NFPA 211 (screen openings sized per standard and removable for cleaning). Keep seating materials and overhangs outside the hazard zone and store combustibles well away.
What material options are best for a round patio and pros/cons?
Pavers: modular, durable, easy to repair — good for curves with edge restraints; concrete slab: seamless and durable but prone to cracking and harder to shape curvilinear edges; pea gravel: inexpensive, excellent drainage, casual look but shifts under heavy use and requires edging; brick: classic look, good for curves but may settle; natural stone: premium look, durable but costly and requires skilled installation. Choose based on budget, appearance, and expected wear.
What fire‑pit types can be integrated and what are the advantages of each?
Built‑in masonry (brick/stone): permanent, attractive, wide design options, good heat retention — requires foundations and permits. Metal ring/bowl (steel or cast iron): inexpensive, portable or semi‑permanent, easy to install, less heat retention, may need a noncombustible pad. Gas (natural gas/propane) with burner: clean, controllable flame, needs certified gas piping and meets appliance listing requirements—manufacturer clearances and NFPA 54 must be followed. Small chimney/patio fireplace: looks like a fireplace, requires flue/liner and foundation, follows IRC/NFPA standards.
Can I add a chimney or flue to my patio fire pit?
Yes for built‑in masonry or factory‑built patio fireplaces. Chimneys require correct flue sizing, liners and minimum clearances per IRC and NFPA 211; terminations often must extend per the 3‑ft/2‑ft rule relative to nearby roofs. Spark arrestors and accessible cleanouts are required where applicable. Gas decorative appliances rarely need chimneys; follow the appliance manual.