You can build a fully functional outdoor patio kitchen yourself in a single weekend for a simple grill station, or over two to three weekends for a complete island with a sink, refrigerator, and bar seating. National Electrical Code (NEC), Code‑making panel materials and NEC references (NEC 210 branch-circuit requirements) notes that NEC kitchen branch-circuit rules require at least two 20‑ampere small-appliance branch circuits to serve countertop and related kitchen receptacle outlets (NEC 210.11(C)(1)/210.52), which affects outdoor kitchens that include counter receptacles and refrigerators tied to the dwelling's kitchen load calculations blank" rel="noopener noreferrer">National Electrical Code (NEC) — Code‑making panel materials and NEC references (NEC 210 branch-circuit requirements). The key is picking the right project path for your space, budget, and skill level before you buy a single block or bag of concrete. This guide walks you through everything: choosing between a full island, a grill-focused BBQ patio, and a compact patio bar/grill; laying out your space; comparing every material option; prepping the site; building the structure; running utilities; and finishing it so it lasts for decades.
How to Build an Outdoor Patio Kitchen: Complete DIY Guide

Three Project Paths: Which Build Is Right for You?
Before you sketch a single line, you need to pick your project path. The three most common DIY outdoor patio kitchens are the full island, the grill-focused BBQ patio, and the compact patio bar/grill. Each one scales in cost, complexity, and the permits you will likely need.
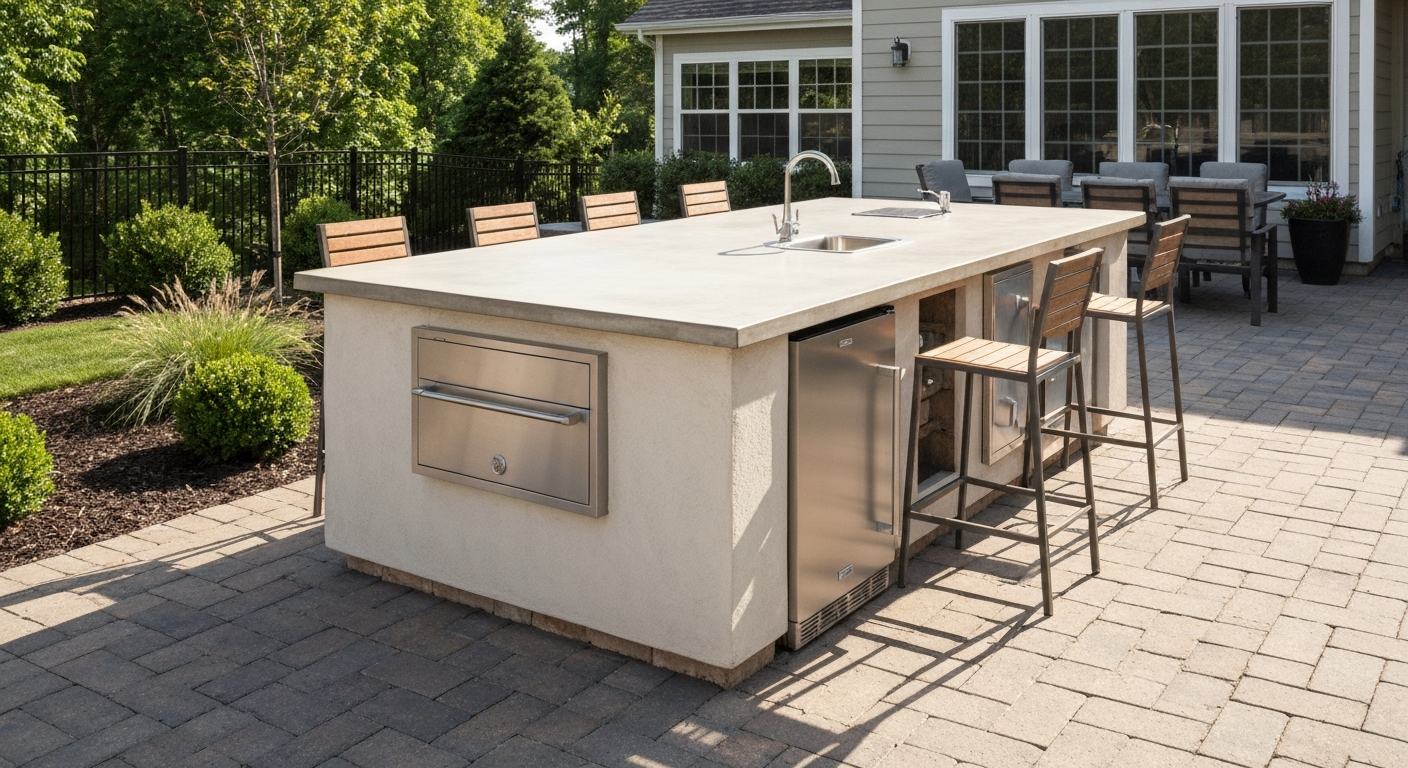
A full outdoor kitchen island typically runs 10 to 16 feet long and includes a built-in grill, side burner, under-counter refrigerator, sink, storage drawers, and bar seating on one side. This is the most involved build and almost always requires permits for the gas line, electrical circuits, and plumbing drain. The 2024 International Residential Code (IRC), Chapter 1: Scope and Administration states building permits are required for work that adds or alters permanent structures or utilities, including accessory outdoor appliances and installations, except where specific exemptions apply 2024 International Residential Code (IRC) — Chapter 1: Scope and Administration. Budget roughly $3,500 to $12,000 in materials depending on appliance quality and countertop choice, with a timeline of three to five weekends for an experienced DIYer.
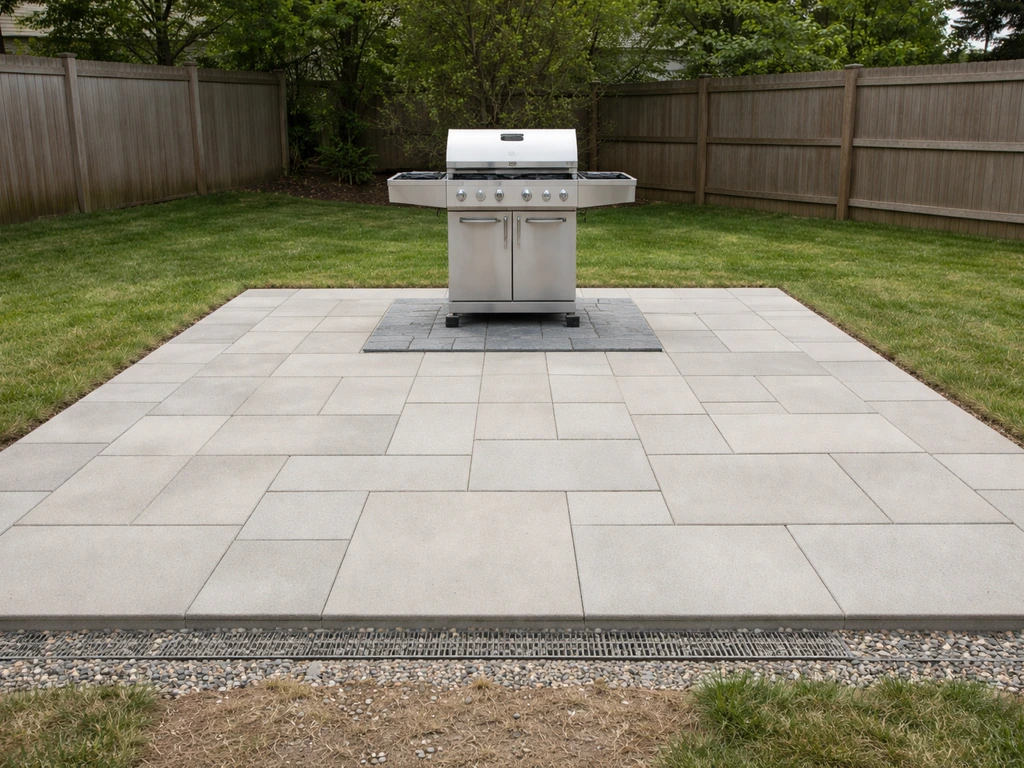
A grill-focused BBQ patio centers on a built-in grill head in a masonry surround with a modest counter on each side, usually 6 to 8 feet total. For step-by-step plans and materials lists on creating this type of setup, see our guide on how to make a grill patio. No sink means no plumbing permit in most jurisdictions, and you may only need a gas and electrical permit. Material costs typically fall between $1,200 and $4,500. Many homeowners build this one first and expand it later. If you need a compact cooking area, see our step-by-step guide on how to build a small patio for a grill for a focused, small-footprint patio plan. If a dedicated BBQ setup is your main goal, the BBQ patio guide in this series goes deep on that specific build.
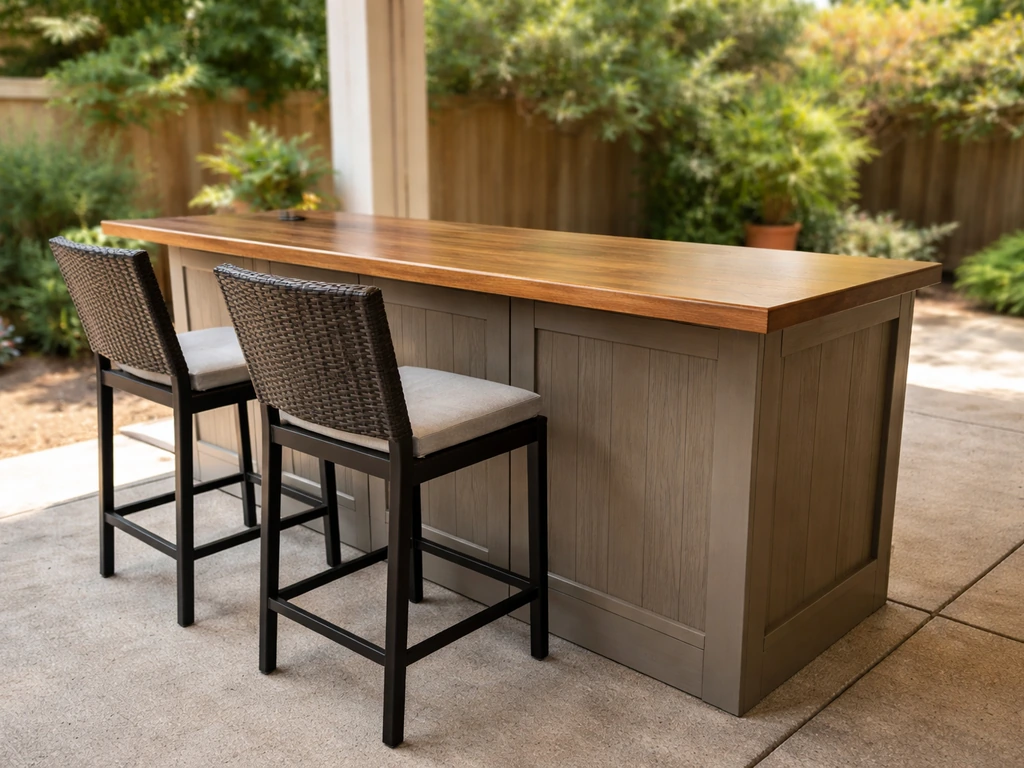
A compact patio bar/grill is the most beginner-friendly option: a 4-to-6-foot structure that combines a small grill or two-burner cooktop with a bar counter and a few feet of prep space. No sink and often no hardwired electrical if you use a weatherproof outdoor outlet on an existing circuit. Material costs can come in under $1,000 if you use concrete block and a tile countertop. If bar seating is the priority, the patio bar and patio bar/grill guides in this series cover those layouts in detail.
Define Your Goals and Assess Your Site
Spending 30 minutes honestly answering a few questions before you design anything will save you from expensive redesigns later. Start with use: are you cooking for two people three nights a week, or hosting 20 people on weekends? That single answer drives island length, appliance count, and seating capacity. A two-person household rarely needs more than 6 feet of counter, while regular entertaining pushes you toward 10 to 12 feet minimum.
Next, walk your site and observe it at different times of day. Note where the afternoon sun hits hardest (you do not want to stand in direct west sun while grilling at 6 p.m.), where prevailing winds come from (you want smoke blowing away from seating and the house), and how far the back door is from where you want to cook. A kitchen placed more than 30 feet from the house without a refrigerator means constant trips inside. Also measure the distance from your main panel for electrical runs and from your gas meter or propane tank, because those distances drive both cost and pipe sizing.
Site and Skill-Level Checklist
- Measure your available footprint including 3-foot clearance on all open sides
- Check the slope: more than 2 inches of drop over 10 feet means you need drainage work before building
- Locate underground utilities (call 811 in the US before digging anything)
- Identify the nearest gas shutoff and main electrical panel location
- Confirm access for concrete delivery or block/paver pallets (typical pallet is 3,000 lbs)
- Rate your skill honestly: have you built anything with mortar or framing before?
- Check local zoning setbacks (many municipalities require 5 to 10 feet from property lines for permanent structures)
- Determine if HOA approval is needed before permits
Size and Layout: Getting the Numbers Right
Outdoor kitchens work best when they follow the same logic as indoor kitchens: a work triangle (grill, prep surface, sink/fridge) with short distances between each point. For an outdoor island, keep the triangle legs under 9 feet each. The grill should be at one end or in the center depending on your layout, never sandwiched between two walls where heat builds up.
Counter height for cooking is standard 36 inches. Bar seating works at 42 to 44 inches counter height with 24-inch bar stools, or at 36 inches with 18-inch stools. Plan for at least 18 inches of prep counter on each side of the grill opening. If you include a sink, put at least 12 inches of counter on each side of that too.
Circulation matters more outdoors than in most indoor kitchens because you are moving around guests. Leave at least 42 inches between the back of a seated bar stool and any wall or obstacle, and 48 inches if people need to walk through that space while someone is seated. Between the cooking zone and any seating, keep a minimum of 36 inches of clearance, and 48 inches if the grill lid swings outward toward the seating area.
| Element | Minimum Dimension | Comfortable Dimension |
|---|---|---|
| Counter height (cooking) | 34 inches | 36 inches |
| Bar counter height | 40 inches | 42–44 inches |
| Prep space beside grill | 12 inches | 18–24 inches |
| Walkway behind bar stools | 42 inches | 48 inches |
| Cook zone to seating clearance | 36 inches | 48 inches |
| Grill lid clearance (overhead) | 27 inches | 36 inches |
| Side clearance (grill to combustible) | 24 inches | Per manufacturer spec |
| Island depth (front to back) | 24 inches | 30–36 inches |
Design Options and Appliance Selection
Appliances make or break an outdoor kitchen, so choose them before you finalize your island dimensions, not after. Every built-in appliance comes with a cutout dimension and a required clearance spec from the manufacturer. Weber's built-in grill installation guides, for example, specify a minimum 27-inch lid clearance above the grill deck and 24-inch side clearances to certain adjacent surfaces. If you design the box first and shop for appliances second, you will almost certainly end up with gaps or tight spots that violate those specs and void the warranty.
Grills and Cookers
Built-in gas grills for islands run 24 to 42 inches wide. A 30-inch, two-burner grill covers most families; a 36-inch, three-burner model is the sweet spot for entertaining. BTU ratings range from about 30,000 BTU for entry-level models to 60,000-plus BTU for premium ones. More BTU is not always better; consistent heat distribution and lid quality matter more for everyday cooking. If you want a charcoal option, built-in charcoal inserts are available but require an ash-cleanout access panel in the island. Kamado-style ceramic grills can be built into islands using manufacturer-specific cradle frames.
Side Burners, Smokers, and Extras
A two-burner side burner (typically a 30,000 to 40,000 BTU drop-in) lets you boil, sauté, or keep sauces warm without running inside. Built-in smoker drawers or pellet-fed side boxes are available for islands but add gas or electrical load to your utility plan. Under-counter refrigerators designed for outdoor use (rated for 0 to 110 degrees Fahrenheit ambient) typically pull 2 to 3 amps on a 120V circuit. Do not use an indoor refrigerator under an outdoor counter: the compressor will fail within one to two seasons in temperature extremes.
Sinks, Drawers, and Bar Features
A single-basin stainless undermount sink (typically 15 by 15 inches for an island, 18 by 16 inches for a larger build) is the most practical choice outdoors. It needs a cold-water supply line and a drain line. If you are building in a frost-prone climate, install a freeze-resistant ball valve on the supply line so you can drain it for winter. Storage drawers (12- and 15-inch widths are most common) give you a place for tools, towels, and condiments. For a bar-style build, adding a bottle opener, towel bar, and a drink rail along the seating edge turns a plain counter into an experience.
Material Comparisons and Pros/Cons
Choosing the right structural and finish material is one of the most important decisions you will make. Each option has real trade-offs in cost, durability, DIY difficulty, and appearance. Here is an honest breakdown.
| Material | Best Use | DIY Difficulty | Approx. Cost/Sq Ft | Durability | Key Weakness |
|---|---|---|---|---|---|
| Concrete block (CMU) | Island structure | Beginner-Intermediate | $2–$5 (block only) | Excellent | Needs cladding for appearance |
| Poured concrete slab | Foundation/floor | Intermediate | $6–$12 installed | Excellent | Cracking without proper joints/reinforcement |
| Natural stone (flagstone) | Surface/cladding | Intermediate | $15–$30 | Very Good | Irregular thickness; needs skilled setting |
| Concrete pavers | Floor surface | Beginner | $3–$8 | Very Good | Can settle if base is inadequate |
| Treated wood framing | Island structure (with cement board) | Beginner | $1–$3 (framing) | Moderate | Fire risk near grill; requires cement board wrap |
| Stucco over CMU | Island cladding | Intermediate | $1–$3 (material) | Good | Can crack; needs prep coat and sealing |
Concrete block (CMU) is the gold standard for island structures and the one I recommend to most DIYers. Standard 8x8x16-inch blocks stack quickly, they are non-combustible, they support heavy countertops without flex, and they last indefinitely. The downside is purely cosmetic: bare block looks industrial, so most builders clad it with stucco, stone veneer, or tile. A 6-foot island structure takes roughly 40 to 50 blocks and can be stacked and mortared in a single day.
Treated wood framing wrapped in cement board (HardieBacker or similar) is popular because most DIYers are comfortable with it. It is lighter, easier to cut, and faster to frame than block. The critical rule: every surface that faces the grill or any heat source must be covered with at least one layer of cement board, and the grill opening must maintain the manufacturer's clearance requirements to combustibles. I have seen wood-framed islands where someone skipped the cement board on the back wall of the grill opening, and that is a house fire waiting to happen.
Countertop and Cladding Choices
Your countertop takes the most abuse outdoors: UV, grease, rain, and temperature swings from near-zero to 100-plus degrees. Choose based on your climate and maintenance willingness, not just on looks.
Concrete Countertops
Cast-in-place or precast concrete tops are extremely popular for outdoor kitchens because they are custom-fit, heat-tolerant, and look great. But they require real skill to do well. The Concrete Countertop Institute and similar professional sources are clear that DIY concrete tops need proper mix design, fiber or rebar reinforcement (or GFRC glass fiber reinforced concrete for thinner sections), vibration during pour to eliminate voids, a minimum 28-day cure before heavy use, and a high-quality penetrating sealer or epoxy topcoat. Skipping any of those steps leads to cracking, staining, or spalling within the first season. A 1.5-inch-thick poured concrete top for a 6-foot island weighs roughly 180 to 220 pounds, so make sure your structure can handle it.
Granite and Natural Stone
Granite is hard, heat-resistant, and genuinely beautiful outdoors. The trade-off is that it is porous and needs a penetrating sealer reapplied every one to three years in exterior conditions. Outdoor granite tops also need to be sealed on all four edges and the underside, not just the top surface. Engineered quartz like Cambria is non-porous and does not require periodic sealing, but many manufacturers explicitly limit or exclude outdoor warranty coverage for quartz in direct sun because prolonged UV exposure can cause discoloration. If you are in a sunny climate, granite or concrete is a safer long-term bet than quartz.
Tile, Stainless, and Sealing
Porcelain or natural stone tile on a cement board substrate is a budget-friendly countertop option and the one I often recommend to first-time builders. Use a frost-rated porcelain tile (PEI rating 4 or 5), a polymer-modified thinset, and a sanded grout sealed with a penetrating grout sealer. The grout lines are the weak point: reseal annually in wet climates. Stainless steel countertops are the most durable and hygienic option, are obviously heat-tolerant, and require zero sealing. They do show scratches and fingerprints and get hot in direct sun, but for a serious cook, they are hard to beat. 16-gauge stainless is the minimum thickness for a countertop; 14-gauge is better for long spans.
Foundation and Base Options
A stable, level, well-drained foundation is the single most important factor in how long your outdoor kitchen lasts. Frost heave, settling, and poor drainage are responsible for the vast majority of cracked countertops, uneven doors, and crumbling mortar joints I have seen on outdoor kitchen failures.
Concrete Slab
A poured concrete slab is the most stable foundation for an outdoor kitchen, especially one with heavy block construction and multiple appliances. Follow American Concrete Institute guidance (ACI 302.1R and ACI 360R for slabs on grade): use a minimum 4-inch slab thickness for residential patios, 6 inches under the island footprint, with 6x6 welded wire mesh or #3 rebar on 18-inch centers, a 4-inch compacted gravel base, and control joints every 8 to 10 feet to manage cracking. Cure with wet burlap or a curing compound for at least seven days before loading it. A slab for a 10x16-foot outdoor kitchen area will typically take 2 to 2.5 cubic yards of 3,500 PSI concrete.
Compacted Paver Base
If you are building a lighter structure like a wood-framed island or a freestanding grill station on pavers, a properly compacted paver base works well. The standard spec is 6 inches of compacted Class II base rock (crushed stone) topped with 1 inch of compacted bedding sand, then your pavers. Use a plate compactor (rentable for $75 to $120/day) to compact the base in two 3-inch lifts. Compact to 95% Proctor density. Under a heavy CMU island, I would always add a poured concrete pad for the island footprint itself, even if the surrounding patio uses a paver base.
Pier/Beam and Block-Built Bases
On sloped sites or where excavation is difficult, concrete tube piers (Sonotube forms filled with concrete) tied together with a pressure-treated or steel beam base can level the playing field before you build the island structure. Piers should extend below the local frost depth (check your county's frost depth map; in the northern US this can be 36 to 48 inches). For a simple compact bar/grill, a block-built base using dry-stacked or mortared retaining wall block (Allan Block, Versa-Lok, or similar) can work if the soil below is stable, undisturbed, and not prone to frost heave.
Site Preparation, Slope Work, and Drainage
Drainage is the part of outdoor kitchen building that most guides skip past too quickly, and it is where I see the most expensive mistakes. Water sitting under your island base or pooling on your patio surface will destroy a well-built kitchen faster than anything else.
Grading and Surface Slope
Your patio surface must slope away from the house at a minimum of 1 percent (1/8 inch per foot), with 2 percent (1/4 inch per foot) being the practical target recommended by the Interlocking Concrete Pavement Institute and most landscape contractors. Measure your existing grade with a 4-foot level and a tape measure: set the level on the surface, lift one end until it reads level, and measure the gap. On a 10-foot run, a 2-inch drop is a 1.7 percent slope, which is good. Less than 1 inch of drop over 10 feet means you need to re-grade before laying any base material.
French Drains and Catch Basins
If your yard naturally drains toward the house or your patio area collects water during rain, install drainage before building anything on top of it. A French drain is a perforated pipe in a gravel-filled trench, typically 12 inches wide and 18 to 24 inches deep, wrapped in landscape fabric, running from the high end of the problem area to a daylight outlet at a lower grade point or to a dry well. Slope the trench a minimum of 1 percent. For larger hardscape areas, a linear catch basin (channel drain) set flush with the patio surface at the lowest point, connected to a 4-inch solid drain pipe, handles high-volume runoff efficiently. For areas with significant impervious surface, check local stormwater rules: the EPA and many municipalities have guidelines or requirements around managing runoff from large hardscape additions as part of low-impact development standards.
Drainage Under the Island
If your island sits on a concrete slab, make sure the slab slopes slightly toward its outer edges or toward a drain. Water that pools under enclosed island cabinets and inside under-counter spaces will rust appliances, rot wood components, and grow mold. If you are building with CMU, leave one un-mortared vertical joint low in the back of the island block course to act as a weep hole. It looks like a small gap in the mortar line, and it lets any trapped moisture escape rather than build up.
Site Prep Step-by-Step
- Call 811 to have utilities marked before digging anything
- Stake out your patio and island footprint with batter boards and string lines
- Excavate to a depth of 8 inches below finished surface elevation (4 inches base rock + 1 inch bedding + paver/slab thickness)
- Install any French drain or catch basin pipe in the trench before back-filling
- Compact native soil with a plate compactor in 3-inch lifts
- Add 4 to 6 inches of Class II crushed base rock in two compacted lifts
- Check grade with a level and long straightboard; adjust until you achieve your 2% slope across the entire area
- For a concrete slab: set forms, add reinforcement, pour and screed; for pavers: add 1-inch bedding sand, screed level, then lay pavers
Building the Island Structure
Once your foundation is cured and your appliances are on hand, building the island itself is the most satisfying part of the project. I will walk through the CMU block method because it is the most durable and the most forgiving for first-time masons.
- Dry-lay the first course of block without mortar to confirm dimensions and appliance cutout locations
- Mix type S mortar (stronger and more weather-resistant than type N) to a peanut-butter consistency
- Lay a full mortar bed for the first course; press blocks level in both directions using a 4-foot level
- Stagger vertical joints by half a block length on each subsequent course (running bond pattern)
- Leave openings for appliance cutouts, refrigerator, and access doors as you stack; frame cutouts with lintel blocks or solid concrete filled cells above openings
- Fill every hollow cell with concrete grout every two to three courses for maximum rigidity (critical under countertop areas)
- Install a 1/2-inch anchor bolt in filled cells at countertop height for securing countertop or cement board substrate
- Allow mortar to cure 24 to 48 hours before loading with a heavy countertop
For a wood-framed island, use 2x4 or 2x6 pressure-treated lumber for the frame, attach it to the concrete slab with 1/2-inch anchor bolts, and sheath all exterior surfaces and all interior surfaces near the grill with 1/2-inch HardieBacker cement board. Use cement board screws (not drywall screws) and fiberglass mesh tape with thinset at all seams. This is the minimum fire-safe assembly; do not substitute with regular drywall or plywood anywhere in the kitchen zone.
Gas, Electrical, and Plumbing Basics
This is the section where honest guidance matters most. Most of the utility work on an outdoor kitchen is DIY-friendly at the planning and rough-in stage, but final connections and inspections need to meet code. Getting this right protects your family, your home's value, and your insurance coverage.
Gas Line Basics
The National Fuel Gas Code (NFPA 54) and the International Fuel Gas Code (IFGC) govern residential gas piping. Pipe sizing depends on total BTU load and the equivalent length of pipe from the meter or tank to the appliances. For most outdoor kitchens with a 40,000 BTU grill and a 15,000 BTU side burner (55,000 BTU total), a 3/4-inch black steel or CSST (corrugated stainless steel tubing) gas supply line is sufficient for most run lengths under 50 feet. For runs over 50 feet or total loads over 75,000 BTU, size up to 1-inch pipe. Use pipe-sizing tables in NFPA 54 Chapter 6 or an NFPA/IFGC-based sizing calculator for your specific run length and load, then verify with your local authority having jurisdiction (AHJ). The flexible connector from the shutoff valve to each appliance should follow the appliance manufacturer's spec: many manufacturers specify a maximum 36-inch flexible connector, though some local codes allow up to 5 feet. Always install a dedicated gas shutoff valve for the outdoor kitchen at an accessible location outside the island structure.
Electrical Requirements
The National Electrical Code (NEC, NFPA 70) requires GFCI protection on all outdoor receptacles (NEC Section 210.8). For an outdoor kitchen with a refrigerator, you will want a dedicated 20-amp circuit for the refrigerator and at least one 20-amp GFCI circuit for countertop receptacles and lighting. NEC Section 210.11(C)(1) and 210.52 require at least two 20-amp small-appliance branch circuits for kitchen counter receptacles in indoor kitchens; these rules influence load calculations for outdoor kitchens tied to the same service. Use weatherproof (in-use) outlet covers on all exterior receptacles. All outdoor wiring must be in conduit (EMT or PVC) or use UF-B (underground feeder) cable for any buried runs. Bury UF-B a minimum of 12 inches deep (24 inches is better and often required under driveways or high-traffic areas). Install a subpanel at the outdoor kitchen if you are running multiple circuits; it keeps the runs shorter and makes future additions easier.
Plumbing Basics
An outdoor sink needs a cold-water supply, a P-trap, a properly sloped drain line (minimum 1/4 inch per foot slope to the drain per International Plumbing Code requirements), and either a connection to the home's drain-waste-vent system or an approved outdoor gray-water solution. Sink drain lines must be vented (air admittance valve or a vent stack) to prevent siphoning the trap dry. Install a vacuum breaker or approved backflow prevention device on the outdoor water supply; the EPA and most water utilities require this to prevent cross-connection contamination. In freeze climates, use a 1/4-turn ball valve on the supply line so you can isolate and drain the outdoor plumbing before the first freeze.
Permit Checklist
- Building permit: required in most jurisdictions for permanent outdoor structures over 200 sq ft (check local threshold)
- Gas permit: required for any new gas piping; typically requires licensed plumber or gas fitter for final connection and pressure test in most states
- Electrical permit: required for new circuits; rough-in may be DIY in some jurisdictions, but verify with your AHJ
- Plumbing permit: required if connecting to the home's drain/waste/vent system
- HOA or design review: required before any permit in some communities
- Zoning/setback check: confirm minimum distances from property lines and structures
Range Hoods for Covered Outdoor Kitchens
If your outdoor kitchen is under a pergola, covered patio, or any overhead structure, a range hood or exhaust canopy is a serious safety and comfort consideration, not just a nice-to-have. Outdoor hood manufacturers typically recommend mounting the hood 36 to 42 inches above the grill grates, with the hood sized to handle the total BTU output of the appliances below. A 60,000 BTU grill generally needs a hood with a minimum 1,200 CFM capture rating for outdoor use (outdoor hoods need more CFM than indoor ones because there is no enclosed room to build pressure). Follow the manufacturer's mounting height specification precisely, as this affects both grease capture and the clearance to combustibles above the hood.
Step-by-Step Build Sequence and Realistic Timelines
This is the order I follow on every outdoor kitchen build. Skipping steps or reordering them costs you time and money. The timeline below assumes one or two motivated DIYers working full weekend days.
| Phase | Tasks | Estimated Time |
|---|---|---|
| 1. Planning and permits | Finalize design, order appliances, pull permits | 1–2 weeks (permit processing time varies) |
| 2. Site prep and drainage | Excavate, install French drain if needed, compact base | 1 full day |
| 3. Foundation | Pour concrete slab or lay paver base; cure slab 7 days minimum | 1 day pour + 7 days cure |
| 4. Rough utilities | Trench and rough-in gas, electrical conduit, plumbing supply/drain | 1–2 days |
| 5. Island structure | Stack and mortar CMU or frame with lumber/cement board | 1–2 days |
| 6. Inspections | Rough-in inspection for gas, electrical, and plumbing before closing walls | Schedule with AHJ (1–5 business days typically) |
| 7. Countertop | Install or pour countertop; tile, stone, or stainless installation | 1 day + cure time if concrete |
| 8. Appliance installation | Set grill, refrigerator, sink; make final utility connections | 1 day |
| 9. Cladding and finish | Apply stucco, tile, or stone veneer to island exterior; seal surfaces | 1–2 days |
| 10. Final inspection and cleanup | Final permits signed off; test all appliances; landscaping restoration | 1 day |
Tools and Materials List
Essential Tools
- 4-foot level and 8-foot straightboard
- Tape measure and chalk line
- Angle grinder with masonry disc (for cutting block)
- Circular saw with masonry blade (for cement board and pavers)
- Plate compactor (rent: $75–$120/day)
- Mortar mixing tub and margin trowel
- Brick hammer and cold chisel
- Power drill with masonry bits
- Pipe wrench and adjustable wrench set
- GFCI tester
- Garden hose with pressure nozzle for curing concrete
Core Materials for a CMU Island (6-foot compact build)
- 40–50 standard 8x8x16 concrete blocks (CMU)
- Two 80-lb bags of type S mortar mix per 25 blocks
- 4 bags of concrete grout mix for cell filling
- 1/2-inch rebar, 4-foot lengths, for vertical cells
- 4x8 sheet of 1/2-inch cement board for grill area backing
- 1 cubic yard of 3/4-inch crushed base rock (if on paver base)
- Countertop material of choice (see countertop section above)
- Backer rod and polyurethane outdoor caulk for all countertop perimeter joints
- Penetrating stone or concrete sealer (exterior-rated)
- Gas shutoff valve, flexible connector, and pipe fittings per appliance manual
- GFCI 20-amp outlet and weatherproof in-use cover
- PVC or EMT conduit for electrical runs
Cost Ranges and Budget-Saving Tips
| Project Path | Budget Build | Mid-Range Build | Premium Build |
|---|---|---|---|
| Compact patio bar/grill (4–6 ft) | $600–$1,200 | $1,500–$3,000 | $3,500–$5,000 |
| Grill-focused BBQ patio (6–8 ft) | $1,200–$2,500 | $3,000–$5,500 | $6,000–$9,000 |
| Full outdoor kitchen island (10–16 ft) | $3,500–$6,000 | $7,000–$12,000 | $15,000–$25,000+ |
The single biggest lever on cost is appliance quality. A 30-inch entry-level built-in grill runs $400 to $700, while a premium model from a name-brand manufacturer can hit $3,000 to $5,000 for the same cutout size. For a first outdoor kitchen, mid-range appliances ($700 to $1,500 for the grill) hit the best sweet spot of durability and cost. On structure, CMU block costs about one-third what a prefabricated stainless steel island cabinet kit costs, and it lasts longer. Tile countertops save $500 to $1,500 compared to granite or concrete on a full island. Getting at least two permits done together (gas and electrical on the same inspection trip) cuts inspection fees and contractor trip charges.
Finishing, Sealing, and Maintenance
Once the build is done, finishing and sealing protect everything you just built. Apply an exterior-rated penetrating sealer to all masonry surfaces, countertops, and grout lines before first use. For concrete countertops, wait the full 28-day cure period before applying a topcoat sealer. For natural stone, apply a penetrating impregnator sealer to all surfaces and edges. Reapply sealers every one to three years depending on sun and rain exposure. Caulk the joint between the countertop and the island structure with backer rod and a polyurethane outdoor caulk rather than grout; rigid grout in that joint will crack within one freeze-thaw cycle.
Annual maintenance is straightforward: inspect all caulk joints and reseal any cracked ones in spring, clean the grill burners and check igniter connections, test the GFCI outlets, and look for any mortar cracking in the island face. Catch mortar cracks early with a tube of type S mortar repair caulk; left untreated, water gets in, freezes, and spalls a crack into a chunk.
Troubleshooting Common Problems
Drainage and Pooling
If water pools on the patio after you build, the most common cause is an inadequate slope on the finished surface. You can often fix this without tearing things up: for paver patios, pull up the affected section, add sand to adjust the bedding height, and relay the pavers. For concrete slabs, a surface-applied resurfacer with a slight slope built in can help minor issues, but a major drainage problem usually means cutting a channel drain into the slab.
Settling and Uneven Surfaces
Settling almost always points to an inadequately compacted base. The fix for paver patios is to pull up the settled section, add compacted base material, and relay. For a CMU island that has shifted, check whether the slab below has cracked or the fill cells have settled. If the slab has cracked significantly, you may need to install a new footing under the affected corner. This is the most common argument for doing the foundation right the first time.
Countertop Cracking
Hairline cracks in concrete countertops are common and usually cosmetic; fill with a color-matched concrete repair caulk and reseal. Larger cracks that go through the slab typically mean the concrete mix was too wet (high water-to-cement ratio), the countertop was not properly reinforced, or it was loaded before fully cured. Prevention is the cure here: follow a proper mix design, use fiber reinforcement or rebar, and wait 28 days before putting heavy appliances on a poured top. For granite or natural stone, cracks usually indicate a support problem; check that the countertop is bearing evenly across the entire island top, not just on the front and back edges.
DIY vs. When to Call a Pro
Almost every part of an outdoor kitchen build is DIY-friendly with the right preparation. The exceptions are situations where a mistake creates a serious safety risk or a code violation that affects your homeowner's insurance.
| Task | DIY-Friendly? | When to Hire a Pro |
|---|---|---|
| Site prep, excavation, and grading | Yes | If slope issues are severe or drainage is complex |
| Concrete slab pour | Yes, with helpers | For slabs over 300 sq ft or if structural engineering is required |
| CMU island stacking | Yes | If you have never laid block and the island is over 8 feet long |
| Gas line rough-in and sizing | DIY planning/trenching; pro for connection in most states | For final connection, pressure test, and permit sign-off |
| Electrical rough-in (conduit/wire) | Yes in most jurisdictions | For panel work and service upgrades; always verify local rules |
| Plumbing supply and drain | Yes for supply runs; drain venting is tricky | If connecting to main drain stack or if frost protection is complex |
| Countertop fabrication (granite/stone) | Tile yes; slab granite, hire a pro | Granite slab cutting and templating requires professional tools |
| Appliance installation and testing | Yes | For large propane setups or if your AHJ requires licensed gas fitter |
The honest rule I follow: do every part of the work that does not put gas or high-voltage electricity at risk until you are comfortable. Dig the trench yourself, set the conduit yourself, run the wire yourself, but have a licensed electrician make the panel connection and pull the permit in jurisdictions that require it. Same with gas: trench, lay the pipe, pressure test with a licensed plumber present, and have the final connection done by someone with the right license for your area. The inspection fees and one professional visit are a small fraction of the total project cost and they protect everything else you built.
FAQ
What building and trade permits should I research for an outdoor patio kitchen project?
Identify local building permits for permanent structures, gas piping, electrical connections, and plumbing/drainage. Check the local AHJ (building department) for fee schedules, required drawings, inspection stages, and code editions adopted (often based on the International Residential Code and local amendments). Include permit exemptions (e.g., temporary or movable appliances) so you can distinguish DIY‑allowed work from permitted work.
Which model codes and code chapters are essential to review?
Consult the adopted versions of the International Residential Code (IRC)/International Building Code (IBC), National Fuel Gas Code (NFPA 54/IFGC), and National Electrical Code (NEC/NFPA 70). Key chapters: IRC/IRC appliance/fuel gas chapters, NFPA 54 chapter on pipe sizing and installation, and NEC sections on outdoor GFCI, branch circuits, and outdoor receptacles.
What appliance and manufacturer documentation do I need?
Collect installation manuals and cut‑sheets for every planned appliance (built‑in grill, side burner, refrigeration, sink, outdoor hood, fridge). These provide required clearances, gas inlet sizes and pressure, flexible connector limits, electrical requirements, ventilation/hood capture, and warranty/installation conditions which must be followed to meet listings and AHJ inspections.
What gas‑system research questions should I answer?
Determine total BTU load of all appliances, required gas type (natural gas vs. LPG), pipe sizing (using NFPA 54/IFGC tables or longest‑run method), allowable flexible connector lengths per appliance, shutoff/valve placement, required pressure testing and leak‑testing methods, and whether a licensed gas fitter is required by local code.
What electrical‑system questions must be addressed?
List required circuits, amperage and voltage for each appliance; GFCI and outdoor protection per NEC (210.8); minimum small‑appliance kitchen branch circuits if countertop receptacles or refrigerators will be tied to kitchen loads (NEC 210.11(C)); conduit, grounding, and weather‑proof receptacle/box types; and whether a subpanel is needed. Identify inspection and permitting requirements.
What plumbing and drainage issues need authoritative guidance?
Verify sink waste routing, trap and vent requirements, grease management (if applicable), backflow prevention/vacuum breaker mandates from local water authority and EPA guidance, frost protection for water lines, slope and sizing of drain lines per IPC/IRC, and whether a sanitary connection or grease trap is required.