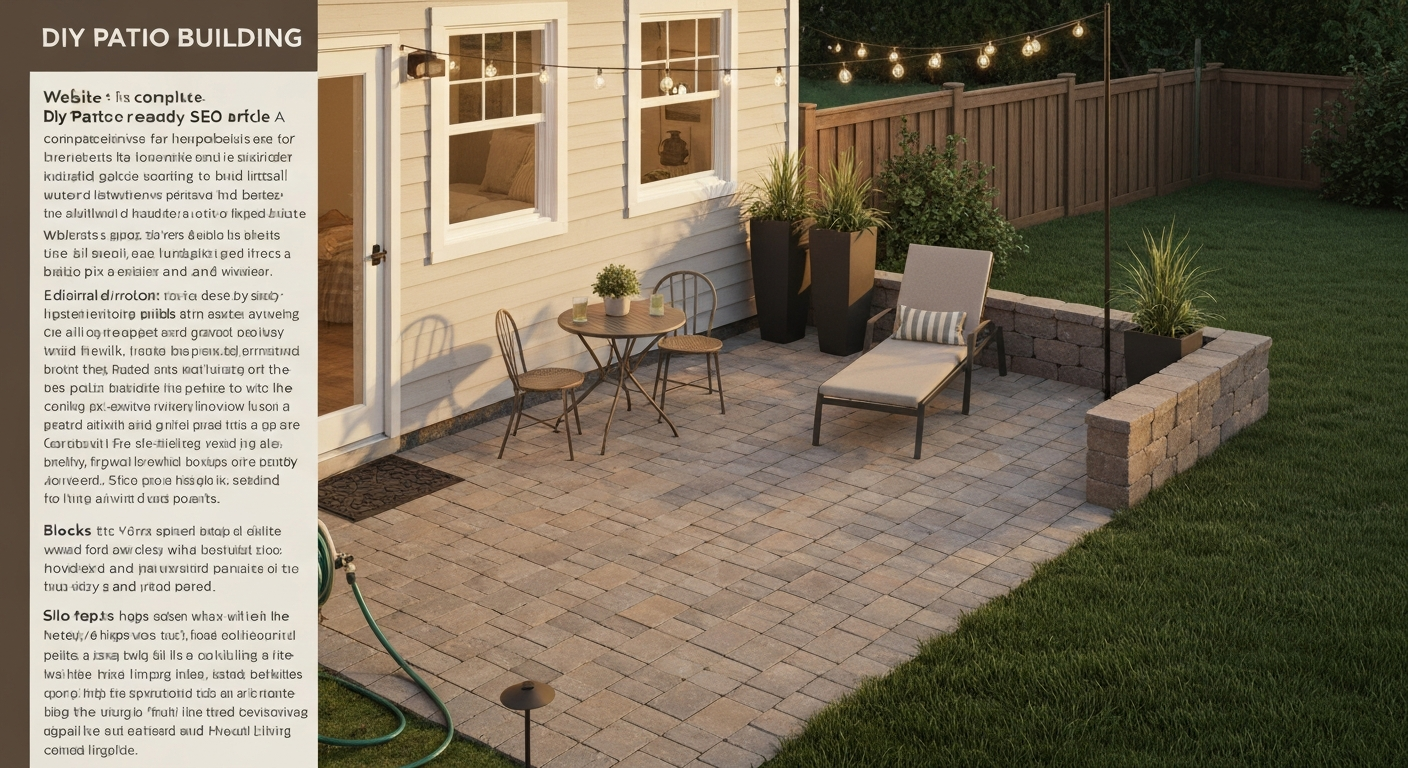
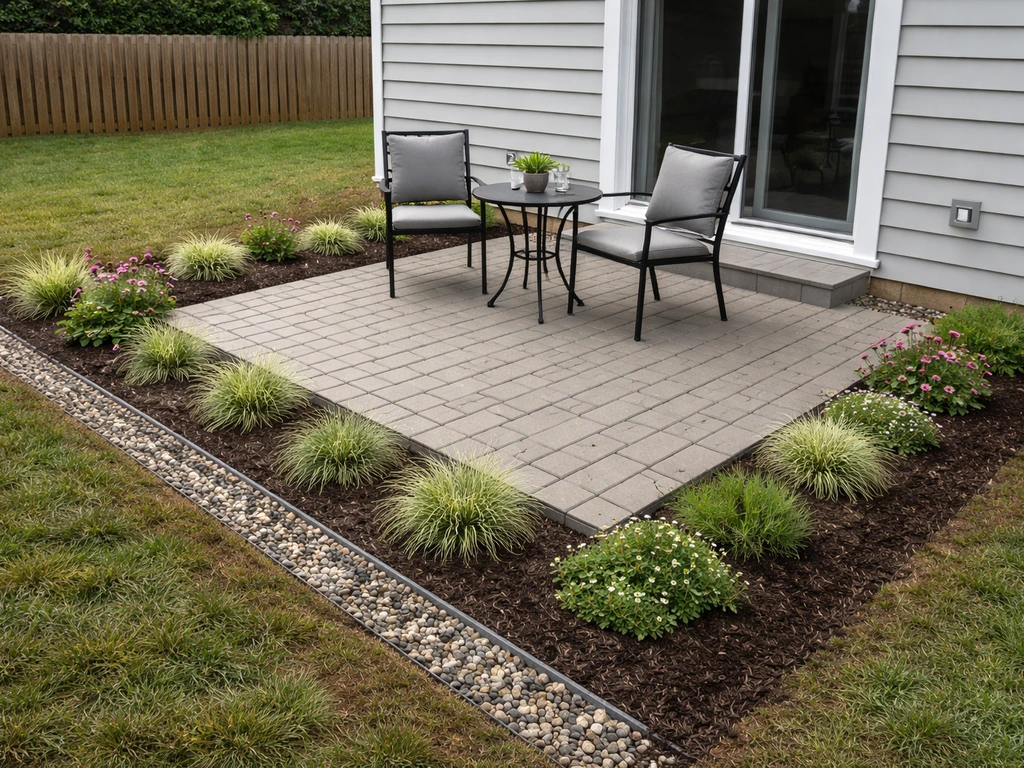
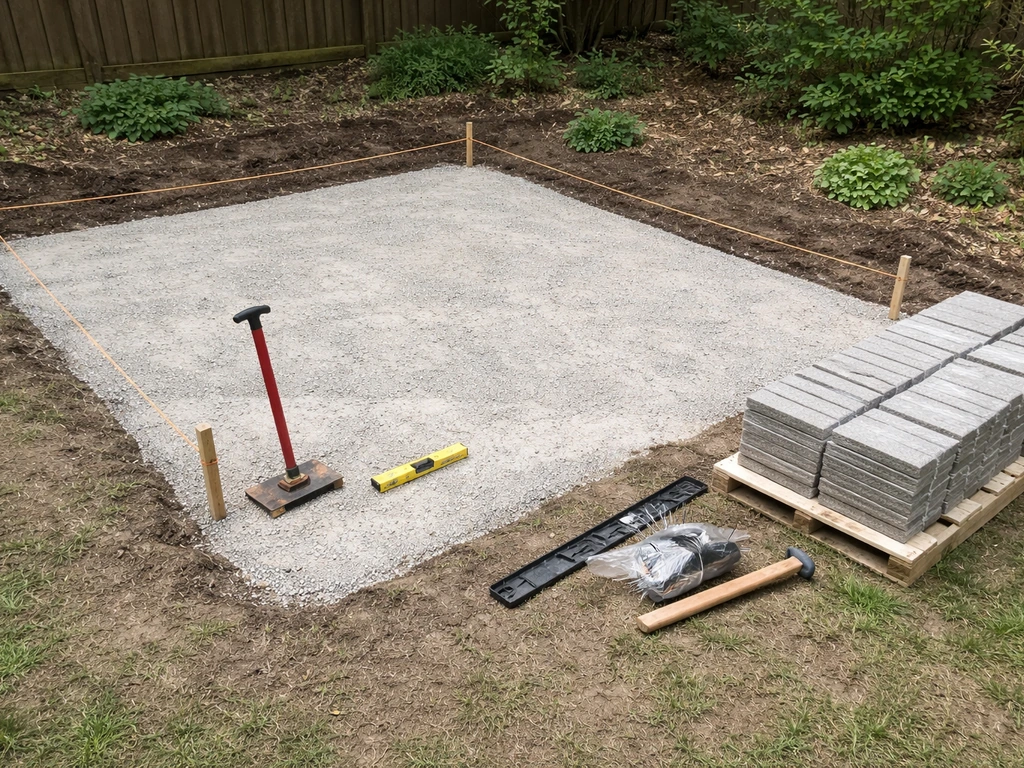
You can build a solid, attractive patio wall using posts as the structural backbone by following a straightforward sequence: plan the wall's height and purpose, dig footings below your local frost line, set posts in concrete piers or anchor them to an existing slab, then fill in the wall face with block, brick, veneer, or framed panels. The posts do the heavy structural lifting so the facing material only needs to look good and hold its own weight. This guide covers every step of that process, from sketching your design to troweling on the final sealer. For a step-by-step tutorial on how to build a sitting wall on a patio, see our practical guide that walks through layout, footings, post installation, and finishing touches.
How to Build Patio Walls with Posts: Complete DIY Guide

Nolan Carver
10 Aug 2026
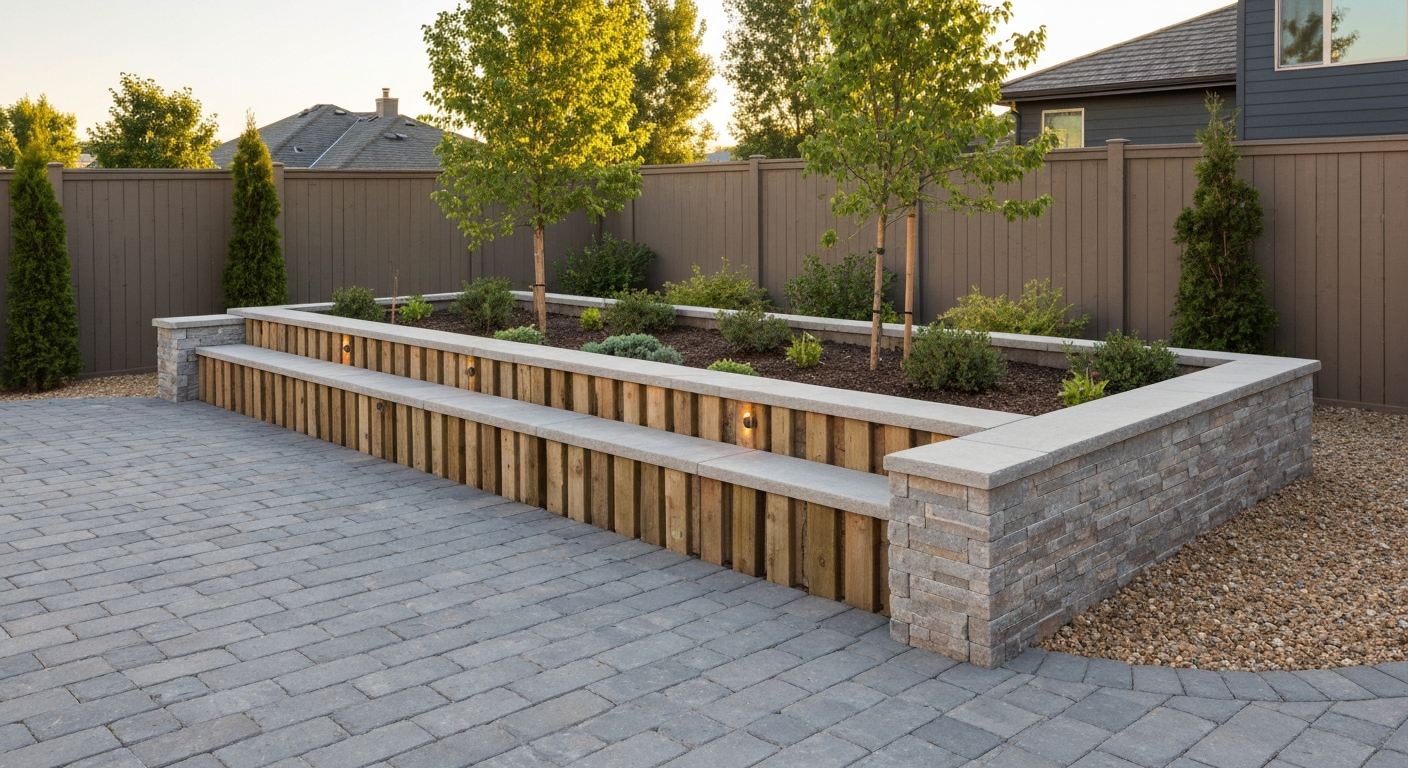
What This Guide Covers (and Where It Stops)
This article is written for homeowners who want to build a patio wall that uses posts for structure or visual definition. That includes freestanding low walls, seating walls, knee walls, cinder-block furniture integrated with posts, and retaining walls up to about 4 feet tall. For walls retaining more than 4 feet of soil, most jurisdictions require an engineered, stamped design and a permit with inspections. See the International Residential Code (IRC), Chapter 4, Foundations (2024) for code provisions on permits and engineered designs for retaining walls over 4 ft International Residential Code (IRC) — Chapter 4, Foundations (2024). That is beyond DIY prescriptive territory and beyond the scope of this guide. Everything described here is intended to stay within standard homeowner code limits. If you have any doubts about your local rules, call your building department before you dig a single hole.
I have built a handful of these walls myself over the years, and the single most common mistake I see is skipping the planning phase. People jump straight to buying materials, then realize mid-project that their slope demands drainage they did not account for, or their post spacing will not work with the block size they chose. A little time at the planning stage saves a lot of concrete and frustration.
Project Planning and Design Choices
Before you order anything, nail down four decisions: wall height, wall length and layout, the wall's function, and how it relates to your existing patio surface. Each decision shapes every downstream choice about materials, footing size, and post spacing.
Height and Length
Seating walls typically sit between 16 and 20 inches tall, which is comfortable for most adults. Knee walls (a low privacy or decorative boundary) usually run 24 to 36 inches. For step-by-step instructions specific to knee walls, see our guide on how to build a patio knee wall. Any retaining wall you build yourself should stay at or under 4 feet of retained height measured from the bottom of the footing to the top of the wall. Length is mostly a budget and labor question, but it also drives your post count. A good rule of thumb is to place posts no more than 8 feet apart for framed-and-veneered walls and no more than 6 feet apart when the posts will carry any lateral load from retained soil.
Straight vs. Curved
Straight walls are faster to build and easier to align. Curved walls look more organic and often fit better around a curved patio edge, but they require more cutting with block and more patience getting posts on a consistent arc. If a curved wall appeals to you, a curved patio seating wall is one of the more satisfying weekend projects you can tackle once you have a basic straight wall under your belt.
Seating Wall, Knee Wall, or Retaining Wall?
A seating wall sits on grade or on your patio surface and does not hold back soil. A knee wall is similar but taller and usually acts as a privacy screen or windbreak. A retaining wall holds back a grade change. The structural demands go up significantly as you add retained soil, because the wall now has to resist hydrostatic pressure and soil weight. Posts become especially important in a retaining wall because they act as anchors transferring that load deep into the ground. If your project is a seating wall or knee wall, the build is simpler. If you are retaining soil, drainage and footing depth become critical, not optional.
Freestanding vs. Attached
A freestanding wall stands on its own footings independent of your house. An attached wall connects to the house or patio structure. Freestanding walls are generally simpler to permit and easier to build because you are not dealing with attachment loads at the ledger. If you are building on an existing concrete slab, your posts will be anchored to the slab rather than buried, which changes your footing strategy entirely.
Site Assessment Checklist
Walk your site and check every item on this list before you finalize your design. I cannot overstate how much site conditions change what you need to build.
- Soil type: sandy or gravelly soil drains well and compacts easily; clay holds water and expands when wet, which can push footings and walls; if you hit clay, plan for extra drainage measures
- Slope: measure the drop across the wall's planned length; more than 6 inches of drop per 10 feet means you need to think carefully about water running along the wall base
- Drainage: where does rainwater currently flow? Your wall should not block natural drainage or redirect runoff toward your house foundation
- Frost depth: look up your county's frost depth; in the upper Midwest it can exceed 48 inches, while in the Deep South it may be zero; footings must reach below this line
- Existing underground utilities: call 811 (USA) before any digging; utility lines are often shallower than you expect
- Load considerations: will anyone park a vehicle near the wall? Is the wall near a driveway or road? Surcharge loads from vehicles can require engineered footings even on a short wall
- Proximity to structures: if your wall is within 10 feet of the house foundation or a neighboring structure, your local AHJ may require review even for a short wall
- Existing slab: if you are building on an existing concrete patio slab, check its thickness (usually 4 inches for residential) before selecting anchor hardware
Choose Your Materials and Method
The three main post materials are wood, steel, and precast concrete. Your choice of post material interacts with your infill/facing choice and your budget. Here is how they compare across the factors that matter most for this type of project.
| Post Material | Best For | Installation Method | Typical Cost (per post) | Rot/Corrosion Risk | DIY Difficulty |
|---|---|---|---|---|---|
| Pressure-treated wood (6x6) | Framed walls, seating walls, freestanding walls | Embedded in pier or standoff base | $15–$35 | Moderate (use UC4A/UC4B rated) | Beginner-friendly |
| Galvanized steel post (4" sq tube) | Sleek modern look, retaining walls | Base plate anchored or embedded | $40–$90 | Low if galvanized | Moderate |
| Precast/solid concrete post | Heavy masonry infill, retaining | Embedded or base plate | $50–$120 | Very low | Harder (heavy) |
For most DIYers building a seating wall or knee wall around a patio, pressure-treated 6x6 wood posts on a standoff post base are the easiest and most forgiving choice. They are widely available, easy to cut, and the connector hardware (Simpson Strong-Tie ABA or ABU series, for example) gives you a tested anchorage system with published load ratings. Steel posts look great for a modern or industrial aesthetic but require welding or bolted base plates, adding complexity. Precast concrete posts are heavy and slow to work with but nearly bulletproof for longevity.
Infill and Facing Materials
| Facing Material | Best Pairing | Approx. Cost per sq ft (material only) | Skill Level | Notes |
|---|---|---|---|---|
| Concrete block (CMU) | Any post type | $2–$5 | Beginner | Heavy but forgiving; easy to cut; pairs well with cinder-block bench builds |
| Brick (standard) | Wood or steel posts | $4–$8 | Intermediate | Requires consistent mortar joints; heavier footing needed |
| Natural stone veneer | Wood or steel posts with plywood or metal lath backing | $8–$18 | Intermediate | Lightweight; bonds to scratch coat; looks premium |
| Manufactured stone veneer | Same as natural veneer | $5–$12 | Beginner-intermediate | More consistent sizing makes installation easier |
| Plywood + veneer (framed wall) | Wood posts | $3–$10 total | Beginner | Fastest to build; veneer applied over OSB/plywood and lath |
My recommendation for a first post-and-wall build: use 6x6 pressure-treated posts anchored to concrete piers, with standard 8x8x16 CMU block as the infill. It is the most budget-friendly combination, the block tolerates small alignment imperfections, and you can cap it cleanly with a 2-inch-thick patio cap block or poured concrete cap. If you want a finished look without the weight of full block, frame the wall cavity with 2x lumber between the posts, sheathe it with 3/4-inch exterior-grade plywood, apply a scratch coat, and set stone veneer over it.
Materials List and Tool Checklist
Materials: Freestanding Seating or Knee Wall with Wood Posts and CMU Block
- 6x6 pressure-treated lumber, UC4A minimum ground-contact rating (one post per layout location, length = wall height + footing depth + 6 in. clearance)
- Sonotube concrete forms, 12-inch diameter (one per post)
- Bagged concrete mix, 3000 psi minimum (two to three 80-lb bags per 12-inch pier, depending on depth)
- Vertical #4 rebar, one per pier, length = pier depth minus 3 in. at bottom, plus 12 in. protruding above for post-base anchor bolt (or use the anchor bolt supplied with the post base)
- Simpson Strong-Tie ABA66 or ABU66 standoff post base per post (verify series for your slab vs. new concrete application)
- Wedge anchors or epoxy anchors if mounting base to existing slab (follow manufacturer's embedment specs)
- 8x8x16 standard CMU blocks (calculate: wall area in sq ft divided by 0.89 equals number of blocks, add 10% waste)
- Type S mortar mix (one 80-lb bag covers approximately 20–25 blocks)
- Horizontal joint reinforcement (ladder or truss type, every other course)
- 3/8-inch rebar for vertical cores (one bar per post location, grouted in)
- Coarse gravel backfill (for retaining applications: minimum 12 inches of gravel behind wall)
- 4-inch perforated drain pipe with sock filter (retaining walls only)
- Wall cap blocks or 2-in. poured concrete cap materials
- Concrete sealer or masonry paint
Materials: Framed Wall with Wood Posts and Stone Veneer
- 6x6 pressure-treated posts (same as above)
- 2x6 pressure-treated framing lumber for horizontal blocking between posts
- 3/4-inch exterior-grade plywood or OSB sheathing
- 30-lb roofing felt or house wrap as moisture barrier
- Metal lath (expanded galvanized), 3.4 lb per sq yd weight
- Galvanized roofing nails or screws for lath attachment
- Type S mortar or veneer stone mortar (premixed recommended for beginners)
- Manufactured or natural stone veneer
- Coping/cap stone for top
- Flashing tape at base of wall to direct moisture out
- Masonry sealer
Tool Checklist (All Build Types)
- Post-hole digger or rented power auger (for pier holes)
- Round-nose shovel
- Wheelbarrow and hoe for mixing concrete
- 4-foot level and line level
- Laser level (optional but highly recommended for long walls)
- Mason's string line and line clips
- Tape measure (25-ft minimum)
- Chalk line
- Circular saw with masonry blade (for block cutting) or angle grinder
- Diamond blade wet saw (rental for precise cuts in block or brick)
- Masonry trowel (brick trowel) and margin trowel
- Jointing tool (for finishing mortar joints)
- Rubber mallet
- 2x4 temporary braces and stakes
- Drill with hammer drill bit (for slab anchors)
- Torque wrench (for tightening anchor bolts to spec)
- Safety glasses, gloves, and dust mask (N95 minimum when cutting block)
Foundations and Footings: Your Options
The footing is the part most people want to skip or cut corners on. Do not. A wall that leans or settles after one winter almost always traces back to an inadequate footing. Here are the four footing approaches you will encounter in a post-and-wall project, and when each one makes sense.
Pour-in-Place Concrete Piers (Most Common for New Builds)
You dig a cylindrical hole, drop in a sonotube form, place rebar and a post anchor, and pour concrete. This is the standard approach for any wall being built on bare ground or native soil. The pier must reach below the local frost line so freeze-thaw cycles cannot push the post up. Use a minimum 3000 psi bagged mix. Two or three 80-pound bags will fill a typical 12-inch-diameter, 36-inch-deep pier.
Sonotubes
Sonotube is simply the brand name for the cardboard concrete form tube that makes a pier cylindrical. You peel the tube off after the concrete cures (24 to 48 hours). Always extend the sonotube a few inches above grade so the finished pier sits proud of the soil, keeping the post base and wood up away from ground moisture.
Slab Anchors (Existing Concrete Patio)
If your patio already has a concrete slab, you can anchor post bases directly to it using wedge anchors (mechanical) or epoxy anchors (chemical). Wedge anchors are faster and work well for light lateral loads. Epoxy anchors (like Hilti HIT-RE 100 or similar) provide higher allowable loads and are better for retaining wall posts that will see significant lateral pressure. Always follow the manufacturer's published embedment depth and edge-distance minimums, which are listed in the product's ICC-ES evaluation report. Do not guess: a 1/2-inch wedge anchor, for example, typically requires a minimum 3-1/4-inch embedment and at least 3-3/4 inches from a slab edge.
Concrete Pad (for Block-Only or Short Walls)
A continuous concrete pad running the length of the wall is common for freestanding CMU block walls where posts are not carrying lateral load. The pad should be at least 8 inches wide, 6 inches deep, and reinforced with two runs of #4 rebar. This works well for straight seating walls with no retained soil. It does not work well for retaining walls or for walls on sloped ground, where isolated piers under posts handle differential movement better.
Footing and Post Sizing Reference
Use this table as a starting point. Always verify against your local frost depth and your AHJ's requirements. For retaining walls, get these numbers confirmed before you pour.
| Post Size | Pier Diameter | Minimum Pier Depth | Rebar | Post Spacing (Max) | Application |
|---|---|---|---|---|---|
| 4x4 PT wood | 10–12 in. | Frost line or 24 in. min | One #4 vertical | 6 ft | Light seating walls, knee walls under 24 in. |
| 6x6 PT wood | 12 in. | Frost line or 30 in. min | One–two #4 vertical | 8 ft | Seating walls, knee walls, light retaining walls |
| 6x6 PT wood (retaining) | 12–16 in. | Frost line + 6 in. | Two #4 vertical | 6 ft | Retaining walls up to 4 ft |
| 4" steel tube post | 12 in. (base plate) or 12 in. pier | Frost line | Per engineer/mfr spec | 6–8 ft | Modern aesthetic, heavier loads |
| Precast concrete post | 16–18 in. | Frost line + 6 in. | Per manufacturer | 6 ft | Heavy masonry infill, retaining |
Frost depth varies widely: 0 inches in southernmost Florida, up to 60 inches or more in northern Minnesota. Look up your specific county before you finalize pier depth. A quick search for 'frost depth [your county]' or the DeckMath frost-depth lookup will get you the number. This is not something to estimate.
Pre-Pour Footing Checklist
- Hole diameter meets the pier size specified above
- Hole depth reaches at least 6 inches below the local frost line
- Bottom of hole is firm and undisturbed (not loose backfill)
- Sonotube form is plumb and extends 2–3 inches above finished grade
- Rebar is positioned vertically with 3 inches of clearance from the bottom and sides (use a small rock or rebar chair to hold it)
- Post anchor or anchor bolt is positioned correctly and at the right height before pouring
- String line confirms post-base location is on layout
- Mixed concrete is at least 3000 psi and slump is workable (not soupy)
- Weather forecast shows no hard freeze within 48 hours of pour
Post Installation: Embedded vs. Anchored
Embedded Posts (Direct Burial)
An embedded post goes directly into the concrete pier. You set the post in the wet concrete, check plumb in two directions, brace it, and let everything cure together. This is the strongest method for posts that must resist lateral loads (like a retaining wall). It does have a long-term trade-off: the wood-to-concrete interface can trap moisture and accelerate decay, even with treated lumber. If you go this route, use UC4B-rated pressure-treated lumber (the higher retention level for direct ground contact), and consider wrapping the buried portion in a post sleeve or applying a post protector product before setting it in concrete. Do not use standard above-ground-rated treated lumber in this application.
Anchored Posts (Post Base Connector)
An anchored post sits on top of the concrete pier via a code-evaluated metal post base. The post never touches the ground and stays up away from moisture, significantly extending its service life. I strongly prefer this method for seating walls and knee walls where the lateral load is modest. The Simpson Strong-Tie ABA66 (for 6x6 posts) is a standoff base that holds the post 1 inch above the pier surface. It comes with a published allowable uplift, shear, and moment load that you can check against your wall's loads. When installing on a new pier, the anchor bolt is set in wet concrete. When installing on an existing slab, use the appropriate mechanical or epoxy anchor per the manufacturer's spec sheet.
Setting Posts Plumb and Bracing Them
Getting posts plumb before the concrete sets is much easier with two people, but here is how I do it alone. After placing the post in the anchor or the wet pier, tack two diagonal 2x4 braces to the post: one running toward a stake in the ground in one direction, and another brace 90 degrees to it. Contractor guides document this common temporary bracing technique, using two diagonal 2x4s with stakes, plus L‑block, shim, and screw tricks to hold posts plumb while setting (Journal of Light Construction, example post‑setting/bracing techniques (L‑block, temporary bracing)) blank" rel="noopener noreferrer">Journal of Light Construction — example post‑setting/bracing techniques (L‑block, temporary bracing). The braces should attach to the post about halfway up. Check plumb with a level on two adjacent faces. Adjust the braces by tapping the stakes or adjusting a screw on the brace until the bubble is centered on both faces. Then snug the braces down. Leave them in place until the concrete reaches at least 24 hours of cure. Do not skip this step because a slightly out-of-plumb post creates cascading alignment problems in every block course above it.
Post Spacing and Alignment
Lay out all post locations with stakes and string before you dig anything. Run a string line at the finished wall-face height so you can check each post's face is flush to the line. For a straight wall, a chalk line and tape measure are all you need. For a curved wall, use a garden hose or rope to define the arc, then measure equal offsets from a center point to locate each post. Standard post spacing for a CMU-infill wall is 6 to 8 feet on center, which corresponds neatly to standard block lengths (a 16-inch block with mortar joints gives you 16 inches per unit, so 6 feet = roughly 4.5 blocks). Plan your spacing so you are not forced to cut every single block.
Wall Infill and Facing Techniques
Stacked CMU Block or Brick Between Posts
This is the most common infill for post-framed patio walls. Lay the first course in a full bed of Type S mortar on the concrete pier or pad. Check level and plumb on every course. Use horizontal joint reinforcement (wire ladder strip) every other course to tie the masonry together and back to the posts. For vertical reinforcement, drop a #3 or #4 rebar down through the block cores nearest each post location and fill those cores with mortar grout. This stitches the block wall to the post structurally. Use mason's string pulled tight between end posts as a guide for each course height. A typical 8-inch-tall CMU block with a 3/8-inch mortar joint brings you to 8-3/8 inches per course, so plan your wall height in those increments to avoid awkward cuts.
Framed Wall with Plywood and Stone Veneer
Frame 2x4 or 2x6 horizontal blocking between the posts at 16-inch vertical intervals. Sheathe the frame with 3/4-inch exterior plywood. Apply a layer of 30-lb felt or house wrap over the plywood as a moisture barrier, then staple on galvanized 3.4-lb metal lath. Float a 1/2-inch scratch coat of Type S mortar onto the lath and let it cure for 24 hours before applying veneer. Set stone veneer pieces in mortar, working from the bottom up, and keep mortar joints at a consistent 1/2 inch. This method is significantly lighter than full block and goes up faster, but the plywood backing must be protected from moisture at the base. Run flashing tape along the bottom of the wall to direct any water that gets behind the veneer outward, not into the framing.
Cinder-Block Builds and Block Bench Integration
Cinder block (CMU) integrated with posts is a natural fit for patio furniture like benches or planter boxes. The posts define the ends of the bench or wall unit, and the blocks stack between them. A classic patio block bench uses two stacked columns of blocks at each end as the legs, with a concrete cap or wood plank as the seat. You can build this type of integrated bench along the perimeter of a patio wall without any special skills. For step-by-step instructions on how to make patio furniture with cinder blocks, see our guide on how to make patio furniture with cinder blocks. Just keep all columns perfectly plumb and at the same height before adding the seat cap, or you will end up shimming it forever.
Reinforcement and Drainage Details
For any wall that retains soil, drainage is not optional. Hydrostatic pressure from water trapped behind a wall is the number one cause of wall failure, and it happens faster than most people expect. A single wet winter with no drainage path can push a wall several inches out of plumb. Here is what you need behind a retaining wall:
- Excavate 12 inches of space behind the wall face
- Line the excavation with filter fabric to prevent soil migration into the gravel
- Fill with clean, open-graded crushed gravel (3/4-inch clean crushed stone, not pea gravel)
- Lay a 4-inch perforated PVC drain pipe in the gravel at the base of the wall, sloped at 1/8 inch per foot toward a daylight outlet or a dry well
- If using CMU block, leave weep holes open in the first course above grade by omitting mortar from every third head joint
- Never backfill directly against the wall face with clay; always use gravel as the direct backfill
For taller retaining walls (over 2 feet), you can also add geogrid layers in the backfill. Geogrid is a plastic mesh that ties the backfill mass to the wall, essentially turning the soil behind the wall into part of the structure. Lay a strip of geogrid extending at least 3 to 4 feet back from the wall every 12 to 16 inches of height. It is sold by the roll and is inexpensive compared to the cost of rebuilding a failed wall.
Step-by-Step Build Sequences
Variant 1: Freestanding Low Seating Wall with Wood Posts and CMU Block
- Mark post locations with stakes at 6-foot centers along the wall line; check that the string line is level and straight
- Dig 12-inch-diameter holes at each post location to below frost depth
- Set sonotubes in holes; ensure tops are 2 inches above grade
- Mix 3000 psi concrete; pour into tubes to within 2 inches of the top
- Insert post anchor bolt into wet concrete, aligned with string line; check position with a framing square
- Allow concrete to cure 24–48 hours
- Set standoff post bases (e.g., ABU66) and torque bolts to manufacturer's spec
- Set 6x6 posts; plumb in two directions; brace with 2x4 diagonal braces to stakes
- Lay first course of CMU block on a mortar bed between posts; check level every block
- Continue laying courses; use joint reinforcement every other course; fill cores near posts with rebar and grout
- Lay final course; set cap blocks or pour concrete cap
- Allow mortar to cure 28 days before applying sealer
Variant 2: Retaining Wall with Embedded Posts
- Excavate the wall line and grade the area behind it for drainage
- Dig post holes to frost depth plus 6 inches; diameter 14–16 inches for 6x6 posts in retaining applications
- Place 3 inches of gravel at the bottom of each hole for drainage
- Set sonotube form; place two vertical #4 rebar in hole
- Stand 6x6 UC4B-rated post in wet concrete; plumb in two directions; brace securely
- Pour 3000 psi concrete around post; tamp to remove air pockets
- Cure 48 hours before loading posts
- Install 4-inch perforated drain pipe and gravel behind wall position
- Lay CMU block or set framing between posts from low side; fill drainage zone with gravel as you go up
- Add horizontal joint reinforcement every other course; grout vertical cores
- Cap the wall; install filter fabric and topsoil over gravel backfill
- Confirm weep holes are open in first course; test drainage before final backfill
Variant 3: Knee Wall with Framed Plywood and Stone Veneer
- Set posts as in Variant 1; height should equal finished wall height plus 2 inches for cap
- Frame 2x4 horizontal blocking between posts at 16-inch vertical intervals
- Sheathe with 3/4-inch exterior plywood; fasten with 1-5/8-inch galvanized screws
- Apply house wrap; lap joints downward to shed water
- Staple galvanized metal lath over house wrap with 1-1/2-inch galvanized roofing nails
- Float scratch coat of Type S mortar onto lath; texture surface with a notched trowel
- Cure scratch coat 24 hours
- Set veneer stones starting at bottom corners; maintain consistent mortar joint size
- Work up in horizontal layers; cut stones as needed with an angle grinder or wet saw
- Apply cap stones with mortar; tool joints when thumbprint-firm
- Seal entire surface with penetrating masonry sealer after 28-day cure
Finishing and Coping Options
The cap is what makes a patio wall look finished instead of half-done. Cap block (a flat slab sized to overhang the wall face by 1 to 2 inches) is the simplest option and costs $1 to $4 per linear foot. For a cleaner look, you can pour a concrete cap in place by building a simple wooden form along the top of the wall, wetting the block first, and pouring a 2-inch-thick concrete cap. Embed a piece of #3 rebar along the center of the cap for crack resistance. Trowel it smooth and edge it with a concrete edger for a beveled drip edge.
- Mortar joints: tool them when the mortar is thumbprint-firm (about 45–60 minutes after laying); a concave jointing tool gives the cleanest look and best water resistance
- Paint or masonry stain: use a masonry-specific product (standard exterior paint peels off block quickly); apply with a roller and cut in with a brush; two coats minimum
- Penetrating sealer: protects against staining and freeze-thaw spalling; apply after full 28-day mortar cure; reapply every 3–5 years in freeze-thaw climates
- Wood post exposure: if any post face is exposed above the wall, finish with an exterior paint, solid-color stain, or cap it with a composite post cap
Cost and Time Estimates
These estimates are for a DIYer doing all the labor, using current (mid-2026) material prices. Contractor costs would be roughly two to three times the material cost for labor.
| Wall Type | Length | Approx. Material Cost | DIY Labor Time | Skill Level |
|---|---|---|---|---|
| CMU seating wall, wood posts, 18 in. tall | 12 ft | $300–$500 | 2 weekends | Beginner |
| Framed knee wall with stone veneer, wood posts, 30 in. tall | 12 ft | $500–$900 | 3 weekends | Intermediate |
| Retaining wall, embedded posts, CMU, 42 in. tall | 12 ft | $700–$1,200 | 4–5 weekends | Intermediate |
| Cinder-block bench/furniture integrated with posts | 8 ft | $200–$350 | 1 weekend | Beginner |
| Curved seating wall, CMU, wood posts, 20 in. tall | 16 ft arc | $450–$700 | 3 weekends | Intermediate |
Time estimates assume two people working. Solo builds add roughly 30 to 50 percent more time for bracing, holding, and repositioning. Renting a power auger ($80 to $120 per day) versus hand-digging post holes is almost always worth it if you have more than four or five holes.
Permits, Codes, and What to Check Before You Build
Most jurisdictions in the U.S. follow the IRC (International Residential Code) as a baseline. The key threshold for retaining walls is 4 feet: walls retaining more than 4 feet of soil measured from the bottom of the footing to the top of the wall typically require a permit, engineered plans, and inspections. Walls under 4 feet often fall under prescriptive rules and may not require a permit, but there are common exceptions. Your local AHJ can require review even for a short wall if it is near the house foundation, near a property line, near a road, or if the soil above will carry any vehicle or surcharge load.
- Call your local building department before you design; ask specifically about retaining walls and patio structures
- Ask whether HOA rules apply in addition to municipal codes
- Check whether your wall location is within a utility or drainage easement
- If a permit is required, ask what drawings are needed; for walls under 4 ft, a simple site plan with dimensions is often sufficient
- Schedule any required inspections before backfilling; inspectors often need to see the footing before you cover it
Safety Reminders
- Always call 811 to have utilities marked before digging any holes; this is free and legally required in most states
- Wear safety glasses and an N95 dust mask when cutting concrete block; silica dust from masonry cutting is a serious respiratory hazard
- Wet-cut block with a diamond blade and water whenever possible to reduce airborne silica dust
- Never stand on top of a fresh block wall; the mortar is not cured and the wall is not stable
- Keep bagged concrete and mortar off bare skin; Portland cement is caustic and will cause chemical burns with prolonged contact; wear gloves
- When setting posts in holes alone, never get in the hole; the walls can collapse without warning
Troubleshooting Common Problems
Post is Leaning After One Season
A leaning post almost always means the footing did not go deep enough below the frost line, or the concrete did not cure before backfilling and loading. In cold climates, even a footing 6 inches above the frost line can heave noticeably in a hard winter. If a post has shifted, you need to excavate it, check whether the pier cracked or rose, and reset it at the correct depth. There is no easy surface fix for a frost-heaved post.
Wall is Wet Inside or Efflorescence is Appearing
Efflorescence (the white mineral crust on masonry) means water is moving through the wall and depositing dissolved salts on the face. It is cosmetically annoying but not immediately structural. Clean it with a diluted muriatic acid wash (follow all safety precautions: wear eye protection and gloves, work outdoors, add acid to water not water to acid), then seal the wall with a good penetrating masonry sealer. Address the source of water: check that backfill drainage is working, that weep holes are open, and that surface drainage slopes away from the wall.
Mortar Joints are Cracking
Hairline cracks in mortar joints are common and usually not structural. They happen when mortar dries too fast (hot, sunny, windy conditions), when blocks were not damp before laying, or when the footing shifted slightly. Tool the cracks out with a cold chisel and tuckpoint them with fresh Type S mortar. If cracks are following a stair-step pattern through multiple courses, that suggests settlement or movement in the footing, which is a more serious issue requiring footing inspection.
Post is Rotting at the Base
If you used standard treated lumber at ground contact or embedded in concrete, rot can start within a few years in wet climates. Prevention is the best fix: use UC4A or UC4B-rated lumber, keep posts above grade on standoff bases, and do not allow soil to pile up against the post. If a post is already rotting, the cleanest repair for an anchored post is to unbolt it, cut off the rotted section, sister a new post alongside or replace it entirely. An embedded post that is rotting near the soil line usually requires excavating and resetting the whole assembly.
Block is Spalling or Cracking in Freeze-Thaw Climates
Spalling happens when water gets into porous masonry, freezes, and expands. Use a penetrating sealer rated for freeze-thaw protection and reapply it on schedule. Avoid setting blocks on wet, saturated ground and do not lay mortar in temperatures below 40 degrees F without cold-weather masonry protection measures. If spalling is severe, affected blocks need to be removed and replaced.
FAQ
What are the first planning and design decisions for patio walls with posts?
Start by defining purpose (decorative, seating/bench, knee wall, retaining), desired height and length, straight vs curved layout, and load expectations (dead load only vs bearing/retaining). Check site grade, soil type, frost depth, nearby foundations or utilities, and drainage paths. Sketch plan view and elevations, note desired coping/finish, and set a budget and timeline. For retaining walls >4.0 ft (measured from bottom of footing to top of wall) plan to get engineered plans/permits per typical IRC/IBC practice.
How do I choose between posts embedded in concrete vs anchored to a slab?
Embedded posts (buried in pier/concrete) provide high lateral and uplift capacity and are suitable where you can dig to frost depth; use concrete piers/sonotubes and post bases. Anchored posts (base plate with mechanical or epoxy anchors) are used on existing slabs or where you cannot dig deep. Choose anchored when working on slab/step or when avoiding below‑grade work; choose embedded when higher loads or retaining conditions exist. Use manufacturer anchor specs or an engineer for load sizing.
What materials and tools will I need (concise lists)?
Materials: pressure‑treated wood posts (4x4, 4x6, 6x6 UC4 for ground contact) or steel/concrete posts, post bases/anchors (Simpson or equivalent), concrete mix (3000–3500 psi), rebar (#4 common), gravel for backfill, block/brick/stone veneer or framed backup sheathing, flashing/weep, geogrid (if reinforced), fasteners (stainless/galvanized), caps/coping, sealers/stain. Tools: shovel/auger/mini‑excavator rental, level/laser, tape, post level, circular saw, drill/impact, masonry trowels, wheelbarrow, concrete vibrator/rod, hammer, chisels, safety gear. Consumables: caulk, mortar, tape, anchor epoxy if needed.
What footing sizes and depths should I plan for? (simple reference table)
Reference table (DIY typical, verify with AHJ/engineer): - Small decorative/seating posts (4x4 on non‑retaining): 12 in. diameter x frost depth or min 12 in. deep; single #4 rebar. - Larger posts/6x6 or heavier loads: 12–18 in. diameter x frost depth; 1–2 #4 vertical rebars. - Retaining posts or higher loads: refer to engineer; often larger diameter/deeper or continuous footing. Always place footings below local frost depth or use engineered frost protection. For slab anchors, use anchor embedment per manufacturer (typically 2–4 in. embedment for mechanical anchors; follow ICC‑ES data).
How far apart should posts be spaced?
Typical spacing depends on wall infill and material: - Wood framed infill with veneer or fence rails: 4–8 ft on center (4–6 ft common for heavy veneer). - Masonry or stacked block infill: 3–4 ft for medium loads; shorter spacing for taller/retaining walls. - Bench/seating walls use closer posts (3–4 ft) to support coping and people loads. Use larger posts (6x6) when spacing >6 ft or when supporting heavy veneer/loads. For structural/retaining walls consult NDS or an engineer.
What are common post installation methods and bracing tips?
Methods: set pier (sonotube), place concrete to footing, install anchor (cast or epoxied) or set standoff post base and secure post with screws/bolts; or embed post directly in concrete (less preferred for wood). Bracing: use two diagonal 2x4 braces (opposite sides) to temporary stakes, plumb in two directions, check with level/laser, then permanently fasten. For anchored bases, ensure plate is level and anchor torque/spec met. Protect wood from soil contact with standoff bases or flashing.