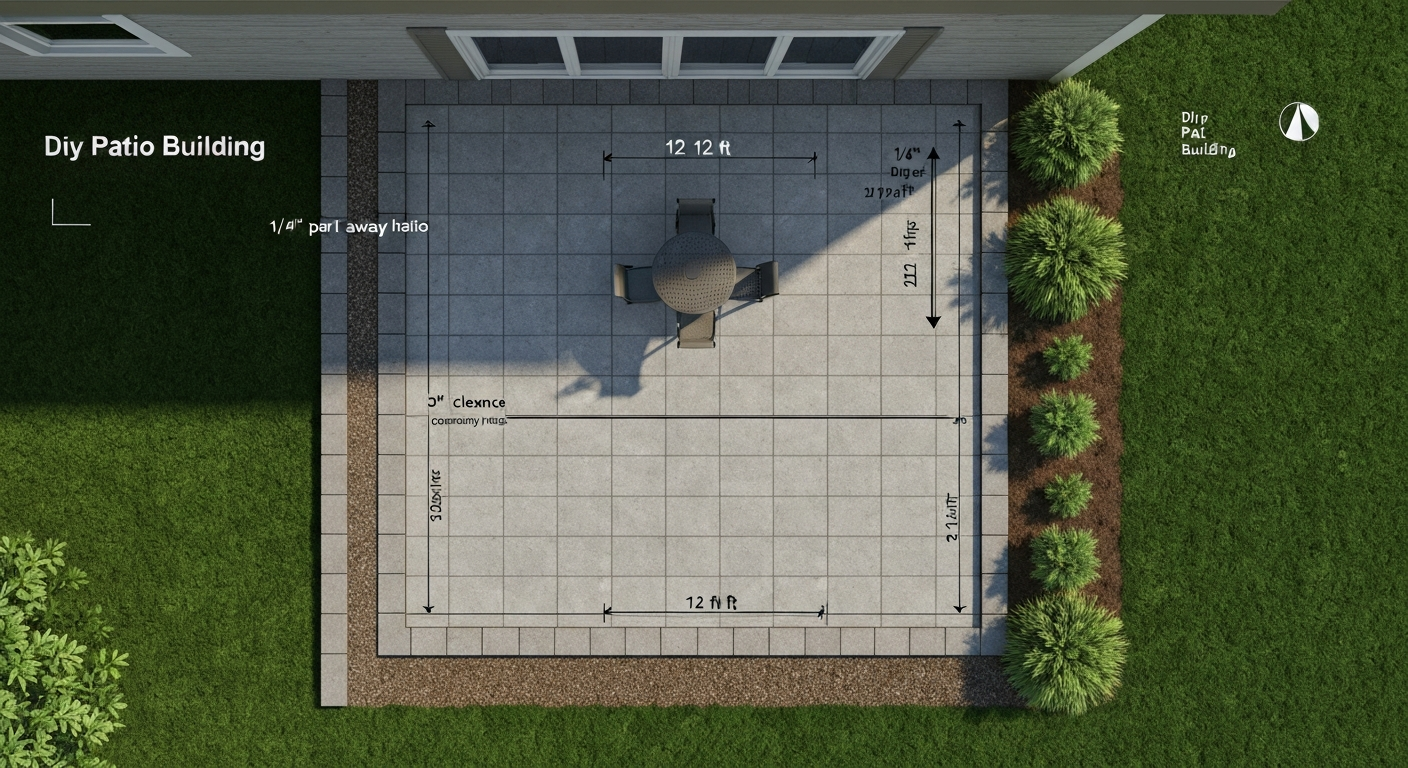
To calculate your patio area, multiply length by width for a rectangle (A = L × W), break any irregular shape into rectangles and triangles and add the pieces together, or use π × r² for a circular patio. Get those numbers right and everything downstream, how many pavers to order, how much base gravel to haul, how much concrete to pour, follows directly. This guide walks you through the exact measuring procedure, the formulas for every common shape, and how to convert square footage into real material quantities before you spend a dollar.
How to Calculate Patio Area: Measure, Plan & Order Materials

Nolan Carver
21 Jul 2026
Why getting the area right saves you money and headaches
An accurate area measurement is the foundation of your entire project budget. Order too few pavers and you delay the job waiting for a second delivery, and risk a batch that does not quite match in color. Order too many and you waste money on materials you have to store or return. I have watched DIYers underestimate a patio area by as little as 10% and end up short on base gravel mid-install, which means stopping work to make an emergency trip to the landscape supplier. Getting the math right before you order anything is one of the easiest ways to keep your build on track.
This guide covers flat and raised patios, attached and freestanding patios, and every shape from a simple square to an L-shaped or curved design. By the end you will have a checklist that takes you from raw measurements to a materials order, so you can show up on build day with everything you need.
Tools you need before you measure
You do not need expensive gear to measure a patio accurately. Most of this list you probably already own, and the rest is cheap to pick up.
- 25-foot or 100-foot tape measure: a 25-foot tape handles most residential patios; a 100-foot tape is worth having for anything over about 20 feet in any direction
- Laser distance measure: optional but genuinely useful for attached patios where one end is tight against siding — reads to within 1/16 inch and is fast enough to re-check measurements without help
- String line (mason's line): bright-colored braided string you stretch taut between stakes to mark edges and establish straight reference lines
- Line level or builder's level: clips onto a string line and tells you when the line is perfectly horizontal — important for measuring slope and for referencing consistent heights
- Stakes or batter boards: hold string lines in place outside the work zone so you can pull cord without disturbing your layout
- Marking paint or chalk: temporarily mark corners and dimensions directly on grass or soil so you don't lose them
- Notepad and pencil (or a phone): write down every dimension immediately — memory is unreliable when you are managing multiple measurements
- Calculator or smartphone app: basic calculator app works fine; apps like Patio Calculator or general area calculators can speed up irregular shapes
One practical tip: always carry a second tape measure or write dimensions in two places. It sounds overly cautious until you drop your only tape in wet concrete.
Basic measuring principles every DIYer should know
Work in straight lines and measure to finished edges
Always measure to where the finished patio surface will end, the outer edge of your edging restraint or the last paver, not to some rough stake in the ground. If you plan to install a plastic edge restraint, that restraint sits just outside your last paver and typically adds about 1 inch per side. That does not change your area calculation much, but it does affect how you stake out the excavation zone (usually 6 inches beyond finished area on each side for a standard base install).
Pick your units and stick with them
In the US, measure in feet and inches and calculate area in square feet. If you measure in feet and decimal fractions (12 feet 6 inches = 12.5 feet), your math stays clean. Do not mix feet-and-inches with pure inches in the same formula, it is a reliable way to get the wrong answer. If you need metric, measure in meters and calculate in square meters. Pavers are sometimes sold by the square foot and sometimes by the piece, so note which unit your supplier uses before you start converting.
Rounding rules
When measuring, round to the nearest inch (or nearest 0.1 foot). When calculating material quantities, always round up to the next whole unit, a pallet, a yard of gravel, a bag of sand. Never round down on materials. The extra 5% you buy is insurance; the 5% you are short on becomes a work stoppage.
Step-by-step measuring procedure for any patio
This procedure works whether your patio is freestanding or attached to the house. It takes about 30 minutes for a straightforward design and gives you everything you need to calculate area and plan materials. For a quick walkthrough on how to work out patio size, see our step-by-step guide.
- Sketch the patio shape on paper before you go outside. Even a rough sketch with labeled sides (Side A, Side B, etc.) gives you a map to fill in as you measure. Include any openings like fire pits, planters, or steps.
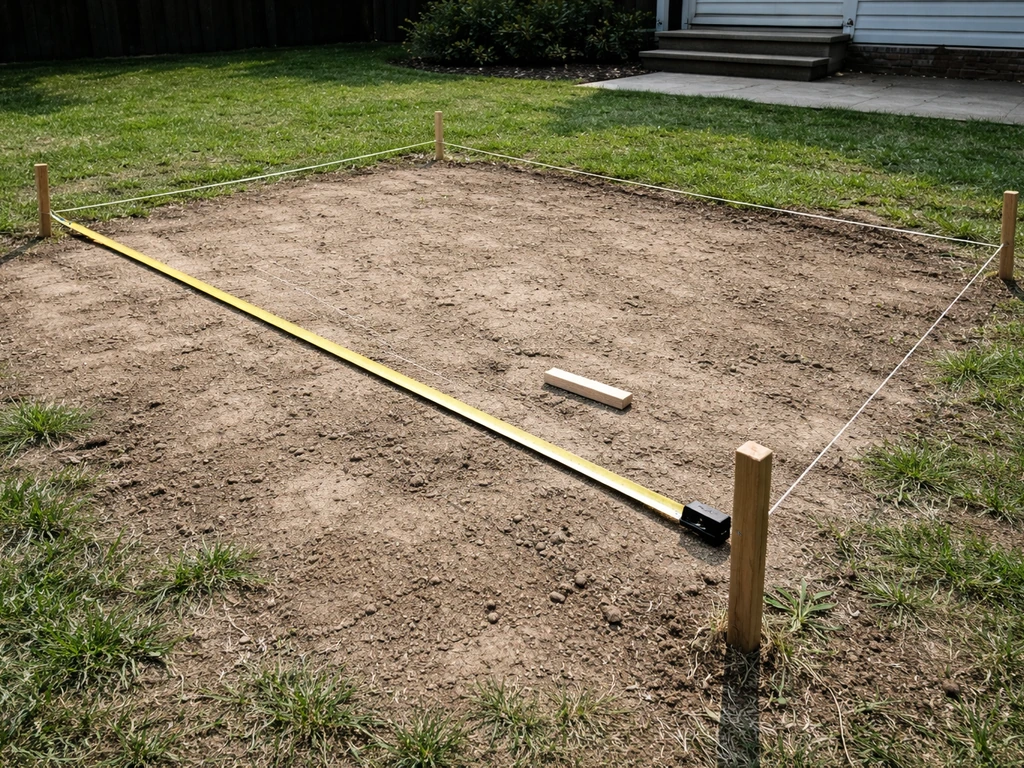
- Stake the corners. Drive stakes at each corner of the planned patio area. For an attached patio, your first two stakes mark the house wall at each end of the patio width.
- Run string lines. Stretch string between the stakes at a consistent height (around 12 inches above grade works well). Pull the lines taut — a sagging line gives inaccurate measurements.
- Measure each side. Run your tape along each string line from stake to stake and record the dimension on your sketch. Measure twice, write it down once.
- Measure the diagonals. On any rectangle or square, measure corner to corner in both directions. Equal diagonals confirm a square layout. If they differ by more than about 1/2 inch on a 12-foot patio, your corners are not at 90 degrees and you need to adjust before proceeding.
- Measure any openings or cutouts. For a fire pit, measure the diameter or the length and width of the opening. For steps, measure the tread depth and width. You will subtract these areas from your gross total later.
- Note any slope. Set a level on a long straight board laid along the patio's length and measure the gap between the board end and the ground (rise) over a known run. This matters for both drainage planning and for converting plan area to true surface area on steeper sites.
- Record everything on your sketch and photograph it. A photo of your staked layout next to your written sketch is surprisingly useful when you are standing in a lumber yard trying to remember if that dimension was 11.5 feet or 12.5 feet.
How to square a patio off a house
Attached patios need to be square to the house wall, otherwise every row of pavers runs slightly diagonal and the whole thing looks wrong by the time you get to the far edge. The 3-4-5 triangle method is the standard trade approach and it works every time.
The 3-4-5 method
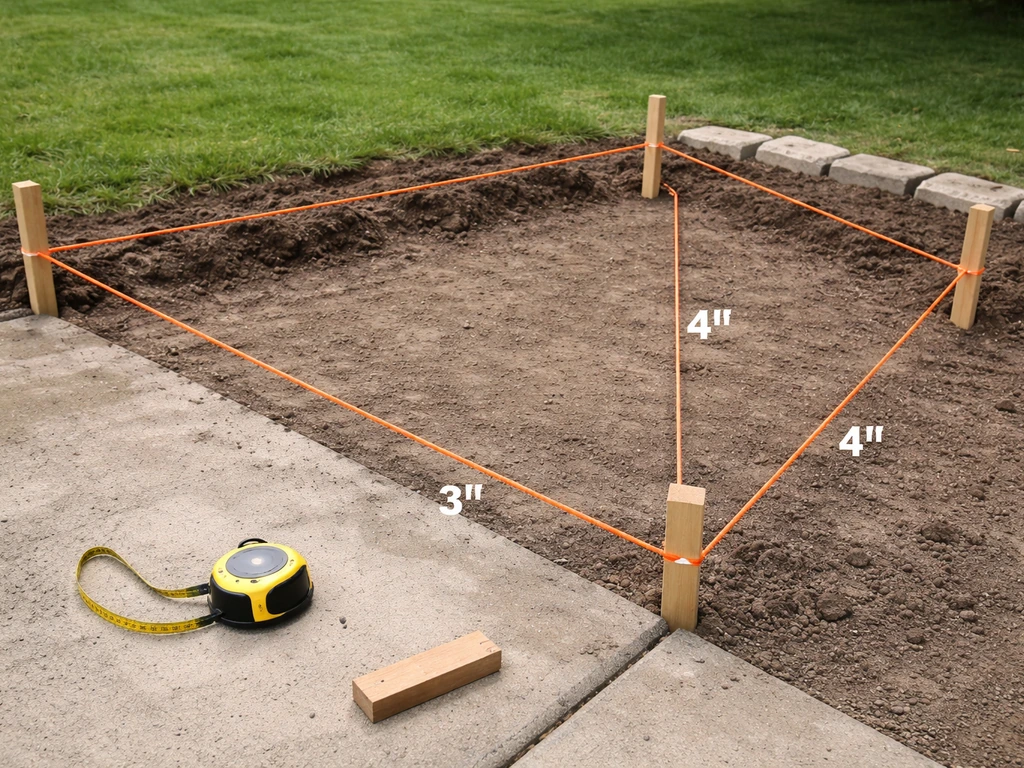
Mark your starting point on the house wall where the corner of the patio will sit. From that point, measure 3 feet along the house wall and mark it. From the same starting point, run a string line out from the house approximately perpendicular and measure 4 feet along it. Adjust the string line until the diagonal distance between your 3-foot wall mark and your 4-foot string mark is exactly 5 feet. When that diagonal hits 5 feet, your string line is at a perfect 90-degree angle to the house. For larger patios, scale this up: 6-8-10 or 9-12-15, same principle, bigger triangle, more accuracy over longer distances.
Once your first perpendicular string line is set and squared, measure out the patio width along the house wall, set a second stake, and repeat the 3-4-5 check to establish that corner. Then connect the two outer corners with a final string line to complete the rectangle. Measure both diagonals of the full rectangle, they should match within about 1/4 inch on a patio up to 20 feet. If you want to dig deeper into squaring technique before you start laying out, the topic of how to square a patio is worth reading through on its own. For step-by-step instructions on squaring an attached patio exactly to the wall, see the section on how to square a patio off a house. See the how to square a patio guide for step-by-step measurements and diagrams to help you lay out perfect 90-degree corners. For a complete step-by-step walkthrough on taking accurate patio dimensions, see how to measure for a patio.
Transfer points and slope away from the house
For an attached patio, your reference height is the door threshold or the bottom of the door sill. The finished patio surface should sit 1 to 2 inches below that threshold so water does not run back into the house. From that reference point, your patio should slope away from the house at a minimum of 1/8 inch per foot (about 1%) and ideally 1/4 inch per foot (about 2%). Over a 12-foot-deep patio at 1/4 inch per foot, the outer edge sits 3 inches lower than the house edge. Measure and record this drop so you can set your base grades accurately during excavation.
Measuring raised patios and elevated decks
For a raised patio on pedestals or a paver deck over a structural surface, you measure the projected (plan view) area, the footprint as seen from above, not the surface area of any sloped or ramped sections. Think of it like measuring a shadow: you stand directly above the patio and measure its rectangular outline on the ground.
Measure from the outer face of the ledger board or house wall to the outer edge of the patio (not including the railing post base), and from one side to the other. If your patio has a railing, the patio surface area stops at the inner face of the posts, the railing does not add to your paving area. Record the ledger elevation (height above grade) because it drives your structural and drainage decisions: any raised paved surface attached to a house must maintain the required clearance above the weep screed (the bottom of your stucco or siding system), which is typically 2 to 4 inches minimum depending on your local code. Do not let your patio surface trap moisture against the wall, that clearance exists to protect the structure.
For the area calculation itself, raised patios use the same formulas as flat ground-level patios. The elevation changes your structural requirements, not your square footage math.
Rectangles and squares: the formulas and a worked example
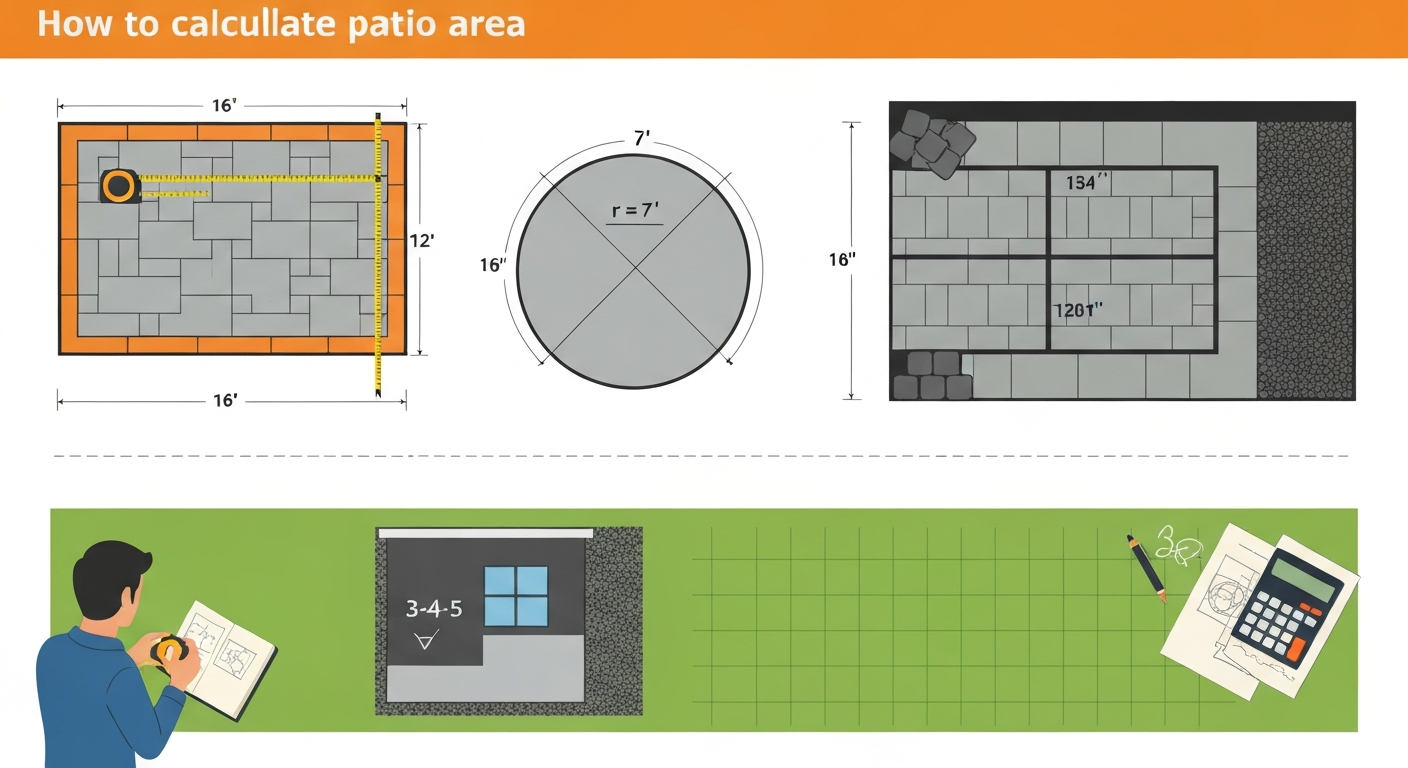
Most patios are rectangular or close to it, so this is the formula you will use most. The math is simple: Area = Length × Width. The only thing that trips people up is keeping units consistent.
Rectangle formula and quick example
Say your patio measures 16 feet long by 12 feet wide. Area = 16 × 12 = 192 square feet. A square is just a rectangle where both sides are equal: a 14-foot-square patio is 14 × 14 = 196 square feet. For step-by-step guidance on how to layout a square patio, consult the dedicated how to layout a square patio guide for measuring, squaring, and staking patterns. For inspiration on styling that space, see tips on how to decorate a square patio. That is the entire formula. For step-by-step instructions on laying a 14-foot square patio and setting base, sand, and edge restraints, see how to build a square patio (internal reference UUID 1d5abef6-25a9-40a6-9cf7-846a3110c904). The practice is in measuring both dimensions accurately from finished edge to finished edge and recording them before you start calculating.
Quick area reference for common patio sizes
| Patio Size (ft) | Area (sq ft) | Approx. pavers at 1 sq ft each + 10% waste |
|---|---|---|
| 10 × 10 | 100 | 110 |
| 12 × 12 | 144 | 159 |
| 12 × 16 | 192 | 212 |
| 14 × 20 | 280 | 308 |
| 16 × 20 | 320 | 352 |
| 20 × 20 | 400 | 440 |
| 20 × 24 | 480 | 528 |
The 10% waste factor shown above is a standard starting point for a simple running bond pattern. Bump it to 15% for a 45-degree diagonal pattern, which creates more cut pieces at every edge.
Circles and arcs: measuring curved patios
Circular and curved patios are more common than people think, a round dining patio, a circular fire pit surround, or a patio with a curved front edge all require circle math. None of it is difficult once you know what to measure.
Full circle area
For a full circular patio, measure the diameter (straight across the widest point through the center) and divide by 2 to get the radius. Then use: Area = π × r². With π rounded to 3.14159, a circular patio 14 feet in diameter has a radius of 7 feet, and its area = 3.14159 × 7² = 3.14159 × 49 = approximately 154 square feet. If you only have the diameter handy, you can also use Area = π × (d/2)² or the simplified version Area ≈ 0.7854 × d².
Partial circles (pie slices and arcs)
A semicircular patio end or a quarter-circle corner feature is just a fraction of a full circle. Use: Area = (angle/360) × π × r². A semicircle (180 degrees) of 10-foot radius = (180/360) × 3.14159 × 100 = 0.5 × 314.159 = approximately 157 square feet. A quarter circle (90 degrees) of the same radius = 0.25 × 314.159 = approximately 78.5 square feet.
Patios with a curved front edge
Many patios are rectangular at the house end and have a curved or bowed front edge. The practical approach is to treat the rectangular portion normally (L × W), then measure the curved section as a partial circle or estimate it as a triangle or trapezoid. Measure the depth of the curve at its deepest point and the width of the curved section, calculate it as a half-ellipse or a simple triangle for a rough number, and add it to the rectangle. For material ordering purposes, a slight overestimate on the curved section is fine, you would rather cut a few extra pavers than run short.
Triangles, L-shapes, and irregular patios
Triangles
A triangular patio section or a diagonal corner cut uses: Area = (base × height) / 2. Measure the base (one straight side) and the perpendicular height (the distance from the opposite corner to that base line at a right angle). If you know only the three side lengths, call them a, b, and c, use Heron's formula: calculate the semiperimeter s = (a + b + c) / 2, then Area = the square root of [s × (s−a) × (s−b) × (s−c)]. This is most useful for oddly shaped triangular cutouts.
L-shaped patios
An L-shape is just two rectangles joined together. Divide the L into Rectangle A and Rectangle B, measure each separately, calculate each area, and add them. There are usually two natural ways to divide any L, pick whichever makes the dimensions easiest to measure from your string lines. Write both rectangles on your sketch and label every side before you calculate.
For example: an L-shaped patio that is 20 feet wide at the top, 12 feet deep on the left side, then steps in to 10 feet wide and continues 8 feet deep on the right. Rectangle A = 20 × 12 = 240 sq ft. Rectangle B = 10 × 8 = 80 sq ft. Total = 320 square feet. Always double-check by measuring the full outer envelope (overall length × overall width) and verifying your pieces add up to less than that envelope.
Trapezoids and other irregular shapes
A trapezoid (one pair of parallel sides of different lengths) uses: Area = ((base1 + base2) / 2) × height. For truly irregular patios with five or more sides, divide the shape into triangles and rectangles on your sketch, calculate each piece, and sum them. If you record corner coordinates (x,y measurements from a fixed reference point), the shoelace formula, also called the Gauss area formula, calculates the area of any simple polygon from vertex coordinates in order, which some area calculator apps do automatically. See Shoelace Formula, Wolfram MathWorld for the shoelace (Gauss) area formula and worked examples Shoelace Formula — Wolfram MathWorld.
Shape formulas at a glance
| Shape | Formula | What to measure |
|---|---|---|
| Rectangle / Square | A = L × W | Length and width to finished edges |
| Triangle | A = (base × height) / 2 | One side (base) and perpendicular height to opposite corner |
| Triangle (3 sides known) | A = √[s(s−a)(s−b)(s−c)] | All three side lengths; s = (a+b+c)/2 |
| Circle | A = π × r² | Diameter ÷ 2 = radius |
| Partial circle (arc) | A = (angle/360) × π × r² | Radius and the angle of the arc in degrees |
| Trapezoid | A = ((b1 + b2) / 2) × h | Both parallel sides and perpendicular height between them |
| L-shape | Sum of rectangles | Divide into rectangles, measure each separately |
| Irregular polygon | Shoelace formula or divide into triangles | Corner coordinates or side + diagonal measurements |
Accounting for slope in your area calculation
For most residential patios, slope is gentle enough (1 to 2%) that plan area and true surface area are functionally identical, the difference is less than 0.02%. Only on steeper utility slopes (say, 10% or more) does it start to matter for material quantities. To convert plan area to true sloped area on a steep site, multiply your plan area by the slope factor: slope factor = the square root of (1 + (rise/run)²). On a 10% slope (rise/run = 0.10), slope factor = √(1 + 0.01) = √1.01 = 1.005. That is a 0.5% increase, still negligible for paver quantities. At a 25% slope the factor is about 1.03, meaning about 3% more material. For practical purposes, if your patio slopes less than 15%, calculate from plan area and apply a standard 10% waste factor, it more than covers any slope adjustment.
What slope does affect meaningfully is your base preparation and drainage design. Per ICPI guidance, the finished patio surface should slope a minimum of 1/8 inch per foot (about 1%) away from any structure, with 1/4 inch per foot (about 2%) being the more common recommendation for positive drainage. See ICPI / UNI installation references and guide spec library (installation & layout practices) for recommended use of batter boards and taut stringlines as permanent layout references outside the worked area and for guidance on using a laser level or transit and straightedges for elevation checks and surface tolerances on paver installations. Make sure your base grade is set to achieve that finished surface slope, not flat.
Converting area into material quantities
Once you have your net area (gross area minus any openings like fire pits or planter beds), you can calculate how much of every material to order. These are the numbers that actually drive your budget.
Pavers
Divide your net square footage by the coverage per paver (usually listed on the product spec sheet, a standard 4×8 inch paver covers about 0.22 sq ft each, meaning you need about 4.5 per square foot). Add 10% for waste and cuts on a straight pattern, 15% for diagonal. Most suppliers sell by the pallet, which typically covers 100 to 120 square feet depending on the paver size, so divide your adjusted total by pallet coverage and round up.
Base gravel (compacted aggregate base)
Standard residential paver installs use a 4-inch compacted aggregate base for foot traffic and a 6-inch base for occasional vehicle traffic. To calculate cubic yards of gravel: (Area in sq ft × depth in feet) ÷ 27. For a 200 sq ft patio at 4 inches (0.333 feet): 200 × 0.333 = 66.6 cubic feet ÷ 27 = 2.47 cubic yards. Order 2.5 to 3 cubic yards to account for compaction loss (compacted base takes about 15 to 20% more loose material than the finished volume).
Bedding sand
The bedding sand layer under pavers is typically 1 inch (about 0.083 feet) after compaction and screeding. Use the same cubic yard formula: Area × 0.083 ÷ 27. For 200 sq ft: 200 × 0.083 = 16.6 ÷ 27 = 0.61 cubic yards, or roughly 0.75 cubic yards with a modest overage.
Material quantities summary table
| Patio Area (sq ft) | Pavers + 10% waste (sq ft to order) | Base gravel at 4 in (cu yd) | Bedding sand at 1 in (cu yd) |
|---|---|---|---|
| 100 | 110 | 1.4 | 0.4 |
| 150 | 165 | 2.1 | 0.6 |
| 200 | 220 | 2.8 | 0.7 |
| 300 | 330 | 4.2 | 1.1 |
| 400 | 440 | 5.6 | 1.5 |
| 500 | 550 | 7.1 | 1.9 |
These are starting-point estimates. If your site has poor-draining soil or you are in a frost-prone climate, increase base depth to 6 to 8 inches and recalculate accordingly. Gravel quantities in the table above assume 15% compaction overage is already included.
Measuring for openings: fire pits, steps, and planters
Any opening in your patio surface, a built-in fire pit, a planter bed, a step opening, needs to be measured and subtracted from your gross area to get your net paver area. For a circular fire pit ring, measure the inside diameter, calculate its area (π × r²), and subtract it. For a rectangular planter, measure the interior dimensions and subtract length × width. Steps are measured separately: note the tread width and depth for each step, calculate the step face area (width × riser height) for any visible step fronts, and order those as a separate line item since they often use a different paver or a bullnose unit.
Layout implications of your area calculation
Your area measurement directly informs your pattern layout. Before you order, think about which direction your pattern runs. A running bond parallel to the house looks clean and wastes very little material. A 45-degree diagonal pattern looks dynamic but every edge becomes a cut, which is why the waste factor jumps to 15%. For a herringbone or basketweave, stick with 10% waste unless you have a lot of tight angles.
Once you know your area and pattern, dry-lay a row or two from the center out to each edge before you bed anything. This is called a dry run and it tells you whether your edge cuts will be a reasonable size (more than half a paver) or awkward slivers. Adjusting starting position by 2 to 3 inches can often eliminate a row of tiny cuts that would look bad and waste material. Your area calculation sets the budget; your layout planning sets the finished appearance.
Common measurement mistakes and how to avoid them
- Measuring to a rough stake instead of the finished edge: always visualize where the last paver or edging restraint sits and measure to that point
- Forgetting to subtract openings: gross area minus all cutouts equals your net paving area — skipping this step leads to ordering too many pavers
- Mixing units mid-calculation: decide at the start whether you are working in feet or meters and convert everything before you start multiplying
- Not checking diagonals for squareness: equal diagonals are the fastest way to confirm your layout is truly rectangular — do this before you start excavating
- Measuring across a slope without accounting for horizontal run: always measure horizontal distance, not tape-measure-along-the-slope distance, for plan area calculations
- Rounding down on material quantities: always round up to the next full unit — the extra material costs less than a second delivery
- Not photographing the staked layout: a quick phone photo of your stakes and string lines saves significant re-measuring if anything gets disturbed
From measurement to build: your planning checklist
With accurate measurements in hand, here is the sequence that takes you from a number on paper to a project ready to execute.
- Confirm final patio dimensions and shape on your sketch — mark all sides, openings, and the location of any steps or features
- Calculate gross area using the appropriate formula for your shape (or sum of shapes)
- Measure and calculate the area of all openings (fire pit, planter, step openings) and subtract from gross area to get net paving area
- Add the appropriate waste factor: 10% for straight patterns, 15% for diagonal
- Calculate base gravel quantity at your required depth (4 inches minimum for foot traffic) using (area × depth in feet) ÷ 27, plus 15-20% for compaction overage
- Calculate bedding sand at 1 inch depth using the same formula
- Confirm finished surface slope: minimum 1/8 inch per foot away from the house, preferably 1/4 inch per foot
- Check that attached patio height leaves required clearance below weep screed or siding system (minimum 2 inches, verify local code)
- Mark the full perimeter with paint or chalk and check diagonals one more time before breaking ground
- Place material orders, rounding all quantities up to the next full pallet or cubic yard
Measurement is honestly one of the least glamorous parts of a patio build, but it is also the part that makes everything else easier. Get this right and your material order will be accurate, your layout will go smoothly, and you will spend build day laying pavers instead of running back to the supplier. The math here is not complicated, it is just addition and multiplication, and any shape can be broken into pieces that use those same basic operations. Measure twice, write it down, and you are ready to build.
FAQ
What’s the first thing to do before measuring a patio area?
Decide the finished patio footprint and walk the perimeter. Identify whether the patio is freestanding, attached to the house, raised, or sloped and note any openings (steps, fire pit, planters). Gather tools (tape measure, laser distance meter, chalk line/string and stakes, batter boards, level/laser level, digital inclinometer or smartphone app, notebook or phone to record). Clear vegetation and obstructions so you can run stringlines and measure straight lines.
What tools do I need to measure a patio accurately?
Tape measure (25–100 ft), laser distance meter (optional but faster), stakes and builder’s string or chalk line, batter boards for layout, 4‑6 ft level or laser level, digital inclinometer or smartphone level app for slope, carpenter’s square or framing square, permanent marker or spray paint for marking, and a calculator or phone for area calculations.
How do I measure simple shapes (rectangle, square, circle, triangle)?
Rectangle/square: measure length and width; area = length × width. Circle: measure diameter or radius; area = π × r² (use r = diameter/2). Triangle: if you have base and height use area = (base × height)/2. If you only have side lengths, use Heron’s formula: s = (a+b+c)/2, area = √[s(s−a)(s−b)(s−c)]. Use consistent units (ft or m) so area is in ft² or m².
How do I handle L‑shaped or other irregular patios?
Divide the shape into regular pieces (rectangles, triangles, trapezoids). Measure and record dimensions for each piece, compute each area using standard formulas, then sum the areas. Alternatively, walk the corner vertices in order and use the shoelace (Gauss) formula with coordinate pairs to compute area directly if you record coordinates.
How do I measure an attached patio and ensure it’s square to the house?
Use the house face or door threshold as a baseline. Attach batter boards or mark a baseline at a fixed distance from the wall. Use the 3‑4‑5 (or scaled 9‑12‑15) method to set true 90° corners with stringlines: measure 3 units along one baseline, 4 along the other, and adjust until the diagonal between those points is 5 units. Verify by checking diagonals of the rectangle (equal diagonals = square). Record any vertical offsets at thresholds.
How do I measure slopes and convert plan area to sloped surface area?
Measure rise over a known horizontal run with a level and tape or use an inclinometer to get the slope angle or percent. Slope percent = (rise/run)×100. To convert horizontal (plan) area to true surface area for a uniform slope, multiply plan area by slope factor = √(1 + (rise/run)²). For gentle patio slopes commonly used (≈1%–2%), the difference is small but expand material quantities when slope is significant.