Squaring a patio means laying out the boundary so every corner is a true 90° angle, opposite sides are equal in length, and the two diagonals across the rectangle match each other exactly. You do it with stakes, string lines, a tape measure, and the 3-4-5 triangle method (or a diagonal check) before you ever break ground. Get this right and every row of pavers lines up cleanly, every form board sits flush, and you never end up with those awkward slivers of cut paver along one edge. Get it wrong and the whole project drifts off course in a way that's really hard to fix once you've started digging.
How to Square a Patio: Step by Step DIY Layout Guide

Nolan Carver
15 Jun 2026
What 'squaring a patio' actually means (and when you need to do it)
A square layout just means the corners form right angles. That's it. The patio itself doesn't have to be a square shape, it just needs to have 90° corners so the geometry is true. A 10x16 ft rectangle is perfectly fine, as long as the corners are actually 90° and not 87° or 93°.
You need to square your layout any time you're building a patio with straight edges and right-angle corners, whether that's a concrete slab, a paver patio, or a flagstone project with a defined border. The main reason it matters in practice is alignment: if your corners aren't true, your paver rows will drift as you work outward, or your concrete forms won't meet cleanly at the corners, and you'll end up making unequal cuts to compensate. It's a problem that compounds the further from the starting corner you get.
One thing worth flagging early: don't assume the corner of your house is square. Squaring a patio off a house starts with verifying that the reference edge along the house is your true 90 degree baseline, not just a visual guess the corner of your house is square. Walls that look perpendicular often aren't, especially on older homes. ICPI’s installation manual likewise warns that corners or walls that seem perpendicular may not be a true 90° to your guide string lines, so you should verify the layout geometry Corners/walls that “appear perpendicular” may still not be true 90° relative to your guide strings. Even a degree or two of error in your reference point will throw the whole patio off. Always verify with your own layout, not by assuming the house is your right angle.
Tools, materials, and key measurements you'll need
You don't need anything fancy for this. The basic kit for squaring a patio layout is:
- Wooden stakes (at least 6, ideally 8 for batter boards) — 1x2 or 2x2 lumber cut to about 18 inches
- Mason's line (string line) — bright colored so you can see it clearly
- A 100 ft tape measure — a 25 ft tape won't cut it for diagonal checks on most patios
- A hammer or mallet to drive stakes
- A line level or a 4 ft spirit level — to set the string at a consistent height
- A pencil or marking spray paint
- A calculator (your phone works fine)
For the 3-4-5 method, you need multiples of 3-4-5 that are large enough to be meaningful. On a standard patio, use 6-8-10 or even 9-12-15 to make the check more accurate. Small triangles amplify small errors, so bigger is better. For diagonal checks, you just need the tape measure and a partner to hold one end.
Before you set a single stake, know your final patio dimensions. Once you know your final patio dimensions, you can start measuring so your layout stays square and true how to measure for a patio. If you haven't figured out size yet, that's a step to sort out first. First, measure the patio's overall length and width, then calculate the area (square footage) from those dimensions to figure out the patio size. The squaring process only works well when you know exactly how wide and long the finished patio will be, because you're building the perimeter boundary from those numbers.
Step-by-step: establish your reference line and right angles
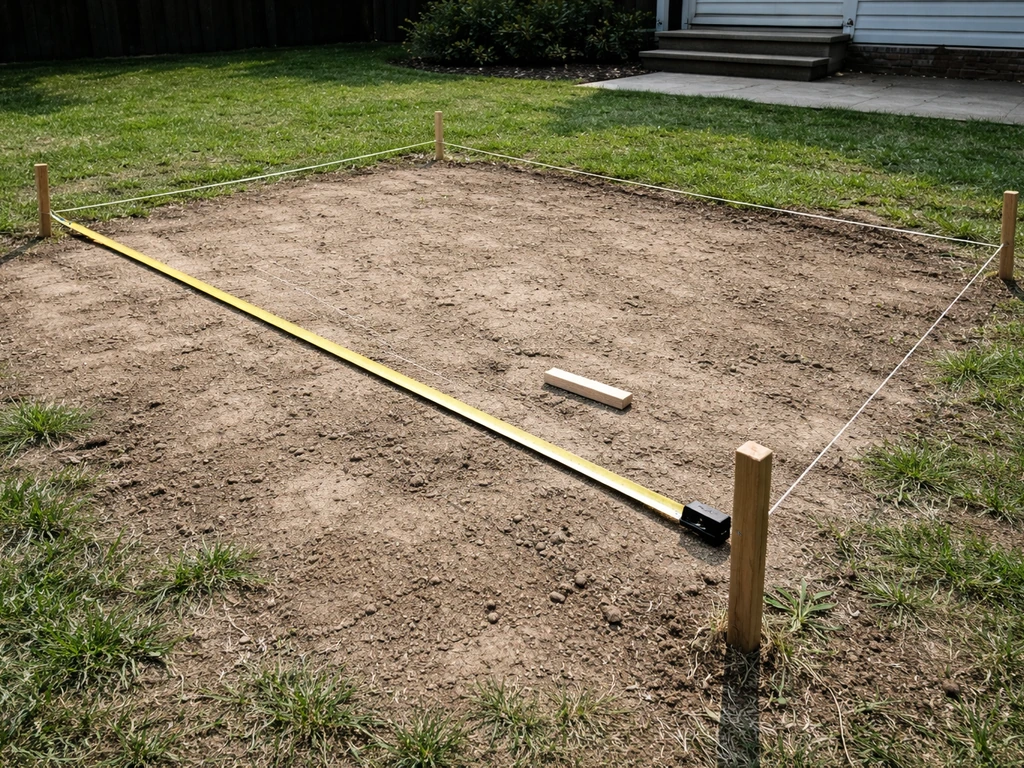
Step 1: Set your reference line
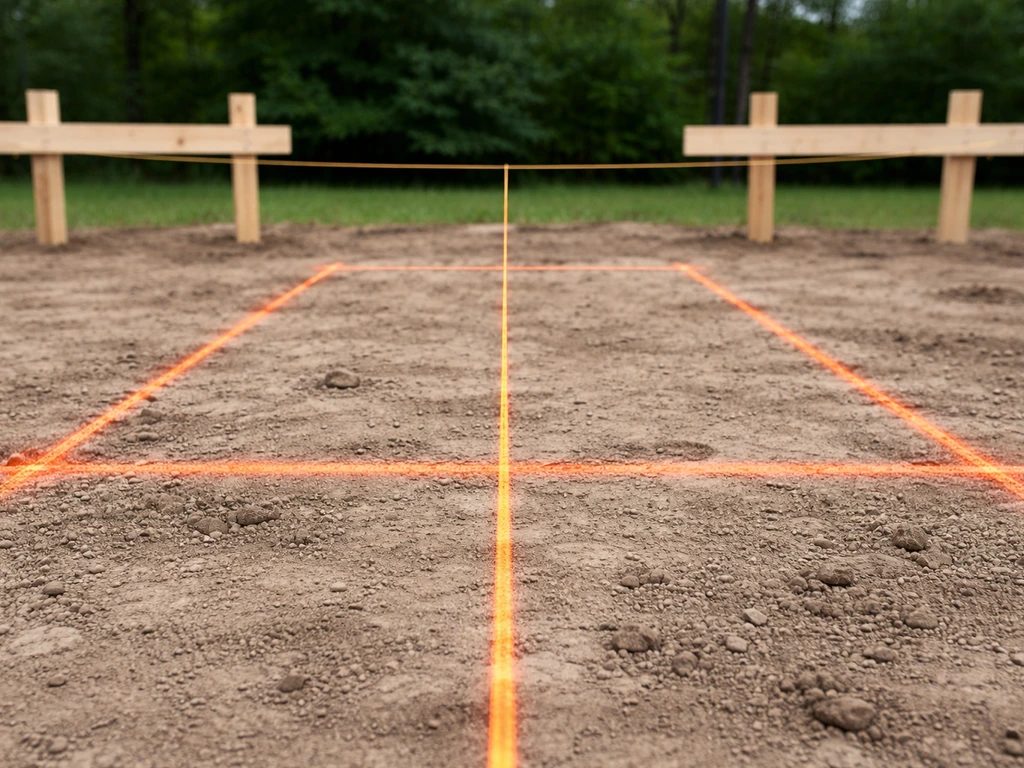
The reference line is the most important line you'll set. It's typically the edge of the patio that runs along or parallel to the house. Drive two stakes at the ends of this first edge, stretch your string line tight between them, and tie it off. This line should be at your desired distance from the house wall (usually at least 2-3 inches of clearance so you're not pouring concrete right against the foundation). Make sure the string is taut with zero sag, because a sagging line gives you a curved reference and everything downstream will be off.
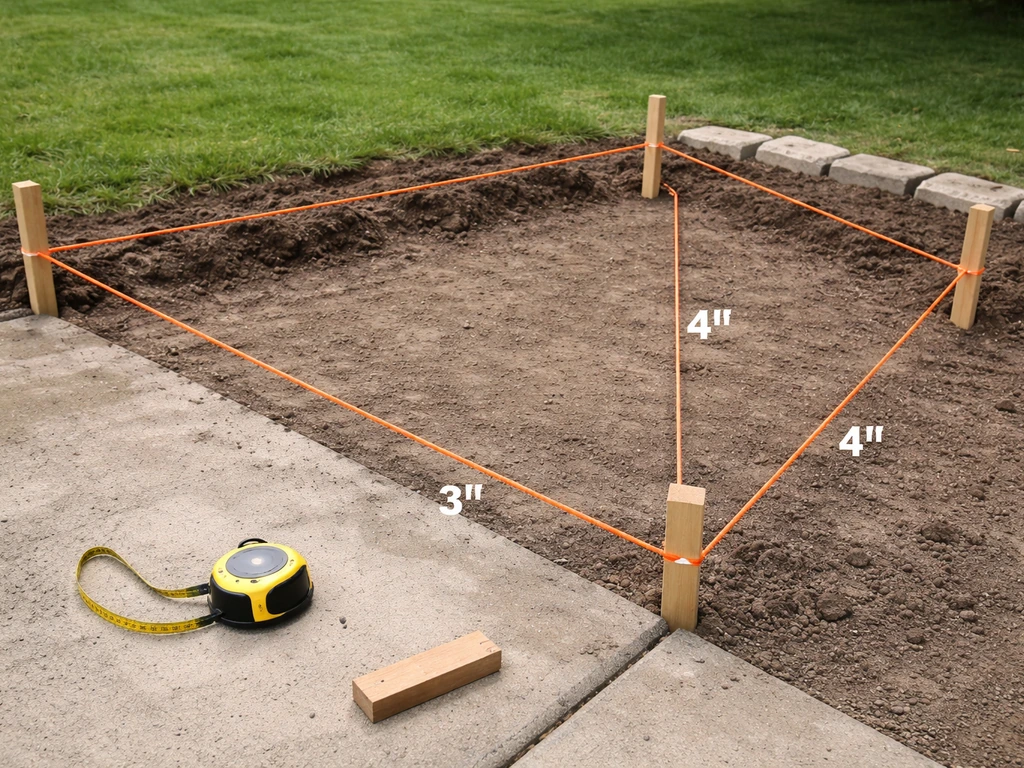
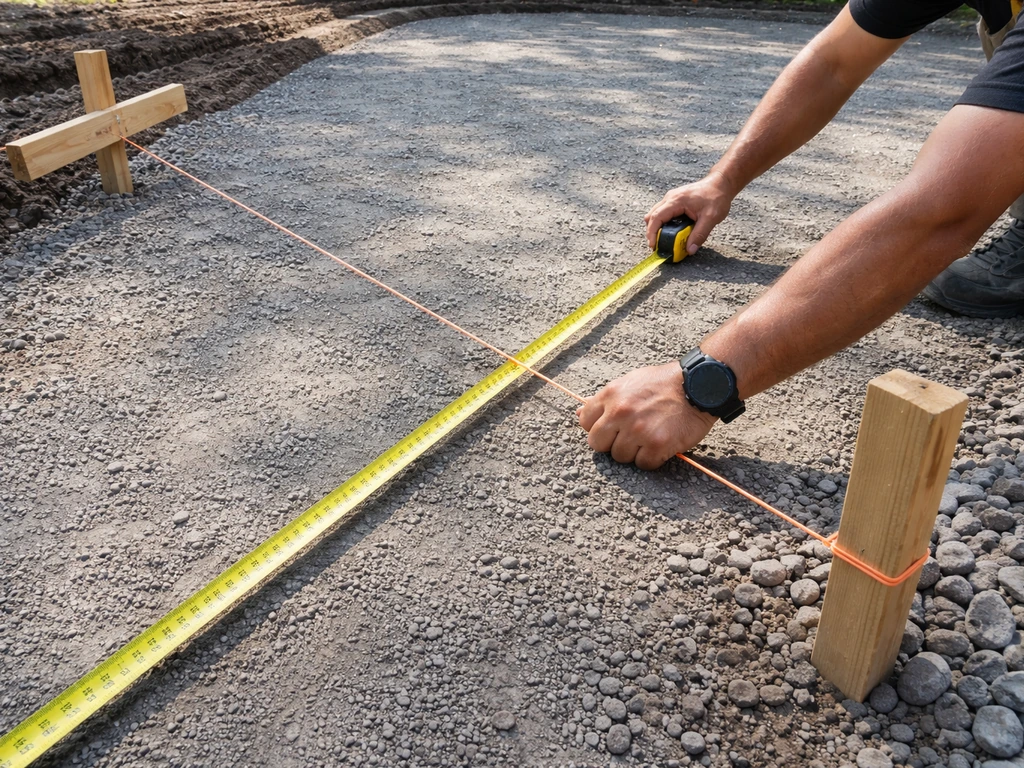
Step 2: Establish the first perpendicular corner using 3-4-5
Pick one end of your reference line as your first corner. From that stake, you need to run a second string line at exactly 90°. Here's how to do it with the 3-4-5 method: measure 3 ft (or 9 ft for a bigger triangle) along the reference string from your corner stake and mark that point with a piece of tape. Now hold your tape at the corner stake and swing out roughly in the direction you want the perpendicular line to go. You need that swing-out point to measure exactly 5 ft (or 15 ft) from the 3 ft mark on the reference string. When it does, the angle at the corner stake is exactly 90°. Drive a stake in that direction, string your second line, and adjust until the geometry works.
Step 3: Complete the rectangle
From your first corner, measure along the reference line to your second corner (the full length of the patio) and drive a stake there. From that stake, use the same 3-4-5 check to establish a perpendicular line heading away from the house. Then run a fourth string line connecting the ends of both perpendicular lines to close the rectangle. You now have four corner stakes and four string lines forming the full perimeter of the patio.
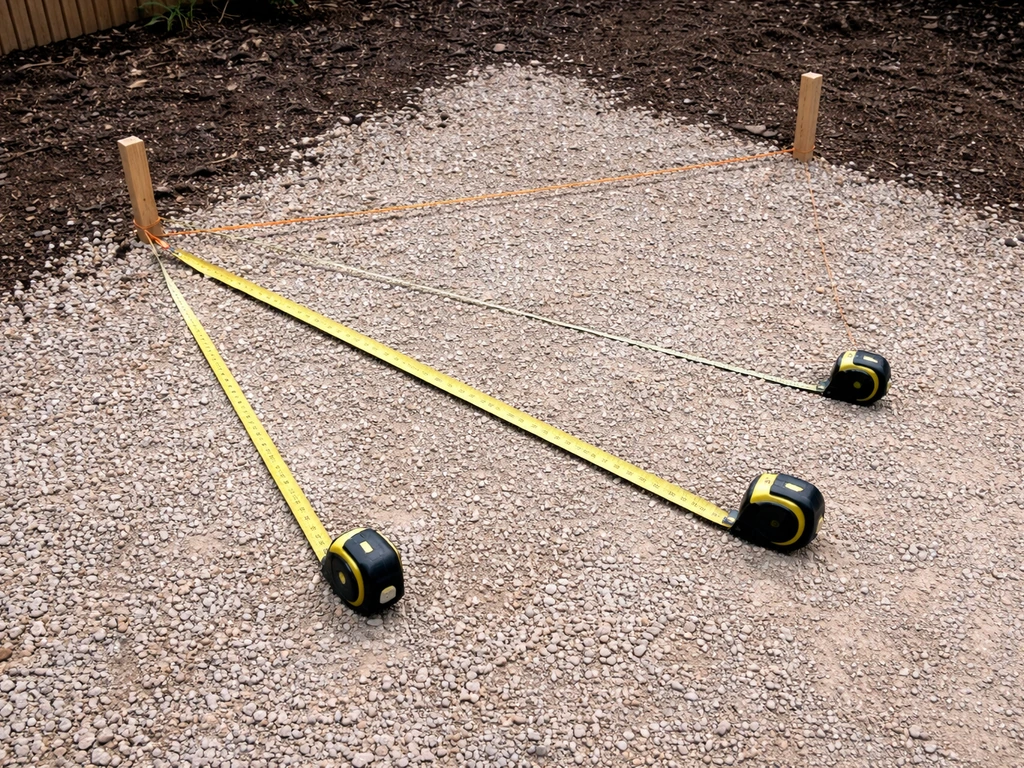
Check your diagonals and fix any misalignment
After you've set all four corners, measure the two diagonals: corner A to corner C (across the rectangle), then corner B to corner D. If the rectangle is truly square, these two diagonal measurements will be identical. If they're off by even half an inch on a small patio, you'll notice it in the finished job. This diagonal check is actually more reliable than the 3-4-5 method alone because it validates the whole rectangle, not just individual corners.
If the diagonals don't match, don't panic. The fix is simple: whichever diagonal is longer, push the string lines at that pair of corners slightly toward each other (moving the stakes inward on that diagonal) while watching both diagonal measurements. Small adjustments have a big effect. Re-measure both diagonals after each adjustment until they match. On a 12x16 ft patio, both diagonals should be exactly 20 ft when the layout is square. After the base is ready, follow the article steps for how to build a square patio, including rechecking diagonals and keeping alignment while you place pavers or pour concrete.
Common mistakes and how to fix them
| Mistake | What happens | The fix |
|---|---|---|
| Using the house corner as a 90° reference | The patio drifts off angle because most house corners aren't true 90° | Set your own layout strings and verify with 3-4-5 or diagonal check |
| String lines going slack during work | Your reference lines shift and corners go out of square | Retie and tension strings before every check; use batter boards instead of single stakes for stability |
| Using too small a 3-4-5 triangle | Small measurement errors look minor but compound over the full patio width | Use 9-12-15 or 6-8-10 multiples for a more accurate check |
| Checking corners but not the full diagonal | Individual corners may look right but the overall rectangle is still a parallelogram | Always do the diagonal cross-check as a final confirm |
| Moving stakes during excavation | Layout goes out of square after you've started digging | Use batter boards set back from the excavation zone so strings can be removed and replaced accurately |
Marking for excavation and keeping square through construction
Once the diagonals match and the layout is confirmed square, mark the ground along the string lines using marking spray paint or a chalk line. Spray directly below the strings all the way around. This gives you a ground-level guide that stays in place even when you pull up the strings for digging.
The best practice here is to switch from single stakes to batter boards before you start digging. Batter boards are small horizontal boards nailed between two stakes, set back about 18-24 inches outside each corner of the patio. You wrap your string lines around nails or screws in the batter boards, which means you can remove the strings for excavation, then replace them in exactly the same position afterward. This is how professional crews keep their layout intact through groundwork and it works just as well for DIY.
After you've excavated the patio area, re-string the lines on the batter boards and do a fresh diagonal check before you start building the base. Excavation always disturbs things slightly, and checking again at this point costs you five minutes and saves you from building on a layout that's drifted out of square.
Base prep and drainage while staying square
Here's where people sometimes accidentally rotate the whole patio out of square without realizing it. When you add slope for drainage (and you absolutely need slope, the standard recommendation is at least 1/4 inch per foot away from the house, with a minimum of 1/8 inch per foot on the low end), the fall direction needs to run away from the house along the length of the patio, not diagonally across it. If you set your grade lines at an angle to match a low spot in the yard, you've effectively rotated the patio's slope direction, and that pulls the edge alignment off.
The right approach: establish your 90° square layout first, then set your elevation/grade along that layout. Use a line level on your strings to set the high side (near the house) and the low side (away from the house) so the fall runs straight out, parallel to the side edges of the patio. This keeps your square geometry intact while giving you proper drainage. On a 10 ft deep patio, a 1/4 inch per foot fall means the far edge of the patio should sit 2.5 inches lower than the house-side edge.
For the base itself, excavate at least 6-8 inches deep for a paver patio (to accommodate compacted gravel sub-base and bedding sand), or as required by your concrete slab thickness plus base depth. To estimate how much patio material you need, start by calculating the patio area from its finished dimensions how to calculate patio area. Dig about 12 inches beyond your marked perimeter on each side to give yourself working room and ensure the base is stable right to the edge. Compact the subgrade first, then add your base material in 2-3 inch lifts, compacting each lift before adding the next. This layered compaction prevents differential settling that can shift your edges and pull the layout out of square later.
Final checks before you set pavers or pour concrete
This is your last chance to catch any squareness issues before material goes down. Don't skip it. Re-string your batter board lines over the compacted base, then run through this checklist:
- Measure both diagonals again — they should still match from your earlier check. If they've drifted, now is the time to adjust your edge forms or string positions, not after the first bag of concrete is poured.
- Confirm string tension — all four lines should be drum-tight with no sag. A sagging string gives you a false read on both level and alignment.
- Check that edge forms or screed rails sit directly under the strings — for concrete forms, the top edge of each form board should just kiss the underside of the string line. For pavers, your screed rails should align to the strings.
- Verify the slope direction one more time — drop a line level on the string running away from the house and confirm it reads the correct fall, not level and not pitched sideways.
- Walk the perimeter and look for any form boards or edge restraints that have shifted — nudge them back into position if needed and re-check the diagonal after any adjustment.
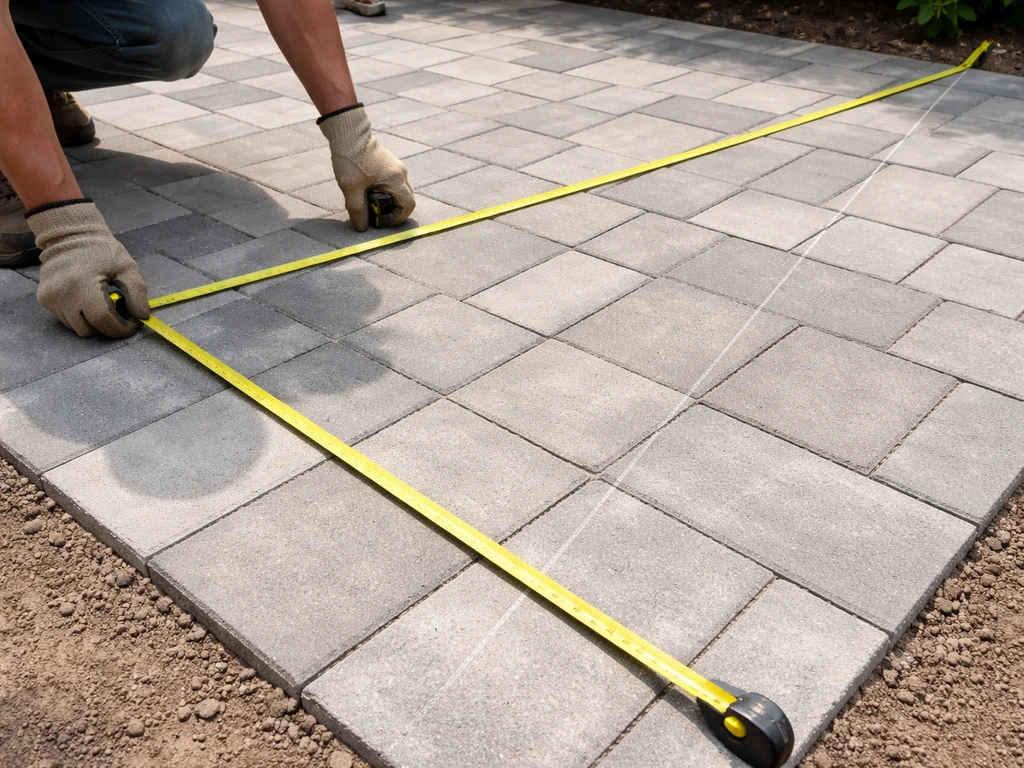
For pavers specifically, snap a chalk line on the screeded sand bed that aligns with your string lines before you place the first unit. This gives you a visible guide to work from as you move away from the starting corner, and it's much easier to follow than looking up at the strings every other paver. Periodically check that your rows are still running parallel to this chalk line as you work outward. For concrete, set your form boards so they double as both the square guide and the grade guide, confirming squareness (equal diagonals) and level (line level on the form tops) before the pour begins.
Once you've got a confirmed square layout with matched diagonals, a properly sloped grade, and compacted base, you're in great shape. The squaring work you do at the layout stage is what makes the rest of the build straightforward. Every other part of the project, from laying the first row of pavers to floating a concrete slab, gets easier when the foundation of the layout is solid and true. Once your square patio layout is correct, you can move on to decorating choices like lighting, seating, and color-coordinated hardscape details.
FAQ
How can I square a patio if one corner is blocked (like by landscaping or the house)?
Use a baseline you can access, usually the long edge along or parallel to the house, then establish the perpendicular lines from that accessible corner. Your stakes and strings do not need to “reach” every obstruction if you can still measure and mark the perpendicular points and the two diagonal endpoints, then connect the perimeter with batter boards or offset stakes outside the blocked area.
What diagonal difference is considered “good enough” on a small patio?
On small patios, treat a half-inch mismatch as a red flag, re-check the tape measures and string tautness, then adjust slowly and re-measure. If you cannot get the diagonals to match within about 1/4 inch (or less if you are using tight-edged pavers), expect uneven cuts or drifting joints along the far edge.
Can I square my patio using only the 3-4-5 method and skip diagonals?
You can, but diagonals are your validation step because they confirm the entire rectangle, not just the 90 degree corner math. If you are working alone, or you are confident in your measurements, the 3-4-5 check is helpful, but you should still do diagonal checks after the layout is set and again after batter boards are installed.
What’s the most common reason a patio ends up out of square even after the diagonals match?
Movement during groundwork. String lines can loosen, batter boards can shift, or you can over-excavate on one side so the perimeter moves before material goes down. Re-string and re-check diagonals right after excavation and after the base is compacted, before starting pavers or pouring.
Should my slope direction be based on the patio’s corners or its long edges?
Base it on the long edges relative to the house. The fall should run away from the house parallel to the patio side edges, not from one corner toward the opposite corner. If you set grade by “matching a low spot” diagonally, you can keep the patio square while rotating the drainage direction and cause side alignment problems.
How far from the house should I set the patio reference string for concrete or pavers?
Keep the string offset so you preserve the clearance you plan to use, typically at least 2 to 3 inches away from the foundation edge for most setups. The key is consistent clearance along the entire reference line, because an uneven offset effectively shortens one side of the rectangle and throws off your diagonal equality.
Do I need to build a truly square patio, or can it be rectangular?
You can build a rectangle as long as all corners are true 90 degrees and the diagonals match. The patio itself does not need equal side lengths, only matching diagonal lengths and right-angle corners to prevent paver row drift and unequal edge cuts.
How do I avoid paver slivers if my patio is slightly off even after layout?
Confirm both diagonals after the screeded sand bed is set, then snap a chalk line for your first row alignment. If you find a sliver forming on one end, adjust your starting course and row positioning from the chalk line, not by “forcing” later rows, because accumulated offsets are harder to correct at the far edge.
What should I do if my diagonals match but my rectangle still looks twisted when I lay the first row?
Re-check that the string lines are connected to the correct corner stakes, and verify you did not rotate the rectangle when transferring from strings to batter boards. A twisted look can also come from a sagging line, an uneven base, or grade adjustments applied inconsistently. Do a quick diagonal check and also verify base elevation consistency before placing the first paver or form boards.
Is it safe to remove the strings during digging?
Yes, if you use batter boards and you can re-string exactly to the same nail or screw positions afterward. Do not remove strings if you only staked the perimeter, because the stakes can move during excavation and small shifts become larger squareness errors once you add base and bedding sand.
How many times should I re-check diagonals during the project?
At minimum: after the initial layout with stakes and strings, after batter boards are installed, after excavation, and again once the base is compacted (before pavers or concrete). Each re-check guards against a different source of drift, loosened strings, disturbed soil, and leveling or screeding errors.