To measure a patio, you need three numbers: length, width, and total area in square feet (or meters). For a simple rectangle, multiply length by width and you're done. For irregular shapes, break the space into rectangles or triangles, calculate each section separately, and add them together. From those numbers you can order pavers, base material, bedding sand, and edging with confidence. Everything below walks you through exactly how to get those measurements right the first time.
How to Measure for a Patio: Size, Footprint, Area

Nolan Carver
31 May 2026
Decide the patio footprint and clearances first
Before you pull out a tape measure, you need to decide where the patio starts and ends. This sounds obvious, but skipping this step means you'll be re-measuring twice. Walk the space and mark out a rough boundary with spray paint, rope, or a garden hose. Then think through these clearances before you commit to final dimensions.
- House wall to patio edge: Leave at least 6 inches between the house foundation and where your patio surface begins, or plan for a proper expansion gap if the patio butts up to the house. This gap lets water drain away from the foundation.
- Door clearance: A standard door swings out about 36 inches. Make sure your patio surface doesn't force the door to swing over a step or a height change that creates a trip hazard.
- Drainage slope: Your finished patio needs to slope away from the house at roughly 1 inch per 8 feet (about 2%). Mark this into your footprint now so you know where the high and low edges are — this affects your edge heights when you order materials.
- Setbacks and utilities: Check local rules for how close a patio can be to property lines. Call 811 (USA) to have underground utilities marked before you stake anything.
- Landscaping and obstacles: Trees, existing beds, AC units, and posts will either get incorporated into the layout or set a hard boundary. Decide now so your measurements mean something.
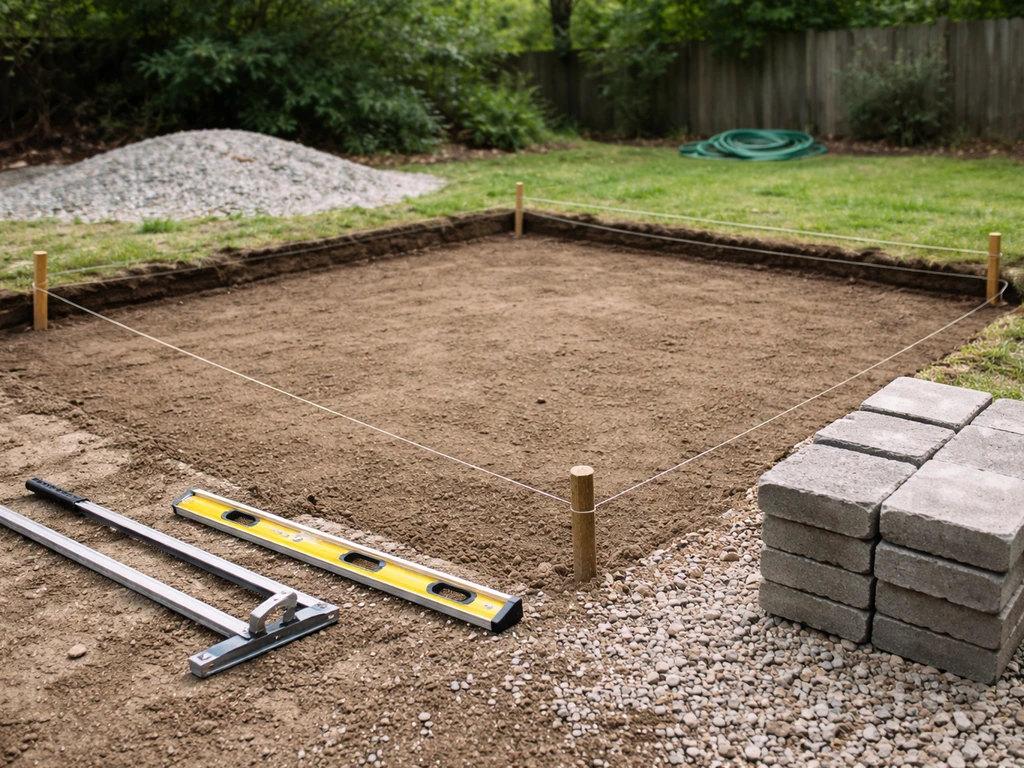
Once you've walked the space and thought through these clearances, mark your final boundary with stakes and string line. That string line becomes your reference for every measurement you take.
Tools and prep for accurate measuring
You don't need fancy equipment, but a few basic tools make a real difference between measurements you can trust and ones that are off by a foot when you're laying the last row of pavers.
- 100-foot tape measure: A 25-foot tape works for small patios, but a longer tape means fewer reset points and fewer opportunities for error on larger spaces.
- Stakes and string line: String pulled tight between stakes gives you a straight, physical reference line to measure from. Floppy rope doesn't work.
- Line level or builder's level: Clip a line level onto your string so you know your measurements are being taken level, not along a slope.
- Marking paint or chalk: Temporary spray paint lets you mark corners and reference points on the ground without committing to anything.
- Notepad, pencil, and a simple sketch: Draw your patio shape (doesn't have to be pretty) and write every dimension directly on the sketch as you go. Photos help too.
- Calculator or phone: You'll be doing simple multiplication and addition — nothing complex, but don't rely on memory.
Before measuring, clear the area as much as possible. Overgrown grass, debris, and clutter cause your tape to catch and throw off readings. If the ground is heavily sloped, measure horizontally (keep the tape level) rather than following the ground surface, because your patio will be built to a flat, level plane, not the slope of the existing terrain.
How to measure a rectangular patio
A rectangle is the easiest shape to measure and, honestly, one of the most practical shapes for a DIY patio. Once you know the square measurements and keep everything aligned, you can start planning how to decorate a square patio with the right layout, materials, and features. Here's the process step by step.
- Set your first stake at one corner of the planned patio. Run a string line along the longest side (parallel to the house if the patio sits against it) to the opposite corner stake.
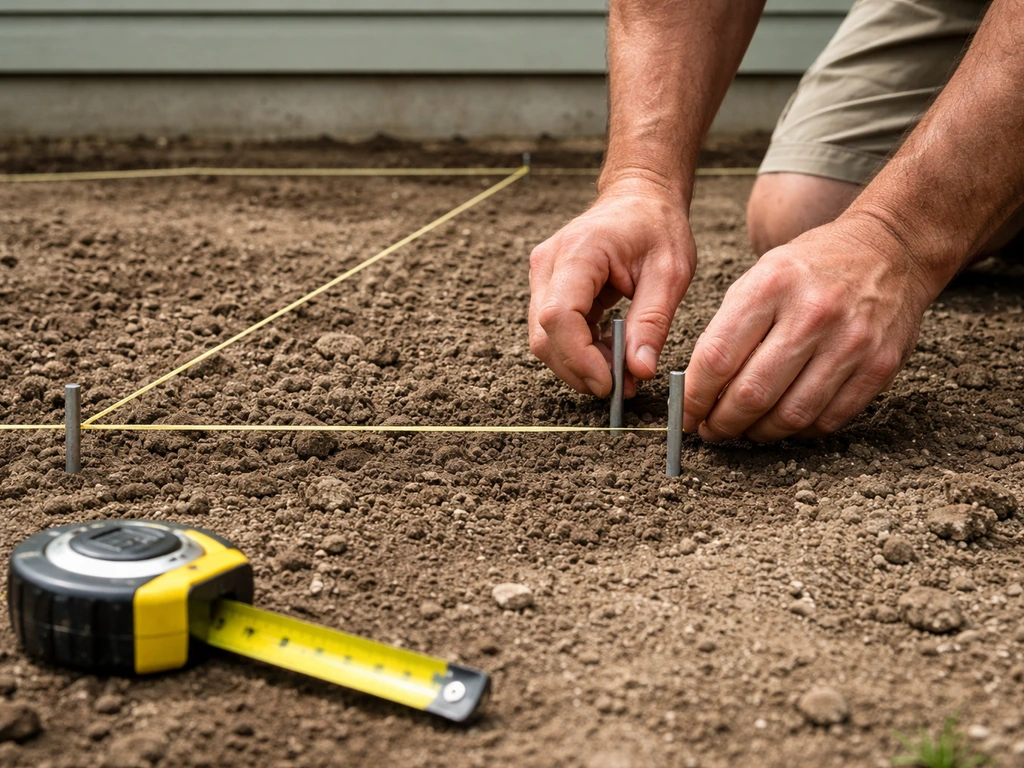
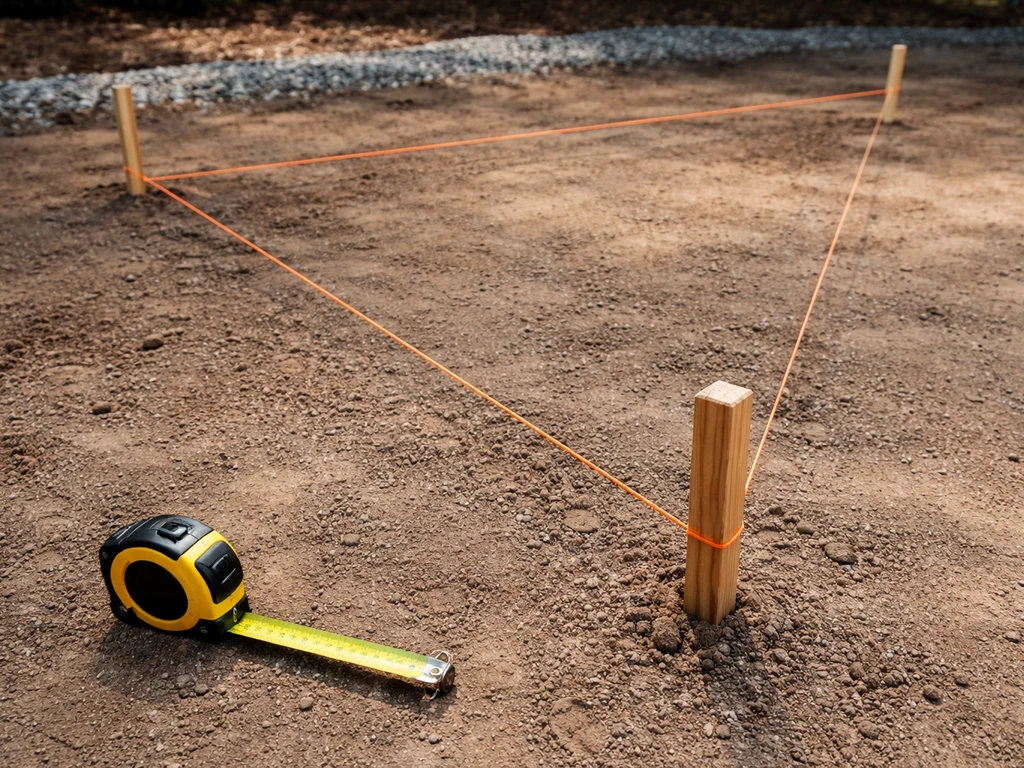
- Run a second string line perpendicular to the first, forming an L-shape at your starting corner. Check for square using the 3-4-5 triangle method: measure 3 feet along one string, 4 feet along the other, and the diagonal between those two points should be exactly 5 feet. If it's not, adjust the angle until it is.
- Complete the rectangle by running strings from the two open corners to form the final two sides.
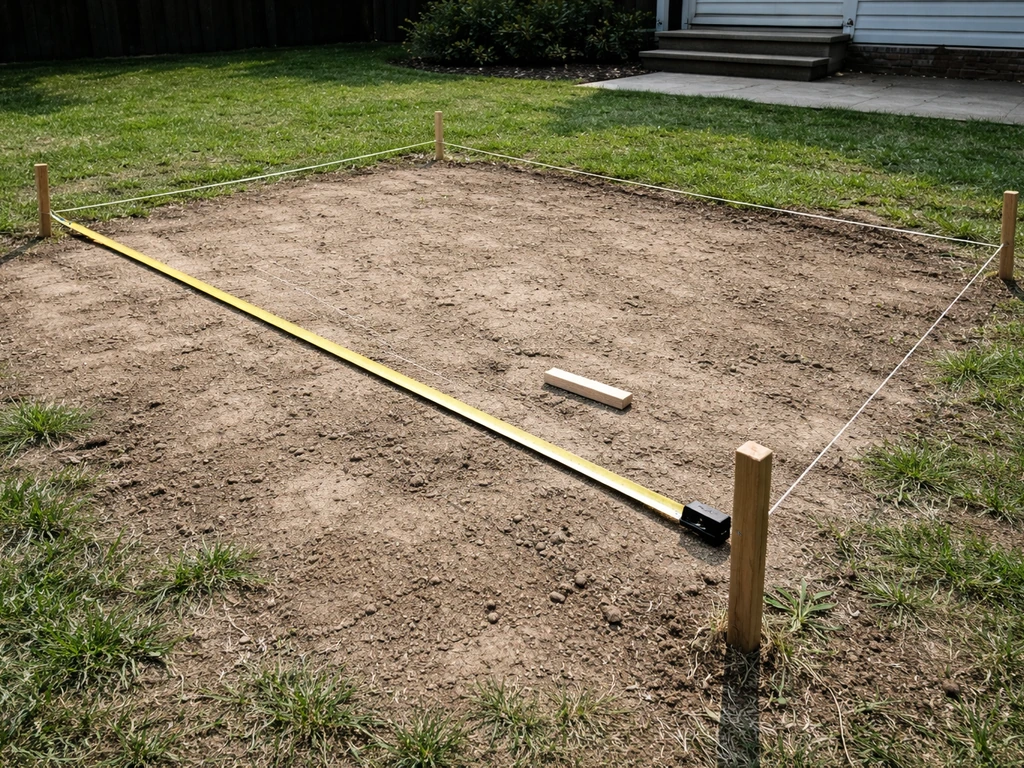
- Measure the length (the longer dimension, running parallel to the house) from stake to stake along the string. Write it down.
- Measure the width (the shorter dimension, running away from the house) from stake to stake along the other string. Write it down.
- Double-check by measuring the diagonals: the distance from corner A to corner C should equal the distance from corner B to corner D. If they match, your rectangle is square. If they don't, adjust your stakes until they do.
As a real-world example, Lowe's planning guides use a 12 ft × 8 ft patio as a standard reference size, that's 96 square feet of surface area. A space that size is achievable for most DIYers in a weekend and gives you enough room for a small table and chairs. If you're aiming for something similar, those two measurements are all you need to start calculating materials.
Getting this rectangle perfectly square is worth your time. A patio that's even slightly out of square will have pavers that creep out of alignment by the time you reach the far edge. If you want a square patio, you still start by confirming your layout is square, then you calculate area as side length multiplied by itself. If squaring up is something you want to dig deeper on, it's worth understanding the full layout process for a square patio before you start setting stakes.
How to measure irregular shapes, curves, and angled patios
L-shaped patios, patios with rounded edges, and spaces with diagonal cuts all get measured the same way: break the shape into simple rectangles, right triangles, or circles, measure each one separately, then add the areas together. This is the only reliable approach, trying to measure an irregular shape as one unit leads to errors.
L-shapes and multi-rectangle patios

Divide the L-shape into two rectangles. Measure each rectangle independently (length × width) and add the two areas. Sketch the layout and label where the two rectangles overlap so you don't accidentally double-count that shared corner area. Mark where the dividing line is with a string or marking paint before you measure so each section is clearly defined.
Curved and freeform edges
For patios with a curved edge (like a sweeping arc away from the house), the best approach is to measure the full rectangle that would contain the curve, then subtract the corner sections that fall outside your actual patio edge. If the curve is gentle, you can also use the grid method: divide the total area into 1-foot squares and count how many squares fall inside the curved boundary. Either way, you'll end up with an approximate square footage, add 10% as a buffer when ordering materials to cover the cuts along the curved edge.
Angled or diagonal cuts
If one corner of your patio is cut at a diagonal, treat that cut corner as a right triangle. Measure the two short sides of the triangle (the legs), multiply them together, and divide by two. That gives you the triangle's area. Subtract it from the full rectangle area to get the true patio footprint.
Account for edges, steps, and obstacles
Real patios almost always have something that complicates the footprint, a door threshold that juts out, existing steps, a downspout, a post footing, or a garden bed that wraps into the space. Here's how to handle the most common ones.
Steps and level changes
If your patio includes steps (either going up from the yard or down from the house), measure the step landings as separate rectangles. A standard step landing is at least 36 inches deep so a person can stand comfortably. Measure each tread depth and the width of the step, then add those areas to your total if those surfaces are getting paved. Note the height of each step riser too, this affects how much base material and edging you'll need along the step faces.
Posts, pillars, and fixed obstacles
For posts or pillars sitting inside the patio footprint, measure around them, not through them. Measure the obstacle's footprint (length × width or diameter) and subtract that area from your total patio square footage when calculating pavers. Mark the obstacle location on your sketch with accurate measurements from two fixed reference points (like the house wall and a side boundary). This lets you plan your paver layout and cuts around the obstacle before you start.
Edge restraints and borders
Edge restraints are installed at the perimeter of the patio to lock pavers in place and resist the outward pressure from foot traffic and freeze-thaw cycles over time. When you measure, record the total perimeter length separately from your area calculation, you'll need it to order edge restraint material and any border pavers. Perimeter is simply the sum of all outer edges of your patio. For a 12 ft × 8 ft patio, that's (12 + 8 + 12 + 8) = 40 linear feet of edging.
Drainage and slope direction
The LSU AgCenter recommends grading paved surfaces away from buildings at about 2%, which works out to roughly 1 inch of drop for every 4 feet of run. When you measure, note which direction water needs to flow off the patio. This determines where your high edge and low edge are, which matters when you're setting string lines for your base elevation. Write this into your sketch with an arrow showing drainage direction.
Calculate patio area and record everything for buying materials

Once you have your measurements, calculating area is straightforward math. Here's how to pull it all together.
| Shape | Formula | Example |
|---|---|---|
| Rectangle | Length × Width | 12 ft × 8 ft = 96 sq ft |
| L-shape | (Rectangle A) + (Rectangle B) | 60 sq ft + 40 sq ft = 100 sq ft |
| Triangle section | (Base × Height) ÷ 2 | (6 ft × 4 ft) ÷ 2 = 12 sq ft |
| Circle or curved area | π × radius² | 3.14 × (5 ft)² = 78.5 sq ft |
| Irregular shape | Sum of all sections | 96 + 12 = 108 sq ft |
After calculating your total square footage, add a waste factor before ordering materials. CMHA notes that joint and bedding details for interlocking concrete pavement systems should account for proper joint materials and filtration considerations, with geotextile being an option depending on engineer and site conditions waste factor. For a standard rectangular patio with straight cuts, add 5-10%. For diagonal patterns, curves, or lots of edge cuts, add 10-15%. This buffer covers cuts, breakage, and the occasional paver that doesn't make it off the pallet in one piece.
Your finished measurement record should include all of the following before you head to a supplier or start an online order:
- Total patio surface area in square feet (with waste factor applied)
- Perimeter in linear feet (for edging and border pavers)
- Sketch showing all dimensions, section labels, drainage direction, and obstacle locations
- Step dimensions if applicable (tread depth, width, riser height)
- Base depth requirement: typically 4-6 inches of compacted gravel base for a standard patio, deeper for heavy loads or frost-prone areas
- Bedding sand layer: plan for 1 inch of bedding sand over the compacted base (this is the layer your pavers sit on directly)
- Joint sand: enough to fill gaps between pavers across the total surface area
With total area, perimeter, and your sketch in hand, you have everything a supplier needs to help you estimate quantities. If you want to do the full area math yourself before hitting the store, working out patio size and area calculations in detail is worth a closer look as a standalone step.
Common mistakes and quick accuracy checks
These are the measuring mistakes that show up again and again on DIY patio builds. Most of them are easy to catch before you start ordering material, much harder to fix after the pavers are delivered.
- Measuring along the ground instead of horizontally: On sloped sites, following the ground with your tape gives you a longer measurement than your actual flat footprint. Always keep your tape level when measuring horizontal distances.
- Skipping the diagonal check: A rectangle that looks square can be off by several inches if you don't check both diagonals. Equal diagonals = square corners. Non-equal diagonals = problem. Fix it before you go any further.
- Forgetting the waste factor: Ordering exactly the square footage you measured is a classic beginner mistake. You will break pavers, you will make cuts, and some will just be wrong. Add your buffer before you order.
- Not measuring the perimeter separately: Many people calculate area and forget they also need edging material. Measure the full perimeter as its own number.
- Assuming the house wall is straight: Run a string line along the house wall before using it as a reference. Many houses have walls that bow or have offsets. Measure from the string, not the wall itself.
- Ignoring underground utilities: Marking paint stakes and string can go almost anywhere, but once you start digging the base, hitting a line is a serious problem. Call 811 before any excavation.
- Only measuring once: Measure each dimension twice. If you get the same number both times, write it down. If you don't, measure a third time and figure out why.
When you're done measuring and before you finalize your material list, do one last walkthrough: stand at each corner of your string-line layout and eyeball whether it looks right relative to the house, yard, and any nearby features. It sounds low-tech, but your eye will catch a layout that's skewed or a corner that's in the wrong place better than a tape measure sometimes. Once everything looks and measures right, you're ready to move on to layout and excavation. Use those measurements to plan the patio footprint for a square-off that looks straight against the house square off a patio.
FAQ
Should I measure my patio to the outside edge of the pavers or the finished edge of the project?
Use the finished edge you intend to pave, then include thickness and edging only when you order base and restraint. If you build to a string line at the outside face of edging, measure to that same reference consistently so your area and perimeter match what you are restraining.
How do I measure for a patio that’s slightly wider at one end (a trapezoid shape)?
Break it into a rectangle plus a right triangle. Measure the top and bottom widths (the two parallel sides), measure the distance between them (length), then calculate rectangle area plus half the triangle area using the triangle legs.
Do I need to measure in yards or should I stick to feet and inches?
Stick to one system from start to finish. If you measure in feet and inches, convert to feet for area (square feet) before multiplying, since suppliers usually quote square footage, and rounding too early can shift your material order.
What if my patio boundary isn’t a clean arc or has an irregular curve?
Use the “measure then grid” approach for accuracy. Measure the bounding rectangle, then apply the 1-foot grid method, counting partial squares by whether most of the square lies inside the patio edge, then add the buffer for extra edge cuts.
How should I handle a patio that slopes but I’m planning to keep it level when built?
Measure the footprint horizontally using a level tape or a taut, level reference line, then record the drainage direction separately. This keeps your area math correct for the paving plane while still letting you set base elevation properly.
If there’s a garage door threshold or deck step that overlaps the patio area, do I include it in square footage?
Only include surfaces you will pave. Treat thresholds or surfaces that are not being covered as exclusions, and subtract their footprint from your total if they block pavement placement or change the paver layout.
How do I measure around a tree root, utility cover, or drain that must remain accessible?
Measure the obstacle footprint and subtract it from patio area, but also mark a maintenance margin on your sketch if you need clearance around a cover or root. That margin affects paver cuts and edging, so factor it before applying your waste percentage.
When calculating perimeter, do I include sides covered by steps, doors, or adjoining walls?
Perimeter should follow the outer boundary of the paved surface, excluding edges that are not retaining pavers. For step edges and corners, add only the portions that will have edge restraint, and measure straight segments individually if the border is not a single simple rectangle.
What’s the simplest way to verify my total area before ordering materials?
Do two checks: first, add the areas of each shape you broke the patio into. Second, estimate by bounding box (largest rectangle that contains the patio) and confirm your final area is realistically smaller by the expected missing corners or cut sections. If the numbers differ wildly, re-check the diagonal or overlap you labeled.