The safest DIY-friendly way to extend a backyard patio is to excavate the new footprint to the same depth as the original, compact the subgrade and gravel base to match what's underneath the existing slab or pavers, slope everything away from the house at about 1/8 to 1/4 inch per foot, and then tie the new section into the old one with a proper expansion joint. Do that foundation work right and the extension will last as long as the original patio without heaving, cracking, or pulling away from the edge.
How to Extend a Backyard Patio: DIY Steps and Tips

Nolan Carver
30 Jun 2026
Concrete vs. pavers: pick your extension approach first
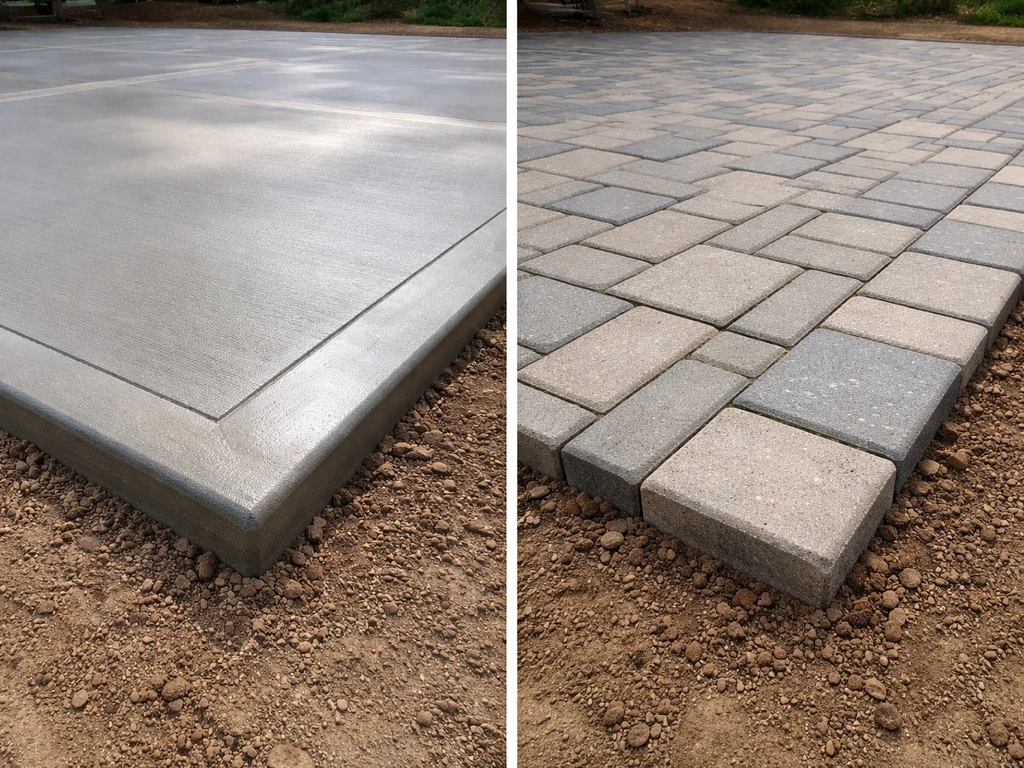
Before you touch a shovel, decide whether you're extending with poured concrete or with pavers. This matters more than most people realize because the two materials behave differently under seasonal movement, and mixing them without thinking through the transition creates problems down the road.
If your existing patio is poured concrete, you have two real options: pour a new concrete slab adjacent to it, or lay pavers right up against the edge. Matching concrete is cheaper per square foot and looks seamless, but you have to deal with control joints and the fact that two independent slabs will always move slightly differently. Adding pavers next to a concrete patio is actually a great solution because the flexible paver surface naturally accommodates movement at the joint without cracking.
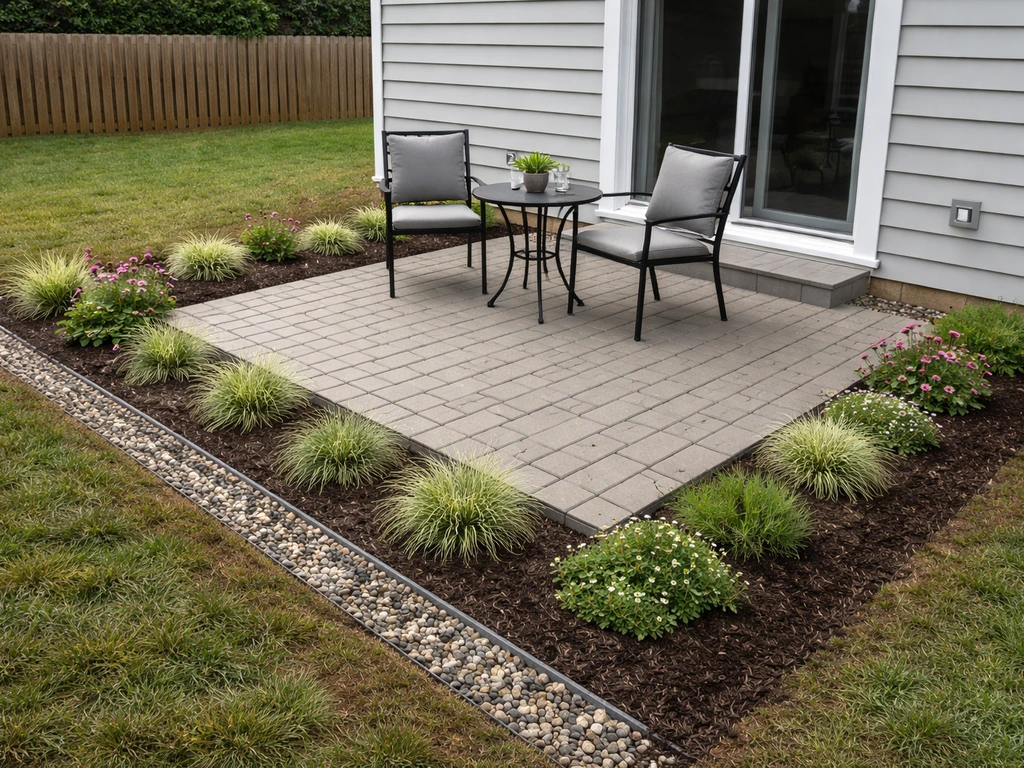
If your existing patio is already pavers, extending with the same paver type is the cleanest approach. You can often pull the edge row of existing pavers, extend the base, and relay everything so the transition is invisible. If you can't source matching pavers, a deliberate border row in a contrasting color or size turns the mismatch into a design feature rather than an eyesore.
| Factor | Poured Concrete Extension | Paver Extension |
|---|---|---|
| DIY skill needed | Moderate to high (forming, finishing) | Beginner to moderate |
| Material cost (installed DIY) | $4–$15 per sq ft roughly | $8–$20 per sq ft roughly |
| Repairability | Hard to patch invisibly | Easy, swap individual pieces |
| Seasonal movement | Rigid, needs control/expansion joints | Flexible, self-adjusting |
| Matching existing look | Seamless if same mix/finish | Match or complement with border |
| Time to use after install | 48–72 hrs cure minimum | Walk on it same day |
| Best for small extensions | Less ideal (thin slabs crack) | Excellent choice |
For most backyard extensions under about 200 square feet, pavers are the more forgiving DIY choice. You can stop partway through, fix mistakes without jackhammers, and the flexible base system handles minor soil movement better than a rigid slab. That said, if you already have a concrete patio and want a seamless look, pouring a matching slab is totally doable if you take your time on the prep.
Plan it out before you dig anything
Grab a tape measure and sketch your existing patio dimensions on paper first. Note the exact outside edge location, which direction the surface drains, and where any fixed structures are (the house foundation, steps, garden walls, fencing). Your extension needs to flow from those fixed points, not fight them. If you're wondering how to build a patio extension, start by planning the layout, drainage, and the right surface finish for your existing patio.
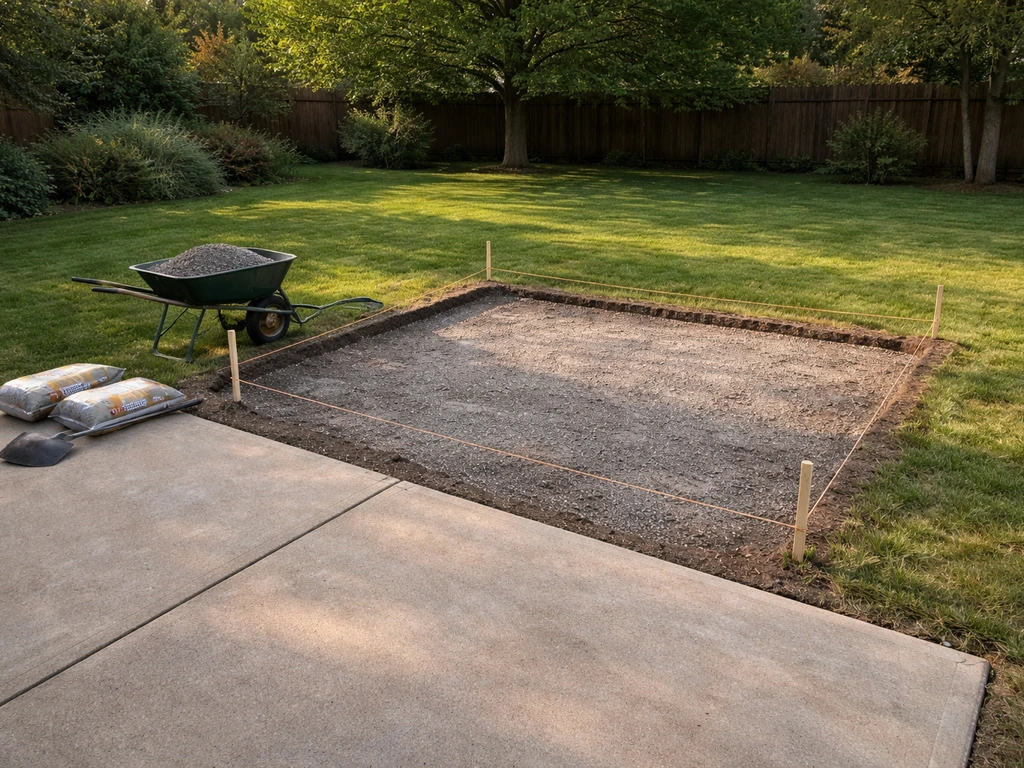
Measure twice, dig once
Mark out the new footprint with spray paint or stakes and string lines. Make the extension a size that makes sense functionally: if you're adding a dining area, you need at least 12 by 12 feet to fit a table and chairs comfortably. If it's just extra lounge space, even an 8-foot extension can transform a tight patio. Once you have stakes in the ground, check the corners for square using the 3-4-5 triangle method: measure 3 feet along one edge, 4 feet along the perpendicular edge, and the diagonal between those two points should be exactly 5 feet if the corner is square.
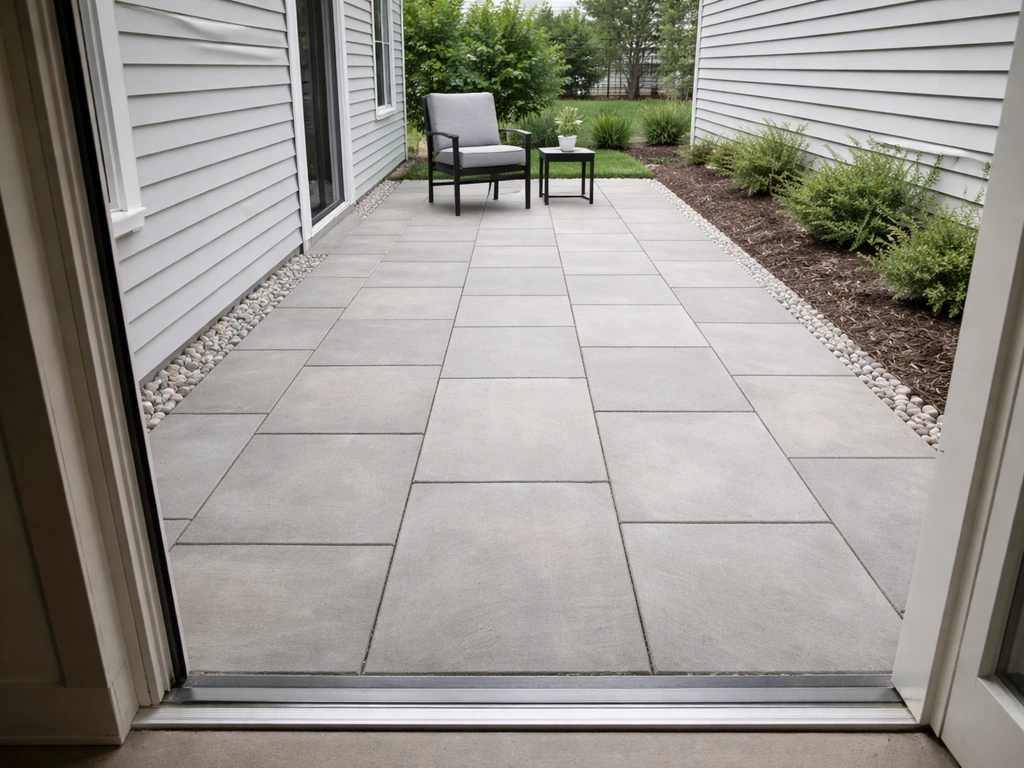
Match the finish and level
Your new surface needs to finish at or very slightly below the existing patio surface, never higher. If you are planning how to extend a raised patio, keep this flush or slightly lower finish rule in mind before you decide on pavers versus a concrete slab. A lip where the new section rises above the old one is a tripping hazard and will trap water at the joint.
Aim for flush, or at most 1/8 inch lower on the new side. For pavers, account for the full stack height: typically about 4 to 6 inches of compacted gravel base, 1 inch of bedding sand, and then the paver itself (standard concrete pavers are about 2-3/8 inches thick). That puts your total excavation at roughly 8 to 10 inches below the finished surface.
For a concrete slab, you need at least 4 inches of concrete thickness plus your base material underneath.
Check local rules
Many municipalities require a permit for patio additions over a certain size (often 200 square feet, but it varies). Check with your local building department before you start. This step-by-step guide covers how to add a patio to your house, from planning and permitting to drainage, base prep, and tying the new section into the old one. It's also worth calling 811 (in the US) to have underground utilities marked before any excavation.
Site prep: excavation, demo, and compacting the subgrade
This is where most DIY patio extensions fail. People rush the dirt work, pour or lay on soft ground, and then wonder why the new section sank or heaved away from the original within a season or two. If you're wondering how to extend a small patio without the new section failing early, focus especially on proper site prep, drainage, and base compaction. Spend as much time on this phase as on the actual surface installation.
Clearing the area
Remove all sod, plants, and organic material from the extension footprint. Organic material compresses over time, which means it will cause settling no matter how well you compact the gravel on top. Dig out at least 8 to 10 inches of depth for pavers (as described above) or about 6 to 8 inches for a concrete slab (4 inches of concrete plus base). Use a flat spade along the edge of the existing patio to get a clean, vertical cut right at the edge.
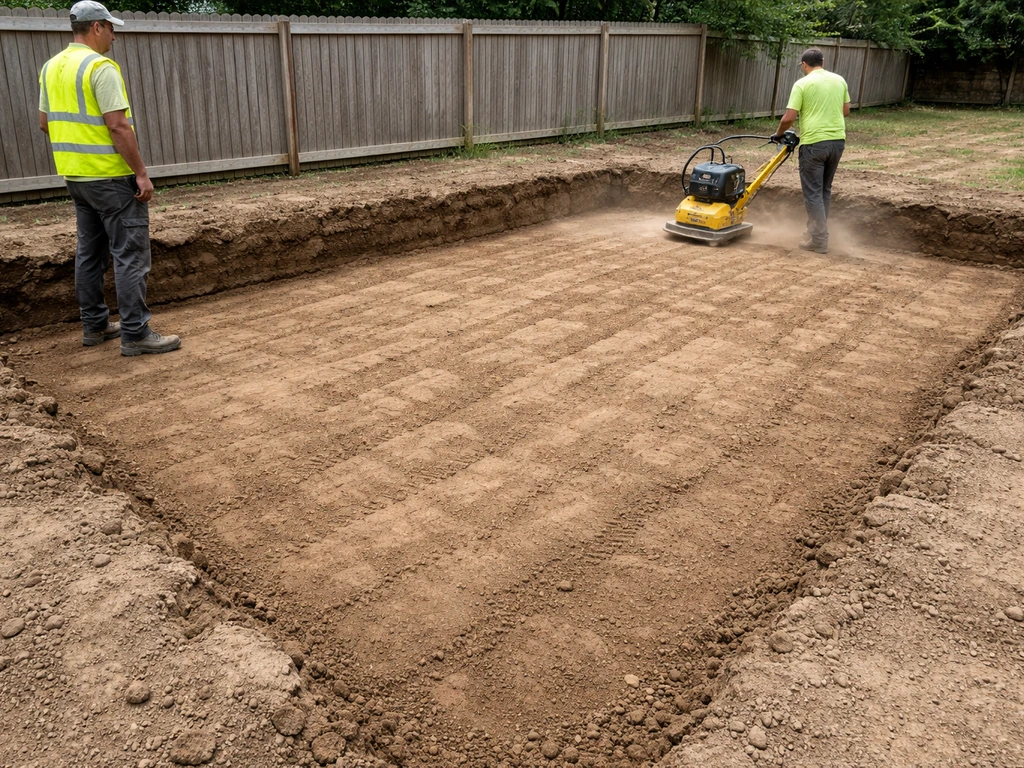
Compacting the subgrade
Once you've excavated to depth, compact the exposed native soil before adding any gravel. Rent a plate compactor for this step. As of 2026, plate compactor rentals typically run about $75 to $175 per day, which is money very well spent. ICPI (Interlocking Concrete Pavement Institute) technical guidance calls for subgrade compaction to at least 98% Standard Proctor density (per ASTM D698). You can't test that in your backyard, but practically it means making at least two or three passes with the plate compactor over every part of the excavated area until the soil stops visibly moving under the machine.
If you're digging into clay or silty soil, lay a layer of geotextile fabric over the compacted subgrade before adding gravel. This is a direct ICPI recommendation: the fabric prevents fine soil particles from migrating up into your gravel base over time, which is one of the main causes of base breakdown and surface settling. It's cheap insurance, usually around $0.20 to $0.50 per square foot for landscaping geotextile.
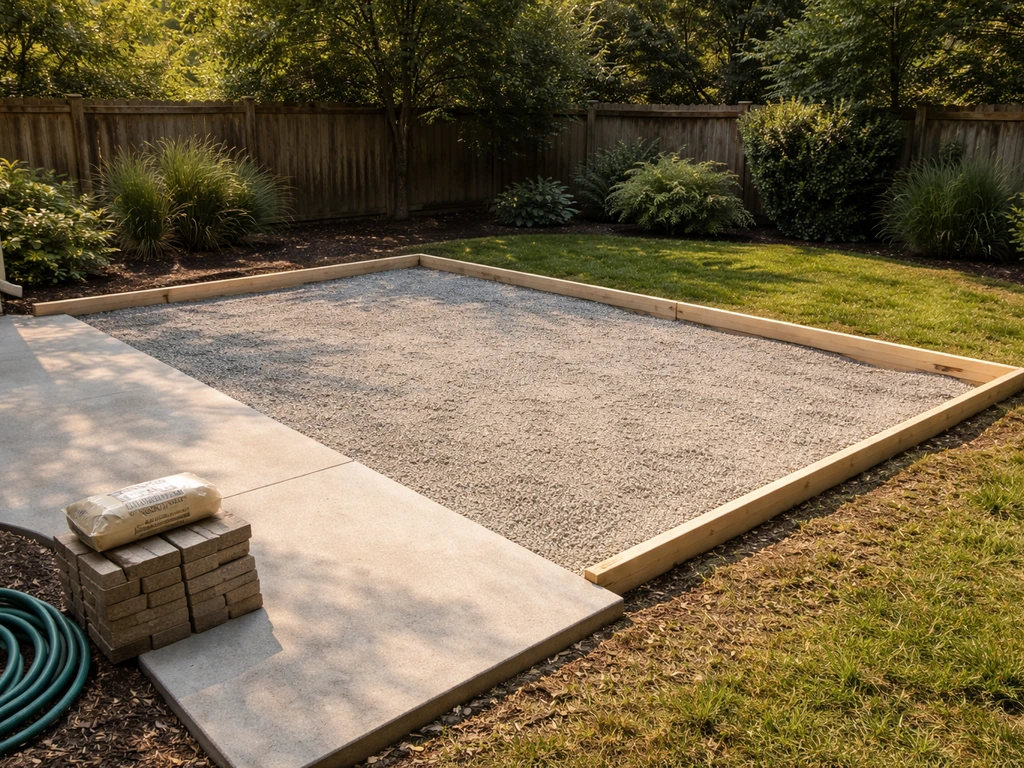
Adding and compacting the gravel base
Use clean crushed stone (often called crusher run, road base, or compactable gravel) rather than pea gravel or river rock. Those rounded stones don't compact and interlock the way angular crushed stone does. Add the gravel in lifts of about 3 to 4 inches, compacting each lift before adding the next. A 4 to 6 inch compacted base is typical for residential patios. Note that loose gravel sits higher before compaction, so add extra and expect it to settle down. After compaction, the top of your base should be perfectly flat and at the correct height to accommodate your bedding sand and pavers (or concrete form height) above it.
Get the drainage right before you lay a single paver or form a slab
Water is the number one enemy of any patio. Get the slope wrong and you'll have puddles on the surface and saturated soil underneath, which leads to freeze-thaw heaving in cold climates and soft, unstable ground in wet ones.
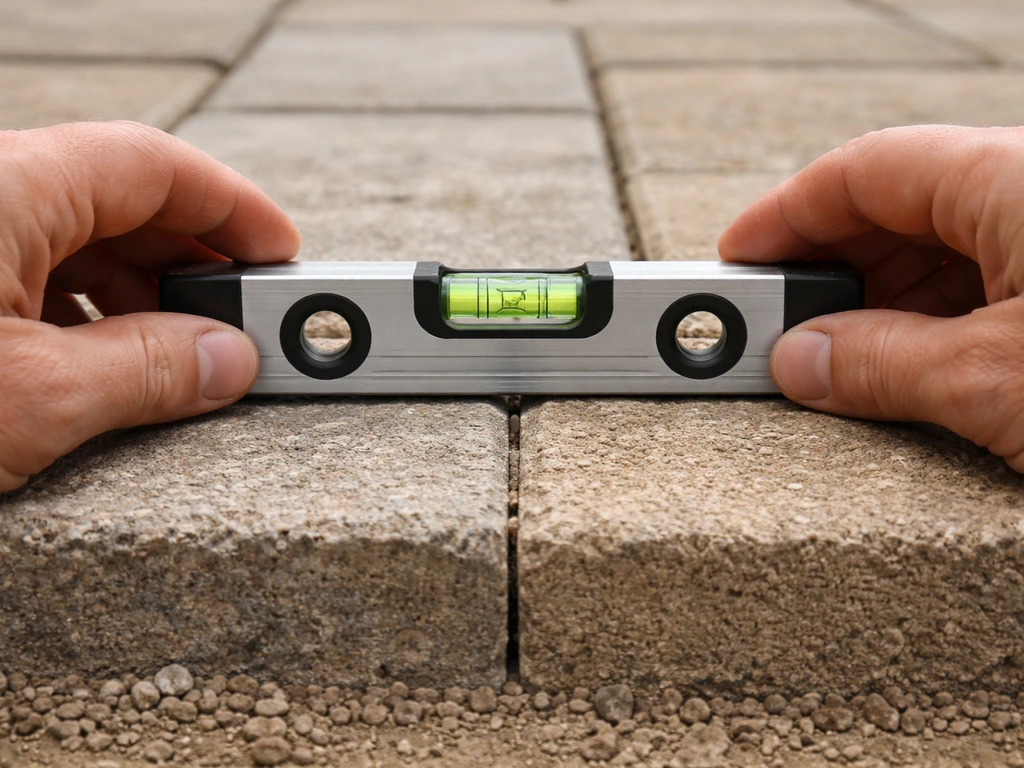
The standard guidance is to slope the finished surface away from your house at a minimum of 1/8 inch per foot, with 1/4 inch per foot being a safer target in areas with heavy rainfall or clay soil. Over a 10-foot-wide patio extension, that means the far edge should be about 1-1/4 to 2-1/2 inches lower than the edge closest to the house. Set your string lines to this slope before you compact the final layer of gravel, and use a 4-foot level with a 1/4-inch shim under one end to check it (that shim creates a 1/16-inch-per-foot slope per foot of level, so do the math for your level length).
If the yard behind the new extension is flat or slopes toward the patio, you may need to think about where that water goes after it runs off the surface. A simple swale (a shallow gravel-filled channel) along the far edge of the extension can redirect runoff to the side rather than letting it pool against the patio. For serious drainage problems, a French drain may be warranted, but in most residential situations a properly sloped surface and well-draining gravel base handle the job without additional drainage infrastructure.
Tying the new section into the existing patio
This is the trickiest part of any patio extension and where even experienced builders take shortcuts they later regret. The core principle: the new section will move independently from the old one. Soil conditions, temperature swings, and base differences mean the two sections will expand, contract, and settle at slightly different rates. Your job is to accommodate that movement rather than fight it.
Connecting a new concrete slab to an existing one
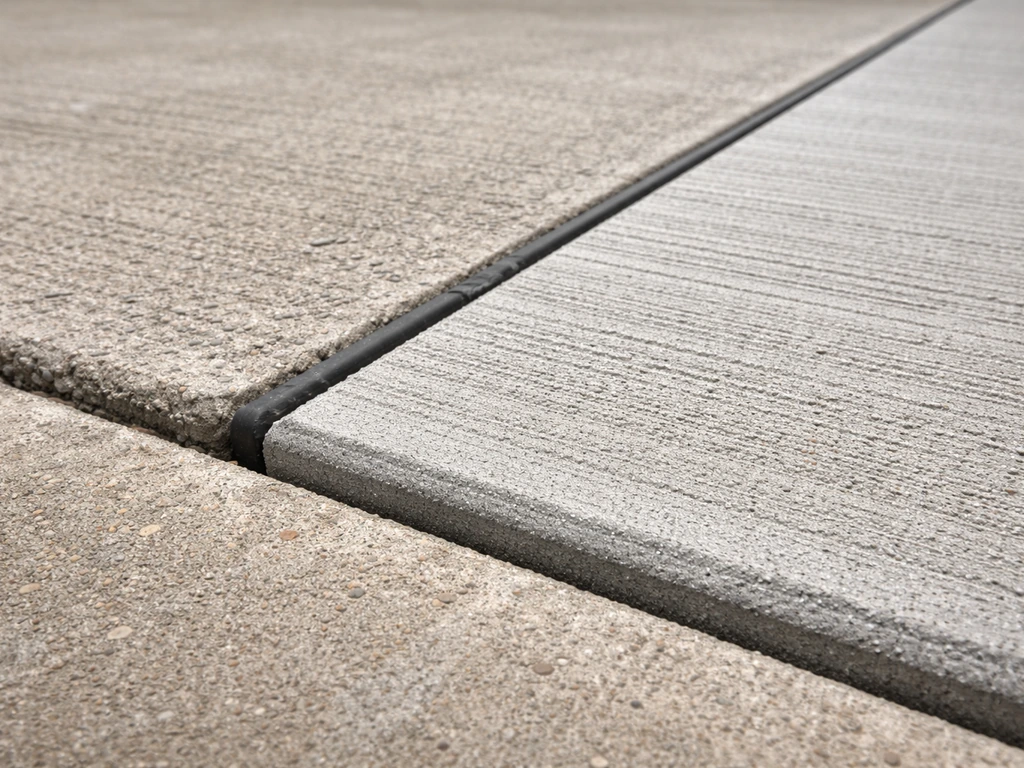
Never pour new concrete directly against an existing slab without an expansion joint between them. To get everything to last, focus on the expansion joint and slope, then choose whether you are extending with pavers or a matching concrete slab how to extend patio. An expansion joint is simply a compressible material (typically a 1/2-inch-thick strip of fiber expansion joint material) placed vertically at the joint between the two slabs. It lets each slab move without pushing against the other and cracking. Secure the strip to the edge of the existing slab before pouring, pour the new concrete up to it, and then seal the top of the joint with a flexible concrete caulk after the slab cures.
Inside the new slab, cut control joints to a depth of at least 1/4 of the slab thickness (for a 4-inch slab that's 1 inch deep) to control where any shrinkage cracks happen. Space them every 8 to 12 feet for a 4-inch slab. Saw cuts should be made as soon as the concrete is hard enough to cut without edge raveling, which is typically 4 hours in hot weather and up to 12 hours in cold weather.
Connecting new pavers to an existing paver patio
If the existing patio has a soldier course or edge restraint, remove it, extend the base into the new area, then relay the pavers continuously across both sections with no hard joint between them. Use plastic or aluminum edge restraint along the new outer perimeter to hold everything together. Fill all joints (including where old meets new) with polymeric jointing sand. Sweep the sand into joints until it's within 1/8 inch of the top of the pavers, then activate it with water per the manufacturer's directions. This locks the joint and resists washout.
Connecting pavers to an existing concrete slab
Pavers butted up against a concrete edge work well because the pavers flex and the rigid concrete doesn't have to. Set edge restraint along the concrete edge to hold the first row of pavers tight, and leave a very small gap (about 1/4 inch) between the concrete and the first paver to allow for movement. Fill that gap with polymeric sand the same as any other joint. The result is a clean transition that won't crack even as the two materials move at different rates.
Step-by-step build process
Extending with pavers (most DIY-friendly method)
- Mark the new footprint with stakes and string lines. Check corners for square with the 3-4-5 method.
- Call 811 to have utilities marked. Check permit requirements with your local building department.
- Excavate the area to the correct depth: typically 8 to 10 inches below your target finished surface (4–6 inches compacted base + 1 inch bedding sand + paver thickness).
- Cut cleanly along the edge of the existing patio. If you're extending an existing paver patio, remove the edge restraint and last row or two of pavers so you can merge the sections seamlessly.
- Compact the exposed native soil with a plate compactor, making at least 2 to 3 passes.
- If the soil is clay or silty, lay geotextile fabric over the compacted subgrade.
- Add crushed angular gravel in 3 to 4 inch lifts, compacting each lift. Target a total compacted base depth of 4 to 6 inches. Check slope as you go (1/8 to 1/4 inch per foot away from house).
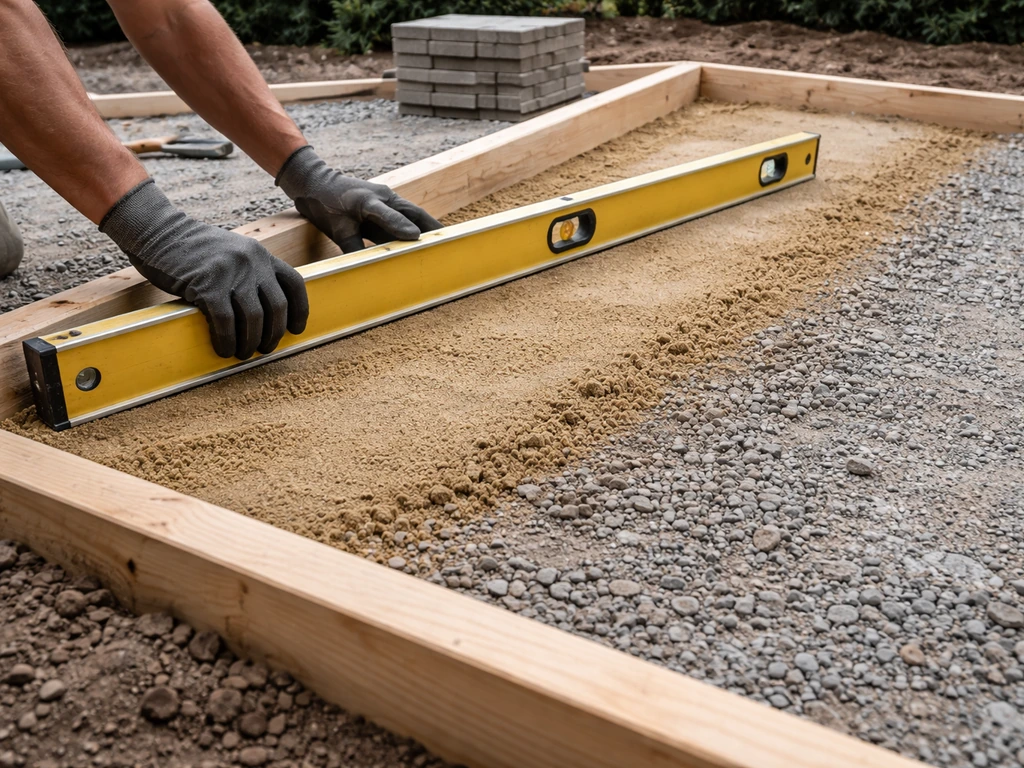
- Screed a 1-inch layer of coarse bedding sand over the compacted gravel. Use 1-inch diameter conduit pipes as screed guides for a consistent depth.
- Lay pavers in your chosen pattern, starting from a fixed straight edge and working outward. Use plastic spacers or your eye to keep joint width consistent.
- Cut border pavers as needed with a paver saw or chisel.
- Install edge restraint with spikes along all exposed outer edges.
- Sweep polymeric jointing sand into all joints until it sits within 1/8 inch of the paver tops.
- Compact the pavers lightly with the plate compactor (use a rubber pad attachment to protect paver surfaces). Add more jointing sand if joints settle.
- Activate polymeric sand with a fine mist of water per manufacturer directions. Keep off the surface until the sand is fully hardened (typically 24 hours).
Extending with poured concrete
- Mark and excavate the footprint to about 6 to 8 inches below the target finished surface (4 inch slab minimum, plus 2 to 4 inch gravel base).
- Compact the subgrade and install compacted gravel base, sloped away from the house at 1/8 to 1/4 inch per foot.
- Build forms from 2x4 or 2x6 lumber screwed to stakes. The top of the form represents your finished surface height. Check that forms match the finished height of the existing patio.
- Attach a 1/2-inch fiber expansion joint strip to the edge of the existing slab where the new concrete will meet it.
- Place wire mesh or rebar grid inside the form for reinforcement (especially important for extensions over 100 sq ft or in freeze-thaw climates).
- Order or mix concrete to a minimum 3,000 psi mix. For most extensions, ordering ready-mix delivered by truck is the practical choice above roughly 50 square feet.
- Pour and screed the concrete level with the form tops. Float the surface and finish to match the existing patio texture (broom finish, exposed aggregate, etc.).
- Saw-cut control joints to 1 inch depth (for a 4-inch slab) within 4 to 12 hours depending on temperature and concrete set speed.
- Cover with plastic sheeting and cure for a minimum of 48 to 72 hours before light foot traffic, and 7 days before heavy use.
- Once fully cured, seal the expansion joint at the top with a flexible polyurethane or silicone concrete caulk.
Budget, tools, and mistakes to avoid
What it'll cost
DIY paver extensions typically run $8 to $20 per square foot in materials depending on the paver style and region. A basic concrete slab extension costs roughly $4 to $15 per square foot in DIY materials (concrete, rebar, base gravel, forming lumber). The labor savings over hiring a contractor are significant, often 50% or more, but the upfront equipment cost matters. Budget for plate compactor rental ($75 to $175 per day), a paver or concrete saw rental if cutting, and delivery fees for gravel and concrete. For a 100 square foot extension, expect total out-of-pocket material and rental costs in the $1,000 to $2,000 range for pavers, less for basic concrete.
Tools you'll need
- Tape measure, marking paint or chalk line, and stakes with string
- Flat spade and square-mouth shovel for excavation
- Plate compactor (rent this, don't skip it)
- 4-foot level and a straight board for checking slope
- Screed board and 1-inch conduit pipes (for paver bedding sand)
- Rubber mallet for setting pavers
- Paver saw or angle grinder with diamond blade for cuts
- Circular saw for cutting form lumber (concrete)
- Wheelbarrow for moving gravel, sand, and concrete
- Garden hose and watering can for activating polymeric sand or curing concrete
Mistakes that come back to haunt you
- Skipping subgrade compaction: no amount of gravel on top fixes soft, uncompacted native soil underneath.
- Sloping toward the house: even a slight mistake here drives water into your foundation. Double-check slope with a level before you pour or lay.
- Pouring two concrete slabs without an expansion joint between them: they will push against each other seasonally and one or both will crack.
- Using round pea gravel as base material: it doesn't compact or interlock. Always use angular crushed stone.
- Leaving organic material in the base: roots, old mulch, and sod decompose and create voids. Remove everything.
- Not sealing the perimeter with edge restraint on paver extensions: pavers migrate outward under foot traffic over time without it.
- Forgetting to account for total stack height: measuring wrong means your new surface ends up higher or lower than the original patio.
- Rushing polymeric sand activation: activating while the sand is still dusty or before all joints are filled leads to weak, crumbly joints.
Your next steps starting today
Start with a site visit to your own backyard with a tape measure and a 4-foot level. Measure the existing patio, check which direction it drains, and note the finished surface height relative to the surrounding grade. Sketch the new extension footprint to scale and calculate square footage so you can get material estimates. Call your local building department and 811 before you buy anything.
Then price out crushed gravel, bedding sand, and either pavers or concrete in your area, add a day of plate compactor rental, and you'll have a real project budget. The base prep is the part that makes or breaks the project, so plan to spend at least half your total project time on excavation, compaction, and slope work before the first paver or form board goes in.
FAQ
Can I extend my patio if the existing surface is not perfectly level?
Yes, but only if you can keep the new finish flush or slightly lower, and you create a proper movement joint at every interface. If your patio is already low and the new work would end up above it, you will likely need to remove more existing material or reduce the base build-up so water does not collect at the transition.
How do I know my paver base is level enough before laying pavers?
For pavers, avoid “just eyeballing” the base height. After compacting the crusher run, recheck with a straightedge across multiple directions, then set bedding sand only after the base is flat and at the target elevation (so the paver top lands where you planned). Any humps or dips in the base become visible and can cause rocking stones later.
What happens if I don’t install edge restraint on the outer perimeter?
Don’t skip edge restraint. Without rigid or semi-rigid edging along the perimeter, paver extensions can spread, joints can open, and polymeric sand can wash out during heavy rain. Use edge restraint on the new outer edge at minimum, and maintain the small movement gap where pavers meet concrete.
If my yard drains poorly, should I increase the patio slope or add drains?
In wet or clay-heavy yards, a slight increase in slope can help prevent puddling, but the key is keeping the subgrade stable and the gravel free-draining. If water seeps into the base area under the patio, even correct slope may not save you, so consider adding better drainage paths (for example a swale) before you build.
Can I fill the concrete expansion joint with mortar or grout?
You can, but it is usually a mistake to use an untested filler for structural concrete joints. Keep the expansion joint material compressible and vertical between the old and new slabs, then seal only the top with a flexible concrete caulk after curing. Filling the joint with rigid materials defeats the purpose and increases cracking risk.
When extending with pavers, how do I prevent the new section from ending up higher than the old patio?
Aim for the patio surface to be at or slightly below the existing surface, and think about the total stack height. If you are extending pavers next to concrete, also include the bedding sand thickness in your calculation, not just the paver thickness, so the final tops do not end up too high.
How can I tell if the subgrade compaction is good enough?
For most DIY paver projects, don’t plan on carrying heavy loads directly across the base area before compaction. Walk the excavated subgrade, then compact in systematic overlapping passes (and add geotextile over clay/silty soils). If the soil is still visibly shifting under the plate compactor, it is not ready.
What are common mistakes when using polymeric jointing sand on patio extensions?
Polymeric sand needs the joints to be properly sized and the pavers clean, and it only locks in when it is wetted correctly. Overwatering can wash sand out, and under-wetting leaves joints loose, so apply water per the product directions and avoid sweeping additional sand into joints after activation.
How do I manage the gap where pavers meet an existing concrete edge?
Check for movement gaps at both ends of the transition, not just one side. For the joint between pavers and concrete, leave the small gap at the concrete-to-paver line (commonly about 1/4 inch), secure edge restraint, and fill the gap with polymeric sand so it can accommodate expansion without creating a hard crack line.
Is it possible to extend a patio upward (raised area) without building retaining walls?
Yes, but you should avoid relying on the pavers alone to handle a step change in elevation. If the extension will be higher due to grade constraints, you may need retaining strategies (for example a proper base and edge system, or additional drainage behind any raised sections) to prevent soil pressure from pushing the pavers.
What’s the best way to handle it if I can’t match the exact paver color or size?
If you can’t get matching pavers, the safest approach is to design the transition intentionally, such as using a border row or changing the running bond pattern at the seam. This reduces the visual impact of a color mismatch and still keeps the functional details right (base, slope, and jointing).
What should I check with my local building department before I start digging?
Permits vary, but a frequent miss is starting excavation before confirmation, especially if utilities run near the work area. Call 811 before you dig, and check whether your city treats patio extensions as hardscape coverage that triggers additional rules or inspections.