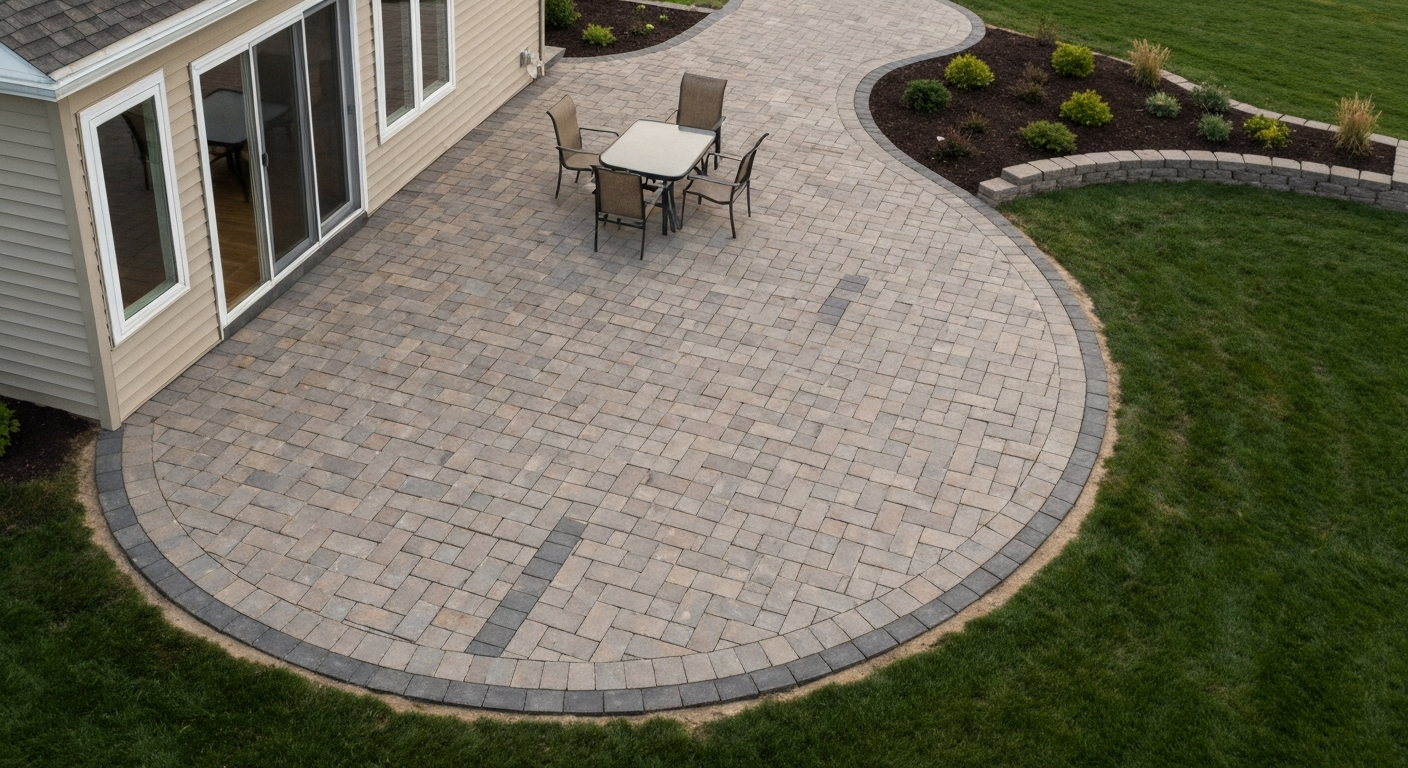
A semi-circle patio is one of the most satisfying shapes you can build yourself. You dig out a half-moon footprint against the back of your house, lay a compacted base, set your edging, and fill it with pavers or pour concrete into a curved form. The curved edge is the only part that's different from a square patio, and once you know how to mark it with a center stake and a length of string, the rest of the build follows the same steps as any flat patio. Most homeowners with a free weekend and basic tools can complete a 10-foot-radius semi-circle patio (roughly 157 square feet) in two to three days.
How to Make a Semi Circle Patio: DIY Plan, Layout & Build

Nolan Carver
11 Aug 2026
What a semi-circle patio actually is, and whether DIY makes sense for you
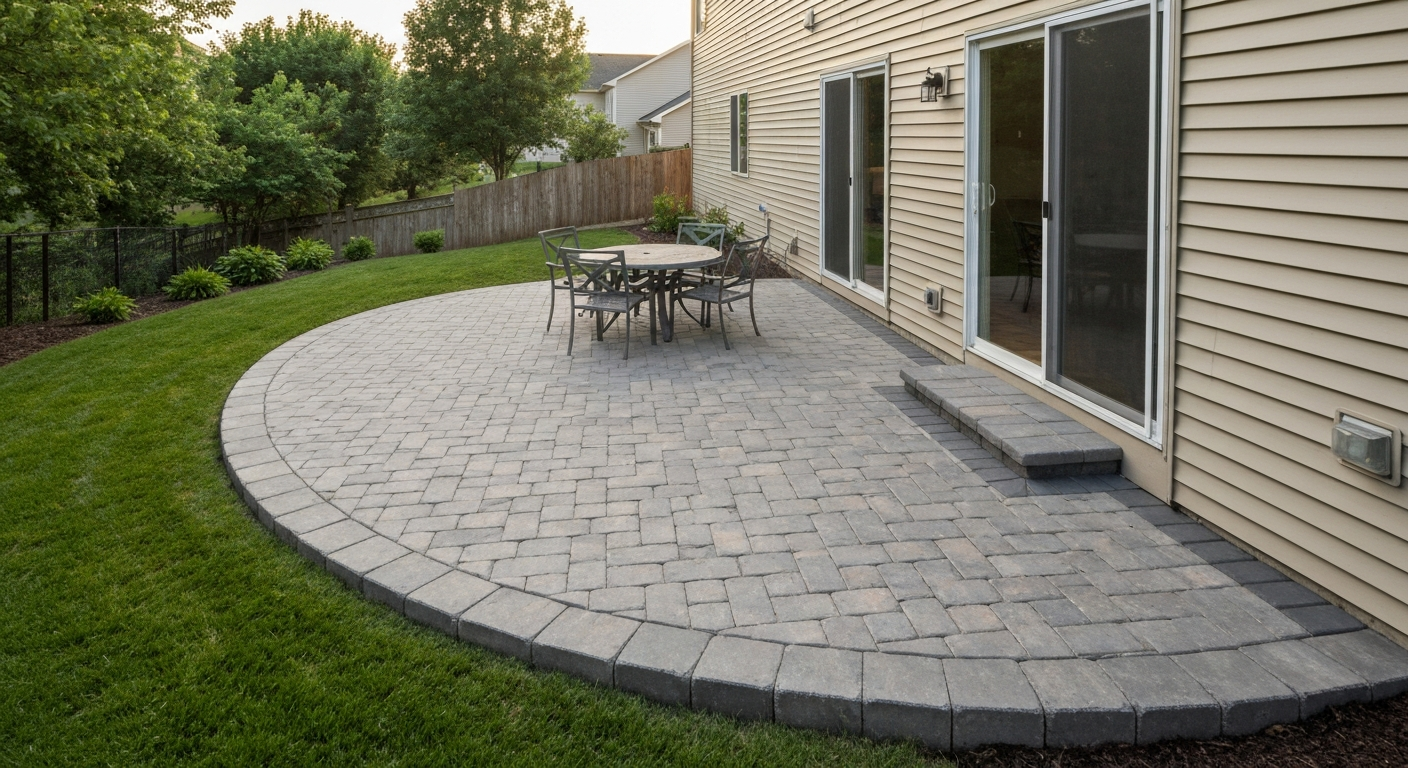
A semi-circle patio is exactly half of a circle, with the flat (diameter) edge typically running along the back of the house wall and the curved arc sweeping out into the yard. It's a great alternative to a rectangle when you want a patio that flows naturally into lawn or garden beds, softens a boxy backyard, or frames a focal point like a fire pit or fountain. Because the straight edge butts against the house and the arc is a single consistent radius, the geometry stays predictable. You're not dealing with compound curves or tricky angles the way you would on a fully freeform curved patio.
This is a realistic DIY project if you're comfortable with basic excavation, can follow measurements, and don't mind some physical labor. A paver semi-circle patio is the more beginner-friendly option because mistakes are reversible: you can pull up a paver, adjust the base, and reset it. Poured concrete is faster once the formwork is built, but it's less forgiving. If you've never poured concrete before, consider starting with pavers. Either way, you do not need to hire a contractor for a straightforward ground-level semi-circle patio on reasonably flat ground.
Design decisions to make before you dig anything
Size and radius
The radius is the single most important measurement in your design. It's the distance from the center point on your house wall to the outermost edge of the patio arc. Common residential semi-circle patios use radii of 6 feet (small, fits about 4 people), 8 feet (comfortable for a table and four chairs), 10 feet (generous entertaining space), or 12 feet and up (true outdoor room). The area formula is simple: area = (π × r²) / 2. A 10-foot radius gives you about 157 square feet, which is the sweet spot for most families. Going beyond 14 feet starts to look more like a full patio than an accent curve, and the material costs climb quickly.
Slope and drainage
Drainage is not optional. The patio surface must slope away from the house at a minimum of 1/4 inch per foot (about 2%), though 1/8 inch per foot is acceptable in tight situations where you can't get more fall. Building America/PNNL recommends sloping patio slabs at least 1/4 inch per foot (≈2%), or 1/8 inch per foot (≈1%) in constrained situations, Patio Slabs, Porch Slabs, Walkways, and Driveways, Slope Away from House (Building America Solution Center, PNNL) Patio Slabs, Porch Slabs, Walkways, and Driveways — Slope Away from House (Building America Solution Center, PNNL). For a 10-foot-radius patio, that means the outer arc should sit at least 2.5 inches lower than the edge at the house wall. Build this slope into your base layer, not by tilting the finished surface after the fact. Water that pools against a foundation causes long-term damage, so get the slope right at the excavation stage.
Siting considerations
Think about sun orientation, privacy, and how the patio connects to your interior spaces. A south-facing semi-circle catches the most sun all day; east-facing gives you morning light with afternoon shade. Check for overhead utilities before you decide where your center point falls, and look for underground lines (call 811 in the US before any excavation). Keep the patio at least 5 feet from property lines in most jurisdictions, though your local setback rules will be specific. If your yard slopes significantly, you may need a step or a small retaining edge on the low side, which adds complexity but is still DIY-able.
Style choices
For the surface material, a fan or running-bond paver pattern emphasizes the arc beautifully. Tumbled concrete pavers give a casual cottage look, while clean-cut natural stone reads more formal. A broom-finished concrete slab is low maintenance and budget friendly. Flagstone set in a patio with tight joints looks great but requires more cutting on the curved perimeter. Pick the material before you finalize your excavation depth, because base thickness requirements differ by material.
Planning checklist and project timeline
Before you order a single paver, run through this checklist. Skipping steps here is what causes projects to stall mid-build or cost more than budgeted.
- Call 811 (Dig Safe) and request underground utility marking at least three business days before excavation.
- Check your local zoning code for setback requirements from property lines, easements, and the house foundation.
- Determine whether you need a building permit. Many municipalities require a permit or plan review if your patio increases impervious surface beyond a threshold (often around 1,000 square feet total on the lot), affects stormwater drainage, or lies within a setback zone. Contact your local building or planning department and ask specifically about patios and impervious surface rules.
- Measure your yard and sketch the patio footprint to scale. Mark the center point, radius, and how the flat edge lines up with the house.
- Check the frost depth for your area. In freeze-thaw climates, base depth affects long-term stability and some jurisdictions tie permit requirements to footing depth rules under the IRC.
- Decide on your surface material (pavers or concrete) and confirm your total budget before ordering.
- Order or rent a plate compactor. This is non-negotiable for a durable base.
- Schedule material deliveries. Gravel base material is heavy. A typical 10-foot-radius patio needs roughly 2.5–3 tons of compactable gravel base.
- Stage materials near the work site but not on the patio footprint.
- Plan for curing/settling time: paver patios can be used within a day of completion; concrete needs a minimum 24–48 hours before foot traffic and ideally 7 days before furniture.
In terms of timeline, a 10-foot-radius paver semi-circle typically breaks down like this: Day 1 for marking and excavation, Day 2 for base prep and compaction, Day 3 for edging, bedding sand, and paver installation. A concrete semi-circle compresses to: Day 1 for marking, excavation, and formwork; Day 2 for pour and finishing; then 5–7 days of curing before use. Add a buffer day for material deliveries and weather.
Measurements, radius formulas, and area calculations
The math for a semi-circle is straightforward, and you only need three formulas. The radius (r) is the distance from the center point to the arc edge. The diameter is 2r (the length of the flat edge along the house). The area is (π × r²) / 2, where π ≈ 3.1416. The perimeter of the curved arc alone (which you need for edging quantities) is π × r.
| Radius (ft) | Diameter / Flat Edge (ft) | Area (sq ft) | Arc Length for Edging (ft) |
|---|---|---|---|
| 6 | 12 | 56.5 | 18.8 |
| 8 | 16 | 100.5 | 25.1 |
| 10 | 20 | 157.1 | 31.4 |
| 12 | 24 | 226.2 | 37.7 |
| 14 | 28 | 307.9 | 44.0 |
| 16 | 32 | 402.1 | 50.3 |
For planning purposes, always add 10% to your area calculation when ordering pavers or stone to account for cuts, breakage, and edge waste. For edging material on the curved arc, add 5% to the arc length figure. The flat (diameter) edge running along the house usually butts against the wall directly and does not need a separate edging piece, though you may want a small expansion gap or flexible sealant there.
How to mark out the semi-circle
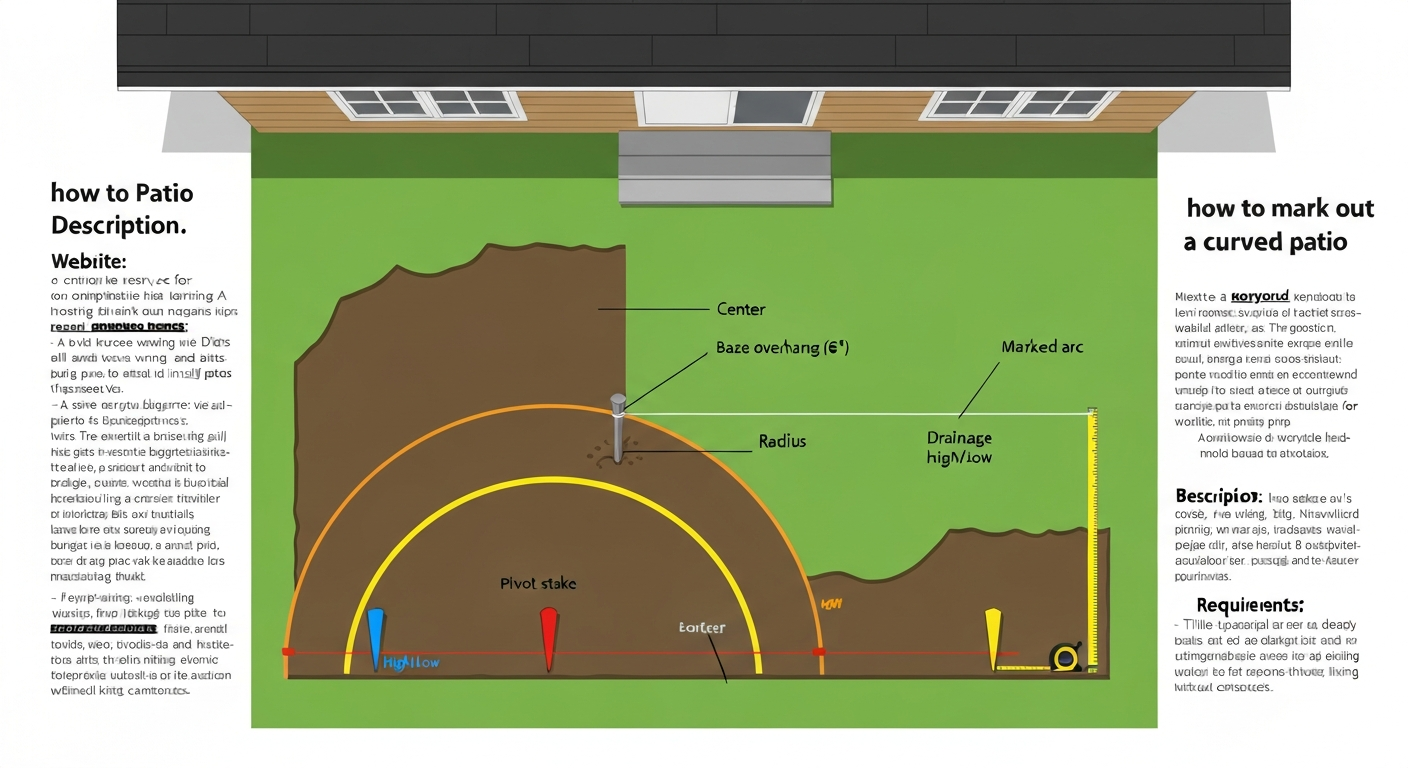
Marking out accurately is the step that determines the shape of everything downstream. Get this right and the rest of the build is easy. The classic method uses a center stake and a string compass, and it works perfectly for any radius. For a step-by-step guide on how to build a curved patio, see the resource 33f7d754-2b47-4d35-ab27-805a63f1494e. For a step-by-step guide on how to mark out a curved patio, consult our how to mark out a curved patio. For step-by-step guidance on laying out a full circle (useful if you later expand beyond a semi-circle), see how to build a round patio. For a full walkthrough on laying out and building circular patios, see how to make a circular patio.
The center-stake compass method
- Find the midpoint of the flat edge along the house wall. This is your center point. Drive a sturdy stake or screw a nail into the wall at ground level at this exact point.
- Cut a piece of non-stretch string or twine exactly equal to your chosen radius. Tie one end to the center stake.
- Tie a can of marking spray paint, a sharpened dowel, or a chalk line marker to the other end of the string.
- Pull the string taut and walk in an arc from one end of the flat edge to the other, keeping the string tight and the marker at ground level. Have a helper hold the center stake if it wants to shift.
- Spray or mark the arc continuously. You'll end up with a clean, accurate half-circle outline on the ground.
String-and-stakes grid method (for uneven ground)
On sloped or uneven ground, the string-compass can drag and give you a wobbly line. An alternative is to calculate the coordinates of points along the arc using the formula x² + y² = r², then plot those points on the ground with stakes every 12–18 inches and connect them with a garden hose or flexible tubing. The hose is especially useful because you can see the curve as a smooth line and adjust before committing to spray paint. Once you're happy with the shape, spray along the hose edge and remove it.
Radius templates for smaller patios
For radii under 6 feet, you can cut a cardboard or hardboard radius template to the exact arc and trace it directly onto the ground in sections. This works well for precise marking around decorative borders or when you want to test the visual size before committing. Lay the template flat, trace with spray paint, shift it along, and repeat until the full arc is marked. This is also the technique to use if you're marking a curved patio edge for cutting pavers, since you can hold the template directly on top of the paver and trace the cut line.
Materials: what to use and the honest pros and cons
The material you choose affects your excavation depth, your edging approach, how much cutting is required, and long-term maintenance. Here's a straightforward comparison of the four most common options for a semi-circle patio.
| Material | DIY Difficulty | Typical Cost (materials only) | Durability | Repairability | Best For |
|---|---|---|---|---|---|
| Concrete interlocking pavers | Easy–Moderate | $3–$8/sq ft | Very high (25+ years) | Excellent — pull and reset | Most DIYers; any radius |
| Poured concrete | Moderate–Hard | $4–$7/sq ft (incl. forming) | High (20–30 years) | Poor — cracks need patching | Large simple arcs; budget builds |
| Natural flagstone | Moderate | $5–$15/sq ft | Very high | Good — reset individual stones | Irregular/organic aesthetic |
| Decomposed granite / gravel | Easy | $1–$3/sq ft | Low–Moderate (needs top-ups) | N/A | Budget, informal, permeable |
| Concrete flagstone pavers | Easy–Moderate | $2–$5/sq ft | High | Good | Budget alternative to natural stone |
Edging options for the curved perimeter
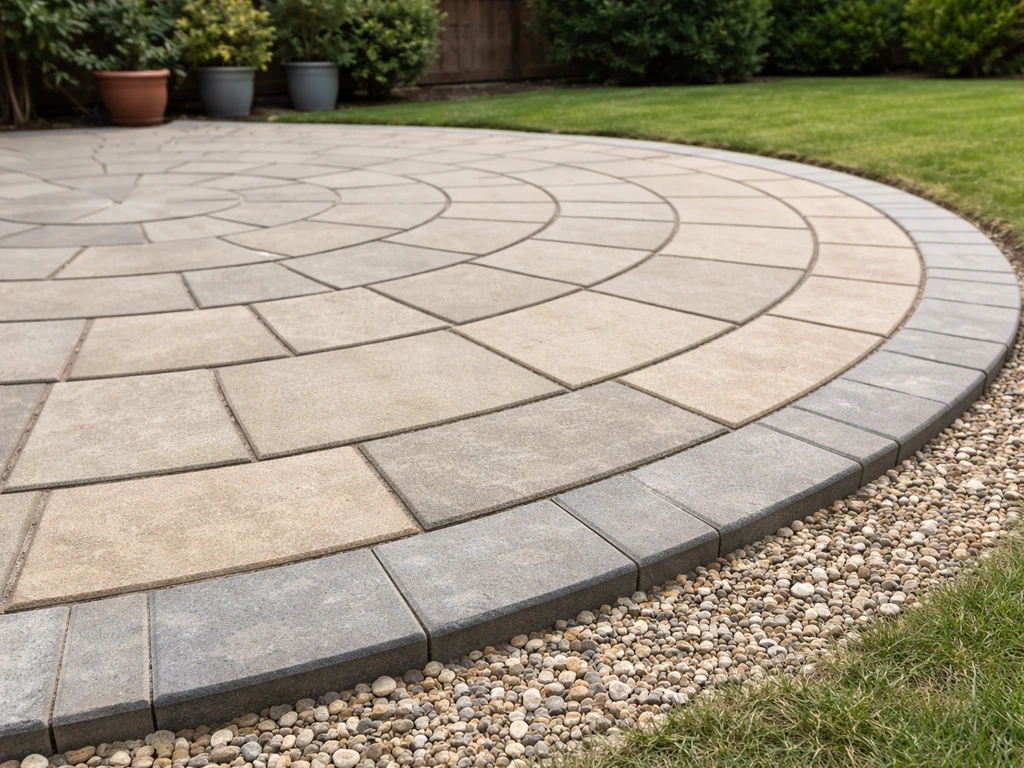
The curved arc of a semi-circle patio needs a dedicated edge restraint to prevent pavers from migrating outward over time. Plastic flexible paver edging (the kind with spikes driven through tabs into the base) is the most practical choice for DIYers. It bends to any radius, is inexpensive ($0.50–$1.00 per linear foot), and anchors reliably when you use spikes every 12 inches on tight curves. Metal edging (aluminum or steel) is more durable and gives a sharper finished look but costs more ($2–$4 per linear foot). Poured concrete curb edging is the most permanent option but requires forming and a separate concrete mix pour around the perimeter. For poured-concrete patio slabs, you use curved plywood or hardboard formwork during the pour, which acts as the temporary edge mold and is removed after curing.
Full tools and materials list
For a paver semi-circle patio
- Tape measure and long steel rule
- Center stake (rebar stake or 2x2 wood stake)
- Non-stretch string or mason's line
- Marking spray paint
- Shovel and flat spade for excavation
- Wheelbarrow
- Plate compactor (rental: $50–$80/day)
- Hand tamper for tight corners
- 4-foot level and a long straightedge
- Rubber mallet
- Paver/angle grinder with diamond blade, or a wet saw (rental: $40–$80/day)
- Safety glasses, hearing protection, and work gloves
- Flexible plastic paver edging and 10-inch spikes
- Compactable gravel base material (¾-inch crushed stone or Class II base)
- Coarse bedding sand (concrete or chip sand, not play sand)
- Concrete interlocking pavers (60 mm / 2⅜-inch thick for pedestrian use, meeting ASTM C936)
- Polymeric jointing sand
- Garden hose and nozzle (for activating polymeric sand)
- Screed pipe or 1-inch conduit (two lengths, for screeding sand level)
For a poured-concrete semi-circle patio
- All marking tools above (stake, string, spray paint)
- Shovel, flat spade, wheelbarrow
- Plate compactor
- Flexible 1/4-inch plywood or hardboard strips for curved formwork (rip to 4-inch width for a 4-inch slab)
- Wooden stakes (2x2 or 1x2) every 12–18 inches around the curved form
- Screws and drill for securing form boards
- Wire mesh (6x6 W1.4xW1.4) or #3 rebar on 18-inch grid for reinforcement
- Rebar chairs or small stones to elevate mesh to mid-slab depth
- Compactable gravel base material
- Ready-mix concrete (minimum 3,000 psi for exterior slabs in moderate climates, 4,000 psi in freeze-thaw zones)
- Concrete mixer or wheelbarrows for transporting ready-mix truck concrete
- Bull float and hand float
- Concrete screed board
- Broom (for broom-finished texture)
- Concrete saw or early-entry saw for control joints
- Curing compound or plastic sheeting for moist curing
- Isolation joint material (felt or foam strip) where slab meets house wall
- Safety glasses, gloves, and rubber boots for concrete work
Material quantities and cost estimates by radius
Use the table below to estimate how much material you'll need. These figures assume a standard paver installation: 4 inches of compacted gravel base, 1 inch of bedding sand, and 60 mm concrete pavers. For poured concrete, assume 4 inches of compacted gravel base and a 4-inch slab. All quantities include a 10% waste factor for pavers/concrete and 5% for edging. Gravel quantities are calculated loose-volume to account for compaction (a factor of roughly 1.3x compact depth). Prices are approximate 2025–2026 US averages and will vary by region and supplier.
| Radius (ft) | Area (sq ft) | Gravel Base (tons) | Bedding Sand (tons) | Pavers (sq ft needed) | Arc Edging (lin ft) | Approx. Paver Material Cost | Approx. Concrete Slab Cost (incl. forming) |
|---|---|---|---|---|---|---|---|
| 6 | 57 | 1.2 | 0.4 | 63 | 20 | $190–$510 | $230–$400 |
| 8 | 101 | 2.1 | 0.7 | 111 | 27 | $335–$890 | $405–$710 |
| 10 | 157 | 3.3 | 1.1 | 173 | 33 | $520–$1,380 | $630–$1,100 |
| 12 | 226 | 4.7 | 1.6 | 249 | 40 | $745–$1,990 | $905–$1,580 |
| 14 | 308 | 6.4 | 2.1 | 339 | 46 | $1,015–$2,710 | $1,230–$2,155 |
| 16 | 402 | 8.4 | 2.8 | 442 | 53 | $1,325–$3,540 | $1,610–$2,815 |
For gravel base, call your local aggregate supplier and ask for the weight per ton of their compacted base material. A rough rule of thumb: one ton of 3/4-inch crushed stone covers about 100 square feet at 2 inches compacted depth. For a 4-inch base, multiply your area by 0.04 (in feet) to get cubic footage, then divide by 27 for cubic yards. One cubic yard of gravel weighs roughly 1.4–1.6 tons. Bedding sand: 1 inch deep over your area in cubic feet divided by 12, then convert to tons (sand weighs about 1.3 tons per cubic yard). For concrete slabs, a 4-inch pour over your area = (area × 0.333 feet) = cubic footage. Divide by 27 for cubic yards. A 10-foot-radius semi-circle slab needs about 1.9 cubic yards of concrete, which is under the 2-yard minimum many ready-mix trucks charge for, so factor in a short-load surcharge or plan to mix bags.
Control joint planning for concrete slabs
A 4-inch concrete slab needs control joints spaced no more than 8–12 feet apart (roughly 2–3 times the slab thickness in inches). Saw-cut joints should be at least 1 inch deep (one quarter of the 4-inch slab thickness) and cut within 4–12 hours of the pour depending on conditions. For a semi-circle patio, plan joints that radiate outward from the center point, creating pie-slice segments. This looks intentional and directs cracking to the joints rather than across the slab face.
Step-by-step: building a paver semi-circle patio
Step 1: Excavate the footprint
Once your arc is marked, excavate the entire semi-circle footprint. Your total excavation depth should equal base thickness + bedding sand thickness + paver thickness, plus about 1/2 inch to account for the finished surface sitting slightly above grade for drainage. For a standard installation: 4 inches base + 1 inch sand + 2.375 inches paver + 0.5 inch = roughly 8 inches total depth. If you're in a freeze-thaw climate with significant frost depth, consider increasing your base to 6 inches of compacted aggregate for better drainage and stability. Remove all organic material and roots. Don't leave sod under the base. The subgrade should be firm, uniform, and free of soft spots.
Step 2: Compact the subgrade
Before adding any base material, run your plate compactor over the excavated subgrade two to three passes. If you hit any soft spots, dig them out, backfill with aggregate, and re-compact. A firm subgrade is what prevents long-term settling. On clay soils, consider laying a layer of geotextile fabric before the base aggregate to prevent migration.
Step 3: Install and compact the aggregate base
Add compactable gravel base in lifts of no more than 3–4 inches each. Compact each lift to at least 98% of Standard Proctor density (ASTM D698) before adding the next. For a DIYer this translates to: run the plate compactor in overlapping passes until the surface stops vibrating and feels solid underfoot. A minimum of 4 passes is typical for each lift. As you compact, build your drainage slope into the base: the base surface at the house wall should be higher than at the outer arc by 1/4 inch per foot of radius. For a 10-foot radius, that's 2.5 inches of total fall across the base surface.
Step 4: Install the curved edge restraint
Before laying bedding sand, install your flexible plastic paver edging along the curved arc. Drive 10-inch spikes through the edging tabs every 12 inches, angling them slightly outward for extra grip on tight curves. The top of the edging should be level with the top of your planned finished paver surface. Check this with a level and string line. Getting the edging right before the sand goes down prevents the headache of sinking edge restraints later. The flat edge at the house wall can butt directly against the foundation or a pre-existing step, with a foam isolation strip to allow for minor movement.
Step 5: Screed the bedding sand
Spread a 1-inch layer of coarse bedding sand over the base. Use two lengths of 1-inch pipe as screed guides, lay your screed board across them, and pull it toward you to create a flat, consistent surface. Remove the pipes and fill the channels with sand. Do not compact the bedding sand at this stage. It should be loose and about 1 inch deep uniformly across the patio. Screeding the curved area is easiest if you work in sections, radiating outward from the center.
Step 6: Lay the pavers
Start from the flat edge at the house and work outward toward the arc. For a fan or running-bond pattern, establish your first course along the diameter line, then lay subsequent courses in arcs. Keep joint gaps consistent (typically 1/8 to 3/16 inch). As you approach the curved edge, you'll need to cut pavers to fit the arc. Mark each cut paver individually by laying it in position over the edge restraint and tracing the cut line with a pencil, then cutting with a wet saw or angle grinder fitted with a diamond blade. Safety glasses and hearing protection are mandatory here. Check every few rows with a level to verify you're maintaining your drainage slope.
Step 7: Compact the pavers and fill joints
Sweep polymeric jointing sand across the paver surface, working it into the joints with a push broom. Then run the plate compactor over the entire surface (use a rubber pad or rental compaction pad to protect the paver faces). Compact in two passes in perpendicular directions. Sweep on a second application of polymeric sand and compact again. Finally, activate the polymeric sand by spraying the surface with water from a garden hose nozzle set to a fine mist. Follow the sand manufacturer's timing instructions. Let it cure for 24 hours before foot traffic and 48 hours before moving furniture onto the surface.
Step-by-step: building a poured-concrete semi-circle patio
Step 1: Excavate and prepare the base
Follow the same excavation steps as for the paver method, but your total depth is simpler: 4 inches of compacted gravel base + 4 inches of concrete = 8 inches. Build in the same 1/4-inch-per-foot drainage slope on the base surface. Compact thoroughly. Install an isolation joint strip (1/2-inch closed-cell foam) against the house wall to allow the slab to move independently from the foundation.
Step 2: Build the curved formwork
The curved arc form is the most distinctive part of a concrete semi-circle pour. Rip 1/4-inch plywood or hardboard into strips 4 inches wide (matching your slab thickness). Wet the strips slightly if they resist bending. Drive 2x2 stakes every 12–18 inches around the outside of your marked arc, leaving room for the form board to sit between the arc line and the stakes. Screw the form strip to the inside face of the stakes, following the arc line precisely. For very tight curves (radius under 6 feet), use two layers of 1/8-inch hardboard, bending and screwing each layer to the stakes. The form board top should sit exactly at your planned finished slab height. The flat (diameter) edge form is a simple straight 2x4 board staked along the house wall.
Step 3: Install reinforcement
Lay wire mesh (6x6 W1.4xW1.4) or rebar (#3 bars on an 18-inch grid) over the base within the form. Place rebar chairs or small flat stones under the mesh to hold it at mid-slab depth (about 2 inches from the bottom). Overlap mesh sections by at least one full grid square. Cut the mesh to fit within 2 inches of the form edges on all sides.
Step 4: Pour and screed the concrete
Order a minimum 3,000 psi mix for moderate climates, 4,000 psi for freeze-thaw zones. Refer to ACI 302.1R, Guide: mix strength, slump, and curing recommendations for slabs for detailed guidance on specifying concrete compressive strength, slump, and curing practices for slabs blank" rel="noopener noreferrer">ACI 302.1R — Guide: mix strength, slump, and curing recommendations for slabs. Have helpers ready. Pour concrete starting at the far arc end and work back toward the house. Fill the form completely, slightly overfilling by about 1/2 inch. Screed with a straight board dragged across the form tops to level the surface. Use a bull float to further smooth and consolidate the surface, working in arcs that follow the semi-circle shape. The arc form board makes a perfect curved screed guide on one side.
Step 5: Finish, cut joints, and cure
Once the bleed water has evaporated and the surface will hold a footprint without sinking, finish with a hand float and then a broom for texture. A broom finish drawn in arcs that follow the semi-circle's shape looks particularly good. Cut control joints radiating from the center point at no more than 8–12 foot intervals, at least 1 inch deep (one quarter of the 4-inch thickness), within 4–12 hours of the pour. Begin curing immediately after finishing: cover with plastic sheeting or apply a curing compound. Keep covered for at least 7 days. Remove forms after 24–48 hours. Do not apply heavy loads for at least 7 days.
Troubleshooting: the problems you're most likely to hit
Water pooling on the patio
This almost always means the base wasn't sloped enough during installation, or high spots on individual pavers are creating small bowls. For pavers, lift the affected units, add or remove bedding sand, and reset. For concrete, pooling is harder to fix after the fact; you may need to apply a resurfacing compound or cut a shallow channel drain at the low point. Prevent this entirely by checking your slope with a level every few courses during construction.
Pavers sinking or shifting
Sinking usually means insufficient base compaction or a soft spot in the subgrade. Lift the sunken pavers, dig out the area, add aggregate, compact thoroughly, replace the bedding sand, and reset. Shifting at the curved edge means the edge restraint spikes are inadequate. Pull and replace with longer 12-inch spikes driven at a steeper angle, or add a troweled concrete collar on the outside of the edging.
Uneven arc edges and gaps
If your arc looks wobbly rather than smooth, the issue was with marking. Use a flexible garden hose to draw a fairer curve before cutting pavers or setting edging. For existing wavy edges, you can usually smooth them out by carefully re-cutting individual border pavers to a true arc line using the string-compass technique with a scribed mark directly on the paver surface.
Concrete cracking
Cracks in a poured slab almost always originate from one of three things: control joints not cut early enough, inadequate curing, or subgrade settlement. Hairline cracks less than 1/16 inch wide are cosmetic and can be filled with a concrete crack sealant. Wider cracks or cracks that step up indicate movement and need investigation. In freeze-thaw climates, cracks that weren't sealed will widen over winter from ice expansion, so seal promptly in the fall.
Finishing, sealing, and maintenance
Paver patios benefit from a penetrating sealer applied after the polymeric sand has fully cured (typically 30 days). Sealer protects against staining, makes cleaning easier, and enhances color. Reapply every 3–5 years. Poured concrete patios should also be sealed after full cure with a penetrating masonry sealer or a topical acrylic sealer. Every few years, check your paver joints and top up the polymeric sand where it has eroded. Check the edge restraint spikes annually and hammer down any that have lifted. Re-level any settled pavers before winter in freeze-thaw climates.
Permits, safety, and a quick cost summary
Permit requirements for patios vary significantly by municipality. Most building departments require a permit review if your patio is attached to the house structure, sits within a setback zone, triggers impervious surface thresholds (often starting around 1,000 square feet of cumulative impervious area on your lot), or if your project affects stormwater drainage. Always check before you dig. Unpermitted work can complicate home sales and may require costly removal. Safety basics: call 811 before any excavation, wear eye and ear protection during cutting, use gloves with concrete (it causes chemical burns on prolonged skin contact), and never operate a plate compactor on a steep slope without footing.
| Project Size | DIY Paver Cost (materials) | DIY Concrete Cost (materials + forming) | Contractor Installed (rough estimate) |
|---|---|---|---|
| 6 ft radius (~57 sq ft) | $400–$800 | $350–$600 | $1,500–$2,800 |
| 10 ft radius (~157 sq ft) | $900–$2,000 | $800–$1,500 | $3,500–$6,500 |
| 14 ft radius (~308 sq ft) | $1,600–$3,500 | $1,500–$2,800 | $6,000–$12,000 |
DIY saves you roughly 50–70% compared to contractor pricing. The biggest variables in your budget are the paver style you choose, local aggregate prices, and whether you need to rent equipment. Factor in about $150–$200 for a full day of equipment rentals (plate compactor and wet saw). If this is your first curved patio project, starting with a 6-foot or 8-foot radius gives you a manageable area to practice the arc-cutting and edge-forming techniques before committing to a larger build.
FAQ
What permits, codes, and local regulations must I check before planning a semi‑circle patio?
Check municipal building and planning departments for permits or plan reviews triggered by new patios that change setbacks, increase impervious surface beyond local thresholds, alter drainage, or attach to structures. Review local stormwater/impervious‑surface ordinances for numeric thresholds (often ~1,000 ft² or local value) and submittal requirements. Consult your local building code office for frost‑depth/foundation rules, egress/fire, and utility locate requirements. Useful references: local municipal code (Municode), your city’s building department guidance, and examples such as Seattle SDCI residential code.
What frost, foundation, and soil standards affect patio design?
Follow local frost‑depth requirements (IRC R403 and local amendments). If frost protection is required, use conventional footings below frost depth or consider frost‑protected shallow foundation approaches per IRC R403.3 (requires insulation details and Air Freezing Index or local frost depth data). For load‑bearing soils, use compaction testing and target compaction levels (see ASTM D698/D1557). For patios supported on granular base, ensure subgrade is stable, uncompromised organic material removed, and base compaction meets spec (ICPI/CMHA guidance recommends ≥98% Standard Proctor for pedestrian areas).
What slope and drainage standards should I design for?
Slope patio slabs and paved surfaces away from the house—recommended minimum is 1/4 in/ft (≈2%) per Building America/PNNL guidance; where constrained a minimum of 1/8 in/ft (≈1%) may be acceptable with alternate drainage. Use NOAA Atlas 14 precipitation data for sizing drains, channel drains, and infiltration features in accordance with local stormwater rules. Ensure positive drainage paths, avoid creating concentrated flows onto neighbors’ properties, and provide runoff management per local stormwater ordinances.
What base, bedding, compaction, and edge restraint specifications are required for paver patios?
For pedestrian paver patios follow ICPI/CMHA guidance: compacted aggregate base typically 4 in (100 mm) minimum (increase for poor soils or vehicle loads), clean coarse aggregate (washed crushed stone), a 1 in (25 mm) compacted coarse‑sand bedding layer, and an appropriate edge restraint (plastic/metal/troweled concrete) anchored to resist lateral movement. Compact base in lifts to target ≥98% Standard Proctor (ASTM D698) and verify with compaction testing if required. Use pavers meeting ASTM C936 for material quality and thickness per use (≈60 mm for pedestrian, ≈80 mm for heavier loads).
What concrete slab thickness, reinforcement, and jointing standards apply to poured concrete patios?
Industry guidance (ACI 302.1R and PCA) recommends a minimum slab thickness of 4 in (100 mm) on a well‑prepared base for pedestrian patios. Reinforcement (welded wire mesh or rebar) is project‑dependent—use reinforcement to control cracking over poor subgrades or where loads demand it. Control/contraction joint spacing: a common rule is 2–3 times slab thickness in inches (4 in slab → ≈8–12 ft spacing). Saw‑cut joints should be at least 1/4 of slab thickness depth and cut early enough (timing per ACI depending on conditions). Specify concrete compressive strength (commonly 2,500–4,000 psi for exterior slabs) and curing procedures (moist cure or curing compound per ACI).
Which industry standards and technical resources should I cite when writing the guide?
Primary standards/resources to cite: International Residential Code (IRC) Chapter 4 (foundations, frost protection), ACI 302.1R (concrete slabs), ASTM standards (ASTM D698/D1557 for compaction testing, ASTM C936 for pavers), CMHA/ICPI installation/specification guides (paver base, bedding, edge restraints, compaction), NOAA Atlas 14 (rainfall frequency), local municipal codes and stormwater ordinances, and Building America/PNNL guidance on slab slope and drainage. Use manufacturer literature for specific paver/concrete product properties and local utility/permit office for local rules.