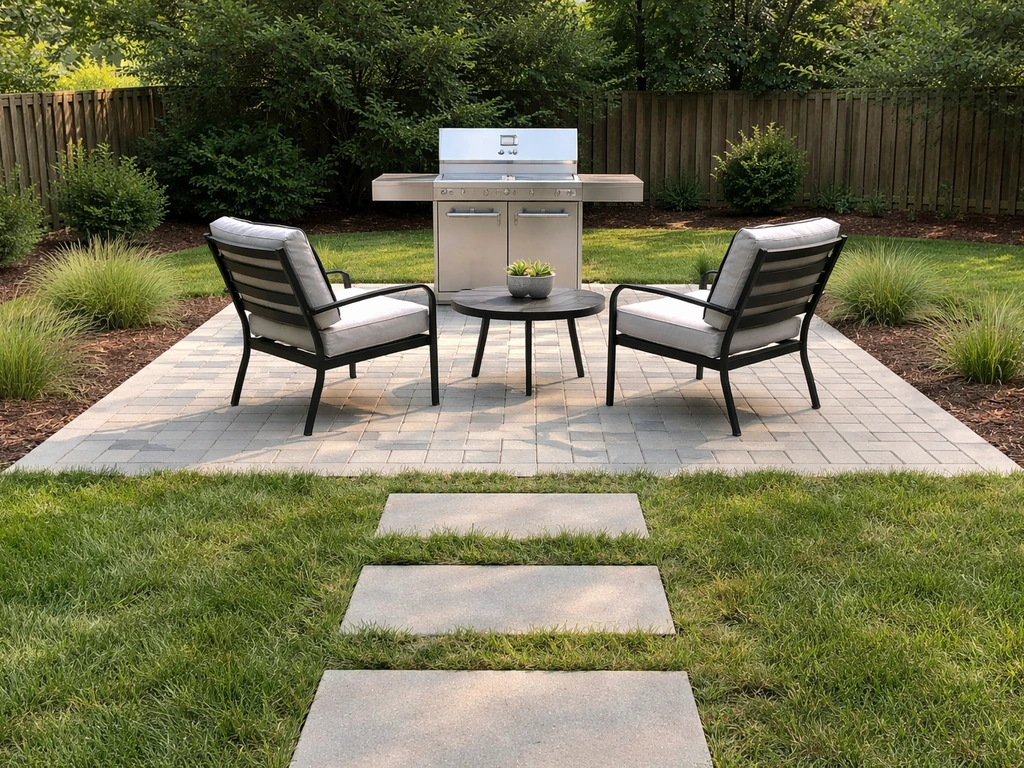
You can turn a backyard into a patio yourself in a weekend or two, depending on size. The basic process is: pick your spot, measure it out, check for utilities, excavate 6–8 inches, compact a gravel sub-base, add a layer of setting sand or concrete, lay your surface material, and finish with edging. Do it right and it lasts 25–50 years. If you want a covered patio, plan the roof structure, overhead clearance, and drainage paths before you finalize the patio layout. Skip the base prep and you'll be pulling up sunken pavers in three years.
How to Turn Backyard into Patio: DIY Step by Step

Nolan Carver
27 Jun 2026
This guide walks you through every stage, from choosing your patio style to the final joint sand sweep. Whether you're working with a blank patch of grass or an awkward sloped yard, the fundamentals are the same. If you follow this step-by-step approach, you'll learn how to build a back patio that suits your space and stays stable for years backyard into a patio.
Decide what kind of patio fits your backyard
Before you touch a shovel, take 20 minutes to think through what you actually need. A patio that works for a grill and two chairs is completely different from one that needs to handle a dining table, fire pit, and foot traffic from a back door. The three questions that matter most are: how much space do you have, how is the ground shaped, and what do you plan to do on it?
For most backyards, a simple ground-level patio is the easiest build and the right starting point. If your yard slopes significantly (more than 6 inches over 10 feet), you'll either need to regrade, build a raised patio with retaining walls, or tier it in sections. Flat or gently sloping yards are ideal for a standard paver or concrete slab project. Heavily shaded spots, tight side yards, or areas with existing tree roots add complications worth knowing about before you commit to a location.
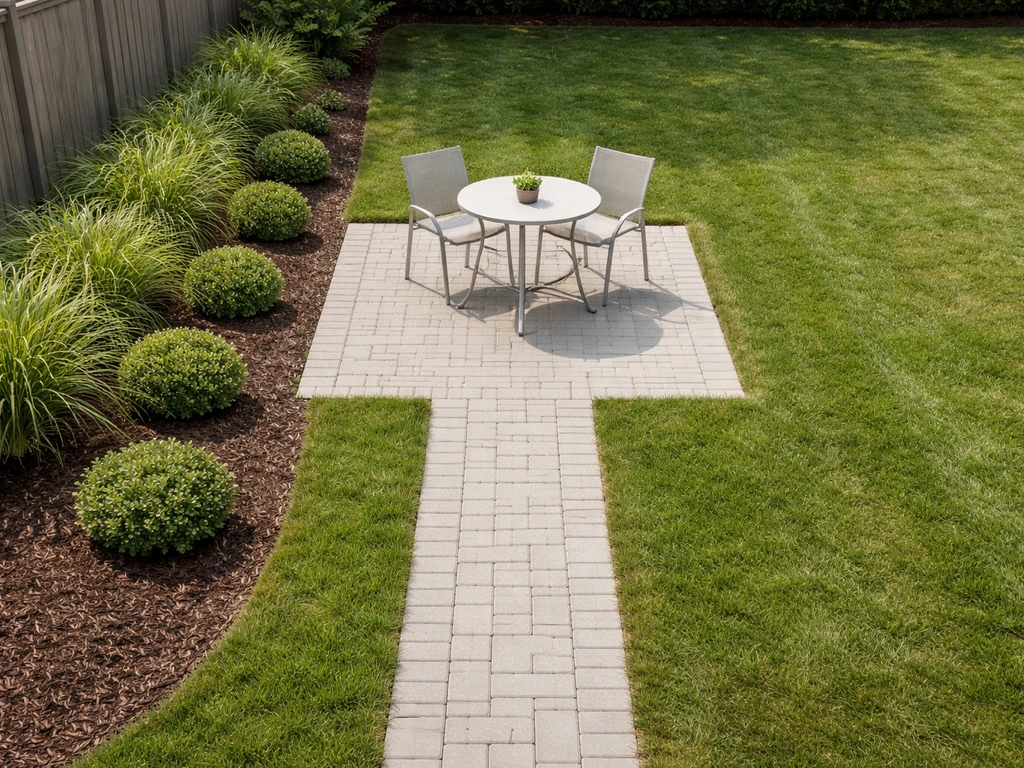
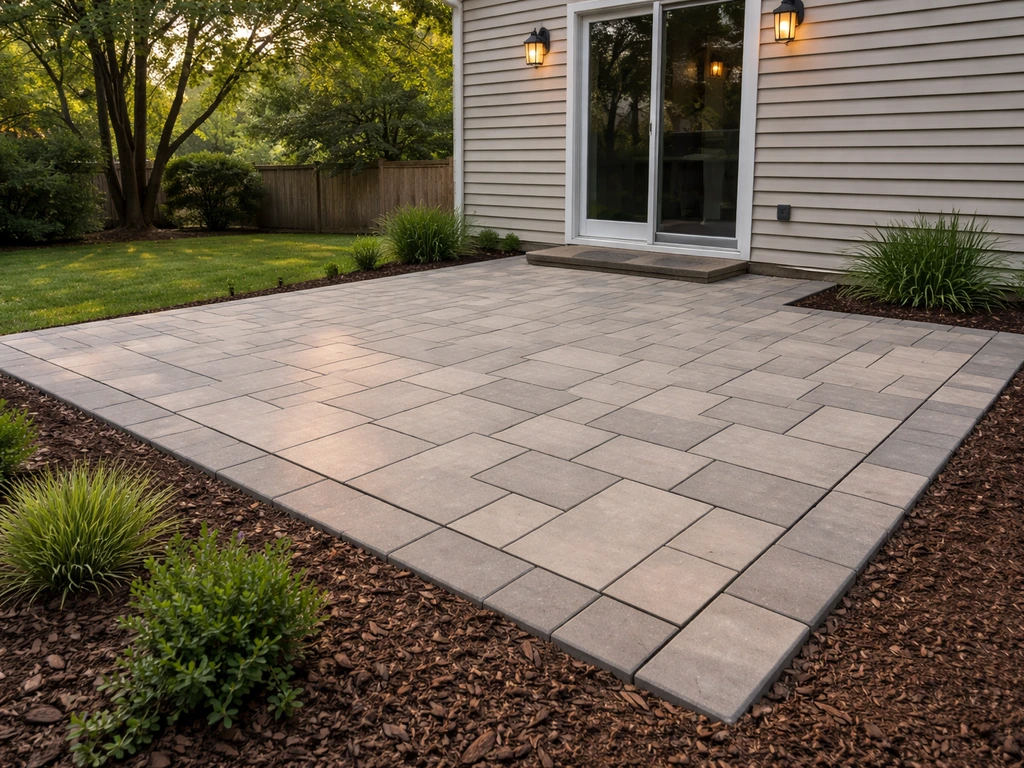
Think about traffic flow too. The best patio locations are directly accessible from the house (back door, sliding glass door, French doors) without a long walk across the lawn. Ideally your patio hugs the house or sits just off it, so it becomes a natural extension of your indoor living space rather than an island in the yard. With a clear plan for measurements, drainage, and surface materials, you can follow a step-by-step approach to how to make a back patio.
- Ground-level slab or paver patio: best for flat or gently sloped yards, beginner-friendly, no structural engineering needed
- Raised patio: needed when slope exceeds 6 inches across the space, adds complexity and cost but levels the surface
- Freestanding garden patio: works as a separate lounge or fire pit zone away from the house, great if the best sun is mid-yard
- Covered patio/pergola base: same build process as any patio, but footings and post placements must be planned before you lay anything
Plan your layout: measurements, pattern, and permits
Measure your intended space with a tape measure and mark it out with spray paint or stakes and string. If you want the right starting point, learn how to design a backyard patio by choosing the size, layout, drainage plan, and surface material that match your space and goals. A 10x12 foot patio (120 sq ft) comfortably fits a small table and four chairs. A 12x16 foot space (192 sq ft) gives you room for a dining set plus a grill station. If you want a lounge area and a dining area together, think 16x20 or larger. Don't design too small. One of the most common regrets homeowners have is building a patio that feels cramped once the furniture goes in.
Once you have your footprint, decide on your surface pattern. For pavers, running bond (like brick) is the easiest pattern to lay and the most forgiving for beginners. Herringbone is stronger and more interlocking, which is better for driveways or high-traffic areas but takes more cutting. Basketweave and random flagstone patterns are purely aesthetic choices. For a first patio, running bond or a simple grid pattern will save you time and cut waste.
Before you dig, call 811 (in the US) to have underground utilities marked. This is free and required by law before any excavation. Do it at least 3 business days before you start. Gas lines, electrical conduits, and irrigation pipes run through backyards more often than you'd expect, and hitting one is both dangerous and expensive.
Check your local permit requirements. Rules vary widely: Seattle, for example, requires a grading permit for paved surfaces of 750 square feet or more. Portland directs homeowners to contact Planning and Zoning before adding any concrete patio on grade. Many cities have similar thresholds. If you live in a neighborhood with an HOA, check their rules before breaking ground too. Setback requirements (how close you can build to a property line) typically range from 3 to 10 feet depending on your municipality.
Site prep and grading for drainage
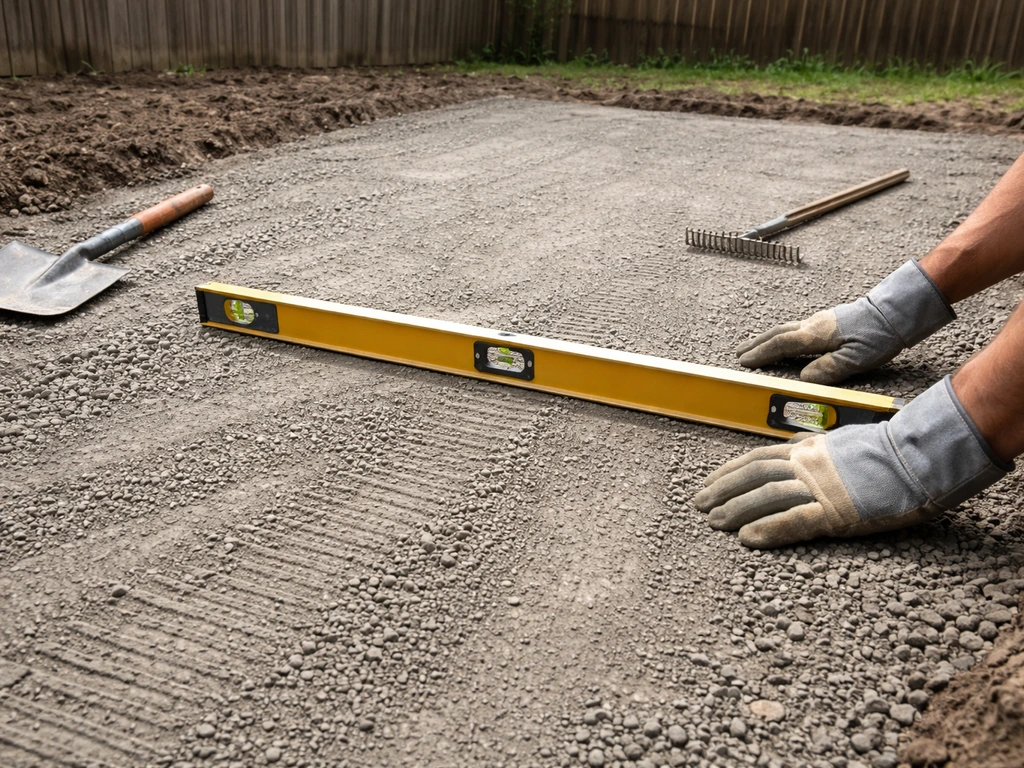
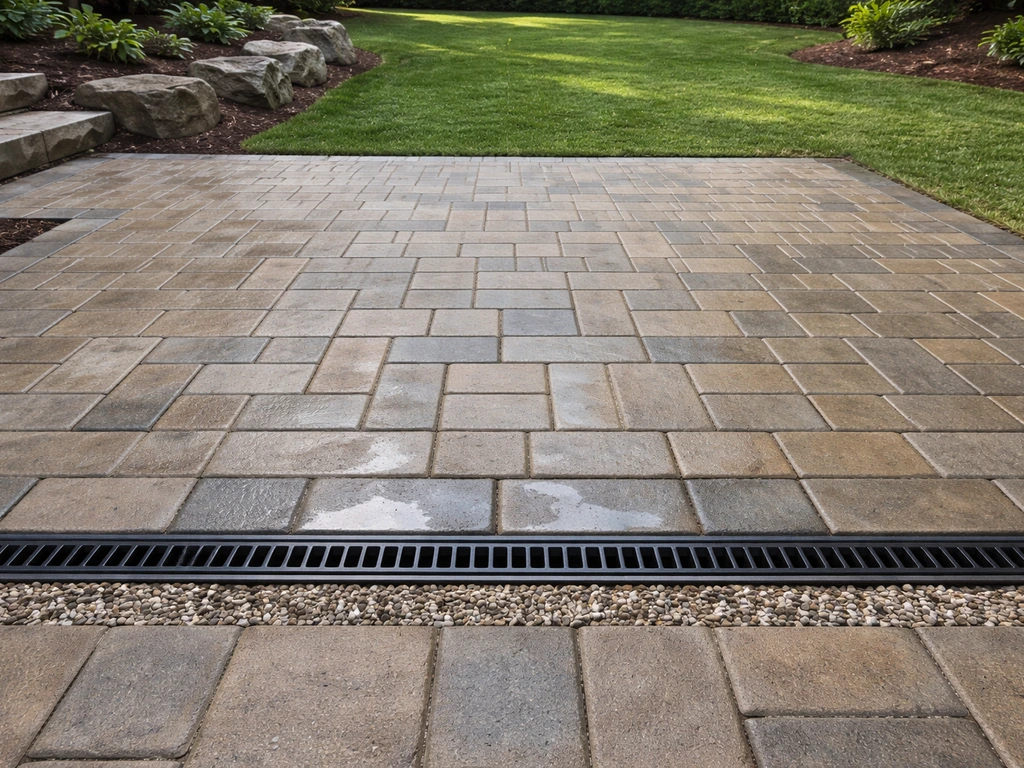
Drainage is the thing most first-time patio builders get wrong, and it's the reason patios fail. Water that has nowhere to go will pool on the surface, seep under your base, freeze and heave in cold climates, and eventually undermine everything you built. The fix is simple but non-negotiable: your patio must slope away from any structure at a rate of 1/4 inch per linear foot, which works out to roughly a 2% grade.
That means for every 10 feet of patio depth, the far edge should sit about 2.5 inches lower than the edge against your house. This is gentle enough that you won't notice it visually, but it's enough to push water away from your foundation every time it rains. A fully flat patio almost always ends up with puddles. Even if it looks fine at first, water pooling will erode your base over time.
To set your grade, use a string line and a line level or a 4-foot spirit level. Run a string from the house side to the outer stake and measure the drop. Adjust your sub-base and sand layer to maintain that grade as you build up. Getting this right during prep saves you from regrading later.
Strip the area of all grass, weeds, and organic material. You're removing living plant matter that will decompose under your patio and cause settling. Use a sod cutter (rentable for about $60–$80/day) for large areas or a flat spade for smaller ones. Remove at least 2 inches of topsoil beyond your excavation target so no organic material stays in the base zone.
Base and foundation build: excavation, sub-base, compaction, and leveling
This is the most physically demanding part of the project, and also the most important. A beautiful surface on a bad base will fail. A plain surface on a properly built base will last decades.
How deep to excavate
Your total excavation depth depends on your surface material. For concrete pavers (typically 2.375 inches thick), you need: 6 inches of compacted gravel base, plus 1 inch of bedding sand, plus the paver thickness. That's roughly 9.5 inches total. Dig to that depth, accounting for your finished surface height. In freeze-thaw climates (anywhere that gets hard frost), bump your gravel base to 8 inches minimum. Frost heave is the enemy of patios in cold regions, and more base depth is your best defense.
Sub-base material and compaction
Use crushed angular gravel (also called road base, Class II base rock, or compactable gravel) for your sub-base, not rounded pea gravel. Angular pieces interlock when compacted; rounded ones don't and will shift. Spread gravel in 2–3 inch lifts and compact each layer with a plate compactor before adding the next. Proper compaction of the concrete paver base, along with correct base depth, helps reduce settlement and improves long-term stability for interlocking concrete pavers compacting the gravel sub-base in layers. Don't dump all 6 inches in at once and run the compactor over the top. It won't compact properly through that depth and you'll end up with a loose layer underneath.
Rent a plate compactor for this step. It costs about $60–$100 per day and makes a real difference. A hand tamper is fine for small patches (under 20 sq ft) and tight edges, but for any full patio it won't give you enough compaction force. Make multiple passes in different directions over each gravel lift until the surface no longer compresses noticeably under the machine.
Bedding sand layer
On top of the compacted gravel, spread a 1-inch layer of coarse bedding sand (also called concrete sand). Don't use fine play sand or polymeric sand here. Screed the sand flat using two pieces of conduit or pipe laid parallel as guides, then drag a straight 2x4 across them to pull a smooth, even surface. This layer is what lets you fine-tune your final paver height and make small leveling adjustments. Once screeded, don't walk on it before laying pavers.
Choose your surface material
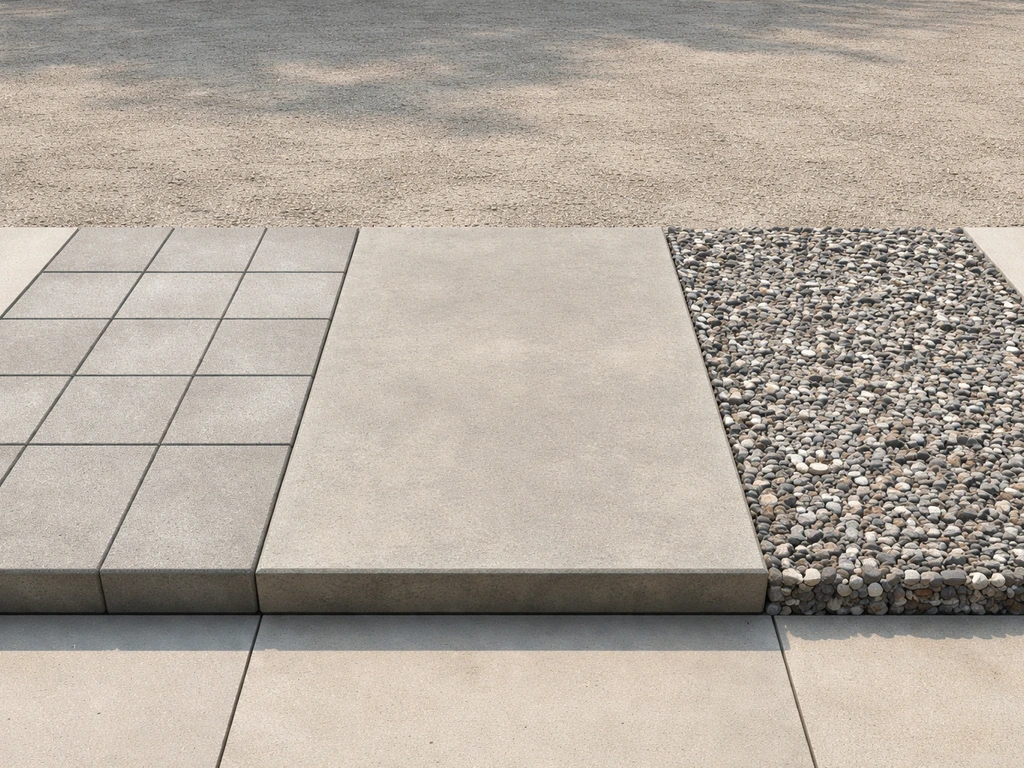
Your material choice affects cost, DIY difficulty, maintenance, and how the finished patio looks and feels. Here's how the main options compare:
| Material | DIY Difficulty | Typical Cost (installed DIY) | Durability | Best For |
|---|---|---|---|---|
| Concrete pavers | Beginner–intermediate | $8–$20/sq ft | 25–50 years | Most DIYers; repairable, versatile |
| Poured concrete slab | Intermediate–advanced | $5–$10/sq ft | 30+ years | Low-maintenance, smooth surface |
| Natural flagstone | Intermediate | $15–$30/sq ft | 30–50 years | Natural/rustic look, irregular shapes |
| Gravel/decomposed granite | Beginner | $2–$5/sq ft | 5–10 years (with upkeep) | Budget builds, informal spaces |
| Brick | Intermediate | $10–$25/sq ft | 30–50 years | Traditional look, classic patterns |
| Rubber or composite pavers | Beginner | $6–$15/sq ft | 10–20 years | Easy DIY, softer underfoot, pool areas |
For most DIYers turning a backyard into a patio for the first time, concrete pavers are the best choice. They're forgiving: if you set one wrong, you lift it and reset it. They don't require mixing or pouring. They come in consistent sizes and thicknesses, which makes base prep straightforward. And if one cracks in 10 years, you replace just that one piece rather than patching a slab.
Poured concrete is cheaper per square foot but much less DIY-friendly unless you have experience with formwork and concrete finishing. It also cracks over time and repairs are visible. Flagstone looks great but requires more time fitting irregular pieces and cuts the design freedom a bit since you're working with natural shapes. Gravel is fast and cheap but not ideal as a main entertaining surface since furniture sinks and it migrates over time.
Step-by-step patio construction process
- Mark out your patio footprint with stakes and string or spray paint, adding 6 inches on each side to give yourself room to work.
- Call 811 to have utilities marked. Wait the required 3 business days before digging.
- Strip all vegetation and topsoil from the area using a sod cutter or flat spade. Remove at least 2 inches past your gravel depth.
- Excavate to your target depth: 9–10 inches for standard pavers in mild climates, 11–12 inches in freeze-thaw zones.
- Set your grade stakes to mark the 1/4 inch per foot slope away from the house. Check with a string level across your perimeter.
- Install landscape fabric over the excavated soil to suppress weeds. This is optional but recommended.
- Add your first 2–3 inch lift of crushed angular gravel. Wet it lightly if dry, then compact thoroughly with a plate compactor. Repeat until you reach your target gravel depth (6–8 inches compacted).
- Check your grade again after compaction. Gravel compresses and your slope may need minor adjustment.
- Install your edging restraints (plastic paver edging or metal edging) along the perimeter before adding sand. Secure with 10-inch landscape spikes every 12 inches.
- Spread 1 inch of coarse bedding sand over the compacted base. Screed flat using pipe guides and a straight 2x4. Do not walk on screeded sand.
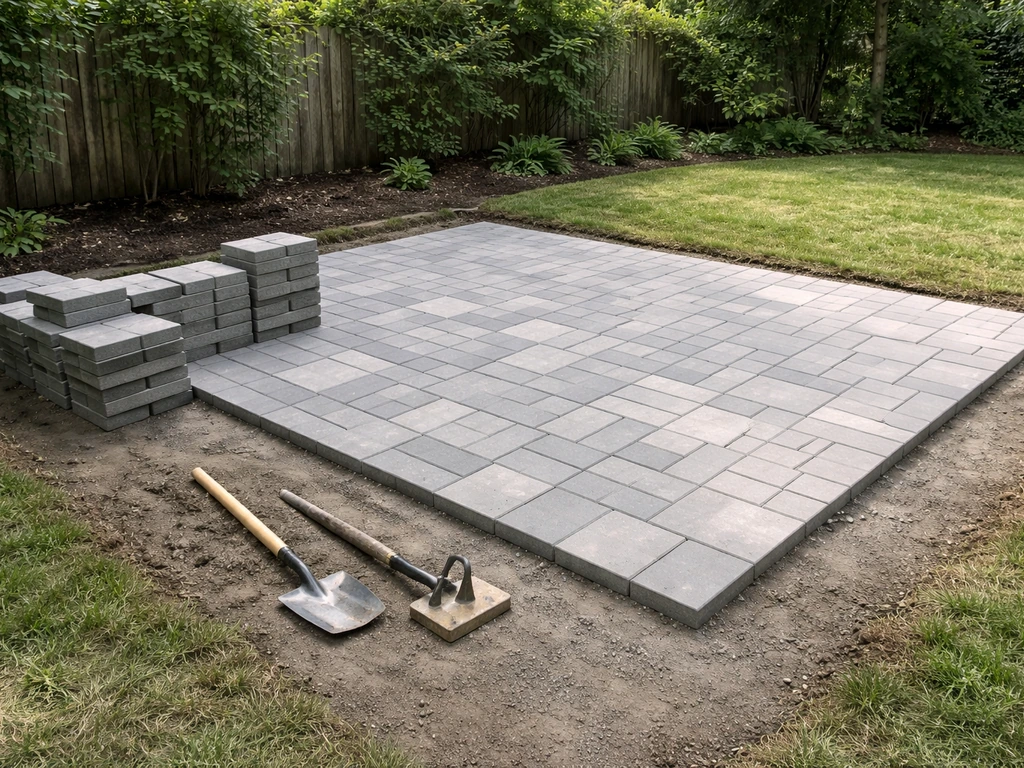
- Start laying pavers from the corner closest to your house, working outward. Set each paver flat without pressing or rocking it into the sand. Use a rubber mallet to seat each paver firmly.
- Check for level frequently using a spirit level across 3–4 pavers. Adjust individual pavers by lifting, adding or removing sand underneath, and resetting.
- Maintain consistent joint gaps (typically 1/8 to 3/16 inch for manufactured pavers) using spacers or by eye for natural materials.
- Cut border pavers to fit using a circular saw with a diamond blade, an angle grinder, or a rented paver splitter.
- Once all pavers are laid, run a plate compactor over the entire surface to seat everything firmly. Put a rubber pad or piece of carpet under the compactor plate to protect paver surfaces.
- Sweep polymeric sand into all joints. Blow off excess, then lightly mist with water to activate the binders. Repeat this step once more after 24 hours.
Edging, finishing details, and troubleshooting common issues
Edging options and why they matter
Edging holds your pavers in place along the perimeter. Without it, the outer rows will gradually migrate outward, gaps open up, and the whole surface starts to look ragged within a few years. Plastic snap-in paver edging is inexpensive (around $1–$2 per linear foot) and works well for standard residential patios. Aluminum edging is more rigid and better for curved shapes. Steel edging is the most durable option and preferred for large installations. Concrete haunching (a thin concrete border poured against the outer pavers) is the most permanent solution but harder to DIY without some experience.
Finishing touches
Once the patio is laid and jointed, think about what makes it livable. A few things worth doing while the space is clear: plan your lighting before you add furniture. Low-voltage paver lights can be set directly into paver joints and run on a transformer plugged into an outdoor outlet. If you don't have an outdoor outlet close by, this is a good time to have one added (a licensed electrician can typically run an outdoor GFCI outlet for $200–$400). If you want string lights overhead, install the anchor posts now before furniture makes access awkward. For seating zones, define areas with an outdoor rug, a raised planter, or a simple fire pit to give the space structure without additional hardscaping.
Troubleshooting common problems
- Uneven settling or sunken pavers: Usually caused by insufficient compaction or organic material left in the base. Fix by lifting affected pavers, adding or removing sand, and resetting. If multiple pavers in an area keep settling, the gravel base below needs rework.
- Water pooling on the surface: Almost always a slope/grade problem. You either don't have enough fall away from the house or one area of the patio is low. For minor pooling, you can sometimes re-level individual pavers. For widespread pooling, you may need to regrade the base.
- Weeds growing between pavers: Usually from windblown seeds landing in joints, not from below. Polymeric sand prevents most of this. For existing weeds, pull them and reapply polymeric sand. Landscape fabric under your base helps with deep-rooted intrusion from below.
- Pavers shifting outward at edges: Your edging stakes have worked loose or edging was installed without enough spikes. Pull the edging back tight, re-spike at 8–10 inch intervals, and refill gaps with polymeric sand.
- Frost heaving in cold climates: Pavers rising and shifting in spring is a sign your base is too shallow or retains too much moisture. In freeze-thaw zones, 8 inches of compacted gravel is the minimum. Proper drainage slope also helps by keeping water from sitting in the base.
Budget, timeline, and your materials + tools checklist
What it costs
A basic DIY concrete paver patio typically runs $8–$15 per square foot for materials, depending on your paver choice and local gravel prices. A 12x16 foot patio (192 sq ft) usually comes in at $1,500–$3,000 in materials including pavers, base gravel, sand, edging, and polymeric sand. The same patio professionally installed would run $4,000–$8,000 or more. You're doing it yourself to save that gap.
| Item | Estimated Cost (12x16 patio) |
|---|---|
| Concrete pavers (192 sq ft + 10% waste) | $600–$1,400 |
| Crushed gravel base (6–8 inches, ~5–6 tons) | $200–$350 |
| Bedding sand (1 inch, ~1.5 tons) | $60–$100 |
| Polymeric sand (joints) | $40–$80 |
| Paver edging + spikes | $50–$80 |
| Landscape fabric | $20–$40 |
| Plate compactor rental (1–2 days) | $120–$200 |
| Sod cutter rental (half day) | $40–$80 |
| Miscellaneous (stakes, string, spray paint) | $15–$25 |
| Total estimate | $1,145–$2,355 |
Budget-friendly tip: the biggest cost variable is your pavers. Basic 12x12 or 16x16 concrete pavers from a big box store run $1–$3 each. Tumbled or architectural pavers cost $3–$6 each. Natural stone starts at $5–$10 per square foot and goes up sharply. If budget is tight, go with standard concrete pavers and put the savings into a better base. A plain paver on a perfect base will outlast a fancy one on a bad one.
How long it takes
A 12x16 foot paver patio typically takes two full weekends for one or two people with no prior experience. Weekend one covers marking, excavation, and base work. Weekend two covers screeding, laying pavers, cutting, and finishing. If you have two or three people helping, you can often compress it into one long weekend. The work is physical but not technical. The main time drains are compacting in proper lifts (you can't rush this) and cutting pavers to fit borders.
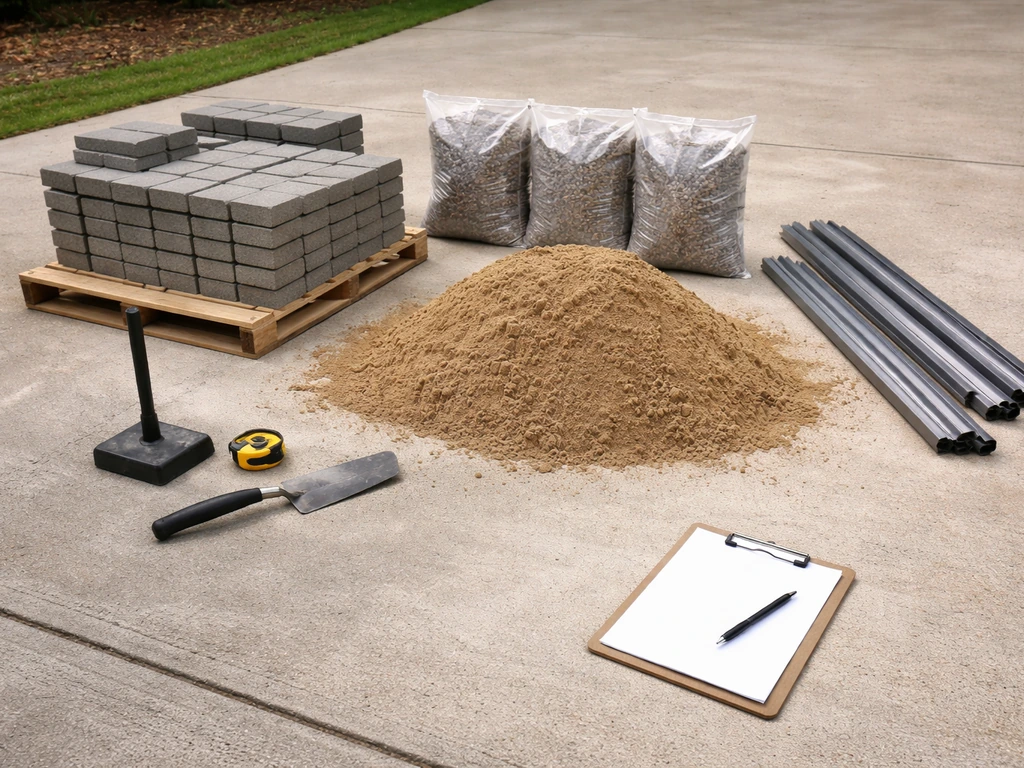
Tools and materials checklist
- Measuring tape (25 ft minimum)
- Stakes and string line
- Line level or spirit level (4 ft)
- Spray paint or chalk for marking
- Flat spade and garden spade
- Wheelbarrow
- Sod cutter (rental)
- Plate compactor (rental)
- Hand tamper (for edges and small areas)
- Screed pipes (two 10-foot sections of 1-inch conduit or pipe)
- Straight 2x4 board (screed board, 8–10 feet long)
- Rubber mallet
- Paver splitter or circular saw with diamond blade (rental or purchase)
- Safety glasses and hearing protection
- Work gloves
- Crushed angular gravel (road base)
- Coarse bedding sand (concrete sand)
- Pavers of your choice (plus 10% overage for cuts and breakage)
- Paver edging restraints and 10-inch landscape spikes
- Landscape fabric
- Polymeric sand
- Garden hose with mist setting (for activating polymeric sand)
- Broom (for sweeping sand into joints)
- Leaf blower (for clearing excess polymeric sand before wetting)
If you've worked through this guide, you have everything you need to start planning your build this week. Mark the space, call 811, order your materials, and book the equipment rental. The planning side of this project, including how to design the layout, size zones for furniture, and think through a covered version of the space, involves a few more decisions worth thinking through before you finalize your footprint. If you're planning how to make a backyard patio, the right layout, furniture zones, and optional covered area are key decisions before you finalize your footprint. Once the base is in and the surface is down, most of the remaining work is finishing details and you'll be sitting out there wondering why you waited so long.
FAQ
Can I build a patio right over existing concrete, pavers, or patio slabs?
Usually, no. If the old surface is cracked, settled, or sloped incorrectly, you can trap water and end up with uneven new pavers or a failing slab. The safer DIY approach is to remove unstable material back to solid base, then rebuild with the correct excavation depth, compacted gravel, and a drainage slope away from the house.
Do I need polymeric sand, or can I use regular joint sand?
Joint sand choice depends on your surface. Regular sand is often fine for lower-traffic patios and is easier to repair if joints wash out. Polymeric sand can lock joints better in some climates, but it requires strict moisture control during installation and can be harder to reset if you ever need to lift pavers.
What if my yard is already pretty flat, but it still puddles after rain?
That’s a sign the ground beneath (or near) the patio site is already holding water or draining toward your foundation. Before you dig, run a simple test by watching where water flows during a heavy rain (or using a garden hose) and choose your patio so runoff can move away from the house. If needed, adjust the grade plan or consider regrading outside the patio footprint.
How do I prevent pavers from settling or rocking after installation?
Rocking almost always comes from uneven compaction, insufficient base depth, or not maintaining the required slope during screeding. Use angular gravel, compact in 2 to 3 inch lifts, and keep bedding sand to the recommended depth. After installing, recheck the grade and tamp lightly with a plate compactor on a paver-protecting board (if your paver system allows it).
How should I handle tree roots near the patio area?
Roots can lift pavers and create voids over time. If you’re near active roots, either move the patio location, reduce excavation depth so you avoid major roots, or plan a raised/tiered approach. For large roots, consult a local arborist or follow municipal rules, especially if cutting is involved.
Is 811 enough, or should I do anything else before digging?
811 marks many underground utility lines, but it doesn’t guarantee you will find every irrigation line, low-voltage cable, or private conduit. Do a targeted check by calling out sprinkler zones, locating outdoor outlets, and reviewing any yard irrigation maps or as-built diagrams you have. Once marked, dig carefully by hand at the edges of the marked areas.
How do I choose the patio size if I’m unsure what furniture will fit?
Start with a layout that leaves working space, not just the footprint. For example, plan clearance around chairs and at least a small path between seating and the door. A practical method is to tape out the likely furniture dimensions on the ground and ensure you can open doors fully and still reach the grill or dining area without stepping across narrow gaps.
What edge type is best for a sloped or curved patio?
Curves generally do better with more flexible or rigid edging like aluminum, but stability still depends on proper base and bedding at the perimeter. For sloped layouts, consider an edging plus a haunching method, or tiered construction, so the outer rows cannot drift as the ground moves. Always plan the edge as part of your drainage and grade line, not as an afterthought.
Should I use a vibrating plate compactor on pavers?
Don’t compact directly on finished pavers without safeguards. Many installers compact the final surface only lightly and only with a compactor plate protection board, and in some cases they avoid vibrating after cutting joints are filled. The goal is to seat pavers without crushing bedding sand or disturbing grade.
What’s the safest way to cut pavers for tight borders?
Use a wet saw or angle grinder with the right blade for your paver type, and measure twice with the same string-line reference you used for grade. Dry cutting can create lots of dust, and cutting too aggressively can chip edges. Dry-fit a few pieces around the border so you don’t realize mid-run that your pattern or spacing won’t close neatly.
How do I maintain drainage after the patio is done?
Keep downspouts and surface runoff working the way your grading plan intended. After rain, check for any new pooling spots at patio corners or near doors. Avoid throwing extra soil or mulch right up to the edge, since burying the perimeter can redirect water into the base and accelerate settling.
What’s the easiest way to add a cover or pergola later without rebuilding the whole patio?
Plan now by installing anchor points or sleeves for posts while the patio is still accessible, ideally during base or after pavers are laid but before major finishing. If you install posts later by coring and digging, you risk disturbing the base and joint lines unless you re-excavate and rebuild around the holes. If you want a roof tied into the house, ensure you also plan for roof drainage so water doesn’t dump onto the patio surface.
Do I need a permit for a small patio, and what should I document?
Many municipalities have thresholds based on square footage, surface coverage, or whether the project changes drainage or grade. Before you build, confirm local requirements and keep simple documentation: your measured layout, grade plan (including slope away from the house), and material specifications. If you do get inspected, this makes it easier to show you followed the drainage and setback rules.