To design a backyard patio that actually works, start with your real space constraints, pick a size between 100 and 200 square feet for most small backyards, slope everything 1/4 inch per foot away from the house, and plan your zones (seating, circulation, garden) before you buy a single paver. That sequence matters more than any style decision you'll make later.
How to Design a Backyard Patio: Layout, Size, Zones

Nolan Carver
10 Jun 2026
Start with your goals and constraints
Before you sketch anything, get honest about what you actually want the patio to do. A dining space for six people has totally different size requirements than a lounge spot for two. Write down your top two or three uses: morning coffee, weekend grilling, kids playing, container garden. Then write down your limits: budget, existing trees or utility lines, HOA rules, whether you're on a slope, and how much maintenance you're willing to do long-term.
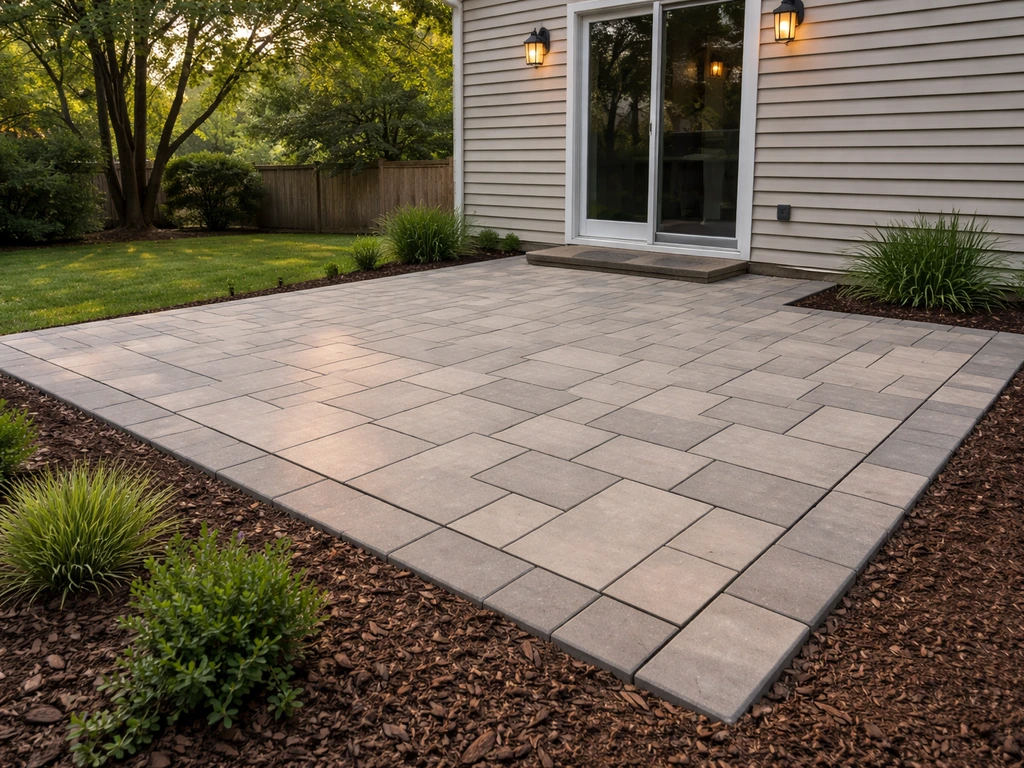
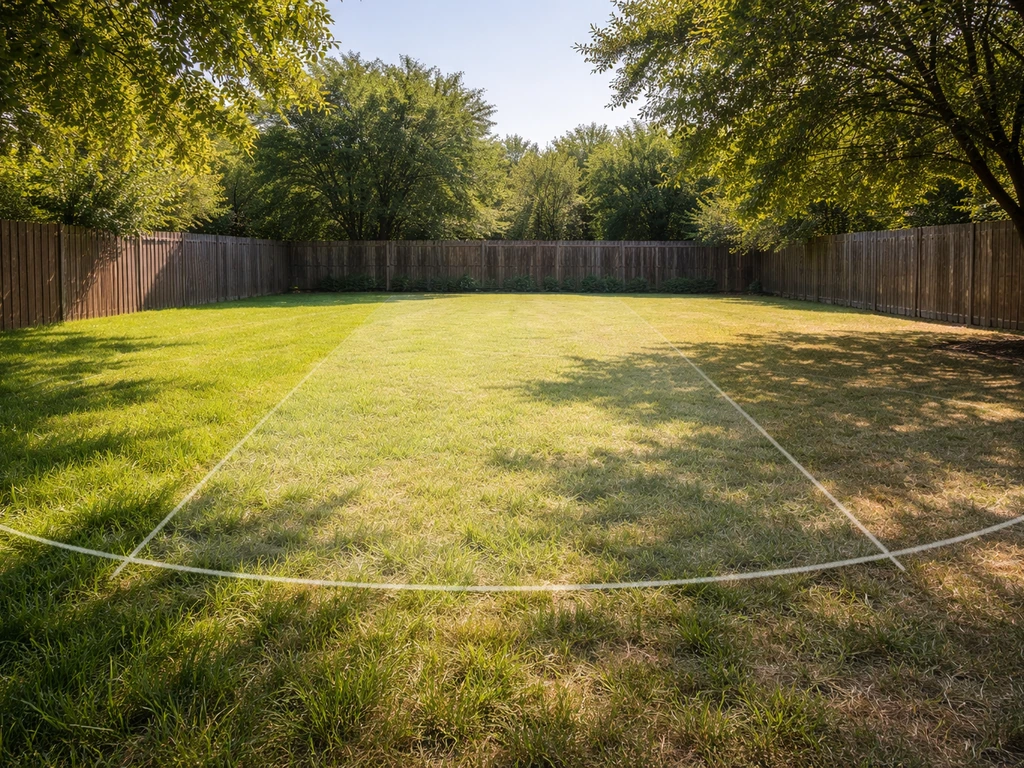
For a small backyard, the biggest constraint is usually square footage. It's tempting to try to fit everything, but a patio that's too cramped to move around in feels worse than a smaller one that's thoughtfully laid out. A 10x10 (100 sq ft) space works for one primary function: a bistro set or a lounge cluster, but not really both. If you want dining for six, plan for at least 150 to 180 square feet, which gets you something like a 10x15 or 12x15. The sweet spot for most small yards falls between 100 and 200 square feet total.
Also think about what you don't want to deal with. Gravel is cheap and easy to install but requires ongoing weed control, and furniture legs sink and wobble on loose stone. Concrete is durable but unforgiving if you get the slope wrong. Pavers give you flexibility and are genuinely DIY-friendly. If you want a step-by-step on the full process, see our guide on how to make a backyard patio for a complete DIY-friendly walkthrough. Know your tolerance for maintenance before you commit to a material.
Measure and map your site before designing anything
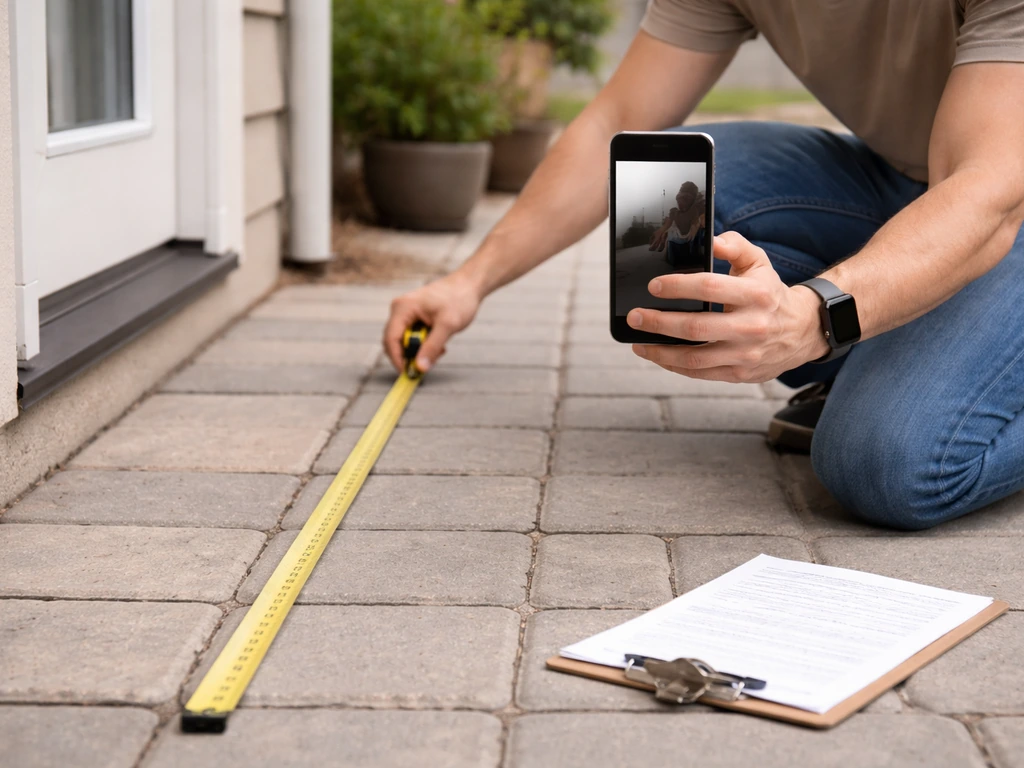
This step takes maybe an hour and saves you from expensive mistakes. Grab a measuring tape, a notepad, and your phone for photos. You're gathering four things: dimensions, sun and shade patterns, drainage behavior, and access points.
Dimensions and access
Measure the full usable area from your house wall outward and side to side. Note where doors, windows, and HVAC units are. The path from your door to the patio is your primary circulation route, and it needs to be at least 36 inches wide for comfortable solo use. If two people will walk side by side regularly, go 48 inches. The door threshold itself needs at least 32 inches of clear width when open, and ideally no step higher than half an inch at the transition from inside to outside. Getting that transition height right is one of those details that makes a patio feel polished versus clunky.
Sun, shade, and wind
Stand in your yard at three different times: morning (around 9 a.m.), midday, and late afternoon (around 4 p.m.). Note where the shade falls each time. South and west-facing spots get intense afternoon sun in summer, which can make a patio feel like an oven from 2 to 6 p.m. East-facing patios get pleasant morning light and shade by afternoon. If you're dealing with a covered patio design, this affects how much your roof needs to extend. Also note prevailing wind direction. A patio positioned behind a fence or structure on the windward side stays much more comfortable.
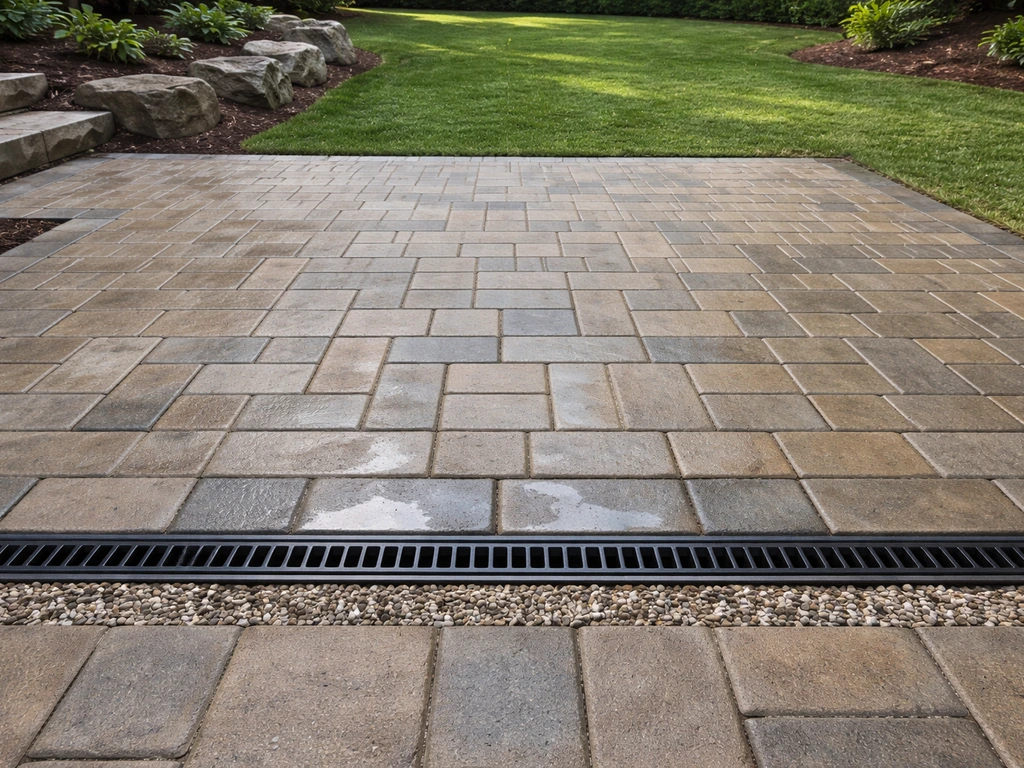
Drainage: the most important thing most people skip
Walk your yard after a rainstorm, or run a hose for a few minutes and watch where the water goes. Low spots that pool are problems. Any area that drains toward the house foundation is a serious problem. Your patio needs to slope away from the house at 1/8 to 1/4 inch per foot.
That sounds tiny, but over a 12-foot-deep patio it adds up to 1. 5 to 3 inches of elevation change from house to outer edge. Mark the high point (at the house) and low point (outer edge) with stakes and string to see what you're working with. A flat patio is one of the most common installation mistakes, and it leads directly to standing puddles, slippery algae, and eventually water getting under your foundation.
Choose your patio size, shape, and layout zones
Once you have your site measurements, you can make real decisions about size and shape. Here's a practical sizing guide based on common use cases.
| Patio Size | Approx. Sq Ft | Best Use | What Fits |
|---|---|---|---|
| 10x10 | 100 sq ft | One primary zone | Bistro set (2 chairs + table) or small lounge cluster |
| 10x12 or 12x12 | 120–144 sq ft | Small dining or lounge | 4-person dining set or sectional + coffee table |
| 10x15 or 12x15 | 150–180 sq ft | Dining for 6 or dual-zone | 6-person dining table or dining + small lounge nook |
| 14x14 or larger | 196+ sq ft | Multi-zone layout | Dining + lounge + grill alcove or garden beds |
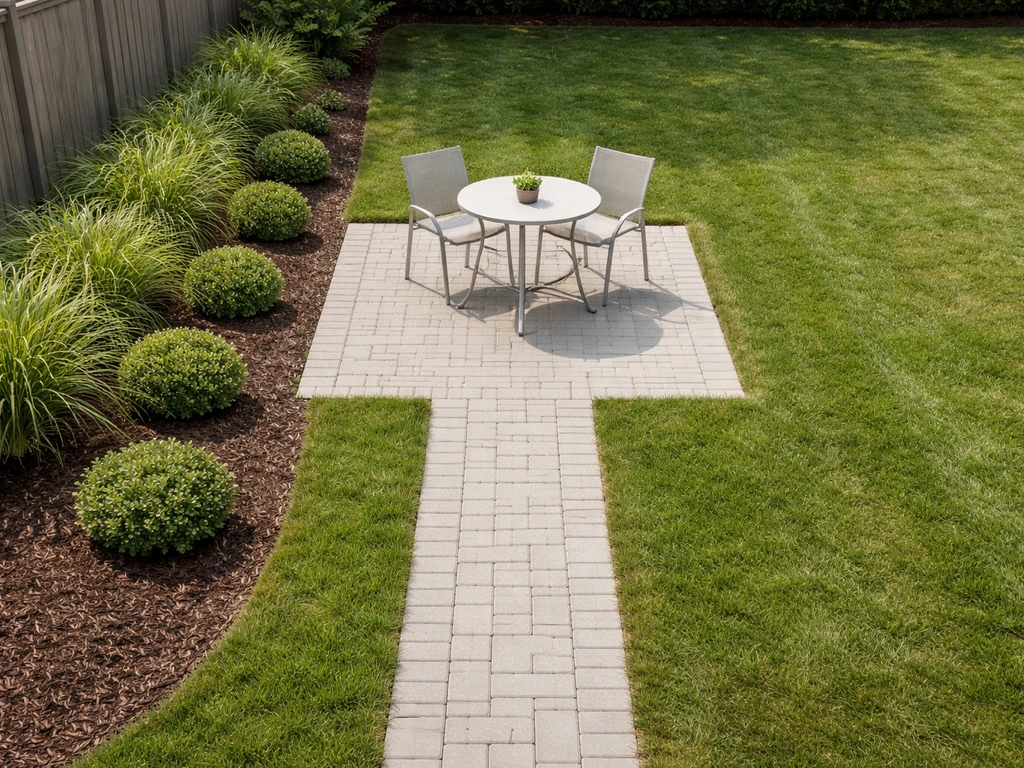
For shape, rectangles and squares are the easiest to build and the most efficient use of materials. L-shapes work well when you want to define two zones (like dining near the door and a lounge area toward the yard) without buying more total square footage. Curved edges look great but add complexity to layout and cutting, so if you're a first-time builder, stay rectangular and add curves later with planters or garden borders.
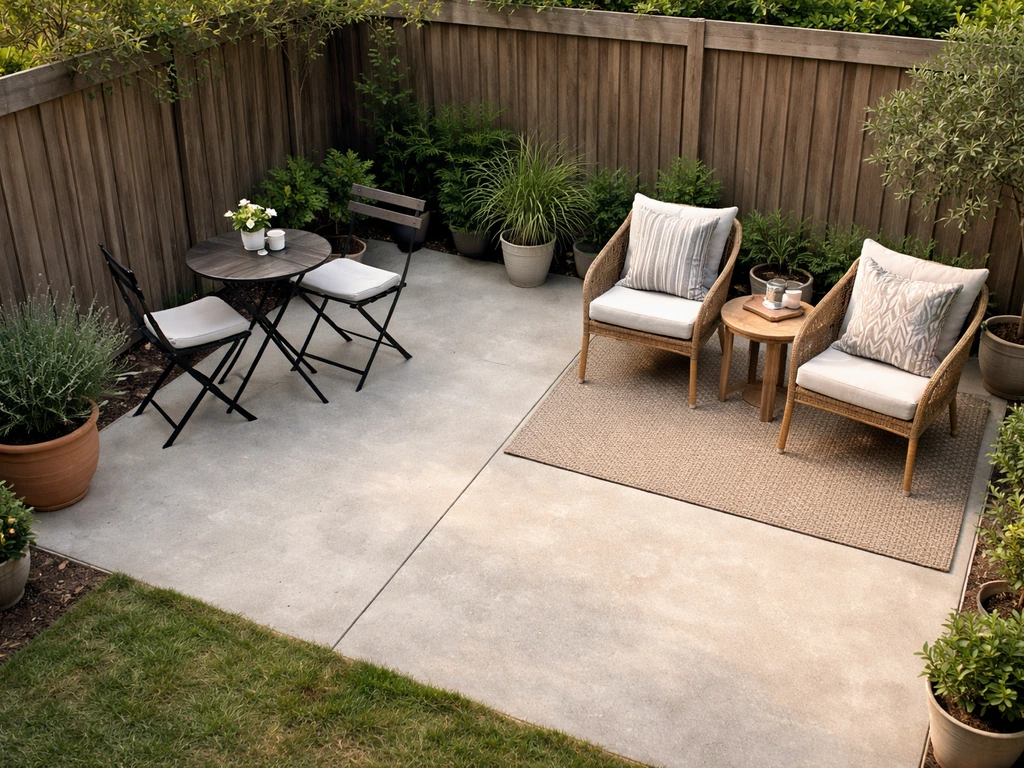
Planning your zones
Even a small patio benefits from thinking in zones. The basic three are: dining/seating, circulation (paths people actually walk), and a service or planting zone. Place your dining area closest to the kitchen door so you're not carrying plates across the whole yard. Position your lounge or fire pit zone toward the view or away from the neighbor's fence.
Put the grill on a service side with easy access but not directly in the path people walk. Keep main walkways at least 36 inches clear at all times, even when furniture is in place. On a 10x10 you'll likely only have room for one main zone plus a narrow circulation path. On a 12x15 or larger, you can genuinely separate dining and lounging without feeling cramped.
Design for comfort: seating, flow, privacy, and lighting
Seating and furniture clearances
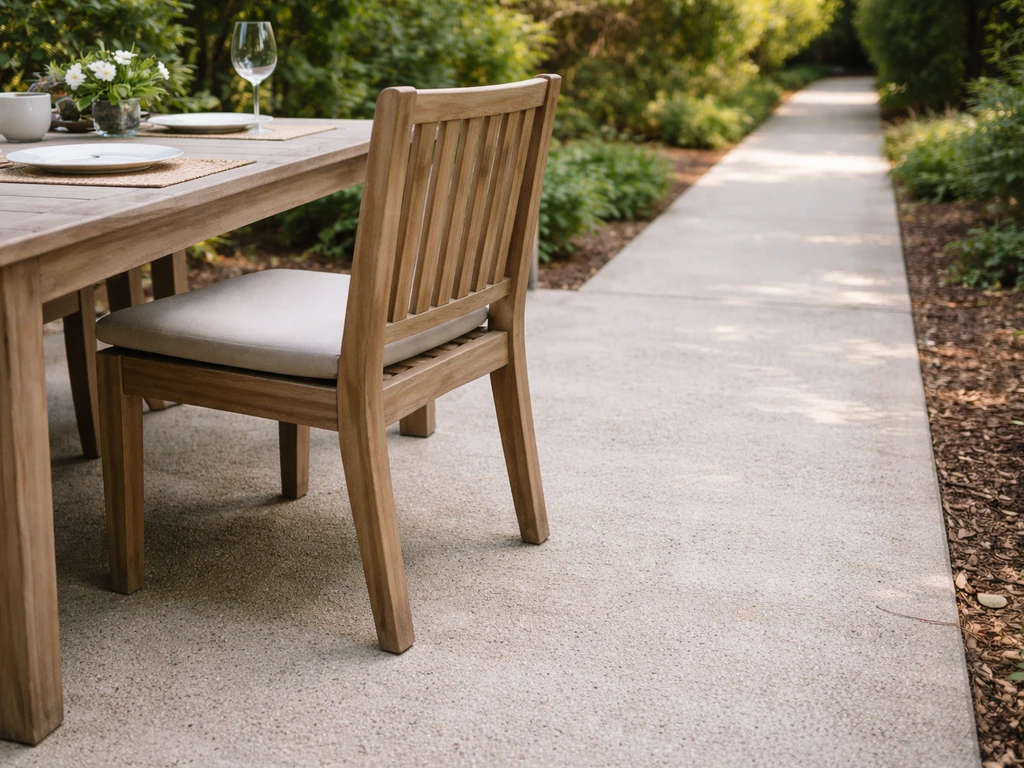
A standard dining chair needs about 24 inches of clearance behind it when pulled out, and you need at least 36 inches of walkway past that. So a 6-person rectangular table that's 36 inches wide and 72 inches long needs a space roughly 10 feet wide and 11 feet deep just to function. Don't design around the table dimensions alone. Design around the table plus the chairs pulled out plus the path behind them. This is why 150 to 180 square feet is the real minimum for a comfortable 6-person dining patio.
Privacy
Privacy screens, fences, trellises, and tall planters can make a small patio feel like an outdoor room instead of just a slab in the yard. Place your seating so it faces away from the neighbor's sightline rather than directly toward it. A trellis with climbing plants on one side costs less than a fence and adds greenery. Even a single large planter at the corner of the patio can block a sightline without requiring any permanent structure.
Lighting that actually works
Most homeowners over-light their patios and end up with harsh glare instead of ambiance. Aim for safety and navigation first: path lights spaced 6 to 10 feet apart in an alternating pattern (not a straight line on one side) give even coverage without blinding anyone. For the seating area, a dimmable overhead pendant or string lights work far better than floodlights. Layer your lighting: one overhead source for general ambiance, path lights for navigation, and maybe a couple of low-voltage accent lights near planters. Any outdoor outlet you add needs GFCI protection and weather-resistant in-use covers. That's not optional, and it's what inspectors will check.
Pick materials and a style that fit a small patio
Material choice affects build complexity, budget, long-term maintenance, and how the patio holds up to your local climate. Here's an honest comparison for small DIY patios.
| Material | DIY Friendliness | Durability | Freeze-Thaw Performance | Maintenance | Relative Cost |
|---|---|---|---|---|---|
| Concrete pavers | High | Very good | Good (with proper base) | Low | Moderate |
| Poured concrete | Medium | Excellent | Fair (needs air entrainment in cold climates) | Low | Moderate to high |
| Flagstone (dry-laid) | Medium | Good | Fair (can shift) | Medium | Moderate to high |
| Flagstone (mortar-set) | Lower | Very good | Good on rigid pad | Low | High |
| Gravel | High | Low | Good | High (weeds, raking) | Low |
For most DIYers building a small backyard patio, concrete pavers are the best starting point. They're forgiving if you make a leveling mistake (you can pull and reset individual pieces), they handle freeze-thaw cycles well with a proper base, and they come in enough styles to match almost any home aesthetic. Standard residential pavers are about 2 3/8 inches thick. Your base will be 4 to 6 inches of compacted gravel aggregate plus 1 inch of bedding sand, so plan to excavate roughly 7 to 8 inches total below your finished surface height.
If you're in a climate with hard winters and you're considering poured concrete, order air-entrained concrete. Non-air-entrained concrete in freeze-thaw conditions can show surface scaling within one to three winters. It's a spec detail that's easy to request and easy to forget.
For style, match your paver color and texture to your home's exterior material. Warm-toned brick or tan stone on a red-brick house, gray or charcoal pavers on a modern home with dark trim. Keep the patio pattern simple (running bond or grid) for a first build. Herringbone and diagonal patterns look great but require more cuts and more time.
Integrate a small patio garden without overcrowding
A small patio garden is one of the most satisfying additions to a compact outdoor space, and it works best when you treat it as a designed zone rather than an afterthought. The key is to keep planters at the perimeter so they define the space without eating into your usable floor area.
Planter placement and sizing
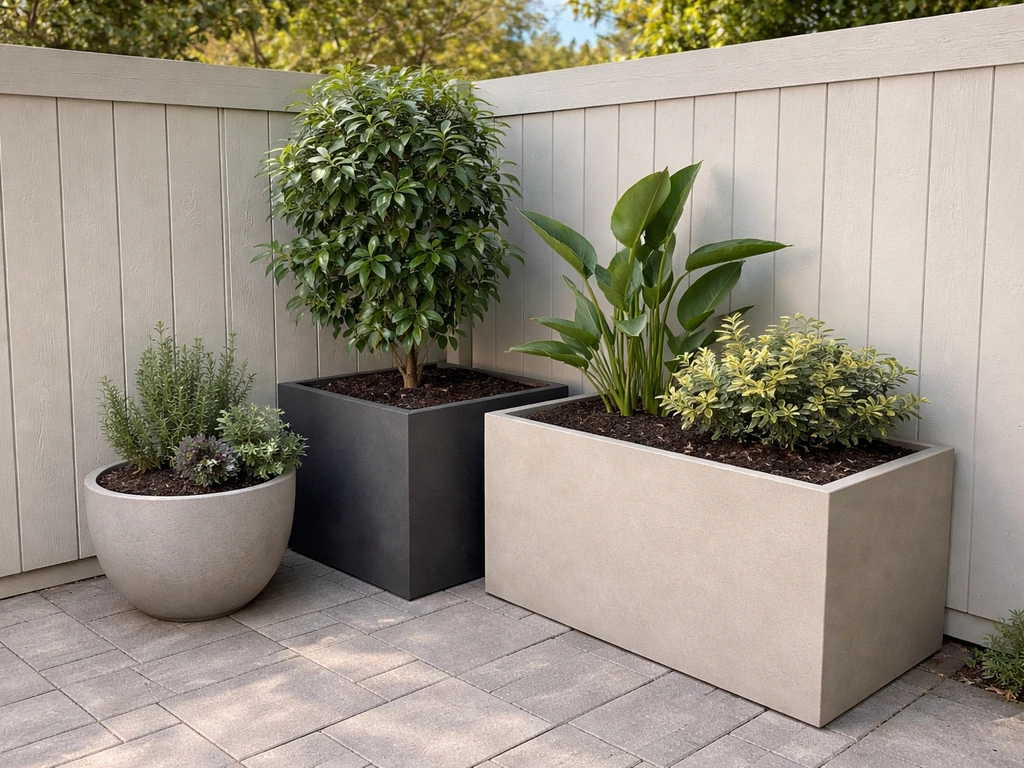
Place larger planters (18 to 24 inches in diameter) at corners or along the back edge of the patio where they function as privacy buffers and define the boundary. Smaller accent planters (10 to 14 inches) work on tables or along steps. Avoid placing planters mid-patio where they interrupt walking paths. A raised planting bed along one side of the patio, 12 to 18 inches deep and 18 to 24 inches wide, gives you a dedicated garden zone without using your floor space.
Soil depth and plant selection
Soil depth is where container gardens fail most often. Herbs and annual flowers do fine in 6 to 8 inches. Peppers, tomatoes, and most vegetables need at least 18 inches of soil depth to perform. If you want to grow tomatoes in containers, use a 5-gallon pot minimum per plant and make sure the container is at least 12 inches deep (18 is better).
For a raised bed along the patio edge, build it to 11 to 12 inches for most flowers and greens, or go 18 inches if you want tomatoes, peppers, or root vegetables. Gardening Know How notes that the [most common raised bed height is about 11 inches](https://www. gardeningknowhow. com/edible/vegetables/vgen/raised-bed-soil-depth.
htm) (built with two 2x6 boards), and it also provides crop-specific depth guidance, including deeper beds for peppers and tomatoes.
Sun and watering
Vegetables need a minimum of 6 hours of direct sun per day. If your patio is heavily shaded, stick to shade-tolerant herbs like mint, parsley, and cilantro, or flowering shade plants. For watering, a simple drip irrigation line run along the planter edge is dramatically more efficient than overhead watering, delivering water directly to the root zone at roughly 85 to 95 percent efficiency. Even a basic timer-controlled drip kit for a small patio garden costs under $50 and saves you from forgetting to water during a hot week.
Planting layout for a small patio
Keep tall plants (tomatoes, tall ornamental grasses) at the back or along privacy sides so they don't shade shorter plants or block sightlines from the seating area. Put medium-height plants (peppers, herbs, compact shrubs) in the middle tier, and low trailing plants (thyme, creeping jenny, low annuals) at the front edge where they soften the hard patio line. This three-tier approach makes a small planting area look intentional and full without crowding.
Turn your design into a build-ready plan
Once your design decisions are made, convert them into a dimensioned sketch you can actually build from. It doesn't need to be pretty. It needs to be accurate. Draw your yard to scale on grid paper (1 square = 1 foot works fine), mark the house wall, door locations, and any permanent obstacles. Draw the patio outline with exact dimensions. Note the high point and low point elevations for drainage slope. Mark your zones with labels. Add planter positions. This sketch becomes your material takeoff sheet, your layout reference during construction, and your reference if something goes wrong.
From there, the next step is construction planning: how to make a backyard patio and how to build a back patio involve excavation, base prep, and paver laying in sequence. The design work you've done here feeds directly into that process, because your sketch tells you exactly how much gravel, sand, and pavers to order.
Your design checklist before you start building
- Write down your primary patio use (dining, lounging, grilling) and your secondary use if you have one
- Measure the full usable area and sketch it to scale on grid paper
- Observe and mark sun/shade at morning, midday, and afternoon
- Run water or observe after rain to confirm drainage direction and identify any low spots
- Set your target patio size (aim for 100–144 sq ft for one zone, 150–180 sq ft for two zones or 6-person dining)
- Choose your shape (rectangle is simplest) and mark it with stakes and string in the actual yard
- Confirm your high point at the house wall and calculate your low point (1/4 inch per foot of patio depth minimum)
- Verify door threshold clearance (32 inches minimum clear width, no step over 1/2 inch)
- Mark all circulation paths and confirm 36-inch minimum clear walkways with furniture in place
- Choose your material (pavers recommended for DIY beginners) and confirm your base depth (4–6 inches gravel + 1 inch sand + paver thickness)
- Plan your lighting zones: overhead/ambient, path, and accent; note outlet locations for GFCI installation
- Decide on planter placement: perimeter only, depth adequate for your plants (18 inches for vegetables), sun exposure confirmed
- Do a final check: does the design leave 36-inch walkways, slope away from the house, and fit your furniture with room to move?
That checklist is your design sign-off. When every item has an answer, you're not designing anymore. You're building. If you're planning a covered structure over the patio, there are additional design decisions specific to that project, like roof pitch, post placement, and how the cover integrates with your house roofline, that go beyond the base patio layout covered here.
A covered patio also adds structure and roof details, so plan the layout with the extra clearance and support points in mind from the start covered patio design. But the site work, sizing, drainage, and zone planning you've done applies directly to that build too. If you want a complete step-by-step overview, start with this guide on how to make a back patio.
FAQ
What’s the minimum patio depth I should plan for if I’m mostly doing dining?
If you want chairs to pull out comfortably, design depth around the chair plus clearance behind it. As a rule of thumb, plan for at least chair pull-out distance plus a 36-inch walkway, then add a little extra for plate/serving movement. This is why a small dining patio often ends up needing more total square footage than people expect.
How do I choose a patio size if I’m not sure how many people will use it regularly?
Pick the primary use first, then design for the realistic comfort level rather than the maximum guest list. If you want 6-person dining sometimes but usually host 2 to 4, a good approach is a main dining zone sized for 4 daily comfort, with a plan for two folding seats when you expand.
Should I design the patio around the door or around the grill and seating?
Prioritize circulation and cooking workflow. Place the grill so the path from the kitchen to the grill and from grill to dining is direct, then route people through a dedicated walkway that stays at least 36 inches clear even when chairs are occupied. Designing around the door alone can create a “cross-traffic” problem when furniture is pulled out.
What’s the best way to confirm drainage in my yard beyond a hose test?
Use a combination test: walk the site after a rain and also run a controlled hose for a longer period (10 to 20 minutes) from the highest likely runoff direction. Mark where water initially hits, where it flows, and where it pools, then re-check after the area has had time to soak and partially dry. This helps catch slow-draining low spots that a quick spray can miss.
Can I build a flat-looking patio if I use the pavers to “level it later”?
It’s a bad idea. Even if individual pavers can be adjusted, a flat final surface still traps water, which leads to algae, slippery spots, and water migrating under the base. The article’s slope guidance exists because it reduces standing water risk across the whole footprint, not just at installation time.
How far should path lights be placed, and do I need lights along every edge?
You typically do not need lights everywhere. Place low-voltage or LED path lights at consistent spacing (about every 6 to 10 feet) in an alternating pattern to avoid glare and maintain visibility. Focus on lighting the main route from the house to the patio, steps, and any dark corners where people naturally turn.
What should I do if my patio space includes underground utilities or tree roots?
Stop and locate utilities before you commit to excavation depth and routing. Plan around known utility lines and avoid disturbing large structural roots where possible, because rerouting base and paver edges later is expensive. If you must build near roots, consider designing the patio outline to keep the highest-root-risk area out of the excavated zone or reduce excavation depth in that section.
How do I handle privacy on a small patio without making it feel enclosed?
Use “partial privacy” instead of full walls whenever you can. For example, rotate seating so it faces away from the neighbor’s sightline, then add privacy at edges using tall planters or a trellis on one side. This blocks direct viewing while preserving open views and air flow.
Where should planter boxes and raised beds go so they don’t ruin the layout?
Keep garden elements at the perimeter or as a dedicated side bed, not in the middle of circulation paths. Corner and back-edge planters can define boundaries and privacy, and a side raised bed creates a garden zone without stealing usable walking space. If you place planters mid-patio, you’ll usually create pinch points that conflict with the 36-inch walkway target.
What soil depth should I plan for if I want both herbs and a few vegetables?
Plan in layers or zones. Herbs and annual flowers can do well with roughly 6 to 8 inches of soil, but many vegetables need about 18 inches for reliable performance. If you want a mixed container approach, separate deeper containers for tomatoes and peppers from shallower containers for herbs.
Is drip irrigation always worth it for a patio garden?
For most small patio gardens, drip is usually worth it because it targets the root zone and reduces waste, especially during hot weeks. A practical decision aid is whether you routinely forget watering or overwater, if the patio is windy, or if the planting zone is small and linear along an edge, since drip tubing is easiest to lay out in those conditions.
Do I need a detailed sketch even if I’m using standard paver sizes?
Yes, at least a dimensioned, to-scale sketch. Paver sizes do not solve the layout variables that matter most for build quality, like exact patio outline, zone boundaries, planter positions, and the drainage high and low points. A sketch also prevents ordering mismatches by turning your design into an accurate material takeoff.