You can build a back patio yourself in a weekend to a few weekends depending on size and material. For a step-by-step walkthrough on how to turn your backyard into a patio, see the full guide. If you want a step-by-step walkthrough, see our guide on how to make a backyard patio. The basic path is always the same: measure and mark your space, excavate the soil, compact a gravel base, set your surface material, and lock everything in with edge restraints. Whether you go with interlocking pavers, a poured concrete slab, flagstone, gravel, or a deck-style surface, the prep work is almost identical and it is the step most DIYers underestimate. Get the foundation right and the rest falls into place.
How to Make a Back Patio: DIY Plans, Costs & Steps

Nolan Carver
20 Jul 2026
Who This Guide Is For and What You'll Actually Build
This guide covers everything from your first patio ever to more ambitious builds like raised patios with retaining walls, covered pergolas, and patios with built-in fire features. If you have never dug a shovel into your backyard for a project like this, start with the planning and materials sections, then follow the paver or concrete walkthrough step by step. If you have built a patio before and want to tackle something more complex, jump ahead to the variants section covering raised patios, covered structures, and fire pits. The goal throughout is that you finish with a patio you actually built, not one you watched someone else build on a video.
Site Assessment and Planning
Before you buy a single paver or bag of gravel, spend an hour assessing what your backyard is actually giving you to work with. Walk out after a heavy rain and watch where the water goes. Note any low spots, where it pools near your house foundation, and which direction the yard naturally drains. That information shapes every decision you make about placement, grade, and whether you need additional drainage solutions.
Measuring and Marking Your Layout
Use a tape measure, a few wooden stakes, and mason's line to mark out your proposed patio footprint. Measure twice: once for the dimensions you want, and again to confirm it actually fits with clearance from the house, property lines, and any existing landscaping. A standard patio for a table and four chairs needs roughly 12 x 12 feet minimum; 16 x 20 feet gives you room to move comfortably. Spray paint or chalk on the ground makes it easy to visualize before you commit to digging anything.
Slope, Grade, and Drainage
Every patio surface needs a minimum slope of 1/8 inch to 1/4 inch per foot, sloping away from your house. That translates to roughly a 1 to 2 percent grade. For a 12-foot-wide patio, that means the outer edge should sit about 1.5 to 3 inches lower than the edge nearest the house wall. The IRC (R401.3) also requires that finished grade falls at least 6 inches within the first 10 feet from your foundation. If your yard already slopes toward the house, you will either need to regrade, add a catch basin with a perforated drain pipe, or redirect runoff with a swale before you start. Ignoring drainage is the single biggest cause of patio problems I see, including frost heave, settling, and standing water.
Evaluating Your Soil
Dig a test hole about 12 inches deep. Sandy or gravelly soil drains well and gives you a firm base. Clay-heavy soil holds water, expands when wet, and shrinks when dry, which causes pavers and slabs to move. If you hit dense clay, plan for a deeper excavation and a thicker compacted base, or consider adding a layer of geotextile fabric between the subgrade and your aggregate base to prevent clay migration upward into the gravel.
Local Regulations, Permits, and Utility Checks
This is the step many DIYers skip and later regret. A ground-level patio on open soil often requires no permit in many jurisdictions, but covered structures, raised patios, retaining walls, gas lines, and permanent fire features almost always do. Jurisdictions that adopt IRC Appendix H PATIO COVERS - 2018 INTERNATIONAL RESIDENTIAL CODE (IRC) may treat small freestanding covers differently from attached or engineered covers, and local adoption or amendments determine whether a permit is required. The rules vary widely by city and county, so the only reliable approach is to call your local building department before you do anything.
- Permits for retaining walls: Most U.S. jurisdictions require a building permit for any retaining wall that holds back more than 3 to 4 feet of soil. Walls supporting a surcharge load (like a driveway or structure above) typically require permits regardless of height. Check San Diego-style permit handouts as a reference format, but always verify with your own municipality.
- Patio covers and pergolas: Attached or engineered covers almost always require a permit. Freestanding covers may fall under IRC Appendix H where adopted, but local amendments determine whether a permit is actually needed. When in doubt, ask.
- Gas lines and fire pits: Any new or extended gas piping to an outdoor grill or permanent gas fire pit requires a mechanical or plumbing permit and inspection under the International Fuel Gas Code (IFGC). Many cities also require a fire permit for permanent gas fire features. Contact your local fire department as well.
- Call 811 before any excavation: Dial 811 (Call Before You Dig) at least 2 to 3 business days before you break ground. It is free, it is required by law in most states, and it protects you from striking buried gas, electric, water, or telecom lines. Even a shallow 6-inch excavation for a gravel patio is enough to hit a shallow utility line.
- HOA rules: If you live in a community with a homeowners association, check their guidelines too. Many HOAs restrict patio materials, colors, or size independent of municipal codes.
Design Basics and Style Choices
Function should drive your design choices before aesthetics do. For detailed layout tips and style examples, see our guide on how to design a backyard patio. Figure out what you actually want to do on the patio: eat outside, entertain groups, let kids play, set up a grill station, add a fire pit. Each use case has different space requirements and affects where the patio should sit relative to the house, the yard, and the sun.
Size and Shape
Rectangular patios are easiest to build and waste the least material. An L-shape works well if you want to wrap around a corner or define a cooking zone from a seating zone. Curves and freeform shapes are achievable with pavers or flagstone but require more cutting and planning. As a rule of thumb: allow at least 3 feet of clearance on all sides of outdoor furniture, so a 6-person dining set needs a minimum 12 x 14 foot space just for the furniture area alone.
Covered vs. Open Patio
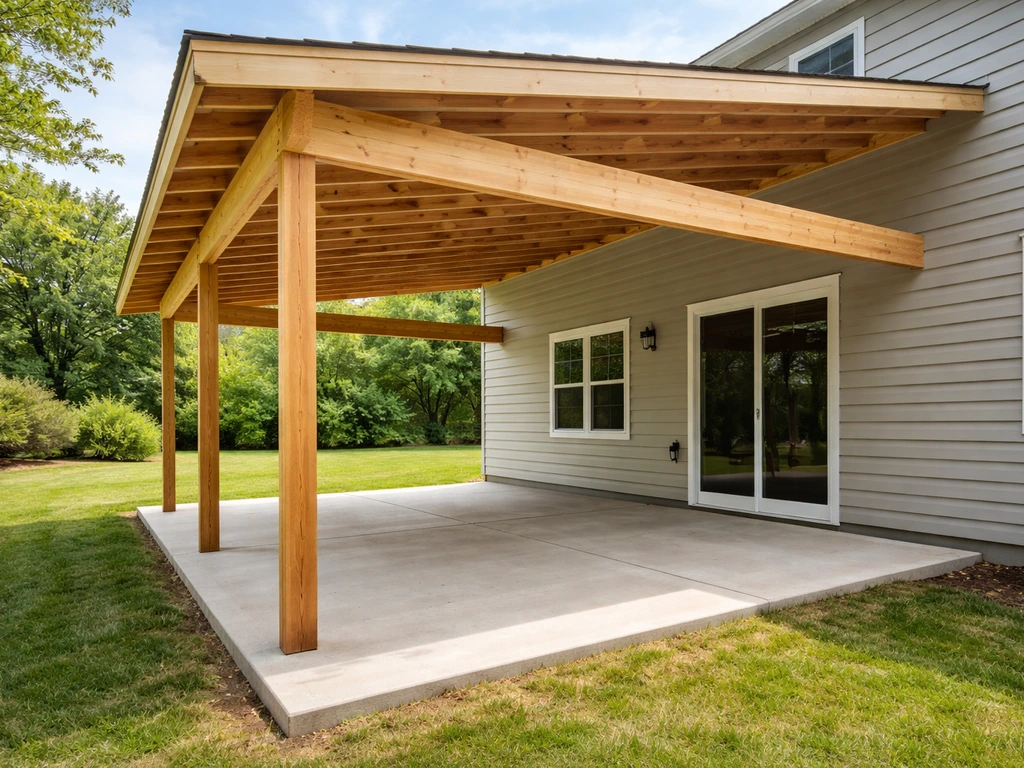
An open patio is the fastest and cheapest build. A covered patio, whether you use a pergola, solid roof, or shade sail, adds usable hours and protection but also adds cost, complexity, and usually a permit requirement. For a first-time builder, I recommend completing the ground-level surface first and adding a cover later as a second phase. It is much easier to attach a pergola post to a finished patio than to try to coordinate both at once.
Furniture Layout and Plantings
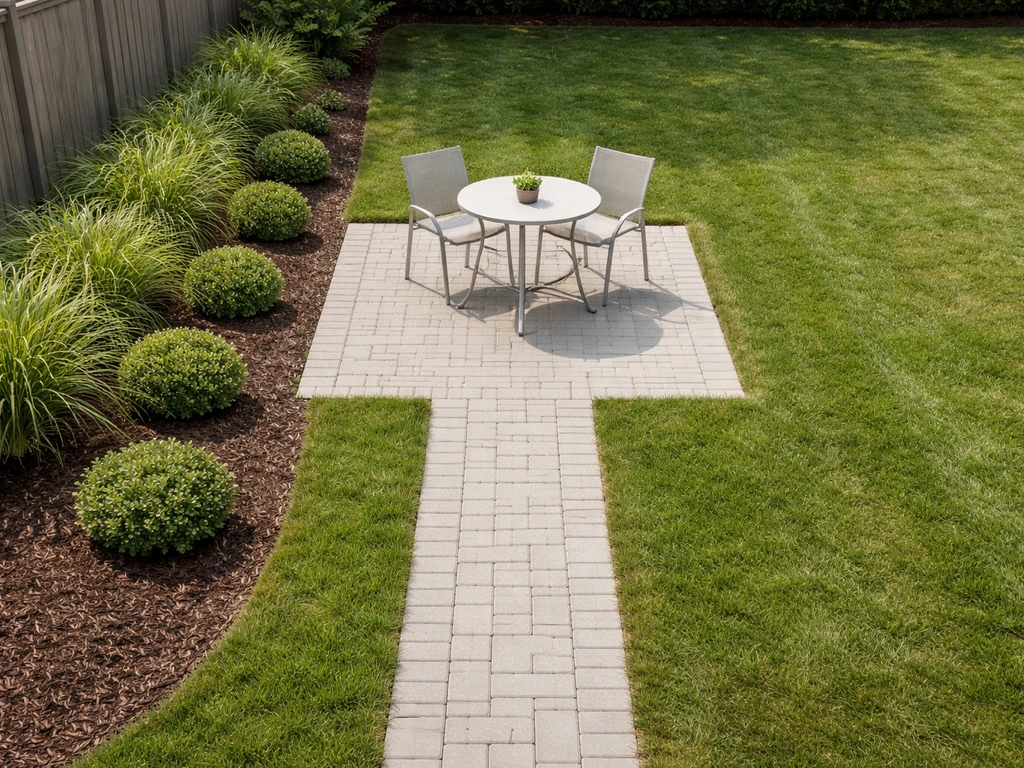
Sketch your furniture layout on paper before you finalize patio dimensions. Surround the patio edge with a planting bed or low border plantings to soften the transition between hardscape and lawn. Avoid planting trees with aggressive root systems (like silver maple or willow) within 10 feet of a paved surface. Raised planters built directly into the patio edge are a great way to add greenery without worrying about roots lifting your pavers over time.
Materials Comparison and Selection Guide
Choosing the right surface material depends on your budget, skill level, the look you want, and how much maintenance you are willing to do long-term. Here is a practical breakdown of the five most common patio surface materials.
| Material | Avg. DIY Cost (per sq ft) | Skill Level | Durability | Maintenance | Best For |
|---|---|---|---|---|---|
| Concrete pavers | $8–$20 | Beginner–Intermediate | Very high | Low (reseal every 3–5 yrs) | Most DIYers; easy to repair individual pieces |
| Poured concrete slab | $5–$12 | Intermediate | High | Low–Medium (seal, re-joint control joints) | Large flat areas; permanent low-maintenance surface |
| Flagstone | $10–$25 | Intermediate | High | Medium (weeding joints, occasional releveling) | Natural, irregular look; fits organic garden designs |
| Pea gravel / crushed stone | $2–$6 | Beginner | Medium | Medium (raking, periodic top-up) | Budget builds, informal spaces, dry creek accents |
| Wood or composite decking | $15–$35 | Intermediate–Advanced | Medium–High | Medium–High (staining, sealing, board replacement) | Sloped yards where excavation is impractical; raised patio feel |
Concrete pavers hit the best balance of DIY-friendly installation, repairability, and long-term durability. If one paver cracks or settles, you pull it out and reset it without touching anything around it. A poured concrete slab is cheaper per square foot on large areas but requires more skill during the pour and finishing, and a cracked slab is harder to repair invisibly. Flagstone looks beautiful but setting individual stones level takes patience. Gravel is the fastest and cheapest option but does not give you the solid flat surface you need for furniture or a grill. Wood or composite decking makes the most sense when your yard has a significant slope that would make excavating and leveling a ground-level patio extremely expensive.
Choosing the Right Patio Type for Your Skill Level and Budget
Not every patio is the right patio for every builder or budget. Here is how to match your situation to the right starting point.
| Skill Level | Recommended Patio Type | Realistic Budget (12x16 ft) | Realistic Timeline |
|---|---|---|---|
| Complete beginner | Gravel or basic paver on compacted base | $300–$1,800 | 1–2 weekends |
| Beginner–Intermediate | Sand-set paver patio | $1,500–$3,500 | 2–3 weekends |
| Intermediate | Poured concrete slab or flagstone | $1,200–$4,000 | 2–4 weekends (cure time included) |
| Intermediate–Advanced | Raised paver patio with small retaining wall | $3,000–$7,000+ | 3–6 weekends |
| Advanced | Covered patio / pergola with footings or deck-style build | $5,000–$15,000+ | 4–10 weekends |
If you are working with a tight budget, a phased build is often the smartest approach. Phase one: ground prep and surface (gravel or basic pavers). Phase two: upgrade to full paver installation once you have saved more. Phase three: add a pergola, fire pit, or lighting. Each phase builds on the last and you are using the patio the whole time rather than waiting months to start anything.
Tools, Materials, and Safety Checklist
Getting your tools organized before you start saves a lot of frustration. Below is a consolidated list of what you need for a sand-set paver patio, which covers most of the tools needed for a concrete or flagstone build as well. Rent the plate compactor and wet saw rather than buying unless you build patios regularly.
| Tool / Item | Qty / Spec | Used For | Substitute / Budget Option | PPE Required |
|---|---|---|---|---|
| Tape measure (25 ft) | 1 | Layout and measuring | None — essential | None |
| Mason's line + stakes | 50+ ft of line | Establishing grade and layout | Chalk line for flat marks | None |
| Line level or 4-ft torpedo level | 1 | Checking slope across the base | Water level (DIY with clear hose) | None |
| Shovel (flat spade + round point) | 1 each | Excavation and edging cuts | None — essential | Steel-toed boots |
| Wheelbarrow | 1 (6 cu ft) | Moving gravel, sand, pavers | Garden cart | None |
| Plate compactor (rental) | 1 | Compacting gravel base and finished pavers | Hand tamper for very small areas only | Hearing protection, safety glasses, steel-toed boots |
| Screed boards / rails | 2 (1-inch diameter conduit or lumber) | Leveling 1-inch bedding sand layer | Two pieces of 3/4-in pipe | None |
| Rubber mallet | 1 | Setting pavers and adjusting height | Dead-blow hammer | None |
| Wet saw / angle grinder with diamond blade (rental) | 1 | Cutting pavers to fit edges and curves | Chisel and hammer for rough cuts only | Safety glasses, hearing protection, dust mask (N95 min) |
| Hand tamper | 1 | Compacting small or tight areas | Piece of 4x4 lumber | Steel-toed boots |
| Push broom | 1 | Sweeping joint sand into gaps | Standard broom | Dust mask when sweeping polymeric sand |
| Garden hose with spray nozzle | 1 | Activating polymeric joint sand | Watering can for small areas | None |
| HDPE or aluminum edge restraint | Perimeter linear feet | Containing pavers at edges | Cast concrete curb header | Safety glasses when cutting |
| Landscape fabric / geotextile (optional) | Same as patio sq ft | Separating subgrade from base aggregate on clay soils | Skip on sandy/gravelly soils | None |
| Compactable gravel base (ASTM 57 or road base) | Per excavation depth + area | Load-bearing base layer | Clean crushed stone | Dust mask in dry conditions |
| Concrete sand (ASTM C33) | 1-inch layer across area | Bedding layer under pavers | None — do not substitute mason sand for bedding | None |
| Polymeric joint sand | Per paver joint sq ft | Locking joints, weed and ant resistance | Regular dry jointing sand (easier to re-work) | Dust mask, gloves |
| Safety glasses | 1 pair per worker | Eye protection during cutting, compacting | None — essential PPE | Always |
| Work gloves | 1 pair per worker | Handling pavers, aggregate, restraints | None | Always |
| N95 dust mask | Multiple per build day | Cutting pavers, sweeping polymeric sand | P100 half-face respirator for extended cutting | Cutting and sand work |
Site Prep and Foundation: The Work That Actually Matters
Ninety percent of patio failures happen underground. The surface material gets all the attention but the base determines whether your patio stays flat and stable for ten years or starts sinking and shifting after the first winter. Do not rush this part.
- Mark the layout: Set stakes at all four corners and run mason's line at your finished patio height. Use a line level to confirm your lines are level, then calculate your slope: the line on the house side should sit 1/8 to 1/4 inch per foot higher than the outer edge. For a 12-foot-wide patio, the outer line sits 1.5 to 3 inches lower.
- Call 811: Do this 2–3 business days before you dig. Free, required, and potentially lifesaving.
- Excavate: Remove all sod and topsoil. For a sand-set paver patio you need to excavate to a depth equal to: paver thickness (typically 2.375 inches for standard pavers) + 1 inch of bedding sand + 4 to 6 inches of compacted gravel base. On clay or frost-prone soils, increase the base to 6 to 8 inches. Most residential paver patios require removing about 8 to 10 inches total.
- Install geotextile (if applicable): On clay or soft soils, lay a geotextile landscape fabric over the subgrade before adding base material. This prevents fine particles from migrating up into your gravel.
- Add and compact the base in lifts: Pour 3 to 4 inches of compactable gravel (road base or ASTM 57 crushed stone) and compact it with the plate compactor. Add another lift and compact again. Compact in multiple passes, overlapping each pass by 50 percent. The base should not shift when you walk on it.
- Check for grade: Use your mason's line and a tape measure at multiple points to confirm the compacted base maintains your 1/8 to 1/4 inch per foot slope away from the house.
- Screed the bedding sand: Lay 1-inch-diameter conduit or screed rails along both sides of a section and pour ASTM C33 concrete sand between them to a 1-inch depth. Drag a straight 2x4 board across the rails to level the sand perfectly. Do not walk on screeded sand; work in sections.
- Install edge restraints before laying pavers: Anchor HDPE or aluminum restraints into the compacted base (not the bedding sand) using the manufacturer's spikes, typically 12 inches apart.
Step-by-Step: Building a Sand-Set Paver Patio
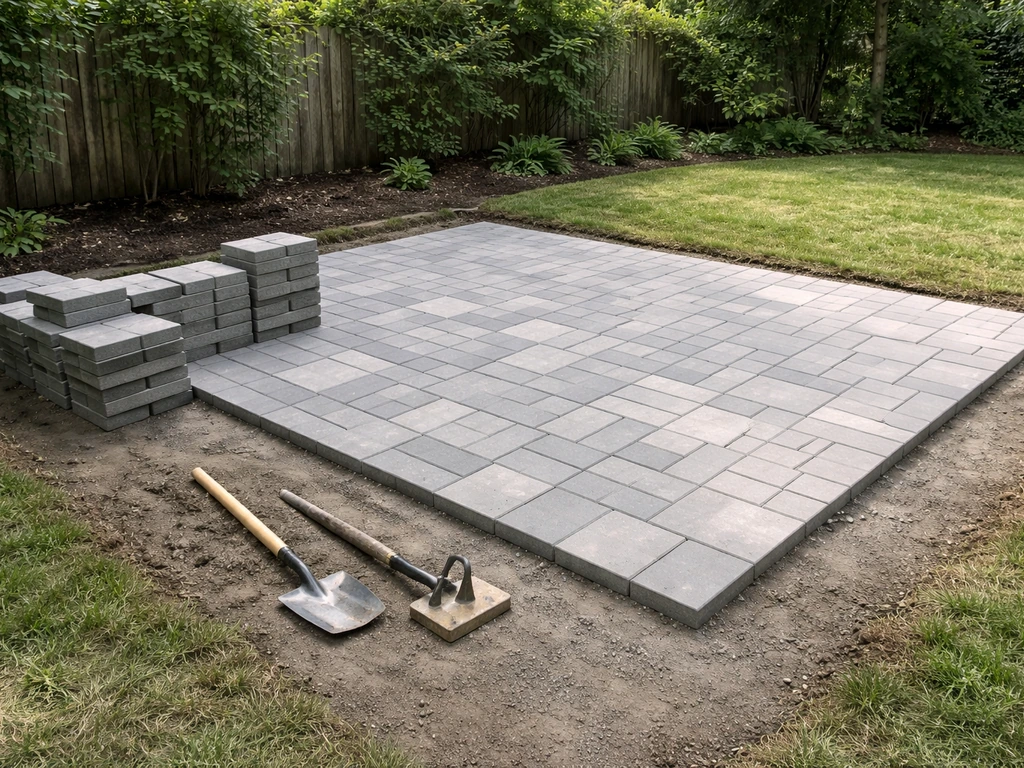
With your base prepped and edge restraints on the two sides where you will begin, you are ready to lay pavers. Start at the corner nearest the house and work outward. This is important because any cut pieces should land at the outer edges where they are less visible. For a detailed, step-by-step guide on how to build a back patio, see the project walkthrough (internal resource ID 585262c7-a0d8-41a1-971a-215e3906c9fd). blank" rel="noopener noreferrer">Herringbone patterns (45° or 90°) provide the best mechanical interlock and resist lateral movement and point loads for vehicular areas, as recommended by the Interlocking Concrete Pavement Institute.
- Choose your pattern before you start: Running bond (staggered like brickwork) is the easiest to lay. A 90-degree herringbone provides the best mechanical interlock and handles point loads better, making it a good choice if you will be rolling heavy grills or furniture across the surface. Mark a reference line at 90 degrees to your house wall to keep rows straight.
- Lay pavers on the sand: Set each paver gently, do not drag it. Press it down firmly by hand and check it against your reference line. Maintain consistent joint spacing, typically 1/8 to 3/16 inch, using a plastic spacer if needed. Do not walk on laid pavers without a kneeling board to distribute your weight.
- Check height as you go: Use a level across every 3 to 4 pavers to confirm no rocking or high spots. A rubber mallet tap lowers a high paver; if a paver is low, pull it, add a small amount of sand, and reset it.
- Cut border pavers: Measure and mark cut lines on pavers with a pencil or chalk. Use a rented wet saw with a diamond blade for clean, precise cuts. For rough cuts on straight lines, a chisel and hammer works in a pinch, but expect a less clean edge.
- Compact the finished surface: Once all pavers are laid, run the plate compactor over the entire surface at least two passes in perpendicular directions. Add a rubber pad under the compactor plate if your pavers are tumbled or have a textured face to avoid surface damage.
- Sweep and activate joint sand: For polymeric sand, sweep dry sand into the joints, compact lightly again, sweep a second time, then activate with a fine spray of water per the manufacturer's instructions. Do this on a dry day with no rain forecast for at least 24 hours. For plain jointing sand, sweep it in and rinse with a gentle spray; repeat after a few days as it settles.
- Seal (optional): A penetrating paver sealer applied after the polymeric sand has cured fully (usually 24–72 hours) enhances color and adds stain resistance. Reapply every 3 to 5 years.
Step-by-Step: Pouring a Basic Concrete Slab Patio
A concrete slab is a more permanent commitment than a paver patio. You cannot easily adjust or remove sections, but for large flat areas it is often the most cost-effective durable surface. The site prep steps are the same as for pavers: excavate, compact the gravel base (minimum 4 inches), and confirm your slope.
- Build your form: Use 2x4 or 2x6 lumber staked around the perimeter at the exact height of your finished slab (4 inches thick for pedestrian patios; 5 to 6 inches for weaker soils or heavier use). Check the form corners are square with the 3-4-5 triangle method. Coat the inside face of the forms with form oil or cooking spray so they release cleanly after the pour.
- Add reinforcement: Lay 6x6-inch welded wire mesh (WWR) over the base, supported at mid-slab height with dobies or wire chairs. Alternatively, use #3 rebar on 18-inch centers for stronger crack control. Reinforcement does not prevent cracks but controls crack width and keeps pieces from shifting apart.
- Plan your control joints: Space control joints no more than 10 to 12 feet apart on a 4-inch slab (about 2.5 to 3 times the slab thickness in feet). For a 12x16-foot slab, one longitudinal joint down the center is sufficient. You can saw-cut joints the morning after the pour or use a groover tool during finishing.
- Order or mix your concrete: For a 12x16-foot slab at 4 inches thick, you need roughly 2.4 cubic yards of concrete. Order from a ready-mix truck if the job is over 1 yard; mixing bags by hand is impractical at that volume. Use 3,000 to 3,500 PSI mix for residential exterior slabs.
- Pour and screed: Pour concrete into the form and use a 2x4 screed board dragged across the form tops in a sawing motion to level it. Work quickly, especially in hot or dry weather when surface moisture evaporates fast.
- Float and finish: Use a bull float immediately after screeding to push aggregate down and bring a thin cream to the surface. For a non-slip texture, drag a concrete broom across the surface before it fully sets to create a brushed finish. Avoid overworking the surface or adding water to the surface to make finishing easier, as both weaken the top layer.
- Cure properly: Cover the slab with plastic sheeting or apply a liquid curing compound within 20 minutes of finishing. Keep it moist and covered for a minimum of 7 days. Do not load the slab for at least 7 days; full strength develops over 28 days.
- Remove forms and backfill: Once cured, strip the forms and backfill any gap between the slab edge and surrounding soil. Install edge landscaping promptly to prevent erosion undercutting the slab edge.
Notes on Deck-Style Patios
If your yard slopes significantly or you have poor drainage that makes a ground-level build complicated, a deck-style patio on posts and framing is often the smarter choice. The structural framing typically requires a permit and inspections for footings and framing. Use pressure-treated lumber rated for ground contact on all structural members, composite decking for the surface if you want lower maintenance, and make sure joist spacing matches your decking manufacturer's recommendations (typically 12 to 16 inches on center). Post footings must go below the frost line in your area, which ranges from 0 inches in the deep South to 48-plus inches in northern states.
Advanced Features: Raised Patios, Covered Structures, and Fire Pits
Raised Patios and Retaining Walls
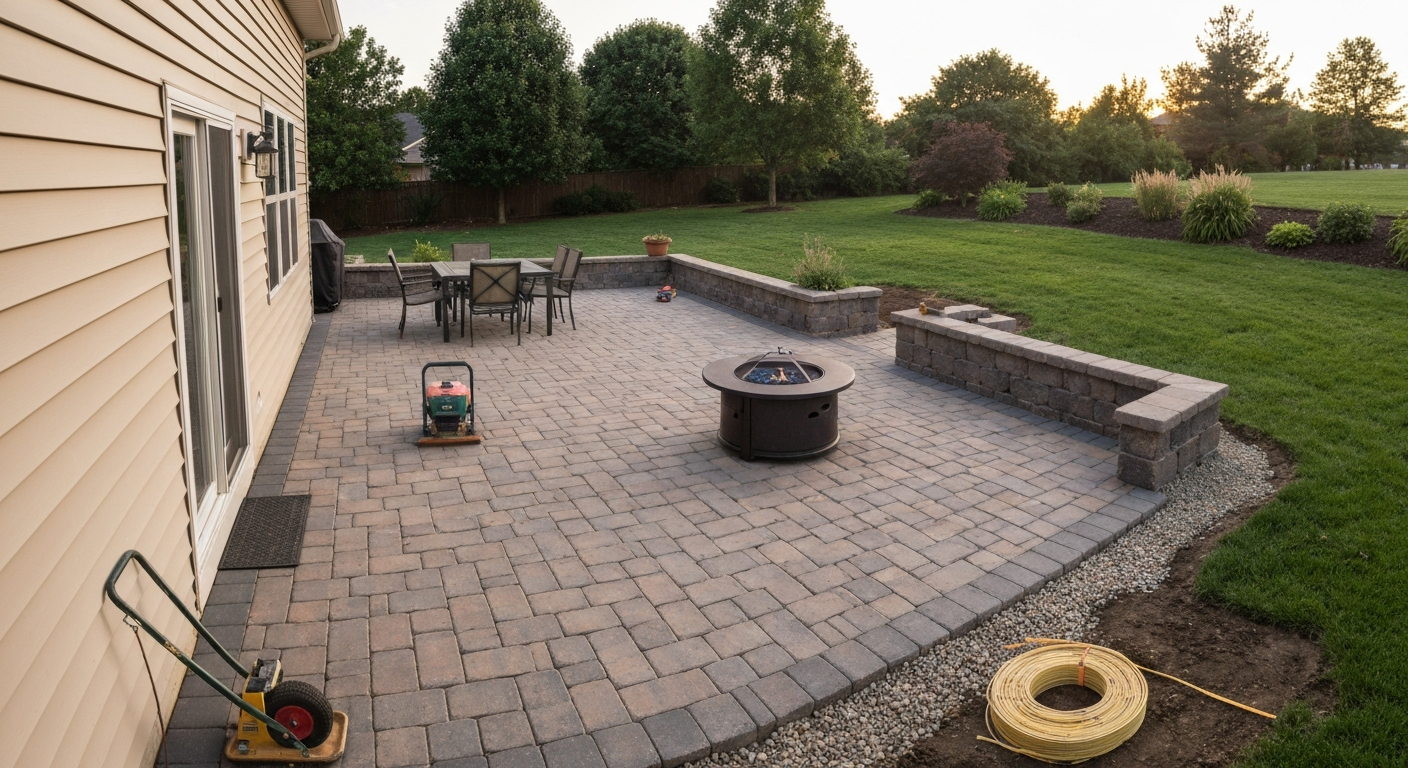
A raised patio typically requires a retaining wall on one or more sides to hold back the elevated soil or fill. Segmental retaining wall blocks (like Allan Block or Versa-Lok) are the most DIY-friendly option for walls under 3 feet. Above 3 to 4 feet, most jurisdictions require a permit and an engineered design. Keep the base course of any retaining wall below grade on compacted gravel, maintain a slight batter (backward lean) as you stack courses, and install drainage aggregate (crushed stone) behind the wall with a perforated drain pipe at the base to relieve hydrostatic pressure. A wall with no drainage behind it will eventually fail.
Pergolas and Covered Patios
A freestanding pergola over an existing patio is a great second-phase project. For a wood pergola, use 6x6 posts set in concrete footings that extend below the frost line. Span 2x8 or 2x10 beams between posts (span lengths depend on load and lumber species; check a span table). Attach a ledger to the house only if you have confirmed the structural wall behind it and plan to get the required building permit for an attached structure. Freestanding pergolas avoid the permit complexity of attached covers in many jurisdictions, though you should confirm with your building department.
Built-In Fire Pits
A wood-burning in-ground fire pit can be as simple as a ring of retaining wall blocks on compacted gravel with a steel insert. Keep it at least 10 feet from any structure, including your house and pergola. For a permanent gas fire pit, you will need a gas permit for any new piping, and many cities also require a fire department operational permit. Use a licensed plumber for the gas line rough-in and have it inspected before you cover anything. The fire pit bowl itself should sit in a non-combustible surround (concrete pavers, stone, or brick) with a gravel drainage layer beneath to prevent gas accumulation.
Steps and Transitions
If your patio sits higher than the adjacent lawn or grade, you need steps. A comfortable outdoor step has a tread of 12 to 14 inches and a riser of 5.5 to 7 inches. Keep all risers in a flight the same height, as inconsistency is a tripping hazard. Stack retaining wall blocks or natural stone for the risers and use paver slabs or thick flagstone for the treads. Always pin or secure the steps to prevent forward sliding; a concrete footing under the base course of step risers is the most reliable method.
Troubleshooting Common Patio Problems
- Standing water on the surface: Your slope is insufficient or has reversed in a low spot. For pavers, reset the affected section: pull the pavers, re-screed the sand to correct slope, and relay. For a concrete slab, you can grind high spots slightly or apply a resurfacer to build up low areas, but severe drainage problems on slabs often require saw-cutting and pouring a thin topping with correct slope.
- Pavers sinking or settling in one area: Usually caused by an inadequately compacted base, or a washout under the sand layer. Pull the pavers from the affected zone, dig down to verify the base is intact, re-compact, re-screed the sand, and relay. If you find saturated or soft soil, you may need to add more base depth or install a drainage solution before rebuilding.
- Pavers shifting laterally (spreading apart): Your edge restraints have failed or were not anchored properly. Re-spike or replace the restraint, then reset the pavers and re-sand the joints. This is why edge restraints must anchor into the compacted base, not just the sand.
- Cracks in a concrete slab: Hairline cracks in a cured slab are normal and usually cosmetic. Fill them with a flexible polyurethane caulk designed for concrete. Wide or structural cracks (wider than 1/4 inch, or where one side has moved up or down) indicate a base problem; in severe cases, a section of slab may need to be removed and repoured.
- Weeds growing in paver joints: Plain jointing sand is the biggest contributor. Transition to polymeric sand (remove old sand, re-sand with polymeric and activate), or use a patio joint sealer. Pulling weeds and applying a targeted patio-safe weed killer first gives you a cleaner reset.
- Frost heave lifting pavers or slab sections: Not enough base depth in a frost-prone climate. The fix is to deepen the base below the frost line, which usually means removing and rebuilding the affected section. Use free-draining crushed stone for the base in cold climates to minimize frost action.
- Uneven or rocking flagstone: Individual stones move on soft or shallow sand. Pull the stone, add or remove bedding material, and reset it. Flagstone on a mortar bed is more stable long-term but much harder to repair.
Realistic Cost and Time Estimates
Costs vary by region, material prices at the time of build, and how much rental equipment you need, but these ranges reflect typical DIY projects in 2025 and 2026 across most of the U.S.
| Project | Material Cost (12x16 ft) | Equipment Rental | Total DIY Estimate | Time (weekends) |
|---|---|---|---|---|
| Gravel/crushed stone patio | $200–$500 | $50–$100 (compactor) | $300–$650 | 1 |
| Sand-set paver patio | $1,200–$2,500 | $200–$350 (compactor + wet saw) | $1,500–$3,000 | 2–3 |
| Poured concrete slab | $600–$1,500 (incl. ready-mix) | $100–$200 (tools) | $800–$2,000 | 2–3 (+ 1 week cure) |
| Flagstone dry-set | $1,500–$3,000 | $150–$250 | $1,800–$3,500 | 2–4 |
| Raised paver patio with 2-ft retaining wall | $2,500–$5,500 | $300–$500 | $3,000–$6,500 | 3–6 |
| Freestanding pergola (wood, 12x16) | $1,500–$4,000 | $100–$200 | $1,800–$4,500 | 2–4 |
Maintenance Through the Seasons
A well-built paver patio needs very little annual maintenance. Sweep off debris regularly to prevent staining and weed seeds taking hold in joints. Inspect the joint sand each spring; if you see washout or gaps, add fresh jointing sand and re-activate polymeric sand or sweep in fresh dry sand. Re-seal pavers every 3 to 5 years if you used a surface sealer. For concrete slabs, check control joints each spring and refill any that have lost their sealant with fresh backer rod and polyurethane caulk. For deck-style patios, inspect fasteners and joist hangers annually, and re-stain or re-seal wood decking every 1 to 2 years as needed.
When to DIY and When to Hire a Pro
Most ground-level patios are genuinely within reach of a motivated DIYer with a free weekend and a willingness to rent the right equipment. That said, some situations make professional help the smarter call even if you are capable of the physical work.
- Hire a pro for: large concrete pours over 5 yards (timing and finishing a big slab is unforgiving), engineered retaining walls over 4 feet, attached covered structures requiring structural calculations, and any gas line rough-in for fire features.
- Consider a pro or co-hire for: heavily sloped sites requiring significant regrading, sites with drainage problems that need underground French drain systems, and any project requiring an engineer's stamp for a permit.
- Confident DIY territory: Ground-level paver patios of any size, concrete pours up to about 3 yards (manageable with a helper), dry-set flagstone, gravel patios, freestanding pergolas with pre-engineered post-and-beam kits, and basic retaining walls under 3 feet.
Diagrams and Images to Sketch or Photograph
Visual references make every step of a patio build faster to understand. Here are the specific diagrams and photos that are most useful for this type of project. If you are documenting your own build, these are the shots worth capturing.
- Top-down layout diagram: Shows the patio footprint with dimensions, the house wall, property lines, and the direction of slope indicated with an arrow. Include the location of any existing downspouts, doors, or utility markers relative to the patio edge.
- Cross-section diagram (side view, to scale): The most important technical drawing. Shows the excavation depth, compacted subgrade, geotextile (if used), compacted gravel base layer with thickness labeled, 1-inch bedding sand layer, paver or slab, and finished surface. Label each layer's depth. Also show the slope direction with the 1/8 to 1/4 inch per foot drop labeled over the patio width.
- Drainage cross-section: A side view showing how water sheds off the surface at the correct slope, with an arrow indicating flow direction away from the house. If a catch basin or French drain is included, show the perforated pipe in gravel below the base layer and the outlet location.
- Edge restraint detail: A close-up cross-section of the patio edge showing the edge restraint spike anchoring into the compacted base (not the sand), the paver sitting against it, and the relationship between restraint height and paver surface height.
- Paver pattern layouts: Top-down diagrams of running bond, 90-degree herringbone, and 45-degree herringbone. Label which patterns are easiest to cut at edges and which provide the best interlock.
- Control joint plan for concrete slab: Top-down view of a 12x16-foot slab with control joint locations marked, showing joint spacing of 10 to 12 feet and the saw-cut depth (typically 1 inch for a 4-inch slab, or one-quarter of slab thickness).
- Step and transition detail: Side-view diagram of patio-to-lawn steps showing tread depth (12 to 14 inches), riser height (5.5 to 7 inches), gravel footing under the base course, and how the step integrates with the patio edge restraint.
- Before and after site photos: Photograph the test hole (showing soil type and depth), the excavated and compacted base at multiple stages, the screeding process, the first few pavers laid from the reference corner, and the finished surface before and after joint sand activation.
FAQ
What's the overall process for designing and building a DIY backyard patio from start to finish?
1) Plan: measure, sketch layout, choose style/materials, check local codes/permits and call 811 for utility locates. 2) Site assessment: check slope, drainage, soil type, and existing hardscape. 3) Design: pick size, shape, pattern, edges, and features (cover, fire pit, steps). 4) Materials/tools: create shopping list and rent heavy tools (excavator, plate compactor, concrete mixer as needed). 5) Prepare site: mark, excavate to proper depth, install geotextile if needed, build base, compact in lifts, and install edge restraint or forms. 6) Build surface: for pavers—bedding sand, lay pavers, compact, joint sand; for concrete—formwork, reinforcement, pour, trowel, saw/control joints; for deck-style—build framing, joists, decking, flashing. 7) Finish and grade: ensure 1%–2% slope away from house (or 6” fall in first 10’ per code), add trim, transitions, and landscaping. 8) Cleanup, cure/settle time, and maintenance plan. Include inspections where required.
How do I assess my site (measurements, slope, drainage, soil) before starting?
Measure the patio footprint and surrounding setbacks; create a simple scale sketch with property lines and structure locations. Check slope: use a 6–10 foot straight board and level—aim for about 1/8–1/4 in/ft slope away from the house (≈1%–2%). Verify finished grade can drop ~6 inches in first 10 feet from foundation or plan drainage swales/drains. Test soil by digging a small hole: sandy soils drain well; clay holds water and may require extra base depth or underdrain. Note trees/roots and buried utilities (call 811). Photograph site for reference.
When do I need permits or inspections?
Permits depend on local adoption of building codes and local amendments. Common triggers for permits: attached/engineered covers (often per IRC Appendix H), retaining walls >~3–4 ft, new gas piping or permanent gas fire pits, permanent fireplaces, and sometimes large concrete slabs or structural changes. Always check your local building department before starting; obtain electrical, gas, or mechanical permits when installing lighting, gas lines, or hard‑wired appliances. Schedule inspections per permit conditions.
Which patio material should I choose: pavers, concrete slab, flagstone, gravel, or wood decking?
- Pavers: modular, repairable, great drainage, require edge restraint and base; good for most DIYers. - Concrete slab: durable and lower long‑term cost, needs forms/finishing skills and control joints; best for smooth finished surfaces. - Flagstone: natural look, needs careful bedding and jointing; can be labor‑intensive. - Gravel: cheapest/easiest, best for low‑traffic areas; needs edging and weed control. - Wood decking (deck‑style patio): elevated areas or when grade differs; allows height and airflow but needs framing, flashing where attached to house, and regular maintenance. Choose by budget, look, skill level, and drainage needs.
What are realistic cost and time estimates for a typical DIY patio?
Costs vary by material, size, and region. Rough ballpark for a 12'×12' patio: gravel $200–600; pavers $800–2,500 (including base materials); concrete slab $800–2,000 (DIY); flagstone $1,500–4,000; wood decking $1,500–4,000+. Time: site prep and base 1–3 days; paver or concrete install 1–3 days for a small patio (plus curing for concrete—wait 7 days for light use, 28 days for full strength); overall weekend project for small patios, multiple weekends for complex builds or features. Add time for permits/inspections.
What tools and materials will I need? Provide a checklist.
Tools: tape measure, marking paint/string line, shovel, wheelbarrow, plate compactor (rental), tamper, level, laser/line level, straightedge/screed board, rubber mallet, masonry saw or angle grinder with diamond blade (for pavers/stone), concrete mixer (optional), concrete float/trowel, jointing broom, safety gear (gloves, eye protection, dust mask), pry bar, drill/impact, circular saw (decking). Materials (depending on type): pavers/stone/concrete mix/decking boards, crushed stone/aggregate base (4–6" typical for pavers), bedding sand (1" for pavers), geotextile fabric, edge restraint or concrete forms, polymeric or joint sand, reinforcement mesh or rebar for slabs, gravel for subbase, drainage pipe/solids for underdrains, landscape fabric, weed barrier. Don’t forget fasteners, flashing, and sealers as applicable.