You can absolutely build a backyard patio yourself, and the key to doing it right is working through four things in order: define what you want the space to do, pick a layout and material that matches your yard and budget, prep the ground correctly (this is where most DIY patios fail), and then lay the surface. If you want a quick overview of the full workflow, see also how to diy a patio for the same step-by-step approach from planning to surface laying. If you want a do it yourself patio on a budget, start by choosing the simplest material and layout you can execute without rushing the base prep. If you want the best odds of success, use a <a data-article-id="567331E5-9055-4397-8CBC-803F9C403794"><a data-article-id="EDD95A0B-7C7D-4345-B693-624CC793455A"><a data-article-id="82176504-E9AF-4F80-AB09-196C07D4B9EC">do it yourself patio</a></a></a> plan to guide your layout, materials, and base prep from start to finish. Whether you're eyeing a simple gravel patio this weekend or a full paver patio with a fire pit zone, the process is the same. This guide walks you through every step, from measuring your yard to the final finishing touches, with honest talk about what's easy, what's tricky, and where to slow down. If you want more easy do it yourself patio ideas beyond this step-by-step guide, look for simple DIY-friendly layouts that focus on what is easiest to execute after base prep.
Do It Yourself Backyard Patio Ideas: Step by Step Build Guide
Start with your goals and a real plan
Before you buy a single paver or bag of gravel, sit down and answer two questions: what will you actually do on this patio, and how many people need to fit comfortably? A dining patio that seats six requires a very different footprint than a lounging space with two Adirondack chairs. Getting this wrong means you either build something too small and cramped or waste money on space you don't use.
For a dining layout, a useful rule of thumb is to allow about 24 inches of table width per person and keep at least 36 inches between the back of a dining chair and any fixed obstruction behind it, so chairs can pull out without bumping a wall, planter, or fence. A more precise way to calculate minimum patio size for a dining table: take the table diameter, add half the chair depth for the front, add a full chair depth for pulling back, then add 12 to 18 inches of walkway clearance around the whole setup. For a 48-inch round table with standard chairs, that puts you at roughly 12 feet by 12 feet just to eat comfortably, not counting a grill or serving table.
For fire pit patios, siting matters as much as size. A safe minimum is 10 feet of clearance between the fire pit and any structure, fence, or combustible surface, 15 feet from overhead combustibles like tree canopies or shade sails, and if space allows, 25 feet from neighboring property lines. Some local codes are specific: the City of Kearney, for example, requires a minimum 10-foot clearance between an outdoor fireplace and any combustible wall, roof, fence, or deck. Check your local ordinances before you dig, because codes vary by city and county.
Once you know the purpose and size, sketch a rough layout on paper or use a free online tool like Google Sketchup or even just graph paper. Mark your house wall, any doors or windows that open onto the space, the direction of the slope, where the sun hits in the afternoon, and any obstacles like downspouts, utility lines, or tree roots. This sketch becomes your build blueprint and helps you catch problems on paper instead of mid-project.
How to measure your yard for a patio
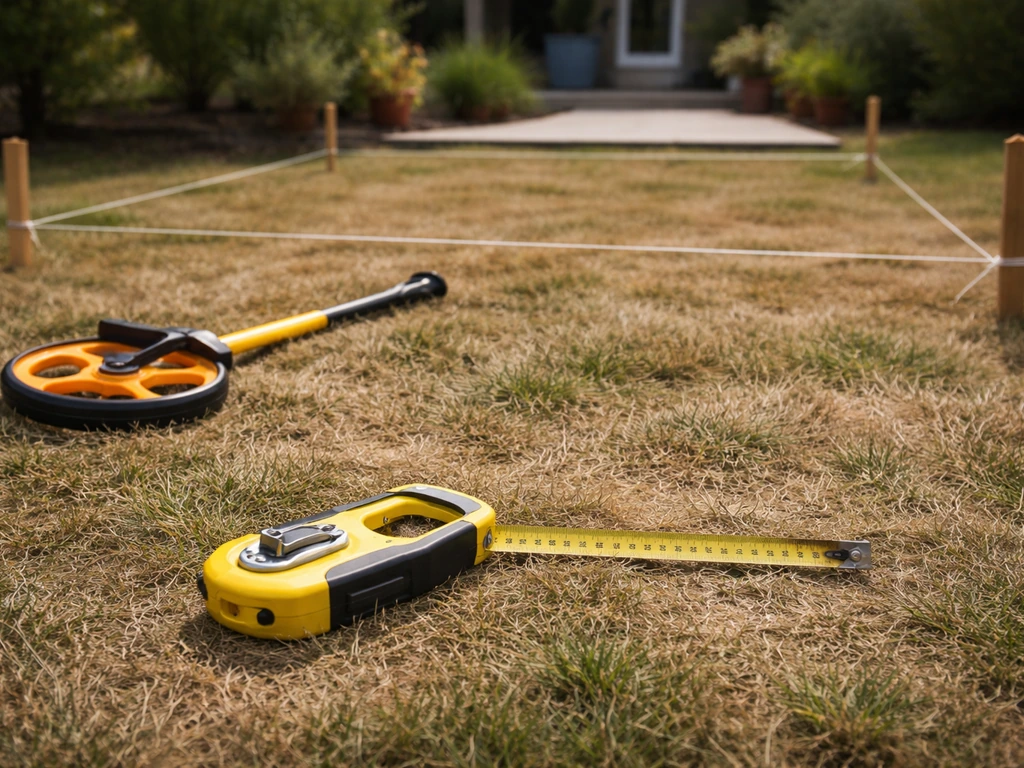
- Use a 100-foot tape measure or a measuring wheel to mark the full area you're considering.
- Drive stakes at each corner and run string lines to define the perimeter.
- Check for square by measuring diagonally corner to corner: if both diagonal measurements match, you have a square/rectangular layout.
- Note the elevation change from one end to the other using a line level or a laser level. A drop of more than 1 inch over 8 feet means you'll need to address grading.
- Mark the location of any drainage paths, downspouts, or low spots where water currently collects.
Popular DIY patio styles and layout ideas
The style you choose shapes the entire project: the material, the tools, the time, and the cost. Here are the most practical DIY-friendly options, ranked roughly from simplest to most involved.
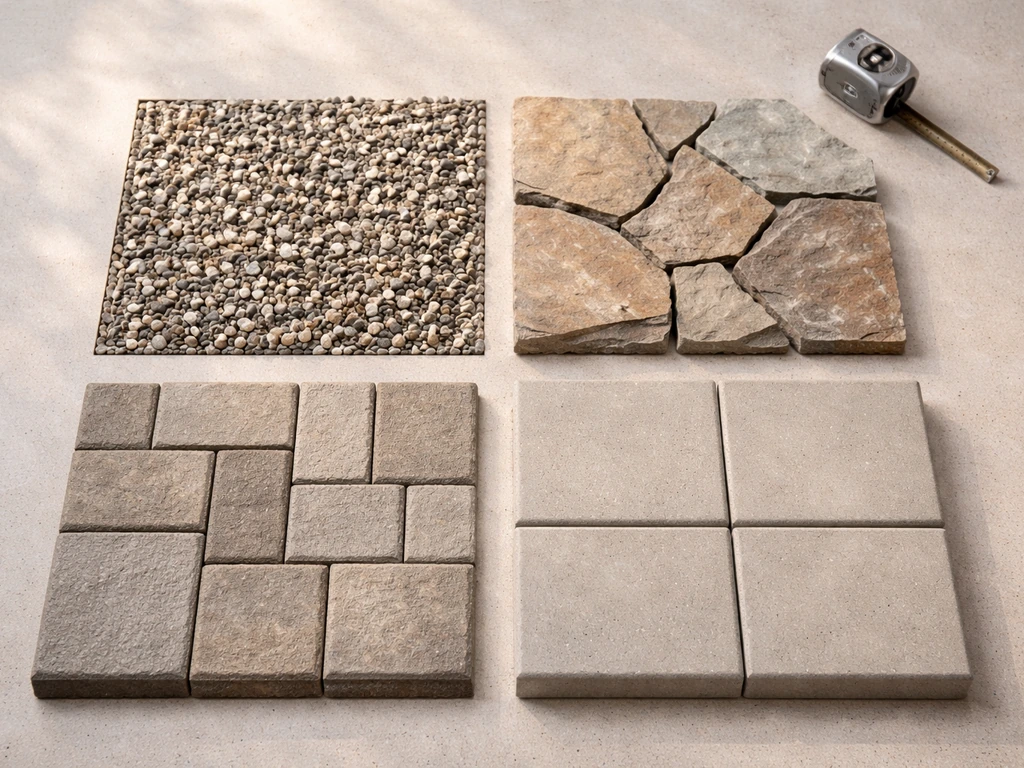
Gravel or crushed stone patio
This is the easiest patio you can build in a weekend. Excavate 4 inches of soil, lay a weed barrier, pour and level crushed granite or pea gravel, and install edge restraints. It drains naturally, costs $1 to $3 per square foot for materials, and is very forgiving for beginners. The downside: chairs sink slightly, it needs occasional raking, and gravel can migrate. Works best for informal seating zones or fire pit circles.
Flagstone or stepping stone patio
Irregular flagstone laid on a compacted sand-and-gravel base gives a natural, relaxed look. You can set stones tightly for a more formal surface or leave gaps for ground cover plants between them. It's a good mid-level DIY project: the base prep is the same as pavers, but you're fitting irregular shapes instead of uniform blocks, which takes more patience. Expect to spend $3 to $8 per square foot for natural flagstone, depending on the stone type and your region.
Concrete paver patio
Concrete pavers are the most popular DIY patio material for good reason: they're consistent in size and thickness, they interlock, and individual pavers can be pulled and reset if you need to make repairs later. You can do straight grid patterns, running bond (like brickwork), herringbone, or combination patterns. The base prep is the most labor-intensive part, but the actual surface laying is very accessible for beginners once the base is solid. Material costs run $3 to $7 per square foot for standard pavers.
Concrete slab patio
Pouring a concrete slab is the most permanent and structurally solid option, but it's also the hardest to DIY well. You need to build forms, mix or order concrete, work fast, screed and float the surface correctly, and saw-cut control joints before the concrete cracks on its own. Mistakes are much harder to fix after the pour. This is a realistic DIY project if you've worked with concrete before or you're willing to rent a concrete mixer and watch a few instructional videos. Poured concrete runs $4 to $8 per square foot for materials.
Raised patio or platform
If your yard slopes significantly, a raised patio built with retaining wall blocks or a wood/composite deck frame might actually be easier than trying to level a ground-level slab. Raised patios solve drainage problems naturally, but they require more planning, more materials, and usually some knowledge of retaining wall construction. If this is your direction, it's a more advanced project than a flat ground-level build.
Materials and cost comparison
Picking the right material is partly about budget and partly about your skill level and how permanent you want the result. Here's an honest breakdown of the main options.
| Material | Cost per Sq Ft (materials only) | DIY Difficulty | Durability | Repairability | Best For |
|---|---|---|---|---|---|
| Gravel / crushed stone | $1–$3 | Beginner | Moderate (needs upkeep) | Very easy | Informal zones, fire pit areas, budget projects |
| Flagstone (dry-laid) | $3–$8 | Beginner–Intermediate | High | Easy | Natural look, irregular layouts |
| Concrete pavers | $3–$7 | Intermediate | Very high | Easy (swap individual pavers) | Most DIY patios, any size |
| Poured concrete | $4–$8 | Advanced | Very high | Difficult | Permanent, smooth surfaces |
| Brick pavers | $4–$9 | Intermediate | Very high | Moderate | Traditional, classic look |
| Composite/wood deck platform | $8–$20+ | Advanced | High (with maintenance) | Moderate | Sloped yards, elevated spaces |
For most first-time DIYers, concrete pavers are the sweet spot. The base prep is manageable with basic tools, the surface laying has a logical process, and if something goes wrong, you can pull a paver and fix it without demolishing the whole thing. Gravel is faster and cheaper if you just need something functional right now. Poured concrete is best left for a second project once you've built some confidence, or for situations where you specifically need a smooth, hard surface.
Drainage, grading, and base prep (the part that actually matters most)
This is the section most beginner guides rush through, and it's the reason most DIY patios fail. A patio that heaves, sinks, cracks, or pools water almost always comes back to bad base prep. Get this right and the surface laying is almost guaranteed to work out.
Slope and grading
Every patio needs a slight slope away from your house so water drains off the surface instead of pooling against your foundation. The standard is a 1/8-inch to 1/4-inch drop per foot of patio length, measured away from the structure. Over a 12-foot patio, that's a 1.5-inch to 3-inch total drop. This sounds small, but it's critical. Use a long level (4-foot or 6-foot) and a tape measure to check your grade as you work. If water currently runs toward your house, you need to regrade the soil before you build anything.
Excavation depth
For a standard paver patio, excavate 7 to 9 inches deep: 4 to 6 inches for the compacted gravel subbase, 1 inch for bedding sand, and the paver thickness (typically 2.375 inches for standard 60mm pavers). If you're in a freeze-thaw climate like the northern U.S. or Canada, go with the deeper end of that range. The subbase is what keeps frost from heaving your pavers. Skimping on excavation depth is the single most common beginner mistake.
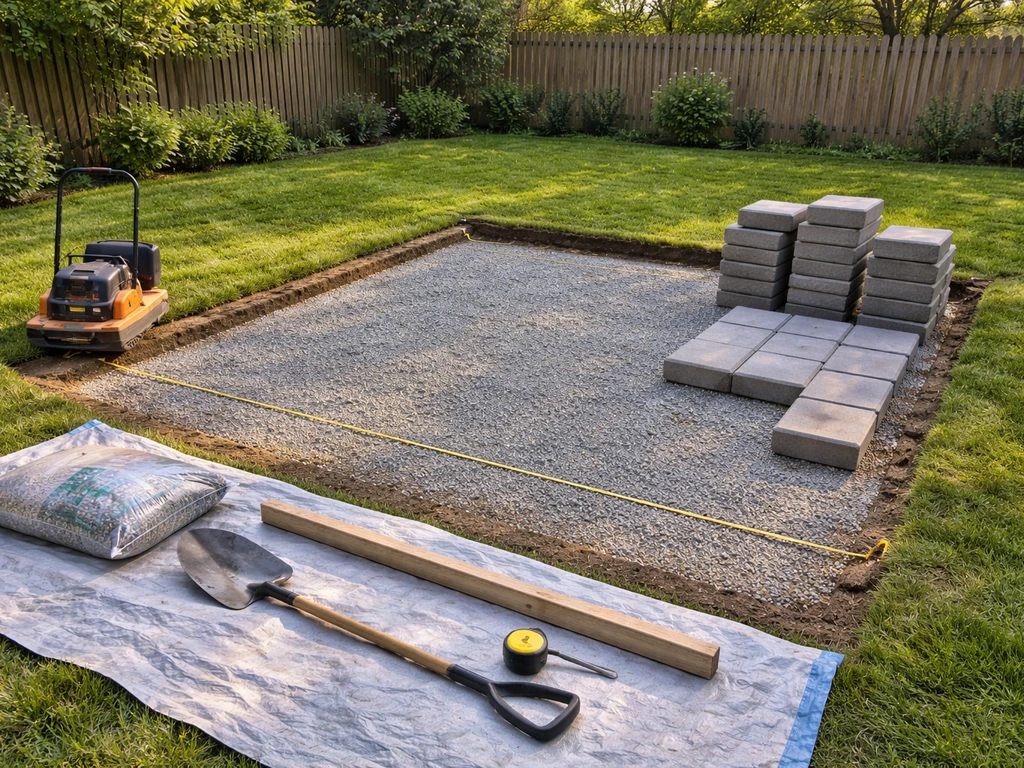
Subbase material and compaction
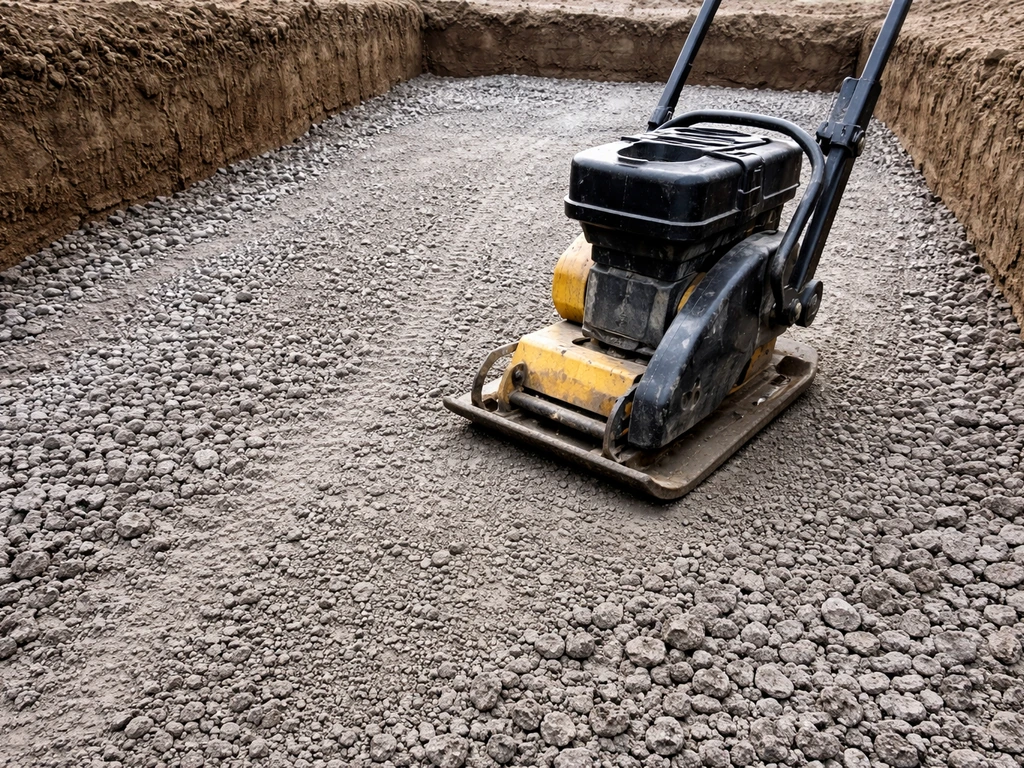
Use compactable gravel, also called crusher run, road base, or Class II base depending on your region. This is crushed stone with fine particles mixed in, and it compacts into a firm, stable layer. Do not use pea gravel or round river rock as your base: they don't compact and will shift under load. Fill in 2-inch to 3-inch lifts, compact each lift with a plate compactor (rent one for about $60 to $100 per day), then add the next lift. Two to three passes with the compactor per lift is the minimum. After compaction, the base should feel and sound solid when you walk on it, not spongy.
Edge restraints
Edge restraints are the plastic or metal borders you spike into the ground around the patio perimeter to keep pavers from spreading over time. They're cheap (around $1 to $2 per linear foot), they take 20 minutes to install, and skipping them is how patios end up with that gap-and-spread problem after a year or two. Spike them every 12 inches for solid hold. Install edge restraints after your base is set but before you lay pavers.
Drainage for problem yards
If your yard has a low spot that collects water, or if your patio area sits at the bottom of a slope, surface drainage alone won't be enough. In those cases, consider installing a simple French drain: a perforated pipe wrapped in filter fabric, buried in a gravel-filled trench that redirects water away from the patio area to a lower outlet or dry well. This is a half-day add-on to your build and saves you from a soggy patio every time it rains.
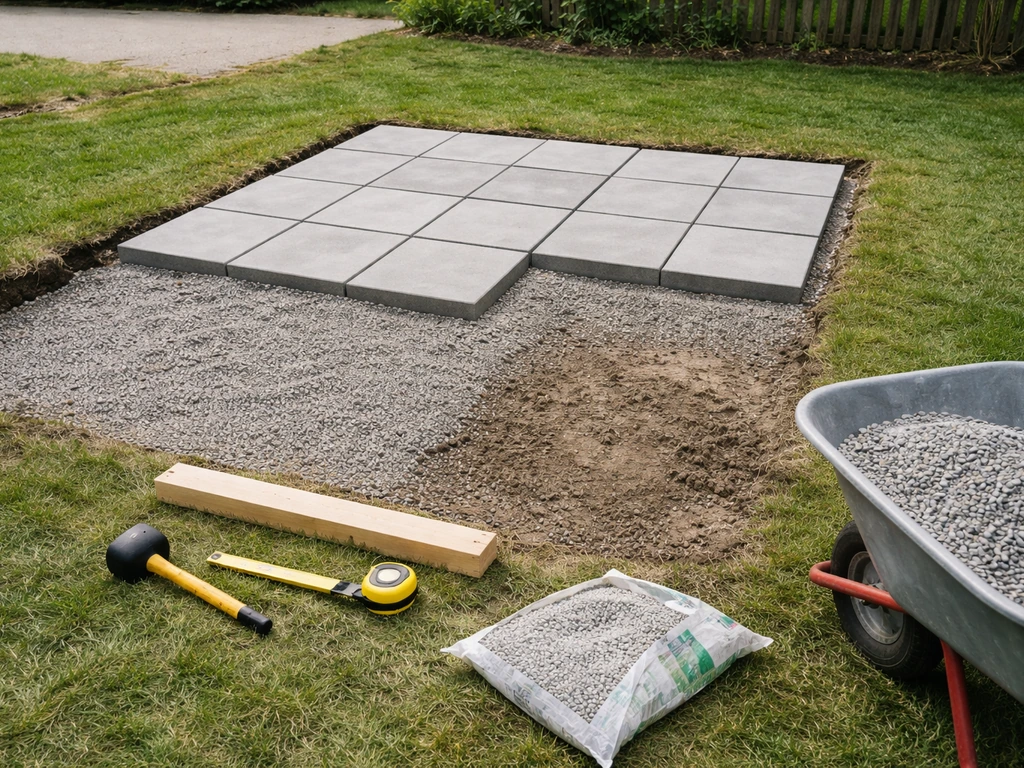
Step-by-step build process for a paver patio
The following process covers a standard dry-laid concrete paver patio, which is the most common and beginner-friendly build. The same base prep steps apply to flagstone and brick, and most of the same principles apply even if you're pouring concrete instead.
- Mark the perimeter: Use stakes and string lines to mark the full patio footprint. Check for square by comparing diagonal measurements. Spray marking paint along the string lines so you have a clear guide when you start digging.
- Call 811 (USA) before you dig: This is a free service that marks underground utility lines. Always do this before excavating, no exceptions.
- Excavate the area: Dig to your target depth (typically 7 to 9 inches for pavers, plus topsoil removal). Keep the floor of the excavation as flat as possible and build your slope into the subbase, not into uneven digging. Remove roots, rocks, and debris.
- Install your slope: Set your string lines at the correct grade, dropping 1/8 to 1/4 inch per foot away from the house. This is your reference guide for the entire base build.
- Add and compact the subbase: Fill with compactable gravel in 2-inch to 3-inch lifts. Compact each lift with a plate compactor. Check grade with your level after each pass. Target total subbase depth of 4 to 6 inches compacted.
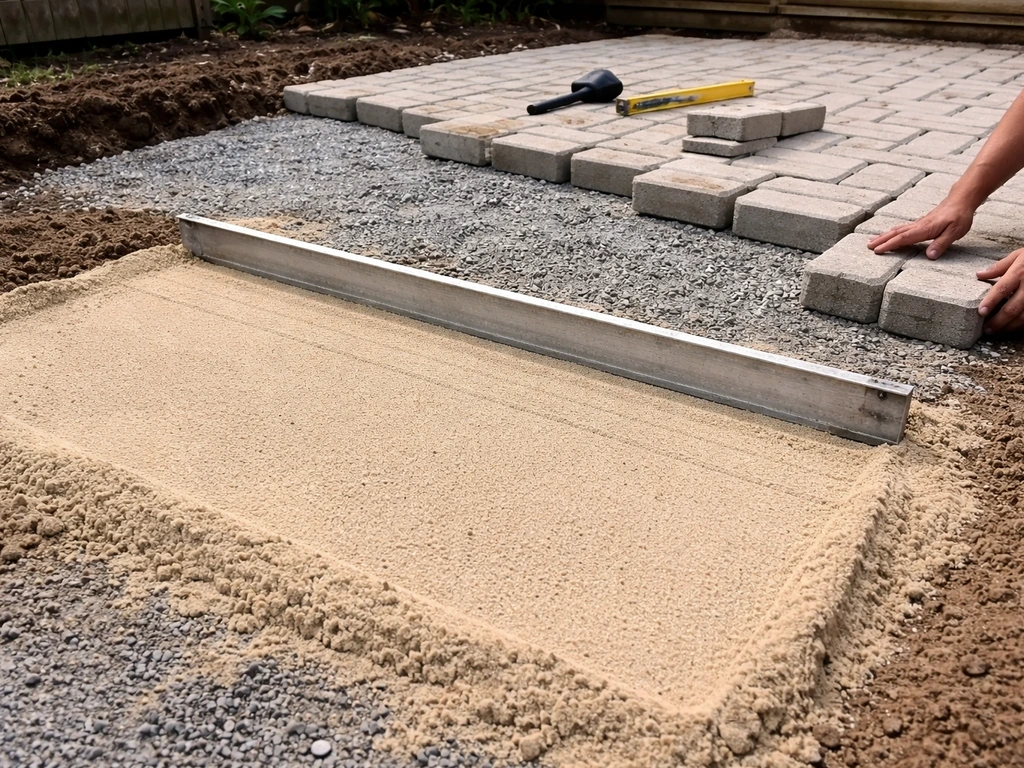
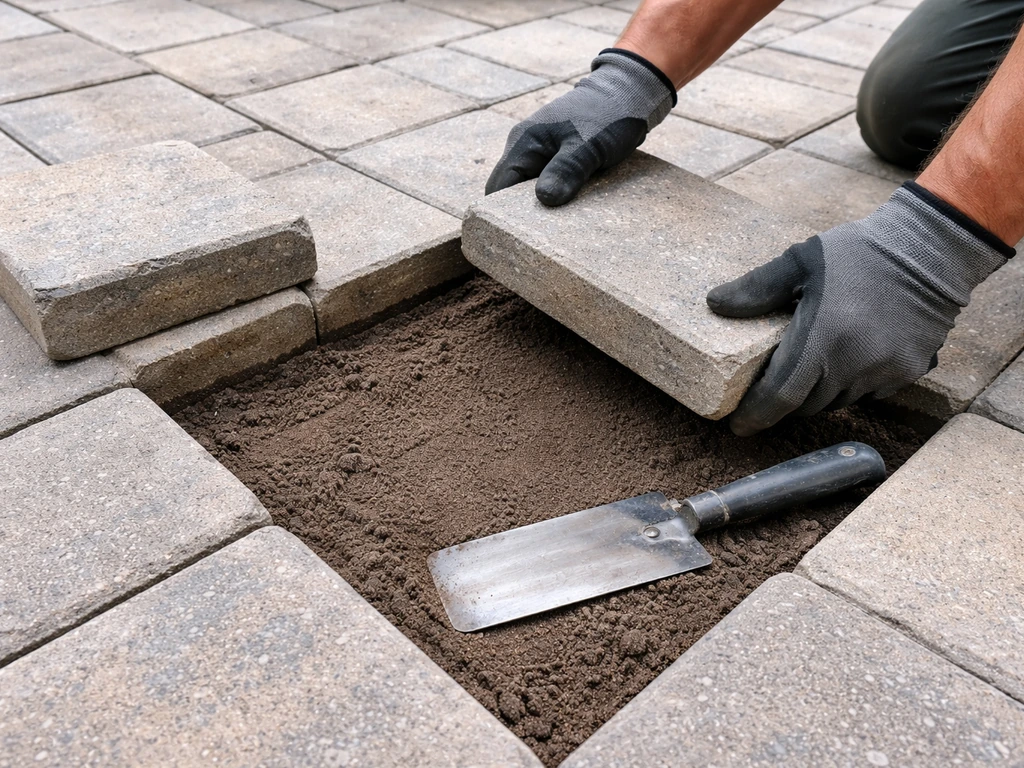
- Lay the bedding sand layer: Spread 1 inch of coarse bedding sand (concrete sand) over the compacted subbase. Use 1-inch diameter pipes or screed rails as guides to drag a straight board across, creating a perfectly flat, 1-inch deep sand bed. Do not compact the sand.
- Install edge restraints: Spike plastic paver edge restraints along the entire perimeter before laying a single paver. This keeps everything locked in place from the start.
- Lay the pavers: Start in a corner, work outward in your chosen pattern. Keep a slight gap (about 1/16 inch) between pavers for joint sand. Use a rubber mallet to gently tap pavers level. Check every few rows with your level, both in-line and diagonally. Cut pavers at edges with a wet saw or angle grinder with a diamond blade.
- Compact the surface: Run the plate compactor over the finished paver surface (put a rubber pad on the plate to protect the pavers) to fully seat them into the sand bed.
- Fill the joints: Sweep polymeric joint sand into all the gaps. Make two passes, sweeping in different directions, then lightly mist with water to activate the binding agents. Polymeric sand hardens slightly and resists ants and weed growth far better than regular sand.
- Final check and cleanup: Walk the entire patio looking for any high or low pavers. Gently pry up problem pavers, add or remove sand, and reset them. Clean off any sand haze with a stiff broom or leaf blower.
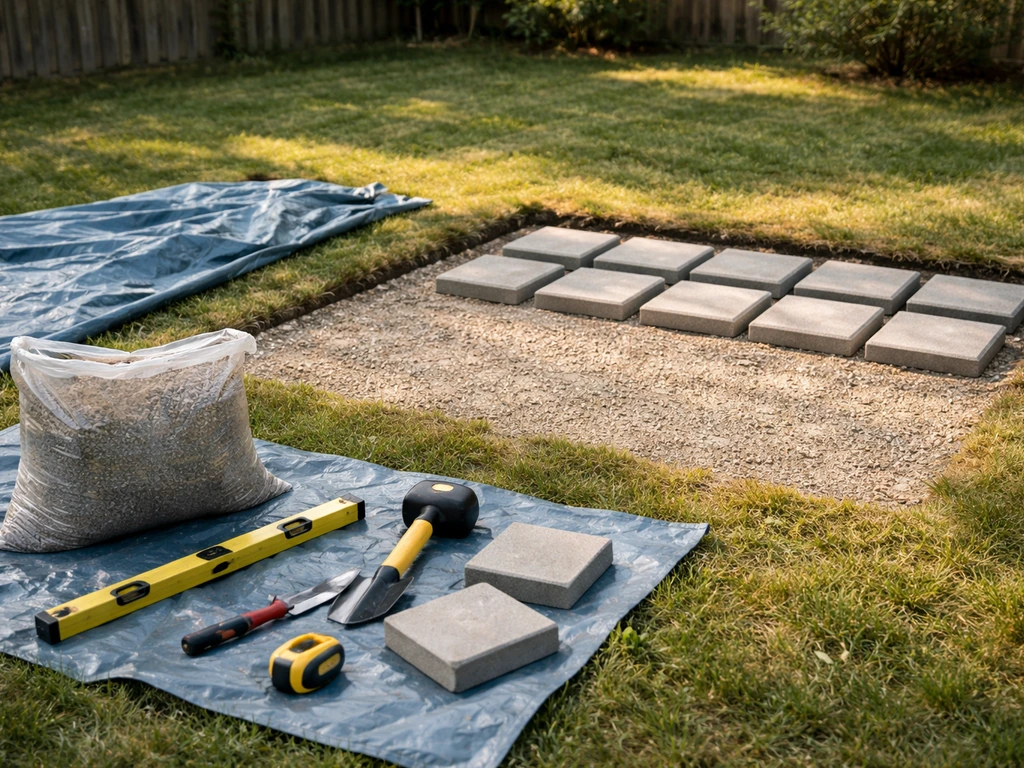
Tools, skills, and realistic timelines
You don't need a lot of specialized experience to build a paver patio, but you do need the right tools and honest expectations about time. Underestimating the job is what makes people rush the base prep, and rushing the base prep is what makes patios fail.
Tools you need
- Tape measure, stakes, string line, and line level or laser level
- Marking paint or marking chalk
- Spade shovel and flat spade for excavation (or rent a mini excavator for large jobs)
- Wheelbarrow for moving soil and gravel
- Plate compactor (rent for $60 to $100/day — this is not optional)
- Screed pipes or rails (1-inch diameter metal conduit works well) and a long straight board for screeding sand
- 4-foot or 6-foot level
- Rubber mallet
- Wet saw or angle grinder with a diamond blade for cutting pavers
- Broom and leaf blower for joint sand cleanup
- Garden hose with a mist nozzle for activating polymeric sand
Skill level and who this project suits
A paver patio in the 100 to 200 square foot range is genuinely achievable for a first-time DIYer who is comfortable with physical labor, follows instructions carefully, and doesn't rush the base prep. If you've done any landscaping, basic carpentry, or tiling work, you'll pick it up fast. The hardest part is not a skill issue, it's patience: waiting for each compaction step to be done right before moving on.
Realistic timelines by project size
| Project Size | Skill Level | Realistic Timeline (solo or 2-person crew) | Notes |
|---|---|---|---|
| Up to 100 sq ft | Beginner | 1–2 weekends | Straightforward gravel or small paver patio |
| 100–200 sq ft | Beginner–Intermediate | 2–3 weekends | Standard paver patio with base prep |
| 200–400 sq ft | Intermediate | 3–4 weekends | Add a day for paver cuts and pattern complexity |
| 400+ sq ft | Intermediate–Advanced | 4–6+ weekends | Consider renting a mini excavator; delivery logistics matter |
| Concrete slab (any size) | Advanced | 1–3 weekends | Pour day is fast but forming, curing, and finishing require experience |
| Raised/terraced patio | Advanced | 4–8+ weekends | Retaining wall knowledge required; engineering may be needed |
Common problems and how to fix them
Water pooling on the surface after rain almost always means your slope is insufficient or runs in the wrong direction. Pull up the pavers in the affected area, re-grade the subbase to the correct 1/8-inch per foot drop, relay the sand bed, and reset the pavers. It's annoying, but it's fixable.
Pavers rocking or sinking usually means the bedding sand layer wasn't uniform or the subbase wasn't fully compacted. Pull the problem paver, check the sand depth, add or remove sand as needed, and reset. If multiple pavers are sinking, you may have a compaction issue in the subbase and will need to pull that section back further.
Pavers spreading apart over time is almost always an edge restraint failure: either they weren't installed, they weren't spiked frequently enough, or the spikes pulled out of soft soil. Add or re-spike restraints and refill joints with fresh polymeric sand.
Weeds growing in joints mean the polymeric sand wasn't activated properly with water, or it was disturbed before it cured. Pull the weeds, sweep in fresh polymeric sand, and mist again. In stubborn cases, a patio-safe weed killer before re-sanding helps.
What to tackle next
Once you've got your patio footprint and material sorted, it helps to zoom into the specific build process that matches your chosen approach. If budget is a driving factor, there are plenty of ways to cut costs without compromising on base quality, the subbase is where you spend for durability, not necessarily on the surface material. If you're a first-timer, starting with a smaller, simpler layout is smart: a 10x10 gravel or flagstone area in a weekend gives you real experience with grading and compaction before you tackle a larger paver project. The process is learnable, the tools are rentable, and the result is a space you'll actually use every day.
FAQ
How do I choose the right patio size for entertaining without wasting space?
Start with the “circulation” needs, not just seating. Add at least 36 inches of clear walking space between the patio edge and any grill, built-in bench, or dining seating, then measure the widest path you will use most often (for example from the door to the dining table). This prevents the common problem of a patio that fits chairs but feels cramped when people stand up or pass serving items.
What if my yard drains poorly, but I still want a paver patio?
Don’t rely only on the patio surface slope if the surrounding soil is saturated. Before building, check where runoff goes after a heavy rain, then plan either a revised subbase slope, a swale that carries water away, or a French drain to intercept water upslope of the patio. If you see water moving toward your patio footprint, regrade or add drainage before you start excavation.
Can I build a DIY patio over existing concrete or old pavers?
Usually no, not if you want it to last. Thin overlays can hide a grade problem, and old concrete often has hollows or settlement that will telegraph through the new surface. If you keep anything, only do it after verifying the base is solid, flat, and properly sloped, and be prepared to remove sections that move or are cracked deeply.
Do I need geotextile fabric under the base, and where does it go?
For most DIY paver bases, you use weed barrier or geotextile at the right interface to stop soil migration, not as a substitute for compaction. Place it between native soil and the compacted crusher run, overlap seams, and keep it taut so it does not bunch. Skip fabric only if your specific base design and soil conditions already minimize migration.
What’s the best time of year to build a patio?
Avoid pouring or laying when the ground is wet, frozen, or actively thawing. For compaction and base stability, choose a stretch of dry weather so the subbase can achieve a firm, non-spongy feel after multiple passes. If a rainstorm is forecast, cover excavated areas to prevent the base from becoming oversaturated.
How do I prevent pavers from rocking if my sand bed looks even at first?
Rocking often comes from inconsistent sand thickness or a localized void in the compacted subbase. When you find a rocker, lift the paver, remove bedding sand down to the stable base, add sand back to the correct depth, screed it level, then reset the paver. If multiple neighbors rock together, expand the repair area because the void is usually larger than the visible stone.
What should I do about efflorescence or haze on concrete pavers after installation?
A light haze can be from manufacturing residue or leftover joint material, especially if polymeric sand wasn’t managed carefully. Wait for the area to dry, then use manufacturer-recommended cleaning methods. Avoid high-pressure washing right away, because blasting can wash joint sand out before it is fully set.
How much water should I use to activate polymeric sand?
Use a controlled watering approach, not a soak. Apply water in small amounts until the sand darkens and becomes slightly firm, then stop and let it sit. Overwatering can cause polymeric sand to wash out before it cures, while under-watering may leave weeds or gaps.
My patio got weeds between pavers, what’s the safest fix that doesn’t damage the base?
Remove weeds by pulling, then remove any loose or failed joint sand in the affected spots down to stable sand. Sweep in fresh polymeric sand and re-activate with careful misting. If weeds keep returning in the same area, that usually signals a base or drainage issue that allowed soil migration, and you may need to lift and rebuild that section.
What’s a reliable way to catch grade mistakes before the whole patio is laid?
Do a “test layout” with temporary string lines or stakes and check the slope with a long level before installing pavers. Mark the planned finished surface height at several points, then verify that water will flow away from the house in at least one clear direction. Correcting grade after base and pavers are down is possible, but it typically requires partial demolition and re-laying.
How do I deal with trees, roots, or utility lines near the patio area?
Plan for at least a safety buffer around roots and utilities, and avoid building directly over anything that may need access. If roots are encroaching, consider adjusting the patio footprint and routing edges around the root zone. For utilities, confirm exact locations with local marking services before digging so you don’t excavate through lines.
Is a raised patio always harder than a ground-level one?
It’s not always harder, but it changes the work. If your yard slopes badly, raised construction can be easier because it avoids excessive excavation and regrading. However, it introduces retaining-wall leveling, block alignment, and drainage behind the wall, so expect more measurement and more materials even if the final layout is simpler.
What are the most common tool mistakes DIYers make, and what should I rent?
The biggest tool-related failure is weak compaction. Rent a plate compactor for base work, and use a proper screed method to level the bedding sand. If you’re installing pavers, plan on renting or using a paver splitter for clean cuts, and avoid forcing irregular chips into tight gaps that can break edges later.