You can absolutely DIY a patio from scratch, and the full process breaks down into six manageable phases: pick your materials, plan the layout, prep the site, build the base, install the surface, and finish the edges. Get those steps in the right order and you'll end up with a patio that stays level, drains properly, and holds up for decades. Skip one or rush it, and you'll be dealing with sunken pavers or puddles by next spring. This guide walks you through every phase with real measurements and honest advice, whether you're a first-timer or someone who's tackled a project or two before.
How to DIY a Patio Step by Step From Start to Finish

Nolan Carver
28 Apr 2026
Pick the right patio type and materials
Your material choice shapes every step that follows, so nail this down before you buy anything. The three most common DIY options are concrete pavers, natural stone, and poured concrete. Each has real trade-offs worth knowing.
| Material | DIY Difficulty | Typical Cost (per sq ft) | Repairability | Best For |
|---|---|---|---|---|
| Concrete pavers | Beginner-friendly | $8–$20 installed | Very easy — swap individual units | Most DIYers, clean modern or classic looks |
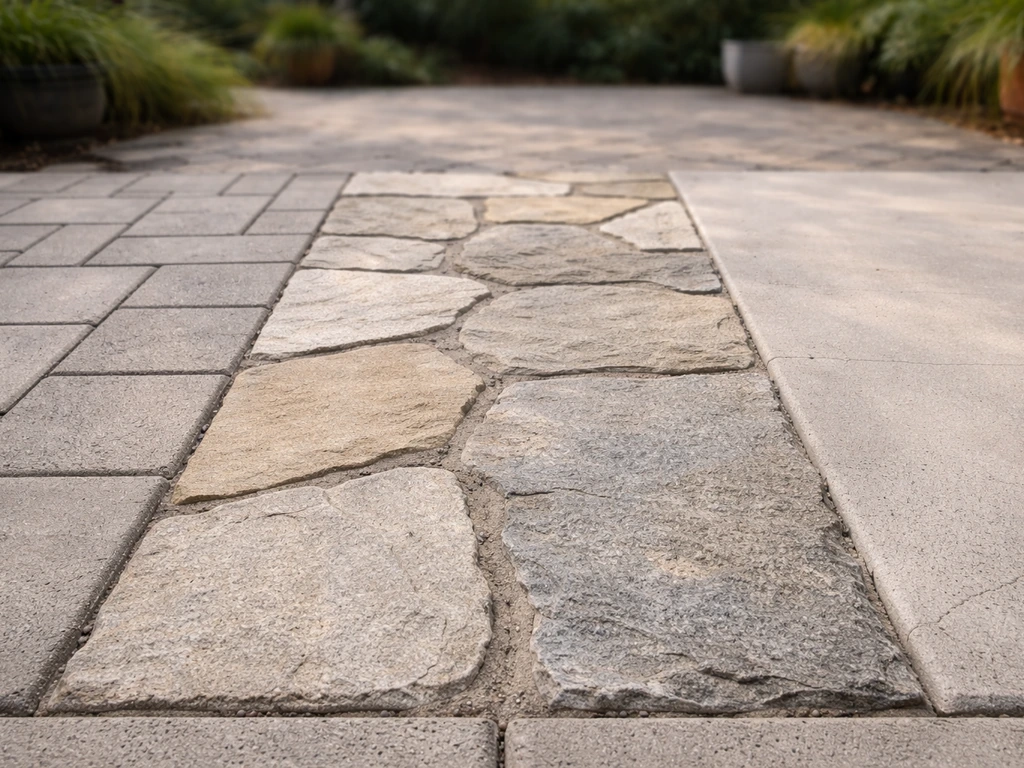
| Natural stone (flagstone, bluestone) | Moderate | $15–$30 installed | Moderate — irregular shapes need re-fitting | Rustic or natural aesthetics |
| Poured concrete | Harder, less forgiving | $6–$12 installed | Difficult — cracks require grinding or patching | Flat slabs, budget builds, driveways |
For most DIYers, interlocking concrete pavers are the best starting point. You don't need special tools or mixed concrete, you can work in sections, and if something shifts down the road you just pull up the affected units and re-level. Natural stone gives a beautiful result but the irregular shapes slow you down significantly. Poured concrete is cheaper per square foot on materials but requires forming, finishing, and cutting control joints at the right spacing (roughly every 5 to 6 feet for a patio, and every 15 to 20 feet for larger slabs), mistakes are permanent. If budget is a real concern, there are creative ways to stretch your dollar that are worth exploring in their own right.
When choosing paver style, you'll also pick a thickness. Standard residential pavers are 2-3/8 in. (60 mm) thick for pedestrian use. Step up to 3-1/8 in. (80 mm) if vehicles will ever roll over the edge. Most home improvement stores stock 60 mm pavers in a wide range of colors and textures, which is all you need for a backyard patio.
Plan layout, measurements, and permits
Measure your intended patio area and sketch it on paper to scale before you touch a shovel. Mark the house wall, any existing structures, and the outer boundary of the patio. A simple rectangular patio is the easiest starting point, odd shapes mean more cuts and more waste. Most paver manufacturers recommend accounting for about 5–10% extra material for cuts and breakage.
Permits are something a lot of DIYers skip and later regret. Check with your local building department before you start. Many jurisdictions don't require a permit for a ground-level patio under a certain size (often 200 sq ft), but some do, especially if the patio connects to a structure or sits within a setback zone. A quick phone call or online search for your city's codes takes 10 minutes and could save you from having to tear out your work.
Also call 811 (in the US) before digging anything. This free service marks underground utilities so you don't accidentally hit a gas or electrical line. Do it at least 3 business days before you plan to start excavating.
Once you know the dimensions, use stakes and string lines to lay out the perimeter on the ground. A batter board setup at the corners gives you something to re-reference even after the string gets bumped around. Check for square by measuring diagonals, if both diagonal measurements are equal, your layout is square. The string lines also give you a reference elevation for slope, which you'll set intentionally in the next phase.
Site prep: demo, grading, and drainage
This is the phase most beginners underestimate, and it's where most patios fail. Uneven ground, poor drainage, and inadequate slope cause more long-term problems than any other single factor.
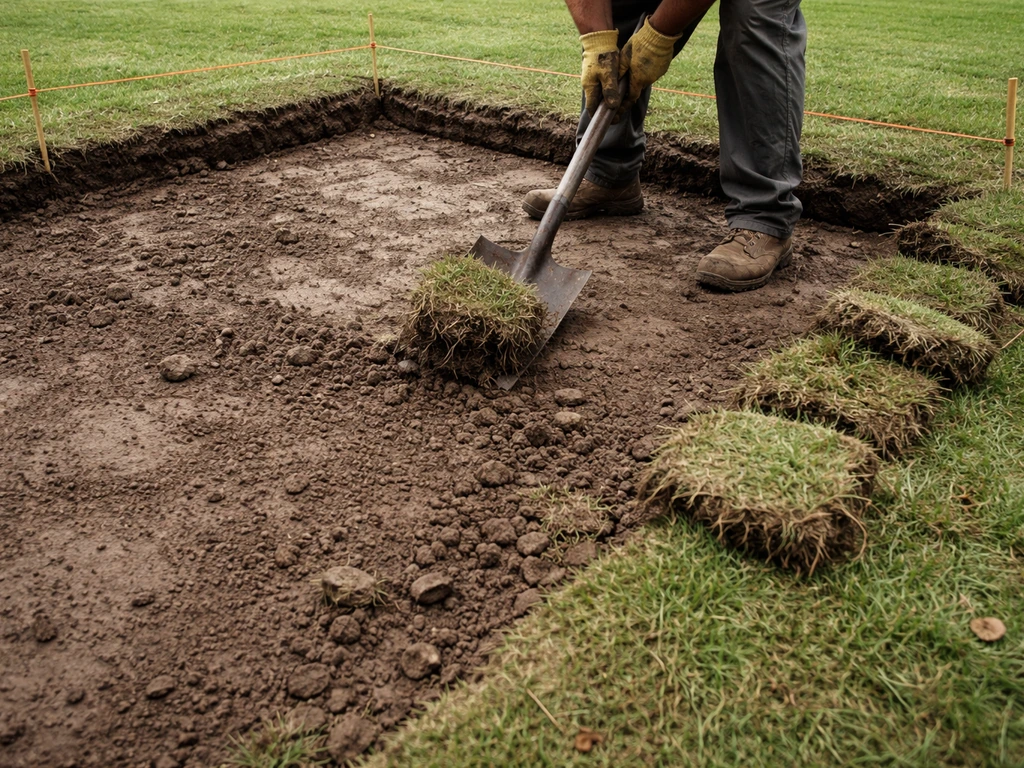
Demo and excavation
Remove all sod, plants, and organic material from the patio footprint. Organic material compresses and decomposes over time, which causes settling. Excavate down to your required depth, for a typical paver patio on stable residential soil, plan for 6 inches of compacted gravel base plus 1 inch of bedding sand plus the paver thickness. For 2-3/8 in. pavers that's roughly 9.5 inches total from finished surface to subgrade. Round up to 10 inches to give yourself room to work. Mark this target depth on your excavation stakes so you're digging consistently across the whole area.
Slope and drainage, the non-negotiable part

Every patio needs a deliberate slope away from the house. The Building America Solution Center recommends at least 0.25 inches of drop per foot of horizontal run, across the full length of the slab or for at least 10 feet. That works out to about 1/4 in. per foot, so a 12-foot-deep patio needs at least 3 inches of fall from the house wall to the outer edge. A related standard used in terrace design is a fall of roughly 1:60, which equals about 1/2 inch per foot, a bit more aggressive and totally fine if your yard handles it. Set this slope into your string lines from the start. Build the whole base to this slope, not just the surface.
If your yard slopes toward the house, you have a few options: cut into the hillside and install a retaining wall at the back, route water around the patio perimeter with a French drain, or build the patio slightly raised so runoff can exit from the sides. Ignoring an existing drainage problem won't make it disappear, it'll just turn your patio into a pond.
Geotextile fabric
Once you've excavated and graded your subgrade (the native soil at the bottom), consider laying a geotextile landscape fabric directly on the subgrade before adding base material. It separates the soil from your gravel, prevents fines from migrating up into the base over time, and helps maintain long-term stability. CMHA guidance specifically recommends geotextile when there's any risk of sand migrating beneath or under edge restraints. It's cheap insurance, a 4x50 ft roll costs about $20–$30 and takes 10 minutes to lay.
Build the base and get compaction right
The base is the single most important part of the whole project. Everything else sits on it. Skimp here and nothing else you do will save you.
What to use for base material
Use a crushed angular aggregate, usually called processed gravel, crusher run, or Class II base depending on your region. Angular stone locks together under compaction in a way that rounded gravel (like pea gravel) never will. Do not use plain sand, topsoil, or pea gravel as base material. These shift too easily and don't compact properly.
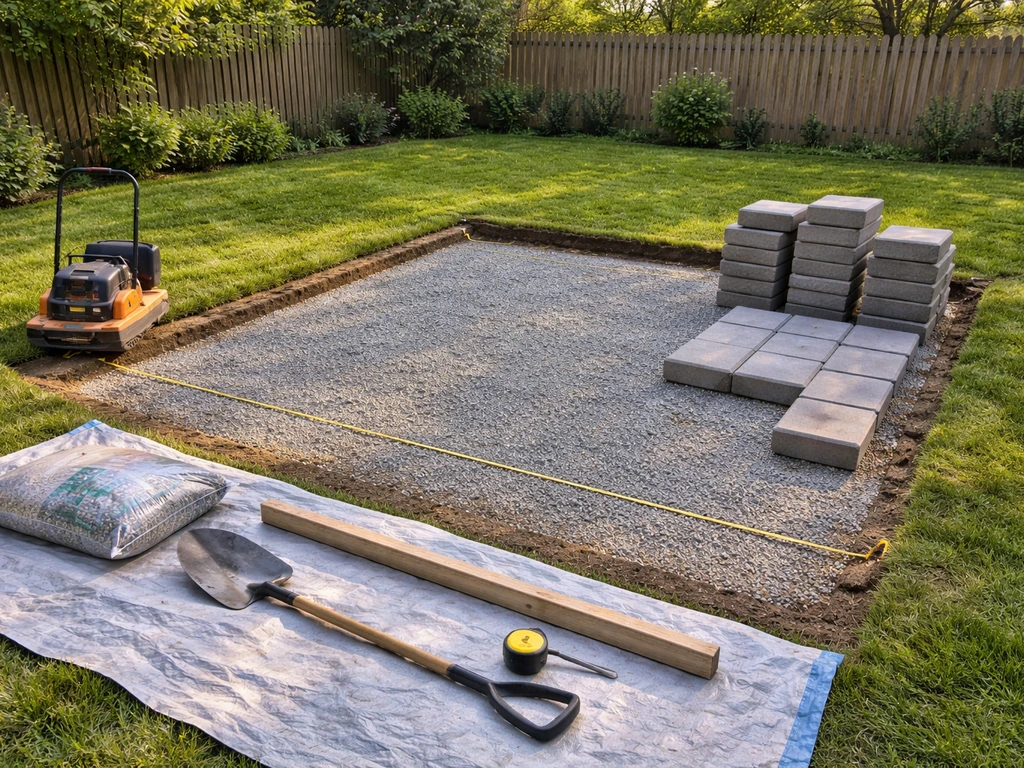
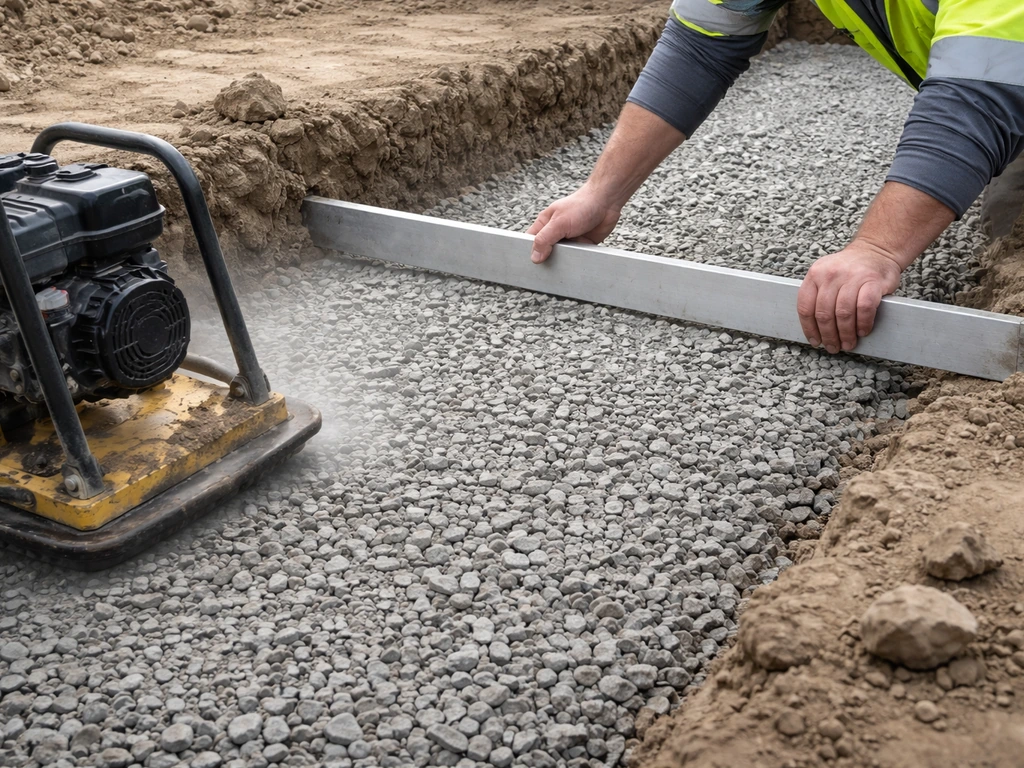
Compaction: do it in layers
This is where most DIY patios go wrong. Dumping 6 inches of gravel in at once and running a plate compactor over it does not give you a solid base. ICPI (the Interlocking Concrete Pavement Institute) specifies spreading and compacting base material in 4 to 6 inch lifts, layer by layer. So if you need 6 inches of base, spread 3 inches, compact it thoroughly, then add the next 3 inches and compact again. The professional target is 98% of Standard Proctor density (ASTM D698), you can't measure that at home, but running a plate compactor in overlapping passes (at least two full passes in perpendicular directions) gets you close.
Rent a plate compactor from your local equipment rental shop, expect to pay around $60–$90 per day. Do not try to substitute a hand tamper for the whole base. A hand tamper is fine for tight spots near edges, but it can't deliver the consistent compaction force you need across a large area. After compaction, check that the base is firm and doesn't deflect noticeably when you walk on it. If it feels spongy, compact again.
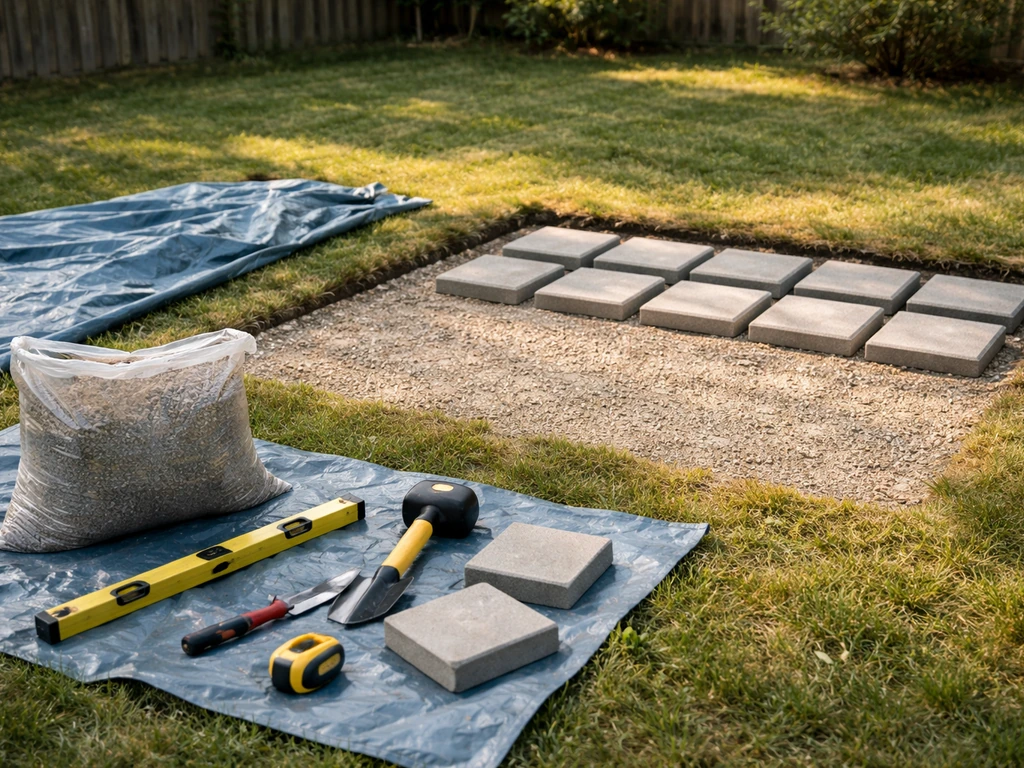
Bedding sand layer
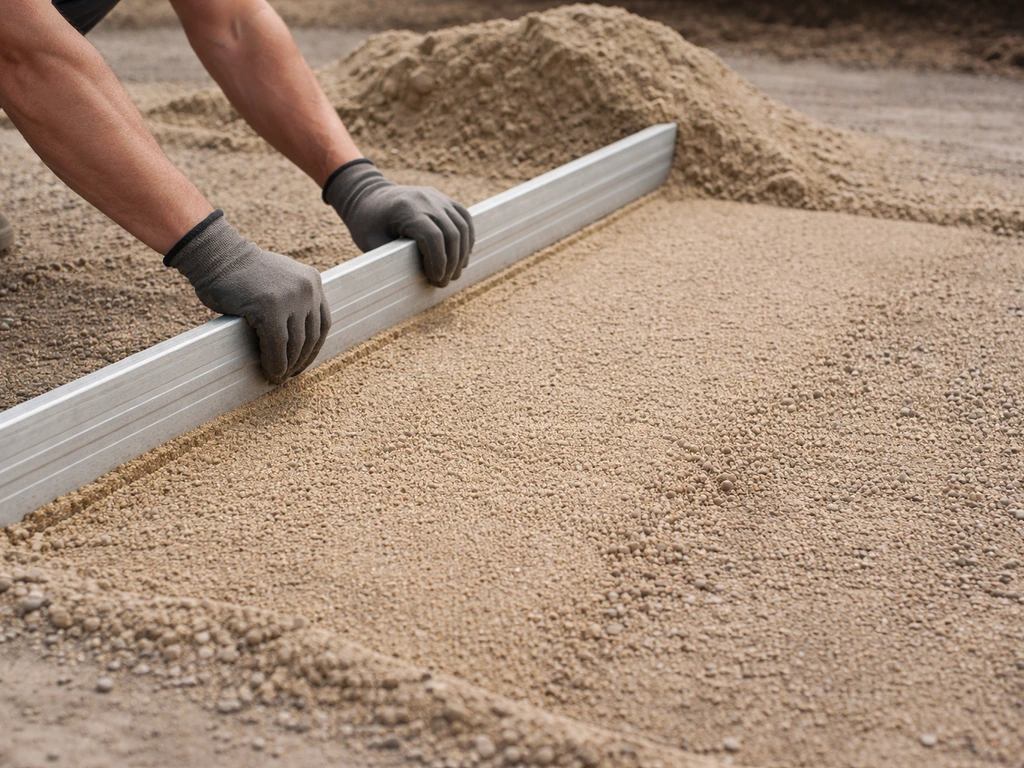
Once the base is compacted, add a bedding sand layer on top. Use coarse concrete sand (not masonry sand or play sand). The bedding layer should be a nominal 1 inch uncompacted before screeding, CMHA specifies 25 mm (about 1 inch) as the target, with 1.5 inches as a practical maximum. Going thicker than 1.5 inches defeats the purpose, thick sand beds allow pavers to rock and settle unevenly. Use two lengths of 1-inch conduit pipe or screed rails set parallel to each other on top of the compacted base, then drag a straight 2x4 board across them to screed the sand to a consistent depth. Pull the rails out once you've screeded a section and fill the grooves with sand by hand.
Install the patio surface: pavers, stone, or concrete
Starting point and pattern
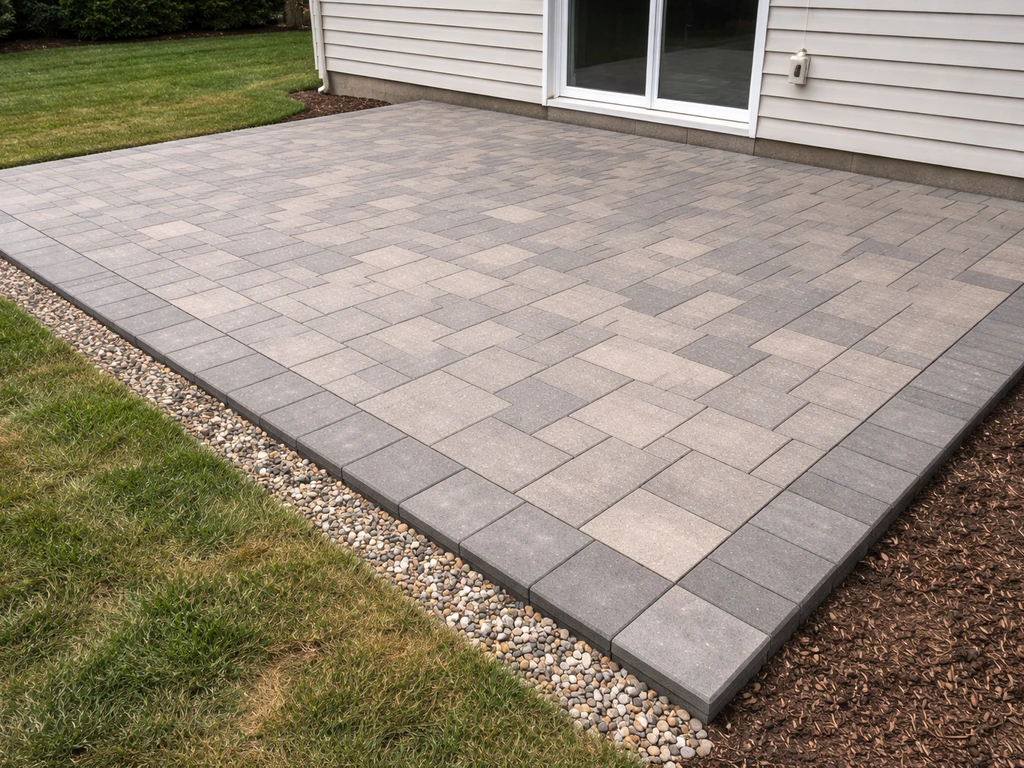
Start laying pavers from a corner or a straight reference edge (usually the house wall or a fixed structure). Work outward so you're always stepping on unfinished base, not on newly laid pavers, which could shift. If you are looking for do it yourself backyard patio ideas, start by choosing a paver style and layout that fits your yard and your drainage plan. The most common beginner-friendly pattern is a running bond (like standard brick), which is forgiving of slight size variations. Herringbone at 45 or 90 degrees is more stable structurally and looks great, but it creates more edge cuts. Basketweave and pinwheel patterns fall somewhere in between. Pick a pattern before you start, changing patterns mid-installation is possible but note that when you change direction, you may need specific edge pavers to maintain proper interlock, per CMHA guidance.
Place each paver gently, don't slide them into position, which disrupts the screeded sand beneath. Butt them tightly against each other. Use a rubber mallet to tap them level. Check level frequently with a straightedge or long level. Pavers should sit about 1/8 to 1/4 inch above your target finished elevation at this stage, they'll drop slightly during the final compaction pass.
Cuts and curves
Save all cuts for the end. Lay full pavers first across the entire field, then go back and cut pieces for edges and borders. You can rent a wet saw (also called a masonry saw or paver splitter) for clean cuts. A diamond blade wet saw costs around $60–$80 per day to rent and gives clean, precise cuts. Score-and-snap splitters work for straight cuts but create rougher edges. Always wear eye protection and hearing protection when cutting.
Poured concrete specifics
If you're going with poured concrete instead of pavers, build forms from 2x4 or 2x6 lumber staked every 2 feet. Set the slope (0.25 inch per foot minimum away from the house) into the forms before you pour. Place wire mesh or rebar on 2-inch chairs inside the form for reinforcement. Cut control joints with a groover tool while the concrete is still workable, or saw-cut them within 24 hours after the pour. Graniterock and other concrete engineering sources recommend spacing control joints 5 to 6 feet apart in patios. These joints create a weakened plane that guides cracking along predictable lines instead of random ones, they should be about 1/4 to 1/3 the depth of the slab.
Edge restraints, leveling, and finishing details
Install edge restraints first (or in sequence)
Edge restraints hold the whole paver field together. Without them, pavers at the perimeter gradually creep outward under foot traffic, and the whole installation slowly fans apart. Install plastic or aluminum paver edging along all exposed patio edges (not against the house, the house wall acts as its own restraint). Spike the edging into the compacted base with 10-inch spikes, spaced every 8 to 12 inches. CMHA is clear that edge restraints must provide sufficient lateral support to prevent sand migration, which is why a quality geotextile underneath also matters at the edges. For curved edges, use flexible plastic edging designed for that purpose.
Final compaction pass
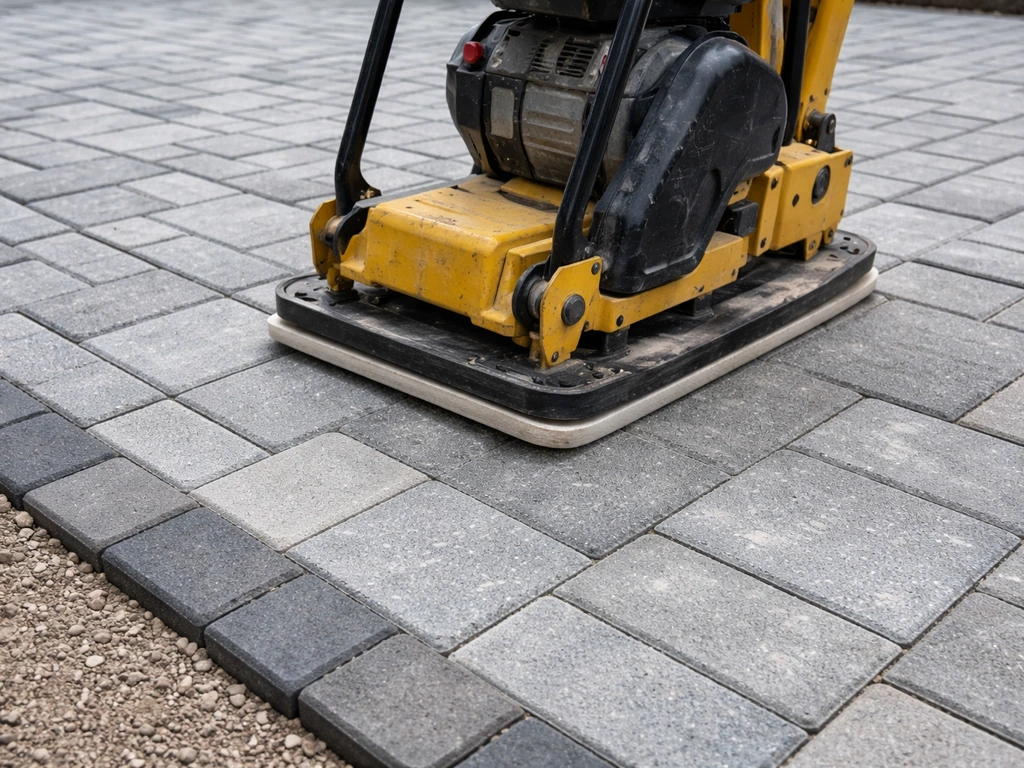
Once all pavers (including cut pieces) are in place and edge restraints are secured, run the plate compactor over the entire paved surface. Place a piece of rubber pad or compaction pad under the compactor plate to protect the paver surface from scuffing. Make at least two passes in perpendicular directions. This final compaction seats each paver firmly into the bedding sand and brings the surface down to your target elevation. After compaction, check that the surface is even using a 10-foot straightedge, the CMHA tolerance for final surface is about 3/8 inch over 10 feet.
Joint sand: regular vs. polymeric
Spread jointing sand over the compacted surface and sweep it into the joints with a push broom. Regular joint sand is easy to work with and inexpensive, but it can wash out in heavy rain and may need periodic replenishment. Polymeric sand is a much better long-term choice, it contains binders that harden when activated with water, locking joints in place and resisting washout and weed growth. To install polymeric sand correctly: sweep it dry into the joints (don't work on wet pavers), make two or more passes with the plate compactor to consolidate the sand, wait about 10–15 minutes, then apply a fine mist of water until the sand is fully activated. Avoid using a strong stream, fine mist is key so you don't displace the sand before it's activated, per Techniseal's installation specs. Check joints after the sand cures: a putty knife pushed into a joint should not move more than 1/4 inch (6 mm) to confirm proper consolidation.
One important reminder: the strength of your patio does not come from joint sand. Joint sand just fills the gaps. The actual structural integrity comes from your base, your edge restraints, and proper compaction. If your base is solid, joint sand is just the final finishing detail.
Troubleshooting, maintenance, and your DIY checklist
Common problems and how to fix them
- Pavers sinking or rocking: Almost always a base problem. Pull up the affected pavers, add and re-compact base material, re-screed the bedding sand, and relay. Don't try to add extra sand under a sinking paver without fixing the base — it'll just sink again.
- Water pooling on the patio: Your slope is insufficient or running the wrong direction. Check the slope with a level and tape measure. You may need to pull up sections and rebuild with the correct 0.25 inch per foot (or steeper) fall away from the house.
- Joint sand washing out: If you used regular sand, re-sand after heavy rain or convert to polymeric sand. If polymeric sand is eroding, it likely wasn't activated correctly — sweep in new product on a dry day and re-activate with a fine mist.
- Edges spreading or pavers shifting laterally: Edge restraint is failing or was installed incorrectly. Re-drive spikes or replace edging with a more robust aluminum system. Check that spikes are going into the compacted base, not just the sand.
- Uneven surface after installation: Check for high or low individual pavers with a straightedge. Pull up the offending paver, adjust the bedding sand, and replace. Don't assume compaction will fully correct a visibly uneven screeded bed.
- Weeds growing in joints: Use polymeric sand and apply a paver sealer. For existing installations, pull weeds manually, re-sand, and consider sealing.
Annual maintenance routine
A well-built paver patio needs very little ongoing work. Once a year, check the joints for sand loss and top up as needed. Inspect edge restraints for any sections that have shifted. Re-apply sealer every 3 to 5 years if you sealed the surface originally. If a paver cracks or gets stained beyond cleaning, the real advantage of pavers shows itself: pull up just that unit and replace it for a few dollars, no grinding or patching required.
Your DIY patio build checklist
- Choose material (pavers, natural stone, or poured concrete) and calculate quantities with 5–10% overage
- Sketch layout to scale and confirm final dimensions
- Check local permit requirements and call 811 for utility marking
- Set string lines with correct slope: at least 0.25 inch drop per foot away from house
- Excavate to required depth (paver thickness + 1 in. sand + 6 in. base = roughly 9.5–10 in. total)
- Install geotextile fabric on subgrade
- Spread and compact base material in 4–6 in. lifts using a plate compactor
- Screed bedding sand to a nominal 1 inch depth (max 1.5 in.)
- Lay pavers from a fixed reference edge, checking level frequently
- Save cuts for last — cut border and edge pieces
- Install edge restraints with 10-inch spikes every 8–12 inches
- Run final compaction pass over entire paved surface (two perpendicular passes)
- Sweep polymeric sand into joints on dry pavers, compact again, mist to activate
- Check joint consolidation (putty knife test: less than 1/4 inch penetration)
- Clean surface and inspect slope and drainage before calling it done
If this is your first build, don't try to tackle a complex freeform design with curves and multiple elevations right out of the gate. A simple 10x12 or 12x16 rectangular patio is a completely satisfying project that teaches you every skill you'll need for bigger builds later. Once you've done one, the base work becomes second nature and you can start exploring ideas like built-in seating, fire pits, or raised sections with confidence. If you want more guidance, these easy do it yourself patio ideas can help you plan a layout that looks great and stays durable. With the foundation done, you can move on to do it yourself backyard patio ideas like built-in seating, fire pits, and raised sections. The fundamentals, slope, compaction, solid base, are the same regardless of the design. The fundamentals, slope, compaction, and solid base are the same, but if you’re aiming for a do it yourself patio on a budget, you can choose a simpler layout and cost-effective materials.
FAQ
What should I do if my yard slopes toward the house (so water naturally runs onto the patio)?
If your patio is flat but your yard drains toward the house, you still need a controlled runoff path. Build the patio with the required slope away from the house and add a side outlet or a perimeter drainage feature (like a French drain) so water has somewhere to go instead of pooling at the edges.
My pavers feel a little spongy or rock, how do I troubleshoot what went wrong?
Don’t rely on joint sand to “fix” rocking pavers. If pavers move after compaction, the cause is usually an uneven base or a bedding layer that is too thick. Remove the affected section, re-screed to the recommended bedding thickness, and re-compact the base before reinstalling.
How much should I set pavers above the final height before the final compaction pass?
Use the final slope for the base, then aim to place pavers slightly high (about an eighth to a quarter inch) so the final compaction brings them to grade. If you set pavers exactly to finished height before compaction, they often end up low after the plate compactor seats them.
What’s the correct way to install polymeric joint sand, and what’s the most common mistake?
Polymeric sand has to be activated correctly to lock joints. Keep pavers dry while sweeping it in, consolidate it with compaction passes, then mist water lightly until it’s fully activated (a steady stream can wash sand out of the joints and prevent proper binding).
Where do I need edge restraints, can I leave them out on the sides that touch grass?
Edge restraints should run along every exposed edge of the paver field so the perimeter can’t spread. Skipping restraint on one side usually shows up first as widening joints or a visibly “creeping” edge after a few seasons of foot traffic.
Can I DIY steps or a raised edge as part of the same patio? What changes in the build?
Yes, but only if the soil and base are stable enough to support cut transitions. For steps, you typically need extra attention to subgrade stability and reinforcing the base at the tread edges, then you’ll set each tread for consistent rise and slope to match drainage.
How do I verify flatness and joint quality during installation, not just after everything is finished?
A 10-foot straightedge check is for overall flatness, but locally you also want tight joints and no edge lippage. If you see dips in one area after compaction, stop and rework that section rather than adding more sand or trying to “shim” later.
Is it safe to build a patio when rain is in the forecast, and what should I protect from water?
Avoid doing the install right before heavy rain. After installing pavers, joint sand work should be done when surfaces can stay dry enough to allow activation, and base materials should not be washed or churned before compaction is complete.
If my city says a permit is not needed for small patios, should I still plan for inspections or paperwork?
If the patio is within a setback zone or connected to a structure, permits are more likely. Even when a permit is not required, some localities still require inspections for drainage, grading, or utilities, so confirm what gets inspected before you finalize the base.
How can I minimize paver cutting and waste for my first DIY patio?
Start with a simple rectangle for your first project, but you can still reduce waste by laying out the design around standard paver sizes. Plan the field so the main area uses full units, then concentrate cuts at the edges so you don’t end up with lots of small pieces in the center.