You can absolutely build a patio fire table yourself in a weekend or two. The basic idea is a non-combustible enclosure (concrete block, brick, or steel frame) sized to hold a gas burner pan, finished with a heat-safe countertop, and connected to propane or natural gas. Most DIYers use a propane setup because you don't need to run a gas line, and a solid mid-size build with a 12x12 inch burner costs roughly $400 to $700 in materials. A do-it-yourself fire pit patio is a great option when you want the same warm, social fire feature but with simpler build decisions. The result is a functional table that doubles as a fire feature, and it's more useful than a standalone fire pit because people can actually sit around it and set drinks on the surface.
How to Build a Patio Fire Table: Step-by-Step DIY Guide

Fire Table vs. Standalone Fire Pit: Know What You're Building
A fire table is a raised enclosure, typically 18 to 24 inches tall, with a flat table surface surrounding a recessed fire pan in the center. It functions as furniture first and a fire feature second. A standalone fire pit sits on the ground or a low base and is purely a fire feature you stand or sit around. If you're thinking about a ground-level ring of stones or a simple bowl, that's a different project. This guide is specifically for the raised table version.
Before you cut or buy anything, nail down these key specs: the overall table dimensions, the burner pan size, and the table height. Standard dining height is 28 to 30 inches; bar height is 36 to 42 inches; and a coffee/lounge table sits at 16 to 20 inches. For a table that seats 4 to 6 people, a common footprint is 48 inches by 24 inches, with a 12x12 or 18x18 inch burner opening in the center. Going bigger than an 18x18 burner means more BTUs and higher gas consumption, so size it to the seating, not just for drama.
| Table Style | Height Range | Common Footprint | Burner Pan Size |
|---|---|---|---|
| Lounge / Coffee | 16–20 in. | 36x36 in. or larger | 12x12 in. |
| Dining Height | 28–30 in. | 48x24 in. or 48x48 in. | 12x12 or 18x18 in. |
| Bar Height | 36–42 in. | 48x24 in. | 12x12 in. |
Fuel Type and Burner System: Propane or Natural Gas
Propane is the go-to for most DIY fire tables because you connect a standard 20 lb tank (the same size as a BBQ grill tank) and you're done. No permits, no trenching, no licensed plumber required. Natural gas is cleaner and you never run out mid-fire, but running a gas line to your patio typically requires a licensed contractor and a permit in most jurisdictions. If your patio already has a natural gas stub-out nearby, natural gas makes sense. Otherwise, start with propane.
Wood-burning is not recommended for a fire table. A table enclosure restricts airflow in ways that make wood combustion unpredictable and creates ember hazards on a surface where people are resting their arms. Gas burners with a control valve give you instant on/off control, which is the right tool for this format.
Picking the Right Burner Kit and Compatible Parts
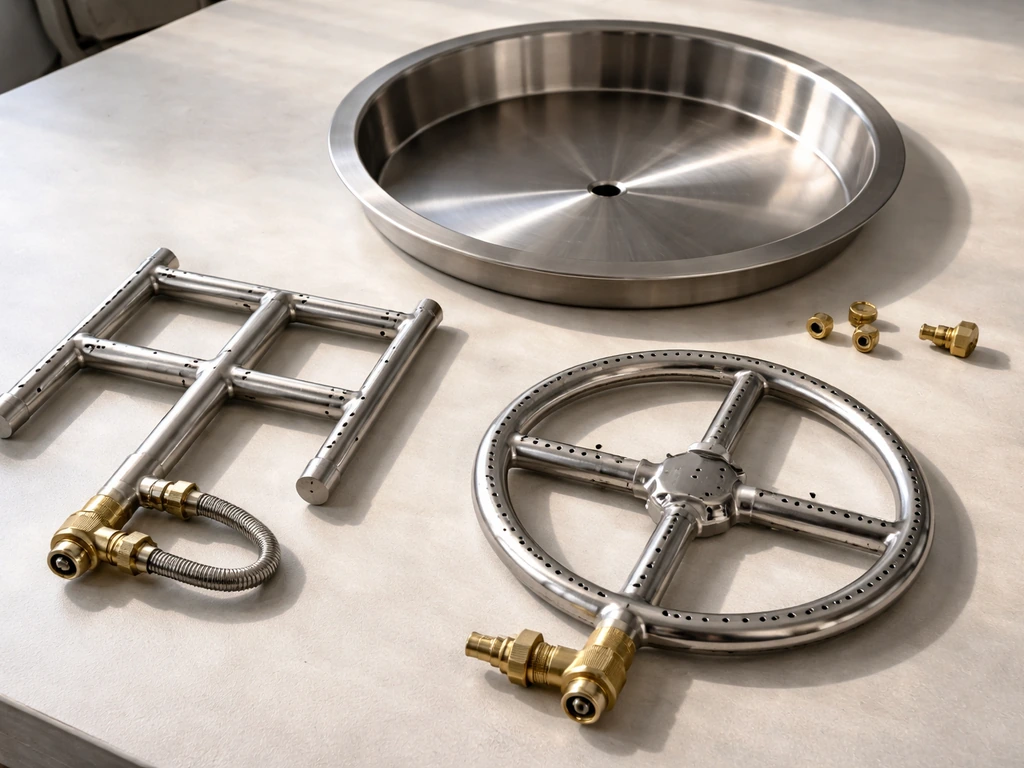
Purchase a complete burner kit rather than assembling individual parts. A quality kit includes the burner (H-burner and ring burners are both common), a stainless steel pan, a control valve, a regulator, and the connecting hose. Brands like HPC Fire, TrueFlame, and Bobe make kits in standard sizes. The kit will specify BTU output and the gas pressure it's rated for: typically around 11.0 inches of water column (in. WC) for liquid propane and about 7.0 in. WC for natural gas. Don't mix those up when buying a regulator.
If you choose propane, your kit will include or reference an air mixer. The air mixer is a small venturi device that blends atmospheric air with propane before it reaches the burner. When you install it, orient the air intake holes facing away from the burner pan, as specified in most installation manuals. This prevents backflow into the mixer, which is one of the most common DIY propane fire pit problems. Connect the gas feed hose to the air mixer inlet, not directly to the burner.
Make sure the kit you buy is listed or tested to ANSI Z21.97 / CSA 2.41, the safety standard for outdoor decorative gas appliances. Reputable manufacturers will state this in their product documentation. If a burner kit doesn't reference a safety listing, skip it.
Plan the Site: Foundation, Leveling, and Safe Clearances
A fire table needs a firm, level, non-combustible surface underneath it. If you want a full patio fireplace instead, the same safety-first thinking applies, but you will be building a larger, fire-rated masonry structure a fire table. Concrete patio slabs, natural stone, and concrete pavers are all fine. Composite decking is the most common problem area. If you're placing the table on a composite or wood deck, you need a non-combustible heat shield under the entire footprint of the table. Use cement board (like PermaBASE or HardieBacker) cut to the table's footprint, and leave at least a 1-inch air gap between the bottom of the cement board and the deck surface using standoff feet or thin non-combustible shims. That airspace lets heat dissipate instead of building up against the deck.
Clearances from combustibles matter a lot. As a general rule, maintain at least 36 inches of horizontal clearance from the burner pan edge to any combustible surface, fence, or structure. Do not position the fire table under a patio cover, pergola, or overhang of any kind. Many burner kit manufacturers explicitly state the burner should not be used under an overhead structure. Check your specific kit's documentation for the exact numbers, because they vary by BTU output.
- Horizontal clearance to combustibles: 36 inches minimum from burner edge (verify with your kit specs)
- Overhead clearance: no overhangs or covered structures directly above the flame
- Clearance from ignition sources: keep the table away from grills, outdoor heaters, and gas meters
- Base surface: concrete slab, pavers, or stone preferred; heat shield required on wood/composite decks
- Level tolerance: base should be within 1/4 inch across the full footprint before you build on it
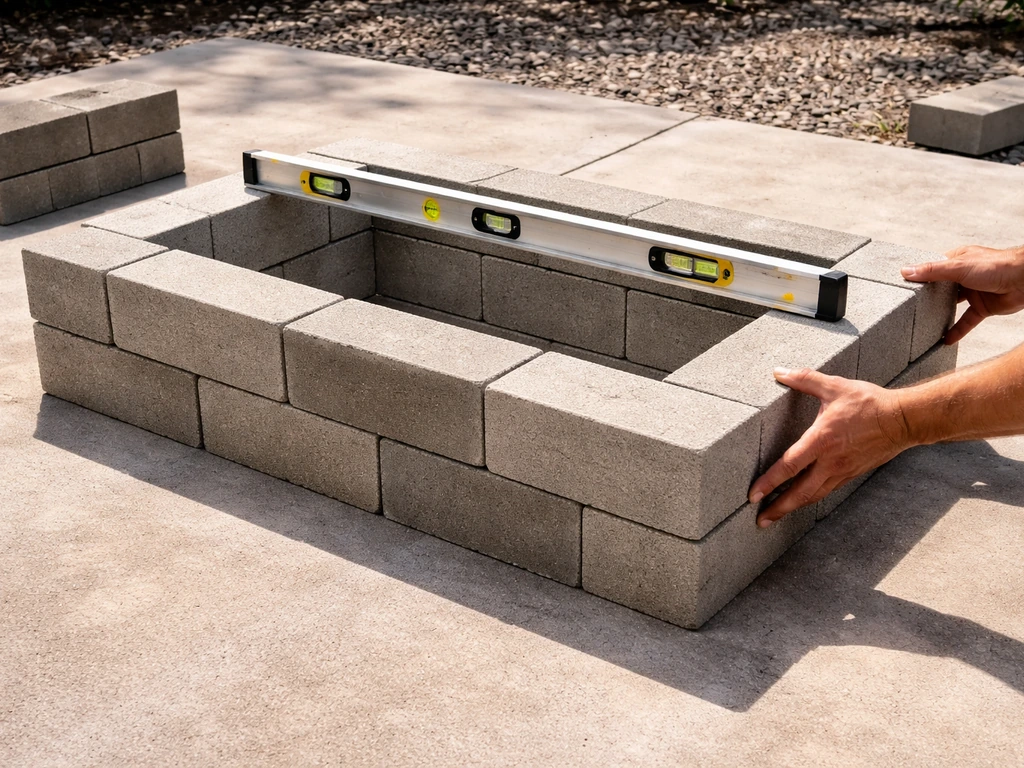
Use a 4-foot level to check the patio surface where the table will sit. Once your patio is level, you can keep following the steps in this guide to build the fire pit patio safely and correctly how to build fire pit patio. If it's off by more than 1/4 inch over the table's footprint, either re-set the pavers in that area or plan to shim the table base during construction. Building a slightly off-level table is a fixable problem, but ignoring it creates a wobbly finished product that never sits right.
Materials, Tools, and What It Actually Costs
You have two main structural options for the table enclosure: concrete block (CMU block) or a steel/metal stud frame with cement board sheathing. CMU block is heavier and more permanent but extremely durable. A steel stud frame is lighter, easier to modify, and still completely fire-safe when sheathed in cement board. Both approaches work well; the choice comes down to whether you want a permanent built-in feature or something more movable.
| Material Category | Budget Option | Mid-Range Option | Estimated Cost Range |
|---|---|---|---|
| Enclosure structure | Concrete block (CMU) | Steel stud + cement board | $60–$150 |
| Burner kit (propane) | Basic H-burner kit | HPC or TrueFlame kit with pan + valve | $150–$350 |
| Countertop surface | Poured concrete top | Porcelain tile or natural stone | $50–$200 |
| Fire media (glass/rocks) | Lava rock filler | Fire glass | $30–$80 |
| Adhesive, mortar, grout, sealer | Standard polymer-modified thinset + grout | Same (brand varies) | $40–$80 |
| Miscellaneous hardware, fittings, vent covers | — | — | $30–$60 |
| Total estimated range | — | — | $360–$920 |
Tools You'll Need
- 4-foot level and tape measure
- Angle grinder with masonry blade (for cutting block) or tin snips (for steel stud)
- Drill/driver with masonry bits
- Notched trowel and grout float (if tiling the top)
- Rubber mallet
- Caulk gun
- Pipe wrench and adjustable wrench (for gas fittings)
- Spray bottle for soap test
- Safety glasses and work gloves
Build the Table Structure Step by Step
This step-by-step covers a CMU block enclosure at dining height (28 inches tall, 48x24 inch footprint), which is the most common DIY approach. Adapt dimensions to your design.
- Dry-lay the first course of block on your patio surface to confirm the footprint and square the corners. Use a framing square and measure diagonals — equal diagonals mean square corners. Mark the footprint with chalk.
- Mix mortar to a peanut-butter consistency and apply a 3/4-inch bed for the first course. Set the blocks, checking level in both directions. This first course is the most important — take your time here.
- Build up courses with staggered joints (like standard brickwork) until you reach the desired table height minus the countertop thickness. For a 28-inch finished height with a 1.5-inch countertop, stop your block at 26.5 inches.
- On the top course, leave the center open to the size of your burner pan plus at least 1 to 2 inches clearance on all sides. Many burner pans are designed to sit on an interior lip. If yours requires this, set a steel angle iron or a course of half-blocks inward at the second-to-last course to create that ledge.
- Install a steel flat bar or angle iron across the opening as needed to support the countertop material on the inner edges. Make sure all metal in contact with the fire zone is steel, not aluminum.
- Install ventilation openings low on two opposite sides of the enclosure. A minimum of two 3x6-inch vent openings (one per side) is typical for a 12x12 to 18x18 inch burner. Check your burner kit's manual for the exact minimum free vent area — it's specified in square inches and scales with burner size. Cover vent openings with stainless steel vent covers to keep insects out without restricting airflow.
- Drill a small pass-through hole in one side wall, low and toward the back, for the gas line to exit the enclosure. Size it to fit the gas hose with a small grommet around it.
- Allow mortar to cure at least 24 to 48 hours before proceeding to the countertop and gas installation steps.
Fire-Rated Components and Heat-Safe Surfaces
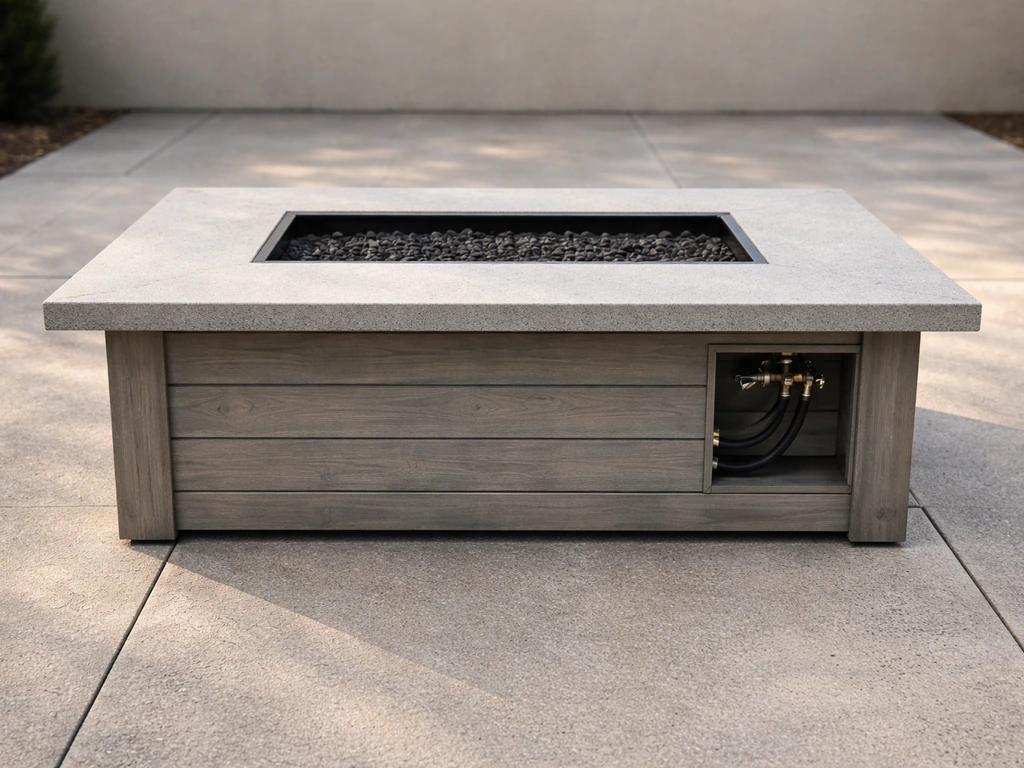
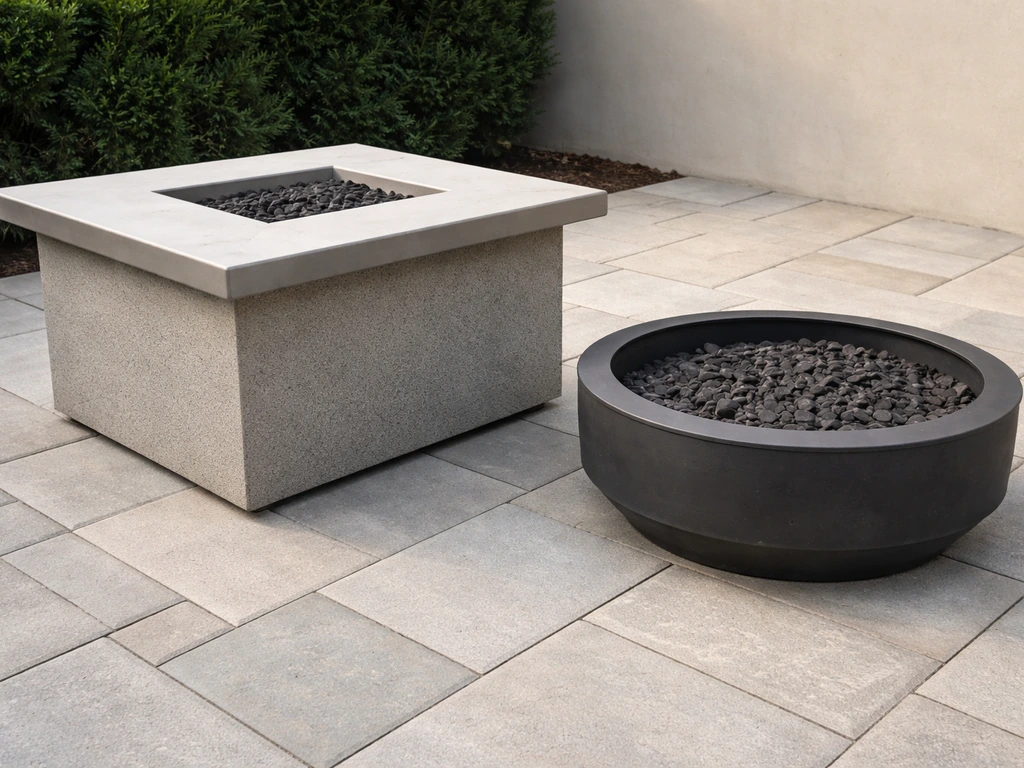
Any surface inside the enclosure that faces the burner should be non-combustible. The block or cement board walls handle this automatically. For the countertop, use porcelain tile, natural stone (granite, bluestone, slate), or poured concrete. Avoid ceramic tile with a glaze that can crack under thermal cycling, thin glass tile, and any composite or laminate material. The countertop surrounds the burner opening but doesn't cover it, so the heat exposure is primarily radiant from the sides and convective from below through the opening. Porcelain pavers (24x24 or 12x24 inch slabs) are the easiest to work with and hold up well outdoors.
Set the countertop tile or stone using a polymer-modified thinset rated for exterior/frost conditions. Apply it with a 3/8-inch notched trowel. Back-butter large format pavers (anything over 15 inches) in addition to the troweled bed to prevent hollow spots. Grout joints with a sanded, exterior-rated grout. Let thinset cure for a minimum of 24 hours before grouting, and let grout cure for at least 72 hours before applying sealer. For a full-strength cure that handles thermal cycling well, wait 7 days before the first fire.
Connect the Gas and Install the Burner Safely
Lower the burner pan assembly into the opening. It should sit on the interior lip or support ledge you built, with the pan edges resting evenly. The pan top should sit recessed below the countertop surface. Most installation manuals specify a minimum recessed depth, commonly 1 to 2 inches below the surrounding surface. This recessing is important: it protects the flame from wind and keeps the fire in a defined visual zone.
For a propane setup, the gas hose runs from the burner control valve, through the side wall pass-through, to a propane regulator, and then to the tank. Keep the tank outside the enclosure, either hidden in a separate compartment with its own ventilation or positioned nearby. Never enclose a propane tank in an unventilated space. Most 48-inch fire tables have enough depth to include a tank compartment at one end, but it must have a louvered door or vent openings for airflow. HPC Fire explains that proper ventilation not only supplies fresh air for the pilot or burner and supports combustion, but also helps manage condensation inside the enclosure condensation management in enclosures.
- Thread the control valve into the burner fitting using gas-rated pipe thread sealant (yellow PTFE tape rated for gas, or paste sealant). Do not use standard white plumber's tape.
- Attach the regulator to the hose, then connect the hose to the control valve outlet. Tighten all fittings with a wrench — hand-tight is not enough for gas connections.
- Connect the other end of the hose to the propane regulator, and connect the regulator to the tank valve.
- If using natural gas, the flexible corrugated stainless steel (CSST) or black iron pipe connection should be made by a licensed plumber or gas fitter. Have them install a manual shutoff valve at the point where the line enters the table enclosure.
Leak Testing Before You Light Anything
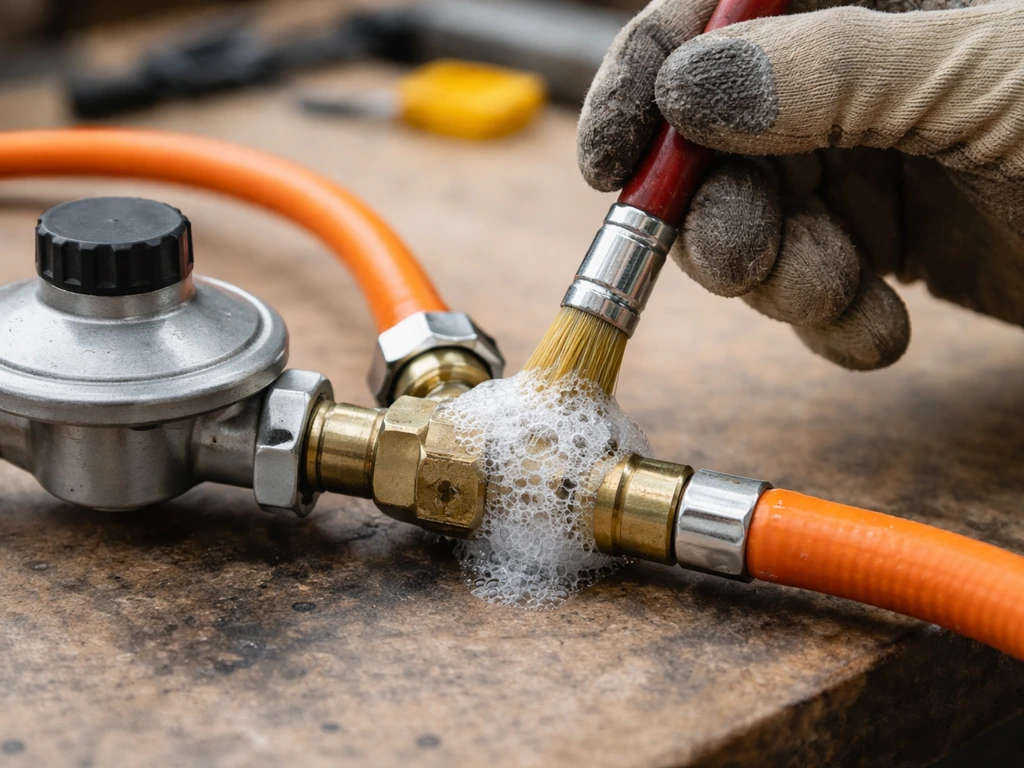
Before the first light, do a leak test on every gas connection. Open the tank valve slowly. Do not turn on the burner control valve. Mix a solution of dish soap and water (about 1 part soap to 3 parts water) and apply it to every threaded connection, the regulator connections, and the hose fittings using a brush or spray bottle. Watch for bubbles. Any bubbling means a leak at that joint. Tighten the connection or re-tape and test again. This process follows NFPA 54 guidance and is the same method used by professional plumbers. blank" rel="noopener noreferrer">A manometer or pressure gauge is the more precise method, but the soap-and-water test is reliable for a DIY assembly at these pressure levels. If you see bubbles at any fitting, do not attempt to light the burner until the leak is resolved.
One thing to watch: if you detect a pressure drop but can't find bubbles with soap, check the air mixer connection specifically. Backflow into the air mixer is a known issue with improperly configured propane burners, and it can cause pressure anomalies that are easy to misdiagnose. Make sure the air mixer is oriented correctly (intake holes facing away from the pan) and that there are no cracks or loose fittings where it connects to the burner feed.
First Fire, Finishing Touches, and Keeping It Running
Curing the Masonry Before the First Fire
If you used mortar and tile, wait at least 7 days from the last grout or mortar application before running a sustained flame. Cement-based materials release moisture as they cure, and a big fire before they've had time to fully set can cause cracking. On day 7, you can run a low flame for 15 to 20 minutes as a first burn, then let everything cool completely. After two or three of these short sessions over a few days, the masonry is conditioned and you can run the table at full output.
Sealing the Countertop
Natural stone and concrete tops need sealer, and even porcelain grout joints benefit from a grout sealer in outdoor environments. Apply penetrating sealer in thin coats, letting each coat absorb until the surface looks saturated, then wipe off excess. For porous stones like limestone or concrete, you may need two or three coats. Reapply sealer once a year, or more often if the surface sees a lot of rain and sun.
Drainage Inside the Burner Pan
Water accumulation inside the burner pan is the number one cause of burner corrosion. Most quality stainless steel pans have a drain hole in the bottom, make sure it's clear and that the pan is not sitting dead level (a very slight tilt toward the drain is fine and actually helpful). Add a layer of lava rock beneath the fire glass or decorative media; lava rock is porous and helps water drain rather than pool around the burner orifices. Remove the fire media and dry out the pan if you get a heavy rainstorm before the table is covered.
Troubleshooting Common Problems
| Problem | Likely Cause | Fix |
|---|---|---|
| Table rocks or isn't level | Uneven patio surface or mortar bed | Shim base or re-set first course; check level before mortar sets |
| Flame is low or uneven | Low gas pressure or clogged orifice | Check regulator output pressure; clean orifice with compressed air |
| Flame blows out in wind | No wind guard; burner too high above pan lip | Add a tempered glass wind guard around the pan opening; check recessed depth |
| Burner won't light after rain | Water in pan or orifice | Dry out pan; remove fire media; run blower or wait 24 hrs |
| Mortar or grout cracking | Fired too early or thermal cycling without expansion joints | Wait full 7-day cure; re-grout with flexible sanded grout; add 1/8-inch expansion gap at countertop edges |
| Smell of gas but no visible leak | Loose air mixer connection or backflow issue | Check air mixer orientation and all upstream fittings; soap-test all joints again |
Ongoing Maintenance
- Cover the table with a weatherproof outdoor furniture cover when not in use — this extends the life of the burner, fire media, and countertop significantly
- Inspect all gas fittings with a soap test at the start of each season
- Clean the burner ports with a wire brush or compressed air annually to prevent orifice buildup
- Remove and store fire glass or lava rock over winter in freezing climates — moisture trapped in porous media can fracture during freeze-thaw cycles
- Reapply countertop sealer once a year for stone and concrete surfaces
- Check vent openings for spider webs, debris, or wasp nests before lighting at the start of each season
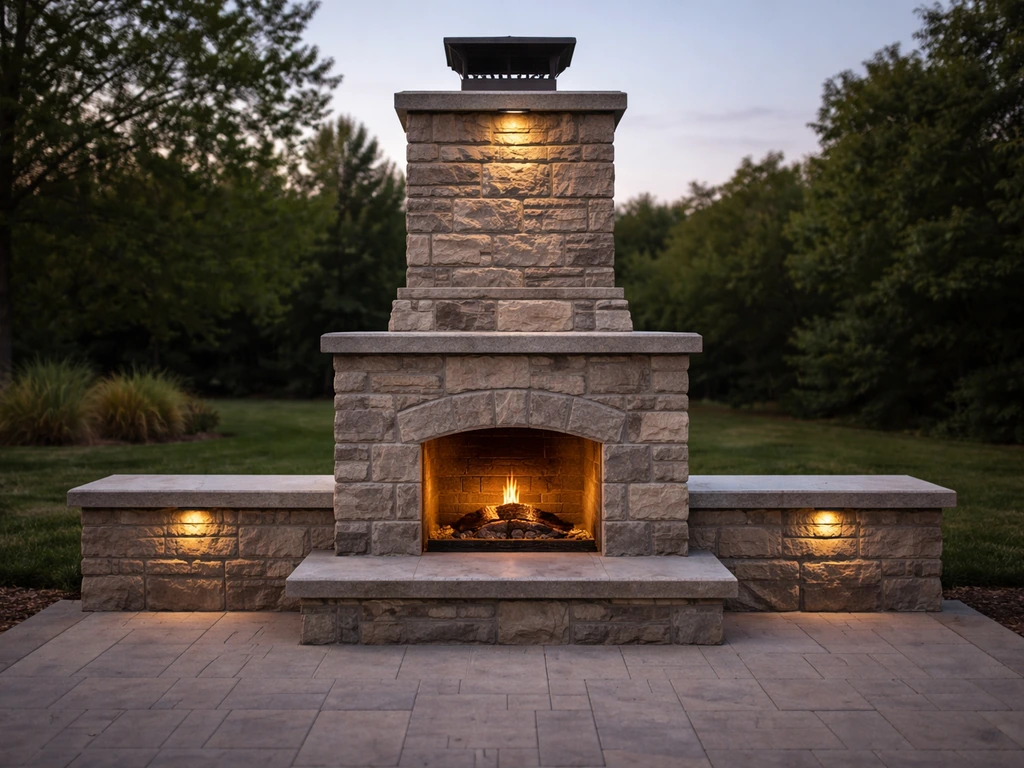
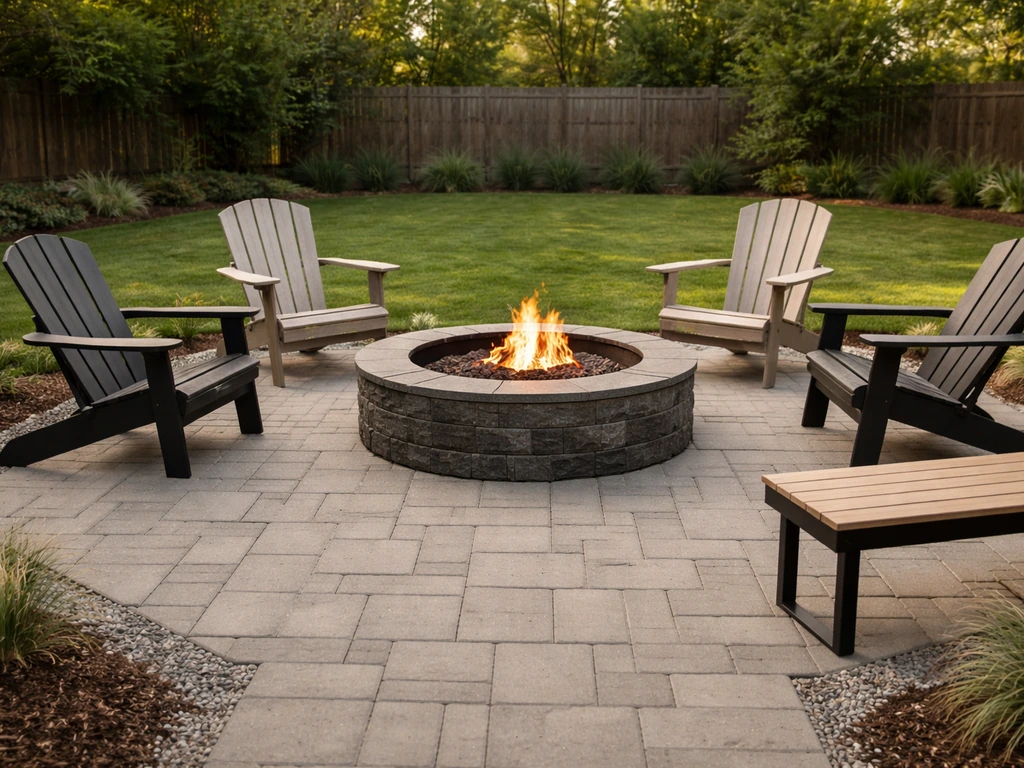
A well-built fire table holds up for 10 to 15 years with basic seasonal care. The burner itself is the most replaceable component: stainless steel burner pans and H-burners are standardized sizes, so if yours corrodes after several years, a direct replacement drop-in is usually available for under $100. The enclosure and countertop, if built with quality materials, will easily outlast the burner. If you're interested in related outdoor fire builds, a ground-level patio fire pit follows a very similar material and clearance logic but with a simpler structure, and a patio fireplace is a larger permanent build for those who want a wood-burning or gas feature integrated into a wall structure.
FAQ
Can I convert a propane fire table to natural gas later?
Sometimes, but it depends on the burner kit. Natural gas and propane use different regulator settings, gas pressures, and often different burner orifices. To avoid unsafe mismatches, buy a kit specifically rated for natural gas or use the manufacturer’s approved conversion parts and installation instructions.
What BTU size should I choose for a 48x24 dining fire table?
A common DIY target is roughly 30,000 to 50,000 BTU total for that footprint, but the correct range is whatever your burner kit documentation states for your selected burner opening size. Going higher than the kit’s recommended burner size can increase consumption and create excessive heat on the countertop and surrounding structure.
Do I need to use a specific regulator for propane, and what happens if I get it wrong?
Yes. The regulator must match the gas type and the burner kit’s specified pressure (liquid propane typically uses about 11.0 in. WC). Using the wrong regulator can cause poor flame appearance, incomplete combustion, and unsafe pressure behavior, so confirm the kit’s rated pressure before installation.
How much should I recess the burner pan below the countertop?
Follow the burner kit’s minimum recessed depth (often 1 to 2 inches below the finished surface). If you recess too shallow, flames and radiant heat can contact the underside of the countertop more than expected, and wind exposure increases. If you recess too deep, the flame pattern can shift and reduce visibility and performance.
Is it safe to run the fire table under a gazebo or covered patio?
Usually no. Most burner kits prohibit installation under overhead structures because clearance and airflow are different from open air. If you need shelter, choose a design that keeps the burner located outside the overhead projection and meet the manufacturer’s specific clearance requirements.
What’s the correct way to position the tank compartment for propane?
Provide real ventilation, use a louvered door or vent openings, and keep the tank outside the sealed enclosure. Avoid fully enclosing the tank in a way that traps gas, especially near drains or lower areas. Also follow the kit instructions for hose routing and any required tank distance from the burner.
Can I use regular outdoor furniture fabric or cushions near the fire table?
Keep cushions and fabrics away from the required clearance zone (don’t rely on the table being “raised”). Heat and radiant transfer can discolor or weaken materials over time. If your seating is close, use fire-resistant cushions or maintain extra spacing beyond the minimum clearance.
How do I keep the countertop from cracking over time?
Use outdoor-rated materials and a proper exterior thinset and grout system, then fully cure before first firing. For stone or large-format pavers, back-buttering and avoiding hollow spots helps prevent flex cracking. Also, consider grout line movement and seal porous stone so water does not freeze and expand inside the assembly.
What should I do if the fire looks weak or the flame keeps changing?
First check that the gas pressure matches the kit’s requirements and confirm all fittings are leak-tested. Then inspect the air mixer connection and orientation (intake holes facing away from the pan), because misalignment can cause backflow behavior and unstable combustion. If symptoms persist, stop using it and consult the burner kit troubleshooting guidance.
Do I need to tilt the burner pan for drainage, and how much tilt is enough?
Yes, a very slight tilt toward the drain hole helps prevent water pooling, which reduces corrosion risk. Avoid setting the pan dead level. After rain, remove fire media and let the pan dry if you notice lingering moisture around the burner area.
What’s the safest way to test for gas leaks beyond dish soap and water?
Soap-and-water is a solid DIY screening method, but a manometer or pressure gauge is more precise for diagnosing pressure anomalies. If you see bubbles, do not light the burner until the connection is fixed and you re-test. If you detect pressure drop without bubbles, re-check the air mixer connection and any mixer-to-burner feed linkages.
How long should I wait before using the table after building and grouting?
Wait at least 7 days after the last mortar or grout work before running sustained flames. Then start with low flame sessions (around 15 to 20 minutes) to condition the masonry and reduce thermal shock risk. Skipping the curing and conditioning period is a common cause of cracking.
How do I handle snow, heavy rain, or freeze-thaw on the fire table?
Water management matters. Make sure the burner pan drain is clear, keep the enclosure surfaces properly sealed when required, and reapply penetrating sealer on porous stone and concrete as recommended. If the table gets flooded, dry the burner pan and confirm there is no trapped moisture before relighting.
Can I replace just the burner later instead of rebuilding the table?
Often, yes. Burner pans and burner components are commonly standardized in kits, so you can buy a replacement that matches your model and opening size for a relatively low cost. Keep the original kit’s burner dimensions and part numbers during the build so future replacement is straightforward.
Should I install lava rock, fire glass, or both, and what’s the main goal?
Use the manufacturer’s recommended media depth and arrangement. The key is allowing water to drain and keeping media from blocking burner ports. Lava rock is porous and can reduce pooling, but too much media can restrict airflow and alter flame behavior.