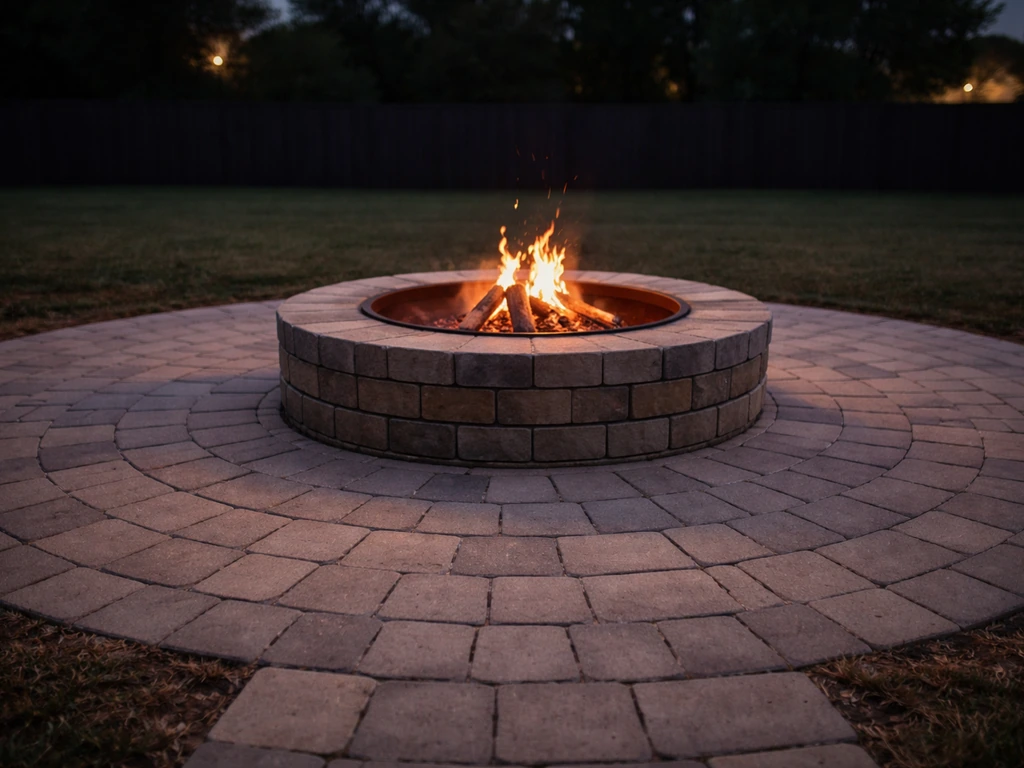
You can absolutely build a fire pit patio yourself, and the basic sequence is straightforward: prep the ground, lay a compacted gravel base, set your pavers or slabs, and build or drop in the fire pit with proper clearances. The tricky parts are getting the drainage slope right from the start, compacting the base thoroughly enough that it won't settle unevenly later, and keeping the fire pit far enough from anything combustible. Do those three things well and you'll end up with a patio that looks great, drains properly, and stays safe for years.
How to Build a Fire Pit Patio: Step-by-Step DIY Guide

Nolan Carver
22 May 2026
Retrofit or New Build? Decide This First
Before you buy a single bag of gravel, figure out which situation you're actually in. There are two very different projects hiding inside the phrase 'fire pit patio,' and they have different starting points.
If you're starting from bare ground, you're doing a full new build: excavate, lay base, set pavers, then build or install the fire pit as part of the same project. This gives you the most control over drainage, layout, and fire pit placement. It's more work upfront, but you get to do everything right the first time.
If you already have a patio (concrete slab, pavers, flagstone) and just want to add a fire pit, that's a retrofit. For a built-in masonry fire pit on an existing paver patio, the approach is to remove enough pavers in the spot you've chosen, excavate down into the base, compact fresh crushed stone, and build the fire pit ring up from there. Polycor's installation guidance for hardscape fire pits describes exactly this method: pull the pavers, fill the fire pit interior with compacted processed gravel or mason sand, and tie the structure into the existing base. For a freestanding metal fire pit bowl on an existing concrete slab, the work is minimal: you just need to verify clearances and make sure the surface underneath is non-combustible, which a concrete slab already is.
The one situation that complicates a retrofit is an existing concrete slab in poor condition: cracked, heaved, or with bad drainage slope. If water pools on your current slab, a fire pit isn't going to fix that, and adding heavy masonry on top of a failing slab will make things worse. In that case, you're better off treating it as a new build.
Plan the Layout, Measurements, and Safety Clearances
Get this step right and the rest of the build is mostly just following a plan. Skip it and you'll be improvising in the middle of construction, which is how drainage mistakes and unsafe placement happen.
Fire pit clearances: the non-negotiables
A good working rule for wood-burning fire pits is at least 10 feet of clearance from any structure or fence and 15 feet from combustible overhangs like tree branches or covered pergolas. Some local codes, like Crowley, Texas, explicitly require 15 feet of clearance to all combustibles for wood-burning pits. Check your specific municipality because these numbers vary. This kind of general clearance guidance also emphasizes verifying applicable local code or ordinances and confirming the fire pit manufacturer's required clearances for your specific model Check your specific municipality because these numbers vary.. For gas fire pits and fire tables, clearances are measured from the edge of the flame and depend heavily on the specific manufacturer's specs: EcoSmart Fire, for example, requires minimum clearances stated in the product manual, and Montana Fire Pits specifies a vertical clearance of 120 inches (10 feet) from the burner to any combustible structure overhead. Always pull out the manufacturer manual for whatever fire pit you're installing and treat those numbers as your hard floor, not a suggestion.
Check local ordinances before you break ground. Many municipalities require permits for built-in fire features, and some HOAs prohibit wood-burning pits entirely. A quick call to your local building department takes 10 minutes and can save you a costly teardown later.
Laying out the patio dimensions
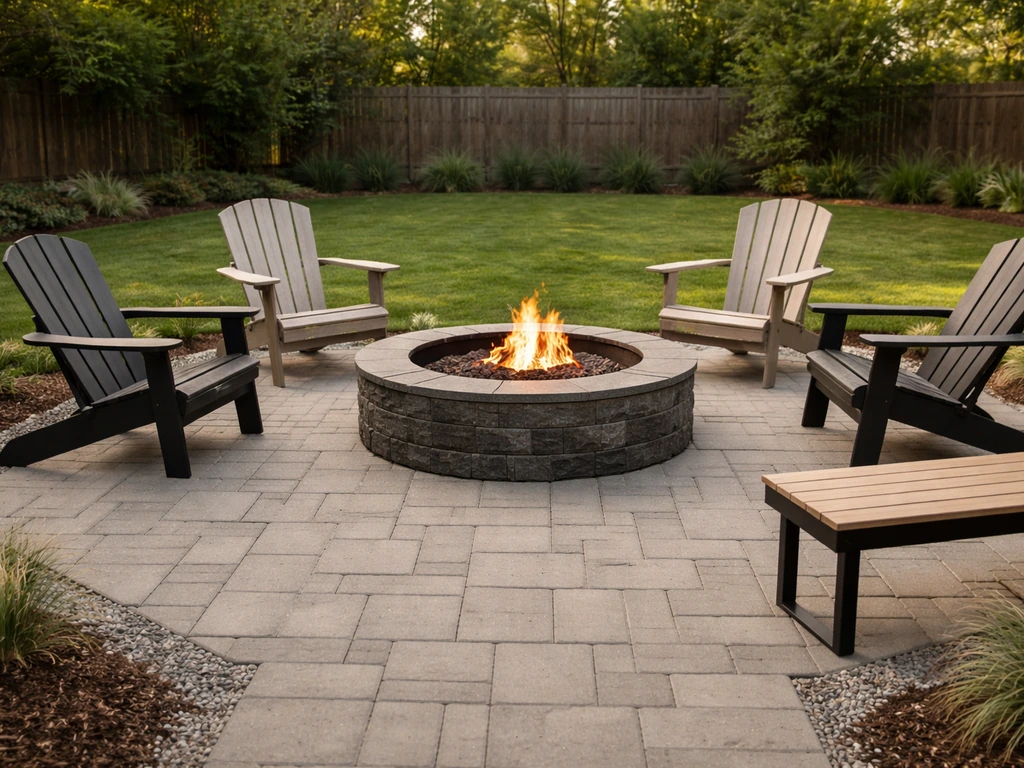
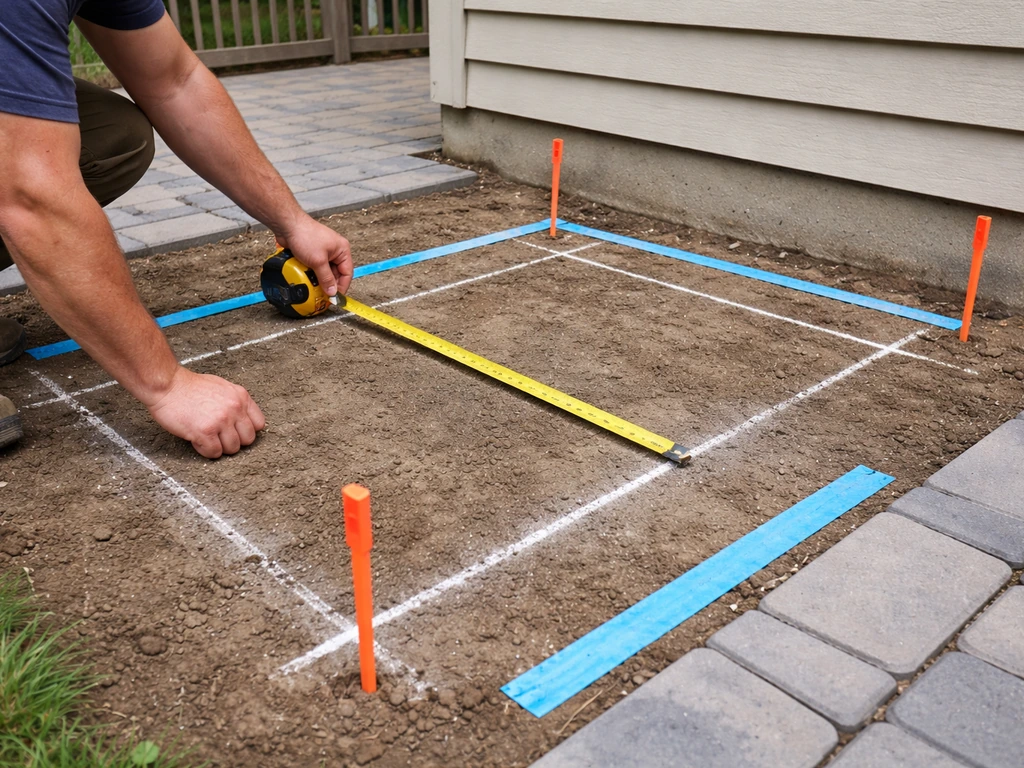
A comfortable seating circle around a fire pit needs about 12 to 16 feet of open patio diameter: roughly 3 feet for seating depth, a 3-foot walkway behind the chairs, and the fire pit itself (typically 36 to 48 inches in outer diameter for a built-in ring). A 16-foot diameter patio works out to about 200 square feet, which is a reasonable target for a 4-person seating area. Mark the full patio footprint with spray paint or stakes and string before you excavate. Include the fire pit location inside that footprint, centered or offset toward one end depending on your design.
Stake the corners of your patio, run batter boards and mason's string lines, and use a line level or laser level to establish your reference elevation. From that reference, you'll build in a drainage slope of 1/8 to 1/4 inch per foot away from the house (or toward a designated drainage direction). Quikrete's patio prep guidance recommends establishing this slope through your string lines during layout, not trying to fix it later with the pavers themselves.
Choose Your Patio and Fire Pit Materials
Patio surface materials
The three most practical choices for a DIY fire pit patio are concrete pavers, natural flagstone, and poured concrete. Here's how they stack up for this specific application:
| Material | DIY Difficulty | Fire/Heat Tolerance | Cost Range (per sq ft installed) | Best For |
|---|---|---|---|---|
| Concrete pavers | Beginner-friendly | Good; individual units can be replaced | $8–$20 | Most DIYers; easiest to cut, set, and repair |
| Natural flagstone | Moderate | Excellent; stone handles heat well | $15–$30 | Rustic or natural aesthetic; irregular shapes around fire pit |
| Poured concrete | Harder; needs forming and finishing | Fair; can crack from thermal cycling near fire pit | $6–$12 | Flat, modern look; best away from the fire pit itself |
| Porcelain pavers (2CM) | Moderate; requires wet saw | Good if rated for outdoor use | $20–$40 | Modern/contemporary look; requires minimum 3/16-inch joints per manufacturer specs |
For most DIYers building around a fire pit, concrete pavers are the best choice. They're forgiving to lay, easy to cut with a rented wet saw or angle grinder, and if the ground settles unevenly near the fire pit later, you can pull individual pavers and re-level without touching the whole patio. Flagstone works beautifully too and handles heat even better, but the irregular shapes make the layout process harder for beginners.
Fire pit types and what they mean for construction
- Built-in masonry ring (block or stone): Most permanent option; requires excavation, compacted base, and stacking fire-rated block or stone. Uses refractory mortar between courses. Sits in or flush with the patio surface.
- Prefabricated steel insert ring: A steel ring set into a masonry surround; speeds up construction and improves durability of the firebox. Common middle ground between full DIY masonry and a freestanding bowl.
- Freestanding metal bowl: Easiest to add. No excavation required for the pit itself. Works well as a retrofit on an existing non-combustible surface. Must still meet clearance requirements.
- Gas fire table or fire pit kit: Requires a gas line (usually a licensed plumber) and manufacturer-specific installation steps for burner placement, venting, and media (glass, lava rock). More complex but no wood ash cleanup.
If you're interested in a patio fireplace instead of a fire pit, or a dedicated fire table build, those are somewhat different projects with their own structural and clearance requirements. If you want a patio fire table instead of a simple fire pit ring, the layout and clearance checks still apply, but the build details depend on the table model you choose. If you specifically want a patio fireplace (a built-in hearth style), the build steps overlap with a fire pit patio, but you should plan for a more substantial firebox and different clearance needs. For this guide, we're focused on the fire pit ring format, which is the most common DIY choice.
Site Prep: Excavation, Base Layers, Compaction, and Drainage
This is the step most DIYers underinvest in, and it's the direct cause of most patio failures. Uneven settling, cracked pavers, pooling water: almost all of it traces back to inadequate excavation depth, poor compaction, or a base that drains poorly. Get this part right and everything above it will hold up.
How deep to excavate
For a standard foot-traffic patio, plan on excavating 8 to 10 inches below your finished surface elevation. That accounts for 6 to 8 inches of compacted crushed stone base, 1 inch of bedding sand, and the paver thickness (typically 2 to 2.375 inches for standard concrete pavers). Rochester Concrete Products recommends a compacted crushed-stone base in the 6 to 8 inch range as the standard for patio applications. If your soil is particularly soft or clay-heavy, go to 10 to 12 inches of base. Under the fire pit itself, dig down an extra 2 to 4 inches so the pit structure can sit on an especially solid compacted base.
StoneCap Masonry notes that professional masons typically excavate about 12 inches deep and compact the crushed stone base to approximately 95% Proctor density. They also point out that inadequate compaction is behind a high percentage of DIY fire pit failures. Rent a plate compactor; don't try to shortcut this with hand tamping on anything larger than a very small area.
Building the base layers
- Remove sod and topsoil to your target excavation depth. Haul it away; do not use it as fill.
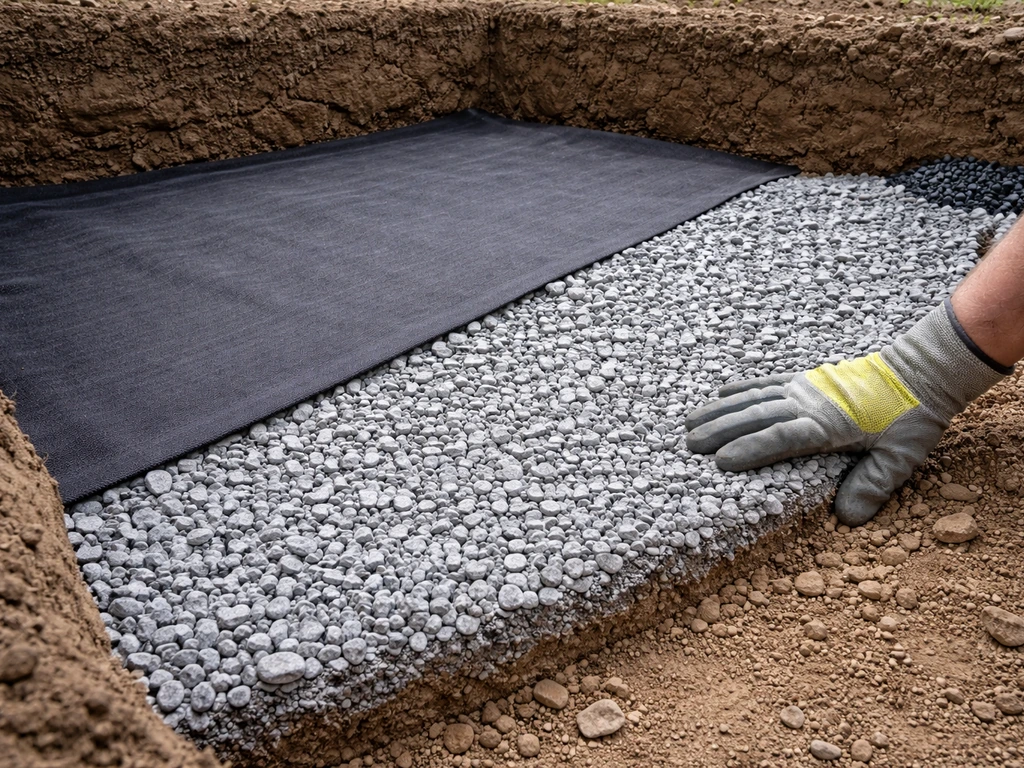
- Lay geotextile landscape fabric over the compacted subgrade to prevent base material from migrating into soft soil below.
- Add crushed stone (3/4-inch clean or compactable crushed limestone works well) in 3 to 4 inch lifts, compacting each lift with a plate compactor. Compaction reduces volume by roughly 15 to 20 percent, so order accordingly.
- Check your drainage slope with a level and string line after each compacted lift. You want 1/8 to 1/4 inch of fall per linear foot, sloping away from the house.
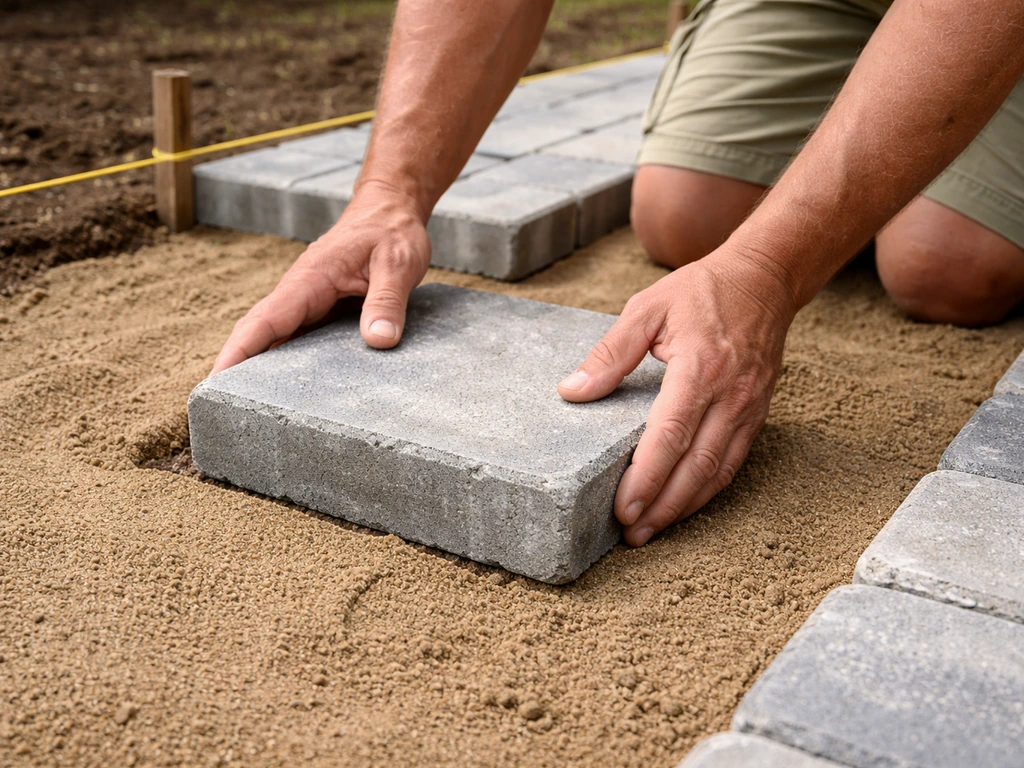
- Once you've reached full base depth, add 1 inch of coarse bedding sand (concrete sand, not play sand) and screed it flat using 1-inch diameter pipes as guides. Do not compact the bedding sand layer.
- For the area directly under and around the fire pit, extend the base material at least 6 inches beyond the fire pit perimeter in all directions. Basalite's Gator Base specs for fire pit applications call for the base to extend 12 inches beyond the perimeter when supporting a fire pit or seating wall structure.
If you're using an alternative engineered base panel product like Gator Base instead of traditional compacted stone plus sand, follow the manufacturer's layering specs exactly: typically geotextile fabric, then compacted stone aggregate, then the panel layer, then the paver. The total system depth needs to account for all layers plus paver thickness.
Lay the Patio Base and Set the Pavers
With the base ready, this part goes faster than you'd expect. The key is keeping your pattern consistent and checking level constantly as you go.
Laying the pavers
Start from a straight edge or a fixed reference point (a house wall, a chalk line, or a screed board) and work outward. Set each paver by pressing it firmly into the bedding sand; don't slide it into position or you'll disturb the sand underneath the adjacent units. Use a rubber mallet to tap each paver flush with its neighbors. Check level and alignment every 4 to 6 pavers.
When you reach the fire pit opening, stop laying pavers at the edge of the pit footprint and set a temporary frame (a ring of stakes or a plywood template cut to the pit's outer diameter) to hold your layout line. You'll come back to finish those edge pavers after the fire pit structure is in place.
Cut pavers for edges and curves with a rented wet saw or angle grinder with a diamond blade. For a circular fire pit opening, you'll be making a lot of small angled cuts. Take your time here: measure twice, cut once. Rough cuts around the fire pit perimeter will be partially hidden by the fire pit surround, but visible gaps larger than about 1 inch will look sloppy and can become trip hazards.
Joint sand and edge restraints
Once all pavers are set and you're happy with the layout, install plastic or aluminum edge restraints around the entire perimeter, pinned into the base with 10-inch spikes. These prevent pavers from shifting outward over time, which is one of the main causes of low spots developing near the fire pit from lateral creep.
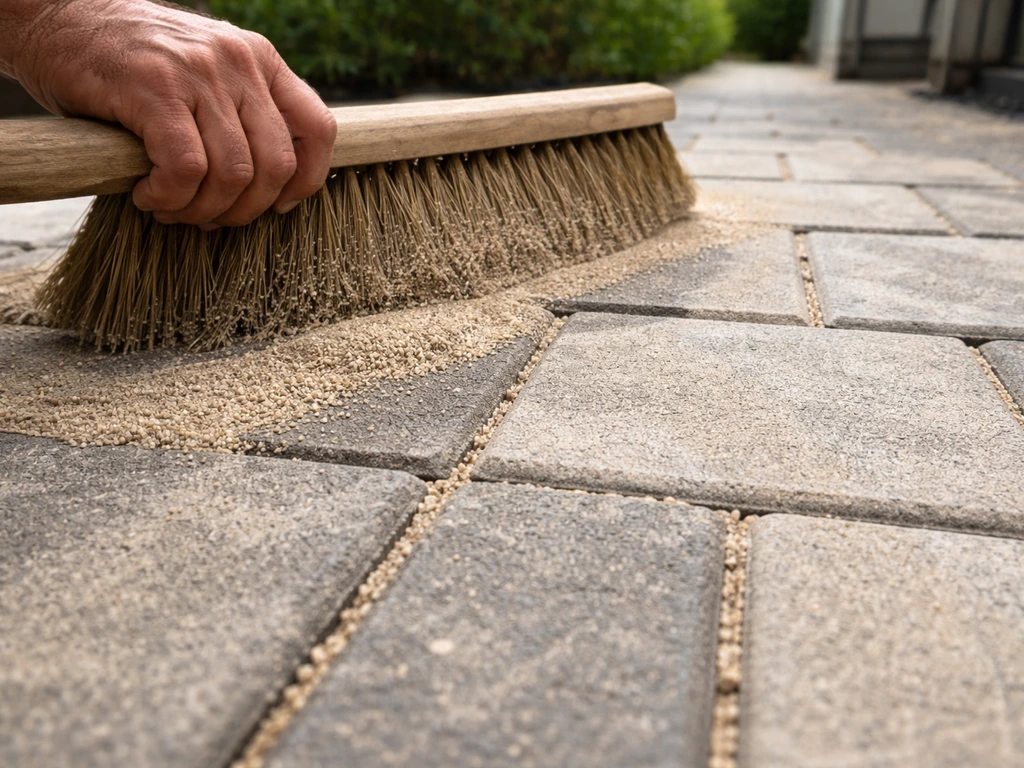
Sweep polymeric sand into all joints, working it in with a push broom. Blow off all excess sand from the paver surfaces before activating the sand with water: any polymeric sand left on the surface when you wet it will leave a white haze that's difficult to remove. Once the surfaces are clean, mist the entire area gently so the sand activates and hardens in the joints. Keep foot traffic off for 24 hours.
Build the Fire Pit and Finish the Transitions
Building a masonry fire pit ring
Use fire-rated concrete block (often called fire brick or retaining wall block rated for high-heat exposure) for the inner courses. Standard concrete block will spall and crack from repeated heating and cooling cycles. Stack the first course dry on your compacted base inside the patio opening, checking that it's level all the way around. Once the layout is right, start mortaring with refractory (fire-rated) mortar. Build up the ring in courses, checking plumb and level after each one. A typical DIY fire pit is 3 to 5 courses high, putting the finished rim at about 12 to 18 inches above the patio surface.
You don't need to mortar every joint on the outer decorative veneer if you're using a two-layer system (structural inner ring plus decorative outer cap). The inner ring handles the heat; the outer veneer is cosmetic. Leave a 3/4-inch gap at the base of the outer veneer to allow airflow and drainage so water doesn't get trapped between the two layers and freeze.
Finishing the patio-to-fire-pit transition
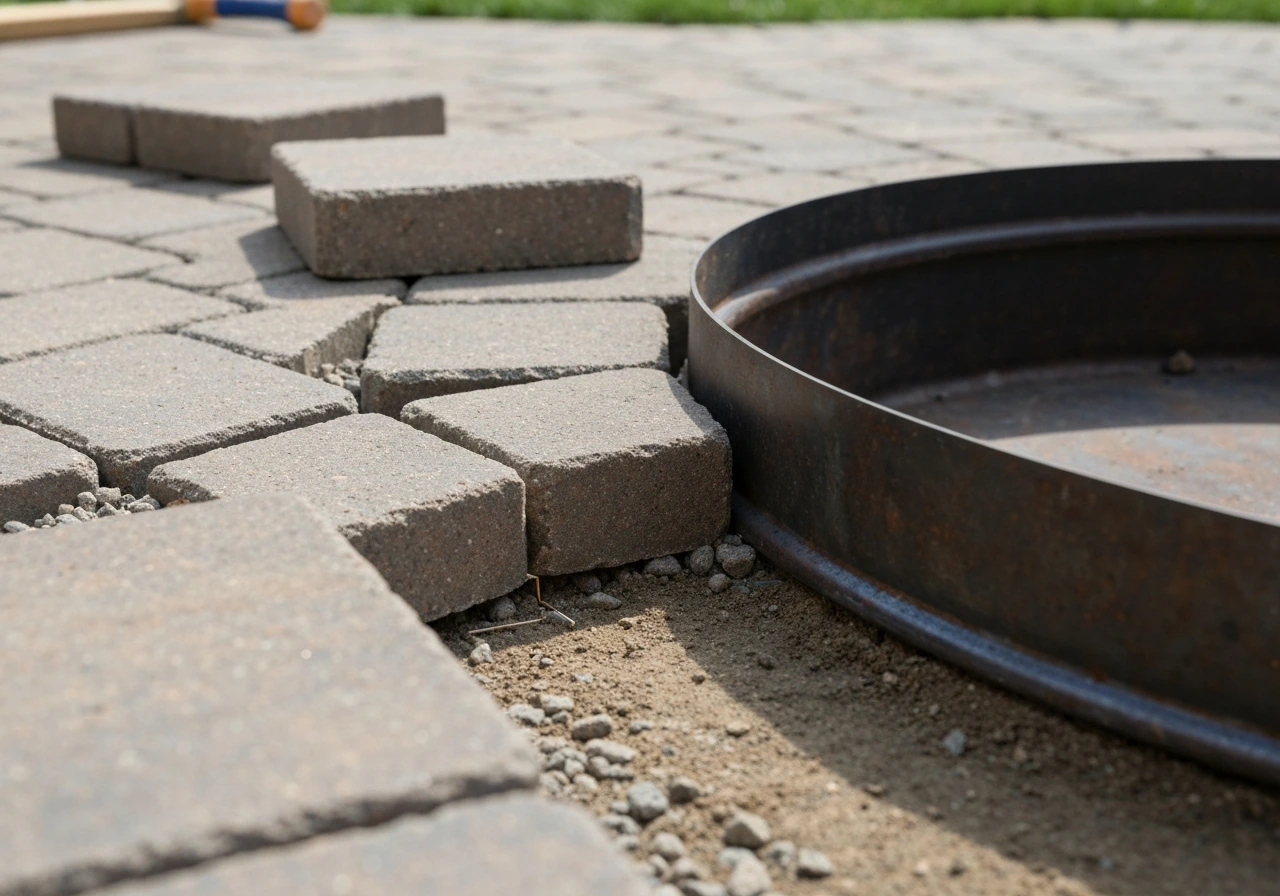
Go back and cut the remaining pavers that butt up against the fire pit surround. Leave a 1/2 to 3/4 inch gap between the paver edge and the fire pit base to allow for thermal expansion and drainage. Fill this gap with polymeric sand or a non-combustible sand-and-mortar mix; don't try to grout it tight or you'll get cracking as the fire pit heats and cools.
If you're installing a prefab metal fire pit or a gas fire table instead of masonry, set it in place now and confirm all clearance distances one final time before considering the project done. For gas fire tables and fire pit kits, follow the manufacturer's installation steps for burner placement, gas line connection, and media installation (glass beads, lava rock). EcoSmart Fire's installation manuals, for example, specify exactly how to position the burner relative to the enclosure, how to place the screen or media, and the minimum clearances from the edge of the flame to surrounding surfaces and overhead structures. Don't shortcut those steps.
Non-combustible zones under and around the fire pit
A concrete paver or natural stone patio surface is already non-combustible, which is one of the main reasons pavers are the preferred surface for fire pit patios. If you're adding a freestanding fire pit to a patio that has any wood elements (a wood deck extension, a wood pergola floor section), a non-combustible pad extending at least 24 inches in all directions around the fire pit base is required, in addition to overhead and lateral clearances.
Troubleshooting the Most Common Problems
Water pooling on the surface
Standing water on a paver patio is almost always a sign of a problem below the surface, not just a surface slope issue. Rochester Concrete Products specifically calls this out as a red flag for base or sub-base failure. If you see it on a new build, check your string lines: you may not have achieved the target 1/8 to 1/4 inch per foot slope during screeding. On an existing patio, persistent pooling usually means the base has compacted unevenly or joint sand washout has allowed water to migrate into and weaken the base. Envisioning Green notes that paver settling can be caused by poor base materials and/or polymeric sand washout that allows pavers to drift outward and create low spots joint sand washout has allowed water to migrate into and weaken the base. In either case, the fix involves lifting the affected pavers, assessing the base, and resetting with the correct slope.
Uneven settling and rocking pavers
If pavers near the fire pit area start rocking or shifting, the most likely culprit is either insufficient compaction of the base during construction or joint sand washout that's broken the interlock between units. Paver interlock depends on tight joints filled with sand; once that sand washes out (from heavy rain hitting the surface, or from water draining off the fire pit itself), pavers start to drift and create low spots. The fix is to lift the affected pavers, check the base for voids, fill and recompact as needed, reset the pavers, and re-apply polymeric sand carefully. Also check that your drainage slope is directing water away from the fire pit base, not toward it.
Cracking near the fire pit
Thermal cycling (repeated heating and cooling) puts stress on any rigid material close to the fire pit. If you've used poured concrete sections, plan for this from the start by including control joints every 8 to 10 feet (MasonryCalcs provides calculation methods for spacing these based on material and exposure). For paver patios, the individual joints between units absorb most of that movement, which is why pavers outperform poured concrete right next to a fire pit. If you're seeing cracks in your masonry fire pit ring itself, check whether you used refractory mortar: standard mortar will crack from the heat cycles. It may need to be ground out and replaced with the correct fire-rated product.
Polymeric sand haze
This is the most common finishing mistake on a paver project. It happens when polymeric sand residue is left on the paver face before the activation water is applied, and it bonds to the surface. Mild cases can be scrubbed off with water and a stiff brush. Severe cases may require a specialized efflorescence cleaner or, in the worst scenarios, stripping and resealing. Prevention is easy: blow or brush every trace of polymeric sand off the paver surfaces before you start misting, and do the final cleanup in calm, dry weather.
Budget, Tools, Materials, and a Build Timeline
Realistic budget ranges
| Project Tier | What's Included | Estimated DIY Cost |
|---|---|---|
| Basic | 200 sq ft paver patio + freestanding metal fire pit bowl, standard concrete pavers, rented plate compactor | $1,200–$2,500 |
| Mid-range | 200 sq ft paver patio + built-in masonry fire pit ring (block + prefab steel insert), nicer paver style | $2,500–$5,000 |
| Premium | 200 sq ft patio in flagstone or porcelain + custom masonry fire pit with cap and seating wall, natural stone veneer | $5,000–$10,000+ |
These are materials-plus-tool-rental costs for a DIY build. Hiring a contractor for the same projects typically doubles or triples these numbers, which is the main reason this project is worth doing yourself if you're comfortable with physical work and basic measurement.
Tools and materials checklist
- Mason's string and batter boards (layout)
- Line level or laser level
- Spray paint (marking excavation boundaries)
- Round-point shovel and flat spade
- Wheelbarrow
- Plate compactor (rent, don't buy for a one-time project)
- Screed pipes (1-inch diameter conduit works perfectly)
- Rubber mallet
- Wet saw or angle grinder with diamond blade (paver cutting)
- Tape measure and chalk line
- Crushed stone base material (calculate: square footage x depth in feet x 1.2 for compaction loss)
- Coarse bedding sand (1 inch depth, same square footage)
- Concrete pavers, flagstone, or chosen surface material
- Plastic or aluminum edge restraints + 10-inch spikes
- Polymeric sand
- Geotextile landscape fabric
- Fire-rated block or stone for fire pit ring
- Refractory mortar
- Prefab steel fire pit insert (optional but recommended for built-in pits)
- Non-combustible fire pit grate
A realistic build timeline
- Week 1: Planning and permits. Finalize layout dimensions, check local codes, apply for any required permit, call 811 to mark underground utilities, order materials.
- Day 1 of build: Excavation and subgrade prep. Mark the full patio footprint, excavate to target depth, compact the subgrade with the plate compactor.
- Day 2: Base layer installation. Lay geotextile fabric, add and compact crushed stone in lifts, check drainage slope, bring base to finished depth.
- Day 3: Bedding sand and paver layout. Screed 1 inch of bedding sand, begin setting pavers from your reference edge outward, leave the fire pit opening open.
- Day 4: Paver cuts and edge restraints. Cut edge and perimeter pavers, install edge restraints all around.
- Day 5: Fire pit construction. Build the masonry fire pit ring (or install prefab insert/bowl), allow mortar to cure per manufacturer specs (typically 24 to 48 hours before first use).
- Day 6: Final paver cuts around fire pit, joint sand application, cleanup.
- Day 7 (and ongoing): Let polymeric sand cure for 24 hours, then do a final inspection of slope, joints, and clearances before the first fire.
Most DIYers can complete this project in one to two weekends of solid work, plus the planning and materials-ordering week upfront. If you're doing a do-it-yourself fire pit patio from scratch with a full masonry surround, add an extra day or two for the fire pit courses to cure properly before you go back and set the pavers tight around it. If you need a step-by-step overview, this guide on how to make patio fire pit walks through site prep, materials, and construction do-it-yourself fire pit patio. Take your time on the base prep: the extra few hours you spend compacting and checking slope on day 2 will save you a lot of headache a year from now.
FAQ
Can I build a how to build fire pit patio directly on existing dirt or grass?
You can, but treat it like a new build: excavate to the full depth needed for your base and bedding, then compact in lifts. Do not rely on leveling with sand on top of soil, since soil compresses later and causes settling around the fire pit opening.
What if my patio needs drainage toward a specific spot, like a drain line or dry well?
Plan the drainage direction before you stake the layout, and keep the 1/8 to 1/4 inch per foot slope consistent across the entire footprint. If you only slope around the fire pit, runoff can still migrate under pavers and pool near the ring.
How far should I place the fire pit from the house if I have gutters downspouts?
Use the clearance rules for combustibles, then also keep the fire pit location away from concentrated downspout flow. If downspouts dump near the patio, water can wash joint sand and weaken the base even when clearances are correct.
Is polymeric sand required for joints, or can I use regular sand?
Polymeric sand is strongly recommended because it locks pavers in place and reduces drifting, especially near the fire pit where thermal and water stresses are higher. Regular sand tends to wash out, which breaks interlock and leads to rocking and low spots.
How do I know if my base is compacted enough before I lay pavers?
A practical check is that the surface feels uniformly firm with no soft spots, and you cannot easily indent it with body weight. For better confidence, compact with a plate compactor and repeat until your base holds its shape, especially after adding the extra 2 to 4 inches under the fire pit.
Should I place sand or gravel under the fire pit itself differently than the rest of the patio?
Yes. The area under the fire pit should be excavated deeper and supported by an especially solid compacted base, then finished in a way that matches the fire pit system you’re installing. Don’t assume the patio base spec alone is enough for the ring’s concentrated heat and weight.
Can I use crushed stone but skip the bedding sand layer?
Avoid skipping bedding sand. The bedding layer helps you fine-level pavers without disturbing the compacted base, and it prevents point loading that can cause pavers to rock or crack at the edges.
What should I do if the fire pit ring is slightly out of level after I mortar the first courses?
Stop early and fix it. Once refractory mortar sets, correcting later is harder and can create gaps that trap water. Re-check level after each course, and adjust while mortar is fresh by resetting blocks rather than forcing the ring into a tilt.
How much gap should I leave between the paver edge and the fire pit surround?
Leave a thermal and drainage gap, commonly in the range of 1/2 to 3/4 inch. Filling this space with polymeric sand or a non-combustible sand-and-mortar mix helps movement and avoids cracking that occurs when you grout it tight.
My pavers get weeds or washout near the fire pit, what’s the likely cause?
Weeds often indicate joint sand failure, and washout near the ring typically means the slope or base drainage is not carrying water away from the fire pit base. Lift the affected pavers, inspect for voids or weak sub-base, recompact, then reapply joint material carefully.
What’s the safest way to cut around a circular opening without damaging nearby pavers?
Stop paving at the opening edge, then use a plywood or stake template to mark the pit footprint before cutting. Cut carefully, remove only what you need, and keep a clean edge gap so the surround sits properly and doesn’t pinch adjacent units.
Do I need to add control joints if I’m building a patio next to a masonry fire pit?
If you pour concrete sections, include control joints at regular intervals (commonly every 8 to 10 feet) so thermal cycling can be accommodated. Paver patios already use many individual joints, which is why they generally perform better right next to the fire area.
How long should I wait before using the fire pit after installation?
If you mortared masonry, give the refractory mortar time to cure before subjecting it to high heat. Also avoid walking on and disturbing the pavers for about 24 hours after you activate polymeric sand, so the joint stabilization is complete.
When should I treat my project as too risky for DIY and hire help?
Hire a pro if your existing slab is failing or drainage is severely wrong, since adding masonry on top can worsen heaving and pooling. Also consider help if you need to reroute gas lines, if permits are required and you are not sure about compliance, or if the site has soft subgrade that won’t compact reliably.