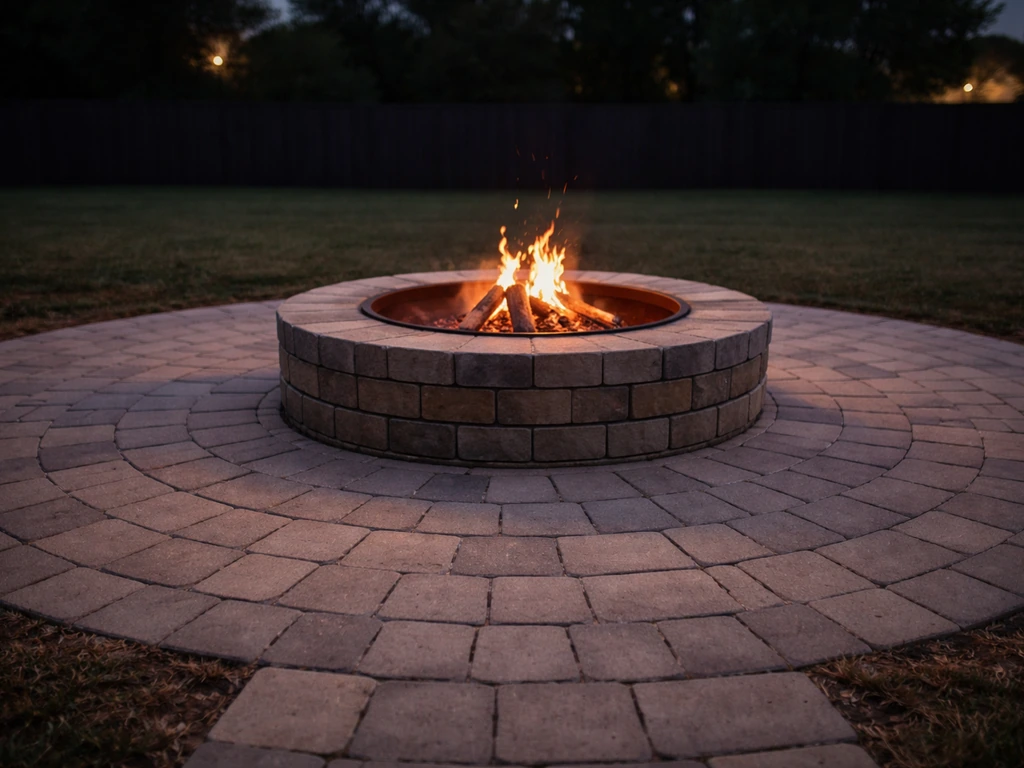
You can build a safe, durable patio fire pit yourself in a weekend. The key steps are picking the right spot (at least 10 feet from any structure, 15 feet from combustibles overhead), sizing the burn area to 30–36 inches in diameter, building a compacted gravel base for drainage, lining the inside with firebrick and refractory mortar, and surrounding it with a masonry wall of your choice. Done right, it won't crack, won't damage your patio surface, and won't create a fire hazard.
How to Make a Patio Fire Pit: Step-by-Step DIY Guide

Nolan Carver
21 May 2026

Pick the right fire pit style and location first

Before you dig a single hole or buy a single block, lock in two things: what style of fire pit you want and exactly where it goes. These decisions control everything else, including your material list, your budget, and whether your fire pit actually passes a local inspection.
Choose your style
For a patio setting, you're typically choosing between three approaches. A ground-level inset fire pit is excavated into the ground and flush with or slightly raised above the patio surface. This is the cleanest look and the most heat-safe option because the mass of the earth insulates the surrounding patio. A raised above-ground ring is built up from the patio surface using retaining wall block, natural stone, or brick, and sits on top of a prepared base.
It's faster to build and works well on existing patios. A prefab kit drop-in uses a pre-engineered steel or concrete ring (typically 36 inches in diameter by 16 inches tall) that you set into an excavated area and surround with your own masonry. Kits cost more upfront but remove most of the guesswork on sizing and structure.
If you're more interested in a gas-fueled version or something closer to a built-in fireplace structure, those are separate projects with different clearance and venting requirements.
Pin down the location
Location is where most people get tripped up, usually by underestimating how far from structures and property lines the fire pit needs to be. The most commonly cited baseline from fire safety guidance is at least 10 feet from any structure or fence. But several municipal codes push that further: 15 feet from a residence is standard in many jurisdictions, and some towns require 25 feet from the nearest property line.
Before you commit to a spot, search your city or county name plus "fire pit ordinance" or call your local fire marshal. The 5 minutes it takes can save you from having to move a finished structure. As a rule of thumb that covers most codes, aim for 10 feet from your house and any fence, 15 feet from combustible overhangs like trees or patio covers, and 25 feet from a neighboring property line if your yard allows it.
For a practical rule of thumb, Tom’s Guide advises aiming for at least 10 feet from structures or a fence, 15 feet from combustible overhangs like trees or patio covers, and 25 feet from neighboring property lines if your yard allows it 10 feet from your house and any fence, 15 feet from combustible overhangs like trees or patio covers, and 25 feet from a neighboring property line.
Also avoid low spots where water pools, anywhere under overhead utility lines, and any spot with poor airflow that would direct smoke toward a neighbor's yard or your own windows.
Plan the layout, dimensions, and clearances
Once you have a location staked out, do a rough sketch on graph paper (or even just on your phone). You need to plan three zones: the fire bowl itself, the seating ring around it, and the clear zone beyond the seating.
Size the burn area
For a patio fire pit meant for ambiance and gathering, a 30 to 36-inch inside diameter is the sweet spot. It's big enough to hold a proper fire and small enough to be cozy rather than a bonfire. A 36-inch inside diameter with a wall thickness of about 4–6 inches means your total outside diameter will be roughly 44–48 inches. Height is typically 12 to 16 inches above the finished patio grade. Go much taller and it starts to block sightlines; go shorter and embers escape more easily. Most local fire codes cap recreational fires at 3 feet (36 inches) in diameter and 2 feet tall, so those numbers keep you compliant almost everywhere.
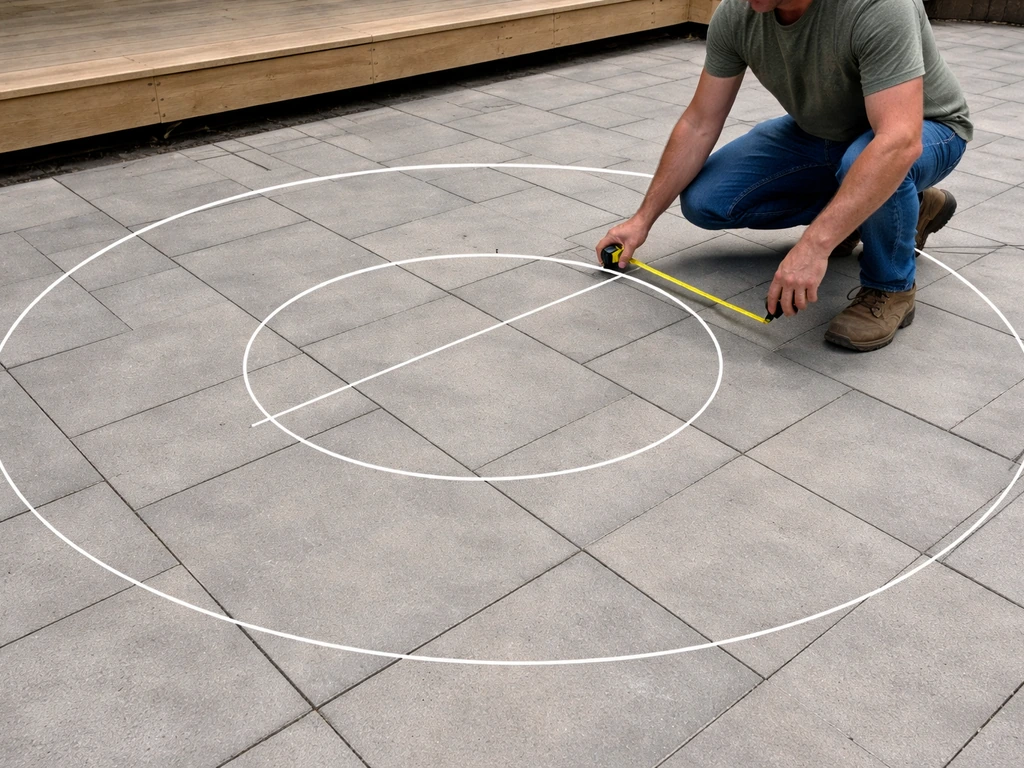
Plan the seating and clear zone
A comfortable seating ring puts chairs or a built-in seat wall about 5 to 7 feet from the center of the fire pit. That works out to roughly 2.5 to 3.5 feet from the outside edge of the pit wall, which feels warm without being too hot. Mark that radius on your patio surface with chalk or spray paint so you can visualize how much room you're actually working with. Beyond the seating ring, keep at least 3 feet of clear patio surface or lawn before anything combustible. If you're building a fire pit patio from scratch around the fire feature, this is the time to plan the whole hardscape layout together.
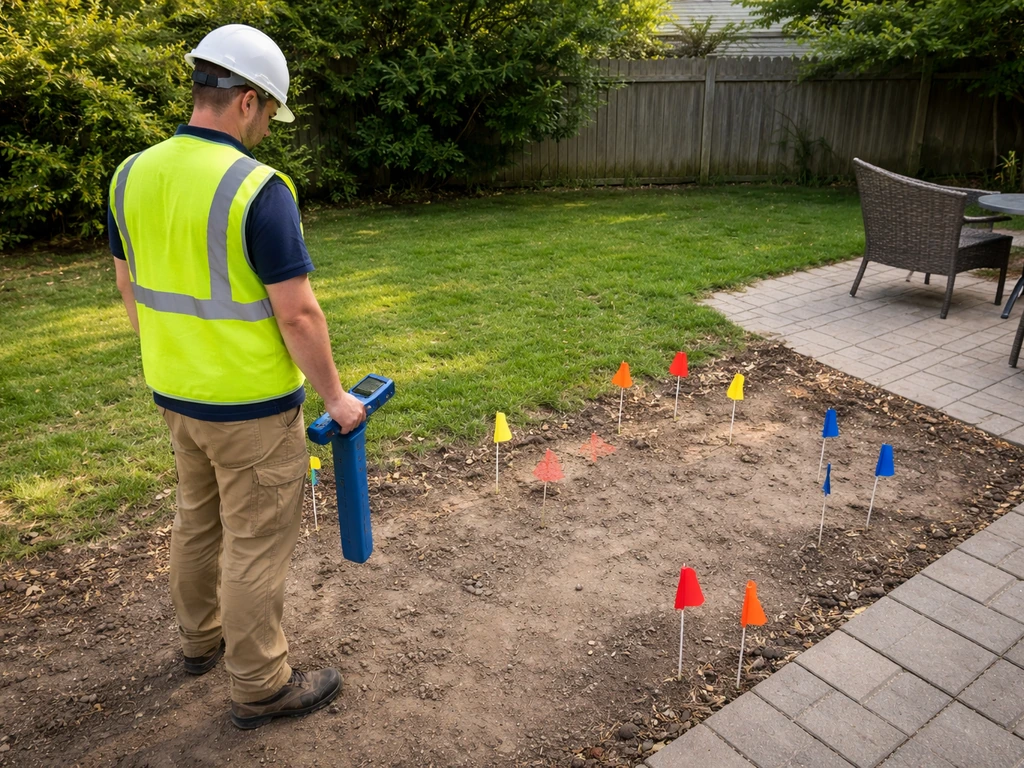
Check for underground utilities
If you're excavating even 12 inches down, call 811 (the free US dig-safe line) before you start. It's free, it's required by law in most states, and it prevents a very bad day. Do this at least 3 business days before you plan to dig.
Choose your materials and design the base and burn area
Material choice is where this project either lasts 20 years or starts crumbling in year two. The critical rule: anything inside the burn zone must be rated for high-heat exposure. Regular concrete block, standard Portland cement mortar, and most natural stones will absorb moisture and then crack, spall, or even explode under repeated thermal cycling.
Materials comparison
| Material | Use Zone | Heat Rating | Cost (approx.) | Notes |
|---|---|---|---|---|
| Firebrick (refractory brick) | Interior lining of firebox | Up to 1800°C | $2–$4 per brick | Best choice for the inside; essential if burning wood |
| Refractory mortar | Bonding firebrick interior | 1200°C–1800°C | $15–$30 per bag | Do not substitute regular mortar; it will crack |
| Standard concrete retaining wall block | Outer structural wall | Not heat-rated | $2–$4 per block | Fine for the exterior surround, not the firebox interior |
| Natural fieldstone or flagstone | Outer decorative wall | Variable | $3–$8 per sq ft | Looks great outside; avoid soft or porous stone inside |
| Crushed stone / pea gravel (3/4 inch) | Base drainage layer | N/A | $30–$60 per yard | Critical for drainage; minimum 4-inch compacted layer |
| Steel fire pit insert/liner | Inner burn ring | High heat rated | $80–$250 | Simplifies construction; highly recommended for DIY builds |
| Polymeric sand / paver base | Surrounding patio surface | Not heat-rated | Varies | Keep away from direct fire exposure; use thermal barrier |
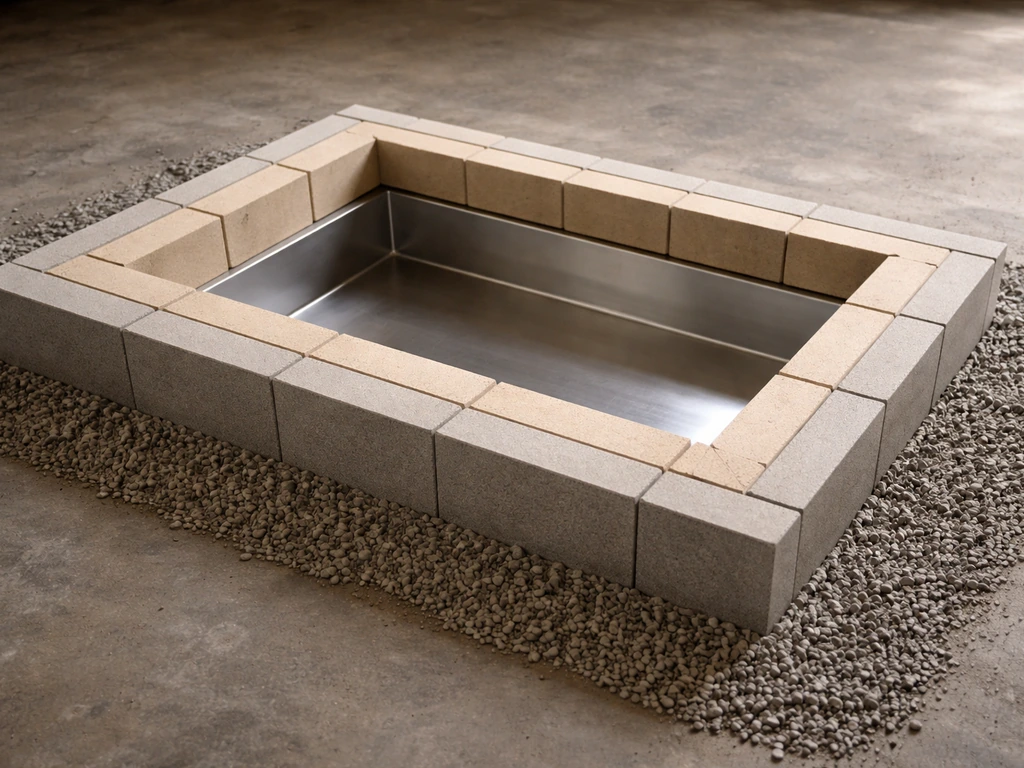
The most reliable setup for a DIY wood-burning patio fire pit is a steel liner inside (which handles the intense direct heat), firebrick lining the interior if you skip the liner, and concrete retaining wall block or natural stone for the outer decorative wall. This separates the structural zone from the heat zone and makes the build much more forgiving. If you're working on or near an existing paver patio, you must install a thermal barrier between the patio base materials and the heat source. The heat from a fire pit will travel down into paver base and sand layers, softening and destabilizing them over time without a barrier.
Step-by-step build instructions
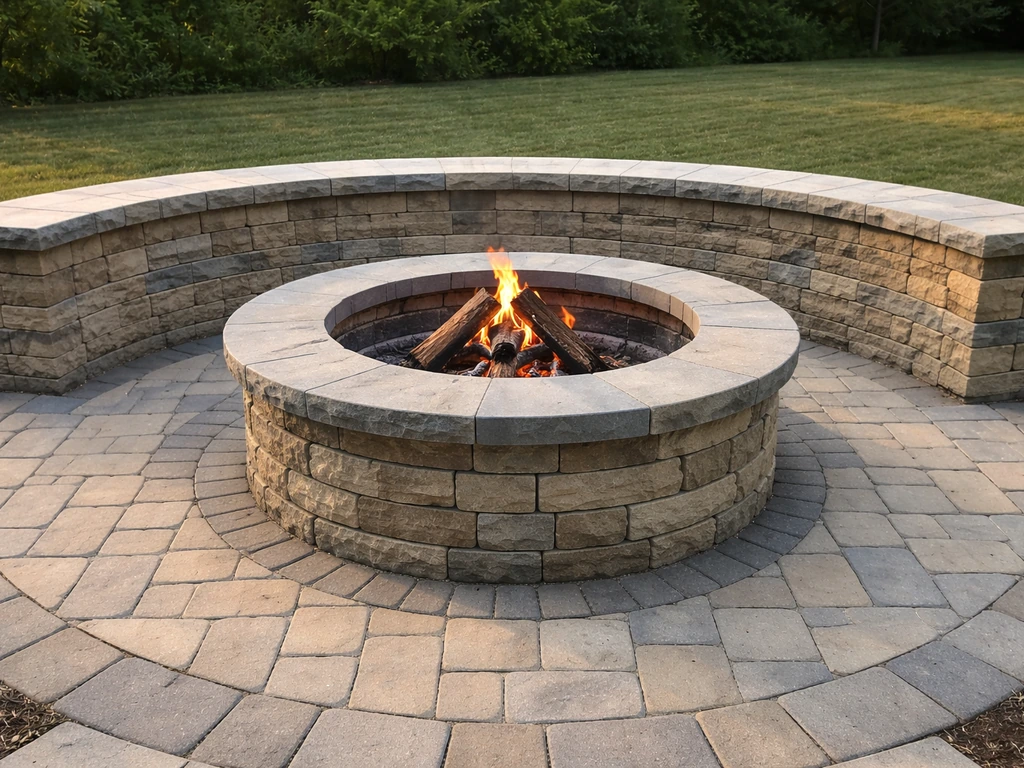
This workflow is for a raised or semi-inset round wood-burning fire pit, 36 inches inside diameter, built on a patio or in a backyard setting. A patio fire table follows a similar build approach, but with a wider, tabletop-style top and additional consideration for heat protection and clearances raised or semi-inset round wood-burning fire pit. Adjust for your specific size and style as needed.
- Mark the circle: Drive a stake at your center point. Tie a string to it at 30 inches (for a 60-inch total excavation diameter, which gives you room for the wall and a gravel perimeter). Walk the string around to spray-paint a circle on the ground.
- Excavate: Dig down 12 inches inside the marked circle. If you're on an existing paver patio, remove the pavers in that area plus an additional 6 inches outside the planned outer wall. Set the pavers aside; you may reuse them. For a semi-inset look, excavate so the top of your finished wall sits 6–10 inches above the surrounding patio grade.
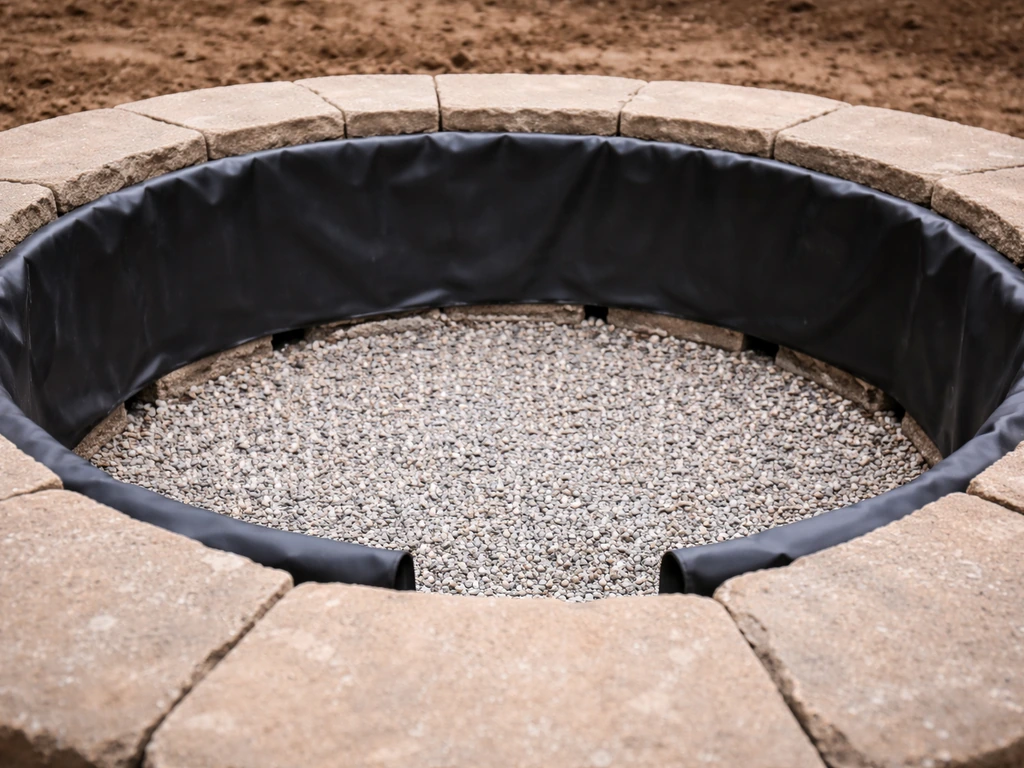
- Build the gravel drainage base: Fill the excavated area with 4–6 inches of compacted 3/4-inch crushed stone. Rake it level, then tamp it firmly with a hand tamper or plate compactor. This layer is what prevents water from pooling in the pit floor and causing freeze-thaw damage. Do not skip compaction; loose gravel will shift and your walls will tilt.
- Install a thermal barrier layer (for patio builds): If you're building adjacent to or on top of an existing paver base, lay a layer of compacted gravel or a purpose-made thermal barrier product between the patio base and your fire pit structure before continuing. This protects the paver base from heat transfer.
- Set the first course of outer wall: Dry-lay (no mortar yet) your first course of retaining wall block or stone in a circle on top of the compacted gravel. Adjust spacing until the circle is even and the blocks are level. Check with a level every few blocks.
- Add the steel liner or start firebrick interior: If using a steel liner, set it centered inside the first course. It should be sitting on the gravel base. If lining with firebrick instead, begin laying firebrick in a circle inside the outer wall using refractory mortar, not standard mortar. Mix refractory mortar per package directions; it's thicker than standard mortar. Leave 1/4-inch joints.
- Build up the outer wall courses: Continue stacking your outer blocks, staggering the joints between courses (offset each course by half a block width). Most retaining wall block uses a lip and pin system, so follow the manufacturer's stacking method. For a dry-stack look, no mortar is needed on the outer wall. For a more permanent mortared wall, use standard masonry mortar on the outer courses only.
- Build up the inner firebrick lining: If you're not using a steel liner, continue laying firebrick courses using refractory mortar up to your target height (12–16 inches). Keep the gap between the outer wall and the inner firebrick filled with gravel or sand, not mortar, to allow thermal expansion.
- Fill the gap between inner and outer walls: Pack crushed stone or pea gravel into the cavity between the firebrick liner (or steel liner) and the outer wall blocks. This fill acts as both insulation and drainage material. Don't mortar this zone solid.
- Install drain holes: Before closing up the base, ensure there are openings at the bottom of the outer wall, between the lowest block course and the gravel base, to allow water to drain out. You can leave one or two small gaps (about 1 inch wide) in the bottom course joints, or drill weep holes through the base if using a solid liner.
- Cap and finish the top: Many retaining wall block lines sell matching cap pieces. Set caps around the top of the outer wall using construction adhesive or a small amount of mortar. This locks the top course and gives a finished look. Let any mortar cure for 48 hours before the first fire.
- Reinstall surrounding pavers: Fit the surrounding pavers back in around the outer wall. Cut pavers as needed to fit the curve using an angle grinder with a diamond blade or a wet saw. Fill joints with polymeric sand and compact per the paver manufacturer's instructions.
Ventilation, drainage, and weatherproofing
These three things are what separate a fire pit that looks good for one season from one that's still going strong a decade later. Most DIY fire pits fail because of water damage and poor drainage, not the heat itself.
Drainage you can't skip
Water is the main enemy. When water gets trapped inside the fire pit and you light a fire, the trapped moisture turns to steam rapidly, which can cause brick faces to spall off or mortar joints to crack. The compacted gravel base handles most of this, but you also need a way for water to exit the outer wall at the base. The small weep gaps or holes you left in the bottom course are critical. Keep them clear. Check them annually and clear any debris with a wire or small brush. If your patio sits on a slope, orient any weep openings on the downhill side so gravity works with you.
Airflow and combustion
A wood fire needs airflow at the base to burn cleanly. The gravel fill around the liner and the weep gaps at the bottom serve double duty here, letting combustion air in from below the fuel. If your fire consistently burns smoky or struggles to catch, inadequate air supply at the base is often the cause. You can improve this by leaving one larger gap at the base of the outer wall on the windward side, or by using a grate inside the pit to lift the fuel off the floor and allow air to circulate underneath.
Protecting the surrounding patio from heat
The outer wall of the fire pit will get warm, and the patio surface immediately adjacent will see some radiant heat. Concrete pavers can handle this fine if the thermal barrier is in place. What you want to avoid is direct flame contact with the patio surface or the outer paver field, and any design where heat is trapped and concentrated against the patio base layer. The gravel fill between the inner and outer walls helps here too, acting as insulation.
Weatherproofing the masonry
Once the fire pit is complete and has fully cured (allow at least a week before applying any sealer), apply a penetrating silane/siloxane masonry sealer to the outer wall and any exposed paver surfaces nearby. These sealers soak into the material rather than forming a film on top, so they let moisture vapor escape while keeping liquid water out. They're especially important in climates with freeze-thaw cycles. Don't apply sealer to the interior firebrick or steel liner. Reapply the sealer on the outer masonry every 2–3 years.
Finish work, seating, and how to use it safely
Add a seating ring or seat wall
A built-in seat wall around the fire pit is one of the most practical upgrades you can add. Use the same retaining wall block as your fire pit outer wall for a cohesive look. Build the seat wall to 18 inches high (standard seat height) and at least 16 inches deep so people can actually sit comfortably. Position it 5 to 7 feet from the fire pit center. Cap it with a smooth, wider cap stone that overhangs slightly on both sides for comfort. If a full seat wall isn't in the budget, use large flagstone slabs set on block piers, or simply plan for movable Adirondack chairs arranged in a circle at the right radius.
Edging the fire pit area
Define the fire pit zone within the larger patio by using a contrasting paver color or pattern in a ring around the fire pit. A 12-inch-wide band of a different paver color around the outer wall looks intentional and also marks a visual boundary between the fire zone and the main patio. You can also use metal landscape edging between the fire pit gravel perimeter and the paver field to keep materials from migrating into each other.
Safe use from day one
Your first fire should be a small, low fire burned for about 30 minutes. This cures any remaining moisture out of new mortar joints and helps the materials settle. After that, some practical habits make every fire safer and extend the life of your fire pit: Follow BobVila’s fire pit safety guidance by using heat-proof tools or gloves and handling any spark screen or guard carefully, since these parts can get hot.
- Keep a garden hose or bucket of water and a shovel within reach every time you light a fire.
- Use a spark screen or spark guard whenever burning wood, especially in dry conditions or windy weather. The screen itself gets very hot, so handle it with heat-resistant gloves.
- Never burn construction lumber, treated wood, cardboard, trash, or anything that produces toxic smoke. Seasoned hardwood is the right fuel.
- Don't leave the fire unattended. Once the flames are out, embers can stay at ignition temperature. Wait at least 30 minutes after the last visible flame before leaving the area.
- Let ashes cool completely, then transfer them to a metal bucket with a lid for disposal. Never use plastic buckets or bags for ash removal.
- Clear dead leaves, debris, and anything flammable from the 10-foot perimeter before every fire.
- Check your local fire restrictions before lighting, especially in summer. Many areas impose temporary burn bans during dry conditions. A quick search for your county's current fire restrictions takes 60 seconds and can save you a citation.
- Clean out ash and debris regularly. Built-up ash raises the fuel bed closer to the rim and increases ember escape risk. A clean pit also makes airflow better and fires easier to start.
Ongoing maintenance
Each spring, inspect the mortar joints on both the inner and outer walls. Small hairline cracks in refractory mortar are normal from thermal cycling and can be repointed with fresh refractory mortar. Larger cracks in the outer masonry wall can be patched with standard masonry caulk or mortar. Check the weep holes are clear, reseal the outer masonry if water is no longer beading on the surface, and inspect the steel liner (if you used one) for rust or deformation. A wire brush and a coat of high-heat spray paint will handle surface rust. With minimal annual maintenance, a well-built patio fire pit will outlast almost anything else in your backyard.
FAQ
I’m building on an existing paver patio. Do I need to tear it out to install a fire pit?
If your patio is already built with pavers, the safest approach is to add a thermal barrier (like a heat-resistant insulating layer approved for outdoor fire use) between the heat source and the paver base materials, then rebuild or rework the gravel and drainage zone so heat and moisture do not migrate into the sand and base layers.
How do I confirm my fire pit size will pass local rules?
Don’t rely on the “inside diameter” alone. For a wood-burning pit, you also need to match the overall height and wall design to your local recreational fire limits, including caps on fire size and maximum height of flames, since the inspection focus is often on flame dimensions and clearances, not just the ring size.
Can I build this as a wood fire pit and later switch it to gas?
Plan for a different clearance than you would for a standard wood pit if you plan to use gas or propane. Even if the fire pit looks similar, the venting, heat output, and control components change the safety requirements, so treat it as a separate project rather than swapping fuel sources on the same build.
What’s the most common design mistake that causes brick spalling?
Avoid stacking your outer decorative wall so it traps water at the bottom. Use weep gaps or drainage openings in the lowest course, keep them unobstructed, and orient them downhill on sloped yards so gravity helps the pit drain instead of letting moisture accumulate.
My fire pit smokes a lot. What should I adjust first?
If your wood fire burns smoky or won’t sustain, check airflow first. Make sure the base has adequate openings for combustion air, confirm the fuel grate or liner floor arrangement allows air under the fuel, and clear the interior if ash buildup is blocking intake areas.
Can I put a bench or built-in seat wall right next to the fire pit?
Yes, but do it conservatively. If you need a nearby seat, keep it at the recommended seating radius and use non-combustible construction for any fixed seating surfaces, then verify there is no direct flame contact or strong radiant heat on materials like wood furniture, cushions, or planters.
Should I seal the inside of the fire pit after it’s built?
Don’t seal the firebrick interior or the steel liner. Use the penetrating silane/siloxane sealer only on the outer masonry and nearby paver surfaces after full cure, and reapply on schedule (every 2 to 3 years) in freeze-thaw climates to reduce water penetration.
Do I need extra-thick walls to make the fire pit last longer?
If you have to choose one, choose drainage over thickness. A thicker outer wall is not a substitute for clear weep gaps, proper gravel compaction, and a drainage path, because trapped moisture and steam pressure are what damage mortar joints and faces over time.
Can I place plants or a mulch bed close to the fire pit?
Leave an adequate clear zone around the seating area and treat nearby landscaping as part of the fire zone. Keep shrubs, mulch beds, and hanging planters out of the clearance area because embers and radiant heat can ignite dry organic materials even if they are not directly in the flame path.
Why does my new fire pit look worse after the first burn, and what can I do?
Start with a small, controlled fire and avoid immediately roasting full-size burns. First fires should be low and short (around 30 minutes) to drive off remaining moisture from mortar joints and help settle materials without shocking the system.