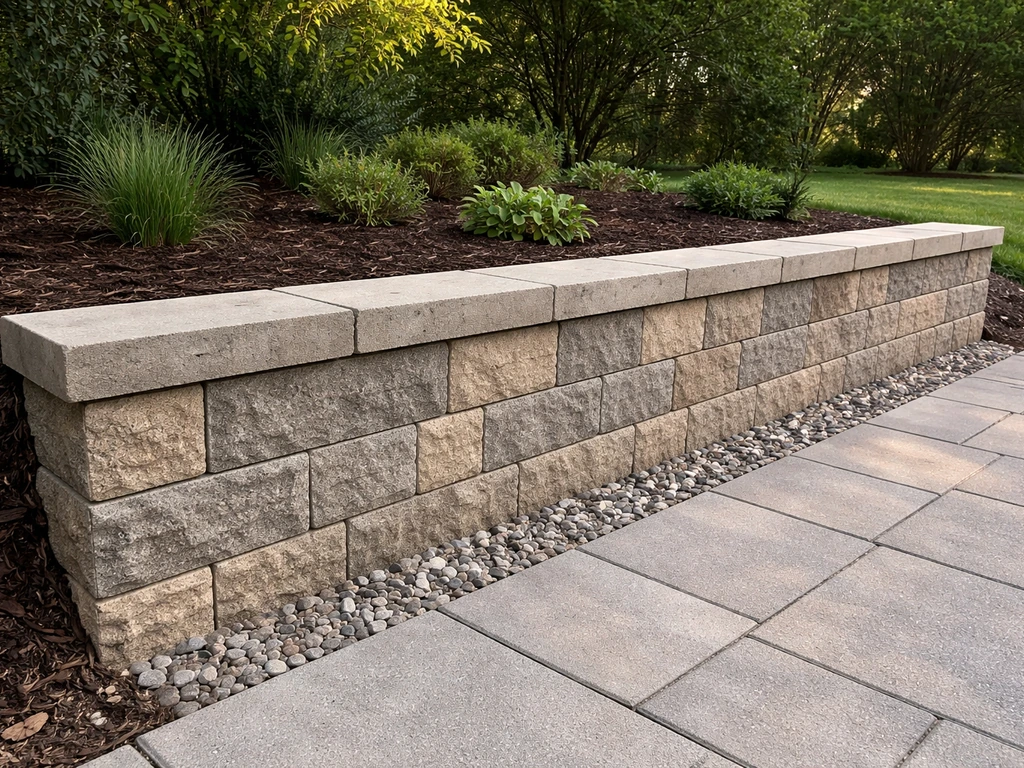
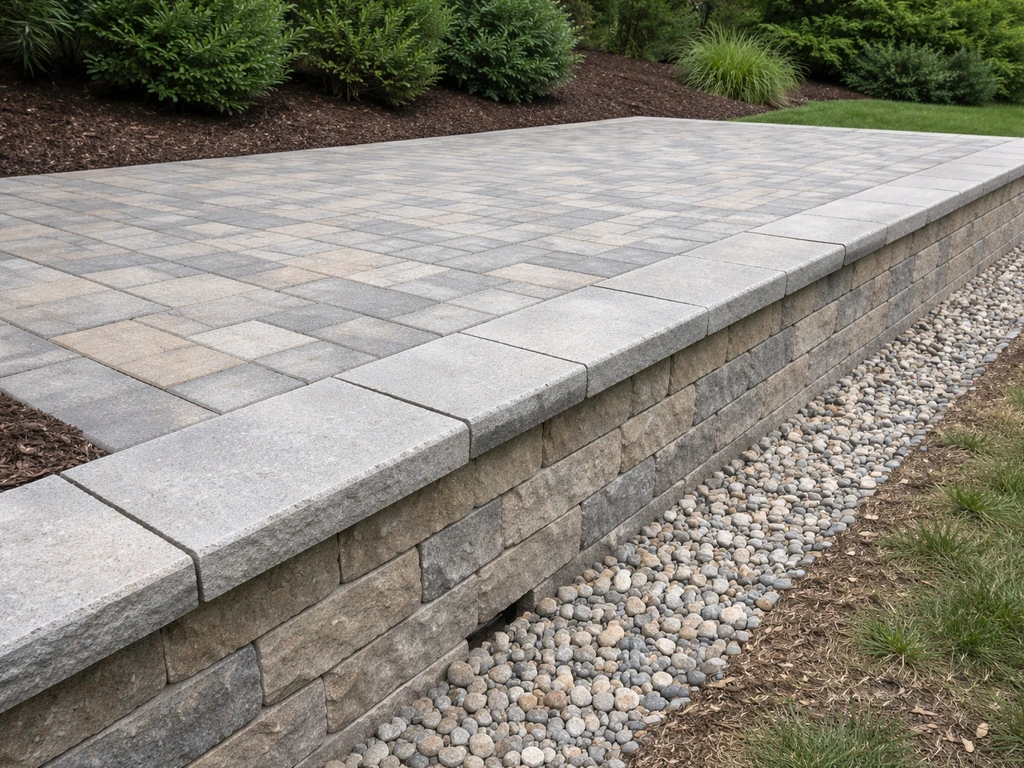
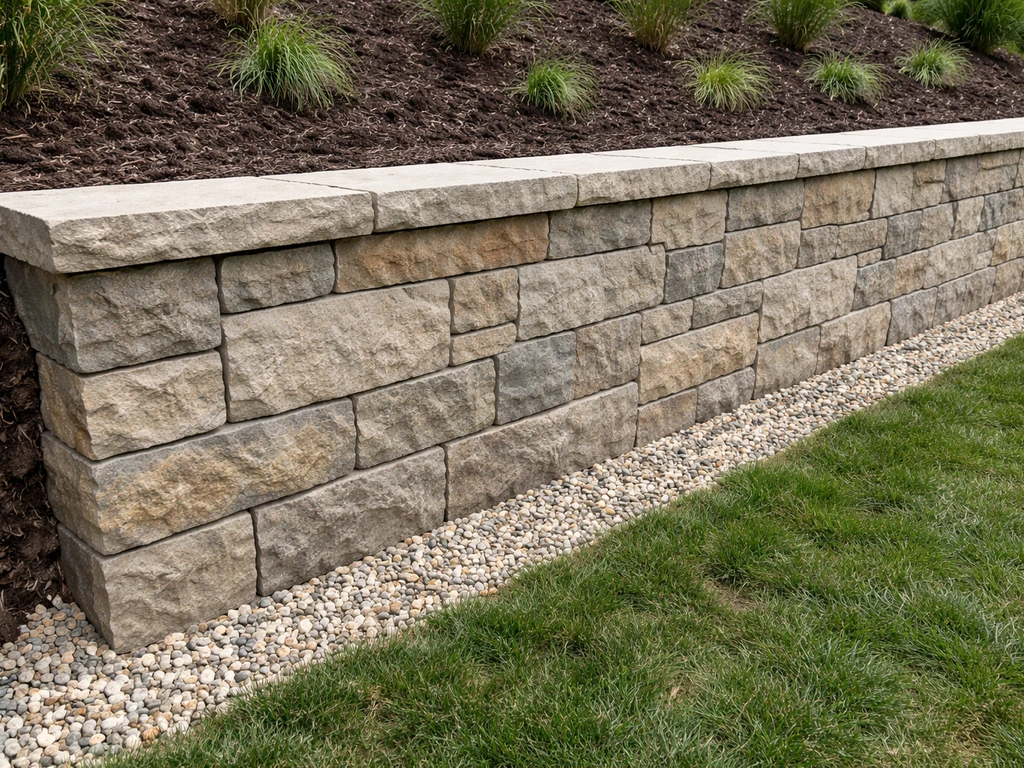
A patio wall bench is a low masonry or wood wall built along the edge of a patio that doubles as seating. blank" rel="noopener noreferrer">City of Santa Clarita Municipal Code – Property Development Standards (retaining wall height/terracing) notes that Local zoning codes commonly impose additional limits (e.g., Santa Clarita: single retaining walls may be limited to ~6 ft as viewed from adjacent property and recommend terracing with two 4‑ft walls separated by set-back when taller walls are desired), so site-specific municipal ordinance limits and setback/terracing rules must be checked early in planning. Most are 16 to 24 inches tall, 12 to 18 inches wide, and capped with a smooth, comfortable surface. When it also holds back a slope, it becomes a combined seating and retaining wall. You can build one from segmental concrete block, natural stone, poured concrete, or wood, and the right choice depends on your site, your budget, and how handy you are. For step‑by‑step instructions and detailed diagrams, see our guide on how to build a patio seating wall. A typical weekend DIYer can finish a simple 10-foot segmental block seating wall in one to two days for $300 to $700 in materials.
How to Build a Patio Wall Bench: DIY Plans & Materials

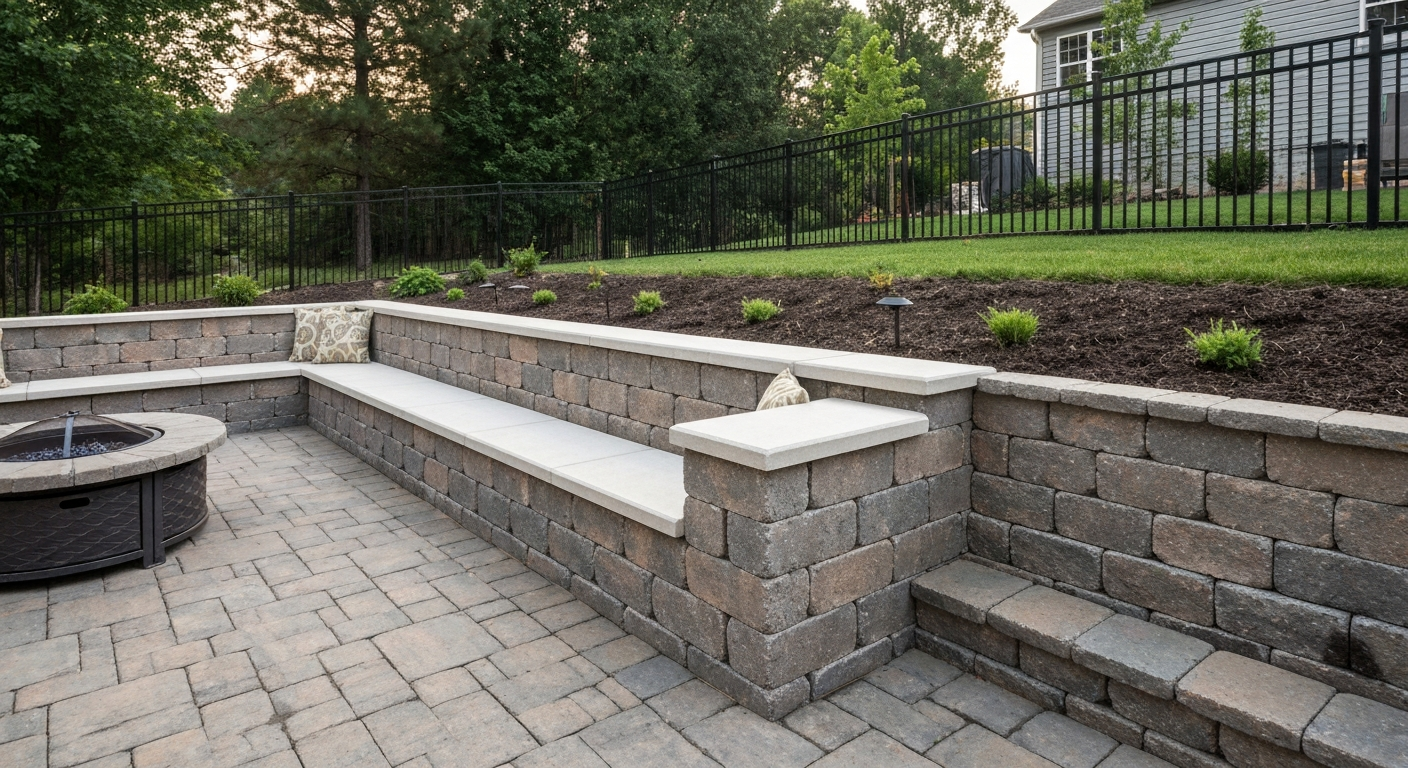
What a patio wall bench is and when to choose one
A patio wall bench is essentially a low structural wall with a cap that functions as a seat. Unlike a freestanding bench you can move, a wall bench is permanent and defines the edge of your outdoor space. Designers sometimes call it a seating wall, and when it retains a slope behind it, it becomes an integrated retaining and seating wall. The appeal is obvious: you get built-in seating that never blows over, never rots on the underside, and visually anchors the patio to the landscape.
Choose a patio wall bench when you need to seat groups without cluttering the space with chairs, when you want to define the patio edge cleanly, or when you have a mild slope that needs to be retained at seating height anyway. If your slope requires a wall taller than about 3 feet to hold back, you are moving into true retaining-wall engineering territory, which is a related but more complex project. For step-by-step guidance on how to build a small retaining wall for patio, consult our detailed how-to guide. For step-by-step instructions on how to build a patio retaining wall, refer to our detailed guide on building and reinforcing small retaining walls. For most residential patios, a wall between 16 and 24 inches handles both jobs neatly.
Which approach is right for your site
Each material has a different skill ceiling, cost range, and long-term maintenance profile. Here is how the four most common methods stack up side by side.
| Method | Skill Level | Approx. Material Cost (per linear ft) | Durability | DIY-Friendly? | Best For |
|---|---|---|---|---|---|
| Segmental concrete block | Beginner–Intermediate | $25–$55 | Excellent, 30+ years | Yes | Most patios; easiest system |
| Natural stone with mortar | Intermediate–Advanced | $35–$80 | Excellent if mortared well | Moderate | Rustic or naturalistic settings |
| Poured concrete | Advanced | $40–$90 (forms + concrete) | Excellent, very strong | Difficult without experience | Contemporary look; retaining walls |
| Wood (pressure-treated or cedar) | Beginner–Intermediate | $20–$45 | 10–20 years with maintenance | Yes | Budget builds; informal patios |
Segmental concrete block (products like Allan Block, Belgard, or Keystone) is the most beginner-friendly option because the units stack with a built-in setback batter, the system is designed for gravity stability, and manufacturer guides walk you through every step including cap attachment. Natural stone looks stunning but requires skill to level and mortar properly, and inconsistent joint widths will show every mistake. Poured concrete is the strongest choice for a wall that truly retains soil, but forming, pouring, and finishing concrete is a real skill and typically requires a rental mixer or a ready-mix truck. Wood is the fastest and cheapest option but will need retreatment or replacement within a decade or two, especially in wet climates.
My honest recommendation: if this is your first masonry wall, start with segmental concrete block. The system is engineered to work, the units are forgiving, and you can build a good-looking 20-inch seating wall in a weekend. If the wall will also serve as a retaining wall, check the manufacturer gravity height limit for your specific block before you start. Most gravity-only (no geogrid) segmental walls top out at 2 to 4 feet depending on the unit, and going beyond that without geogrid reinforcement or engineering is where walls start to fail.
Design and layout guidance
Seating dimensions that actually work
Comfortable outdoor seating height sits between 17 and 19 inches from the ground to the top of the cap. Go lower and people feel like they are sitting on the floor; go higher and shorter guests dangle their feet. For seating width (depth from front face to back), 14 to 18 inches works for most adults. If you want people to be able to lean back or sit facing inward, plan a minimum 16-inch seat depth. Cap thickness matters too: a 2-inch cap gives you a nice finished edge but a 3-inch or thicker natural stone cap feels more substantial and holds up better to impact.
- Seat height: 17–19 inches finished (top of cap to ground)
- Seat depth: 14–18 inches minimum, 16 inches recommended
- Cap thickness: 2–3 inches for concrete pavers, 2–4 inches for natural stone
- Wall width at base: match block unit depth (typically 6–12 inches for segmental block)
- Minimum radius for curved sections: 4 feet for segmental block; tighter curves need cut units
Laying out the plan
Start with a simple plan sketch on graph paper, one square per foot. Mark the patio perimeter, the bench wall location, and any corners or curves. Straight walls are the easiest to build and the easiest to cap. If you want curves, segmental block handles gentle curves by fanning units apart slightly on the front face; tighter curves require cut units or specialty curved units from the manufacturer. Aim for your wall to run parallel to or at a right angle from the patio edge to simplify cap cutting.
When integrating with an existing patio, the wall base should sit on undisturbed compacted soil or a properly built aggregate base, not on top of existing paver sand. If your patio paver surface already exists, you will need to pull pavers at the wall location, excavate to proper base depth, build the wall, then re-lay pavers up to the wall face. This is extra work but it is the only way to get a stable connection. Think of the wall and the patio as two structures that meet, not one sitting on top of the other.
Sightlines and orientation
Orient seating walls so that seated guests face the best view, whether that is a fire pit, a garden, or the yard. A seating wall that faces a blank fence wall is a wasted opportunity. Also consider sun exposure: a west-facing seat wall will bake in afternoon sun in summer, and a dark-colored cap will get hot enough to be uncomfortable. Light-colored caps, shade overhangs, or strategic planting can solve this. On sloped sites, a seating wall built at the downhill edge of the patio creates a natural front-row view over the yard.
Permits, codes, and safety
Most low patio seating walls (under 2 feet tall with no retained soil behind them) fall below local permit thresholds, but you must check with your municipality before you build. A common trigger in U.S. jurisdictions is a retaining wall taller than 4 feet measured from the bottom of the footing to the top of the wall. Many cities exempt walls under that height, but nearly all jurisdictions add an important caveat: if the wall supports a surcharge, meaning a driveway, building footing, or steep backslope loads the soil behind it, a permit and often an engineered design are required regardless of wall height. Do not skip this check.
The International Residential Code (IRC Section R312) requires guardrails on any open-sided walking surface more than 30 inches above the grade below, with guards at least 36 inches tall and openings no larger than a 4-inch sphere. For a patio wall bench, this matters if your patio sits more than 30 inches above the adjacent grade. In that case, your seating wall may need to double as or be supplemented by a guardrail, and the structural requirements change significantly. Some municipalities follow the International Building Code instead, which sets a common commercial guard height of 42 inches. Check your local adopted code.
Local zoning rules can also set maximum wall heights visible from adjacent properties, sometimes as low as 6 feet total, with requirements to terrace tall walls into two shorter walls separated by a setback. For most residential patio seating walls at 16 to 24 inches, none of this applies, but if your site has a significant slope and you are considering walls over 3 feet, get local code clarity early. For examples and design considerations, see retaining wall with patio on top. A quick call to your building department is free and can save you from tearing out work.
- Check local permit thresholds before starting — typically triggered at 4 ft from bottom of footing to top of wall
- A surcharge behind any wall (driveway, structure, steep slope) often triggers permits regardless of height
- IRC R312 requires guards at 36 inches min. when open-sided surfaces are more than 30 inches above grade
- Call 811 before any excavation to locate buried utilities — this is required by law in most U.S. states
- Check local setback requirements for walls near property lines
Tools and materials checklist
The list below covers a segmental concrete block seating wall, the most common DIY approach. Adjust quantities for your specific wall length and height. For a 10-foot-long wall that is 20 inches tall (two to three block courses plus a cap), this is a realistic shopping list. For step-by-step instructions, see our guide on how to build patio bench.
Tools
- Tape measure and string line with line level
- Marking paint or marking flags
- Flat spade and round-point shovel
- Tamper or plate compactor (rent a plate compactor for any wall over 5 linear feet)
- Rubber mallet
- 4-foot level and torpedo level
- Circular saw with diamond blade or masonry chisel and hammer (for cutting block)
- Caulk gun (for construction adhesive on cap)
- Wheelbarrow
- Safety glasses, gloves, knee pads
Materials (10-linear-foot wall, 20 inches tall)
- Segmental retaining wall block: approx. 30–40 units depending on unit size (calculate length × courses × units per course)
- Matching cap units: approx. 10–12 linear feet worth (cap units run slightly long, order 10–15% extra)
- Compactable gravel base (3/4-inch crushed): approx. 0.5 cubic yards for a 10-ft wall
- Washed drainage gravel (clean 3/4-inch stone): approx. 0.3 cubic yards for the 12-inch drainage zone behind the wall
- 4-inch perforated drain pipe: 12 linear feet (run behind the wall base, daylight at ends)
- Geotextile filter fabric: one roll (covers trench base and drainage gravel)
- Construction adhesive (landscape/masonry type, e.g., LIQUID NAILS Landscape or Sikaflex): 2–3 tubes
- Landscape fabric (optional, for soil separation at backfill): 1 roll
- Backfill soil: approx. 0.2–0.3 cubic yards (if needed behind drainage zone)
- Marking paint: 1 can
For a natural stone wall, swap the block for fieldstone or cut stone and add Type S mortar mix (one 80-lb bag covers approximately 12 to 15 standard brick joints). For a wood wall, you will need 4x4 or 6x6 pressure-treated posts, 2x8 or 2x10 pressure-treated decking boards for the seat, galvanized structural screws (3-inch minimum), and post anchor hardware. Poured concrete requires form lumber (2x8 or 2x10), concrete (one 80-lb bag of concrete mix yields about 0.6 cubic feet; estimate your form volume and round up 10%), and rebar (#4 or #5) with wire ties.
Site assessment and preparation
Before you touch a shovel, call 811 (or your country equivalent) to have underground utilities marked. Water lines, electrical conduits, gas lines, and irrigation can all run through yard areas, and hitting one is dangerous and expensive. This call is free and required by law in most U.S. states. Schedule it at least two to three business days before you plan to dig.
Next, assess your soil and slope. Push a screwdriver or rod into the soil at your wall location. If it goes in easily with one hand, you have soft or loose fill that will need extra compaction or deeper excavation. Rocky soil is excellent for bearing but hard to excavate by hand. Clay soil is the trickiest: it holds water, swells when wet, and shrinks when dry, which is hard on wall foundations. If you have heavy clay, plan for a thicker drainage gravel layer behind the wall and make sure your perforated drain pipe has a clear outlet.
For sloped sites, stake out the wall location with string lines and use a level to find how much the ground drops across the wall length. If the slope runs along the wall (the wall runs across a hillside), plan a step-down in your courses so the base stays buried at consistent depth. Each step should correspond to one full block course height. If the slope runs into the wall from behind, that is a retaining situation and drainage planning becomes even more critical.
- Call 811 before any digging — mandatory in most U.S. states
- Mark your wall footprint with paint or string lines
- Check for slope direction: cross-slope means stepped base; back-slope means retaining conditions
- Probe soil for softness, clay content, and rock
- Assess natural drainage: where does water flow after rain? Make sure your wall does not create a dam
- Check for tree roots within 3 feet of the wall line — roots will eventually push walls out of alignment
Foundation and base work
This is the step most DIYers underestimate, and it is the main reason walls fail. Every good wall starts with a properly excavated and compacted base trench. For a segmental block seating wall, excavate a trench 12 to 18 inches wide and deep enough to bury the first block course at least 1 to 2 inches below finished grade, plus 6 inches of compacted gravel base below that. So for a block that is 6 inches tall, your trench needs to be at least 12 to 14 inches deep from finished grade.
Compact the trench bottom with a tamper or plate compactor before adding any gravel. If you skip this step and the native soil shifts seasonally, your whole wall will move with it. Fill the trench with 6 inches of 3/4-inch crushed compactable gravel in two 3-inch lifts, compacting each lift thoroughly. The finished leveling pad should be flat and level across the full wall length. Check with a 4-foot level and a string line. This investment of time pays for itself a hundred times over in wall stability.
Frost-depth considerations
In freeze-thaw climates (anywhere that sees regular sub-freezing winters), water in the soil expands when it freezes and can heave a shallow foundation significantly. For a freestanding seating wall that is not retaining soil, a well-drained gravel base is usually sufficient because water drains through before it can freeze and push. For a wall retaining soil or in a climate with deep frost (USDA Zones 4 and colder), bury your gravel base deeper, to or below the local frost depth if possible, or use a thicker, wider free-draining base to limit moisture accumulation. Your local building department can tell you the frost depth for your area. In Zone 5 to 6 areas, 18 to 24 inches is common. In Zone 4 and colder, frost depth can reach 36 to 48 inches or more.
For poured concrete walls with proper footings, ACI best practice calls for air-entrained concrete in any freeze-thaw exposure zone, with roughly 4 to 8 percent entrained air for normal-strength mixes. This air-entrainment creates tiny bubbles that accommodate ice expansion and dramatically extends the life of the concrete. If you are ordering or mixing concrete for a footing or wall in a cold climate, specify air-entrained mix or add an air-entraining admixture per the product instructions.
Geotextile and geogrid
For walls under about 2 feet that are not retaining significant soil, a geotextile filter fabric under and around the drainage gravel is sufficient to prevent fine soil particles from migrating into and clogging your drainage layer. Lay it in the trench before adding gravel, then fold the edges over the gravel before backfilling. For walls exceeding the manufacturer's gravity height limit (typically 2 to 4 feet depending on the block), geogrid reinforcement layers are required. Geogrid is a plastic mesh that gets laid horizontally between block courses and extended back into the compacted fill behind the wall, typically at elevations specified by the manufacturer or engineer. If your wall approaches or exceeds the manufacturer gravity limit, follow the product-specific installation guide exactly, or hire a geotechnical engineer to design the reinforcement schedule. The Concrete Masonry & Hardscapes Association's Segmental Retaining Wall Best Practices Guide - CMHA compiles specification, drainage, geogrid, and inspection recommendations for SRW systems and is intended to supplement the NCMA design manual as practical construction guidance.
Drainage and moisture control
Water is the number-one enemy of any masonry wall. Hydrostatic pressure (water building up behind the wall with nowhere to go) is what makes walls bulge, lean, and eventually topple. The solution is not complicated but it must be built in from the start, because retrofitting drainage after the wall is done is very difficult.
Behind every wall that retains any soil, install a 12-inch-wide zone of clean, free-draining aggregate (3/4-inch washed stone) from the base to within a few inches of the top of the wall. At the base of this drainage zone, lay a 4-inch perforated drain pipe in a gravel envelope, wrapped in geotextile filter fabric to keep silt out. This pipe needs to daylight (exit to open air or a collection point) at each end of the wall. If the pipe has nowhere to drain, it does no good. Slope the pipe at a minimum of 1 percent grade (about 1/8 inch per foot) toward the outlet.
For segmental block walls, the vertical gaps between block units act as natural weep points, but relying on them alone is not enough. The 12-inch drainage aggregate zone is what actually moves water away from the wall face. The weep gaps just let any water that makes it to the face escape rather than build up pressure. Do not fill these gaps with mortar or concrete unless the wall is specifically designed as a mortared gravity wall with engineered drainage details.
At the surface, make sure your patio and the ground behind the wall both slope away from the wall, not toward it. A minimum 2-percent surface grade (1/4 inch per foot) is the standard recommendation for patio drainage. If surface water from a lawn or garden bed flows directly toward the back of your wall, consider adding a small swale or French drain upslope to intercept it before it reaches the wall. This single step prevents more seating wall failures than almost anything else.
Backfill best practices
Backfill behind the drainage zone with native soil or clean fill in 6- to 8-inch compacted lifts. Compact each lift with a hand tamper or plate compactor, but keep the compactor at least 3 feet back from the wall face to avoid pushing the wall outward. Never backfill with clay-heavy soil directly against the drainage gravel; the geotextile filter fabric is there to separate the soil from the drainage aggregate. If you removed topsoil during excavation, it can go back as the final 4 to 6 inches of backfill on top for planting.
Building the wall course by course
Segmental block walls (step-by-step)
- Set your string lines and mark the wall footprint with paint
- Excavate the trench to the required depth (6-inch gravel base + buried first course depth + 12-inch drainage zone width behind the wall)
- Compact the trench bottom thoroughly with a plate compactor
- Lay and compact 3 inches of 3/4-inch crushed gravel, then a second 3-inch lift, compacting each — finished depth should be 6 inches
- Set the first block course on the leveling pad, checking for level every 4 to 6 feet along the wall using a string line; tap blocks down with a rubber mallet as needed
- Install the 4-inch perforated drain pipe at the base of the wall, behind the first block course, in a gravel envelope and wrapped in filter fabric — make sure both ends daylight
- Backfill the 12-inch drainage zone behind the first course with clean washed gravel
- Set the second course, offsetting the vertical joints (running bond pattern) by at least one-third of a block length from the course below — check for level and batter (slight backward lean) as specified by manufacturer
- Continue courses, adding drainage gravel behind each course as you go
- If geogrid is required per the manufacturer height limit, lay it flat on the designated course, extending it back into the compacted fill at the manufacturer-specified depth
- Once all block courses are set, apply construction adhesive (2 to 3 beads per cap unit) to the top block course and set the cap units in place
- Allow adhesive to cure per product directions (typically 24 hours) before loading the wall with weight
- Compact and grade the final backfill layer, ensuring surface drainage flows away from the wall
Natural stone with mortar
Mortared stone walls need a proper concrete footing, not just a gravel pad, because mortar does not flex. Pour a footing at least 8 inches deep and as wide as your stone wall will be plus 4 inches on each side, using 3,000 PSI concrete. In freeze-thaw climates, use air-entrained concrete. Once the footing has cured for at least 48 to 72 hours, begin setting stone in Type S mortar. Work in sections no taller than 18 inches per day to let the mortar set before adding weight. Keep joints at 3/4 inch to 1 inch, brush them smooth when the mortar is thumbprint-firm, and keep the wall damp for 72 hours after laying for proper cure. Leave deliberate weep holes (unmortared vertical joints) every 4 to 6 feet at the base course.
Wood seating walls
A wood seating wall is the fastest build. Set 4x4 or 6x6 pressure-treated (ground-contact rated, UC4B or better) posts in concrete-filled holes or in post anchors set in a concrete pad, spaced 4 to 6 feet apart. Frame the seat surface with 2x8 or 2x10 pressure-treated boards running horizontally between posts, then attach 5/4 deck boards or 2x6 boards as the seat surface using galvanized or stainless-steel screws. Leave 1/8-inch gaps between seat boards for drainage. Wood walls are not suitable for retaining soil; they are best used as purely decorative seating elements on flat sites.
Cap installation and finish details
The cap is what people actually sit on, so it deserves careful attention. For segmental block walls, use manufacturer-matched cap units or cut paver stones to width. Apply two or three beads of landscape construction adhesive (products like LIQUID NAILS Landscape or Sikaflex work well) to the top surface of the final block course, press the cap units firmly down, and check that each cap is level side-to-side and front-to-back. Offset the cap joints from the block joints below for a cleaner look and better mechanical interlock. For natural stone, mortar the cap stones in place with Type S mortar and tool the joints neatly.
Finish the exposed block face with a masonry sealer if you want to reduce efflorescence (the white mineral deposits that sometimes appear on new block). This is optional but helpful in wet climates. For natural stone, a penetrating sealer reduces staining and makes cleaning easier. For wood walls, apply a UV-protective deck stain or sealant after assembly and plan to reapply every two to three years.
Seating comfort: cushions, backs, and add-ons
A hard masonry seat works fine for short gatherings but gets uncomfortable fast. Outdoor seat cushions (typically 3 to 4 inches thick) solve this immediately. Look for cushions rated for outdoor use with quick-dry foam and UV-resistant fabric covers. Most seating wall cushions are made to order in the width of your cap, typically 15 to 18 inches. Store them inside or in a deck box when not in use to extend their life.
If you want a back support, you have a few options. The simplest is placing large outdoor throw pillows or bolster cushions against a nearby planting bed edge or a second, taller wall section behind the seat. Some designers build a low wood or metal back rail into the wall design, anchored with post anchors set in the top block course before the cap goes down. This requires planning ahead: set the post hardware before the cap adhesive cures. A back rail at 12 to 16 inches above the seat top is usually enough for lower-back support without feeling like a cage.
Time and budget expectations
| Wall Type | Wall Length | Estimated Material Cost | Estimated Time (DIY) | Notes |
|---|---|---|---|---|
| Segmental block, seating-only | 10 ft | $300–$550 | 1–2 days | Most beginner-friendly |
| Segmental block, retaining + seating | 10 ft | $450–$700 | 2–3 days | Add drain tile and gravel |
| Natural stone with mortar | 10 ft | $500–$900 | 2–3 days | Footing cure time adds a day |
| Poured concrete | 10 ft | $500–$1,000 | 3–5 days (including cure) | Forming and finishing is skilled work |
| Wood (PT posts + decking) | 10 ft | $200–$400 | 1 day | Fastest build; limited lifespan |
These estimates assume you are renting a plate compactor (typically $60 to $100/day) and buying materials at a home center. Stone yard or masonry supplier pricing can vary widely by region. Budget an extra 10 to 15 percent for waste, broken units, and the things you did not plan for (like hitting a buried irrigation line). Labor from a contractor typically runs $50 to $100 per linear foot installed, so a 10-foot wall could cost $500 to $1,000 in labor alone on top of materials.
Troubleshooting common problems
Wall is settling or sinking unevenly
This almost always traces back to an inadequate base. If one section of the wall has dropped more than others, the leveling pad under that section either was not properly compacted or was thinner than the rest. The fix is to disassemble the affected section, re-excavate, add and compact fresh gravel, and rebuild. It is frustrating but not complicated. Catching it at one or two courses is much easier than after all the courses and cap are set.
Wall is bulging or leaning outward
Bulging is a drainage problem in most cases. Water has built up behind the wall, the hydrostatic pressure has exceeded the wall's gravity resistance, and something has to give. If caught early (wall is leaning but not cracked), excavate behind the wall, improve the drainage aggregate and pipe, and rebuild the leaning section. If the wall has cracked or multiple courses have moved, the wall likely needs to come down and be rebuilt with proper drainage. For a retaining wall that has moved significantly, consult a structural engineer before rebuilding; there may be a soil stability issue beyond just drainage.
Efflorescence (white staining) on block face
Efflorescence is mineral salts being carried to the surface by water moving through the masonry. It is harmless but looks bad. It is most common in the first year on new block. Clean it with a diluted masonry cleaner (muriatic acid diluted per product instructions or a commercial efflorescence remover) and a stiff brush, then rinse thoroughly. Applying a penetrating sealer after cleaning helps reduce recurrence. Better drainage behind the wall reduces it at the source.
Frost heave in cold climates
If your wall shifts seasonally and mostly settles back in spring, the base is shallow or poorly drained. Frost heave lifts wet soil as water freezes and expands. The solution is a thicker, wider free-draining gravel base that prevents moisture accumulation, combined with good drainage behind the wall. In severe freeze-thaw climates, some movement in ungrown seating walls (not retaining walls) is normal; maintaining good drainage and resetting any shifted cap units annually is manageable. If a retaining wall is heaving badly, the base needs to go deeper, possibly below frost depth, and an engineered footing may be necessary.
When to hire a pro
Most seating walls at 16 to 24 inches are well within DIY territory with a weekend of careful work. But there are situations where calling a professional is the smarter move. If your wall needs to retain more than 3 feet of soil, if you have unstable or very steep slopes, if the wall is close to a structure or property line, or if you need an engineered design for a permit, a licensed masonry contractor or geotechnical engineer is worth the cost. Getting the engineering wrong on a retaining wall can create a genuine safety hazard, and fixing a failed wall costs far more than getting it right the first time.
Also consider hiring out the base compaction and excavation if your site has poor access. Renting a mini-excavator and knowing how to use it efficiently is a real skill, and the gravel compaction step on a large wall is physically demanding. Many DIYers build the wall themselves after a contractor handles the earthwork, which is a reasonable compromise that keeps costs down while ensuring the foundation is solid.
FAQ
What are the common construction methods for a patio wall bench (seating wall) and how do they differ?
Four common methods: 1) Segmental concrete block/paver seating wall — modular, dry-stacked or with rebar/adhesive; good for DIY, limited gravity heights without geogrid. 2) Natural stone with mortar — durable, more skilled masonry work, needs proper footing and weep/drainage. 3) Poured-in-place concrete — fully structural, best for long runs or integrated retaining walls; requires formwork, rebar and often professional design for retaining functions. 4) Wood seating wall — easiest/fastest, visually warm but less durable/low maintenance, must use rot-resistant lumber or structural timber and proper footings. Differences: durability, difficulty, allowable height without reinforcement, freeze/thaw performance, finish options and cost.
What dimensions and layout guidelines produce comfortable seating and meet safety/code concerns?
Comfort: typical seat height 16–18 in and seat depth 15–18 in; cap overhang 1–1.5 in; continuous level top for sitting. If bench doubles as guard/edge adjacent to a drop, code triggers apply: the IRC/IBC require guards when any walking surface is more than 30 in above grade (IRC R312) — then a 36 in (residential) or 42 in (some commercial) guard may be required. For short benches acting as low retaining walls, keep heights under common local permit thresholds (often 4 ft measured from footing to top) or check jurisdictional rules and setbacks.
How do I plan the foundation/footing and base for each method?
Segmental block/paver: excavate full-width trench, compact subgrade, install 4–6 in compacted crushed stone leveling pad (6 in common), larger for taller walls; use a compacted leveling course and proper compaction lifts. Natural stone with mortar and poured concrete: dig and form a cast-in-place concrete footing sized for bearing and frost depth per local code and load — typically at least 12 in wide and several inches thick depending on wall height and soil; use reinforcement per engineer/ACI. Wood: use concrete piers or continuous compacted crushed stone pad below posts or bottom plates; treat wood in contact with concrete or use isolation. In freeze/thaw climates place footings below frost depth or use frost-protected shallow foundations per local code.
What drainage and backfill details are essential to prevent hydrostatic pressure and failure?
Provide a continuous drainage zone behind the wall: 12 in of free-draining granular fill adjacent to the wall face, a 4 in perforated drainpipe (wrapped in filter fabric) at the base sloped to daylight or a positive drain, and geotextile as needed to prevent fine migration. For SRWs follow manufacturer and NCMA guidance: keep the drainage aggregate and geotextile compatible with native soils. Backfill in 6–8 in compacted lifts with appropriate compaction equipment; avoid heavy compaction directly against delicate faces unless specified.
When do I need geogrid or engineering for a seating/retaining wall?
Use geogrid (and an engineered design) when the wall retains significant soil or surcharge, exceeds manufacturer gravity height limits, or when stability against overturning/sliding is required. Manufacturer catalogs and the NCMA DMSRW provide reinforcement schedules — for anything above typical gravity limits (~2–4 ft depending on unit) or if supporting a driveway/structure (surcharge), obtain an engineered design. Also check local rules: many jurisdictions require engineering if the wall supports a surcharge regardless of height.
How do I install caps and finish details for comfort and durability?
Select caps matched to the wall system (manufacturer caps for SRW units or cut natural stone/cast concrete caps for custom walls). Adhere caps with recommended adhesive or mortar, use dowels where required for poured concrete caps, provide a slight slope (1:50 or ~1/4 in per ft) toward the patio to shed water, and seal cap joints with flexible sealant where freeze/thaw is a concern. For comfort add a rounded front edge and integrate backrests or cushions. Provide weep joints or control joints per material practice to control cracking in poured concrete.