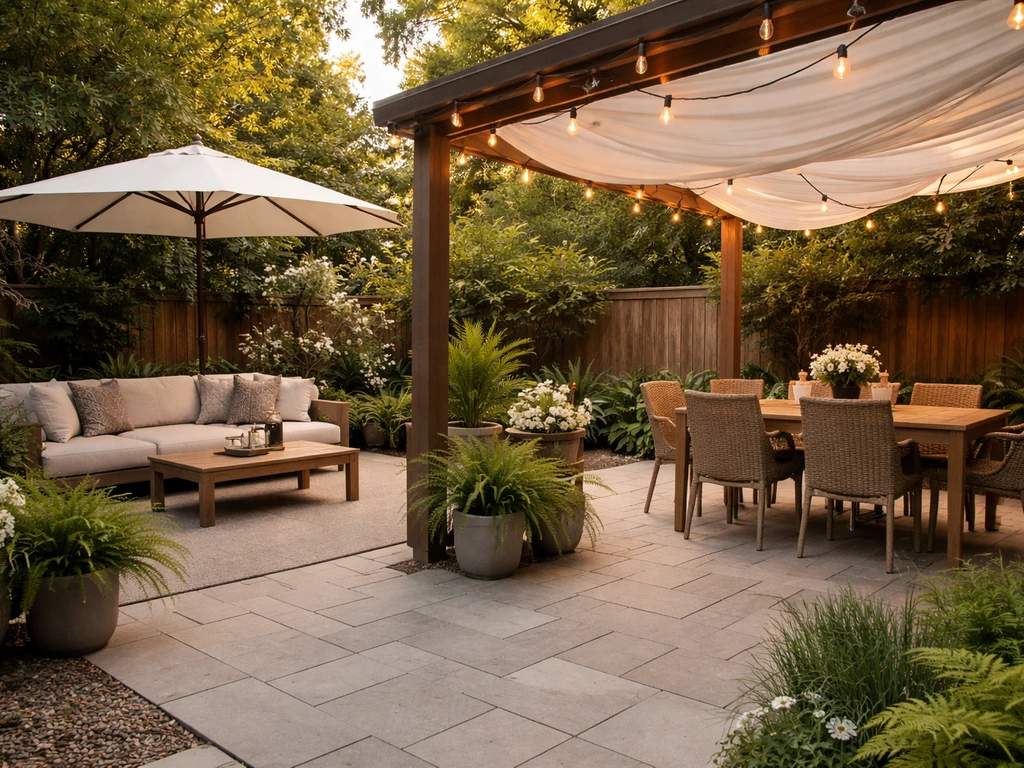
You can create a beautiful, durable patio yourself, no contractor required. For step-by-step instructions on how to make an outdoor patio, see how to make outdoor patio. The key is working through the project in the right order: nail down your design goals first, assess your actual site conditions, pull any required permits, set a realistic budget, choose the right material for your skill level, and then build on a properly prepared base. Skip any of those steps and you'll pay for it later with cracking, settling, or drainage headaches. Follow them and you'll end up with an outdoor space you're proud of for decades.
How to Create a Beautiful Patio: DIY Plan, Materials & Build Guide

Nolan Carver
28 Jul 2026
What this guide covers and who it's for
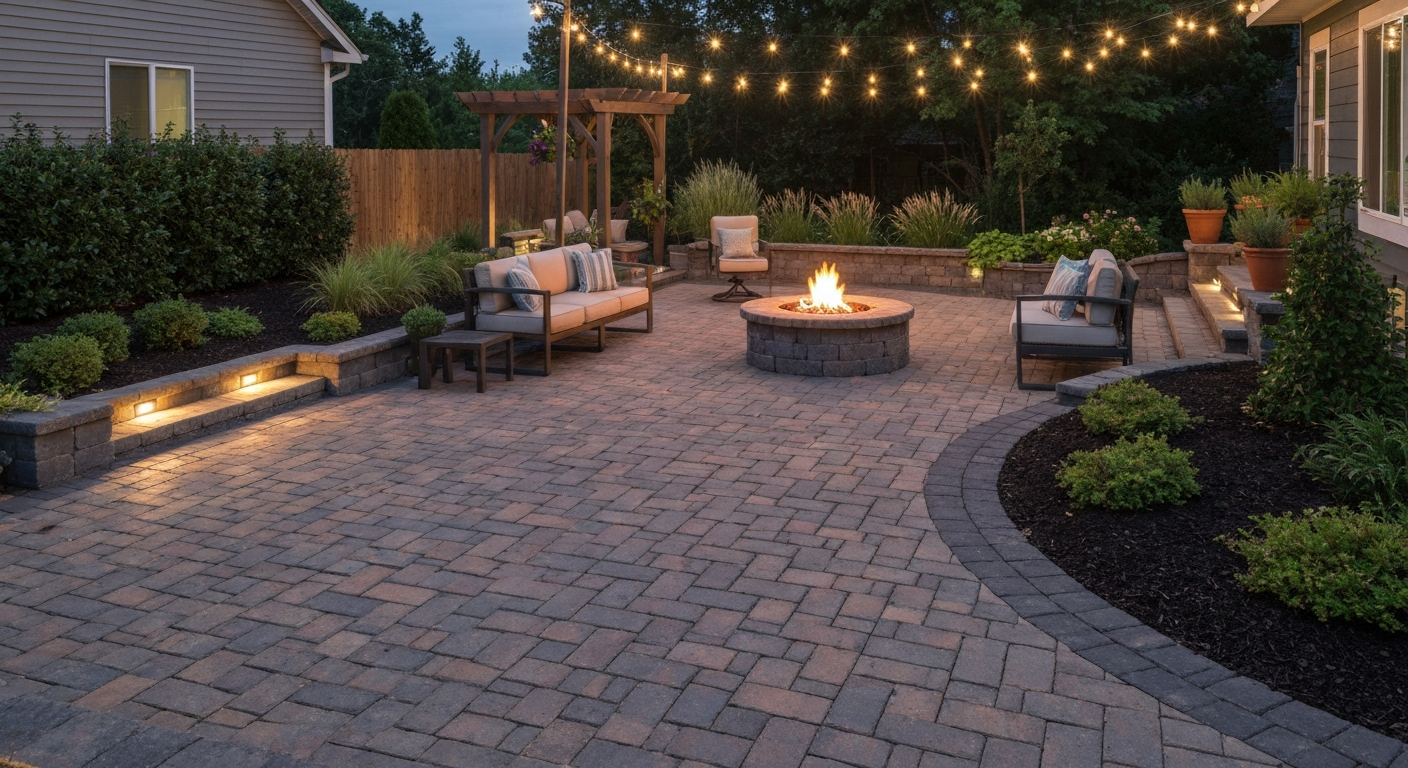
This is a complete DIY patio planning and build guide written for homeowners at every experience level. Whether you've never mixed a bag of sand in your life or you're a weekend warrior who's done a few projects before, you'll find the information you need here. We'll walk through setting design goals, reading your site, handling permits and utility checks, building a realistic budget, choosing and comparing materials, gathering tools, and laying out your space before a single shovel hits the dirt. For detailed step-by-step instructions on how to build outdoor patio, see our full guide. Later sections cover the actual build steps, add-ons like fire pits and raised platforms, styling for privacy and ambiance, and how to maintain and troubleshoot what you build. The goal is to give you the confidence to execute this yourself, and to know exactly why you're doing each step.
Set clear design goals before anything else
Before you price a single bag of gravel, answer three questions: What will this patio actually be used for? What style fits your home and yard? And how big of a project are you taking on? These answers drive every decision that follows.
Function first
A patio designed for weekend dinner parties looks very different from one meant for a quiet morning coffee. Think about how many people you regularly host, whether you want a dining area, a lounge zone, or both, and whether you're planning a grill station, fire pit, hot tub, or garden beds nearby. Outdoor kitchens and fire pits add weight and heat loads the base needs to account for. Hot tubs can weigh 4,000 to 6,000 pounds when filled, that's not a sand-set paver situation without serious engineering.
Style and mood
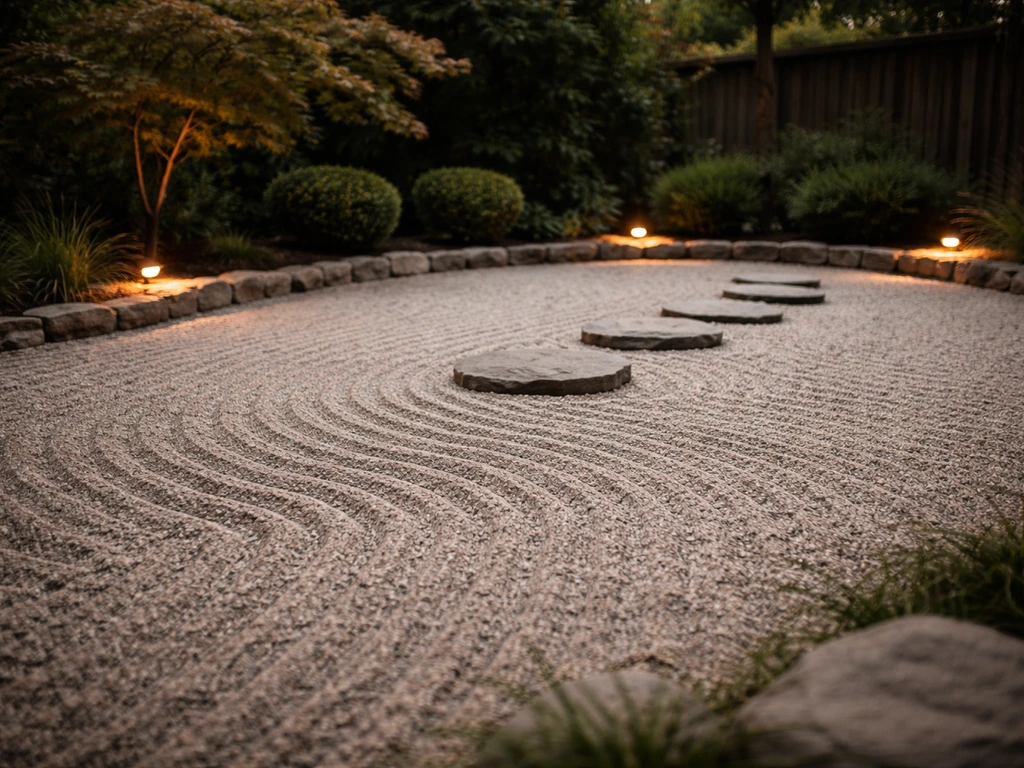
Style isn't just about looks, it informs your material choice, plant selection, lighting, and furniture. A few popular directions worth thinking through: a patio oasis leans tropical and lush, with layered plants, water features, and soft lighting; a private patio prioritizes screening with tall planting, trellises, or fence panels; a zen patio goes minimal, clean lines, gravel or stepping stones, and very deliberate plant placement. None of these are exclusive, and you can blend elements. What matters is picking a direction so your choices stay consistent rather than random.
Scope: what level of project are you committing to?
Be honest about your available weekends and physical capacity. A simple 200 sq ft gravel or paver patio is genuinely achievable in two to three weekends for most people. A raised patio with a retaining wall, built-in fire pit, and pergola is a multi-month commitment. There's no wrong answer, just make sure your scope matches your timeline and budget before you start tearing up grass.
Assess your site before you design anything
Your yard will tell you a lot if you take the time to read it. Site assessment isn't glamorous, but it's where most DIY patio failures start, a spot that drains toward the house, a slope that's steeper than it looks, or a buried utility line that turns a dig into an emergency.
Measurements and layout
Measure the candidate area carefully. Sketch it to scale on graph paper, 1 square equals 1 foot works well for most yards. Note the house walls, any doors that swing outward (a 32-inch door needs clearance), garden beds, trees, and fences. Measure any existing grade change across the area using a line level or a long level on a straight board. Even a 6-inch drop over 10 feet is a slope you'll need to address.
Sun, shade, and wind
Spend a day noting sun patterns. A west-facing patio is brutal in late afternoon summer heat; an east-facing one is great for morning coffee but shady by noon. This affects where you place a pergola, umbrella, or shade sail. Wind direction matters too, especially if you're planning a fire pit, you don't want smoke blowing toward the house or seating.
Soil type and drainage
Dig a test hole about 12 inches deep. Clay soil drains slowly and expands when wet, it needs a more generous granular base to prevent heaving. Sandy soil drains fast and compacts well. If your hole fills with standing water after a rain, you have a drainage problem that needs solving at the base layer, not after the pavers are down. ICPI guidance calls for compacting the subgrade to at least 95% standard Proctor (ASTM D698) for pedestrian patios, in plain terms, that means a firm, non-spongy base before any gravel goes in.
Slope and grading
The finished patio surface needs to slope away from your house at about 1/4 inch per foot (roughly 1.5 to 2%) to move rainwater away from the foundation. That's the standard from Unilock and most major paver manufacturers. You build this slope into your base preparation, the paver surface simply follows whatever grade the base is at, so if the base is wrong, the surface is wrong. Slopes steeper than about 5% make permeable paver systems impractical without terracing or underdrains.
Access and utilities
Check whether large equipment (a plate compactor, concrete mixer, or wheelbarrow loads of gravel) can reach the site. A narrow gate or a fence you can't remove will add significant labor. On utilities: always call 811 (the U.S. national dig-safe hotline) before any excavation. It's free, it's legally required in most states, and it takes a few days to get lines marked, so call early in your planning process.
Permits, codes, and safety checks
This is the part most DIYers skip, and it causes real problems at resale or with neighbors. Take an hour to make a few calls before you build.
Do you need a building permit?
The International Residential Code (IRC Section R105. The International Code Council's International Residential Code (IRC R105.2) is the model baseline that commonly exempts certain minor detached accessory structures and at‑grade patios under 200 sq ft, though many jurisdictions amend that threshold, always verify with your local building department International Code Council — IRC (R105.2 work exempt from permit) (model code baseline). 2) has historically set 200 square feet as a common threshold below which at-grade patios may be exempt from a permit, but many municipalities amend that threshold down, sometimes to 120 square feet, sometimes they require permits for any paved surface. Call your local building department before you dig. A 5-minute phone call can save you a stop-work order or a forced teardown.
Retaining walls
If your patio design involves a retaining wall, the permit trigger in most U.S. jurisdictions is around 4 feet measured from the bottom of the footing to the top of the wall. Seattle uses that 4-foot threshold as a common reference point. Some jurisdictions go lower, at 3 feet. Any wall above the threshold typically requires engineered drawings. Even below the threshold, factor in surcharge loads, a wall supporting a patio above it is carrying more than just soil.
Pergolas and patio covers
Open, freestanding pergolas under about 120 to 200 square feet are often permit-exempt, depending on jurisdiction. The moment you attach a pergola to the house or add a solid roof, most municipalities treat it as a structure requiring plan review. Don't assume, verify.
Fire pits and outdoor fireplaces
The International Fire Code requires portable outdoor fireplaces to be at least 15 feet from any structure, with some residential exceptions. Permanent built-in fire pits and gas fire features are regulated differently and typically require local fire authority (AHJ) approval. Check your local fire code before you start mortaring in block.
HOA rules and property setbacks
If you're in an HOA, submit your plans for approval before ordering materials. Most HOAs have review timelines of two to four weeks, and some require specific materials or colors. Separately, zoning setbacks, minimum distances from property lines, apply to structures and sometimes to paved surfaces too. Your local planning department can tell you exactly what applies to your parcel.
Budget planning: what does a DIY patio actually cost?
DIY saves you significant money on labor, but materials, equipment rental, and base prep add up fast. Here are realistic budget brackets based on current (2025-2026) U.S. market data. These are installed DIY costs, meaning you're doing the work, and exclude any structural add-ons like walls or pergolas.
| Patio Type | DIY Material Cost (per sq ft) | Notes |
|---|---|---|
| Gravel / decomposed granite | $2 – $10 | Lowest skill threshold; needs edging; shifts over time |
| Concrete slab (poured) | $4 – $12 | Permanent; requires formwork, mixing, finishing skill |
| Concrete pavers / brick | $10 – $30 | Most beginner-friendly; repairable; wide style range |
| Natural flagstone (dry-laid) | $12 – $30+ | Heavy; irregular shapes; needs fitting patience |
| Natural stone (mortar-set) | $15 – $35+ | Requires concrete slab substrate; mortar skills needed |
| Composite decking (raised platform) | $35 – $80 | Includes framing + boards; most complex DIY build |
| Outdoor porcelain tile | $12 – $35+ | Sand-set or pedestal system; fragile during install |
Budget decision checkpoints
- Under $1,500 total: Gravel or decomposed granite up to ~200 sq ft is very achievable. Rent a plate compactor (~$80/day) rather than buying one.
- $1,500 – $4,000: Concrete paver patio in the 200–300 sq ft range. Budget for base gravel, bedding sand, edge restraints, pavers, and tool rentals.
- $4,000 – $8,000: Larger paver or flagstone patio (400+ sq ft), or a smaller patio with a modest retaining wall or fire pit add-on.
- $8,000+: Raised composite platform, complex grading, built-in features, or high-end stone. At this tier, price out local contractor quotes as a sanity check — the gap may narrow when you factor in your time.
Always add a 10 to 15% contingency to your material estimate. You'll break pavers during cutting, you'll need extra gravel after grading reveals a deeper excavation than expected, and supply prices fluctuate. It's not pessimism, it's just how building projects work.
Materials overview: which paving surface is right for you?
No single material is best for every situation. The right choice depends on your budget, your climate, your skill level, and the look you're going for. Here's an honest side-by-side breakdown.
| Material | Skill Level | Durability | Repairability | Best Climate | Standout Weakness |
|---|---|---|---|---|---|
| Gravel / DG | Beginner | Low–Moderate | Easy (add more) | Any | Migrates; weeds; not firm underfoot |
| Poured concrete | Intermediate | High | Difficult (patch or replace slab) | Moderate climates | Cracks from frost/settling; hard to repair cleanly |
| Concrete pavers | Beginner–Intermediate | Very High | Excellent (lift and relay) | Any, incl. freeze-thaw | Higher upfront cost vs. concrete |
| Flagstone (dry-laid) | Intermediate | High | Good | Any | Irregular gaps; shifting over time without good base |
| Natural stone (mortar-set) | Advanced | Very High | Moderate | Mild–Moderate (avoid hard freeze-thaw) | Requires slab sub; staining risk; needs wet-set mortar system |
| Composite decking | Advanced | Very High | Moderate | Any | Highest cost; requires structural framing; permits likely |
| Outdoor porcelain | Intermediate–Advanced | High | Moderate | Mild–Moderate | Brittle during install; slippery when wet if wrong finish chosen |
The recommendation for most DIYers
Concrete interlocking pavers hit the sweet spot for the majority of DIY patio builders. They're beginner-friendly because they don't require mixing, pouring, or wet-setting, you're stacking dry components. They're forgiving because individual pavers can be lifted and reset if the base settles or you need to run a utility line later. They meet ASTM C936 dimensional and strength standards, which means you're working with a consistent, quality product. And they come in enough colors, shapes, and textures to pull off almost any style from rustic to contemporary. If you're new to hardscaping, start here.
A note on natural stone
Large-format natural stone is beautiful but less forgiving. Many stone vendors and setting system manufacturers like Laticrete specifically require mortar-bonding over a poured concrete slab for large stone, not dry-laying over sand. Skipping that recommendation in a climate with real freeze-thaw cycles leads to cracked or lifted stone within a few years. If you want natural stone and live somewhere that freezes hard in winter, budget for the concrete slab substrate.
Tools and materials checklist by paving method
Gather everything before you start. Running out of bedding sand on day two, with half your base exposed, is genuinely frustrating. Below are the core tool and material lists for the three most common DIY paving approaches.
Sand-set concrete pavers (most common DIY method)
- Materials: concrete interlocking pavers (ASTM C936), compactable aggregate base (ASTM D2940) — budget 4" depth for pedestrian patios, ASTM C33 coarse bedding sand at ~1" depth, polymer sand for joints, plastic edge restraint with spikes
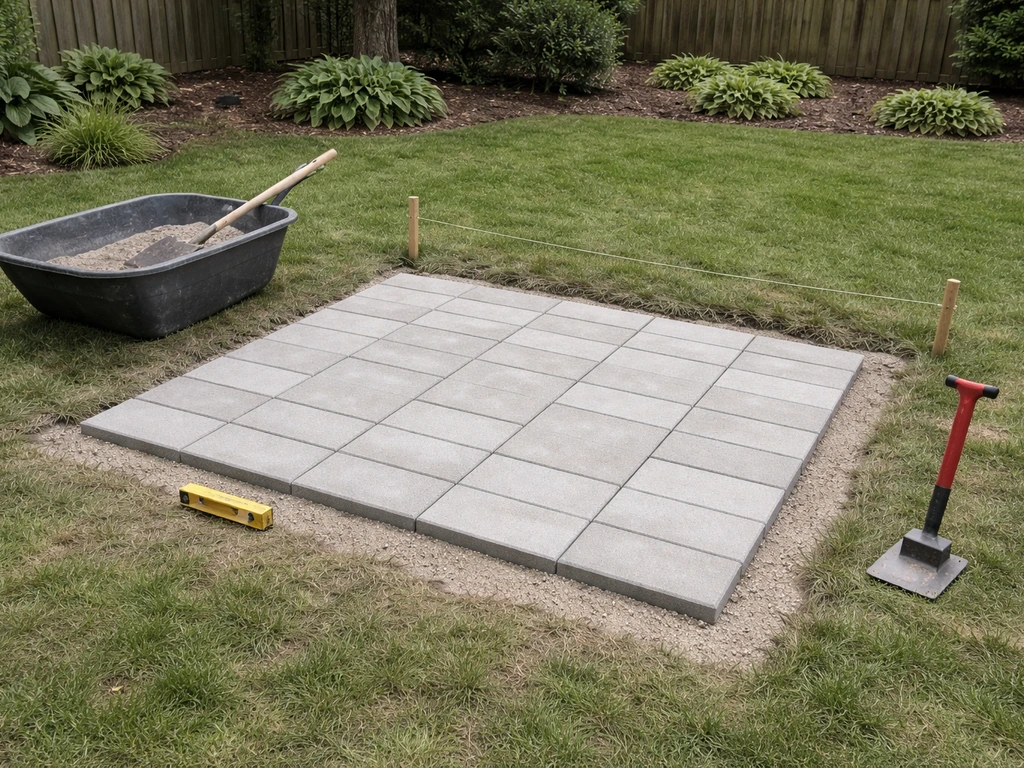
- Tools: plate compactor (rent), hand tamper, long screed pipes (1" diameter conduit works well), screed board or straight 2x4, rubber mallet, paver saw or angle grinder with diamond blade, tape measure, line level, string lines, chalk line, push broom, garden hose or plate compactor for final joint sand setting
- Safety gear: safety glasses, ear protection, work gloves, dust mask when cutting pavers
Poured concrete slab
- Materials: 2x4 or 2x6 form boards, stakes and screws, 4" compacted gravel base, 4" concrete (order ready-mix for anything over ~30 sq ft — hand mixing is brutal), rebar or wire mesh reinforcement, expansion joint material, concrete sealer
- Tools: circular saw (for form cuts), drill, level, wheelbarrow, concrete rake and float, bull float, edging tool, jointing tool, broom finish brush, garden hose
- Safety gear: waterproof gloves (concrete is caustic), rubber boots, safety glasses
Dry-laid flagstone
- Materials: flagstone (budget 20–25% waste for irregular pieces), compacted gravel base at 4" depth, coarse sand or stone dust bedding layer at 1–2", polymeric sand or crushed granite for joints
- Tools: pry bar (for lifting and repositioning stones), brick chisel and hammer or angle grinder with diamond blade, hand tamper, level, rubber mallet, tape measure, garden hose
- Safety gear: heavy work gloves (flagstone edges are sharp), steel-toed boots (these stones are heavy), safety glasses when cutting
Layout and sizing: how to plan the space on paper (and on the ground)
Getting layout right before you dig is one of the highest-value steps in the whole project. Changes on paper take 30 seconds; changes after the base is compacted take 30 minutes of re-work.
How much space do you actually need?
A dining table for four needs a minimum of 12 x 12 feet (144 sq ft) with chairs pulled out. A six-person dining set is more comfortable at 14 x 16 feet. A lounging area with a sofa and two chairs needs roughly 12 x 14 feet. If you're combining dining and lounging, a 16 x 20 foot patio (320 sq ft) gives you room to move between zones without feeling cramped. Add a fire pit and you need an additional 10-foot clearance zone around it, factor that into the total footprint.
Sketching the layout
Use graph paper and a scale (1 square = 1 foot is easy). Draw the house wall and any doors, then sketch the patio outline. Mark the main traffic paths, where people will walk from the door to the seating, from the seating to the grill, from the grill to the yard. Those paths need to be at least 3 feet wide, ideally 4 feet. Place your focal point (fire pit, water feature, statement planter) where it's visible from the main seating area and from inside the house if possible.
Sample layout configurations
- Simple rectangle off the back door (12 x 16 ft, ~192 sq ft): ideal for a first patio; quick to build; works for dining or lounging but not both comfortably
- L-shaped patio (combines a 12 x 12 dining zone and a 10 x 12 lounge zone at 90 degrees): separates activities; fits naturally into a corner between house and fence
- Curved-edge patio (roughly oval, ~250 sq ft): softens the yard visually; requires more cuts in pavers or careful flagstone selection; worth the extra effort for contemporary or cottage styles
- Multi-level design (upper paver patio at door level, lower gravel or paver zone 18–24 inches down via steps and retaining wall): handles a sloped yard beautifully; requires the most planning, base engineering, and likely a permit
Transfer the layout to the ground
Once your sketch is finalized, use stakes and string lines to mark the patio edges on the actual ground. Measure diagonals to check for square (both diagonals of a rectangle should be equal). Spray marking paint or landscaping chalk along the string lines, then step back and walk around the space. Live with it for a day before digging. You'll often catch issues, a corner that's too close to a tree root, or a shape that's wider than it looked on paper, that are very easy to fix at this stage.
Accounting for paver patterns
Running bond (like standard brick) and straight stack patterns require the fewest cuts and work well for beginners. Herringbone at 45 degrees looks great but creates a lot of diagonal edge cuts and adds about 10% more material waste. Basketweave is forgiving on irregular spaces. When you order pavers, always add 10% to your square footage calculation for cuts and breakage, more like 15% for diagonal herringbone.
Preparing the site and building the base
The base is the most important part of your patio. A beautiful surface on a bad base will crack, heave, and sink within a few seasons. Done right, the base work takes more time than laying the pavers, and that's exactly how it should be.
Excavation depth
For a sand-set paver patio in a frost-free or mild climate, excavate at least 7 to 8 inches below finished grade: roughly 4 inches of compacted aggregate base, 1 inch of bedding sand, and the paver thickness (typically 2. For quick base‑depth defaults and a calculator that notes ICPI/CMHA recommendations, see the Paver & Patio Calculator (ICPI/CMHA base‑depth defaults noted) Paver & Patio Calculator (ICPI/CMHA base-depth defaults noted). 375 to 3.125 inches for standard concrete pavers). In regions with hard winters, go 6 to 8 inches of base or deeper depending on your local frost line, the extension-level guidance from sources like DuPage County recommends base depths well below frost line for structural elements. When in doubt, go deeper: extra base material is cheap compared to relaying a heaved patio.
Grading the subgrade
After excavating, use a hand tamper or plate compactor to firm up the soil. The target is the 95% compaction standard referenced by ICPI, in practice, this means pressing until the soil no longer gives underfoot and doesn't leave foot impressions. Grade the subgrade to your target slope (1/4 inch per foot away from the house) using a level and string lines. Every layer above it will follow this slope, so getting it right here saves a lot of aggravation.
Installing the aggregate base
Spread ASTM D2940 compactable aggregate (typically a crushed limestone or granite blend) in 2-inch lifts, compacting each lift before adding the next. Don't dump 4 inches at once, it won't compact evenly. After each lift, check your grade with a level. Install edge restraints (plastic or metal paver edging pinned with 10-inch spikes) before adding the bedding sand, the edge restraint needs to sit on the compacted base, not on sand.
Screeding the bedding sand
Lay two 1-inch diameter conduit pipes on the compacted base as screed guides, spaced about 6 feet apart. Pour ASTM C33 coarse bedding sand between them, then drag a straight 2x4 screed board across the pipes to create a perfectly even 1-inch sand layer. Carefully remove the pipes and fill the grooves with sand. Do not walk on the screeded sand, any footprint will create a low spot under a paver. Work forward, screeding as you go.
Laying pavers, cutting, and finishing joints
With a properly prepared base, the actual paving goes quickly. Start from a fixed, straight edge, usually the house wall or a permanent edge restraint, and work outward. Set each paver with a firm hand press, keeping joints tight (most concrete pavers are designed for 1/16 to 1/8 inch joints). Use a rubber mallet to tap any paver that sits high. Check your level every few feet and pull and re-set any pavers that are off before you get too far.
Cutting pavers
For straight cuts, a paver splitter (rentable) is fast and clean. For curves or angled cuts, a circular saw or angle grinder with a diamond blade works well, always cut outside the finished area and wear eye and dust protection. Score once, then cut through. Wet cutting reduces dust and gives a cleaner edge.
Compacting and jointing
Once all pavers are laid and edge restraints are secured, run a plate compactor over the entire surface (use a rubber plate protector pad to avoid scarring the paver faces). This seats the pavers firmly into the bedding sand. Then spread polymeric joint sand over the surface, sweep it into the joints, and compact again. Apply a second sweep of joint sand, blow off excess from the surface with a leaf blower, then lightly mist with water to activate the polymer binder. Polymeric sand resists weeds, ants, and washout far better than plain sand, it's worth the extra cost.
Add-ons: raised patios, fire pits, and retaining walls
Once your base patio is done, add-on features are what take a functional slab to a true outdoor living space. Here's what to know before you start building vertically.
Raised patios and composite platforms
A raised patio using composite decking materials (Trex and similar) works like a ground-level deck, framed with pressure-treated lumber joists and posts, with composite boards on top. Installed costs run $35 to $80 per square foot when you include framing and fasteners, making this the most expensive DIY patio option. Trex publishes detailed span and fastener specifications in their installation manuals, follow them exactly, since span limits exist to prevent bounce and structural failure. Posts and footings need to go below frost line for structural stability.
Fire pits
A DIY dry-stacked block fire pit is one of the most satisfying add-ons you can build. Keep a minimum 15-foot clearance from any structure per IFC guidelines for recreational fires. Build on a non-combustible paver or concrete pad, never on wooden decking. For a simple round pit, retaining wall block (not standard CMU, it can spall from heat) stacked 2 to 3 courses high works well for wood-burning. Gas fire pit inserts require a gas line, which means a licensed plumber and a permit in virtually every jurisdiction, don't DIY the gas connections.
Retaining walls
Segmental retaining wall block (SRW block) systems designed for DIY use, like Allan Block or Versa-Lok, come with manufacturer installation guides that specify batter (backward lean), base depth, and drainage requirements. Under 4 feet, most homeowners can build these safely following manufacturer instructions. Above 4 feet, get an engineer. All retaining walls need drainage behind them, a gravel backfill column and perforated drain pipe at the base are standard. A wall without drainage will fail eventually as hydrostatic pressure builds.
Styling your patio: lighting, plants, privacy, and furniture
The hard structure is done, now make it beautiful. Design elements at this stage are low-commitment and reversible, which means you can iterate and improve over time without demolishing anything.
Lighting
String lights are the fastest, highest-impact lighting upgrade for any patio, a set of weatherproof LED globe strings on a pergola or between posts transforms the space at night for under $100. For a more permanent install, low-voltage landscape lighting along patio edges and in adjacent planting beds adds depth and safety without requiring an electrician (most systems run on a 12V transformer you plug into a standard outlet). Solar lights have improved significantly but still underperform hardwired options in heavily shaded spots.
Privacy solutions
If you're after a private patio feel, the most effective solutions combine a physical screen with planting. Tall ornamental grasses, bamboo in root-control pots (important, bamboo spreads aggressively), and columnar trees like 'Sky Pencil' holly give a natural screen without the formality of a fence. For faster results, a cedar or composite privacy panel mounted to posts gives immediate screening. A combination of a 6-foot panel and a climbing vine on a trellis above it is hard to beat for both privacy and style.
Plants and containers
Large containers in the corners of your patio anchor the space and soften hard edges. Use a mix of heights, a small ornamental tree or tall grass in a large pot, medium shrubs in mid-size containers, and trailing plants or herbs at the edges. For a patio oasis feel, go lush and layered with tropical-look plants like elephant ears, canna lilies, and bold-leafed hostas. For a zen patio, stick to a minimal palette: one architectural grass, one clipped boxwood, and gravel or moss between stepping stones.
Furniture and layout
Match furniture scale to patio scale, oversized furniture on a small patio feels claustrophobic. On a 12 x 16 patio, a 4-person dining set plus two lounge chairs is about the limit. Use an outdoor rug to define the seating zone and add warmth underfoot. Leave clear paths at least 30 inches wide between furniture pieces. Weather-resistant materials like powder-coated aluminum, teak, and all-weather wicker require the least maintenance; wrought iron is beautiful but heavy and prone to rust at chips.
Maintenance and how to handle common problems
A well-built patio needs minimal maintenance, mostly cleaning and the occasional joint sand refresh. But things happen, and knowing what's normal versus what needs attention saves you from unnecessary re-work.
Annual maintenance routine
- Spring: sweep off debris and check joint sand depth; top up with polymeric sand in any areas where it has washed or eroded
- Spring: inspect edge restraints — kick them with your foot; any flex or shifting means the spike has come loose and needs to be replaced
- Spring/Fall: check surface drainage by watching where water pools during a heavy rain; any ponding on the patio surface (not just nearby) signals a joint or grade problem to address
- As needed: apply a concrete paver sealer every 2–4 years to enhance color and protect against staining; clean with a dilute muriatic acid solution (carefully, following label instructions) if efflorescence (white salt deposits) appears
- After winter in freeze-thaw climates: walk the patio and look for raised or sunken pavers; individual settled pavers are easy to fix — lift with a flat bar, add or remove bedding sand, and re-set
Settling and uneven pavers
A paver or two settling slightly in the first year is normal as the base fully consolidates under use. Reset them by lifting with a flat pry bar, adjusting the sand level beneath, and tapping back into place. If you have a section of 5 or more pavers settling in the same area, that's a base issue, probably insufficient compaction or a drainage problem causing the base material to migrate. You'll need to lift that section, re-excavate, re-compact with additional base material, and relay.
Drainage problems
If water is pooling near the house wall, your patio isn't draining away from the structure correctly. This usually means the base was graded flat or toward the house. To fix it properly requires lifting and re-grading the affected area, there's no good shortcut. That's precisely why getting the 1/4-inch-per-foot slope built into the base from the start is worth every minute it takes. In situations where the yard simply drains toward the house regardless of patio grade, a strip drain (linear drain grate) installed at the edge of the patio and tied into a dry well or downspout drainage system is an effective solution.
Weeds in joints
Polymeric sand dramatically reduces weeds but doesn't eliminate them entirely, airborne seeds land on the surface and germinate in organic debris that collects in joints. The best treatment is pulling weeds when they're small and refreshing joint sand annually. Avoid herbicide on a patio surface unless it's a product specifically safe for hardscape, as many general herbicides stain pavers.
Building your own patio is one of the most satisfying DIY projects you can take on as a homeowner. The physical result is permanent and visible every day, the skills you build transfer to other projects, and the savings compared to hiring out are real. Take it one phase at a time, don't rush the base prep, and don't be discouraged if something needs to be re-done, that's part of how you learn to build things that last.
FAQ
What are the first steps to plan a beautiful DIY patio?
Define goals (entertaining, quiet retreat, fire feature), pick a style (modern, rustic, Zen, Mediterranean), and measure the space. Sketch a layout showing house access, furniture zones, and circulation (keep 3–4 ft walkways). Set a target size and slope: aim for a finished surface slope of about 1.5–2% (≈1/4" per foot) away from the house for drainage. Make a simple materials shortlist and a two‑tier budget (basic and desirable).
How do I estimate budget ranges before I start?
Use three budget tiers: budget (gravel/sand, $2–$10/ft² installed), mid (concrete slab or basic pavers, $10–$30/ft²), high (natural stone or porcelain with complex prep, $30–$50+/ft²). Add extra 10–25% for site prep, permitting, and unexpected conditions (roots, poor soil). For add‑ons: fire pit $300–$5,000 depending on built‑in vs. portable; retaining walls vary by material and height — small gravity walls are cheaper, engineered walls cost more. Get local quotes for a final number.
When do I need a permit or plan review?
Check your local building department. Model code exemptions exist for small at‑grade patios and accessory structures under a threshold (often ~200 ft²), but jurisdictions vary. Permits are commonly required for retaining walls above ~3–4 ft, fixed or roofed covers/pergolas, structural footings, and some built‑in fire features. Always verify with your AHJ before construction.
How do I choose materials (pavers, concrete, natural stone, porcelain, gravel)?
Match material to style, budget, and performance: - Gravel: cheapest, easy DIY, good for casual spaces; needs edging and weed control. - Concrete slab: economical for flat sites; good base for tile or furniture; needs control joints. - Concrete/brick pavers: modular, durable, easy to repair; require compacted base and edge restraint. - Natural stone: high-end look, often requires wet set on a concrete slab for large formats. - Porcelain: sleek, low-maintenance; install methods vary (sand‑set, mortar, pedestals). Consider freeze‑thaw, slip resistance, and installation method when choosing.
What base and drainage requirements ensure a durable patio?
Compact subgrade to at least ~95% standard Proctor for pedestrian patios. Typical compacted aggregate base depth: ~4" for pedestrian patios, ~6" for driveways; increase depth in poor soils or frost zones. For sand‑set pavers, use ~1" screeded bedding sand over compacted base and install an edge restraint before pavers. Finish slope ~1.5–2% away from structures. For permeable systems use an open‑graded reservoir base, geotextile separators, and consider slope limits and underdrains.
What tools and materials should I have for a DIY paver patio?
Essentials: tape measure, marking paint, string and stakes, shovel, plate compactor, wheelbarrow, level and long straightedge/screed board, masonry saw or wet saw for pavers/stone, rubber mallet, edging restraints, landscape fabric/geotextile, aggregate base (crushed stone), bedding sand (ASTM C33), jointing sand or polymeric sand, safety gear (glasses, gloves, ear protection). Have extra material for cuts and mistakes (5–10% for pavers, 10–15% for irregular stone).