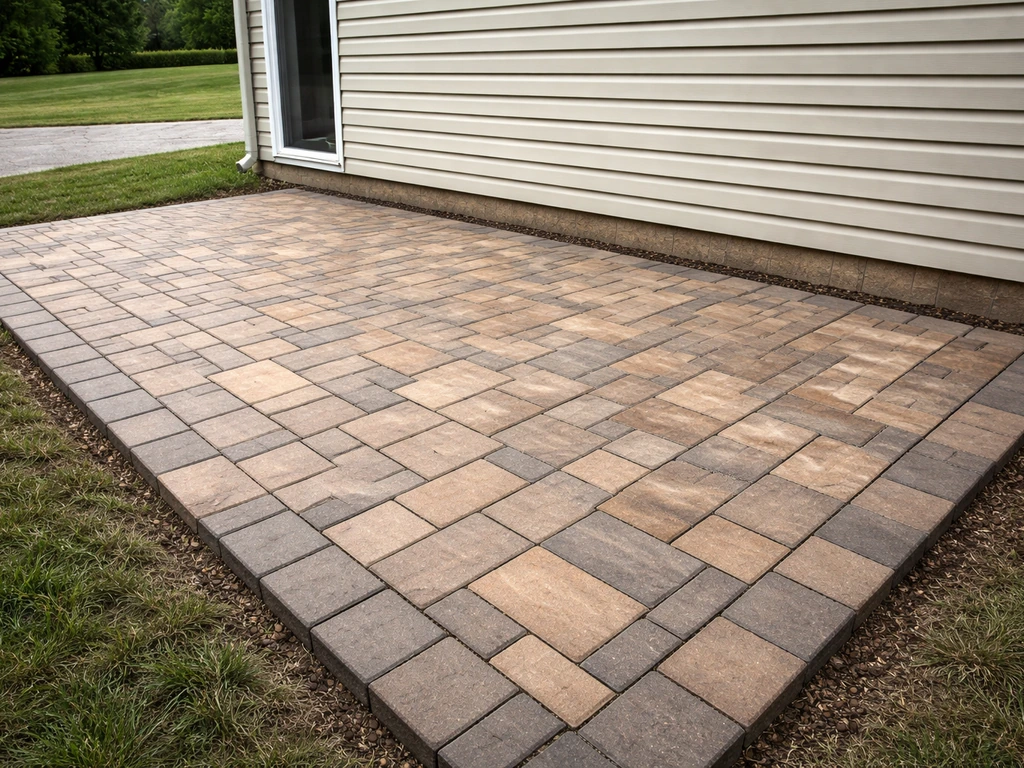
You can build a solid, good-looking outdoor patio yourself in a long weekend without hiring a contractor. The basic process goes like this: plan the size and layout, choose your material, excavate and grade the ground, lay a compacted gravel base and sand layer, set your surface material, lock in edging, fill joints, and seal if needed. For a detailed guide on how to create a beautiful patio, follow the steps below from planning to finishing details. Every step is learnable, and the tools are all rentable. Here's how to do it from start to finish.
How to Build an Outdoor Patio: Beginner DIY Steps

Nolan Carver
13 May 2026
Planning and measuring your space
Before you touch a shovel, spend real time on your plan. Walk the space at different times of day and note where the sun hits, where water pools after rain, and how you actually move in and out of the house. These observations will shape your layout more than any design app.
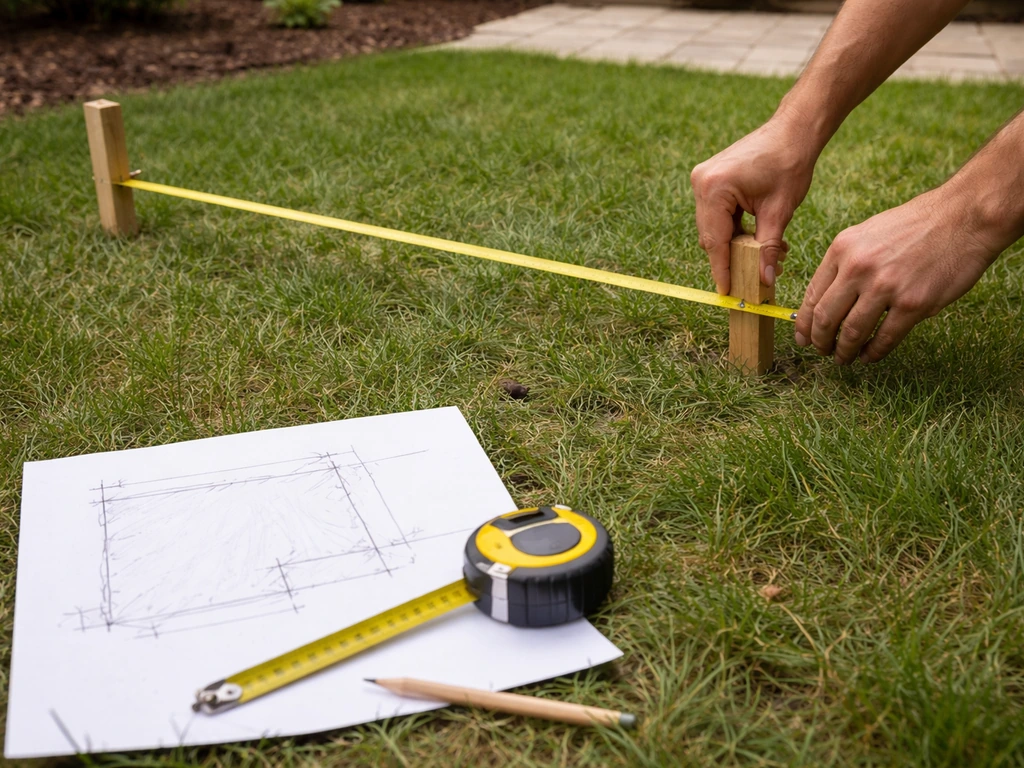
Measure the area twice and sketch it on paper with actual dimensions. A common mistake is building too small. A 10x10-foot patio feels cramped once you add a table and chairs. Most outdoor dining setups need at least 12x16 feet to feel comfortable. If you want a lounge area on top of dining, go bigger. Mark the corners of your planned patio with stakes and string so you can physically stand in the space before you commit.
Check your local municipality for permit requirements. Many areas don't require a permit for a ground-level patio under a certain square footage, but rules vary. Also call 811 (the national dig-safe line in the US) at least 3 business days before digging. It's free, required by law, and it keeps you from hitting a gas or electrical line.
- Mark out the full patio footprint with stakes and string lines before digging
- Use a tape measure to confirm dimensions at least twice
- Note any slope direction so you can plan drainage away from the house
- Identify underground utilities by calling 811 before you excavate
- Check local permit rules—ground-level patios under 200 sq ft often don't require one
Choosing patio type, layout, and materials
The material you choose drives everything downstream: how deep you excavate, whether you need a concrete footing, how long it lasts, and how much you'll spend. For most DIYers, concrete pavers are the best starting point. They're consistent in thickness (which makes leveling easier), widely available, forgiving if you make a mistake (you can pull and relay them), and durable under foot traffic and freeze-thaw cycles.
| Material | Avg Cost (per sq ft) | DIY Difficulty | Durability | Best For |
|---|---|---|---|---|
| Concrete pavers | $3–$8 | Beginner | Excellent | Most DIYers, high-traffic areas |
| Natural stone (flagstone) | $6–$20 | Intermediate | Excellent | Rustic or organic aesthetics |
| Poured concrete | $4–$10 | Advanced | Excellent | Seamless look, larger slabs |
| Gravel/decomposed granite | $1–$4 | Beginner | Moderate | Budget builds, casual spaces |
| Brick pavers | $4–$10 | Beginner-Intermediate | Very good | Classic/traditional style |
For layout, a simple rectangle or square is the easiest to execute and minimizes cutting. Running bond (pavers offset like brickwork) and herringbone are both popular patterns. Herringbone is more complex to cut around the edges but locks the pavers together better under heavy use. If this is your first patio, stick with a running bond or straight grid pattern and save the fancy layouts for when you're more comfortable with the process.
Think about how the patio connects to the rest of your yard too. A clean rectangular patio anchors a space and makes it easy to add elements later like a fire pit, raised beds, or a privacy screen. If creating a more relaxing retreat is the goal, the design principles shift a bit toward things like planting buffers, water features, and enclosed feels. If you want a private patio, plan for screening or fencing and position seating so it feels secluded from neighbors and street views. If your goal is a true patio oasis, think about comfort-focused add-ons like shade, soothing lighting, and calming landscaping relaxing retreat. Those finishing touches matter, but the foundation work is exactly the same regardless of the final vibe. A zen patio uses similar build fundamentals, but the layout and planting choices focus on calm sight lines, natural textures, and minimal clutter.
Site prep: grading, drainage, and base/subbase
This is the step most beginner DIYers underestimate, and it's where most patio failures start. If the ground under your patio is soft, poorly drained, or not graded correctly, the surface will shift, crack, and puddle water within a couple of years. Get this right and everything else is easy.
Grading and slope
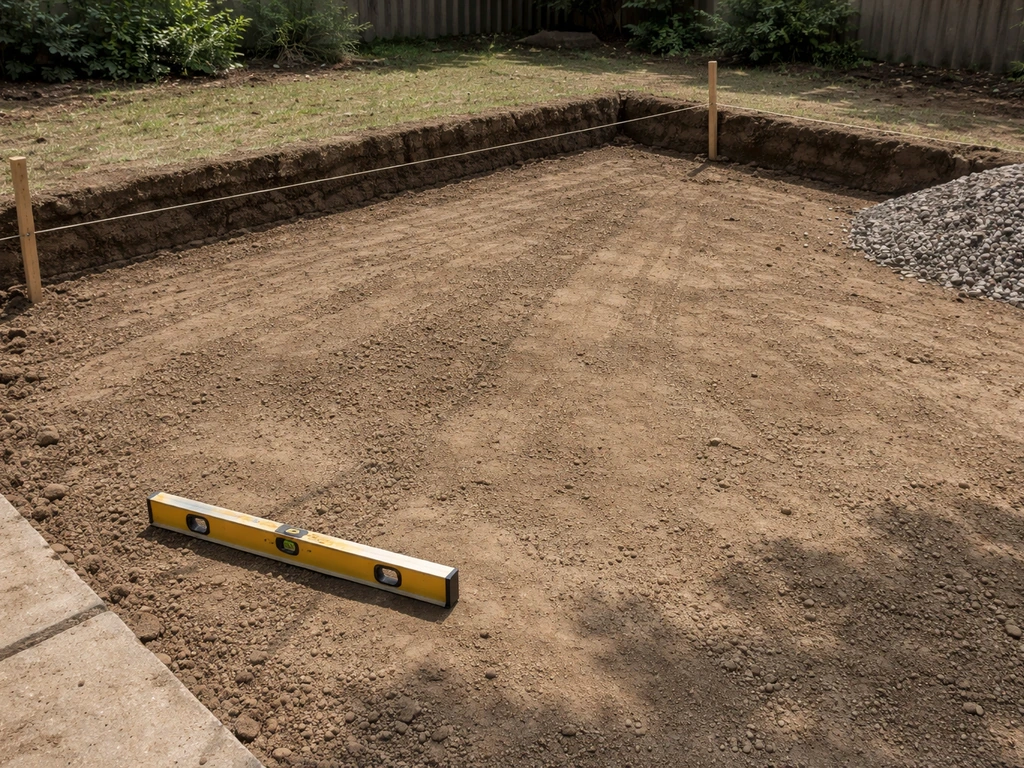
Your patio needs to slope away from the house at a rate of about 1/8 inch per foot (roughly 1% grade). This keeps water from running toward your foundation. Use a level and a long straight board to check the slope across your work area before you start compacting base material. If the ground naturally slopes toward the house, you'll need to adjust this during excavation, not after.
How deep to excavate
Your total excavation depth equals paver thickness + 1 inch of bedding sand + gravel base thickness. For a standard pedestrian patio, use 4 to 6 inches of compacted gravel base. Lowe’s step-by-step patio guide notes that a typical paver patio uses blank" rel="noopener noreferrer">about 4 to 6 inches of paver base and about 1 inch of sand to keep the base and surface even before setting pavers. Most concrete pavers are about 2.375 inches thick. So a typical total excavation depth is around 7.5 to 9.5 inches below finished grade. Mark this depth on your stakes so you're not guessing as you dig.
Excavation and soil type
Remove all organic material, grass, and roots from the excavation area. Organic material compresses over time and causes settling. If you hit heavy clay subsoil (it's dense, sticky, and barely drains), lay a geotextile fabric (also called landscape fabric or filter cloth) over the subgrade before adding gravel. This non-migrating layer keeps the clay from mixing up into your gravel base over time, which would eventually destabilize the surface.
Building the base layers
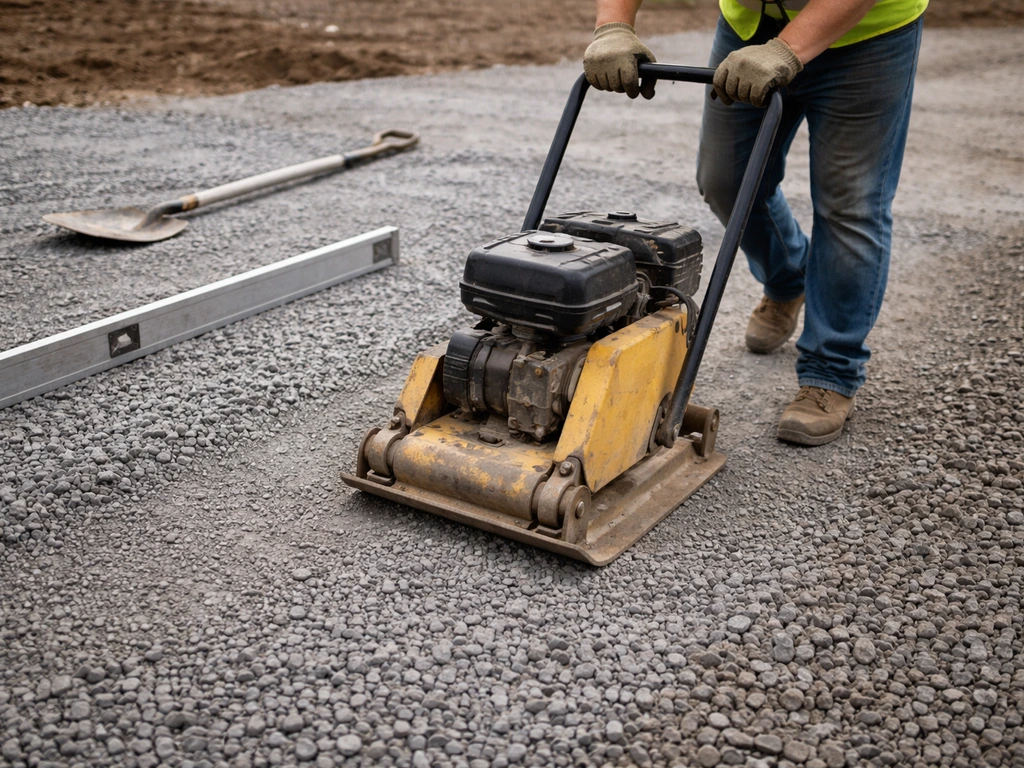
Use crushed stone or dense graded aggregate (also called road base or compactable gravel) for the base layer. Spread it in uniform lifts of about 3 inches at a time and compact each lift with a plate compactor before adding more. Don't dump all 6 inches in at once and try to compact it in one pass. It won't compact evenly and you'll end up with soft pockets. Rent a plate compactor from any equipment rental shop for about $60 to $90 per day. It's worth every cent.
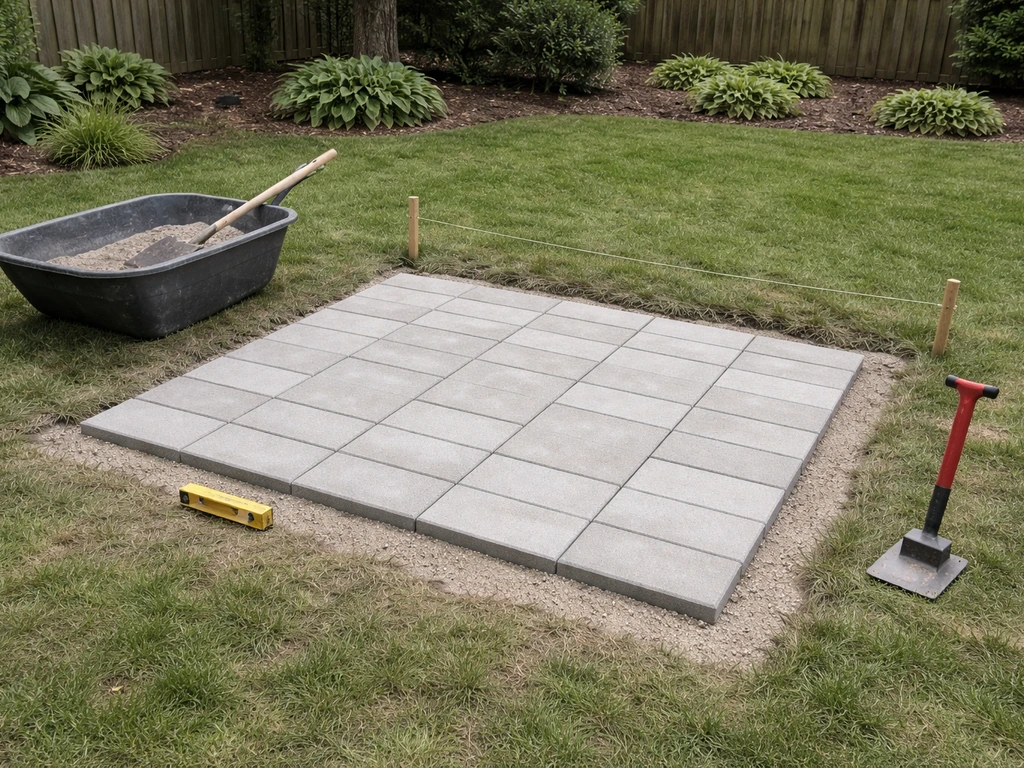
Once your gravel base is fully compacted and at the correct depth, spread 1 inch of coarse bedding sand (also called paver sand or concrete sand) evenly over the top. Use two lengths of 1-inch diameter conduit pipe as screed guides to pull a straight board across the sand and get a perfectly level, 1-inch-thick layer. Do not compact the sand. You want it loose so the pavers can bed into it slightly as you set them.
Foundation and edging: stabilizing the patio
Edge restraints are the unsung heroes of a paver patio. Without them, the pavers at the perimeter slowly migrate outward over time, gaps open up, and the whole surface starts to look sloppy. Plastic edge restraints are inexpensive and easy to install. Set them around the full perimeter of the patio directly on top of the compacted gravel base, flush with where the paver surface will end up.
Secure edge restraints with long galvanized spikes driven through the pre-punched spike holes. Space them about 12 inches apart along straight sections, and closer together on curves. Use a rubber mallet to drive the spikes fully into the ground. On corners, cut the restraint to fit and spike each section independently. Metal edge restraints are a sturdier option if you're worried about shifting on a large patio or in areas with heavy freeze-thaw activity.
If your patio abuts the house foundation, you don't need edge restraint on that side since the foundation wall acts as the restraint. Just make sure your slope runs away from the house and that there's a small gap (about 1/2 inch) between the pavers and the foundation to allow for expansion and water runoff.
Step-by-step build process (DIY-friendly)
Here's the full sequence laid out in order. Follow these steps and you'll have a clean, stable patio surface at the end of the build.
- Mark your layout: Set corner stakes and run string lines at finished patio height. Use a line level or laser level to establish your 1/8-inch-per-foot slope away from the house.
- Excavate: Dig out to the required depth (paver thickness + 1 inch sand + 4-6 inches gravel base). Remove all organic material and loosen the subgrade with a hand tamper or plate compactor.
- Lay geotextile fabric (if needed): If you have clay soil, unroll landscape fabric over the subgrade, overlapping seams by at least 6 inches.
- Add and compact gravel base: Pour in dense graded aggregate in 3-inch lifts. Compact each lift with a plate compactor until it doesn't move underfoot. Check grade with a level frequently.
- Install edge restraints: Set plastic or metal edge restraints around the perimeter on top of the compacted base. Spike them every 12 inches.
- Screed the sand: Lay two 1-inch conduit pipes as depth guides, pour coarse bedding sand between them, and drag a straight 2x4 board across to level it at exactly 1 inch. Remove the conduit pipes and fill the grooves lightly.
- Set pavers: Start at a fixed corner (typically the corner nearest the house) and work outward. Lay pavers in your chosen pattern, keeping consistent 1/8-inch joint gaps. Set each paver by pressing it straight down—don't slide it into position, as this disturbs the sand.
- Cut border pavers: Use a wet saw or angle grinder with a diamond blade to cut pavers for the perimeter. Wear safety glasses and hearing protection.
- Check and adjust level: Use a rubber mallet to tap down any pavers sitting too high. Use a long straight board to check the surface level every few rows. Low spots can be lifted, extra sand added underneath, and re-set.
- Compact the surface: Run the plate compactor over the finished paver surface (use a pad or protective rubber sheet between the compactor and the pavers to avoid scratching). This seats all pavers firmly into the sand bed.
- Fill joints: Pour polymeric sand over the surface and sweep it into all joints with a push broom. Blow off excess with a leaf blower on low. Mist the surface lightly with water to activate the binding agents in the sand, then let it cure for 24 hours.
A few things to keep in mind as you go: always start setting pavers from a straight, fixed edge and work outward so small errors don't compound. If you're doing a large patio solo, work in sections and keep the screeded sand covered with a tarp if you can't finish the same day (rain can wash it out of position). And keep checking your slope as you go. It's much easier to adjust the sand layer than to pull up 200 finished pavers.
Finishing details: leveling, joints, sealing, and maintenance
Sealing
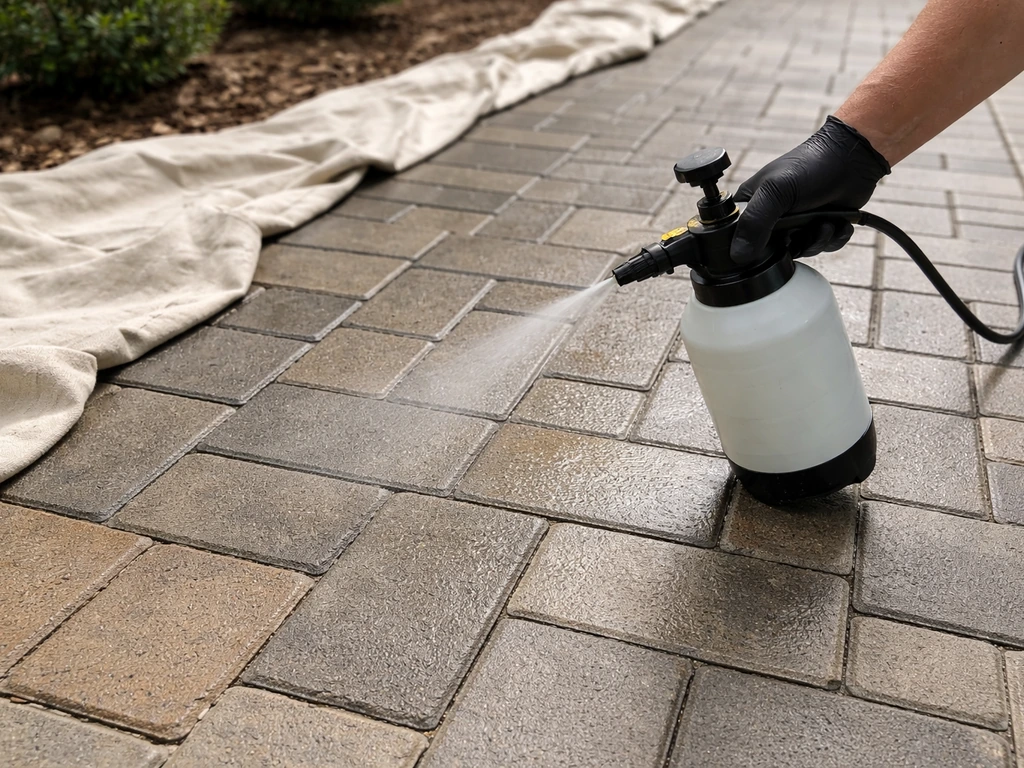
Sealing is optional but worth doing on concrete pavers and natural stone. A good penetrating paver sealer protects against stains, reduces weed growth in the joints, and enhances the color. Wait at least 30 days after installation before sealing so the pavers can fully cure and any efflorescence (white salt residue) has a chance to appear and be cleaned off first. Apply sealer with a pump sprayer or roller on a dry day when temperatures are between 50 and 90 degrees Fahrenheit. Most sealers need reapplication every 2 to 3 years.
Troubleshooting common problems
Uneven settling usually means the base wasn't compacted enough in spots, or organic material was left in the subgrade. The fix is simple: pull the affected pavers, add or remove sand as needed to get them flush, and reset. That's one of the biggest advantages of a paver patio over poured concrete. You can always go back in and fix a problem area without tearing everything out.
Pooling water after rain is almost always a grading problem. If you see water sitting on the surface, check your slope with a level. It may have shifted slightly during compaction or you may have a low spot that needs to be built up. For water that seems to be coming up from below, check that your base gravel drains away from the patio perimeter and that you don't have a clay pan trapping water directly under the base.
Weeds pushing through the joints are a sign that polymeric sand has degraded or wasn't applied properly. Clean out the joint, remove any weeds, and refill with fresh polymeric sand. Sealing afterward helps lock it in place longer.
Ongoing maintenance
- Sweep or rinse the surface seasonally to remove debris and prevent staining
- Inspect joints each spring and refill any that have eroded with polymeric sand
- Check the perimeter edge restraints annually and re-spike any sections that have shifted
- Reseal every 2 to 3 years to maintain stain resistance and joint integrity
- Pull any individual pavers that have shifted and reset them before the problem spreads
- In freeze-thaw climates, avoid using metal shovels or salt-based ice melts directly on pavers—both can cause surface damage over time
A well-built paver patio needs very little maintenance year to year. The work is front-loaded in the base prep. Do that part right and you'll have a surface that looks good and stays stable for 20 years or more. Once the patio is solid, you can start layering in the details that make the space genuinely enjoyable: furniture, lighting, plants, privacy screens, or whatever fits the way you actually live outside.
FAQ
Can I build a DIY patio that will handle heavier loads like a grill or hot tub? (Without it settling)
Yes, but the key is matching your patio depth and base design to how it will be used. For light foot traffic, 4 to 6 inches of compacted gravel base over a properly prepped subgrade is typical. If you plan on moving a wheelbarrow, grill cart, or putting heavy furniture directly on the pavers, keep the base on the higher end and compact in thinner lifts, then verify slope before you set a single paver.
Do I have to make my patio perfectly level, or should it slope even if I want it to feel flat?
If your contractor wants pavers to sit perfectly level, you still need drainage away from the house. The practical approach is to establish the slope first, set the screeded sand guides, then check level only within the paved field for evenness, not across the whole patio toward the house. Re-check the grade with a level and straight board after each compaction stage, since shifting can change the pitch.
Is there anything different about how to build an outdoor patio in freeze-thaw climates?
You can, but doing it right depends on your subgrade. In cold climates, freezing and thawing amplify weak base areas, so skip any shortcuts like using topsoil or un-compacted fill. Use geotextile over heavy clay or poorly draining soils when appropriate, use dense graded aggregate, compact in lifts, and keep the slope toward the outside edge so water does not sit under the patio.
How do I plan for paver cuts so the patio edge looks straight and professional?
Cutting is inevitable, so plan for it early. For a cleaner look, design your layout so you end up with small trim pieces on the least noticeable side (usually against landscaping or the far edge). Use a paver splitter for straight cuts and an angle grinder with a masonry blade for tricky shapes or curves. If you expect many cuts, consider renting a wet saw if your local rental options include pavers materials.
Can I seal my patio right after installation, and what should I do if there’s white residue?
Avoid sealing too early, but also don’t seal dirty or still-shedding joints. Wait the recommended cure window, and if you see efflorescence, clean it first so it does not get trapped under the sealer. For best results, seal on a dry day with moderate temperatures, and protect nearby plants or turf with plastic if the sealer could run off.
Why did weeds come back after I installed joint sand, and what’s the correct fix?
Polymeric sand only works well when the joints are filled correctly and cured properly. After sweeping it in, you usually need to wet the joints lightly so the sand activates and locks in place, then let it set fully before heavy foot traffic. If weeds appear, remove the joint sand, clean out roots, and refill with fresh polymeric sand rather than just patching over the top.
Do I always need a permit to build an outdoor patio, and what should I check before digging?
If you’re in the US, 811 is for utility locate before digging, and it is required by law in many areas. You still may need a local building or zoning permit for patio size, setbacks, or drainage requirements. Start with your municipality’s permit counter or website, and compare their rules to your planned square footage before you order materials.
What patio size should I choose if I don’t want it to feel cramped after buying furniture?
Most DIYers underestimate how wide the patio feels once furniture is in place, so build to real dimensions and include circulation space. For example, keep clear paths around seating and leave room for chair movement if you plan dining. If you want dining plus a lounge, treat the lounge as an extra zone, not just an added row of pavers, and consider a slightly larger footprint to prevent cramped edges.
What’s the best way to avoid uneven rows while setting pavers?
Set pavers from a fixed, straight reference edge and verify often with string lines, a level, and a tape measure. If one side runs high or low, the error compounds fast across rows. When you adjust, pull and reset pavers while the sand is still workable, then re-screed sand where needed so the surface is consistent before moving on.
Can I build a paver patio over an existing concrete driveway or slab?
Yes. If you have an existing slab, you generally want to avoid pouring over it unless the conditions require it. A paver patio over concrete often needs a specific drainage and leveling approach, and you must ensure the base supports allow proper slope away from structures. In most cases, the more reliable DIY route is building on compacted base where you can control grade, but if you’re planning on a retrofit, confirm the drainage plan first to prevent trapped water.
If my patio is next to the house, do I still need edge restraints and a gap to the foundation?
For a patio abutting the house, leave a small expansion gap at the foundation edge and keep the slope away from the wall. The foundation side can act as a restraint, but the rest of the perimeter still needs edge restraints to prevent outward migration. If you get water near the foundation, prioritize drainage and grading before aesthetics, since that’s what protects both the patio and the home.
If some pavers sink or rock later, how do I repair only that area?
Small settlement is common over time if the base is slightly off, but you can usually fix it locally with minimal teardown. Pull the affected pavers, remove or add bedding sand as needed to bring the surface flush, then re-set and keep the surrounding area undisturbed. Make sure the underlying base is stable and properly compacted, otherwise the problem will return.