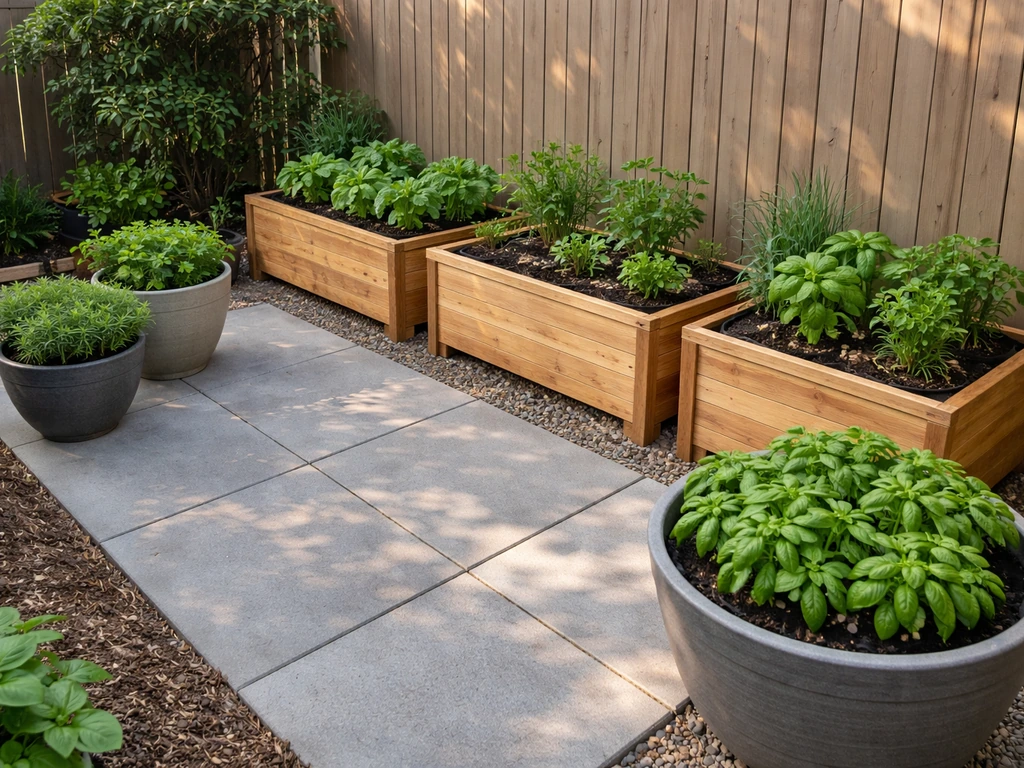
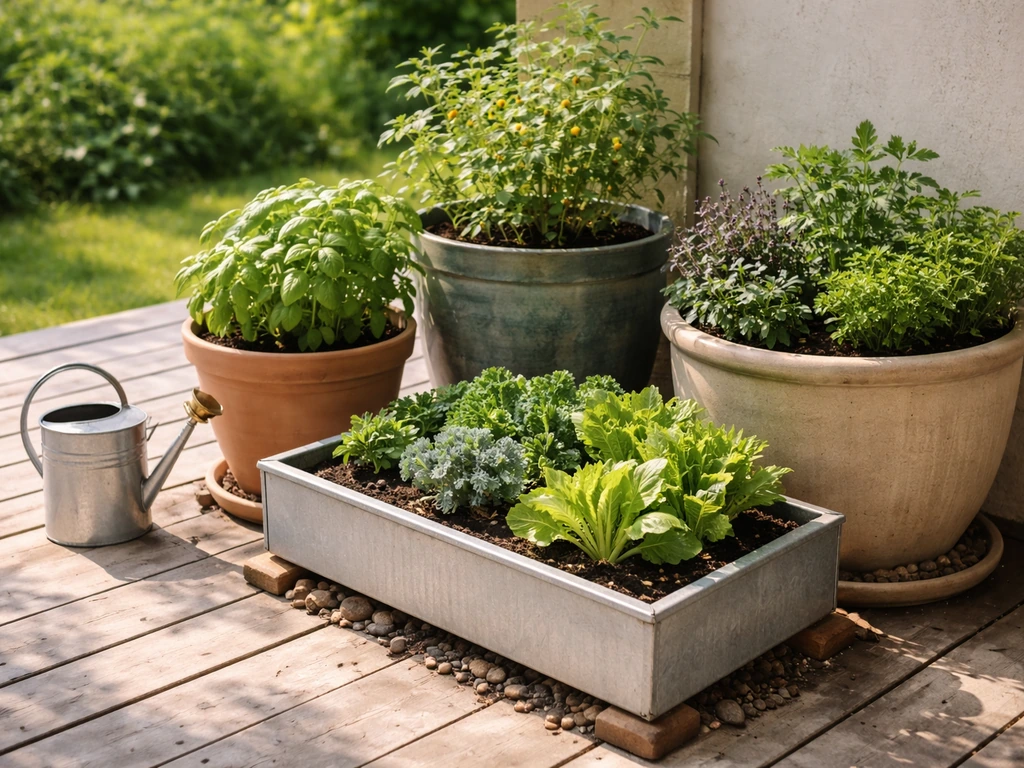
You can grow a productive patio vegetable garden using containers, DIY raised beds, built-in planters, or vertical systems, even on a small concrete slab or wood deck, as long as you plan for sunlight, weight limits, drainage, and the right potting mix. 2023 USDA Plant Hardiness Zone Map, USDA ARS notes that The USDA Agricultural Research Service maintains the official interactive 2023 USDA Plant Hardiness Zone Map (1991–2020 normal) used to translate days‑to‑maturity and frost dates into zone‑specific planting windows; county extension offices provide localized frost‑date guidance for planting calendars 2023 USDA Plant Hardiness Zone Map — USDA ARS. A 10x10-foot patio can realistically support tomatoes, peppers, lettuce, herbs, beans, and more across a single season without major construction. The key difference from a backyard garden is that every decision, from pot size to soil recipe, has to account for the patio surface beneath you.
How to Grow a Patio Vegetable Garden: Complete DIY Guide

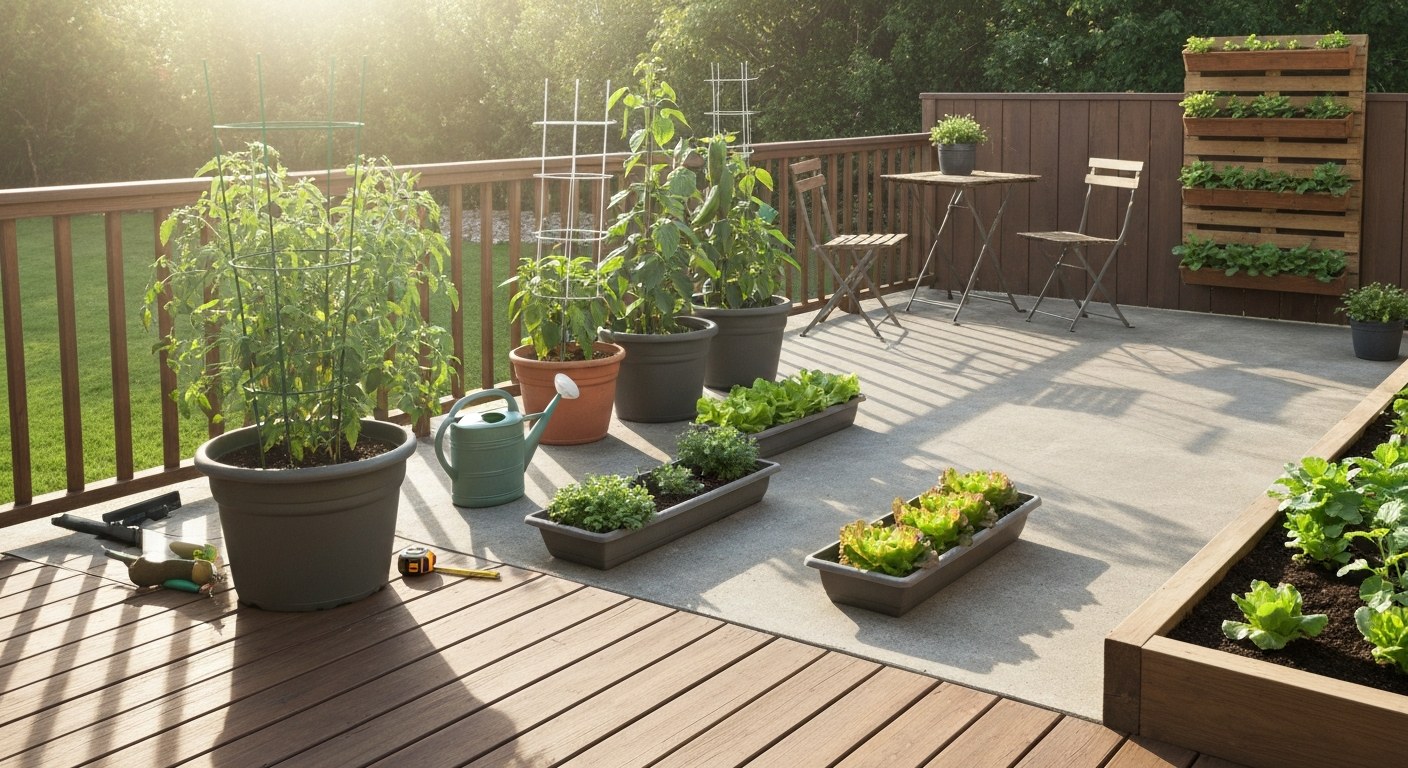
Quick-Start Planning Checklist
Before you buy a single seed packet, run through these four areas. Skipping even one of them causes real problems later, and I've made every one of these mistakes personally.
- Site and surface: Is your patio concrete, pavers, wood deck, or tile? Each has different drainage and weight implications. Wood decks require the most attention to load limits.
- Sun exposure: Count actual hours of direct sunlight, not just whether the area feels bright. Most vegetables need 6 to 8 hours of full sun. Herbs and leafy greens tolerate 4 to 6 hours.
- Weight and load: The International Residential Code (IRC) sets a standard residential deck live load of 40 pounds per square foot (psf). A large container with moist growing media and a mature tomato plant can approach 100 pounds on its own — so placement and distribution matter enormously. Concrete slabs generally tolerate more, but decks and raised patios need careful calculation.
- Access and permits: Check whether your municipality requires permits for built-in or attached planters, especially on elevated decks or if you plan to run a permanent drip irrigation line. Most container gardens need no permit at all, but built-in planters attached to deck framing can trigger a structural review.
Assessing Your Patio Before You Plant
Measure your usable space
Sketch your patio to scale on graph paper, even a rough sketch helps. Measure the full surface area, then subtract any furniture footprint, walkways (leave at least 30 inches for comfortable passage), and doorway clearances. What remains is your planting zone. A 10x12-foot deck with a table and chairs might realistically have 30 to 40 square feet of usable planting space along the edges and corners.
Sun and shade mapping
The single most common mistake new patio gardeners make is overestimating sunlight. Spend one full day at home and note the shaded and sunny zones at 8 a.m., noon, and 4 p.m. Take a photo each time. South-facing patios typically get the most sun; north-facing ones may only support leafy greens and herbs. Overhanging rooflines, fences, and neighboring structures can eliminate 2 to 3 hours of direct sun even on a south-facing patio.
Wind, drainage, and surface strength
Wind dries containers out fast, especially tall planters and lightweight pots on upper-story decks. If your patio is exposed, factor in windbreak options like trellises or compact shrubs along the perimeter. For drainage, look at where water flows when it rains: containers sitting in standing water develop root rot quickly, so either elevate pots on pot feet or position them where water drains freely. For structural strength, concrete slabs can typically handle 80 to 100 psf or more, which is well above the weight of most garden setups. Wood deck framing designed to the IRC 40 psf standard is still workable, but you need to spread heavy containers across multiple joists and avoid stacking heavy loads in one corner. If your deck is older or you're unsure of its rating, have it inspected before loading it with planters. This is something I'd strongly recommend cross-referencing with patio construction guidance, especially for raised patios where foundation and surface strength go hand in hand.
Layout Options: Containers, Raised Beds, Built-In Planters, and Vertical Systems
There's no single right layout, the best one depends on your patio size, surface type, load capacity, and how much DIY work you want to do. Here's an honest comparison of the four main approaches.
| Layout Type | Best For | Pros | Cons | When to Choose It |
|---|---|---|---|---|
| Containers (pots, grow bags) | Decks, small patios, renters, beginners | Flexible, moveable, low cost, no construction | Dries out fast, limited root depth, can tip in wind | Any size patio; when permanence isn't desired |
| Freestanding raised beds | Larger patios, concrete slabs, serious growers | More root volume, better moisture retention, organized look | Heavier, semi-permanent, costs more to fill | You have 40+ sq ft of open patio and want high yield |
| Built-in planter boxes | Deck edges, patio perimeters, permanent installs | Clean integrated look, can share patio structure | Permanent, requires permits sometimes, heaviest load | New patio build or renovation with structural planning |
| Vertical/pallet planters | Fences, walls, tiny patios, balconies | Uses vertical space, very light per sq ft of floor space | Shallower soil, dries quickly, limited to herbs/greens/strawberries | Space is extremely limited or you want a living wall aesthetic |
My recommendation: start with containers for your first season, get a feel for sunlight and watering demands, and then add a DIY raised bed or built-in planter once you know where the sun actually lands. Committing to a permanent built-in planter before you've observed a full season is a common regret.
Container Types and Sizes: Matching the Pot to the Plant
Container size is not optional guesswork. Planting a standard tomato in a 1-gallon pot will produce a stressed, unproductive plant no matter how well you water and fertilize it. University of Maryland Extension and NC State Extension both publish minimum container volumes per crop type, and those guidelines hold up in practice. The table below covers the most common patio vegetables.
| Vegetable | Min. Container Size | Min. Soil Depth | Notes |
|---|---|---|---|
| Tomato (determinate/bush) | 5 gallons | 12 inches | Larger = better; 10 gal preferred for indeterminate types |
| Tomato (indeterminate/vining) | 10–15 gallons | 14–16 inches | Needs staking or cage; very heavy when mature |
| Pepper / Eggplant | 5 gallons | 12 inches | Compact varieties work well in 3-gal pots |
| Cucumber | 5 gallons | 12 inches | Vertical trellis saves floor space |
| Zucchini / Squash | 10 gallons | 14 inches | One plant per container; large footprint |
| Green beans (bush) | 5 gallons | 10 inches | 4–6 plants per 5-gal container |
| Lettuce / Spinach / Arugula | 2–3 gallons | 6–8 inches | Perfect for shallow rectangular planters |
| Kale / Chard | 3–5 gallons | 8–10 inches | Cut-and-come-again varieties best for containers |
| Carrots | 5 gallons | 10–12 inches | Use round deep pots; avoid short-rooted compacted media |
| Radishes / Beets | 2–3 gallons | 8–10 inches | Fast crops; good succession fillers |
| Herbs (basil, parsley, cilantro) | 1–2 gallons | 6 inches | Group multiple herbs in one wide pot to save space |
| Herbs (rosemary, thyme, oregano) | 2–3 gallons | 8 inches | Perennials; overwinter in mild climates |
For material choice, fabric grow bags are lighter than plastic pots when empty and air-prune roots naturally (reducing circling), but they dry out faster and need more frequent watering in summer. Glazed ceramic pots retain moisture longer but are heavy, a 15-gallon glazed pot filled with moist media can easily hit 80 to 100 pounds. Lightweight options like thin-walled plastic or fabric bags work best on wood decks with load concerns.
DIY Planter and Raised-Bed Builds: 4 Step-by-Step Projects
Project 1: Stacked Cedar Planter (Beginner, Under $40)
This is a simple two-tier stacked box planter that looks good, drains well, and uses standard cedar fence boards. No power tools are required beyond a circular saw or handsaw.
- Materials: Four 6-foot cedar fence boards (5.5 inches wide x 0.75 inches thick), 1.5-inch exterior wood screws (1 box), sandpaper (80 grit), landscape fabric, optional exterior wood stain
- Tools: Saw, drill/driver, measuring tape, square
- Cut list: Eight pieces at 24 inches (sides and ends) for two identical square boxes
- Cut boards to length: eight pieces at 24 inches each.
- Assemble the first box by screwing four pieces into a square frame using two screws per corner joint. Pre-drill to prevent splitting.
- Repeat for the second box.
- Stack the second box on top of the first, offset by 2 inches in each direction for a tiered look. Screw them together through the bottom of the upper box.
- Line the inside with landscape fabric, folded over the top edge and stapled. This keeps soil in while letting water drain through the bottom gap.
- Fill with potting mix to within 1 inch of the top edge.
- Total interior depth (both tiers combined): approximately 11 inches — suitable for lettuce, herbs, peppers, and shallow-rooted crops.
Project 2: Lightweight Raised Bed on a Concrete Patio (Intermediate, $60–$90)
This build uses 2x10 cedar or redwood boards to make a 4x2-foot raised bed with a closed bottom lined for drainage. It sits directly on a concrete slab and keeps roots, soil, and drainage water contained. This format is ideal if you want a raised bed without the weight of a traditional in-ground design. Rutgers (NJAES) recommends at least 12 inches of planting depth for raised beds used for vegetables, noting this depth supports adequate root zone volume and proper drainage for long‑term productivity Rutgers (NJAES) recommends at least 12 inches of planting depth for raised beds used for vegetables..
- Materials: Two 8-foot 2x10 cedar boards, two 2-foot 2x10 cedar boards, 2.5-inch exterior screws, 6-mil plastic sheeting (cut to fit bottom), drill bit for 0.5-inch drainage holes, landscape fabric
- Tools: Circular saw or miter saw, drill/driver, measuring tape, pencil
- Cut the two 8-foot boards down to 4 feet each (gives you four equal sides for a 4x2 box, or keep two at 4 feet and use the 2-foot sections for ends).
- Assemble the four sides into a rectangular frame, screwing through the long sides into the ends. Use two screws per joint.
- Cut a piece of 6-mil plastic sheeting to fit the interior bottom. Lay it in and drill 0.5-inch holes every 6 inches through plastic and wood for drainage.
- Line the interior walls with landscape fabric to slow wood decay and keep fine soil from washing out.
- Place the bed on the concrete slab. Elevate it on two cedar 2x4 runners if you need faster drainage or want airflow under the box.
- Fill with a lightweight container mix (see the soil section below). A 4x2x10-inch raised bed holds approximately 0.56 cubic feet of soil — use the mix ratios in the soil section to build the lightest productive medium possible.
- Rutgers NJAES recommends at least 12 inches of planting depth for vegetable raised beds, so a 2x10 board at 9.25 inches of actual depth is workable for most crops but borderline for deep-rooted vegetables like carrots or parsnips.
Project 3: Built-In Deck Planter Box (Advanced, $120–$200)
A built-in planter runs along the edge of a deck or patio perimeter, is framed with pressure-treated lumber, and is clad in cedar or composite decking boards. Because it is attached to or rests against the deck structure, this is where structural load planning matters most. Treat this as a dead load (the planter structure plus growing media plus stored water) that is permanent and must be distributed over multiple joists.
- Materials: Pressure-treated 2x4s for framing, cedar 1x6 boards for cladding, 0.5-inch composite or cedar decking for the interior liner, 3-inch structural screws, 6-mil liner, overflow drain fitting (1-inch diameter minimum), joist hanger hardware if attaching to existing deck frame
- Tools: Circular saw, drill/driver, level, square, pencil
- Plan the planter dimensions to align with deck joists. The planter should span at least three joists (typically spaced 16 inches on center) so the weight distributes rather than concentrating on one.
- Build a PT lumber frame that defines the outer wall, interior liner support, and bottom support. Minimum interior depth: 12 inches for vegetables.
- Clad the exterior with cedar 1x6 boards, leaving a 0.25-inch gap between boards for drainage and ventilation.
- Install a composite or PT plywood interior liner. Drill or cut a 1-inch overflow drain hole 1 inch above the planter bottom — this is critical. Green-roof and structural planter design guidelines require mechanical overflows on built-in planters rather than relying on surface drainage alone, so water never builds to full saturation weight against your deck structure.
- Line the interior with 6-mil plastic before filling with a lightweight mix (see soil section).
- Attach the planter to the deck frame using joist hangers or ledger screws if the design requires it. Check local code requirements, as attached planters may require a permit in your jurisdiction.
- Fill with mix in stages and check for sagging or deflection in the deck surface before filling completely.
Project 4: Pallet Vertical Planter (Beginner, Under $20)
A repurposed shipping pallet mounted vertically on a fence or wall works well for herbs, strawberries, lettuce, and microgreens. It takes up almost no floor space, ideal for a narrow balcony or fence line.
- Materials: One heat-treated (HT-stamped) shipping pallet, landscape fabric, staple gun and staples, potting mix, zip ties or L-brackets for wall mounting
- Tools: Staple gun, drill, level
- Important: Only use pallets stamped HT (heat-treated), not MB (methyl bromide fumigated). The MB stamp means the wood was treated with a pesticide you do not want in contact with your food plants.
- Lay the pallet flat. Cut landscape fabric to cover the back and two sides completely, then staple it tightly so no gaps remain. This creates the back pocket that holds soil in.
- Stand the pallet upright and mount it to a fence post or wall stud using L-brackets or heavy-duty zip ties. Use a level to make sure it's plumb.
- Fill each horizontal slat gap with potting mix, pressing it firmly between the boards.
- Water gently until the mix is moist throughout. Let it settle for a day before planting.
- Plant herbs or seedlings through the slat gaps. Push roots firmly into the pocket behind the board.
- Note: This design works best in partial shade for moisture-sensitive plants because vertical orientation dramatically increases evaporation rate. Water daily in summer.
Lightweight Structural Options and Load-Saving Materials
If your patio is a wood deck or elevated structure, reducing the weight of planters and growing media is not optional, it's a structural concern. The saturated unit weight of standard mineral soil runs 115 to 135 pounds per cubic foot according to engineering references. A 4x2-foot planter filled 12 inches deep with saturated mineral soil would weigh roughly 93 to 108 pounds just for the soil. Lightweight alternatives cut that dramatically.
| Material | Weight Advantage | Best Use | Notes |
|---|---|---|---|
| Cedar (lumber/cladding) | Lightest structural wood | Planter boxes, raised bed frames | Naturally rot-resistant; no need for PT preservatives in direct soil contact |
| Composite decking boards | Lighter than most hardwoods | Planter cladding, interior liners | Rot-proof, but not structural on its own; avoid heavy composite mixes |
| Corrugated metal (Galvalume panels) | Very light, strong for its weight | Raised bed walls, vertical planter backs | Inexpensive; edges need to be rolled or taped; lasts 20+ years |
| Aluminum angle and sheet | Significantly lighter than steel | Planter frames, corner brackets | More expensive but near-permanent in outdoor settings |
| Foam-core panel (rigid foam insulation) | Extremely light; good insulator | Planter liner insulation, not structural | Insulates roots from temperature extremes on concrete; pair with structural shell |
| Fabric grow bags (felt) | Lightest container option | Direct container planting | Air-prunes roots; dries fast; ideal for deck load concerns |
For growing media, replacing even half the volume of a planter with a lightweight soilless mix (peat/coir + perlite base) versus topsoil reduces weight by 50 to 60 percent. Wet topsoil at 95 to 105 lb/ft³ versus a coir-perlite container mix at roughly 40 to 55 lb/ft³ saturated makes a meaningful difference on a deck that is already loaded with furniture and people. I always use a soilless mix in any planter on a wood deck, no exceptions.
Potting Mixes and Soil Amendment Recipes
Never use straight garden soil or topsoil in containers. It compacts, drains poorly, and becomes a brick within a few weeks. Every container garden needs a purpose-built mix. Here are three practical recipes drawn from ATTRA/NCAT organic production guidance, each suited to a different growing situation.
Recipe 1: Standard All-Purpose Container Mix
Use this for most vegetables: tomatoes, peppers, beans, cucumbers, kale, chard, and most herbs. The ratio is 1 part coconut coir (or peat moss), 1 part finished compost, and 1 part perlite by volume. For every 5 gallons of mix, add 1 tablespoon of ground dolomitic lime (if using peat, which is acidic; skip lime with coir). Add 2 tablespoons of a balanced granular slow-release fertilizer (like a 5-5-5 or 8-8-8 organic blend) per 5 gallons. This mix drains freely, retains adequate moisture, and starts plants with enough nutrient base for the first 4 to 6 weeks.
Recipe 2: High-Drain Mix for Root Vegetables and Mediterranean Herbs
Use this for carrots, radishes, thyme, rosemary, and oregano, anything that hates wet feet. Ratio: 1 part coir, 0.5 parts compost, 1.5 parts coarse perlite or coarse horticultural sand. This mix drains very fast, so it needs more frequent watering in summer heat, but root rot and damping off are almost eliminated. Skip lime. No added slow-release fertilizer for Mediterranean herbs (they prefer lean soil); add 1 tablespoon of slow-release per 5 gallons for root vegetables.
Recipe 3: Heavy-Feeding Mix for Tomatoes and Squash
Heavy feeders like tomatoes, zucchini, and eggplant need more nutrient density and moisture retention. Ratio: 1 part coir, 1.5 parts mature compost, 0.75 parts perlite, and 0.25 parts worm castings. Per 10-gallon container, add 2 tablespoons of slow-release balanced fertilizer plus 1 tablespoon of granular kelp or fish meal for trace minerals. Compost used in food-crop containers should be fully finished (thermophilic composting that reached 131 to 160°F and was turned regularly), which eliminates most pathogens and weed seeds. Avoid fresh or partially composted material in containers, it ties up nitrogen and can introduce disease.
| Mix Type | Coir/Peat | Compost | Perlite | Extras | Best For |
|---|---|---|---|---|---|
| Standard all-purpose | 1 part | 1 part | 1 part | Lime (if using peat), slow-release fertilizer | Most vegetables, leafy greens, herbs |
| High-drain | 1 part | 0.5 parts | 1.5 parts | No lime needed | Carrots, radishes, Mediterranean herbs |
| Heavy-feeding | 1 part | 1.5 parts | 0.75 parts | Worm castings (0.25 parts), kelp/fish meal | Tomatoes, peppers, squash, eggplant |
Plant Selection: Best Vegetables for Patio Containers
Patio growing rewards compact, high-yield, container-adapted varieties. Standard full-size varieties bred for in-ground gardens often produce disappointing results in containers. Stick to varieties described as 'bush,' 'dwarf,' 'compact,' 'patio,' or 'container' types whenever possible. The table below organizes crops by season and includes specific compact cultivars worth growing.
| Season | Crop | Recommended Variety | Container Size | Notes |
|---|---|---|---|---|
| Spring (cool) | Lettuce | Black Seeded Simpson, Buttercrunch | 2–3 gal shallow tray | Direct sow; harvest outer leaves continuously |
| Spring (cool) | Spinach | Space, Tyee | 2–3 gal | Bolts in heat; succession-sow every 2–3 weeks |
| Spring (cool) | Radish | Cherry Belle, French Breakfast | 2 gal | 25–30 days to harvest; ideal succession crop |
| Spring (cool) | Kale | Dwarf Blue Curled, Red Russian | 3–5 gal | Cut outer leaves; plant lasts all season |
| Spring/Summer | Tomato | Tumbling Tom, Patio F1, Bush Early Girl | 5–10 gal | Determinate types stay compact; stake anyway |
| Summer | Pepper | Lunchbox, Shishito, Thai Hot | 5 gal | Very productive in containers; likes heat |
| Summer | Cucumber | Bush Pickle, Spacemaster | 5 gal + trellis | Train vertically to save floor space |
| Summer | Zucchini | Patio Star, Bush Baby | 10 gal | One plant per pot; harvest frequently |
| Summer | Green beans | Provider (bush), Contender | 5 gal | 4–6 plants per pot; no trellis needed for bush types |
| Summer/Fall | Eggplant | Patio Baby, Ichiban | 5 gal | Needs heat; performs well in black pots |
| Fall (cool) | Arugula | Wild Rocket | 2–3 gal | Fast; great for cut-and-come-again harvest |
| Fall (cool) | Beets | Detroit Dark Red, Chioggia | 3–5 gal deep | Minimum 8-inch depth for roots to form |
| Year-round (mild) | Herbs | Genovese Basil, Flat Parsley, Chives | 1–2 gal | Group in one wide container for efficiency |
| Year-round / microgreens | Peas, sunflower, radish shoots | Any standard variety | Shallow tray (2–3 inches deep) | Harvest in 7–14 days; no season restriction |
Microgreens deserve a special note: they grow in trays as shallow as 2 inches, have no load concern whatsoever, and produce edible shoots in 7 to 14 days. They're a great starting point if you've never grown food before, and they fit on a railing shelf or tabletop.
Seasonal Planting Schedules and Succession Planning
The best patio gardens don't just plant once in spring and call it done. Succession planting, starting new crops every 2 to 3 weeks and filling gaps left by finished crops, keeps the space productive from frost to frost. Use the 2023 USDA Plant Hardiness Zone Map and your county extension office's local frost dates to anchor the timing below to your location. The calendar here assumes a zone 6b/7a example (last frost mid-April, first frost mid-October), but adjust by shifting 2 to 3 weeks earlier or later per USDA zone.
| Month | Action | Crops |
|---|---|---|
| February–March | Start seeds indoors under lights (6–8 weeks before last frost) | Tomatoes, peppers, eggplant, basil |
| March–April | Direct sow cool-season crops in containers outdoors (after soil thaws) | Lettuce, spinach, radishes, arugula, kale, peas |
| April–May | Transplant warm-season seedlings after last frost; succession sow cool crops | Tomatoes, peppers, cucumbers; second round of lettuce/radish |
| May–June | Plant summer heavy feeders; set up drip irrigation; begin fertilizing schedule | Zucchini, beans, eggplant; all summer crops established |
| June–July | Succession sow beans and cucumbers every 3 weeks; watch for heat stress on lettuce | Bush beans, cucumbers; let cool crops bolt or pull and replace |
| July–August | Midsummer assessment: refresh pots with spent plants; start fall transplants indoors | Start kale, broccoli raab, chard for fall; maintain summer crops |
| August–September | Transplant fall crops; pull summer crops as they finish; cut back herbs | Kale, spinach, arugula, beets, radishes; second herb plantings |
| September–October | Extend season with row cover or cold frame over containers; harvest aggressively | Hardy greens under cover; last peppers and tomatoes |
| October–November | Winterize containers; store or protect planters; plan next season | Overwintering herbs (rosemary, thyme) in mild climates or indoors |
| November–January | Grow microgreens indoors; maintain perennial herbs | Microgreens trays; rosemary, chives in a sunny window |
A practical succession rule for lettuce and radishes: every time you harvest a full container, immediately resow or drop in a new transplant within 48 hours. You'll rarely have a gap in production. The same logic applies to beans: pulling one pot at 60 days and dropping in a second sowing two weeks earlier means you're harvesting continuously rather than in one big glut.
Watering Your Patio Garden: Hand-Watering, Drip, and Timers
Containers dry out faster than in-ground beds. In full summer sun, a 5-gallon pot with a tomato may need watering once or even twice a day. The simplest rule: stick your finger 2 inches into the soil, if it's dry, water thoroughly until it drains from the bottom. If it's still moist, wait. Underwatering is obvious (wilting); overwatering is sneakier (yellowing lower leaves, soggy soil, root rot). Both cause problems.
Hand-watering vs. drip irrigation
Hand-watering works perfectly well for fewer than 8 to 10 containers. Beyond that, a simple drip system pays for itself in saved time within one season. A basic drip setup uses 0.5-inch header tubing connected to your outdoor faucet, with 1/4-inch spaghetti lines running to individual drip emitters in each pot. Emitter flow rates typically run 0.5 to 2.0 gallons per hour (gph), use 1 gph emitters for small pots and 2 gph emitters for large pots like 10-gallon tomato containers. For even delivery across a multi-pot setup, use pressure-compensating emitters and install an inline filter (150-mesh minimum) and pressure regulator (typically 25 to 30 psi for drip systems) at the faucet connection. Add a battery-powered timer at the faucet head and you have a fully automated system for under $60 in parts.
| Container Size | Emitter Flow Rate | Daily Run Time (Summer) | Watering Frequency |
|---|---|---|---|
| 1–2 gallon (herbs) | 0.5 gph | 15–20 min | Once daily in heat; every 2 days in spring/fall |
| 3–5 gallon (peppers, lettuce) | 1.0 gph | 20–30 min | Once daily in heat |
| 5–10 gallon (tomatoes, squash) | 2.0 gph | 25–35 min | Once to twice daily in peak summer heat |
| Built-in raised bed planter | 1.0 gph per emitter, 1 emitter per 2 sq ft | 20–30 min | Once daily; adjust based on soil moisture test |
Fertilizing and Feeding Your Container Garden
Containers flush nutrients with every watering, so container-grown vegetables need more frequent feeding than in-ground plants. A two-part approach works well: start with a slow-release granular fertilizer mixed into the potting medium at planting time (as described in the soil recipes above), then supplement with a liquid feed every 7 to 14 days during peak growing season. Liquid fish emulsion or seaweed-fish blend (typically 2-4-1 to 3-3-3 NPK) applied at half the label rate every week is a good organic option that's hard to over-apply. For tomatoes and peppers, switch to a lower-nitrogen, higher-phosphorus-and-potassium formula once flowers appear, high nitrogen at that stage pushes leafy growth at the expense of fruit. A 2-8-4 or similar bloom formula applied every 10 days from first flower to harvest works well in practice.
Pest and Disease Troubleshooting
Patio container gardens actually have fewer pest and disease problems than in-ground gardens in my experience, because you can inspect them daily, move containers to improve airflow, and catch problems early. Here are the most common issues and organic controls.
| Problem | Symptoms | Likely Cause | Organic Control |
|---|---|---|---|
| Aphids | Clusters of small insects on new growth; sticky residue | Warm weather, poor airflow | Blast with water; apply insecticidal soap; introduce lacewings |
| Fungus gnats | Tiny flies around soil surface; wilting seedlings | Overwatering, wet surface soil | Let soil surface dry between waterings; yellow sticky traps; Bacillus thuringiensis israelensis (Bti) drench |
| Spider mites | Fine webbing on leaves; stippled, bronzed leaves | Hot dry conditions | Increase humidity; apply neem oil spray every 5–7 days |
| Powdery mildew | White powdery coating on leaves | Poor airflow, temperature swings | Remove affected leaves; spray 1 tsp baking soda + 1 tsp horticultural oil in 1 qt water weekly |
| Root rot | Wilting despite moist soil; dark mushy roots | Overwatering, poor drainage | Reduce watering; ensure drainage holes clear; repot in fresh well-draining mix |
| Blossom end rot (tomatoes, peppers) | Dark sunken patches on fruit base | Calcium uptake disruption (often from irregular watering) | Consistent watering schedule; avoid calcium-deficient mix |
| Leaf yellowing (lower leaves) | Older leaves yellowing and dropping | Nitrogen deficiency from leaching | Apply liquid fish emulsion at half-strength; top-dress with worm castings |
| Caterpillars / hornworms | Chewed leaves; large green caterpillars | Moth eggs; harder to spot early | Hand-pick daily; apply Bacillus thuringiensis kurstaki (Btk) spray |
The single most important pest management practice in a container garden is daily observation. A 3-minute walkthrough in the morning while you water catches 90 percent of problems before they become serious. Treat the early sign, not the full infestation.
Harvest Tips and Winter Care
Harvest frequently and consistently. Most fruiting vegetables like beans, cucumbers, and zucchini produce more when you harvest often, leaving overripe fruit on the plant signals it to stop producing. For leafy greens, harvest outer leaves and leave the growing center intact for continued production. Herbs like basil should be pinched back to just above a leaf node every 10 to 14 days to prevent bolting and keep the plant bushy.
At the end of the growing season, empty containers of spent soil (don't store wet soil in pots over winter, it can crack ceramic or freeze in plastic), clean pots with a dilute bleach solution (1 tablespoon bleach per gallon of water) to prevent disease carryover, and store lightweight containers stacked in a shed or garage. Cedar and corrugated metal planters can stay outside if drainage holes are kept clear. Perennial herbs like rosemary, thyme, and chives can overwinter in containers in zones 6 and warmer; move them to a sheltered spot near the house wall where they get some radiant heat and are protected from desiccating wind.
Budget Options and Cost-Saving Strategies
You can start a productive patio vegetable garden for well under $100 if you prioritize. If you want a step‑by‑step beginner guide, see how to start a patio garden. Here's how I'd stage it across three budget levels.
| Budget Level | Approximate Cost | What You Get | Best Moves |
|---|---|---|---|
| Starter | $30–$60 | 4–6 fabric grow bags (3–5 gal), a bag of potting mix, seeds | Grow bags are the lightest and cheapest containers; buy mix in bulk bags; start from seed not transplants |
| Mid-range | $80–$150 | Mix of plastic and fabric containers, basic drip kit, DIY cedar stacked planter | Build Project 1 planter for under $40; add a $25 battery drip timer; buy one bag of perlite and one of coir to mix your own potting medium |
| Full build-out | $200–$400 | DIY raised bed + built-in planter + drip system + trellises | Source cedar from a lumber yard offcut bin; buy perlite and coir in bulk (saves 40% vs. single bags); repurpose an HT pallet for the vertical planter |
The biggest cost savings come from mixing your own potting media versus buying pre-bagged mixes, and from starting plants from seed rather than buying nursery transplants. A single $3 seed packet of tomatoes gives you 20 to 30 seeds; nursery transplants run $4 to $8 each. Over a 5-pot tomato setup, that's a $25 to $35 difference from one packet.
Integrating Your Garden with Patio Construction
If you're building a new patio or renovating an existing one, the smart move is to plan garden integration into the construction phase rather than retrofitting later. Built-in planter boxes along a patio perimeter are far easier to frame when the deck is being built than when it's complete. Drainage design matters too: patio surfaces should slope away from the house at a minimum 1/8 inch per foot, and planter locations should never block or redirect that drainage path. If you're building a raised patio, the foundation and sub-base work discussed in patio construction guides directly impacts how much load capacity you'll have for planters. It's worth thinking about how your planting layout connects to the overall patio design, for example, integrating a planter bench along a patio edge or positioning a vertical planter to serve as both a garden and a privacy screen. Topics like how to make a patio garden and how to start a patio garden dig deeper into the design and planning side of combining growing space with your broader outdoor living layout. For step-by-step instructions on how to patio your garden, see the dedicated guide. For step-by-step design choices and plant lists, see our guide on how to make patio garden. For a practical checklist and step-by-step approach, see steps for patio ideas.
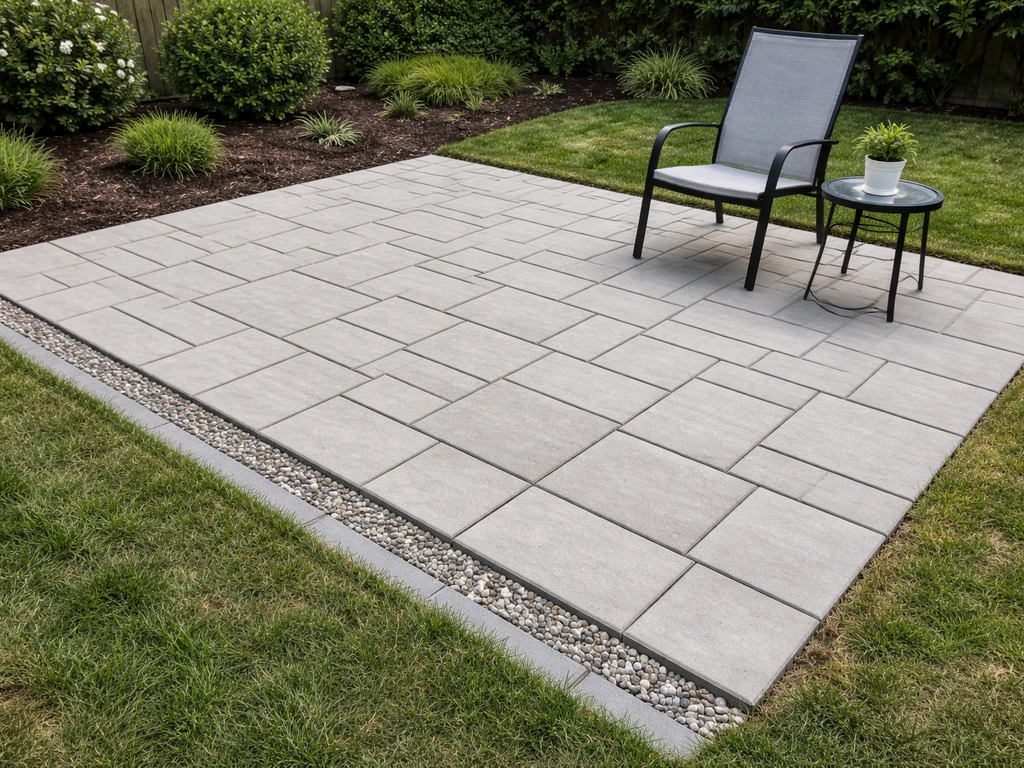
One practical integration tip: if you're laying pavers or building a slab, leave a small gravel-filled reservoir zone (12 inches wide, 4 to 6 inches deep) along the patio edge where you plan to place large containers. It improves drainage under pots, reduces moisture sitting on your surface, and keeps containers from staining or cracking concrete over time. It costs almost nothing to include at the construction stage and saves real headaches later.
FAQ
Quick-start planning checklist for a patio vegetable garden — what should I evaluate before building?
Site: measure usable area, note obstacles, door swing and access. Light: record sun hours (full sun = 6+ hrs, part sun = 3–6 hrs, shade = <3 hrs). Weight/load: assume live load guideline 40 psf for decks (use building code/engineer for verification) and estimate saturated media weight (container media can range 95–135 lb/ft³); confine heavy planters to load‑rated areas. Drainage: ensure runoff has slope to drain, provide pots with saucers/overflow, and for built‑in planters include mechanical drains and downspouts. Access & ergonomics: plan for 18–36 in clear paths, planter heights 24–36 in for comfortable work. Utilities: note hose/ water, electricity for timers/low‑voltage pumps, nearby gas lines. Permits & structure: check local codes for built‑in planters, deck attachments; consult an engineer if altering structure or concentrating loads.
What layout options work best on a patio?
Containers: flexible, movable, best for flexibility and seasonal rearrangement. Raised beds (freestanding): deeper root zone (≥12 in), better soil control, moderate weight. Built‑in structural planters: integrated aesthetics, requires waterproofing, drains, and structural design. Vertical systems: trellises, pocket planters, stacked pots — maximize vertical area for vining/compact crops. Hybrid: mix shallow beds for greens, deep planters for roots/tomatoes, and verticals for vining crops. Choose based on load limits, sunlight distribution, and maintenance access.
Step-by-step DIY raised-bed/planter build (simple timber box, 4' x 2' x 1') — tools and materials list
Materials: (4) 8-ft 2x8 boards (cut to 4', 2'), exterior-grade screws or structural screws, 4 corner posts (4x4, 12 in tall set inside corners), landscape fabric, gravel for bottom (optional), waterproofing (exterior paint or pond liner), 4 deck blocks or footing pads. Tools: circular saw or miter saw, drill/driver, tape measure, speed square, level, clamps, stapler (for fabric). Steps: 1) Cut boards to length. 2) Assemble long side to short sides with screws and butt joints reinforced by 4x4 inside corners. 3) Line interior with landscape fabric or waterproof liner stapled to prevent soil contact with raw wood. 4) Place on prepared level surface or footings. 5) Add 1–2 in coarse gravel for drainage if desired, then fill with prepared raised‑bed soil to 12 in depth. 6) Add plants and mulch. Note: Use rot‑resistant wood (cedar, redwood) or composite; avoid treated wood that’s not rated for edible gardens.
Materials and steps for a lightweight container mix for patio pots (DIY potting mix recipe)
Recipe (by volume): 1 part coconut coir or sphagnum peat moss, 1 part high‑quality compost (well‑aged), 0.5–1 part perlite or coarse vermiculite. Amendments per 10 gallons mix: 1–2 cups kelp meal or rock mineral mix, 1 cup dolomitic lime if using coir/peat (adjust for pH), and 2–3 tablespoons slow‑release organic fertilizer or follow soluble feed schedule. Mix steps: rehydrate coir if compressed, combine components thoroughly, adjust moisture to sponge‑damp, test pH (target ~6.0–6.8), and fill containers. For certified‑organic setups, follow organic input choices. For heavy feeders (tomato, squash) increase compost ratio to boost nutrients but keep drainage.
How deep should planters or containers be for common patio vegetables?
General minimums: leafy greens (lettuce, spinach) 6–8 in; herbs 6–8 in; bush beans, radishes 8–10 in; carrots/pole beans 10–12 in (deeper for longer carrots); peppers/eggplant/tomato (determinate) 12–18 in (use 5+ gallon containers for tomatoes; indeterminate tomatoes prefer 15–20+ gallons or 18–24 in depth). Reference extension guidance (NC State, UMD) when selecting container sizes.
Which plants are best for patio containers and what container sizes do they need?
Recommended combinations: • Salad greens: shallow trays or 6–8 in pots. • Herbs (basil, parsley, chives): 6–8 in pots. • Peppers & eggplant: 5–7 gallon pots (12–18 in depth). • Determinate tomatoes: 5–10 gallon (15–18 in diameter). • Indeterminate tomatoes: 18–24 in diameter or 15–20+ gallon. • Bush beans: 5 gallon or 10–12 in deep planters. • Pole beans & peas (vertical): 10–12 in + trellis height. • Carrots/beets: 12+ in deep for longer roots; shorter varieties in 10 in. • Zucchini/squash: 10–15 gallon with wide footprint or grow in larger raised beds. Match plant choices to sun exposure and container volume.